• Notice for iPhone users: DO NOT use the image size reduction option when uploading photos to the forum. This causes portrait images to post as landscape. We have added a warning to the image insert pop-up as well.

OME Spring Install

CJ7Pilot

18436572
BENEFACTOR
Gold Member
Lifetime Member
SOA Member
City
Yuba City
State
CA
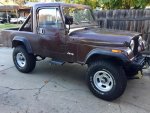
So I got started on my OME/YJ spring conversion today.

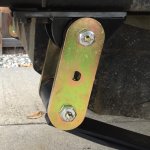
I did the rear springs today, so nothing too complicated. The rears are a direct swap, although I did use the Rocky-Road beefed-up spring hangers, and MORE greaseable YJ shackles.

I got more lift than I was expecting, but that's a good thing! I expect it will settle an inch or so over time.

I'm hoping to tackle the front end tomorrow, which will be a little more involved, due to the wider springs.

Stay tuned! :thumbsup:

OME Rear - 1.jpg

OME Rear - 2.jpg

OME Rear - 3.jpg
 
Last edited:

Cmath

Scrambler Enthusiast
Lifetime Member
City
Woodstock
State
Ga
I have been thinking of doing the same thing to mine.Can't wait to see the rest.What size tires do you have there?
 

CJ7Pilot

18436572
BENEFACTOR
Gold Member
Lifetime Member
SOA Member
City
Yuba City
State
CA
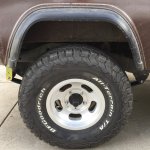
33x10.5 BFG all-terrains. I really like these tires!
 

Cmath

Scrambler Enthusiast
Lifetime Member
City
Woodstock
State
Ga
I have the same tires on my dodge . On the third set. You fit 33's on there with no lift? I have 31's with no changes in the suspension and wondered what size tires would fit(33?) without serious suspension changes.
 

CJ7Pilot

18436572
BENEFACTOR
Gold Member
Lifetime Member
SOA Member
City
Yuba City
State
CA
I'm pretty sure the springs that came on my Jeep were 2-1/2" lift (brand unknown), so even being worn out, there was enough room for 33s.

The OMEs are also 2-1/2" lift (and not worn out), with another 1/2" coming from the longer YJ shackles.

I think 31s are probably the biggest you'd want to run with stock springs.
 

tower210

Scrambler Junkie
Lifetime Member
City
Olathe
State
KS
I have the same tires on my dodge . On the third set. You fit 33's on there with no lift? I have 31's with no changes in the suspension and wondered what size tires would fit(33?) without serious suspension changes.

I think "fit" is relative..... whether you are articulating and flexing, or just puttering around town.


Cmath

Scrambler Enthusiast
Lifetime Member
City
Woodstock
State
Ga
So what you are saying is that i can squeeze 35s on there if I drive straight on flat ground where ever I go.
:huh:
 

FLCJ8

Legacy Registered User
City
Palm Bay
State
FL
So what you are saying is that i can squeeze 35s on there if I drive straight on flat ground where ever I go.
:huh:

Maybe even larger if you have narrow track axles and are traveling down hill. :rotfl: :rolleyes:
 

CJ7Pilot

18436572
BENEFACTOR
Gold Member
Lifetime Member
SOA Member
City
Yuba City
State
CA
Well, I didn't get the front springs done today for a couple of reasons:

1. I'm sore and stiff from working on the ground all day yesterday, and I couldn't get motivated to do it again today.... ;)

2. More relevant to this thread, the 6-degree caster shims I bought (which were arguably on the steep side already), turned out to be 8-degrees, which really isn't suitable for this project. I'll get some 4-degree shims in this week, and try again next weekend.

I was able to get some prep work done though, installing eye bushings, laying out parts, double checking all the hardware, etc.

I'm not too impressed with the Daystar grease-able main eye kit. The bushings were too oversized, to the point where I had to bevel the inside edges just to press them in, and that in turn squeezed down the bolt sleeve hole, and the sleeves were all but impossible to install. On top of that, two of the lock nuts had the wrong threads... I think they sent 14mm nuts for my 9/16 bolts!

The MORE grease-able shackle kits, on the other hand, are well made, and easy to install!

As I mentioned before (for those who aren't familiar with this swap) the rear springs bolt right in with no modifications necessary. OME springs are made for YJs, and YJ rear springs are the same width and length as CJ rear springs.

The front end is a different story. CJs (76-86) use a 2" wide front spring, and YJs use a 2-1/2" wide front spring which is also a little bit longer.

So, to install the OME YJ springs, I bought new front spring hangers from Rocky-Road, which are 2-1/2" wide, and move the front mounting point about 1" forward, and about 1/2" down. I also bought a MORE YJ grease-able shackle kit (as mentioned above).

For the spring plates, I'm using a YJ right-front plate on the right (yes, it has the correct u-bolt spacing), and a CJ right rear plate on the left. My shock mounts are welded to the axle tube, so I don't have to worry about welding extra studs to to the spring plates.

The CJ main-eye hangers are already 2-1/2" wide, so that end of the spring should fit right in.

Now, there are a few kits out there for installing YJ springs on CJs, but they are all pretty expensive, and include parts that I don't need to use. I think I have about $900 tied up in this conversion, and the kits seem to run about $1500. The Rubicon Express kit was most appealing to me, and that's the route I probably would have taken... but they no longer offer a 2-1/2" lift kit for CJs. Also, I did not buy new shock absorbers.

ABOUT the caster shims... I know there are differing opinions about this, especially using them on the front axle. However, I have NO intention of cutting and welding either the spring perches or the knuckles on this axle... so I'll be using shims.

The reason I'm adding caster from the get-go, is that I'm using longer shackles, and lower shackle hangers. Right now, it feels like I have almost no caster, but that could be the worn out springs, so I have no idea what the OMEs are going to feel like. The best I can do is pick a starting point, and adjust as necessary.

Rubicon Express recommends 3-5 degrees of adjustment on their kits, but that's with their own springs. I was going to play it safe with 6 degrees, but ended up with 8 degree shims by mistake.

Now, I think I'll start with 4 degrees, and see how it pans out... any thoughts? :shrug:

Thanks, guys!
 

spankrjs

Scrambler Junkie
Lifetime Member
SOA Member
City
Biloxi
State
MS
Make sure you use steel shims, not aluminum. I run steel shims on both my lifted/wheeled Scramblers, 4.5RE lift with 33's, no problem :twocents:

Interested to know how it rides when you get finished:popcorn:
 

CBRogers

Perpetual Parts Collector
Lifetime Member
City
Yorktown
State
Va
I had to use 6 degree shims on the front of my CJ-7 when I did mine a long time ago. But that was with also re-drilling the front shackle to take some of the lift out of it. It was a Desert Steel Shackle.

I would try the 8 degree shim in there first. Hopefully you took a caster measurement from the face of the Pinon before dismantling. If so then you can re-install everything and use a angle gauge to get a rough idea if you are back in the same ballpark. There is about 2-4 degrees of float between being good and getting that dive to the sideline feeling of a bad positive caster. Too much negative caster only really makes it harder to steer off of center. You should be able to tighten down most of the way to check angles and replace shims as needed without having to worry about hurting the bolts.

Definitely make sure you are using the Steel shims. Those aluminum ones are bad news. Also do not stack shims to get more. Only use one at a time. If it takes more than 8 degrees you might have to think about cutting and modifying the perches.


Carl
 

CJ7Pilot

18436572
BENEFACTOR
Gold Member
Lifetime Member
SOA Member
City
Yuba City
State
CA
I would try the 8 degree shim in there first. Hopefully you took a caster measurement from the face of the Pinon before dismantling. If so then you can re-install everything and use a angle gauge to get a rough idea if you are back in the same ballpark. There is about 2-4 degrees of float between being good and getting that dive to the sideline feeling of a bad positive caster. Too much negative caster only really makes it harder to steer off of center. You should be able to tighten down most of the way to check angles and replace shims as needed without having to worry about hurting the bolts.

That's a good plan! I haven't taken the front end apart yet, so I'll measure the current angle before I get started. You make a good point about hand-tightening the u-bolts so as not to ruin them.

I'm definitely using steel shims, and they'll be bolted to the spring packs, not just slipped in.

Thanks for the input, guys! :thumbsup:
 

CJ7Pilot

18436572
BENEFACTOR
Gold Member
Lifetime Member
SOA Member
City
Yuba City
State
CA
On a somewhat unrelated (but interesting) note, when I took the left rear wheel off, I bumped the brake drum with my elbow, and it "clanked."

I figured the screws that attach it to the axle flange had come loose, and I decided to go ahead and have a look at the brakes while I was there.

Well, the screws were tight, but the axle nut was loose... the whole axle flange was wobbling around! The washer behind the axle nut was dished, so I flipped it over, re-tightened the nut, and replaced the cotter pin.

This will get me by for now, for limited local driving, but those stock axle shafts/flanges have to go!

I had intended to install one-piece axles, but today a Warn full-floating axle kit came up in the for sale section, so I'm going to give that a try.

I'll do a separate thread for that installation.
 

CJ7Pilot

18436572
BENEFACTOR
Gold Member
Lifetime Member
SOA Member
City
Yuba City
State
CA
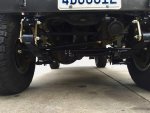
Well, it took more than a month, but I finally got the front springs in!

I had intended to take a lot of photos, but once I got going, I forgot about it. No biggie though, changing leaf springs id a pretty straight forward operation.

The main alteration with this swap (aside from the spring plates, mentioned previously), was installing the Rocky-Road shackle hangers.

They are designed to use the two factory bolt holes on the underside of the frame, as well as a third hole forward of the frame rivet, which is easy to mark and drill.

Furthermore, the mount has a vertical flange that is intended to be bolted through the side of the frame (through an existing hole) with a 5/8" bolt. However, I built a front bumper that attaches to that same frame hole with a 3/4" bolt....

So... after drilling out the 5/8" hole to 3/4", it almost lined up.... After the hangers were all bolted up from the bottom, I ran a 3/4" drill bit through the side holes, and it all worked out fine. If anything, my bumper lines up even better than it did before!

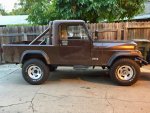
Now my Jeep is level again, with no driver-side lean! :thumbsup:

OME front - 1.jpg

OME front - 2.jpg

I ended up using 6 degree caster shims, which added about 4 degrees of caster, even with the longer shackles.

Driving around the neighborhood, I can already tell it returns to center much better.

I'll get the sway bar and steering damper re-installed tomorrow, and take it out on the highway. First though, I need to extend the sway bar links by about 3".

Also, I think I'm going to flip the drag link to the top of the steering knuckle... anyone have a reamer I can borrow? :cheers:
 

CJ7Pilot

18436572
BENEFACTOR
Gold Member
Lifetime Member
SOA Member
City
Yuba City
State
CA
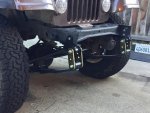
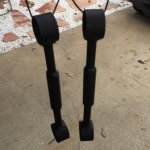
Here are my extended sway bar links, using re-purposed main-eye bushing sleeves:

steering - 1.jpg

And here's the whole thing put back together:

steering - 2.jpg

I'll definitely be flipping the drag link in the future!

I took the Scrambler out for an extended test drive, and it handles beautifully! No wandering, no fighting to hold a line... 6 degree shims seem to have been the right choice with this setup!
 

Randyzzz

Blown Budget
BENEFACTOR
Gold Member
Lifetime Member
SOA Member
City
Redmond
State
OR
Looks great. I wonder how much they will settle.
 

Rmhavema

Overlander
Lifetime Member
City
Northville
State
MI
Looks great! I ended up buying a similar setup. Two of my ome springs had "+" signs and two had "-" signs. There were no instructions, so guessing it means high or low check load or maybe left and right?
 
Last edited:

CJ7Pilot

18436572
BENEFACTOR
Gold Member
Lifetime Member
SOA Member
City
Yuba City
State
CA
Copied from a google search:

OME/Dakar spring will often have a +, o, or a - painted on one end of the leaf spring, so what does that mean? The + means slightly over spec, and when we say slightly it wasn't enough to consider the spring an error rather it is by design. The o is exactly at spec and the - slightly below spec, again by design. As the drivers side of a vehicle often has more weight, its common to use a + on the drivers side and a o or a - on the passenger side. Or, a o on the drivers side and a - on the passenger. The total difference side to side is likely just 1/8"-1/4" but it can be just the right amount to level the vehicle. This is particularly important when A and B springs are not offered such as many of the newer spring applications.

I didn't pay any attention to the markings, but now that you mention it, I remember that there were some. I'll check tomorrow, and see how they ended up on my Scrambler!
 
Top