- City
- Mount Pleasant
- State
- SC
I’m on it! Traveling for work this week but let me see if I have some pics to scrounge up.Pics pics pics!

I’m on it! Traveling for work this week but let me see if I have some pics to scrounge up.Pics pics pics!
Yessir! I’m getting there! I’m pokey on this iPad. Bear with me! ?Love me some sheetmetal work! I'm assuming that these are already in...?
Hahahaha! I know; shame on me! I bought it in Nevada back in ‘92. TAG will no longer service the 1000 Professionals, so I really need to be more careful.?. That thing has ended up going with me in the bowels of engines, and halfway in I think “why have I got my good watch on”? Kinda like my nice T-shirt’s that I wear to just “check the oil” and end up pulling an entire head a couple of hours later!Wearing a Tag to weld? C'mon Man, you're going to get weld spatter on the crystal and band (ask me how I know). I wear G-Shocks at work and they're pretty ugly but still functional.
I don't know why that's so hard for me not to do, but I do it all the time. I'll come in with a dress shirt on from work and my wife will be like "you know you have a huge oil stain on your back, don't you?"Kinda like my nice T-shirt’s that I wear to just “check the oil” and end up pulling an entire head a couple of hours later!
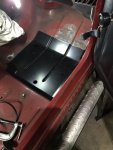
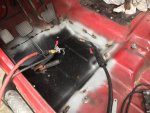
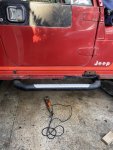
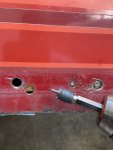
Ugh! It doesn't take much with these Heeps of ours! Man, that is great you are taking a course. I've had to learn from my mistakes over the years, and wish I'd have taken a course. You'll be able to do some serious damage when you're done!! My MIG machine is by far one of my favorite tools in the garage. I've run quite a bit of wire through it, and repaired so many rusty panels on Jeeps (not to mention frames, mufflers, etc). I'm having a blast with this plasma cutter, too. A bit more money than I wanted to spend, but just cutting the rocker panel out took about 30 seconds, and I used a piece of heavy steel as a "guide", so the cut was straight. Won't warp the sheet metal either!!Excellent info and pics. Thanks for taking the time to post all of that.
I had a nice rust free 85 CJ-7. Went off to school, leaving it and the parents' place. No carpet in it, but did leave rubber mats in the front.
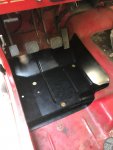
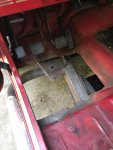
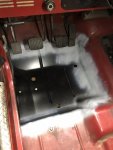
When I came I discovered that the door to top seam leaked, leaving water in the floors, and the mats kept it from evaporating, so I had rust. Over the years I've wire wheeled it a few times and hit it with rustoleum, which slowed it down, but the pans now are to the point where I want to replace them with a new panel rather than try to cut and paste in sections.
I'm not a welder, but am starting a 10 week welding class next week. The local community college finally offered one at night when I can get there.
Hahahaha!! My wife gets so irritated too! My garage has piles of "oil rags" which were formerly nice shirts.I don't know why that's so hard for me not to do, but I do it all the time. I'll come in with a dress shirt on from work and my wife will be like "you know you have a huge oil stain on your back, don't you?"
?