• Notice for iPhone users: DO NOT use the image size reduction option when uploading photos to the forum. This causes portrait images to post as landscape. We have added a warning to the image insert pop-up as well.

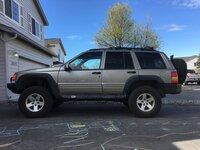
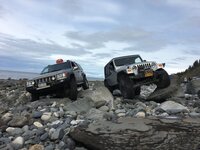
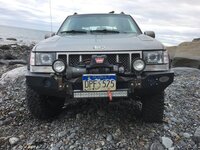
Budget Iceland Offroad ZJ build

AK-RWC

Legacy Registered User
Gold Member
City
south central
State
AK
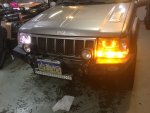
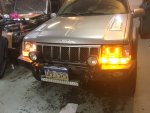
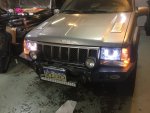
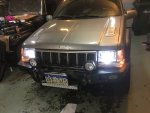
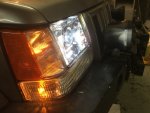
My son was “helping” me in the garage and asked about the engine hoist, so I showed him how it operates. Maybe a week or two later, both kids were in the garage with me playing with the hoist; just jacking the arm up and releasing the pressure. I ran upstairs for something and heard a loud crash followed by crying. My wife and I ran down to the garage to find that my son told his little sister to pull on the lifting arm chains while he jacked. Since the legs weren’t attached, the arm came down...onto the ZJ. Thankfully neither of the kids were hurt, and the only real damage was to the right side turn signal. (That fiberglass bumper pulled through yet again!) Since we’d been tossing around the idea of new headlights anyway, this was the motivation I needed to get it done: all new assemblies for both sides.

A2ED7EF0-678F-4C71-B423-3FC058C9E269.jpeg
I called The Retrofit Source ("TRS") prior to ordering because I was concerned about an LED not having enough heat to melt snow/ice, but I was attracted to the M-LED 2.0 because it didn't require a separate harness. After doing an informal poll among Jeep owners here, it was apparent that LEDs were only icing up during times when halogens were icing up too, even with the factory LEDs on the JLs/JTs. So, since the LEDs had much smaller drivers to mount and were otherwise plug-and-play, I ordered them up with the 9004/9007 splitters (recommended by TRS), and selected the FlatBoy Switchback shrouds, mostly because they were somewhat rectangular and would provide a nice transition from the round projector lens to the rectangular ZJ housing. It turns out that the LED also gets quite hot; hot enough that Morimoto incorporated a cooling fan for the heat-sink. This means that there's an internal fan circulating warm air within the housing. I'm hoping that any concerns I would have otherwise had about icing will be completely nullified.


31537B44-D6E8-48FD-B9D5-E2CD3E5C6F59.jpeg
Since you can't put a projector into the factory housing since the OEM Fresnel lens would simply kill the benefits of the projector's beam, there are a couple of aftermarket ZJ housings available that are a "euro" style and provide a clear front. I ordered these Anzo USA 111066 housings from Amazon. Into the oven they went so soften the butyl rubber so you can pry the fronts off.
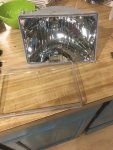

5381FC69-3963-4B61-81D5-109336D431BA.jpeg
Front off. Next, remove the bulb cover thing that's screwed in.
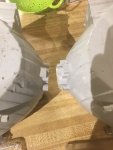


8CEB9CF5-1287-4D96-87FF-3EA9FF2547A0.jpeg
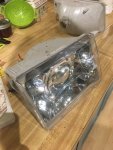
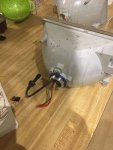
Then, down to the garage to quickly open up the 9004 hold to H4 diameter using a die grinder and a carbide bit. I also decided to bring the rear mounting surface down about 1/2" to have a few more threads for the back of the projector to screw to. I used a flat-file to make sure it was all still at the same plane.

2995E091-DE54-470C-A8D0-087EBEF48720.jpeg
E49BC25D-F942-41C7-B818-9942C8237B96.jpeg
First mock-up of the projector inside the housing.


E63DE78E-D046-4885-A0BC-023D4F70777A.jpeg
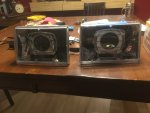
Both projectors more-or-less ready for baking with new butyl rubber.


670BFD34-471D-4416-8808-69139130E8B1.jpeg
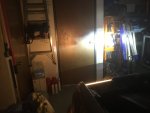
OEM headlight on bright on the left, with the M-LED 2.0 on bright on the right.


85A0D114-5BAE-40E4-9B11-C751686A9029.jpeg
There was, however, a snag. Not knowing the differences between a 9004 and a 9007 bulb, I assumed that since they're sold as the same splitter, it was simply a design change or wattage difference on the filament side. So, since TRS said this was plug-and-play, and the only directions anywhere for this are on their website (and Morimoto's) for how to screw the projector into the housing, I simply tried the plug and play. The dims were on bright, and when I tried swapping sides I ended up melting the connector and I heard sizzling coming from the driver. I immediately sent an email to TRS and went to bed. In the morning, after going back and forth with their tech support, I tried one more time using my multimeter to make sure I wasn't doing anything "wrong" since it's possible to flip the polarity for the driver input (TRS said this was an intentional design since some Toyotas are reversed). Sure enough, I fried the other driver. I called TRS and they said that the first advice I got was wrong; that the "older Jeeps" did need the relay harness. TRS had that, and two new drivers, on the way at no charge the next day.
 
Last edited:

AK-RWC

Legacy Registered User
Gold Member
City
south central
State
AK
Not entirely the end of the saga though: when I had it all mocked up, the dim was bright and the bright had the LEDs completely off. I was ready to toss in the towel when my wife suggested that I just reverse the wiring where the relay harness plugged in to the OEM headlight. I pulled out my multimeter and realized she was probably right; that I just needed to flip the pins in the Morimoto relay harness. I did that, mocked it up again, and everything worked! Someone who has done ZJ HID projectors using TRS products then told me an important instruction: even though the 9004 and 9007 use the same base "plug," the order of the three wires is different. However, because the 9007 is the more common and more popular OEM headlight bulb, the aftermarket caters the adapters, splitters, and harnesses to the 9007, and they just sell the same harness to people who need the 9004. One minor set of instructions telling me to swap the pins probably could have saved my original drivers and obviated the need for the relay harness, but at that point I had a relay harness.

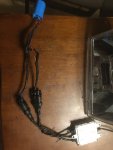
I then spent several more hours getting the drivers and relay cleanly mounted, ran the wires, and soldered the switchback connections in.
A6864B35-1170-4C4A-88DC-11AAA35BF263.jpeg
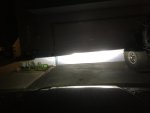
First time seeing them outside against the garage door for a minor angle tweak.


7ECB801C-E5C5-4D3F-AF4B-F1EF229B30C9.jpeg
8F60ECAB-472D-4612-A71B-0FA4335A9B3D.jpeg


D97C909B-D649-4CB9-BC6B-BCE89CEA2EE6.jpeg
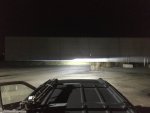
I found a warehouse, parked a little way away, and did some more tweaking to align the projectors.


8F2BD35D-DB74-4A60-9684-40E800FE9DBE.jpeg
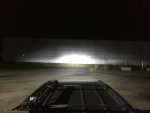
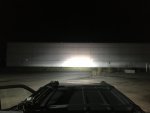
Brights.


77BABA75-31FA-403C-A82B-0D584B0B2D4B.jpeg
Brights, with the cheap 30" light bar and the tungsten/halogen VisionX spot lights on. The LEDs on bright almost completely wash out the light bar and spots!


3DEB8CA1-A184-4ACD-894F-17C9AF51DB86.jpeg
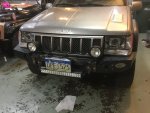
Back in the garage, everything off.


38EFFF1D-D8CD-44BF-B104-F2F7F6B7F6ED.jpeg
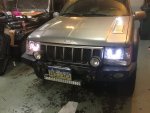
DRLs. These come on with the ignition via a fuse-tap to the PDC.


06C21395-318C-4A9B-A230-EA75E532FB51.jpeg
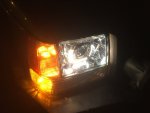
Left turn signal.


311606C0-B265-45EB-B870-FCBA9AA5E8B0.jpeg
Hazard lights.
 
Last edited:

AK-RWC

Legacy Registered User
Gold Member
City
south central
State
AK
ED88519A-0CD3-46E9-BE78-A85E4F9D1CEC.jpeg
Parking lights on; switchback is still bright.


CCDA3098-44A7-45DD-9DB2-8FFFC63416E2.jpeg
You can't tell from the pic and it's hard to catch in real life, but when the headlights turn on, the switchback/DRL dims slightly.


710D896B-323D-48ED-902B-323E5A37EE91.jpeg
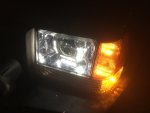
Nice side shot with the headlight on dim.


These things are AMAZING. I should have done it five years ago when I first contemplated a legit lighting upgrade.
 
Last edited:

bigwalton

Alaskan Postal nutjob
FORUM MANAGER
SOA Member
City
Dexter
State
MI
Good luck with the icing. I put a set of LEDs I had on hand in the TJ I got and had massive icing issues here last winter. Worst was when wet, sloppy crap was flying off of tires in front of me.

Swapped them with Mater’s heated Trucklites
and have had no more issues.
 

AK-RWC

Legacy Registered User
Gold Member
City
south central
State
AK
Good luck with the icing. I put a set of LEDs I had on hand in the TJ I got and had massive icing issues here last winter. Worst was when wet, sloppy crap was flying off of tires in front of me.

Swapped them with Mater’s heated Trucklites
and have had no more issues.

People here with the heated TruckLites (and I think there's a JW Speaker that's heated too?) said that the heating element just tends to bake the road grime to the plastic. It was around 20 degrees last night, and although there was no precipitation, I could feel at least a tidbit of warmth on the headlight. I think there's a HUGE difference between a bulb swap and doing what's required for an full-on projector; if this puts off enough heat to require a cooling fan for the heat-sink, we should be OK.
 

bigwalton

Alaskan Postal nutjob
FORUM MANAGER
SOA Member
City
Dexter
State
MI
Sounds good, I have been insanely impressed with these Truck Lites. I had low expectations (I inherited them from Dan Grec after he got back from Africa, they were spares) but I haven’t had any issues since going to them :shrug: I’m pretty anal about checking for it in crappy weather.
 

AK-RWC

Legacy Registered User
Gold Member
City
south central
State
AK
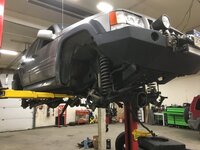
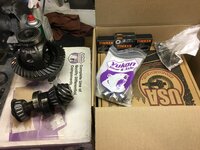
I’ve been sitting on a set of used 4.10 rear JK gears for several years that I’d been holding onto because they are larger than the ZJ’s Dana 44HD ring gear, but they fit on the ZJ carrier and the pinion will work by using a Chrysler 8-1/4” crush sleeve. (This conversion also requires a different yoke.) Then at the end of the summer I was able to get some used 4.10 gears from a HP Dana 30 that I think was in a YJ. I finally ordered set up kits in December, and yesterday a friend gave me a discount for chasing the patterns (I arranged the weekend shop space and stripped the axles for him) so the ZJ is now on 4.10 gears with new clutches in the rear and new wheel bearings/seals!

I didn’t get home until 5:00 am though. It was a long night. On the short test drive there was a vibration above 50 mph, but I didn’t hear any gear noise so I’m hoping it’s just something stupid as to the driveshafts that I didn’t catch because I was groggy when reinstalling.


538FE024-7ADE-4DB6-8980-EE1602A39C93.jpeg855A3A10-0174-4AC9-AEED-DEF7C128D63A.jpeg


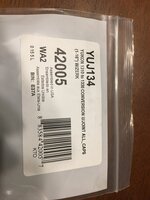
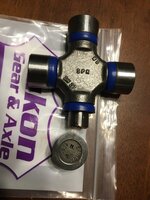
Something that I was frustrated by was the premium Yukon charges for taking a Spicer U-joint of out of the Spicer box and sticking it in their plastic sandwich baggie. Based upon advertising photos, I thought that Yukon actually sold a conversion 1310/1330 joint with the hardened cross shaft. Nope. So I paid extra for the privilege of having a Yukon p/n.
F4C60CFE-6E90-4130-A64D-828B1CB0DFA2.jpeg
B5EADECD-DFCA-4569-AA6B-9D1C5CEAD6AC.jpeg
 
Last edited:

AK-RWC

Legacy Registered User
Gold Member
City
south central
State
AK
Pre-gear change pics that I forgot to post:


9CD8C2A5-B5C3-44BD-A1CE-46C49322D76E.jpeg
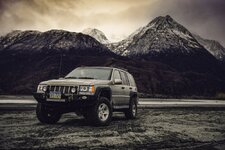
Cool pic a buddy of mine took and edited when my club was doing a winch demonstration just after I installed the headlights. Note the lack of winch. The solenoids had started giving me fits, so I took it off to give it to a guy who uses the forum handle "Blackjack," and is notoriously known within certain 4x4 circles (including Pirate) as the Mad Winch Doctor due to his expertise in WARN products. He currently works for a company that is an authorized WARN dealer/service center, but he does fun stuff on the side sometimes for friends. I dropped the XD9000i off asking him to do a bit of a cleanup and rebuild in August of 2020. He took it apart and said that the good news was the gears and drum were in great shape. He then asked if he could build me "something special." I said yes.


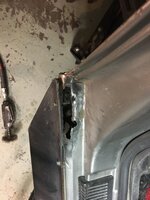
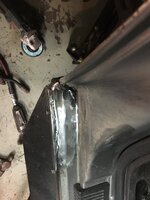
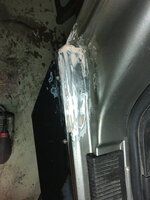
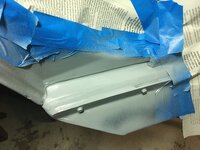
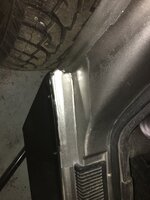
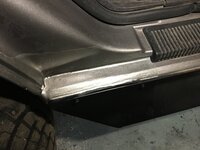
When doing the winter tire change I decided to scrape at a paint bubble to put some POR-15 over it. The bubble collapsed, which turned into a full-blown rust repair while changing tires:
5F017999-52B7-4CA6-A738-96986D9BCD2F.jpeg

84143F12-01D9-4896-A69B-07957EE88DFF.jpegBFE522A4-5ECE-4D64-8F69-F1978ACC0032.jpeg62BF386B-6B25-42EC-BD21-3DF5E5A341A6.jpegFB44F164-D24A-44D5-B715-CD6E18F352F3.jpeg35276244-1BC6-4DDE-A05B-6D9CDD8495E5.jpeg
Not professional, but not bad for a couple hours of spontaneous mid-week after-work repair (while changing to the studs).
 
Last edited:

AK-RWC

Legacy Registered User
Gold Member
City
south central
State
AK
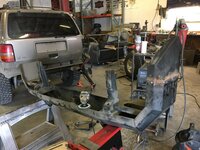
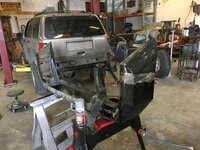
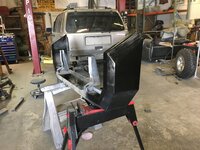
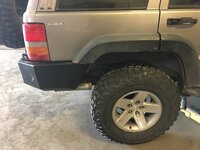
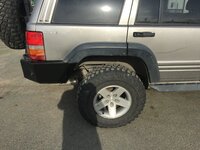
I couldn't ever figure out what was going on with the driveshaft vibration, and ultimately decided it was probably because I needed a new rear driveshaft; maybe something happened to it while I was changing to the 1310/1330 conversion joint? I don't know, but removing the rear shaft caused the vibration to go away. However, I also needed to stretch the wheelbase back after discovering that it was touching at compression, and my alignment guy hadn't done it for me after putting the long-arm system on. Pushing the back axle rear meant I needed to section the rear bumper, which was designed for a factory opening rather than the Iceland Offroad flares. So, I found a Saturday at my buddy's shop to use his lift and welder. I think I cut out 2.25" or 2.5" from the leading edges:


DCF4AD1C-4282-4604-ADCF-CC065D2CC68D.jpegD63DAF93-F8C7-4FC1-9696-42AF4566AD04.jpegD5E4DD50-8171-4212-B3E9-56FB5B96179B.jpegA7EC7563-F8A0-43E0-9EED-4158FF9A68F0.jpegFD92D054-158E-4680-A9B0-DEDE2973B4E1.jpeg93EC9E7C-46C1-447B-954A-73FF5872E2B2.jpeg
Again, not professional body work, and I was anticipating using some body filler, but was pleased enough with how the welds ground down smooth that I just went with high-build primer and sanded for a couple minutes. If you look closely you can tell where there's a defect, but if there's any bit of road grime on the bumper you can't tell.


0EFAE73A-0252-45EF-8591-3F09029CAF2E.jpeg
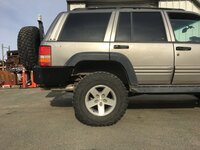
And one more Saturday got the wheelbase stretched. This was actually a huge PIA because I didn't have enough thread engagement on the front lower rear control arm joints, so I had to slide them to the forward most mounting hole. That requires dropping the front upper rear mounting brackets out of the skid plate system, which requires removing the exhaust pipe. Fundamentally, this was a full-day project. I pushed the front axle forward 1.5" and the rear axle back 1.25". I pulled the springs and shocks and literally set the axles down on the bump stops to make sure everything was centered as best it could be in the wheel well at full compression, and this is where it all ended up.


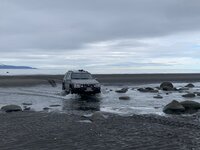
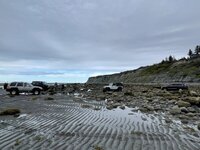
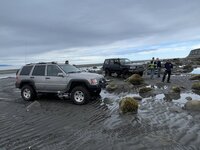
With that, I got an alignment and had them specifically check the pinion angle, and took it beach-wheeling (which seems to now be the annual test-run for ZJ mods), but still had a vibration from the driveshaft at highway speeds. I needed to get down to my other property though, so I just made my family suffer through the vibration:
FB1903DB-7DB4-4B2C-BD0A-D84574D8F056.jpeg


Picked up the "primered Camaro" winch from my buddy in Soldotna on the way down. Let's just say this isn't a Warn VR12, even if that's what the sticker suggests.
F5CDA029-2260-42F9-907C-EE270ABE55E0.jpeg


And unfortunately, we had to use it. I won't even get into the details of what went down on this run.
6055DAFC-D8AB-4991-97C9-38EAB8C7CF69.jpeg
 
Last edited:

AK-RWC

Legacy Registered User
Gold Member
City
south central
State
AK
2FF18139-32D5-4A3E-A9A9-551294B2E9C8.jpeg
3654764B-8756-4615-9468-C30ED777F17F.jpeg
My friend looking at the ZJ later commented as I was winching the WK2, "Wow, that winch is fast!"


I later checked the driveshaft while rotating on jack stands and decided that both the slip yoke and the centering ball were slightly going out, so I ordered a whole new shaft from Adams, and checked the pinion angle myself. I ended up rotating it up 2 degrees, and it's 100x better than before, but I still have some vibration that comes on around 80 mph, but it goes away by 90.

At this point, I'm ready to stick a fork in in the ZJ! There's really no other mods I want to make on it at the moment. One of the M-LED 2.0 cutoff plate solenoids is on the fritz, but Morimoto/TRS sent me a replacement projector and a new switchback under warranty. I still need to install it since it just arrived last week. The right side of the rear bumper is a little loose too, even though the bolts are tight, so I need to address that. But these are just maintenance items! It's weird reaching the "end" of a project. (At least for now.)
 
Last edited:

Kane

CJ-8 Member
City
Berlin
State
ct
It came along very nicely as a sweet go anywhere daily driver. Nice work.
 

bigwalton

Alaskan Postal nutjob
FORUM MANAGER
SOA Member
City
Dexter
State
MI
This is just awesome. It’s basically the same kind of thing I tried to do with my LJ.
 

AK-RWC

Legacy Registered User
Gold Member
City
south central
State
AK
Minor updates: the vibration continued getting worse which coincided with us moving and my putting all my tools and worldly possessions into storage where I didn't have regular access, my family being more-or-less homeless, and the addition of another vibration coming from the front somewhere. Last month I FINALLY got time to borrow a friend's shop with a lift, and my buddy who helped set up the gears came over to help me with an inspection. I immediately found the front vibration was from a bad front left hub, and he immediately found that the double-cardan end of the rear driveshaft was loose; laterally as well as longitudinally. We discussed the mods in the NP231 and I expected it was going to need a full rebuild, but he encouraged me to pull the rear driveshaft and check the output shaft yoke nut. Sure enough, it was barely holding on. I cleaned the threads and ran it on with red Locktite and an impact. Combined with the new hub, it was smooth sailing up through 80 mph!

Then it died on me in a parking lot. I quickly diagnosed this as the heated wire for the front O2 sensor had frayed and grounded against the heat shield/tub, due to the awkward angle that the center portion of the custom exhaust pipe had to be twisted to; both sensor and the front one in particular were digging into the head shield. I decided I was done playing games with exhaust shops and that to get it right I needed to just repair this myself. I ultimately had to disconnect all the exhaust (laying in the snow on the side of the road) to pull the front O2 sensor so it wouldn't ground and fry the fuse, to get it home. I bought a new sensor and a short sleeve so I could cut and rotate/bend (jam at an angle?) the center portion(s) such that it would line up with the front V-band flange and the rear V-band flange without any rotational tension, and without any longitudinal tension (I was having to use heavy-duty ratchet straps to hold the rear pipe up to the center pipe so I could align it and get the V-band clamp on). That also gave me the extra 3/4" or 1" I needed so the whole system wasn't under it's own tension and could just hang relaxed. I tacked the sleeve in place, pulled the center back out to fully weld, and it went back in like butter: sensors don't touch anything and I was able to easily hold the flanges in place by hand to get the V-band clamps in place without stressing them.

The last things to address are clearances with it fully flexed (can I run the Pewag chains, or do I simply not have enough clearance now that the springs can compress further?), and tightening up the loose rear bumper. It's also developed a nasty smell since last summer, so I need to undertake a full interior detail.
 
Top