• Notice for iPhone users: DO NOT use the image size reduction option when uploading photos to the forum. This causes portrait images to post as landscape. We have added a warning to the image insert pop-up as well.

My "new" dream Scrambler

AK-RWC

Legacy Registered User
Gold Member
City
south central
State
AK
I hope this forum doesn't frown too much on TDK/Aqualu builds. I gave up on trying to find a Scrambler that was worth buying, and quite frankly, after having dealt with two other CJ-7s, I promised myself I'd never buy another rusty CJ. So when the frame finally gave up the ghost, this project emerged. My build thread is here:

http://www.alaska4x4network.com/showthread.php?p=506194#post506194
 

bigwalton

Alaskan Postal nutjob
FORUM MANAGER
SOA Member
City
Dexter
State
MI
Excellent. No problem with a build like this on here at all... most of us :drool: at the thought of being able to build one from the ground up like this.

I miss Anchorage, go have a fish taco at Humpy's for me. :D
 

Randyzzz

Blown Budget
BENEFACTOR
Gold Member
Lifetime Member
SOA Member
City
Redmond
State
OR
Nice! I would have happily traded my factory tub for an aluminum tub...

Looks like you started your build a month before mine! I don't feel so bad anymore about how long mine's taking.;)
 

Kane

CJ-8 Member
City
Berlin
State
ct
In Alaska that must be the only way to build a good Jeep. The project looks amazing.
 

AK-RWC

Legacy Registered User
Gold Member
City
south central
State
AK
In Alaska that must be the only way to build a good Jeep. The project looks amazing.

We actually don't use salt on the roads. There's a little salt mixed in with the sand just to keep the piles of sand from turning into ice-blocks, but for the most part, we just let a layer of packed ice mixed with sand accumulate on the roads. It does get cold enough for saltwater to freeze, so salt isn't all that effective. That being said, almost everyone switches to studded tires in the winter. Alaska also has lots of coastline, but few communities are exposed to the open ocean. Here in Anchorage there is saltwater just a few yards from my office, but it's not blowing into our parking lot.

This doesn't exactly make us rust-free Arizona, but I'd take an older Alaskan project anyday over something from New England.
 

bigwalton

Alaskan Postal nutjob
FORUM MANAGER
SOA Member
City
Dexter
State
MI
This can be seen in the relatively decent condition of the Alaskan Postals, especially the frame. They added an undercoating to them alogn with the other goodies and the frames tend to be awesome. The only real issues I've seen regularly being the wheelwell/tub connection and the right hand/driver floor. I was psyched beyond words when I saw the frame on mine in person the first time :D
 

AK-RWC

Legacy Registered User
Gold Member
City
south central
State
AK
LOST just pointed out in another thread that my local board is closed to registrations, and when I log out of it, I can't even see the build thread. SO to save everyone from having to register there, I'll start double-posting the pics. What sucks for now is that I have to get this thread caught up on two years of the project. Thankfully, not much happened in two years. I think I can just cut-and-paste all the text.

It started with the dash, around November of '07:
dashpicoriginal-1.jpg
 
Last edited:

AK-RWC

Legacy Registered User
Gold Member
City
south central
State
AK
Originally posted 12/7/07:


shocktowers-1.jpg

Shock-towers

tubtailgate-1.jpg

Tailgate

tubwindshieldframe-1.jpg

Windshield frame with new seal and cowl seal

Frame should be here early next week.

I don't know what the weight savings is, but this thing is definitely lighter than a YJ tub.
 
Last edited:

AK-RWC

Legacy Registered User
Gold Member
City
south central
State
AK
Originally posted 12/21/07:


framecrate6-1.jpg


framecrate5-1.jpg


framecrate4-1.jpg


I love the look of zinc in the winter.
 
Last edited:

AK-RWC

Legacy Registered User
Gold Member
City
south central
State
AK
Originally posted 12/22/07:


It was hot-dip galvanized in Spokane after being assembled in Montana. Little Giant and I will be prepping it at 5-Star tonight, and painting it with POR-15 tomorrow.

In the meantime, pics from unloading earlier today:

frameunloading-1.jpg


framesuspended-1.jpg
 
Last edited:

AK-RWC

Legacy Registered User
Gold Member
City
south central
State
AK
I'm literally cutting and pasting from my original thread on the Alaska4x4Network, and I'm only bringing over my posts with photos. Many of the comments won't make sense without the context of the other posts, which I'm not bothering to import.
Originally posted 12/26/07:


frameandtub-1.jpg

The makings of my dream (and probably LG's nightmare since it's in his garage).
 
Last edited:

AK-RWC

Legacy Registered User
Gold Member
City
south central
State
AK
Kurt is a buddy of mine who at the time owned a 4x4 shop with an aftermarket parts subsidiary.
Originally posted 4/10/08:


Kurt-a Clause brought presents today!!!

Unfortunately, the presents didn't include spring bushings, and only included bushings for one shackle.

kurtaclause-1.jpg

kurtaclause2-1.jpg
 
Last edited:

AK-RWC

Legacy Registered User
Gold Member
City
south central
State
AK
Lots happened that I didn't document for awhile. For some context, again reminding everyone here that you're missing out on over half of the discussion in my original thread, LittleGiant was my roommate at the time. His very nice YJ with a broken NP231 sat next to the Scrambler for the entire time we lived together. It actually went down in '06, and hasn't moved under its own power since. The current and long standing joke is that I'll have assembled a whole new Jeep by the time he gets his t-case back under his YJ.
Originally posted 12/14/08:


For the record, it was psychologically very difficult for me to start drilling holes in my perfect, new, galvanized frame. Once that first hole went in, things got easier.


22gallontank-1.jpg

I need to clean the inside of the fuel tank this week before it can go in. The varnish is nasty, and I don't want to put my happy new sending unit in there. I also had to cut and weld the 15-gallon tank-strap since they don't offer one for the 20 gallon tank. I used a rubber "Welcome" mat between the tank and Kilby skidplate.


fuelbrakelines3-1.jpg

Front of the frame with brake lines. I also made new little brackets to mount the soft-lines to the hard-lines. I didn't want to put a nasty rusted-out bracket from my old frame on this new clean one.


fuelbrakelines2-1.jpg

Shot of the fuel pump and filters. I decided to mount them on the additional crossmember that Throttle-Down Customs includes in their frame. In the 7, I found problems with my fuel-pump overheating and wanted to keep it as far away from the exhaust (and hence the frame rails) as I could. In the 7, I only had it zip-tied to the brake line that runs along the crossmember to the left in the photo, which in the shorter wheelbase is still fairly close to the Flowmasters. There's a nice little shelf there, but no practical way to mount it without zip-ties again. This additional crossmember mounting keeps it up and out of the way, away from heat, and allows nice by-passing of where the shocks would hit.


fuelbrakelines-1.jpg

Another shot of the fuel-pump mounting looking forward.


Also please note that absolutely nothing has changed on Little Giant's Jeep.
 
Last edited:

AK-RWC

Legacy Registered User
Gold Member
City
south central
State
AK
Originally posted 3/2/09:


Proof of progress:

auxtanktestfit2-1.jpg

Auxiliary fuel tank, courtesy Fat******* and the boys at BSI. The angles on the final tank were opposite my spec. so it didn't mount as cleanly as I wanted, but I couldn't complain so I just modified the front to make it work, and cut a couple pieces of angle to make brackets for the rear. I figure this will hold 5-7 extra gallons. It sits in the otherwise wasted space between the last two cross-members of the CJ-8 frame. I'm going to mount a low-pressure transfer pump and plumb it into the filler line on the stock tank. I've set it up so the breather Ts into the main tank (for the charcoal canister). The round pipe you see at the top will accept a factory CJ sending unit, so I'll still be able to buy new sending units easy and see how much is in the auxiliary tank with the flip of a switch for my factory fuel gauge.


auxtanktestfit-1.jpg

Still need to paint the brackets and buy a couple more bolts. It obviously needs to come out again anyway for the sending unit and all the lines. Lots of room next to the frame rails to install the transfer pump, and if I need to bolt through for frame-mounted fender protection. The tank does not change the departure angle at all, and is nicely tucked up and out of the way.


rearaxleinstalled-1.jpg

Tera 60 mocked up. I still need to clean it up and weld on the tabs where the disc soft-lines intersect with the hard-lines. I had to move them since they interfered with the new perch location. Also need to clean and repaint the spring plates.

axleapart-1.jpg

Big Dan has the front housing, helping me with welding the right perch to the cast differential. Pulling it apart was good since it was time for new bearings, and one new hub (one race won't stay seated, even after multiple attempts and peaning the hub). I also found one of the outer shafts, which was already egged-out and required a tack-weld for the u-joint cap, had broken the welds and the cap was thinking about a vacation. Complete new Alloy USA shafts/u-joints will be in the mail tomorrow.
 
Last edited:

AK-RWC

Legacy Registered User
Gold Member
City
south central
State
AK
Originally posted 4/12/09:


engineinstalled-1.jpg

Engine is in! AMC 401 with all aluminum top end and Holley ProJection 4Di. I found the right side frame mount to be cracked, so that's welded (thanks to BadCo) and they are all cleaned and painted with new hardware. The headers are just hanging on there to keep them out of the way for now. Unfortunately, I broke the dip-stick tube in moving the engine. :wall: I've cut a few holes in the firewall of things that I know I'll use (brakes, steering, fuse-box).

frontaxleinstalled-1.jpg

Front axle is in! It's now a rolling chassis! All new bearings and seals throughout, along with a full set of Alloy USA shafts and u-joints. I reused the old 4.10 and Detroit EZ-Locker. I picked up new hubs. Justin is cleaning my Warn Premiums in his parts washer later this week. I'm actually thinking that with a custom tie-rod, and may be able to get away with nearly a high-steer with the stock Scout knuckles.

weldedperch-1.jpg

Thanks for BigDan for welding the perches on!

caliperbling-1.jpg

WolfheartAK pointed out that I wasn't even going to get a full summer on the brake pads, so those got changed. My girlfriend decided I should have bling-bling colored calipers. Although not visible in this photo, I got a part number from a Scout board for a DOT approved 10" extension for the factory brakelines. Now I just need an adaptor for my 7/16 hardline to the 7/16" softline.

enginebling-1.jpg

Fancy AN fittings.

tcaseinstalled-1.jpg

T-18 and Dana 300. Re-used a factory cross-member.
 
Last edited:

AK-RWC

Legacy Registered User
Gold Member
City
south central
State
AK
I bought and renovated a condo, two doors from where I was renting a room from my buddy, in June of '09. Nothing happened on the Jeep that summer.
Originally posted 3/3/10:


Buying a condo caused a major stall. Other than getting it moved, not much has happened. Here is what it looks like in the sun:

sun2-1.jpg

sun1-1.jpg
 
Last edited:

AK-RWC

Legacy Registered User
Gold Member
City
south central
State
AK
My CJ-7, which was the "donor" vehicle, had already had a YJ-tub swapped in '98.
Originally posted 9/4/10:


Finally have the firewall stripped from the orange carcass. I'm rebuilding and properly sealing the heat/air boxes and POR-15ing all the metal parts, as well as the swing-pedal assembly. The steering column I rebuilt when I installed it in 2000, so I'm not going to mess with it again. I do need a new u-joint for my Borgeson shaft. I'll post before and after pics soon.

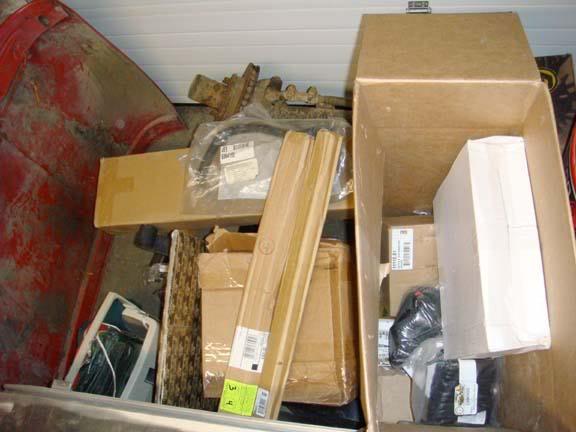
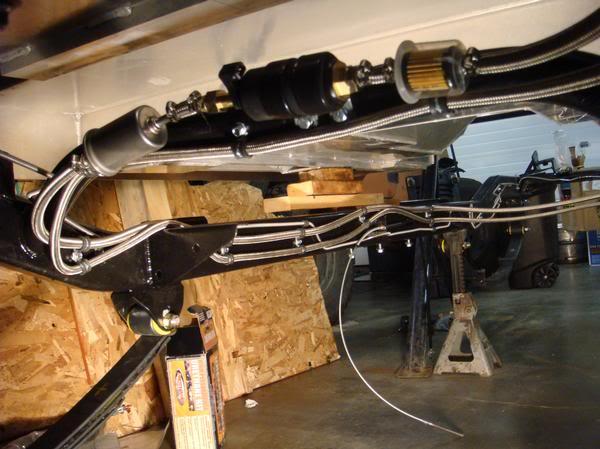
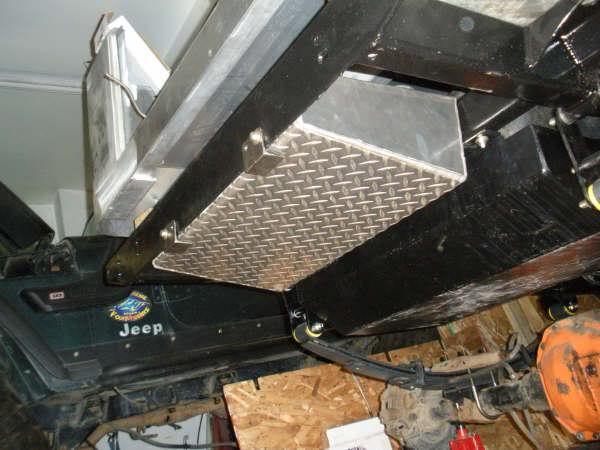
Also have the auxilliary fuel tank and pump installed.

EDIT: pics added

carcass-1.jpg

Firewall stripped from the carcass.


dirtyairheaterboxes-1.jpg

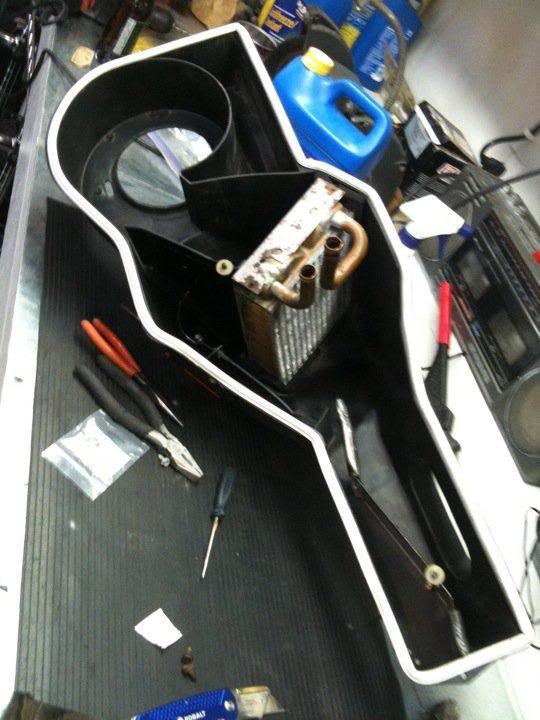
Air/heater boxes out.


ventboxrebuilt-1.jpg

I removed all the metal components, including the internal flappers, and drilled out the rivets for the brackets, to POR-15 everything and add a top-coat of Hammerite for effect. All the rivets that I removed were replaced with aluminum, but the rivets that hold the actual boxes together were left since they seemed fine. The two halves of the defroster duct (not the accordian part) were held together with steel staples, which were replaced with aluminum rivets. All the plastic seams were sealed with a thin bead of black RTV.


insideheaterbox-1.jpg

I replaced the heater core about six years ago, and I upgraded the blower motor to the Chevy C/K style in 1999 or 2000. All the flappers were POR-15'd, and I replaced all the "sponge" seals with a rubberized foam. The plastic housing was sealed to the steel backing-plate by some dry putty garbage, which I stripped off and replaced with a new self-adhesive rubberized weather seal.


rebuiltheaterbox-1.jpg

Completely reassembled housing ready for install with all new hardware, most of which is stainless. I love POR-15! I also had to drill and tap a replacement stud into the backing-plate.


pedalsonbench-1.jpg

I didn't take a good "before" shot of the swing-pedal assembly, but I can assure you it was completely rusted. Only the pedals themselves still had some paint. I actually think that AMC didn't bother to paint the brackets. Everything was POR-15'd and painted with Hammerite except for the pedals themselves which looked good, so they were prepped and painted with Hammerite only.


auxtankassembled-1.jpg

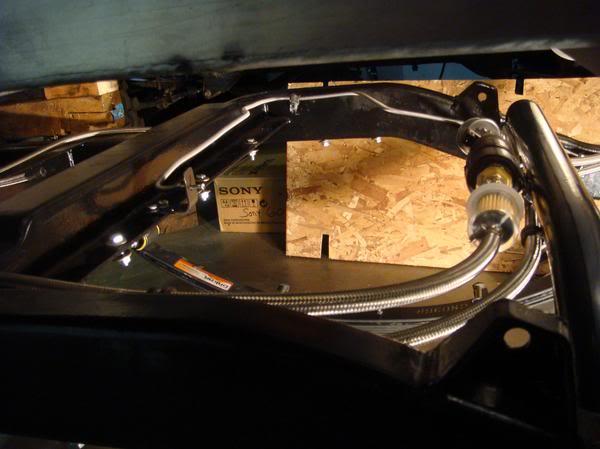
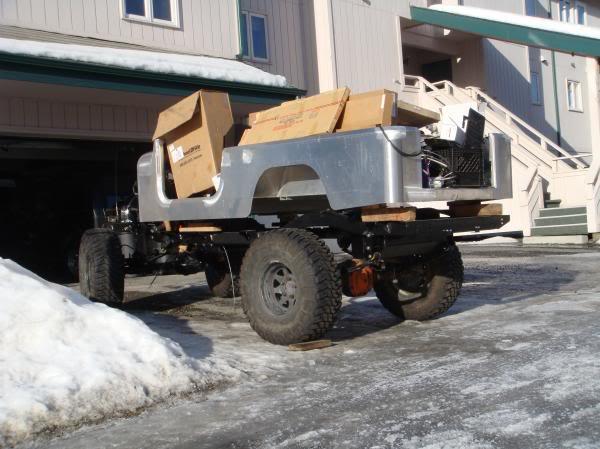
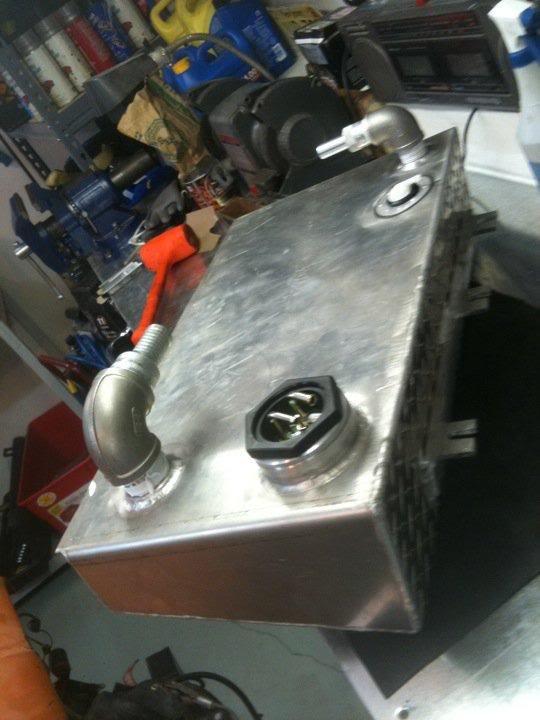
Auxilliary fuel tank with Jeep sending-unit and Jeep check-valve installed. Fat******* hooked me up with the custom tank, and Sleddy helped with the odd-sized hole needed for the check-valve.


auxtanktop-1.jpg

Fuel tank installed. I haven't cut the hoses yet since we're still working on where/how the filler will mount.
 
Last edited:
Top