• Notice for iPhone users: DO NOT use the image size reduction option when uploading photos to the forum. This causes portrait images to post as landscape. We have added a warning to the image insert pop-up as well.

Project Purple People Eater ('81)

wewjr32

CJ-8 Member
City
Franklin
State
TN
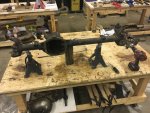
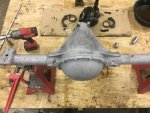
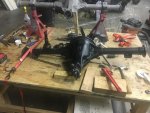
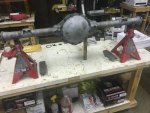
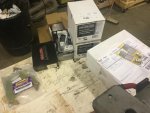
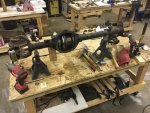
Got the axle housing sandblasted last night. Next step is to "attempt" to do my first gear swap. Already have the new ring on the Tru-Trac and bearings pressed onto the carrier as well. If anyone has any advice for someone attempting this setup for the first time, please let me know. I've read and researched enough to have a basic understanding of the process (I hope). One local guy I talked with suggested I try to reuse the old crush sleeve because it can take a ton of force to actually get the new one set and even then sometimes it might not get crushed properly at the start. I know this can get tedious with having to take everything in and out a couple times until you get the shims just right so any suggestions that might help me avoid mistakes would be greatly appreciated.


IMG_8845.jpg

IMG_8846.jpg
 

sdsupilot

CJ-8 Member
Member
City
OKC
State
OK
Been a while since I've been in a differential. Patience is the most important part.

I know the woodworking struggle well. Most of the time I back the jeep out of the garage. Painting is the worse though. Takes forever to clean all the dust out prior to painting something.
 

wewjr32

CJ-8 Member
City
Franklin
State
TN
Finally got all my parts and tools in that I ordered for the re-gear and found some time the past two nights to start the work.

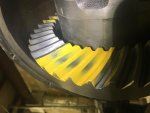
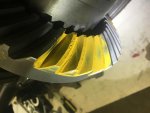
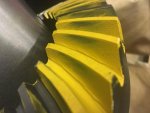
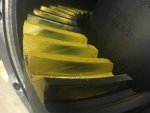
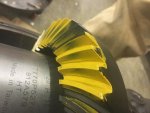
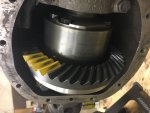
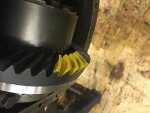
I'm starting with an AMC 20 and installing 4.10 gears and a Detroit Tru-Trac. I used the old inner pinion bearing race and outer pinion bearing to make setup parts that make adjusting the shims a bit easier (setup parts will slide on and off by hand). I also took the old pinion nut and cut off the top portion to make it easier to screw on and off by hand. I think I got everything dialed in tonight. Since I have never done this before I wanted to hear what some folks on here had to say about the pattern I got on the ring gear. I was able to get my backlash set to around 6.5-7 which I believe is in the factory specs (5-9?). Here is a photo of the drive and coast sides of the ring gear. Thoughts on the pattern?


IMG_8903.jpg

IMG_8902.jpg
 

wewjr32

CJ-8 Member
City
Franklin
State
TN
I got my pinion and carrier installed tonight. It took a tremendous amount of force to get the yoke fully seated on the pinion. I ended up breaking a 1/2" drive breaker bar trying to get the pinion nut torqued on. Switched over to a 3/4" breaker bar and a 4' pipe to get it fully torqued down. I'm guessing the crush sleeve just takes a ridiculous amount of force to get it started. I put my 250ft/lb toque wrench on it and it clicked before I could get the nut to move. I had to strap the axle to a table and wedge a pipe wrench on the yoke to get it all tightened up.

IMG_8909.jpg

IMG_8911.jpg

I ended up with a rotational torque reading on the pinion nut just under 25in/lbs. I read that this is just under the top end of the factory spec but the yoke feels pretty tight to turn by hand, is this normal?

My backlash is set a .007 but I do have some backlash noise when I start to turn the yoke either way. Will this go away when I break in the gears or is this a bad thing?

First time attempting to install a new set of gears so these are probably dumb questions.
 

wewjr32

CJ-8 Member
City
Franklin
State
TN
This first axle that I am almost finished putting together was the original narrow trac axle that came under my Scrambler when I got it. I ended up getting a set of wide trac axles since then but the narrow tracs are still getting rebuilt and going under my CJ5. The only thing left to do on this first axle rebuild is to get the old drum brakes cleaned up and painted. I plan to convert the wide trac AMC 20 for my Scrambler to disc brakes.

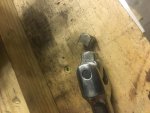
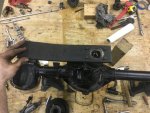
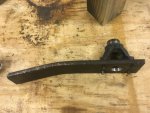
Tonight I spent some time cleaning up the shop. It finally got to the point where I was spending more time looking for a tool than actually being productive. When I was cleaning up I found an old bush hog blade that I've used as a support on the press and thought it would make a good yoke isolator. It should be easier than using a pipe wrench to remove and install the pinion nut. Pretty pleased with the finished product. I think it was worth the time to fab up since I have at least three more axles to build.

IMG_8918.jpg

IMG_8919.jpg
 

wewjr32

CJ-8 Member
City
Franklin
State
TN
Starting to make some noticeable progress which always helps with the motivation. The process of setting up new gears is actually lot less complicated than I originally thought. Once you understand the basic principles, its mainly just tedious work (as long as you have the right tools).

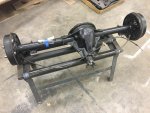
Since my last post I've gotten the NT AMC 20 fully assembled with a Tru-Trac, new 4:10 gears and all new seals/bearings. I also cleaned/replaced a few parts in the drum brakes but forgot to take any pictures. This setup is ready to swap out under my CJ5. Should make a pretty substantial difference since I am currently running 2:73 gears with 33" tires and a 3-speed (on long steep hills I have to downshift to 1st gear).
IMG_8955.jpg

Earlier this week I got the NT Dana 30 dialed in with the correct shim measurements to set the pinion depth and backlash. I just need to pull off the setup bearings and races and do a final assembly with the new parts. A note to anyone who might be doing this in the future, check your installation kit before you get into it and make sure you have the oil slingers and oil baffle included. I bought a R&P + installation kit from G2 and they did not include these parts or the inner axle seals (which likely need to be replaced too). The NT Dana 30 is already painted so once I get it all put back together its ready for the CJ 5 as well.

The WT AMC 20 for the Scrambler is stripped down and sandblasted. I'm hoping to get the new gears installed in it this weekend. I also have to mount new spring perches that I got from Barnes 4WD since the PO had it setup for SOA. Additionally, I plan on converting the rear to disc brakes. Shout out to mhinchliffe for passing along the part numbers he used on his disc brake conversion.

Tonight, I got the WT Dana 30 completely stripped down and cleaned. It was gross to say the least. Hopefully we'll have some decent weather this upcoming week so I can get the housing sandblasted.
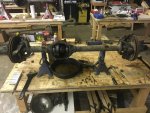
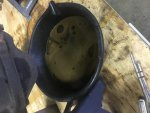
IMG_8948.jpg

IMG_8947.jpg

IMG_8954.jpg

I'm glad I follow this forum because I had to use a trick I learned from reading through countless threads. I stripped one of my brake caliper retaining bolts when I was tearing down the axle but I was able to weld a nut onto the bolt head and use my big 3/4" drive impact to finally get it out.

IMG_8953.jpg

1 axle down, 3 to go. Should be pretty good at this by the time I'm done.
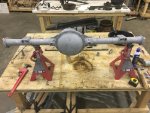
 

wewjr32

CJ-8 Member
City
Franklin
State
TN
Spent a few hours in the shop tonight but made little progress to no progress. :banghead:

Does anyone know the factory tolerance for runout on the AMC 20 carrier? Or the acceptable variation in backlash as you measure around the ring?

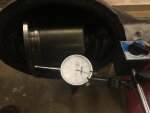
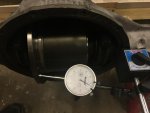
I have a brand new Detroit Tru-Trac, new bearings and a new ring gear on it. I installed a brand new pinion with new bearings into the housing and then started messing around with different shims to try to get the correct backlash. I kept getting upwards of .006"-.008" of difference in backlash readings as I would spin the carrier. At first I thought I didn't have enough preload so I tried adding more shims until it got so tight that I had to stand on the axle to pry the carrier out with a bar. I realized that the preload probably wasn't the issue so I checked the runout by measuring on the back of the ring gear and noticed that this was probably the cause of my inconsistent backlash readings. Pressed the ring gear off the carrier and set just the carrier in the housing to check the runout on its mating face. It measured approximately .003". Is this acceptable?

IMG_8960.jpg

IMG_8959.jpg

I already put a file to the back of the ring gear after I pressed it off and it likes like there might have been a couple high spots. However, if the carrier runout is too far out tolerance then I don't want to waste my time trying to set this all up again. I'm hoping that since this is a brand new carrier it is still within tolerance and maybe I just had a high spot on the ring gear causing it not to mate up well.

Hopefully I didn't speak too soon in my last post saying how well the axles were going together, tonight was quite the opposite.
 

wewjr32

CJ-8 Member
City
Franklin
State
TN
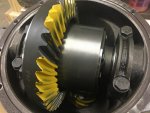
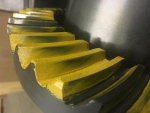
Made a bit of positive progress this afternoon. After filing the back of the ring gear and mating surface of the carrier, I was able to get backlash readings at multiple points around the ring gear within .003" of each other. So far I've installed and removed the carrier at least 9 times, with the last 3 times also changing the depth shims on the pinion. I think I'm just about there. I need to increase the depth on the pinion once more to get a better pattern.

IMG_8967.jpg

Fingers crossed it will be fully dialed in after the next setup. The three teeth at the top of the photo are from the most recent setup. The set of teeth at the bottom of the photo were before I increased the pinion depth this last time. Moving in the right direction but needs more depth. This is where I left off for the night.

"Sport" found his favorite stick in the shop, an old whiskey barrel stave.

IMG_8962.jpg
 

TravelnMan

Legacy Registered User
City
Granby
State
CT
0.003" of runout sounds like a lot on that machined surface to me. Is the high spot the same everytime around? If it's still a concern I'd try indicating on the opposite side and another surface to measure the side - side runout. That could tell you if the whole carrier is moving or if there really is a high spot. Otherwise looks like you have a good plan to adjust the final pattern.
 

wewjr32

CJ-8 Member
City
Franklin
State
TN
0.003" of runout sounds like a lot on that machined surface to me. Is the high spot the same everytime around? If it's still a concern I'd try indicating on the opposite side and another surface to measure the side - side runout. That could tell you if the whole carrier is moving or if there really is a high spot. Otherwise looks like you have a good plan to adjust the final pattern.

I agree, I thought it was a bit too much for being a brand new carrier. It did appear to be around the same spot every time around when rotating. On my first test fit, I was getting backlash readings from .003" - .010" as I would rotate the ring gear. After working on the carrier bearing preload I was able to get the readings down to about a .005" variation. (I don't have a case spreader but this preload required a rubber mallet to get the carrier set and a pry bar to remove it - I have since backed off the preload very slightly). I think filing the ring gear and the carrier mating surface also helped. On my first gear pattern I noticed the pinion not being close enough to the ring. Now after I've increased the pinion depth twice I am getting backlash readings from .005" - .008" (so less variation than initially). I'm still reading some runout when I measure off the back of the ring gear but I'm assuming this is from the mating face of the carrier since I already noticed the reading there. If I can get the pinion depth set properly via a good pattern and get my backlash readings between .006" - .009" I think I go with it (unless anyone knows a reason this would cause problems?). The last AMC 20 I setup completed had consistent backlash readings all the way around, so this one is somewhat frustrating.
 

wewjr32

CJ-8 Member
City
Franklin
State
TN
Got the narrow trac Dana 30 differential buttoned up tonight but not without a bit of a fight. Used the old pinion nut to to check the preload on the outer bearing and make sure I had the right amount of shims installed. I got impatient when I was pulling the pinion nut off as it seemed to have gotten some junk in the threads and was taking quite a bit of effort to spin off so I stuck my impact on it...bad idea and I knew it. :banghead:

Ended up stripping the last maybe 1/8" off the pinion threads. Luckily it wasn't that deep and the new nut still threads on the pinion. I figured with the nut being torqued on to at least 150ft/lbs and the fact that they are tapered to lock on there, I should be ok. Maybe only the last 1/16" of the nut, at the most, is at the edge of the stripped portion. If it was the rear axle I might be a bit more concerned, but I will definitely keep an eye on it. This one was going together way too easy at first, I knew something would pop up.

Anyways, that's one set down. Good learning experience and practice for the important set that goes under the scrambler. Wish I had access to a two post lift and I'd go ahead and swap these out under the CJ5. Will probably wait a couple months before I tackle that project, need to get this scrambler on the road!
 

wewjr32

CJ-8 Member
City
Franklin
State
TN
Made some progress tonight. Got the differential for the Wide Trac AMC 20 all dialed in. Only took two pinion depth adjustments tonight. These first two photos are after my first adjustment. If you compare them to the last attempt above, you can see that it moved some but still not enough for my liking.

IMG_8976.jpg

IMG_8977.jpg

Went ahead and adjusted the pinion again after that and also increased the backlash a bit as it was decreasing the more I adjusted the pinion. The photos below are after my final attempt and a pattern I am happier with.

IMG_8978.jpg

IMG_8979.jpg

Glad to finally have all the proper measurements set. I am going to hold off on the final install of the differential for now because I still need to weld the new spring perches as well as the disc brake caliper brackets. It's a bit easier to move around when the housing is empty.

Here are my notes from this setup, just a few attempts before I got it right.

IMG_8980.jpg

IMG_8981.jpg

And all the parts for the disc brake conversion.

IMG_8982.jpg
 

wewjr32

CJ-8 Member
City
Franklin
State
TN
Had a pretty good afternoon in the shop today. Started with a little cleanup and then spent some time around the press. I got the old u-joints out of my front axles. I forgot how much of a pain rusty u-joints can be to remove. After that I pressed the inner bearing onto the pinion and pressed the ring gear onto the new Tru-Trac.

Prior to setting the ring gear, I got the proper preload on the carrier and also measured the runout (better than the last Dana 30 differential I did, this was within spec at .002"). I am either getting better at this or was very lucky this afternoon because I nailed the setup on the second try. I'm going to say it was a lot of luck, but I have learned a bunch since this is now my 4th differential in a matter of 2 weeks. Installing new gears seemed very intimidating initially, but once you understand the concept and have the patience to deal with measurements at the .001" scale, it really isn't all that complicated (albeit time consuming and sometimes frustrating).

On my second attempt at setting the backlash I was between .006" - .007". I decided to go ahead and check the pattern since this was what I was aiming for anyways and I was pleasantly surprised.

IMG_8991.jpg

IMG_8992.jpg

IMG_8993.jpg

IMG_8995.jpg

With that I decided to call it a day. The real test is when I actually get to put these on the road. Still have some work to do to get these buttoned up, but I'm hoping to have a rolling chassis in a month or so.
 

wewjr32

CJ-8 Member
City
Franklin
State
TN
Took advantage of the nice weather down here today and got some stuff sandblasted.

IMG_8999.jpg

IMG_9001.jpg

Need to get the spring perches welded on my axle housings as well as the new caliper brackets on the rear and then I'll get everything primed and painted. Just the bare metal axle housing looks so much nicer.
 

mhinchliffe

CJ-8 Member
City
W-S
State
NC
Don't forget to weld on a fixed mounting point for each rubber brake hose in the rear. Just putting it out there.
See post 107 in my thread
 
Last edited:

wewjr32

CJ-8 Member
City
Franklin
State
TN
Don't forget to weld on a fixed mounting point for each rubber brake hose in the rear. Just putting it out there.
See post 107 in my thread

Ah, thanks Matt! I totally would have forgotten those and banged my head on the workbench when I realized I had to grind off a fresh paint job to weld them in. I have those brake hose mounts in a box on my work bench and I am making a note to pull them out and set them by the caliper brackets so that I remember to do them all together.

It always pays to have multiple folks overseeing a project, even if it is just through a forum!
 
Top