• Notice for iPhone users: DO NOT use the image size reduction option when uploading photos to the forum. This causes portrait images to post as landscape. We have added a warning to the image insert pop-up as well.

Project Puzzled

Kiko

Base Coat 1H
Lifetime Member
City
Cincinnati
State
Oh
First off I must explain Project Puzzled.

1. It is a puzzle to put back together.
2. I'll be puzzled most of the time as to what is what, what to do next, and where this is going.
3. You will be puzzled by my thoughts and questions as well as what I chose to do next and where this is going.

Goal: Get it done by SOA Nationals in 2013. I probably won't make that goal, but I need set one.

Goal: Build a rig that I can drive in for a few hours on the street, and have it be fully capable off pavement, and drive it home.

Goal: Have it be able to squeeze in and out of my garage without airing down or changing tires.

Goal: Only build it once.

Goal: Make it safe for the kids to come along for the ride(s).

Goal: Take a lot of pictures along the way trying not to do so from my phone or iPad.

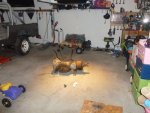
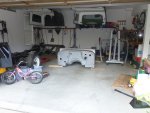
The pile:
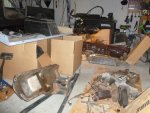
P1000439.JPG

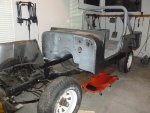
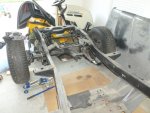
Tub and Frame:

P1000440.JPG
 

Kiko

Base Coat 1H
Lifetime Member
City
Cincinnati
State
Oh
Step 1 is to get everything sorted and organized.

Step 2 will be to get the tub off the frame (its not attached now, I just need to make room and lift it off)

Step 3 will be to strip down the frame, get it to metal, fix anytihing that needs fixed, and rust proof it. Start it right from the ground up.

While I'm doing that I need to start to think more about how I want to build it. I need to have a decent understanding before the IOK swap meet this fall so I can do some shopping/trading.
 

rguest3

Legacy Registered User
City
Sarasota
State
FL
Did you build your first Scrambler? (82 chestnut Brown) Perfect color by the way...

Build with what you like about the first one and change what you don't like. As you know the options are endless....

To help me, I always build the project on paper first with a spreadsheet on the computer. This way you may not go in too many directions at once. :banghead: Kinda make a flow chart with the order of things to do.

But, we'll be watchin...

:popcorn:
 

Kiko

Base Coat 1H
Lifetime Member
City
Cincinnati
State
Oh
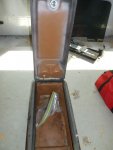
Where did the pile go? It's all gone except for the stuff I can't lift. Got it all moved to the basement. I will begin sorting there. I did have a sad moment as I discovered the black console was once nutmeg. :( So hard to find nutmeg interior.

P1000446.JPG

P1000442.JPG
 

Kiko

Base Coat 1H
Lifetime Member
City
Cincinnati
State
Oh
Did you build your first Scrambler? (82 chestnut Brown) Perfect color by the way...

Build with what you like about the first one and change what you don't like. As you know the options are endless....

To help me, I always build the project on paper first with a spreadsheet on the computer. This way you may not go in too many directions at once. :banghead: Kinda make a flow chart with the order of things to do.

But, we'll be watchin...

:popcorn:

Chestnut Jeep 1 was 90% done when I got it. It was not a frame off but is very clean.

I have some thoughts in my head as to direction. I've been writing them down as well when I think a decision is final. Good suggestions though. Since the tub is already off I have to do the frame first. Even though it is clean, it needs to be done or I'll kick myself in 5 years for not doing it when I had the chance.
 

Kiko

Base Coat 1H
Lifetime Member
City
Cincinnati
State
Oh
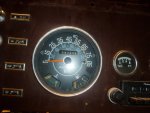
Original Miles and Jeep radio still installed :)

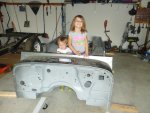
BTW, the dash is from the disassembled one. It was also Chestnut Brown from the factory. I have twins.

P1000444.JPG
 
Last edited:

Kiko

Base Coat 1H
Lifetime Member
City
Cincinnati
State
Oh
How close are the vins of the twins?

They are both early 82s. My original one is # 1994 CJ off the line for 82. The new one was # 4748 off the line.

The new one was an Auto. The original one was a T4. Both are 1H paint codes. Trim on the new one is Black vinyl Highback and original one is nutmeg highback with purse straps (laredo).

So pretty close. :)
 
Last edited:

spankrjs

Scrambler Junkie
Lifetime Member
SOA Member
City
Biloxi
State
MS
Looks like a great project, have fun:cheers:

What is it about those "Toby" Scramblers - they always end up in a million pieces spread out all over the garage:thumbsup:
 

Kiko

Base Coat 1H
Lifetime Member
City
Cincinnati
State
Oh
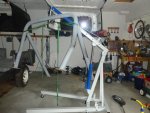
I didn't get much done last night. Got the engine hoist put together and that was it. Well and did some more thinking. My company sent me an Amazon gift card as a bonus and I did some window shopping.
 

MrBeep

CJ-8 Vendor Supporter
Member
SOA Member
CJ-8.com Vendor
City
Dillsboro
State
IN
Looks like a great project, have fun:cheers:

What is it about those "Toby" Scramblers - they always end up in a million pieces spread out all over the garage:thumbsup:

Some are driven 1000s of miles and then disassembled and others just come that way.:thumbsup:

Of course I have 2 projects scattered over 2 states for myself. :banghead: :wave:

Subscribed....:popcorn:
 
Last edited:

Polarfire

Jeep Aficionado
Lifetime Member
City
Columbia
State
MO
Looks fun! :popcorn: I feel like I should be working on something, hmmm.....:shrug:
 

Kiko

Base Coat 1H
Lifetime Member
City
Cincinnati
State
Oh
Tub and rollbar off today. Managed to do it by myself while the kids played in the driveway. Pics after I get them in bed.

I did learn it would have easier to hoist the tub with the rollbar in place. But not impossible. :)

It did require some well placed ratchet straps and a little fine tuning but I got it off and on the ground without incident.
 

Kiko

Base Coat 1H
Lifetime Member
City
Cincinnati
State
Oh
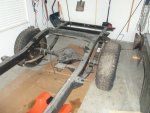
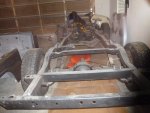
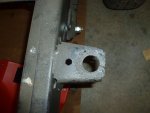
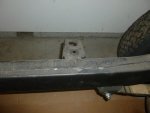
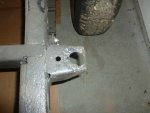
Looks like 3 of the body mounts are a bit toasty. Other than that it looks really good.


ImageUploadedByTapatalk HD1345391198.390882.jpg
ImageUploadedByTapatalk HD1345391214.824994.jpg
ImageUploadedByTapatalk HD1345391232.772683.jpg
ImageUploadedByTapatalk HD1345391251.933135.jpg
 

Kiko

Base Coat 1H
Lifetime Member
City
Cincinnati
State
Oh
So not much has happened in the past few days except for a lot of thinking and research due to my niece having some medical issues. I'll hopefully get back to work tomorrow night or Saturday. However, I think I've finalized my build plans. Please comment if you see something way out of whack.

A goal to start with was to be able to get it in and out of the Garage. With that, I'm going to go with 35s, a 4 inch suspension lift, and 1 inch body lift. From my math and getting some heights of similar rigs it *should* fit. Torn a bit between the RE 4.5" and the BDS 4". Comments are welcome about this, but I'll probably just start another thread in the appropriate location for thoughts on the 2 kits.

In order to push the 35's I've decided to swap the Dana 30 for a scout Dana 44. I'm going to leave the AMC 20 in the rear and go with 4.56 gears and swap in chromoly axles. I can't see myself twisting or breaking the 20k and I don't think the 44 is that much of an upgrade in the rear. If I would break the 20, I would probably break the 44 in the same scenario. If I was worried about it I would go with a rear 60 but just can't justify the expense if I don't think my driving style would break the 20. Both front and rear will be locked but I'm not sure who I'm going to go with there yet. I will probably go disk brake on the rear as well.

For the powerhouse, I'm thinking a 350 TBI (for injection without a bunch of electronics) mated up with a 700R4. The 700R4 has a low first gear and has a .70 overdrive. So I think I should do highway speeds around 21-22 rpm and crawl perty well too. I really would like more hp than the 258 can give me without a huge investment. The stock 350 seems to be the top end 258. Plus, it will sound cool and have the power when I need/want it.

Sticking with the Dana 300 transfer case. It will of course need dual sticks. I thought about the 4:1 kit but I'm not thinking it would be necessary with the already low first gear in the 700R4.

Frame will be reinforced, blasted, and hopefully get a dip in a galvanizing pool. Don't really know the cost of this so it may just be paint. I haven't contacted the local place that does it for an estimate.

Body and rocker armor will be added but will be all painted so you really can't see it. Tube fenders up front.

Full family roll cage to top it off.

So that's the dream. Just have to make it a reality. Again, if I have something off or that doesn't make sense, let me know before I realize it somewhere down the line. :)
 

John N

Addicted....Ex-SOA VP
BENEFACTOR
Gold Member
Lifetime Member
SOA Member
City
Rockville
State
VA
It sounds like you have a good plan. From my experience, I hate to see someone spend the money for one piece axles, gears and a locker on a CJ Model 20. I've seen too many bend the tubes and spin the pumpkin. Use the Scout Dana 44 rear if you can get it with the front. I've found the 4:1 gears in transfer case is really helpful with the automatic, but it's fairly easy to add latter on.
 

Bad Karma

Captain Sarcasm
BENEFACTOR
Lifetime Member
Member
City
Cobourg, Ontario, Cana
State
da
stay away from BDS... stiff as hell, your spine will thank you.

It cost me between $200 and $300 to galvanize my frame. worth every penny. Only problem is paint doesnt stick to it very well, even if you use the proper "primer for galvanized" so spray bomb it after its primed, easy to touch up if it flakes off.
 

Kiko

Base Coat 1H
Lifetime Member
City
Cincinnati
State
Oh
It sounds like you have a good plan. From my experience, I hate to see someone spend the money for one piece axles, gears and a locker on a CJ Model 20. I've seen too many bend the tubes and spin the pumpkin. Use the Scout Dana 44 rear if you can get it with the front. I've found the 4:1 gears in transfer case is really helpful with the automatic, but it's fairly easy to add latter on.

I know of a pretty big stockpile of scout 44s. Why is the rear scout 44 that much better? From what I know, the 20 is 29 spline...44 is 30. 44 has a stronger housing but the 20 can be reinforced. 20 has a larger ring gear.

What am I missing?
 
Top