• Notice for iPhone users: DO NOT use the image size reduction option when uploading photos to the forum. This causes portrait images to post as landscape. We have added a warning to the image insert pop-up as well.

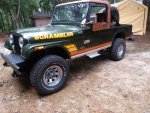
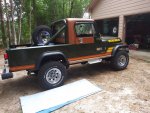
spankrjs's Biloxi, MS '83 Scrambler

spankrjs

Scrambler Junkie
Lifetime Member
SOA Member
City
Biloxi
State
MS
Intermittent problems are so GRRRR! Is the PCM still throwing a Code #51 Lean Condition when the engine stumbles? Did you or HESCO adjust the timing on the PCM or is it at the factory setting? I know you can subtract 6 degrees of timing in the PCM but it takes one of the factory Jeep/MOPAR diagnostic computers.

On the HESCO/Mopar PCM I understood that HESCO deleted the a/c and voltage inputs/programming so their computer would not throw CEL's. On non HESCO factory computers the missing a/c input will throw a code but not trigger the CEL, the missing voltage input will throw a low voltage code and a CEL.

No, the two times it stumbled today, no CEL, no code 51, no codes at all. The stumble was too brief, maybe 5-10 seconds. IIRC, it has to be lean for like two minutes before it trips the CEL.

When it was throwing the Code 51, it still ran good, just a slight seat of the pants performance decrease. I never kept pushing it to see if it would start to stumble/buck, don't want to damage the engine. A five minute cool down, clear the code out, it would work perfect again.

The timing is all stock, no modifications. The highest I have seen the total advance on this one is around 29 degrees. On my red Scrambler with a 4.0/Hesco MPI I have seen the total advance as high as 36 degrees, no problems/pinging, works perfectly.

I have a 94/95 Wrangler 4.0 stock PCM. I have thought about plugging it in and seeing what it would do. I am sure I could figure out the AC/charging wiring, maybe.

When I scan the Hesco PCM, a few things do pop up on the scan tool, which is interesting:

1) On the system charging, it shows what the alternator output is. Not sure if it is getting this info from the constant hot or ignition wiring, but it does know the charge rate/status.

2) On the AC stuff, IIRC, it says "undetected".

3) The battery temp always has something indicated, not sure if it changes or is a set number all the time.
 

tmancj7

Basic User
City
Denver
State
CO
Interesting that the HESCO PCM does track alternator output to avoid the low/missing voltage code. I bought one of the last HESCO kits and it did not come with a manual trans PCM, ended up running a stock 1993 Wrangler 4.0 PCM. The stock PCM throws Code 33 (A/C) and Code 41 (Alternator Low Volt). To stop the CEL for Code 41, run a wire with a resistor (1K Ohm 1/4 Watt I think, maybe 1K Ohm 1 Watt) from the battery so the PCM is reading battery voltage. There are probably several places to pick up voltage and route to the PCM, it just has to be above the low volt CEL trigger threshold whatever that is maybe 12 volt. IIRC the PCM pin for voltage is Pin 37 and the HESCO harness does not have that pin or wire so you would have to add it. Battery temp is indicated on the stock PCM too, seems like it might be air temp in the engine bay. To pass the emissions test here I have to have a working CEL and it cannot be lit or it is an automatic fail.

Plugged in the DRB to watch how the Map sensor works and ended up with three codes:

1. Code 51 - O2S stays below center
2. Code 13 - No change in MAP from start to run 14 starts
3. Code 21 - O2S stays at center
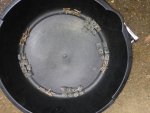
O2 Sensor.jpg
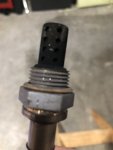
Pulled the O2 sensor and had this mess, sooty and smelled like fuel. Different symptoms so not much help on your issue. I have a non-op factory a/c system I want to fix soon so following this thread has been really helpful to read.
 

spankrjs

Scrambler Junkie
Lifetime Member
SOA Member
City
Biloxi
State
MS
Interesting that the HESCO PCM does track alternator output to avoid the low/missing voltage code. I bought one of the last HESCO kits and it did not come with a manual trans PCM, ended up running a stock 1993 Wrangler 4.0 PCM. The stock PCM throws Code 33 (A/C) and Code 41 (Alternator Low Volt). To stop the CEL for Code 41, run a wire with a resistor (1K Ohm 1/4 Watt I think, maybe 1K Ohm 1 Watt) from the battery so the PCM is reading battery voltage. There are probably several places to pick up voltage and route to the PCM, it just has to be above the low volt CEL trigger threshold whatever that is maybe 12 volt. IIRC the PCM pin for voltage is Pin 37 and the HESCO harness does not have that pin or wire so you would have to add it. Battery temp is indicated on the stock PCM too, seems like it might be air temp in the engine bay. To pass the emissions test here I have to have a working CEL and it cannot be lit or it is an automatic fail.

Plugged in the DRB to watch how the Map sensor works and ended up with three codes:

1. Code 51 - O2S stays below center
2. Code 13 - No change in MAP from start to run 14 starts
3. Code 21 - O2S stays at center
View attachment 74798
Pulled the O2 sensor and had this mess, sooty and smelled like fuel. Different symptoms so not much help on your issue. I have a non-op factory a/c system I want to fix soon so following this thread has been really helpful to read.


I had Hesco rebuild this motor for me, and install one of their "last" MPI kits on it. I think they went deep digging for parts to get the "kit" together.

The PCM that came with this kit has a "MOPAR Rebuilt" sticker on it. The PCM on my Red Scrambler has a "MOPAR Performance" sticker on it. Just an interesting thing I noticed the other day.

Thanks for the info on the wiring, that will come in very useful :thumbsup::cheers:

I will probably not mess with this one for a few weeks, I have to get ready to drive my Red Scrambler to Michigan next weekend :fingerscrossed:

When I get back, I will probaby check out the following:

1) Unplug the hole I drilled in the throttle plate (bypass the IAC with extra air, increases idle speed) to see how it does during extended idle/AC on conditions.
2) Check MAP sensor for proper operation (scan tool and vacuum pump)
3) Disconnect vapor canister AND power brake booster, just eliminate the possibility of vacuum leak. I don't "think" this is an issue, but I am curious why my IAC is shut at idle, is the engine sucking air from some small bypass leak somewhere? Where is your IAC at idle?
4) Change out the combination fuel filter/pressure regulator. Don't "think" this is an issue?
5) Install an in dash fuel pressure gauge. I have the gauge already, just need time to install it. It is electrical, not mechanical, don't want 60psi of fuel in the cab!!!!!!!
6) Swap in the OEM YJ 4.0 ECM, wire up the AC stuff, see what happens.

This one is still my "back up" for Michigan, if the Red Scrambler decides to crap out at the last minute. It drives fine 90% of the time, worse case, I just wont use the AC during extended idling conditions :thumbsup:

When I get back to messing with this one, I will report my findings. Glad to hear this stuff is useful, and thank you for your suggestions/experiences:thumbsup::wave:
 

tmancj7

Basic User
City
Denver
State
CO
Heck yes this stuff is useful, thank you for posting it up!

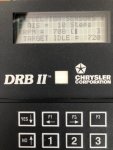
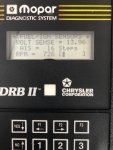
I think IAC on the DRB II is the AIS (Automatic Idle Speed) readout, if I am wrong let me know and I can go back and look at the other values. AIS at idle fluctuates from a minimum of 10 Steps to a Max of 16 Steps on this one. Not sure if altitude makes a difference in the number of steps, if so keep in mind this CJ is at 5280 feet.

Minimum at warm idle:
AIS Minimum.jpg
Max at warm idle:
AIS Max.jpg
The coolant temp on this one hangs at 181° when it is idling in my garage, which of course sent me down a rabbit hole this weekend because the CTS looks like this:
CTS Tight Squeeze.jpg
No way to change the CTS without taking off the thermostat housing so might as well change the thermostat, then the upper and lower heater hoses of unknown origin aaaaand finally fix that leaky valve cover gasket while it is apart. Everyone on here knows the drill. After all that the temp still hangs below the thermostat setting at 195°. Have fun in Michigan, Trevor
 

spankrjs

Scrambler Junkie
Lifetime Member
SOA Member
City
Biloxi
State
MS
Heck yes this stuff is useful, thank you for posting it up!

I think IAC on the DRB II is the AIS (Automatic Idle Speed) readout, if I am wrong let me know and I can go back and look at the other values. AIS at idle fluctuates from a minimum of 10 Steps to a Max of 16 Steps on this one. Not sure if altitude makes a difference in the number of steps, if so keep in mind this CJ is at 5280 feet.

Minimum at warm idle:
View attachment 74831
Max at warm idle:
View attachment 74832
The coolant temp on this one hangs at 181° when it is idling in my garage, which of course sent me down a rabbit hole this weekend because the CTS looks like this:
View attachment 74837
No way to change the CTS without taking off the thermostat housing so might as well change the thermostat, then the upper and lower heater hoses of unknown origin aaaaand finally fix that leaky valve cover gasket while it is apart. Everyone on here knows the drill. After all that the temp still hangs below the thermostat setting at 195°. Have fun in Michigan, Trevor


Glad it is helpful :thumbsup:

Yes, "AIS" is the same as the "IAC" steps. I am very jealous of your DRB II :drool: I am using an "EZ-Lync" scanner, works well, but does not have all of the functionality of the DRB II. But, I can use it to scan GM, Ford, OBD1 and OBD 2. Comes in handy on GM engines, or Howell fuel injection. I might have to look into obtaining a DRB II :thumbsup:
Yep, your CTS is in a tough spot, know all about the "rabbit holes" :thumbsup::cheers::wave:
 

GreatCJ8

Charter Member
Gold Member
City
Lynchburg
State
VA
...and recommend it if you are trying to keep your Scrambler/CJ close to stock height.

IIRC, there's a lifted option for the yj bds kit too, right?
PS- TYVVM for that write-up. You explained all the minor pitfalls very well!
 

spankrjs

Scrambler Junkie
Lifetime Member
SOA Member
City
Biloxi
State
MS
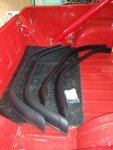
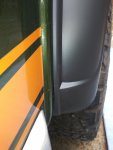
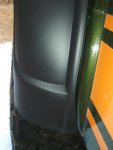
Decided to finally fix my "holy flares":

20200419_085004.jpg

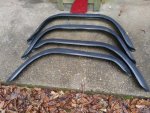
This part number was noted on this site, so bought it:

20200419_085225.jpg

Four new flares, and hardware:

20200419_085212.jpg

Old flare off:

20200419_092925.jpg

Old hardware, was only missing one screw and plastic thing.

20200419_092934.jpg

No rust or bad paint damage anywhere:

20200419_092942.jpg

20200419_092954.jpg

20200419_093007.jpg

20200419_093018.jpg
 

spankrjs

Scrambler Junkie
Lifetime Member
SOA Member
City
Biloxi
State
MS
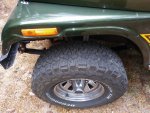
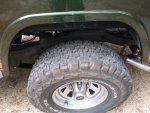
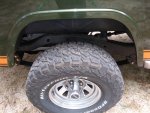
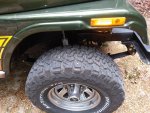
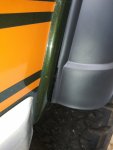
Looks kind of cool with no flares, but tires do stick out:

20200419_093037.jpg

20200419_093047.jpg

The rear flares have a front and a back, so they are side specific.

This is backwards, rear of flare toward front of the vehicle:

20200419_103918.jpg

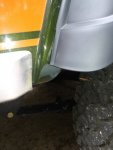
This is correct, rear of flare to back of vehicle:

20200419_115526.jpg
 

spankrjs

Scrambler Junkie
Lifetime Member
SOA Member
City
Biloxi
State
MS
DO NOT do what I did, trim the rear of the flare to fit the front!!!!!!!!!

20200419_112647.jpg

20200419_112651.jpg

I cut one, should have been the passenger side, NOT the driver side. I went ahead and installed it on the correct side. Does not look terrible. If my OCD get the better of me, I will purchase just this one flare new.

20200419_130538.jpg

Live and learn.
 

spankrjs

Scrambler Junkie
Lifetime Member
SOA Member
City
Biloxi
State
MS
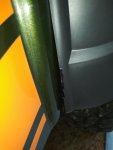
This how they should go: front edge

20200419_115514.jpg

Rear edge:

20200419_115526.jpg

You could probably carefully shave a little off the inside of each flare to get them to fit better, but they work fine out of the box.

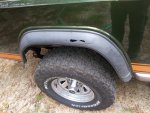
The new rear flares did not sit as high up on the side of the body as the originals, you can see the old flare line in the paint:

20200419_130550.jpg

I might pull the rear flares off again, try to buff this line off.

Anyway, finished, looks much better IMO:

20200419_130559.jpg

I have been driving this one a good amount the last few weeks, with the the AC on. No "hot fuel issues" yet, BUT the temps have not been higher then 80.

That's it for now :wave:
 

Belizeit

CJ-8 Member
Gold Member
City
River Ridge
State
La
I can hear the OCD brewing from here ! This is a good time to have it when it comes to the hand washing part of it Been burning through some soap here :)
 

spankrjs

Scrambler Junkie
Lifetime Member
SOA Member
City
Biloxi
State
MS
Finished "tropical storm yard clean up Saturday", decided to work on this one Sunday, and hopefully fixed/figured out two long standing issues.

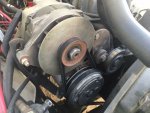
#1 - AC belt slipping. This has been an issue since I installed the AC on this Jeep. For the past few months, the only time the AC belt would squeal would be upon initial AC clutch engagement. Lately, if it squealed upon start up, it would not stop slipping. So, revisited my belt tension arm modification.

Originally, I drilled and tapped the front bracket for a bolt to peg the tension arm in place. This is fine, except it is a huge PIA to hold tension on the adjustment arm, try to keep spacers on the peg bolt, and thread the bolt into the hole, all at the same time. It is tight up front.

20200614_110335.jpg

So, I pulled the alternator/brackets back off, and threaded the bolt in from the back side. This way, all I have to do is keep tension on the adjuster arm, and can easily install bushings/spacer/eccentrics to keep tension on the arm. Picture from the rear of the front bracket. I used a cap screw, smaller head then a bolt, more clearance for heater hose.

20200614_113718.jpg

From the front, nice threaded shaft to slide spacers on.

20200614_113730.jpg

Another discovery I should have caught earlier: The bolt that holds the tension arm tight to the front bracket is a little short. The bolt engages the welded nut threads on the rear of the bracket, but only a few threads. I found a longer 7/16 fine thread bolt and installed it. Longer bolt, more thread engagement, more clamping force?

20200614_115115.jpg

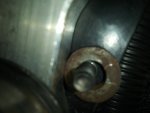
I also found this weird washer in my stash. It is thick, and shaped like an eccentric. I installed it on my newly reverse installed bolt to keep a bit more tension on the AC belt tension arm.

20200614_121728.jpg

20200614_121734.jpg

And threaded a nut on it to keep it from falling off:

20200614_121939.jpg

After this, I will only get a quick chirp when the AC clutch initially engages. It will only chirp at idle. If I am driving, even just 5-10 mph, and turn the AC on, no chirp.

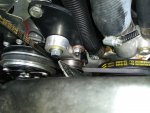
I will probably install a smooth "idler pulley" off of the timing chain cover, similar to how the dealer installed AC Jeeps came equipped. Taking some measurements: roughly 9" from the center of the power steering pulley to center of the crank; roughly 12" from the center of the crank to the center of the AC clutch. Not sure if 3" really makes a difference, but, when I first started the Jeep up and engaged the AC, I could watch the AC belt "quiver/lash about" a little bit at idle. This "lash/quiver" was between the crank pulley and the AC clutch.

Hard to picture, but this portion of the belt, longest run:

20200614_124236.jpg

Will probably go junk yard shopping/idea sourcing off of some later 4.0 powered Jeeps. I just want a smooth pulley, with a bearing, that the smooth side of the belt can run against. Just a bit of tension added, lessen the length of "unsupported belt" run. Basically, add a serpentine belt idler pulley between the crank and AC clutch pulleys.

For now, I am happy just to have a quick "chirp" upon clutch engagement. This has been bugging me for awhile.
 

spankrjs

Scrambler Junkie
Lifetime Member
SOA Member
City
Biloxi
State
MS
Issue #2, and the more important nagging problem, potentially fixed the vapor lock issue, fingers crossed!!!!!!!!!!!!!!!!!!!!!!!!!!!

Since the AC install, I have had vapor lock issues when the outside temperature is over 90, high humidity, AC on. This is the only time I have had problems on this Jeep with vapor lock. Of course, conditions when you would want the AC on.

This MPI kit uses the later "single port fuel rail", i.e. only a supply line at the fuel rail. My pressure regulator is back by the tank, inside the fuel filter, identical to a 1999-2001 Grand Cherokee.

This particular single line system should be running at around 50 psi at the fuel rail. I have had 60 psi since I installed the MPI on this motor.

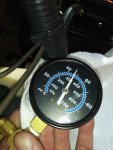
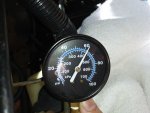
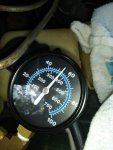
The Jeep has not been started for two weeks. Key on, fuel pressure quickly hits where it should be at. This is key on, fuel pump prime ONLY, not engine running:

20200614_123928.jpg

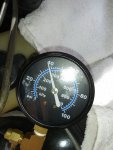
Start the Jeep up, 64 psi:

20200614_124010.jpg

Turned the Jeep off. After an hour, fuel pressure dropped to 38. This is normal on these Mopar MPI kits, there is no "one way check ball" like a OEM Cherokee/Wrangler would have. So, bleed off is normal. If it dropped quickly to 0, would indicate a problem.

20200614_133357.jpg

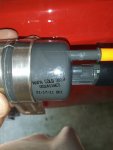
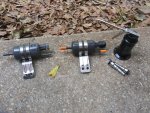
I installed the fuel filter that Hesco supplied when I completed the MPI install on this Jeep. I have had a spare fuel filter/pressure regulator, purchased from NAPA, floating around in my spares for a couple of years.

20200614_134238.jpg

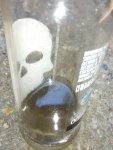
When I drained the fuel filter/pressure regulator, this fuel was tinged black on the return side. Fuel out the rail was clear. So, the filter was working. I am "thinking" this black is from something failing inside the filter/regulator?? Hope so anyway.

20200614_140315.jpg

The filter/regulator uses "quick connects" on all the fittings. I do not know why they call them "quick connects", because there is no way to disconnect them while under the Jeep!!!!!!!!!!!!!

Anyway pulled the old filter/regulator off, and swapped the fittings over to the new filter/regulator. I put a little motor oil on the fuel filter fittings to prevent tearing the o-rings inside the quick connect fittings.

20200614_141009.jpg

And installed:

20200614_144741.jpg

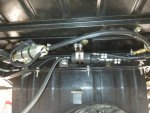
Kind of busy back there. I am using a TanksInc internal fuel tank fuel pump kit on this Scrambler. I also installed/plumbed an external fuel pump, hooked up to the original fuel sending unit. I did this in case the internal fuel pump ever bit the dust. I can change from internal fuel pump to external fuel pump with two quick fuel line swaps, and a quick plug/unplug of my fuel pump wiring. Best of both worlds.

More importantly, upon start up, 52 psi, right in the range where it needs to be:

20200614_145551.jpg

I drove this Scrambler for 2.5 hours yesterday. Temp at 90, high humidity, AC on full blast the entire time. I did back road driving, highway driving, stop and go traffic driving, and a few "turn off, wait five minutes, restarts", without a single hick up. None. No vapor locking.

So, how did 10 psi of excess fuel pressure cause vapor locking? Or did it? Who knows. For now, it is working perfectly, and no "lean condition" check engine codes. No codes at all, runs perfect.

More testing needed to verify the results, but so far, no vapor locking :woot:
 

spankrjs

Scrambler Junkie
Lifetime Member
SOA Member
City
Biloxi
State
MS
You won’t know what to do without vapor lock issues on this thing!

I hope your right :fingerscrossed::fingerscrossed::fingerscrossed:

IF it can make it through the "torture test of this summer" down here, without a vapor lock issue, I will maybe consider it solved ;)

Before I take the "nuclear option" below, I can always swap over to my external fuel pump, rule out a problem with the in tank pump set up, IF the vapor lock issue returns.

IF this does not fix it, I will probably install an aftermarket fuel rail with a return port on the back end. Do away with my OEM filter/regulator, and install an aftermarket/adjustable FPR on a newly installed return line. Hope I do not have to do all of that :fingerscrossed:

I just do not like the singe line fuel rail, I prefer, right or wrong, my red Scrambler's two port rail. With a two port, at least there is some fuel circulation at the fuel rail, the hottest part of the entire fuel system. With the single port rail, fuel just dead heads at the rail. Maybe the running engine consumes enough fuel to keep enough circulation going to prevent vapor lock? I know all the 4.0's went to the single rail, but was this for performance/vapor lock prevention, or just a way to save a few bucks when building the vehicles :shrug: They did away with the "fuel pressure test port" on the fuel rail on the later year 4.0's, that was for sure "cost saving", and stupid IMO :banghead:

I :shrug: this "fuel pressure reduction" fixed the problem :shrug:

Someone smarter then I will have to explain why 10psi excess fuel pressure would cause vapor lock :popcorn:
 

Belizeit

CJ-8 Member
Gold Member
City
River Ridge
State
La
I think you need to at least ride to Atlanta and back to test this thing. Or maybe north to the dunes to really know or not. :twocents: :evil:
 

spankrjs

Scrambler Junkie
Lifetime Member
SOA Member
City
Biloxi
State
MS
No problems with heat related fuel issues lately, temps in the high 90's with high humidity, so well over 100 degrees, AC on full blast, no issues so far :fingerscrossed::fingerscrossed::fingerscrossed::fingerscrossed:

But, the damn AC belt is squealing again. :banghead: It will squeal non stop if it squeals on initial clutch engagement. I can get it to not squeal IF I engage the AC while accelerating in 2nd gear, engine under a slight load. Strange, but it works :shrug:

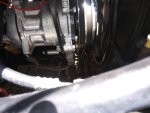
The belt is tight up top at the "tensioner", but is loose between the longest, most critical run: between the crank and compressor.

So, time for "Phase 2" on this issue :popcorn:
 

spankrjs

Scrambler Junkie
Lifetime Member
SOA Member
City
Biloxi
State
MS
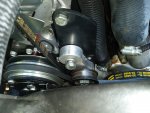
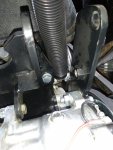
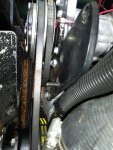
So, I want to add an "idler pulley" for the AC compressor V-belt, between the crank and the compressor. This will keep the belt tight in this area. With the AC on, I can watch the belt kind of "move/whip" in this area. This belt is tight between all the other pulleys on this circuit.

Some back ground:

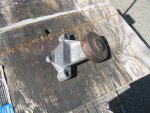
This is the tensioner on a 258 equipped YJ with AC. It is actually a real tensioner, maybe, hard to confirm:

0 YJ Tensioner.JPG

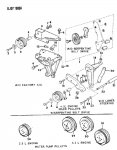
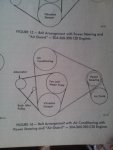
Factory parts diagram, showing the same tensioner on a V-belt drive with "American Air":
1 YJ Tensioner.jpg

I am not 100% sure if this is a real tensioner, or just an arm with a pulley that bolts in place, like what came with my kit from JeepAir. A real tensioner would be ideal. But, I have fixed my arm in place with a second bolt, so my belt stays tight up here.

My belt gets loose between the crank and the compressor. So, I want to add an idler here.

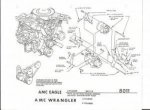
Just to show I am not crazy, Jeep actually did this. Hard to see, but this diagram shows an idler pulley where I want to add one, on a 258:


2 AMC Idler Blurry.jpg

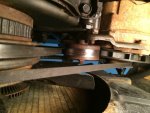
In real life, on a Cj 258, down on the timing cover off of the alternator bracket:

2.1 258 Idler mounted.jpg

The above picture is different then my set up. My AC compressor is down low, alternator on top. Regardless, this is what I want to mimic.

Another CJ 258, with air, not sure if "dealer add on" or "factory" (there are many differences between the two, and over the years):

2.2 258 idler different.jpg

2.3 258 idler different.jpg

The picture directly above is what I want to do: smooth pulley to put a slight bend/tension on the AC compressor belt between the crank and compressor to stop it from "jumping" when the AC clutch engages.

AMC did the same thing on the V8's engines:

3 AMC V8 Idler.jpg

3.1 AMC V8 Idler.jpg

3.2 AMC V8 Idler pulley.jpg

On the V8's, they call it a "back idler pulley":

4 AMC V8 back side idler.jpg

Obviously, the V8 stuff will not work on a 258. What is interesting about the V8 AC idler, it was added via a TSB because people were complaining about the AC belt squealing when the compressor clutch engages. It is a PN 319706, and the internet told me about the TSB, so take it with a grain of salt. BUT, original owner's of AMC V8 powered cars stated that some early models did not come with this idler pulley from the factory, that it was added at the dealer, when they complained about belt squeal.

So, a bunch of background just to prove I am not crazy or reinventing the wheel.

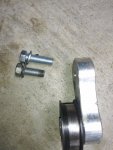
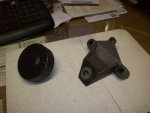
AMC V8 suff will not work, and I am sure the OEM 258 parts will be rare, hard to find, expensive, and will probably/maybe not work 100% correctly with my aftermarket JeepAir kit components. It might, but I think I will just "RedneckRay" it and make my own idler/bracket.
 
Top