You are using an out of date browser. It may not display this or other websites correctly.
You should upgrade or use an alternative browser.
You should upgrade or use an alternative browser.
Torqueflite 999 rebuild
- Thread starter ag4ever
- Start date
- City
- Richmond
- State
- TX
Time to get back at it, was down a couple weeks due to my cardiologist requiring an angioplasty. Luckily, nothing requiring repair nor stints were found. But, I was restricted to lifting nothing over 5 lbs for about a week. That severely limits what you can do on a transmission.
First step of reassembly is installing a new shift linkage seal. I used the bolt / nut / fender washer method. Be careful using this method as it can exert high pressure on the seal. If it is not going in straight, stop adjust and continue. Like all other seals installed, a thin layer of RTV was applied to the perimeter surface. Thin, don’t use too much. Save some for other people.
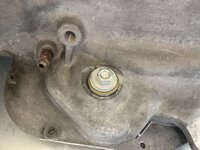
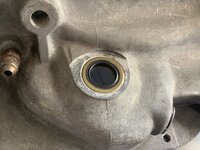
Next up, install the output shaft support. 4 bolts secure it to the case. They are tightened to 150 inch-pounds. (INCH, not foot)
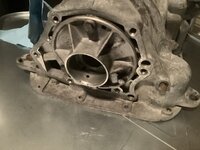
Now it is time for the overrunning clutch. Look at the inner race, one edge will be more shinny than the other. This side goes against the rear of the case. Apply assembly grease to this surface. I greased all sides. Once it is seated, drop in a roller in each pocket. Install the springs between the metal fingers and the roller. The springs should push the rollers “up hill” or towards the narrow part of the pocket.
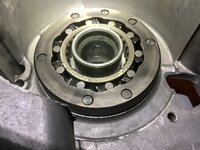
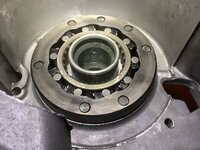
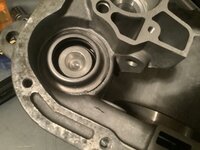
After the roller spray (overrunning clutch) is complete, move to the low-reverse servo. Grease the seal liberally, slide it into the case while rotating. Place the spring on the piston, then the retainer. Press down on the retainer and install the snap ring. Feel free to speak like a sailor while performing this task. Won’t make it easier, but might make you feel better.
First step of reassembly is installing a new shift linkage seal. I used the bolt / nut / fender washer method. Be careful using this method as it can exert high pressure on the seal. If it is not going in straight, stop adjust and continue. Like all other seals installed, a thin layer of RTV was applied to the perimeter surface. Thin, don’t use too much. Save some for other people.


Next up, install the output shaft support. 4 bolts secure it to the case. They are tightened to 150 inch-pounds. (INCH, not foot)

Now it is time for the overrunning clutch. Look at the inner race, one edge will be more shinny than the other. This side goes against the rear of the case. Apply assembly grease to this surface. I greased all sides. Once it is seated, drop in a roller in each pocket. Install the springs between the metal fingers and the roller. The springs should push the rollers “up hill” or towards the narrow part of the pocket.


After the roller spray (overrunning clutch) is complete, move to the low-reverse servo. Grease the seal liberally, slide it into the case while rotating. Place the spring on the piston, then the retainer. Press down on the retainer and install the snap ring. Feel free to speak like a sailor while performing this task. Won’t make it easier, but might make you feel better.

- City
- Richmond
- State
- TX
Time to soak the double wrap low-reverse band in transmission fluid. While it is soaking, find the band anchor pin and replace the o-ring. Grease the pin and o-ring, insert it in the case.
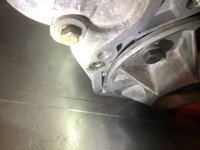
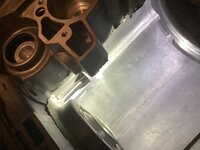
After the band has soaked until they stop bubbling on the friction material, insert it in the case with the double anchor wedged against the pin. Insert the low-reverse drum into the band and rotate while pushing it into the overrunning clutch. It will slide in and seat into the inner race. Once seated it will only rotate one direction. Next, find the apply lever and pivot pin. Replace the o-ring on the pivot pin, grease it up and slide it into the case and apply lever. The apply lever should seat in the servo piston and on the single anchor on the double wrap band.
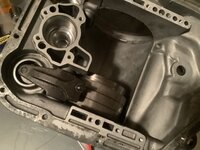
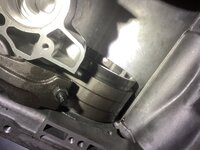
TTFN


After the band has soaked until they stop bubbling on the friction material, insert it in the case with the double anchor wedged against the pin. Insert the low-reverse drum into the band and rotate while pushing it into the overrunning clutch. It will slide in and seat into the inner race. Once seated it will only rotate one direction. Next, find the apply lever and pivot pin. Replace the o-ring on the pivot pin, grease it up and slide it into the case and apply lever. The apply lever should seat in the servo piston and on the single anchor on the double wrap band.


TTFN
- City
- Richmond
- State
- TX
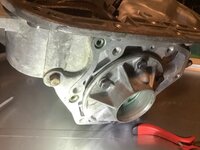
More reverse tear down (rebuild). Next up, install the output shaft assembly. Be sure the sealing rings are 180 degrees out from each other, the rings are well lubricated, the support is well lubricated, and gently insert it into the support.
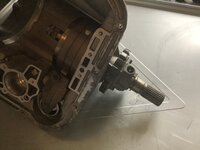
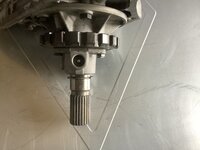
Once installed, time to start stacking the gear train. Thrust washer #10, then rear planetary, then thrust washer #9, then driving shell, then thrust washer #6, then front planetary, then thrust washer #5, then front annulus gear, then snap ring on the output shaft.
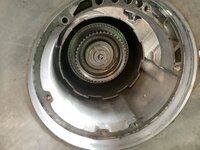
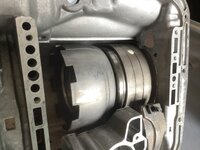
With all that installed, it is time to measure the gear train endplay. You want to measure the gap between the snap ring and the part the arrows are pointing at. I set a dial gauge up to measure the movement of this part when it was pulled out and pushed in.
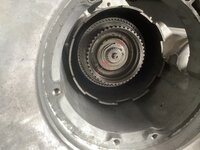
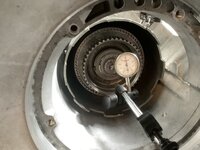
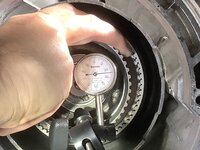
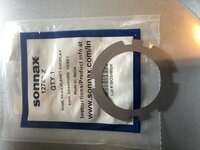
I measured right under 0.025”. Acceptable range is 0.005” to 0.048”. I was in the middle, but would like it on the low side due to the assembly grease and oils lubricating all of the parts. So, I used a shim from the below package. Each shim is 0.010” (+/- 0.001”). This leaves me with 0.015” endplay. That should be good for this transmission and the intended use.
Here is the endplay spec for the input shaft and the gear train.


Once installed, time to start stacking the gear train. Thrust washer #10, then rear planetary, then thrust washer #9, then driving shell, then thrust washer #6, then front planetary, then thrust washer #5, then front annulus gear, then snap ring on the output shaft.


With all that installed, it is time to measure the gear train endplay. You want to measure the gap between the snap ring and the part the arrows are pointing at. I set a dial gauge up to measure the movement of this part when it was pulled out and pushed in.


I measured right under 0.025”. Acceptable range is 0.005” to 0.048”. I was in the middle, but would like it on the low side due to the assembly grease and oils lubricating all of the parts. So, I used a shim from the below package. Each shim is 0.010” (+/- 0.001”). This leaves me with 0.015” endplay. That should be good for this transmission and the intended use.

Here is the endplay spec for the input shaft and the gear train.

- City
- Richmond
- State
- TX
Ok, now where did I last leave off…
Before installing the clutch assemblies, they need to be pressure tested by stacking the front clutch on the pump, then add the rear clutch. I used an old coffee container to hold the pump vertically.
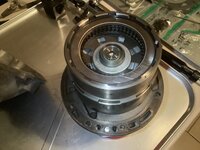
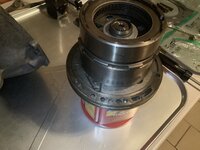
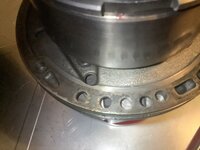
You pressure test by applying 30 psi (approximately) to the holes in the pump.
Be very careful when sliding the clutches onto the pump shaft. The sealing rings need to be teased very well so they stay in the grooves. Ask me how I know this. Grrrr.
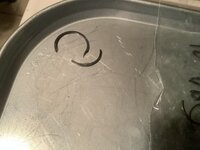
Once you have a clutch assembly that passes pressure testing (you hear the clutches move and make a thunking sound) you move on to installing the kickdown servo. Slide the lower portion in holding the steel pin. Be sure it slides down completely and the rings compress allowing it to fall all the way in. Don’t force it! It should drop in with gently pressure. Don’t force it! Ask me how I know it should not be forced. Grrr.
After the lower portion is seated, add the spring and top portion. I used a large socket and a wood slide clamp to compress the spring allowing the circlip to be installed. After the servo is installed, locate the apply lever on the servo and slide the pivot pin in from the front of the case.
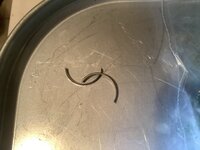
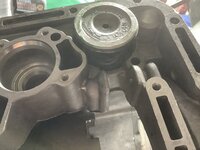
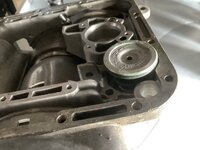
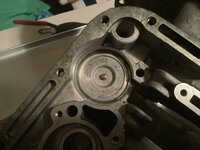
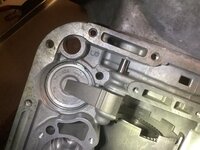
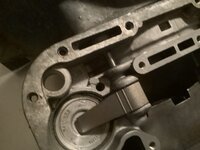
Before installing the clutch assemblies, they need to be pressure tested by stacking the front clutch on the pump, then add the rear clutch. I used an old coffee container to hold the pump vertically.


You pressure test by applying 30 psi (approximately) to the holes in the pump.
Be very careful when sliding the clutches onto the pump shaft. The sealing rings need to be teased very well so they stay in the grooves. Ask me how I know this. Grrrr.

Once you have a clutch assembly that passes pressure testing (you hear the clutches move and make a thunking sound) you move on to installing the kickdown servo. Slide the lower portion in holding the steel pin. Be sure it slides down completely and the rings compress allowing it to fall all the way in. Don’t force it! It should drop in with gently pressure. Don’t force it! Ask me how I know it should not be forced. Grrr.
After the lower portion is seated, add the spring and top portion. I used a large socket and a wood slide clamp to compress the spring allowing the circlip to be installed. After the servo is installed, locate the apply lever on the servo and slide the pivot pin in from the front of the case.


- City
- Richmond
- State
- TX
After the lever is installed and everything moves as intended, place a small amount of RTV on the threads of the pipe plug and insert in the pivot pin hole. Tighten to snug, you are only sealing the hole and the RTV will do most of the work.
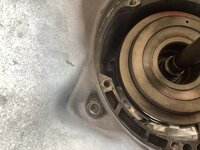
Now it is time to place the transmission vertical with the tail facing down. I tried the next step horizontally, but it was no fun. Vertical was a breeze.
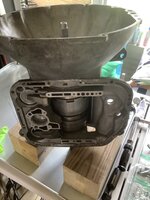
Stack the rear clutch inside the retainer shell, and then add the front clutch. Rotate the clutches until all splines are fully engaged.
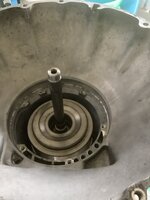
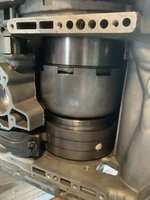
Grab the front band and fish it between the front clutch and the case. It barely fits so you may need to rock the clutch side to side making room. Once it wraps the drum, install the strut between the lever and the band anchor. Install the anchor screw through the outside of the case. Tighten until just snug.
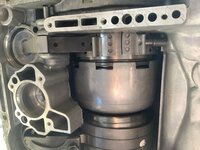
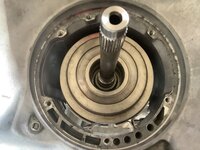

Now it is time to place the transmission vertical with the tail facing down. I tried the next step horizontally, but it was no fun. Vertical was a breeze.

Stack the rear clutch inside the retainer shell, and then add the front clutch. Rotate the clutches until all splines are fully engaged.


Grab the front band and fish it between the front clutch and the case. It barely fits so you may need to rock the clutch side to side making room. Once it wraps the drum, install the strut between the lever and the band anchor. Install the anchor screw through the outside of the case. Tighten until just snug.


- City
- Richmond
- State
- TX
Now time to install the pump. Find some bolts you can cut the heads off. Mine were probably too short, but worked fine. I would have like them to be 1” longer. Tom Hand suggests using 3” bolts. Insert these headless bolts in two of the pump bolt holes as guides. Once again, be VERY certain the sealing rings are tight to the input shaft. If it shears now, you must pull the pump to replace them!
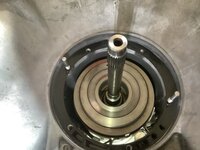
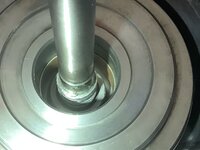
Slide the pump into the input shaft and carefully seat it. Use two bolts on opposite sides to slowly pull it into the case. A pop means the sealing rings just sheared. I did not hear a pop, so fingers crossed.
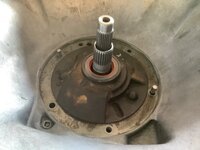
Remove the two bolts and the two guide studs. Remove all of the old sealing washers if they are still on the bolts. Mine were stuck to the bolt heads like cement. Install the new sealing washers and install the bolts. Tighten to 175 inch-pounds. INCH!
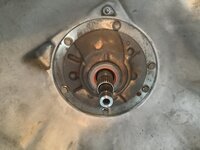
I hope to wrap the assembly up tomorrow. Fingers crossed, but before I can do that I have a Gun show to attend. Hopefully I can find a revolver I have been looking to buy for a while. Fingers crossed.
TTFN


Slide the pump into the input shaft and carefully seat it. Use two bolts on opposite sides to slowly pull it into the case. A pop means the sealing rings just sheared. I did not hear a pop, so fingers crossed.

Remove the two bolts and the two guide studs. Remove all of the old sealing washers if they are still on the bolts. Mine were stuck to the bolt heads like cement. Install the new sealing washers and install the bolts. Tighten to 175 inch-pounds. INCH!

I hope to wrap the assembly up tomorrow. Fingers crossed, but before I can do that I have a Gun show to attend. Hopefully I can find a revolver I have been looking to buy for a while. Fingers crossed.
TTFN
- City
- Richmond
- State
- TX
Already bought it, Colt Python. Now I guess I need to start looking for the other 6 serpents. Baby Browning in .25 and a Walther PPK (.32 or .380, not sure which I want yet) are two more semi-autos I would like to add to the collection. Already have the Browning 1955 (FN 1910) In .380.Let this group know what revolver you’re looking for. With this group, you never know.
I also NEED to focus and get the trans rebuild finished! Just too many distractions. Squirrel…
- City
- Rockville
- State
- VA
Love the Pythons and Diamondbacks. Not letting any of them go.Already bought it, Colt Python. Now I guess I need to start looking for the other 6 serpents. Baby Browning in .25 and a Walther PPK (.32 or .380, not sure which I want yet) are two more semi-autos I would like to add to the collection. Already have the Browning 1955 (FN 1910) In .380.
I also NEED to focus and get the trans rebuild finished! Just too many distractions. Squirrel…
- City
- Richmond
- State
- TX
Yup, right there with you. Mine is an early ’80s, Royal Blue, 6”, 99% (or more, I would say close to 99.75%) original finish. No turn ring on the cylinder. This will NOT be a safe queen, it will get shot. Probably not all the time, but multiple times a year at a minimum.Love the Pythons and Diamondbacks. Not letting any of them go.
Would not mind picking up late 50’s or early 60’s one. Guy I bought mine from showed me a half dozen others he had. 2 were ‘56 models. One being a three digit serial number, almost a ‘55 number.
I hope to go to Wanenmacher’s next year, either April or November. I was invited to attend SHOT this January, but I had prior obligations. Hope to attend SHOT in ‘24. Fingers crossed.
- City
- Redmond
- State
- OR
I’ve got the same issue…I’ve been on a Ruger Blackhawk run lately, picked up my 200th Anniversary .45 Colt in November. Been a little wary of another purchase with the current status of OR background checks, but it was all put on hold on Tuesday, so I’m looking again. There’s about 5 things I’m looking for…Ruger 22/45, Henry .44 Mag Carbine, Henry .22 Mag, Henry 410 (maybe an Axe) and a Ruger Vaquero .44 Mag. Not in that order, but eventually…
- City
- Richmond
- State
- TX
Well, life happens, projects get delayed. But, back on the saddle again.
Time to air test the servos, front clutch, and rear clutch. See the attached photo for the proper ports to apply 30 (ish) psi. You should hear a nice solid clunk with air application and a second clunk when air is removed. I am happy to report that after sitting idle for 4 1/2 moths, all circuits tested good. Arrows indicate what parts are being tested with each port.
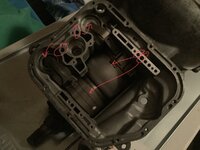
Time to air test the servos, front clutch, and rear clutch. See the attached photo for the proper ports to apply 30 (ish) psi. You should hear a nice solid clunk with air application and a second clunk when air is removed. I am happy to report that after sitting idle for 4 1/2 moths, all circuits tested good. Arrows indicate what parts are being tested with each port.

Last edited:
- City
- Richmond
- State
- TX
Btw, new to me Python shoots like a dream. Buddy and I ran through a box of 38 and half a box of 357, each. Not really thrilled that he let my 10 year old son shoot his python. Now my son wants one for himself too. Told buddy he screwed up, you have to start them on basic guns and work up to the nice ones. Can’t start with the best because all else will pale in comparison. Oh well, too late now. To top it off, he let my wife shoot his Ruger 5.7 pistol that is suppressed, now she wants one too. (That does not bother me too much since I would like a PS90 and a FN Five-seveN)
- City
- Richmond
- State
- TX
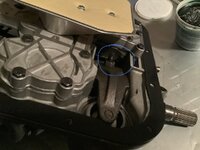
Time to adjust the Low Reverse Band. Loosen the jamb nut, and tighten the inner bolt with a 1/4” socket to 72 INCH-Pound. Once tightened, loosen it 4 full turns. (I adjusted this after installing the valve body, so pictures are showing out of sequence items)
Insert the accumulator piston into the center bore, then place the spring on top of it.
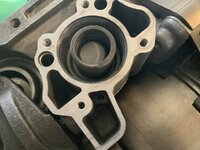
Place the valve body into place (grease the selector shaft seal first). Thread the park rod through the transmission case. Hand tighten the 10 bolts for the valve body, then tighten them in a crisscross method to 100 INCH-Pounds.
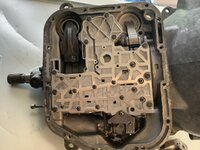
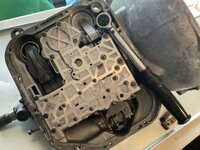

Insert the accumulator piston into the center bore, then place the spring on top of it.

Place the valve body into place (grease the selector shaft seal first). Thread the park rod through the transmission case. Hand tighten the 10 bolts for the valve body, then tighten them in a crisscross method to 100 INCH-Pounds.


Last edited:
- City
- Richmond
- State
- TX
Install the reverse neutral safety switch.
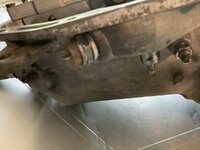
Check to see that the switch contacts the rooster comb.
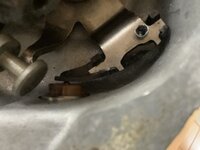
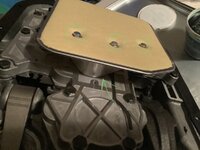
I am using a deep pan, so next step is installing the filter extension / o-ring / filter. Grease the o-ring for initial seal.
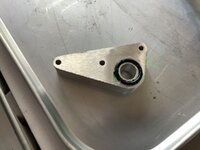
I tightened the filter bolts to 25 Inch-Pounds. The book just said ‘snug’ and 25 feels snug-ish.
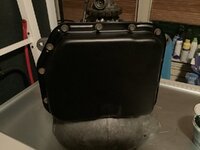
I then placed 3 rare earth magnets in the bottom of the pan. The previous pan did not have magnets but I felt magnets could not hurt. My wife’s Land Cruiser has 2 magnets in the pan and when I replaced a control solenoid recently it has some metal particles on them. So, adding magnets for added cleaning. Next, place the gasket on the pan and insert some bolts to hold it in place (rubber pan gasket that came with the deep pan). Place pan on transmission. Finger tighten all bolts, then to 100 in-lbs, then to 150 in-lbs.

Check to see that the switch contacts the rooster comb.

I am using a deep pan, so next step is installing the filter extension / o-ring / filter. Grease the o-ring for initial seal.

I tightened the filter bolts to 25 Inch-Pounds. The book just said ‘snug’ and 25 feels snug-ish.

I then placed 3 rare earth magnets in the bottom of the pan. The previous pan did not have magnets but I felt magnets could not hurt. My wife’s Land Cruiser has 2 magnets in the pan and when I replaced a control solenoid recently it has some metal particles on them. So, adding magnets for added cleaning. Next, place the gasket on the pan and insert some bolts to hold it in place (rubber pan gasket that came with the deep pan). Place pan on transmission. Finger tighten all bolts, then to 100 in-lbs, then to 150 in-lbs.

Last edited:
- City
- God's Country
- State
- AR
Btw, new to me Python shoots like a dream. Buddy and I ran through a box of 38 and half a box of 357, each. Not really thrilled that he let my 10 year old son shoot his python. Now my son wants one for himself too. Told buddy he screwed up, you have to start them on basic guns and work up to the nice ones. Can’t start with the best because all else will pale in comparison. Oh well, too late now. To top it off, he let my wife shoot his Ruger 5.7 pistol that is suppressed, now she wants one too. (That does not bother me too much since I would like a PS90 and a FN Five-seveN)
You need to change things up a bit, get your son a S&W 27, preferably a 27-2 back when they made them properly.
And once the wives shoot suppressed, you have carte blanche to buy cans!
- City
- God's Country
- State
- AR
Install the reverse neutral safety switch.
View attachment 108980
Check to see that the switch contacts the rooster comb.
View attachment 108981
I am using a deep pan, so next step is installing the filter extension / o-ring / filter. Grease the o-ring for initial seal.
View attachment 108978
I tightened the filter bolts to 25 Inch-Pounds. The book just said ‘snug’ and 25 feels snug-ish.
View attachment 108977
I then placed 3 rare earth magnets in the bottom of the pan. The previous pan did not have magnets but I felt magnets could not hurt. My wife’s Land Cruiser has 2 magnets in the pan and when I replaced a control solenoid recently it has some metal particles on them. So, adding magnets for added cleaning. Next, place the gasket on the pan and insert some bolts to hold it in place (rubber pan gasket that came with the deep pan). Place pan on transmission. Finger tighten all bolts, then to 100 in-lbs, then to 150 in-lbs.
View attachment 108979
Your TF999 thread has convinced me that I need to take mine to someone else to rebuild it LOL
- City
- Richmond
- State
- TX
It really is not hard, just time consuming for the first one. I am sure I could knock a second one out in a weekend with proper pre planning of part purchases.Your TF999 thread has convinced me that I need to take mine to someone else to rebuild it LOL
So far, the rear bearing is impossible to find new, extremely hard to find used. The torque converter is equally hard to find. Currently have a torque converter being ordered by a local transmission parts house coming from Dallas. NOBODY else could find one, including Transtar. Nobody wanted to take my old one and rebuild it.


