• Notice for iPhone users: DO NOT use the image size reduction option when uploading photos to the forum. This causes portrait images to post as landscape. We have added a warning to the image insert pop-up as well.

My ‘85 build officially begins!

rstickley

SOA Member
Gold Member
SOA Member
City
Branch
State
La
Time to catch y’all up. In September of 2020, I picked up this 85 that was someone’s project. No motor, trans, or transfer case. Just what I wanted. I wanted to LS/auto swap one so this was a good start. This really isn’t a good time financially for me but I’m not getting any younger.
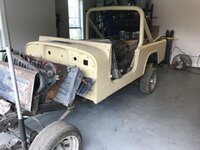
3A35A1B4-F507-4AD6-92AC-A45D72DB58AE.jpeg

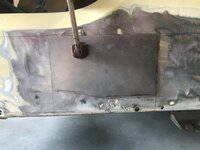
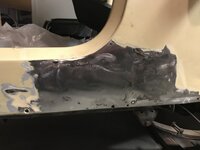
So i assessed the body closer, placed an order with Classic Enterprise. Now I have never done any body work whatsoever but have been around it a lot. So I watched a lot of YouTube (Fitzee’s Fabrication) and started cutting. First area was the B post. The bottom was rusted out and they filled with expanding foam. I cut the bad out to where the new replacement would fit in.
66824A88-16A3-4DA9-A0B8-1D7D421C34D4.jpeg
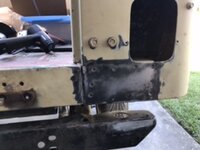
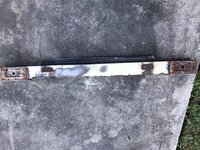
The outer wall had some rust holes in it so I made a template and welded it in place.
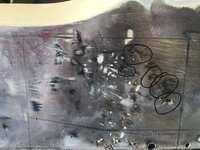
EE00438B-E216-44A6-96E4-38C24D3A2B15.jpeg318F82E4-635A-416A-8AF7-CA7D2B449982.jpegE24EE63E-D327-4ABE-9F4E-41CE6CE485C8.jpegimage.jpg
I got aggravated with this area so I stopped for a while and moved onto the next one.(this was last May)

Since I do mobile blasting and I do a lot of cars, I am always on the lookout for parts I may need and try to do a little horse trading!😎 Since I picked up this project, I have gotten a 5.3LS, 4L60E, NP241C(pass) and a Dana 44 out of a FSJ.

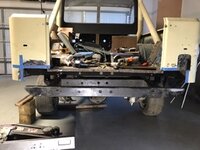
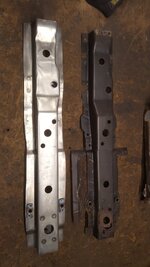
A couple of months ago I decided to tackle the big one. The rear body support/tailgate mount.
A9087691-A5A9-4DDD-88ED-0ED4CF27A4BD.jpeg16990647-E172-4BA2-BE46-400CEBE93F22.jpeg
Now keep in mind, I have never done this stuff before so I just kinda feeling my way around. I started drilling the spot welds I knew I had to and prying and pulling here and there. I would compare the new piece and see what I had to do. I eventually got it out.
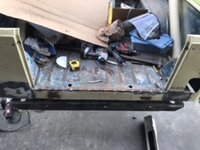
76068201-C6BB-45D7-BF2A-50E9D49E7FD2.jpegE20C2859-934F-47EB-AFB6-00F11C60AE90.jpeg
 
Looks great. Just a little at a time and it will be done before you know it.
 
Nice progress…
agreed, coming right along... I just did this the other day... the new replacement piece doesn't have as many holes as the old one does (for drainage and wire loom) so before you install it, if you want to, add them on the bench... it is a lot easier than when you have it in place.

cb
 
agreed, coming right along... I just did this the other day... the new replacement piece doesn't have as many holes as the old one does (for drainage and wire loom) so before you install it, if you want to, add them on the bench... it is a lot easier than when you have it in place.

cb
Thanks! That’s a great idea. I made all the spot weld holes today so I will add those tomorrow and then blast and prime.
 
A lot of their parts are very good and close, but don't have the drainage that the originals had.

Example.

Started with this.
20211223_171240_resized.jpg

Measuring 3x and drilling once... or 6 times...

20211223_174642_resized.jpg

It isn't "exact", but a quick glance up underneath and you would see something that more resembled the original and you now have drainage as well.

cb
 
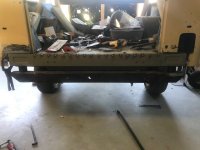
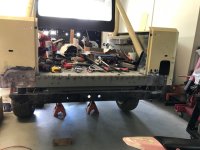
Time for a little update. It's been really slow moving. I finally got the rear brace installed and somewhat completed. I was very happy the way it was going and looking once I put the patch panels in. Then, when I spot welded the patches to the new brace behind them, it warped like crazy because there was a slight gap between the two.
IMG_8144.jpg
IMG_8291.jpg

I still have to spot weld the brace to the floor on the underside but I had to take a break from this as every time I go to work on it, I get discouraged on how it turned out. I know I can fill it with filler but don't know if that's what I want. I may call a friend, who did the body and paint on my last Scrambler, to come and look at it to see what he thinks.

So I moved to the firewall on a piece that has been bugging me cause I see it every time I walk in the garage. I started noticing rust falling out of from between the panels. Drilled out a lot of spot welds and got it off. I'm glad I did cause it was bad.
IMG_7815.jpg
IMG_8290.jpg

Lucky some of the spot welds were not welded good and they popped loose with a little pressure on them. I will blast this area, prime and reinstall outer plate.
 
If you can cut the spot welds and then either put screws in place, c clamps, vice clamps... basically anything to squish the pieces of metal together, you will be able to get it a lot closer and have it not get wavy.

cb
 
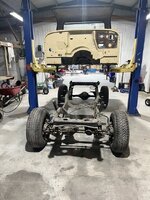
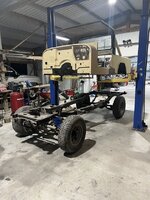
IMG_1224.jpegIMG_1225.jpegFinally getting back on the '85. Lots of "life" stuff has happened since 2022. My last house where I lived for 17 yrs had flooded 4 times and FEMA finally decided to buy it and tear it down. So for 2 yrs I searched for what I wanted. I wanted to be in the country, have a shop or the property to build a shop, and a little closer to my home town and friends as I am divorced and children are grown. Found a place and moved in 1 1/2 yrs ago. It had a large shop with a 9K lb lift and 1 1/2 acres. Shop needed/needs a lot of work. I completely rewired it, with new lights, and breaker panel.

After seeing all the pictures from this years nationals, I decided I am gonna get back on the Jeep now. Went out and pulled the body and put it on a little cart and will start on the frame modification next.
 
Back
Top