You are using an out of date browser. It may not display this or other websites correctly.
You should upgrade or use an alternative browser.
You should upgrade or use an alternative browser.
Parking Lot Gem from the Desert Rebuild
- Thread starter dkg4244
- Start date


- City
- Dallas
- State
- tx
Love the matched liner , great work

- City
- Wilbur by the Sea
- State
- FL
The SPI primer is good stuff and sands easily after it has cured. The 2k is a good choice because you can use it at the suggested ratio and it fills and levels well, or thin it a bit and use it as an overall prep primer. All the SPI epoxy products are the way to go. And the clear will sand out easily. Give it at least a day to harden. Use a paint stick wrapped in 800 with slightly soapy water for sanding lube. Just knock the runs down with the 800 then go to 1000 in the general area of the runs. Beyond that 1200, then compound. If you want to go to 1500 it will make less polishing work. The starting grit for all over clear sanding depends on the grade of orange peel in the finish. Always start finer with say 800 rather than 600. Do a small area to get a feel for how fast the paint smooths out. If you flowed the paint nicely you may even start at 1000. Use a squeegy to clear the surface of water and gauge where you're at. Good Luck, Looks nice!
Lookin good. I used the raptor liner but left it as black. I like yours better. It would look good with the white paint I used. I follow the SPI forum and when I run out of what I'm using I want to try their epoxy primer. How good does it sand after the wait period? I currently use Kirker which works good, just want to support the forum and the price is reasonable.
Thanks for all the kind words everyone. The SPI products are top notch for the price. The epoxy is especially great. It sands very well without clogging the paper. It also fills well and there are a few panels such as the fenders, hood, and tailgate that won't require much if any 2K filler primer.
Surf, thanks for the tip. I'll be sure to try that tomorrow. I hope I can get the runs out without too much work. Worst case is that I have to paint it again.
Surf, thanks for the tip. I'll be sure to try that tomorrow. I hope I can get the runs out without too much work. Worst case is that I have to paint it again.
Here is a little write on my painting process. This will focus on the doors. After the door were sanded to bare metal with 80 grit paper on DA sander, I applied 2 coats of white SPI Epoxy primer to seal the metal. That was applied with my Devilbiss Starting Line HVLP that I use for primer. It was sprayed with a 1.8 tip.
Next, two coats of SPI 2K primer was sprayed on the doors. Wait 10 mins in between each coat. This was sprayed with the same primer gun and tip. The fan adjustment set wide, about a hand length spread at a hand length distance from the panel. The pressure was set at about 25 PSI.
The 2K prime is a building primer that fill imperfections and is easily sandable. I then sanded with 400 grit paper on a long block dry to flatten the panels. The end result is this.
You can see some spots where I went down to bare metal. This is OK. If it were a show vehicle or street rod, I would have stopped before bare metal and reapplied 2 coats of 2K filler primer and sand flat again. On this Jeep, I want as little paint as possible and I want to emulate the factory results, so I stop here and carry on with my sealer coat.
The sealer coat is Epoxy reduced 25% with regular Urethane reducer. It's important to let the Epoxy sit and induce for 30 minutes before spraying. The panel gets 2 light coats of sealer 30 mins apart to seal the bare metal, provide adhesion for the base coat, and to give the base a uniform color to build on.
The sealer was applied with the same gun, this time with a 1.3 tip to deal with the thinner material, and with a faster spray technique to prevent runs. It lays very flat when sprayed in this manner. It's OK not to get full coverage here.
Next, I applied 2 coats of PPG Omni Jamaican Beige Base coat. This mixes 1:1 and is ready to spray right away. This is sprayed out of a similar Devilbiss Starting Line HVLP with a 1.3 tip and the pressure around 25-28 PSI at the gun regulator. I typically set my compressor at 100PSI and choke it down at the gun.
After 2 coats, 30 mins apart, and 30 mins after the last coat, it's time for clear. My clear gun is a SATA NR2000. This gun has a 1.4 tip and is set at 28-30 PSI. I typically use it with the fluid needle set pretty wide open and the fan as wide as my primer setup. The SPI Universal clear mixes 1:1 and is ready to spray immediately. I applied 3 coats, 30 mins apart. On the first coat, it's OK not to make it perfect. I struggle with this often, worrying about trying to make it slick on the first pass. DON'T do it. It just leads to runs. Spray the first coat medium, the second coat wet, and the third coat wet. It's important to work quickly here, so one area doesn't set up and dry before you are done with the whole panel, or you will be in danger of getting overspray on the section you finished first. I'm learning as I'm going so I figured I would post my observations to help others who are interested in painting their project themselves as well.


- City
- Landing
- State
- NJ
Wow. Would you like a job here in NJ ???!!! 


- City
- Fremantle
- State
- WA
:applause: what a great write up! Good detail and although I'm no spray painter I can get all of what you're doing and see where I went wrong in a couple of places doing my CJ10. I did get some runs in the clear and thin spots in the base. If I might take liberty to add this, when you've layed down the color go over EVERYTHING with a good light or torch to be sure you're covered. I have quite a few places where I can see primer :vomit: but I'm not going back (yet). Be sure you've got 100% coverage before you go to clear.
Keep up the great work and information.
Keep up the great work and information.
Here's an update. I got the tub painted! This is a big day. I painted the tub in the same manner as everything else: 2 coats of epoxy, body filler, block sand, epoxy, 2 coats of 2K primer, block sand with 400, sealer, 2 coats of base, 3 coats of clear. I'll let the pictures do the talking.
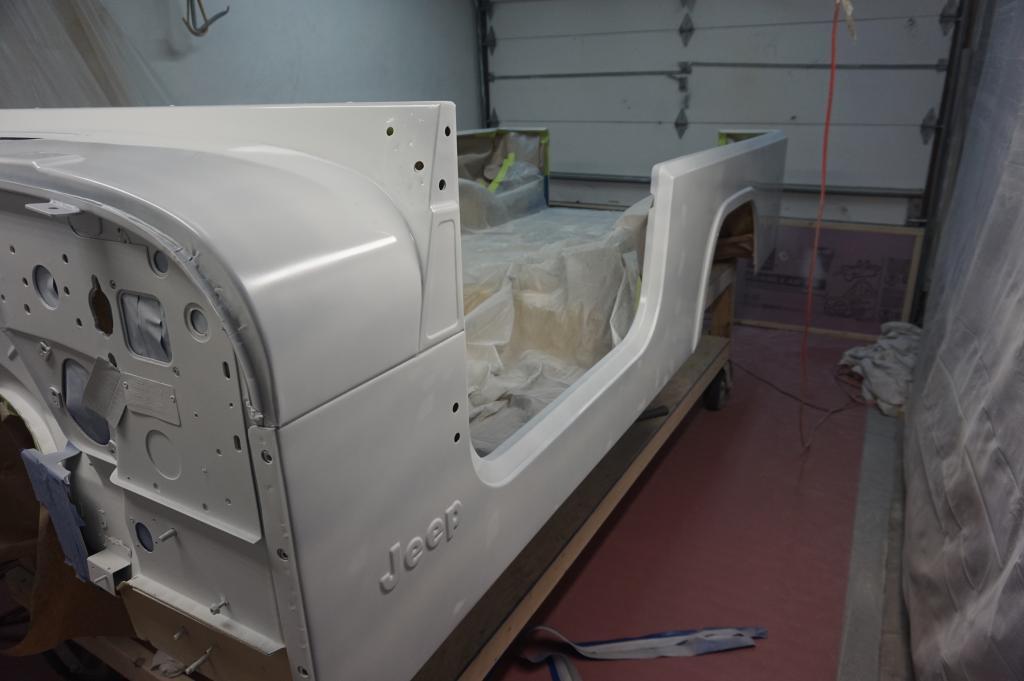
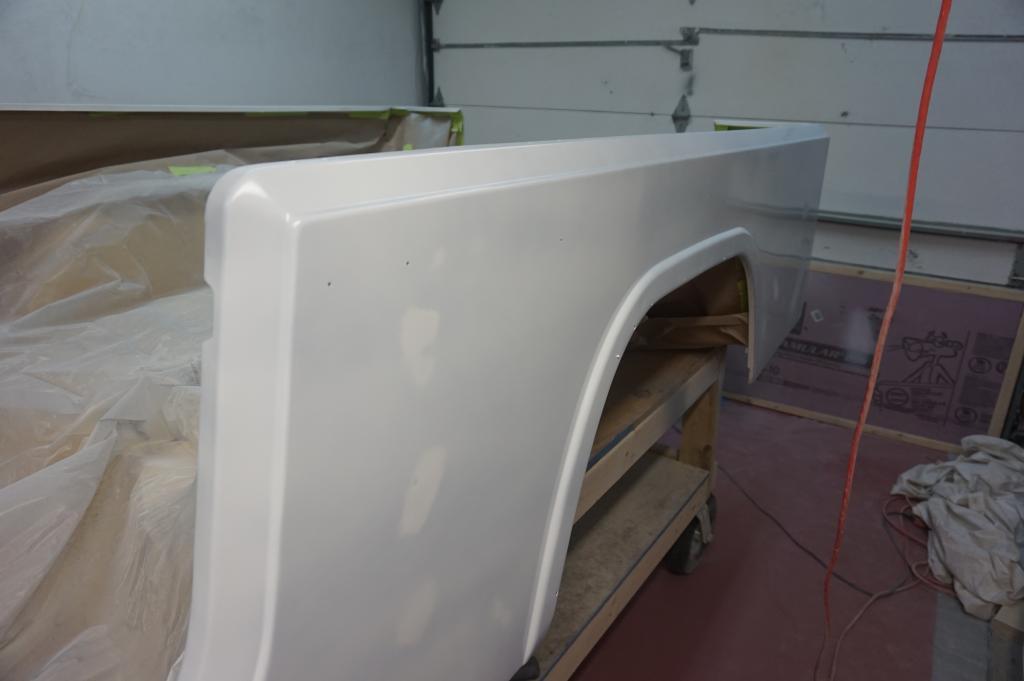
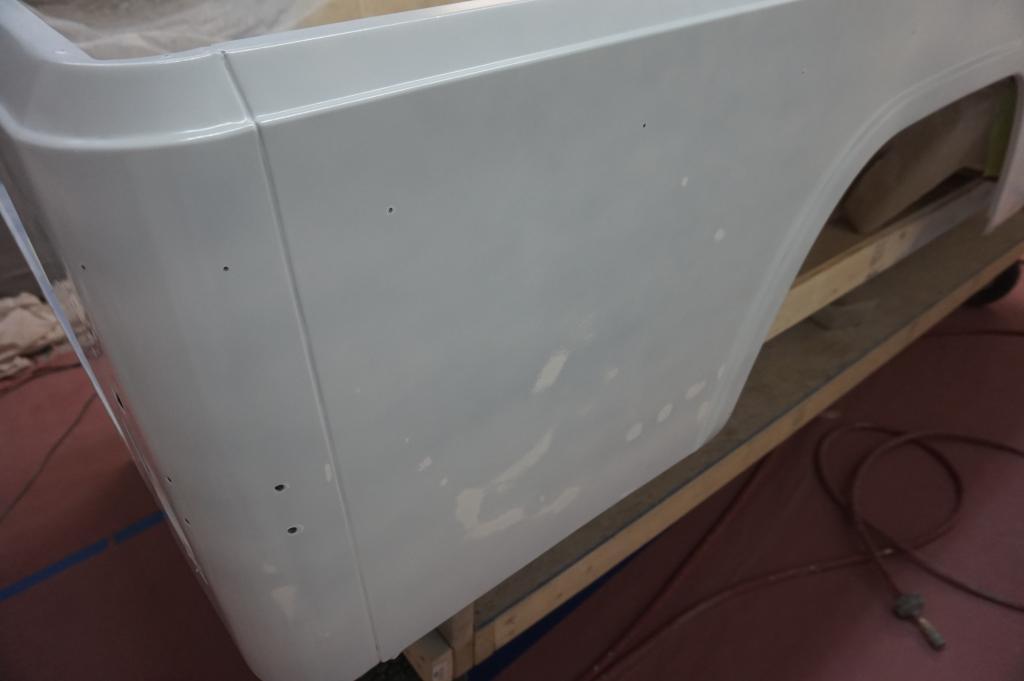
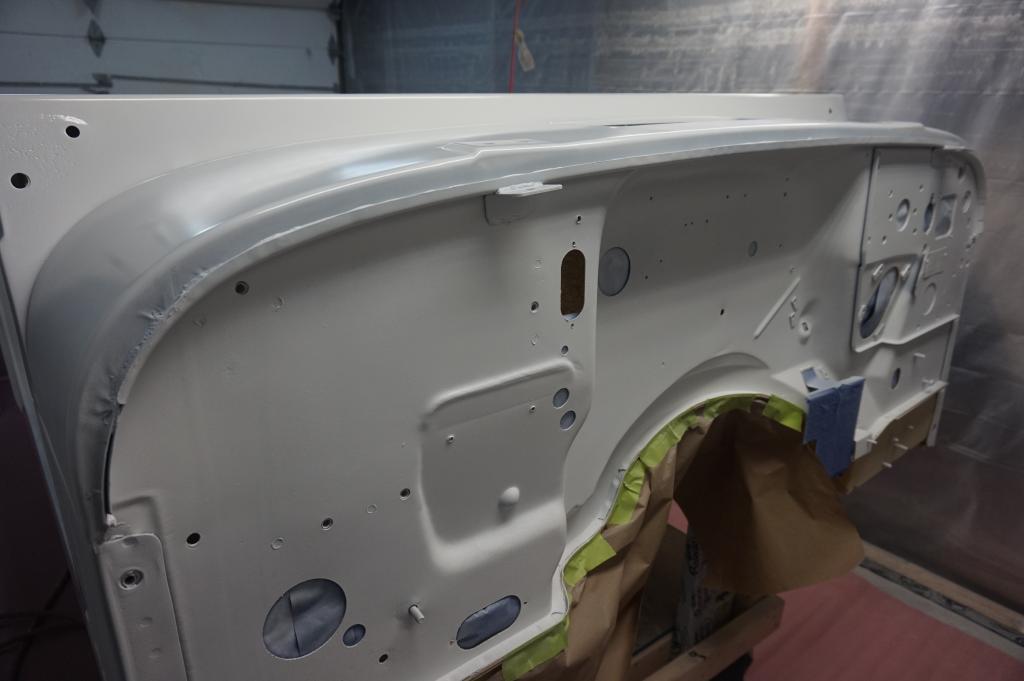
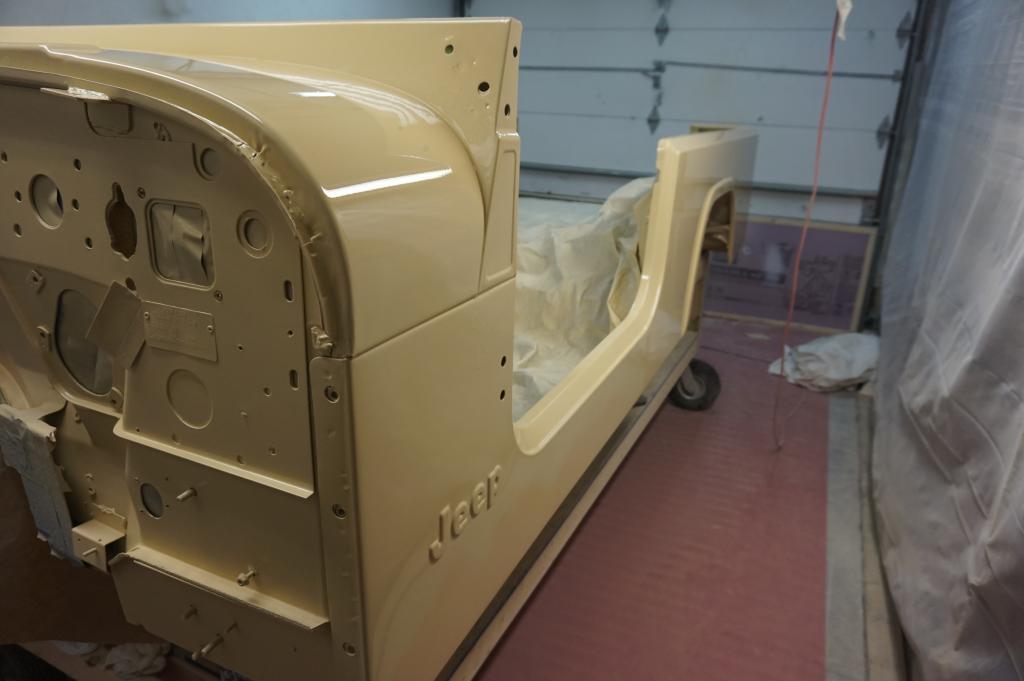
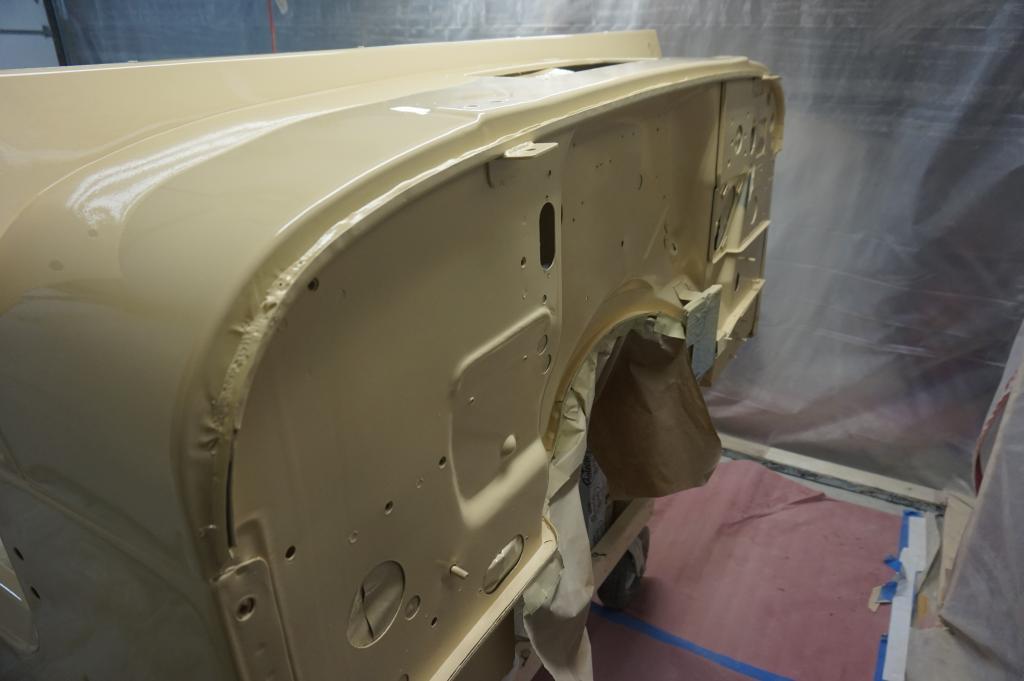
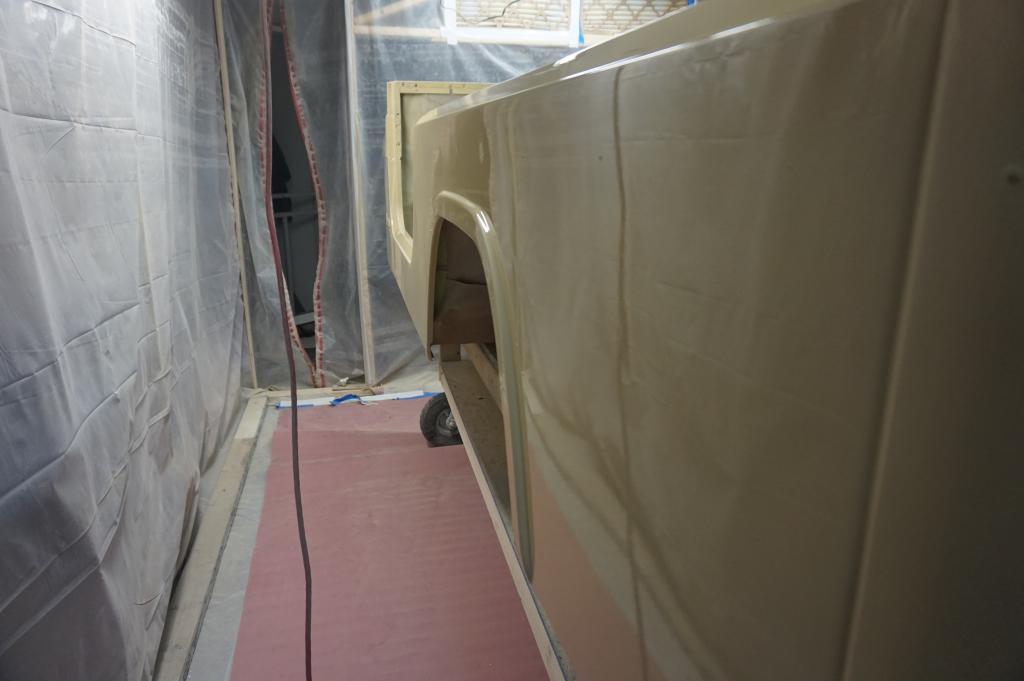
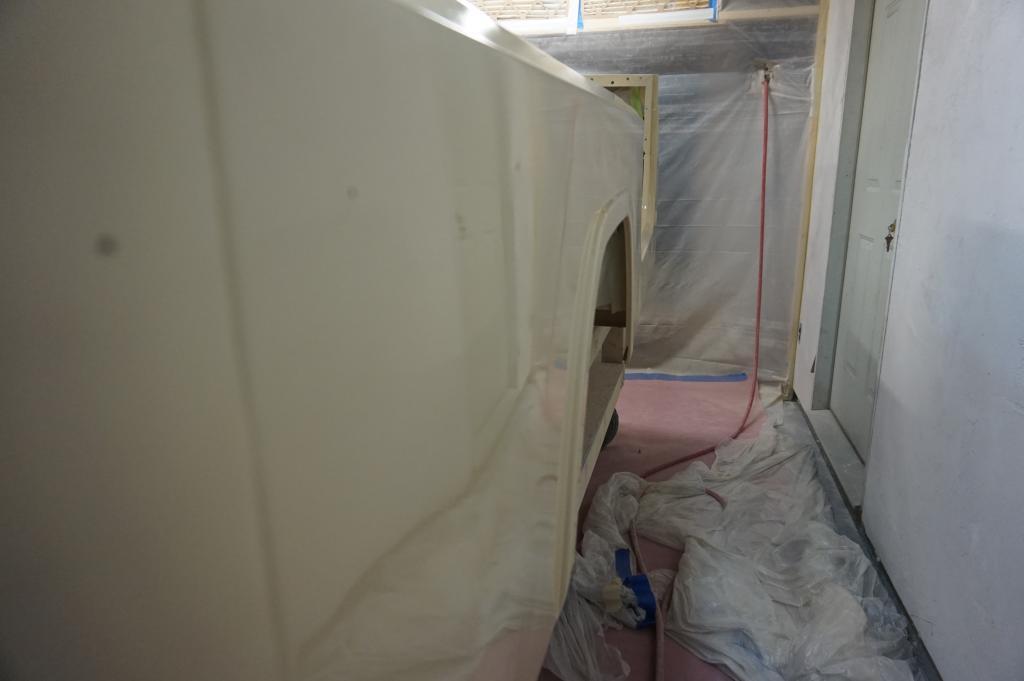
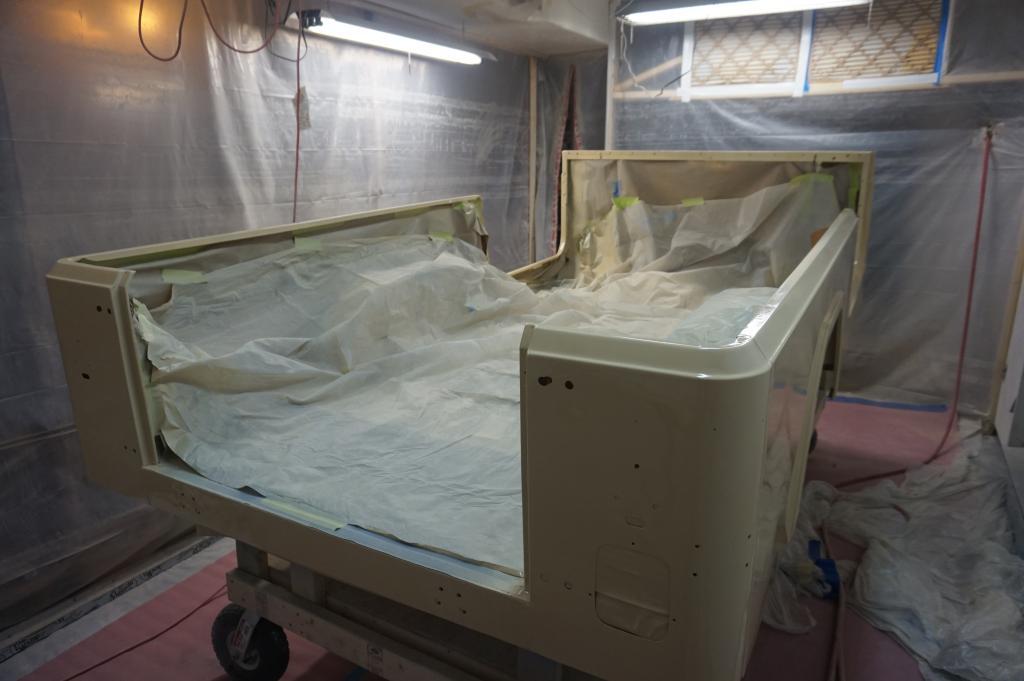
Now it's time to start reassembly!


Now it's time to start reassembly!
- City
- Dallas
- State
- tx

great work !!!!
Thanks guys! The comments are encouraging.
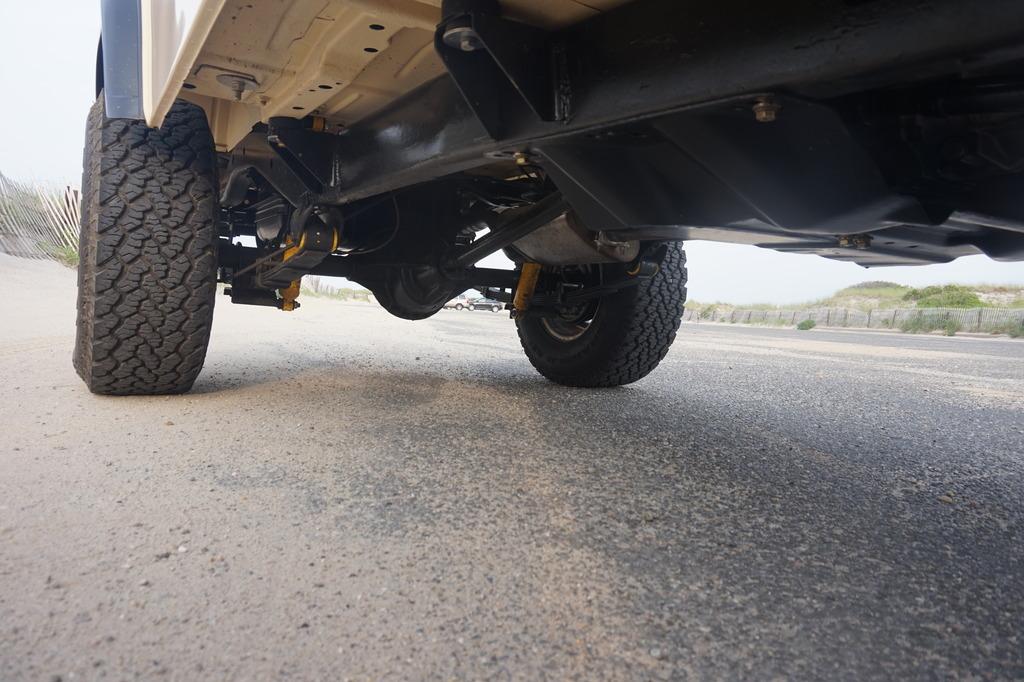
Got some work done today. I mounted the engine mounts in the frame and started working on my crossmember. The AX-15/D300 combo clocks the transfer case up form the stock position, so the bump in the factory crossmember is no longer necessary. This is a detriment to ground clearance so I figured I'd flatten it out.
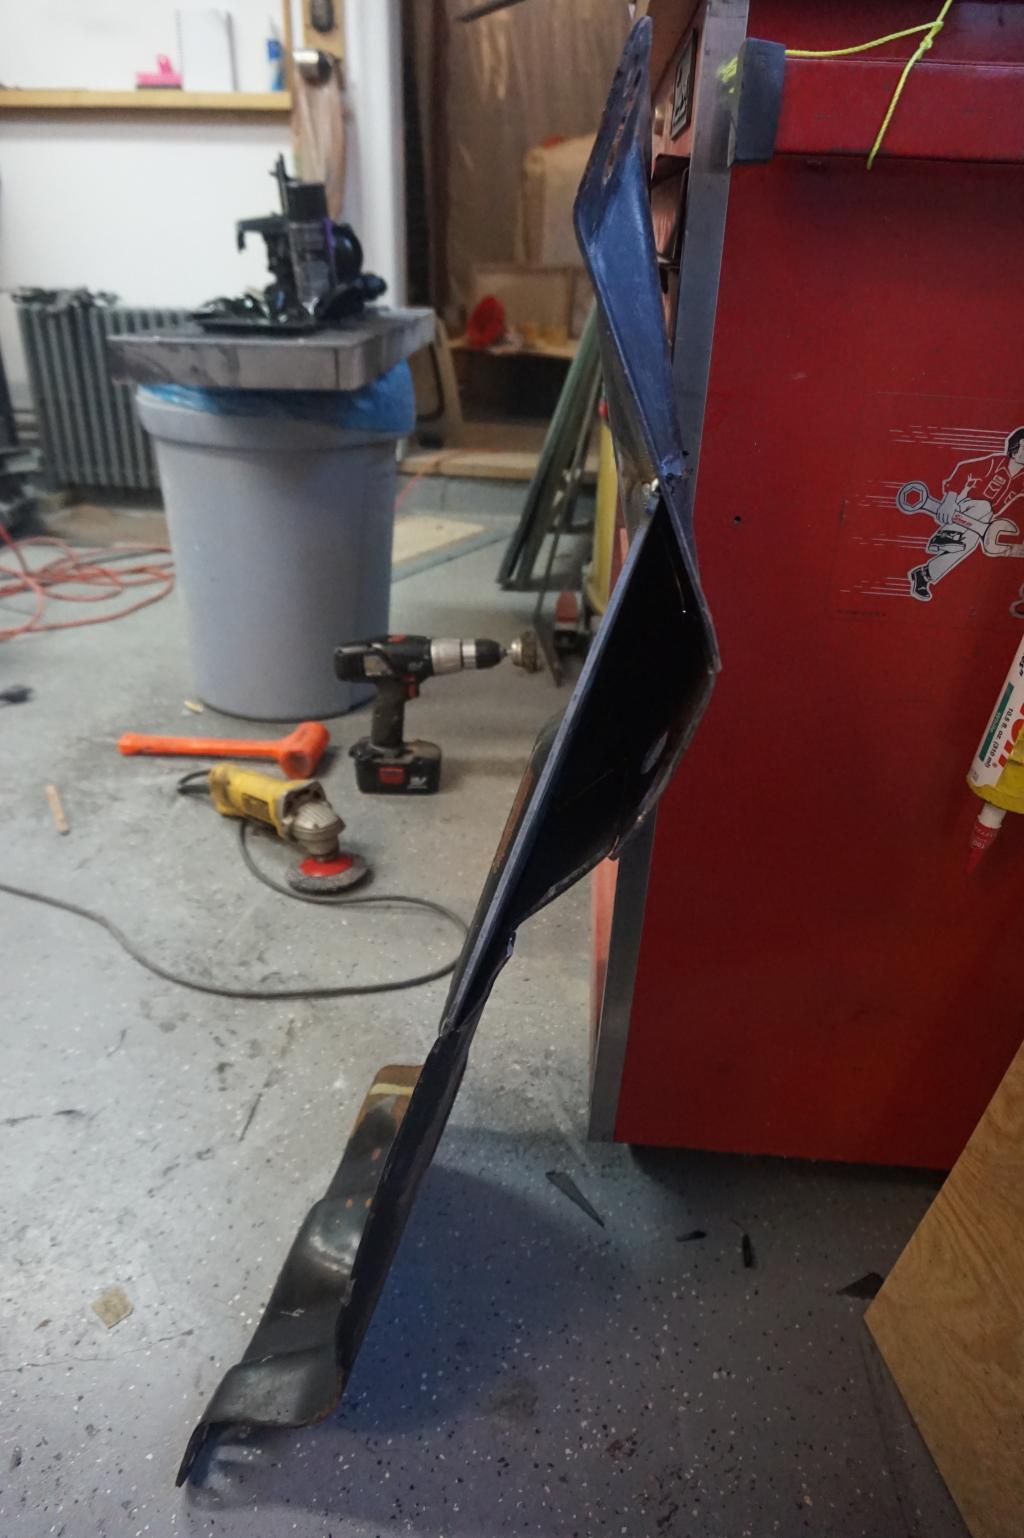
You can see where the factory bump is, and where I added some 3/16" steel plate to replace it.
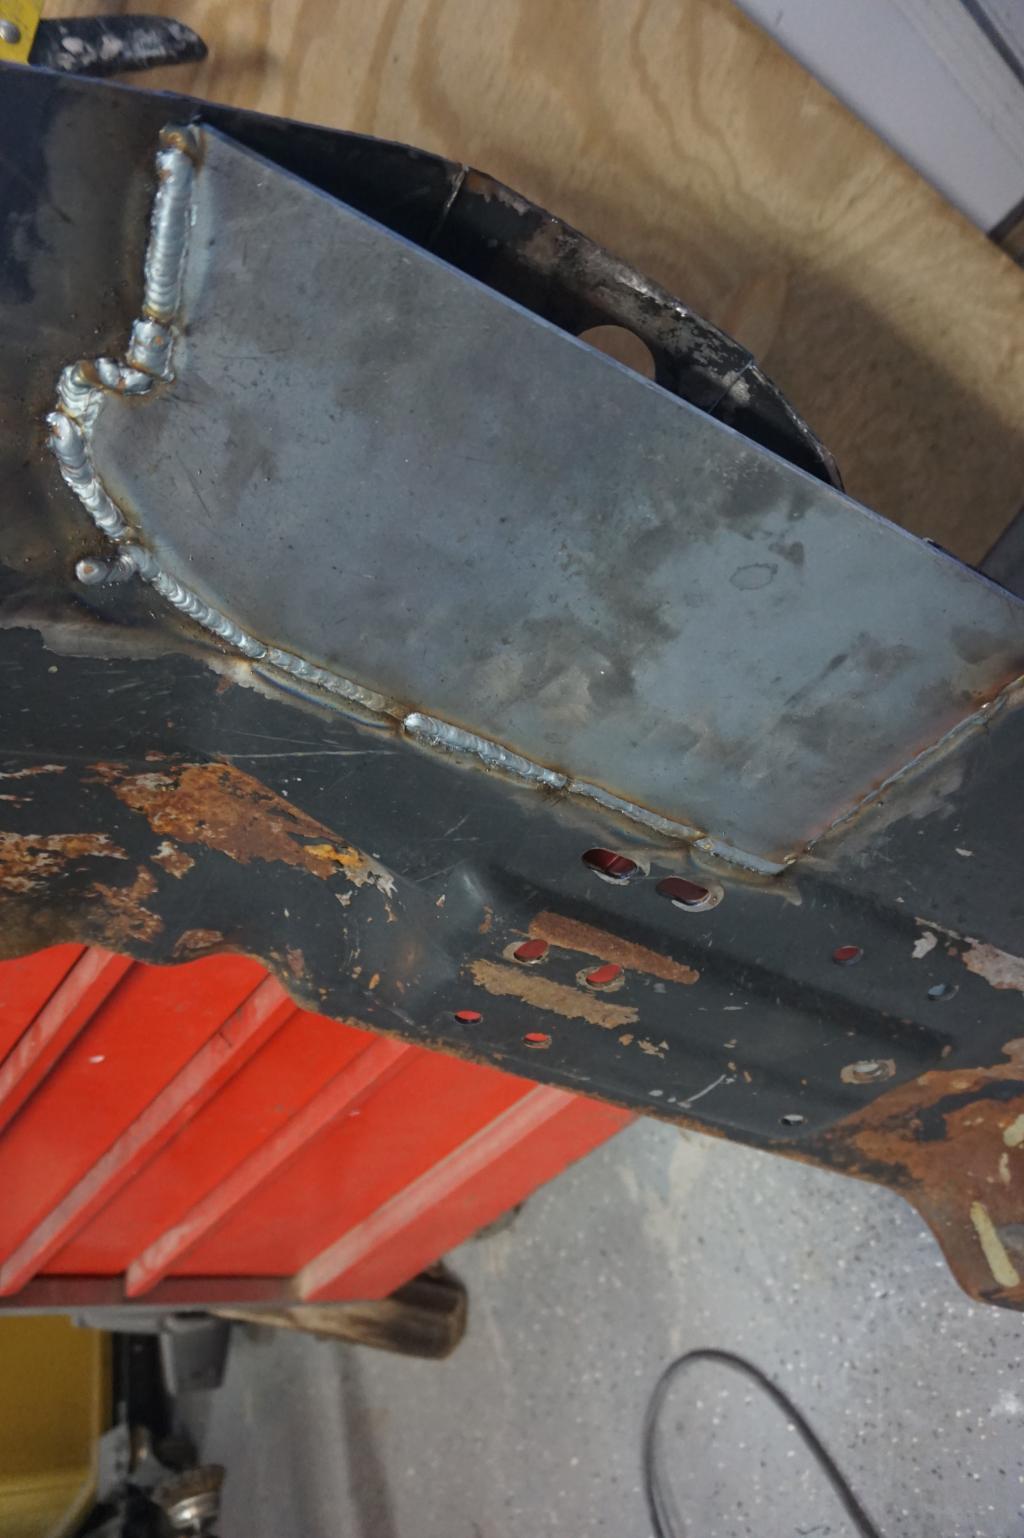
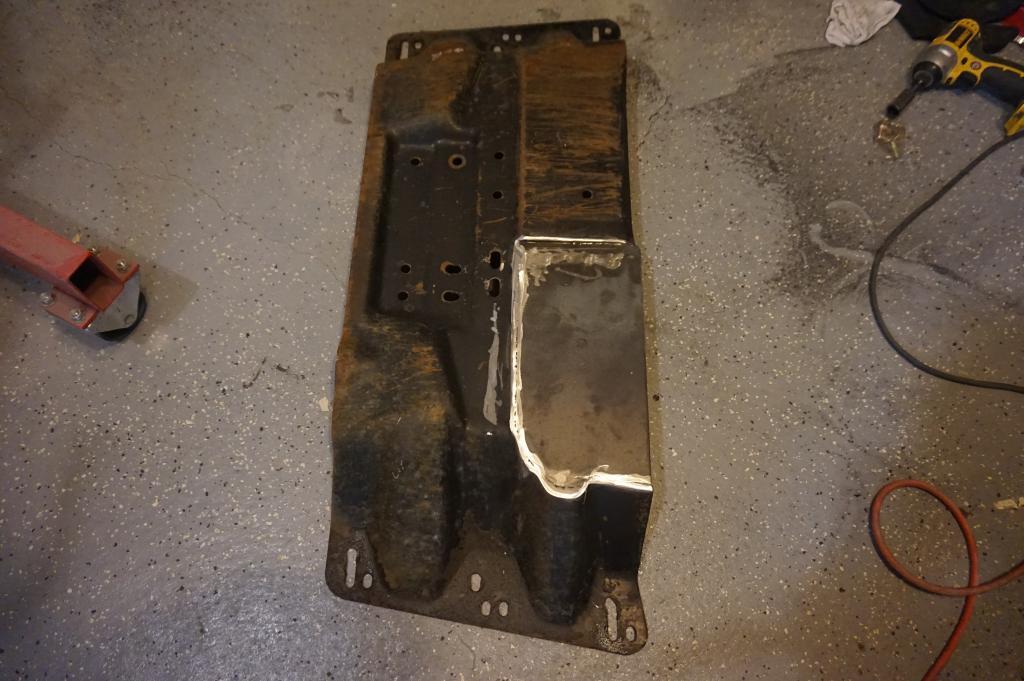
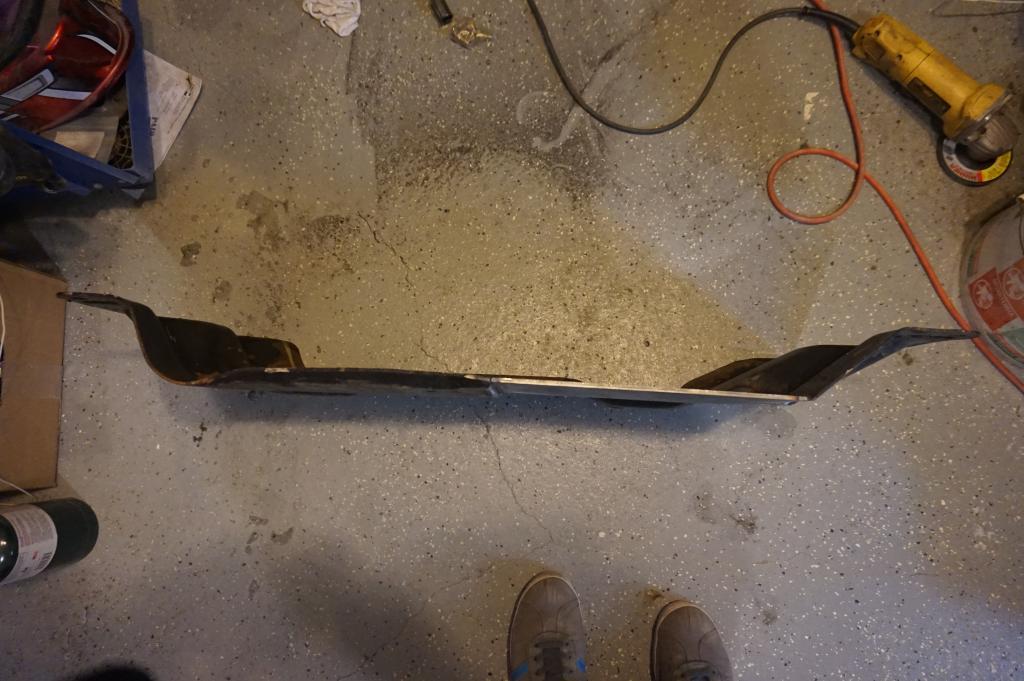
Much better clearance now.
Next, I got my energy suspension urethane engine mounts on.
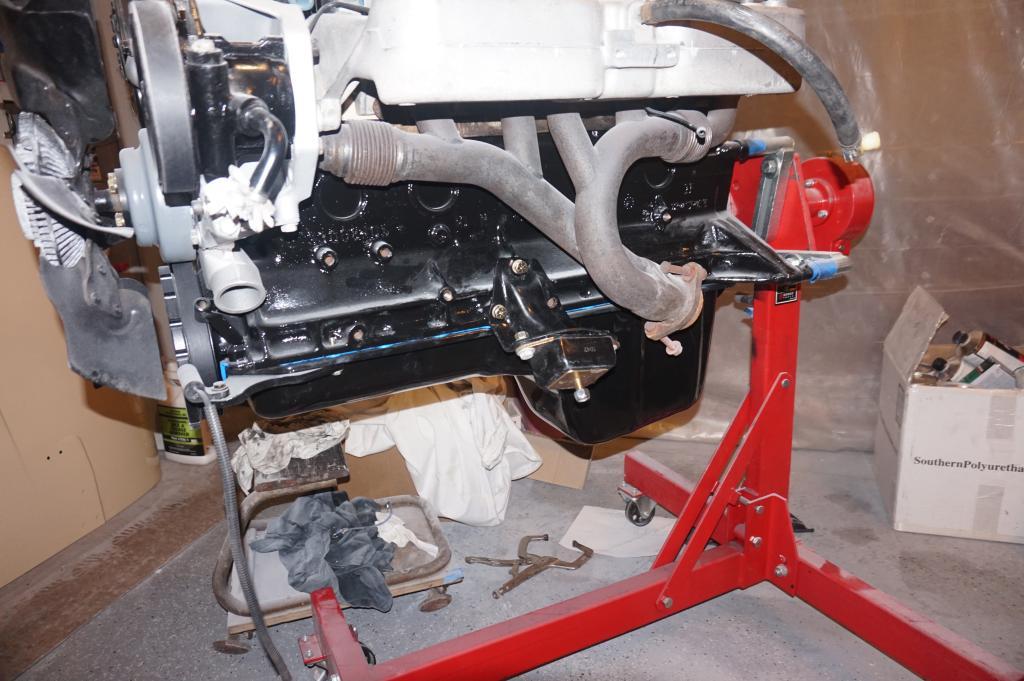
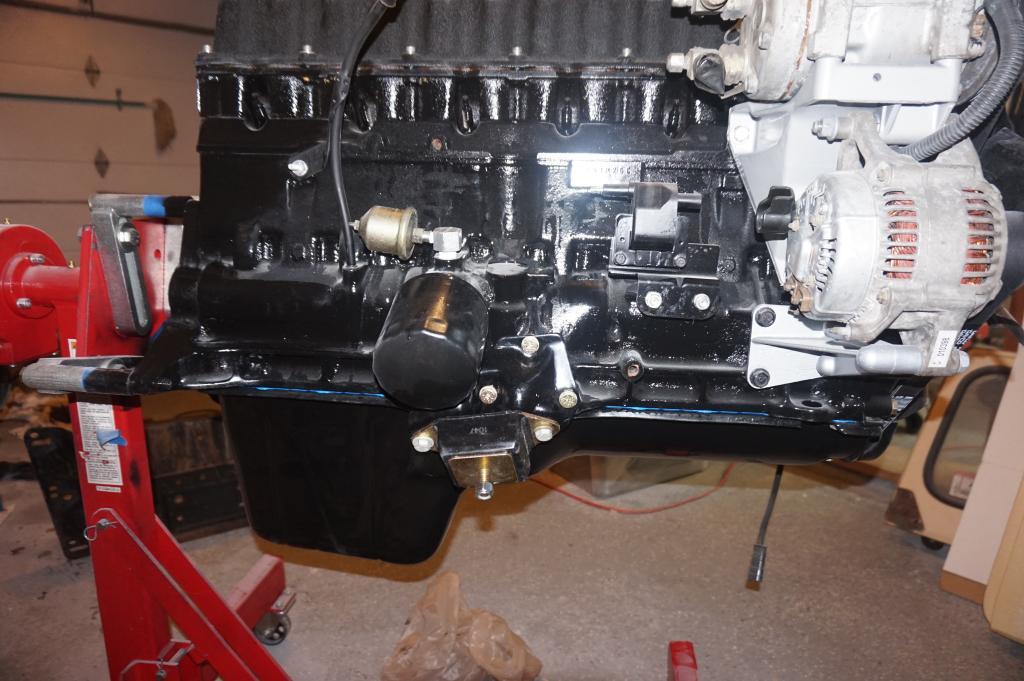
Hopefully I'll have the engine and trans in the frame by the end of the weekend!
Got some work done today. I mounted the engine mounts in the frame and started working on my crossmember. The AX-15/D300 combo clocks the transfer case up form the stock position, so the bump in the factory crossmember is no longer necessary. This is a detriment to ground clearance so I figured I'd flatten it out.

You can see where the factory bump is, and where I added some 3/16" steel plate to replace it.


Much better clearance now.
Next, I got my energy suspension urethane engine mounts on.


Hopefully I'll have the engine and trans in the frame by the end of the weekend!

bobbysjeep
Legacy Registered User
- City
- Charlotte
- State
- NC
Looking good!


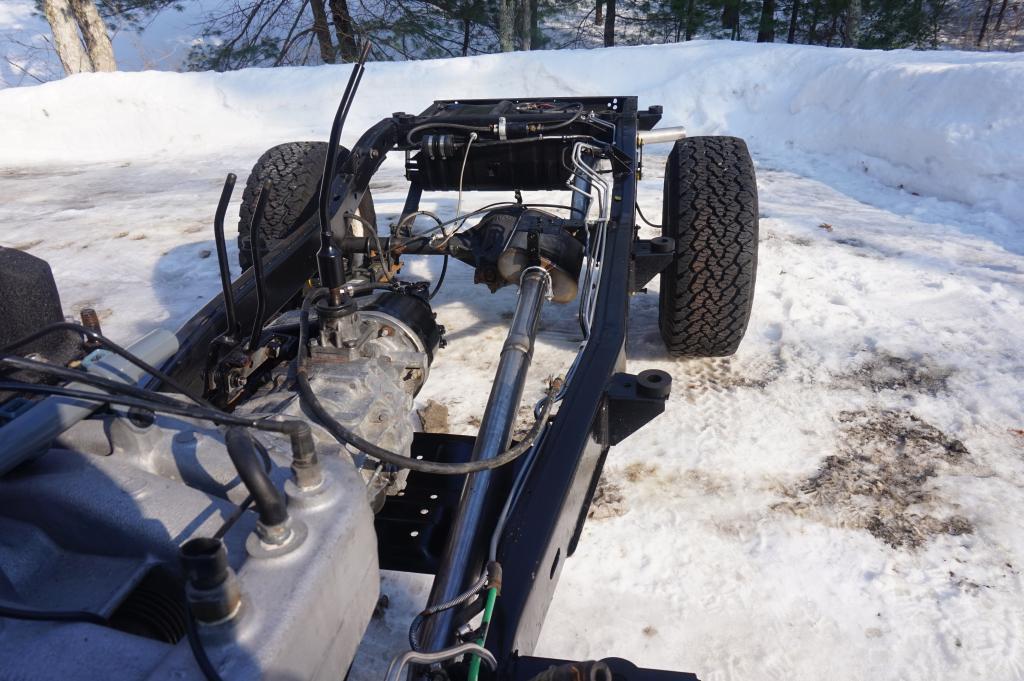
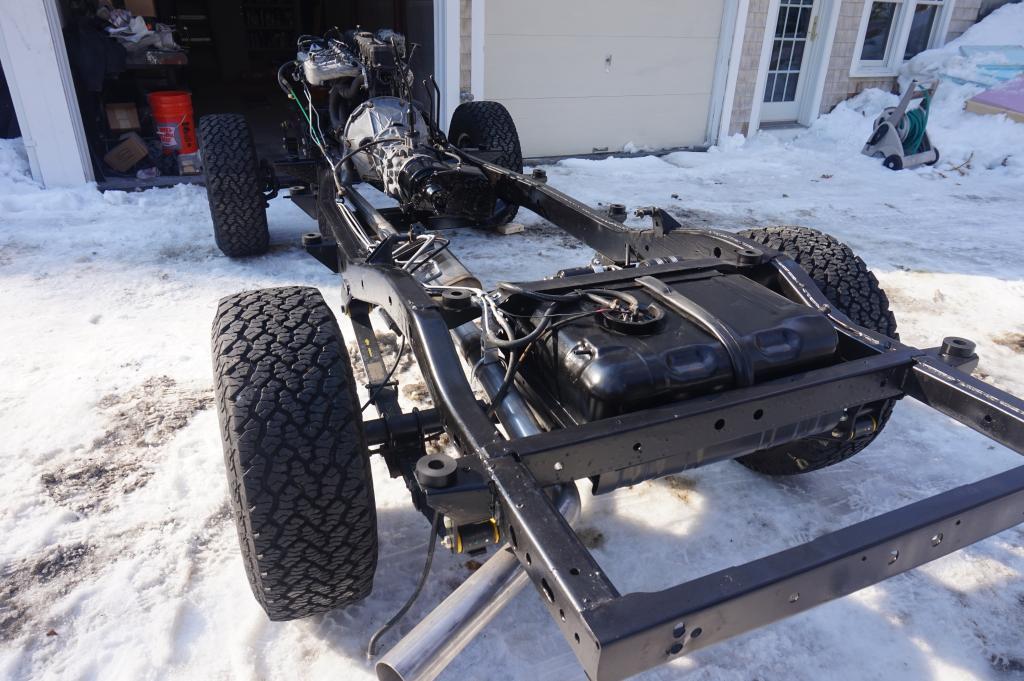
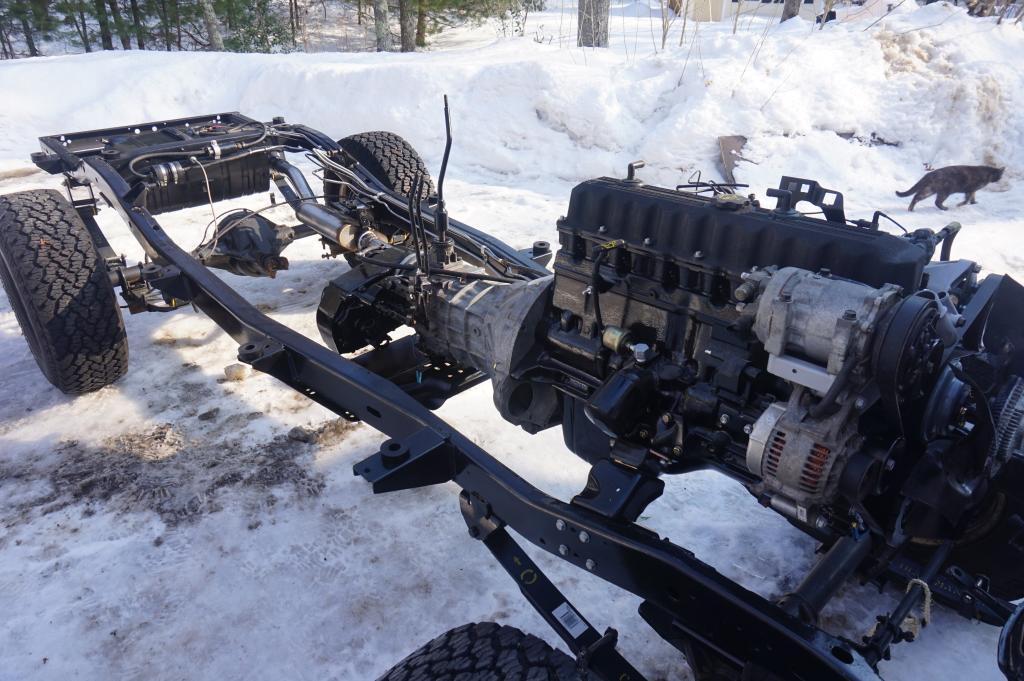
Today was a big day. I got the body mounted up to the frame. I ran all my fuel lines and brake lines and installed the fuel tank and a new exhaust system. I also replaced the seals in the transfer case as they were leaking when the Jeep was together.
The exhaust is a 2.5" stainless setup with a Magnaflow muffler. I had a local exhaust shop bend it up and weld in an O2 sensor bung up by the collector. The shop that did the work was Lou's Custom Exhaust in Plymouth MA. They did a nice job and were pretty reasonable ($330 for everything) and completed the work in a few hours. I would use them again and highly recommend them.
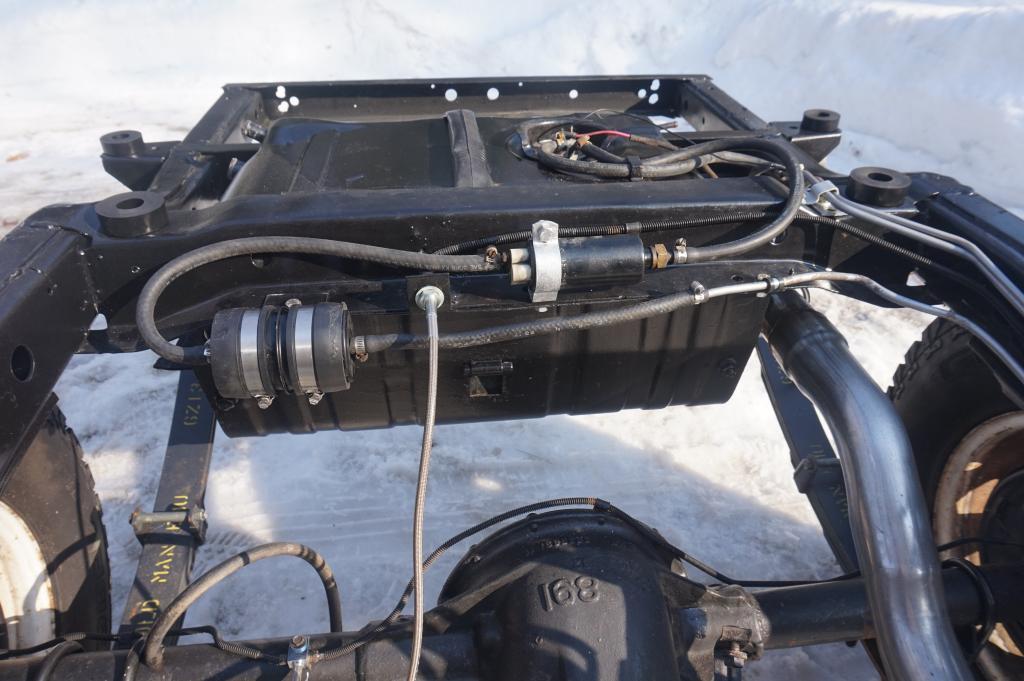
You can see how I mounted the fuel pump and filter. I had to make up a small bracket and used a rubber plumbing fitting as a bushing and clamped it to the filter.
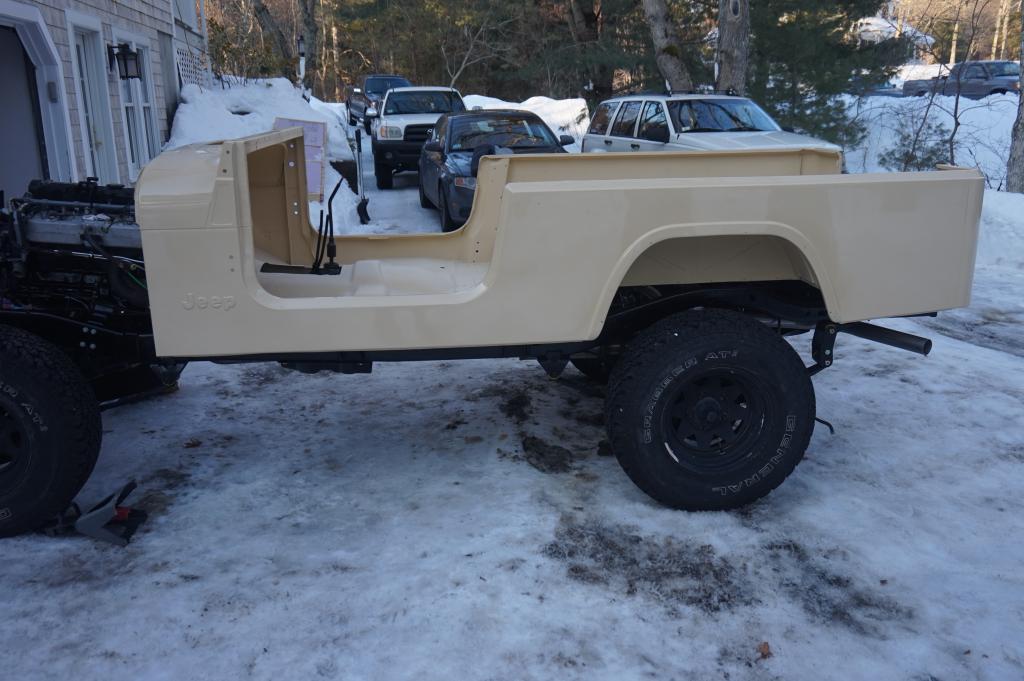
And finally, the body mounted up no problem. It feels great to see it on the frame. It's really coming together!
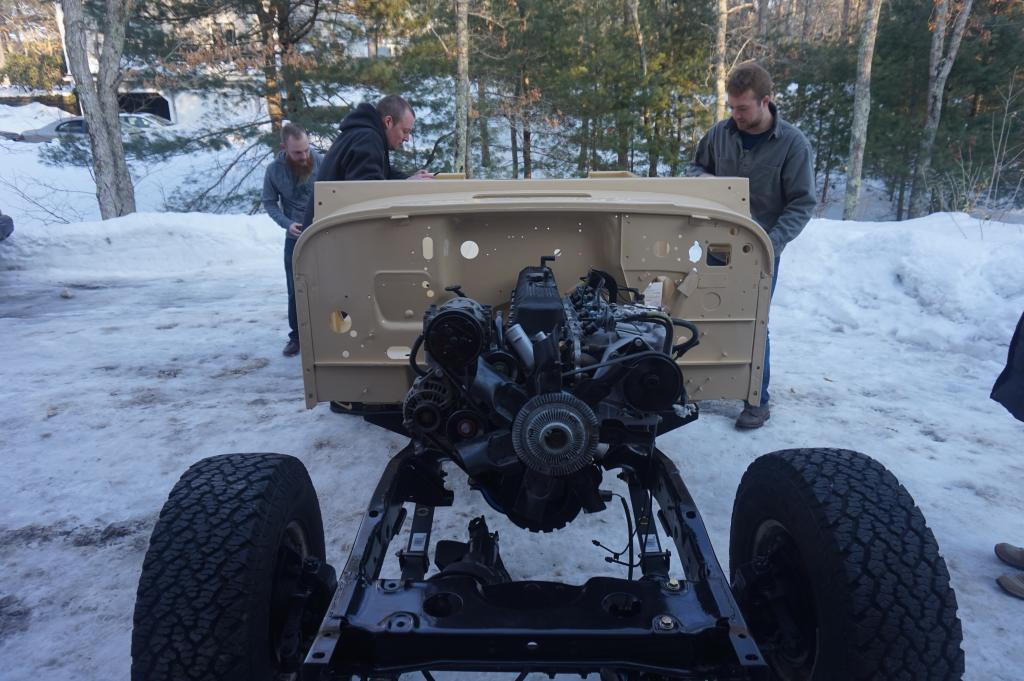
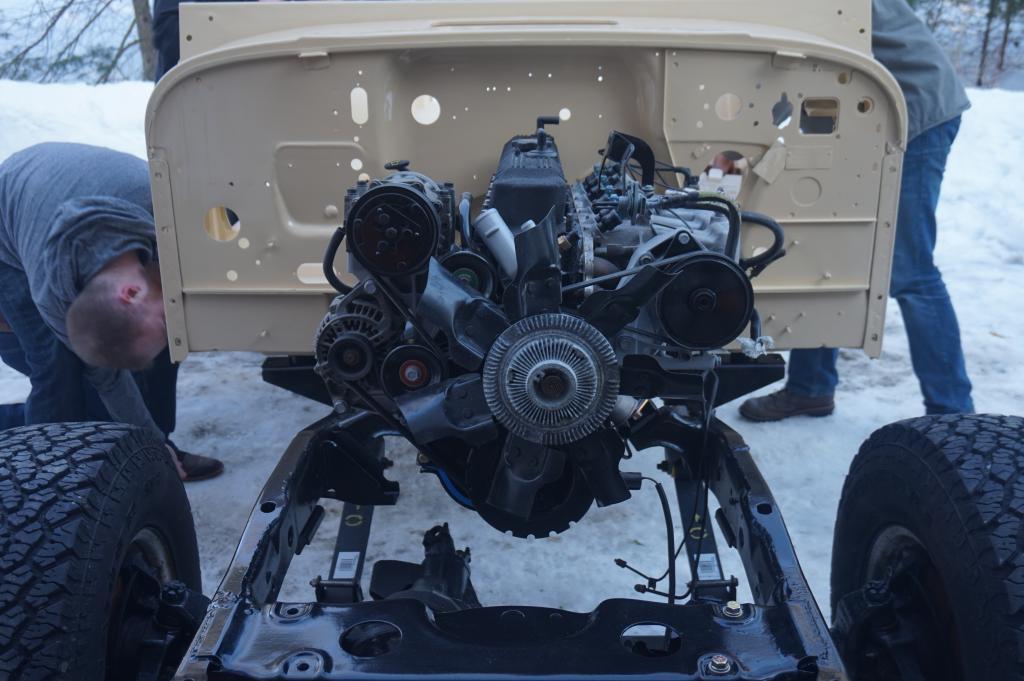
The exhaust is a 2.5" stainless setup with a Magnaflow muffler. I had a local exhaust shop bend it up and weld in an O2 sensor bung up by the collector. The shop that did the work was Lou's Custom Exhaust in Plymouth MA. They did a nice job and were pretty reasonable ($330 for everything) and completed the work in a few hours. I would use them again and highly recommend them.


You can see how I mounted the fuel pump and filter. I had to make up a small bracket and used a rubber plumbing fitting as a bushing and clamped it to the filter.


And finally, the body mounted up no problem. It feels great to see it on the frame. It's really coming together!


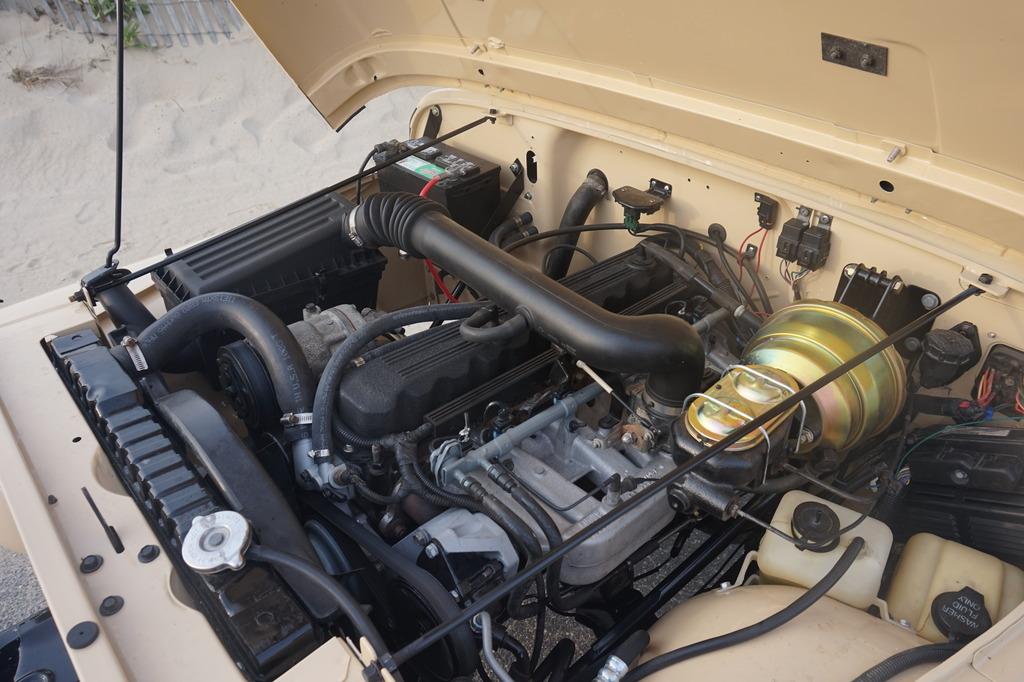
Well I got the engine running and broken in! I had an issue getting it to fire the first time, it turns out the CPS air gap was too wide. I closed it up and it turned over. It had trouble firing because the engine was flooded from all the fuel that was injected during the cranking attempts. It fired up and ran for about 2 minutes before the header started to glow orange. All the excess fuel was burning up in the exhaust so I had to shut it down. I let it sit for a while and tried it again. This time it fired right up like it should and ran very smooth. I ran it at about 1800-2000 RPM for 20 minutes to break in the cam. I shut it down and changed the oil. No surprises. I'm hoping that the cam and lifters survived the failed start attempts and didn't suffer any damage. Time will tell, but I think it will be fine. There were no bad noises, and the engine sounded very smooth.
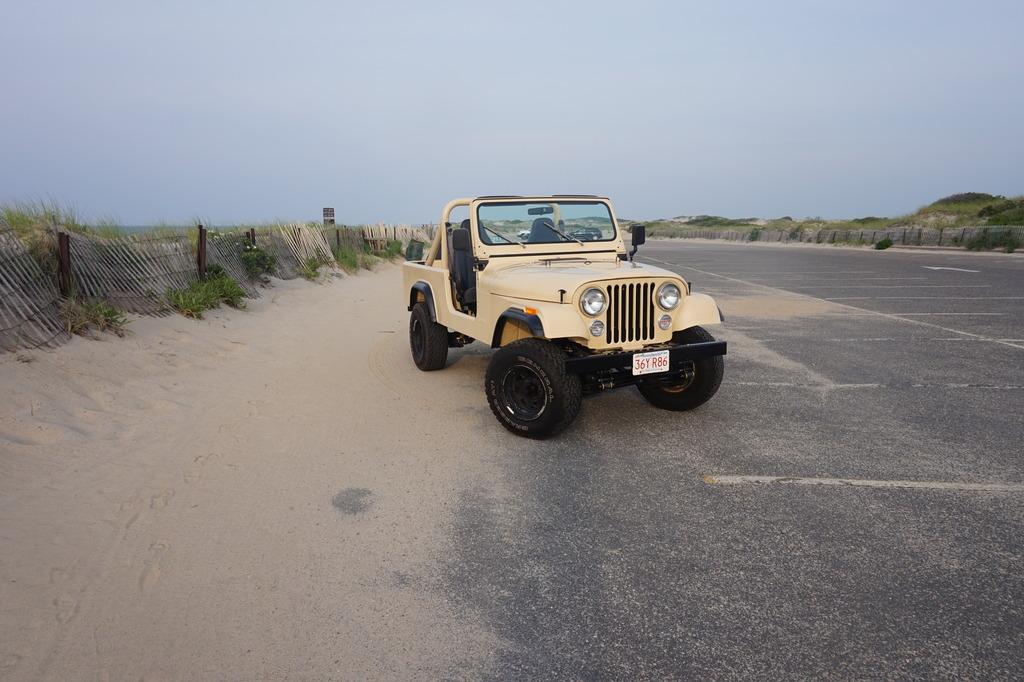
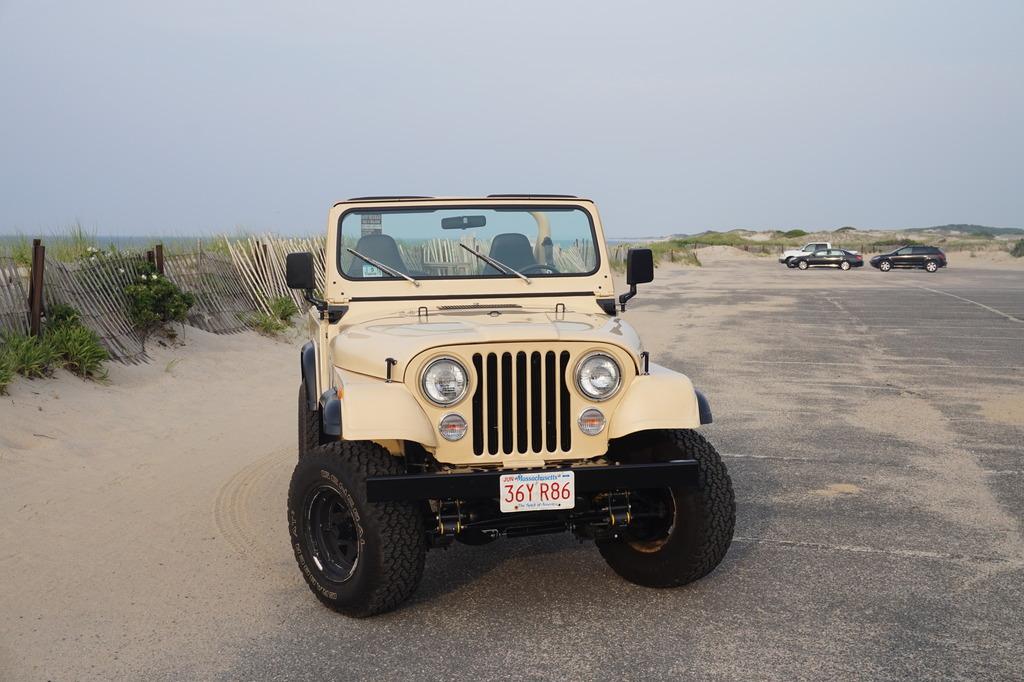
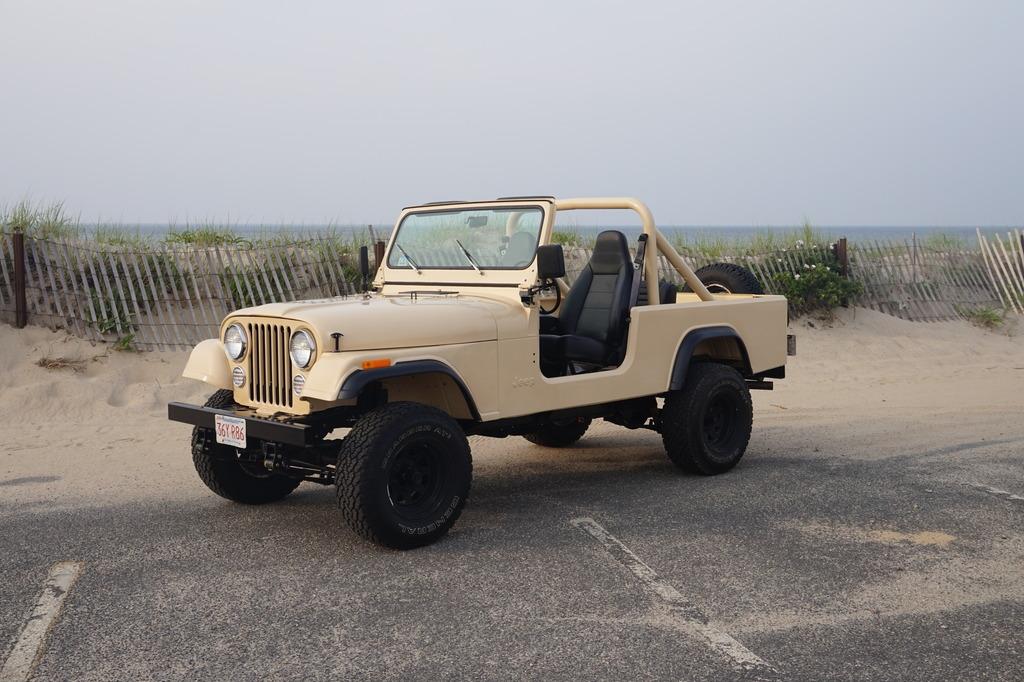
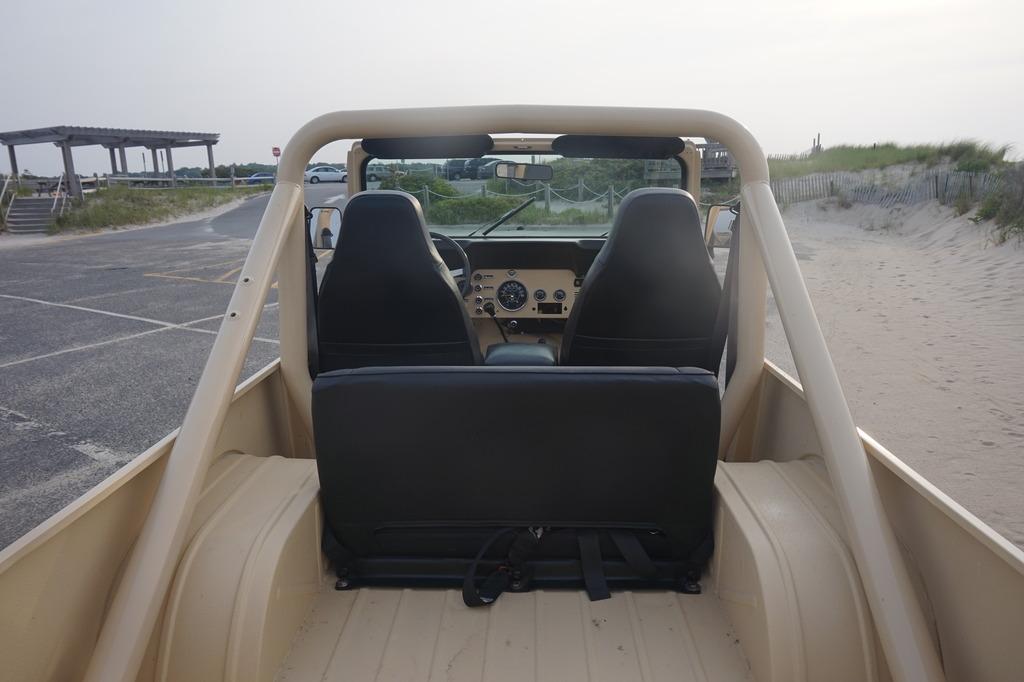
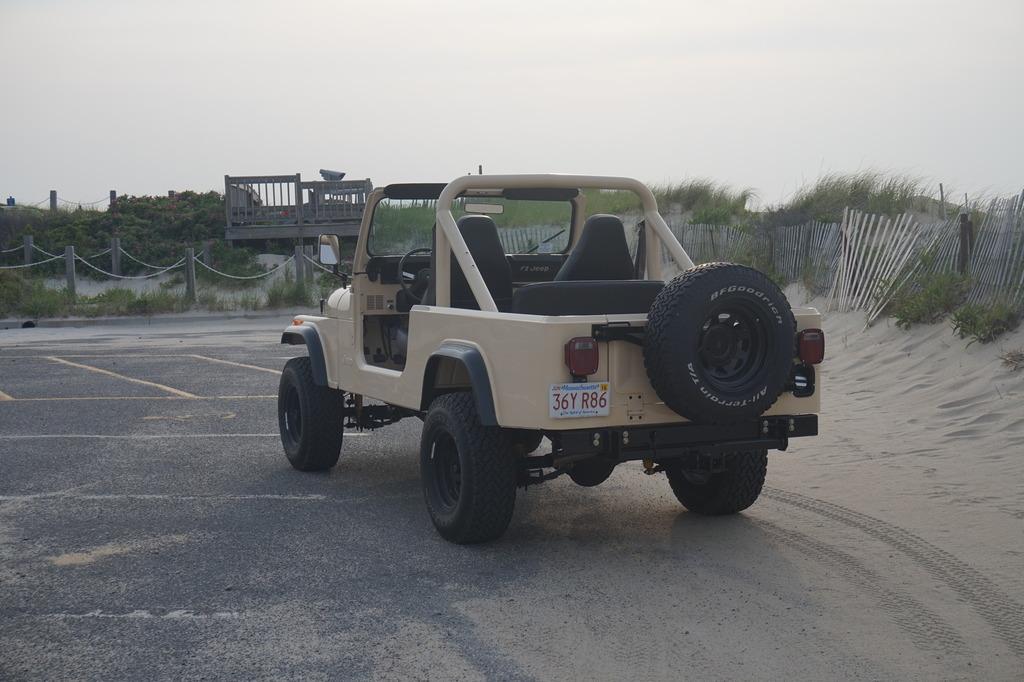
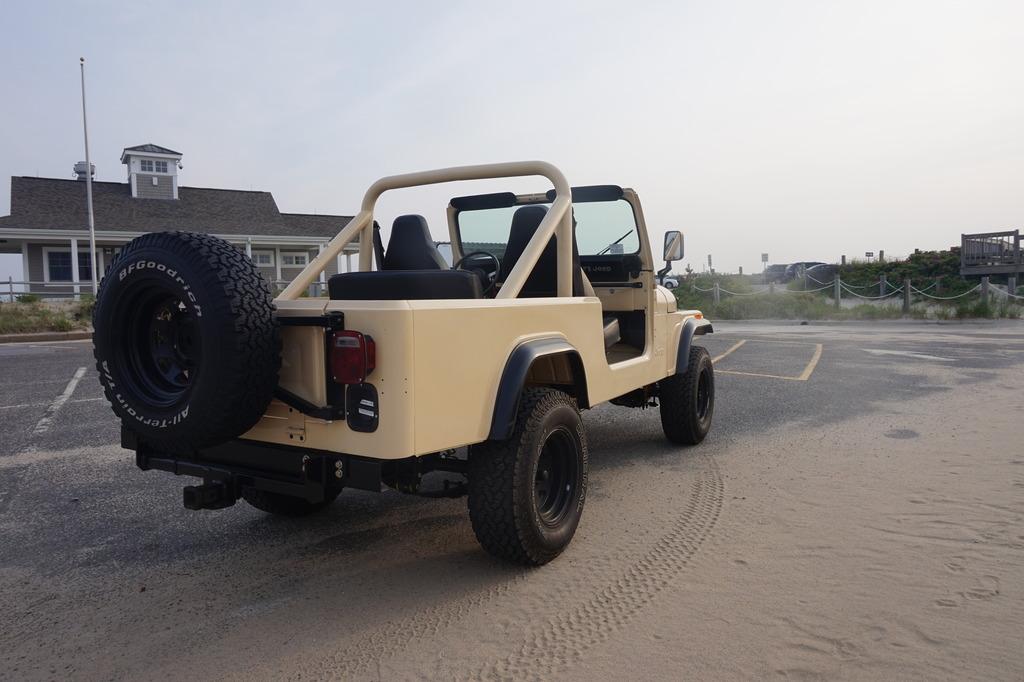
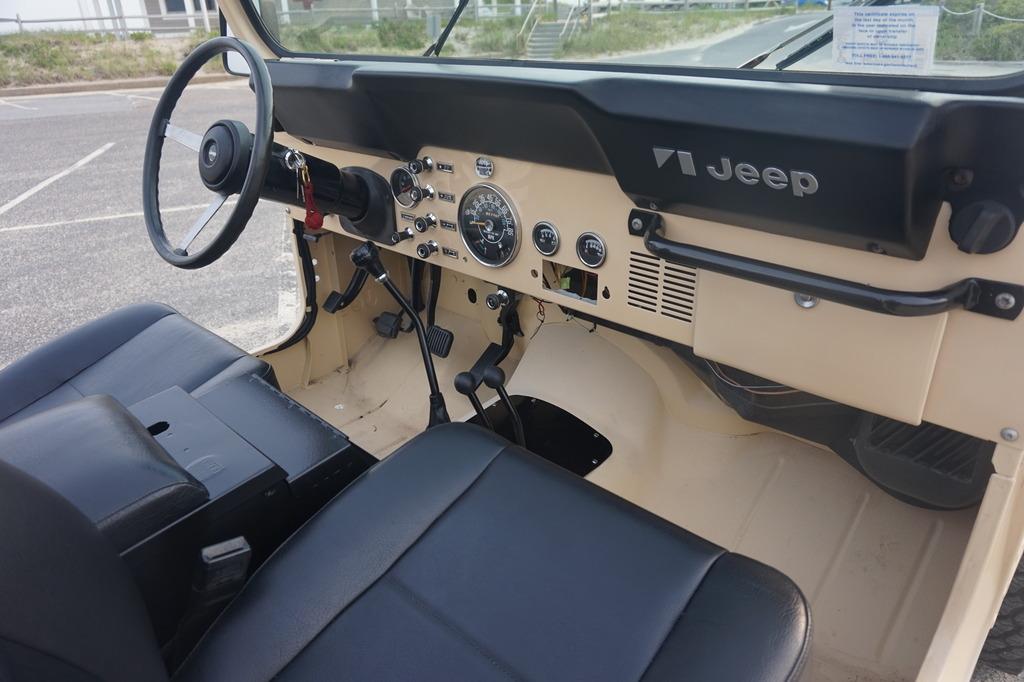
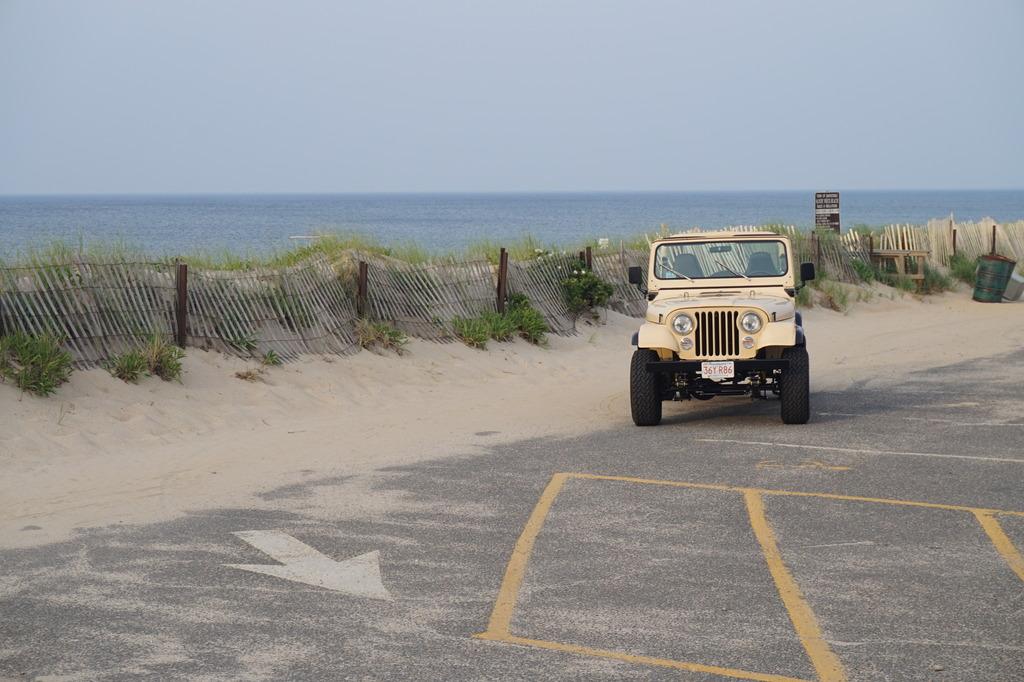
Here are some long overdue pictures of the Jeep. It's been together and driving for over a month now and it's been performing great! I am very impressed with the stroker engine. It has a TON of torque right off idle and is ultra responsive to throttle input. The engine hardly works to push the Jeep down the road. It has a broad powerband and feel very strong. It's a great engine for a Jeep like this. I just got back from the beach, and don't worry, this is as close as it ever gets to salt water.