- City
- miami
- State
- ok
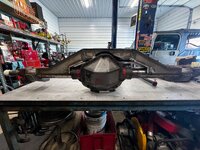
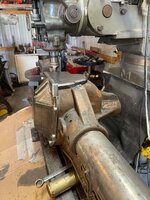
Nearly a year later,  , I finally have tackled the steering gear mount and pitman. I wish I would have spent more time laying out the 1/4 I cut out, didn’t spend much time cleaning it up. Figured I was going to have to do it a couple of times to get it right. I crudely cut the 1/4 plate out, didn’t want to waste a whole bunch of time but put it all together and was on the money. Initially had a pvc drag link and couldn’t quite hit both steering locks. But found some junk pipe and was able to mock up a drag link. Steering goes lock to lock setup that way. Now that I know my drag link length I can build my track bar to the same length to keep it all happy.
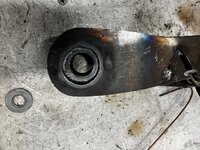
Plan on twisting the rod end of the pitman arm to limit out the travel of the heim that way I have plenty of travel in the misalignment spacer for droop. Some shaping needs done to it as well as more metal to make it double shear.
, I finally have tackled the steering gear mount and pitman. I wish I would have spent more time laying out the 1/4 I cut out, didn’t spend much time cleaning it up. Figured I was going to have to do it a couple of times to get it right. I crudely cut the 1/4 plate out, didn’t want to waste a whole bunch of time but put it all together and was on the money. Initially had a pvc drag link and couldn’t quite hit both steering locks. But found some junk pipe and was able to mock up a drag link. Steering goes lock to lock setup that way. Now that I know my drag link length I can build my track bar to the same length to keep it all happy.Plan on twisting the rod end of the pitman arm to limit out the travel of the heim that way I have plenty of travel in the misalignment spacer for droop. Some shaping needs done to it as well as more metal to make it double shear.


 !
!