


- City
- Columbia
- State
- MO
Well the day is finally here!! I still can't wipe the stupid grin off my face! My fiance and I went up to her parents today to spend some time with them. I was prepared to help her dad in the shop with whatever project he had going on, which is what I normally do. Lately it has been a small '68 Triumph TR250. Now my Jeep has been sitting up at the shop outside, patiently waiting for a spot to open up long enough for me to get it inside and begin the project but (fortunately) he has been quite busy with customer cars. Everytime I thought I had a chance I would head up to the shop only to find a new customer project had moved in! 
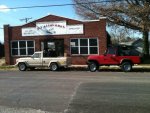
Well today I went into the shop and he asked me to help him move the Triumph up closer to the front of the paint booth. I didn't think much of it but I thought it was funny that he wanted to move it as he was right in the middle of wet sanding the final coat of primer. Once we had it moved up he said "well, that should be enough room for you to get your Jeep in here". I almost jumped out the window! Of course the battery in the Jeep was dead from sitting and there is a small drain on it that I haven't located in the rats nest of wiring but once we hooked the jumper box up it fired right up. Once I had the Jeep in he said I could start tearing it down but he had to still be able to move it outside in order to get other cars in and out and that it may still need to sit outside a few nights until we can get a better spot in the shop for it. As you can see in the pics it is sitting right in front of the only overhead door in the shop so it is currently blocking the entrance/exit.
I got most of the small items taken off the exterior. I broke about 1/2 of the t-connectors for the aluminum rocker gaurds even after a liberal dose of PB Blaster. Everything else came off pretty easy. That is about as far as I got today but I will update as often as possible! Unfortunately, I will not be able to work on this as much or as often as I would like. My in-laws (to be) live about 45 minutes east of me (close to Saint Louis) so it is a bit of a drive to get there and I work 24 hour shifts on the fire department and have a part-time job on my days off so I only have so many days to go up and work on it. I will be there as often as I can! I will update this thead on my plans for the build soon but for now here are the pics of what I am starting with and what I got done today.
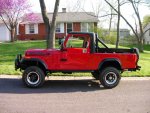
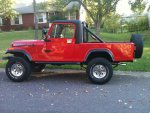
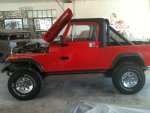
This is what it looked like a few days after I got it in the summer of 2010:


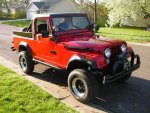
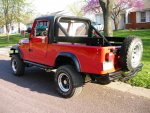
It is mostly a stock '82 Scrambler SR with a SBC 350, T-5 tranny, Dana 300, 30 front/AMC 20 rear, unknown gear ratio with open diffs. The lift is a 4" Rough Country lift that will be replaced by a 4" Rubicon Express lift with Bilstein shocks. The person I got it from bought it to go rock crawling with but decided it was too nice to tear up so he traded it to me for my '98 TJ Sport that was setup for rock crawling. The owner before him was the one who did the first "resto" on it. It is what I would call a "driveway" resto. It looks good from 20 feet but the paint has lots of runs and pinholes, the wiring is horrible, and there are many areas that were done cheaply and not to my standards. The advantage is that there is zero rust and most of the bolts should come out easily due to the recent resto.
This is after a few months of owning it:


Well today I went into the shop and he asked me to help him move the Triumph up closer to the front of the paint booth. I didn't think much of it but I thought it was funny that he wanted to move it as he was right in the middle of wet sanding the final coat of primer. Once we had it moved up he said "well, that should be enough room for you to get your Jeep in here". I almost jumped out the window! Of course the battery in the Jeep was dead from sitting and there is a small drain on it that I haven't located in the rats nest of wiring but once we hooked the jumper box up it fired right up. Once I had the Jeep in he said I could start tearing it down but he had to still be able to move it outside in order to get other cars in and out and that it may still need to sit outside a few nights until we can get a better spot in the shop for it. As you can see in the pics it is sitting right in front of the only overhead door in the shop so it is currently blocking the entrance/exit.
I got most of the small items taken off the exterior. I broke about 1/2 of the t-connectors for the aluminum rocker gaurds even after a liberal dose of PB Blaster. Everything else came off pretty easy. That is about as far as I got today but I will update as often as possible! Unfortunately, I will not be able to work on this as much or as often as I would like. My in-laws (to be) live about 45 minutes east of me (close to Saint Louis) so it is a bit of a drive to get there and I work 24 hour shifts on the fire department and have a part-time job on my days off so I only have so many days to go up and work on it. I will be there as often as I can! I will update this thead on my plans for the build soon but for now here are the pics of what I am starting with and what I got done today.
This is what it looked like a few days after I got it in the summer of 2010:
It is mostly a stock '82 Scrambler SR with a SBC 350, T-5 tranny, Dana 300, 30 front/AMC 20 rear, unknown gear ratio with open diffs. The lift is a 4" Rough Country lift that will be replaced by a 4" Rubicon Express lift with Bilstein shocks. The person I got it from bought it to go rock crawling with but decided it was too nice to tear up so he traded it to me for my '98 TJ Sport that was setup for rock crawling. The owner before him was the one who did the first "resto" on it. It is what I would call a "driveway" resto. It looks good from 20 feet but the paint has lots of runs and pinholes, the wiring is horrible, and there are many areas that were done cheaply and not to my standards. The advantage is that there is zero rust and most of the bolts should come out easily due to the recent resto.
This is after a few months of owning it:
Attachments
Last edited:


 ) I've thought about going with the T-176 but I'm not sure how it would be with 4:10 gears and highway driving (I still want to be able to do 70mph with no issues). I also have my refurbed Jeep SE Warn 8275 winch that I will be putting on the front.


