• Notice for iPhone users: DO NOT use the image size reduction option when uploading photos to the forum. This causes portrait images to post as landscape. We have added a warning to the image insert pop-up as well.

Windshield Frame/Wiper Binding Issues

spankrjs

Scrambler Junkie
Lifetime Member
SOA Member
City
Biloxi
State
MS
Planning my cross country run to Moab, and I want my wipers to function.

Did a little research here, and I see that I am not the only one with this problem:(

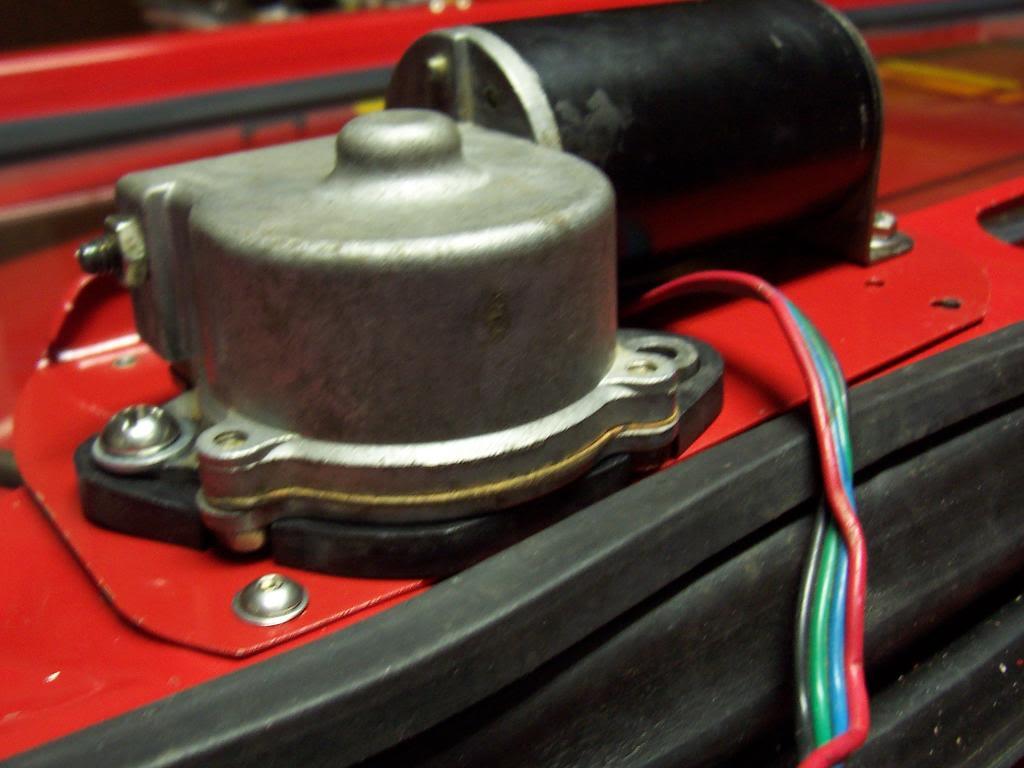
To establish a base line, here is the info on my all original 1983 Scrambler: original non ribbed steel frame, original linkage, motor, etc. Wipers work whisper quiet in low, high, and intermediate, no knocking or binding sounds at all. This leads me to believe that when new, the CJ wipers worked excellent.

On my red Scrambler, I had to replace the windshield frame during the rebuild with a replacement steel frame, which has the ribs. I also replaced all the linkage. Since I installed this stuff, I had a slight "knocking" sound when the wipers would move. Well, the other day they locked up. So, yesterday I took all the wiper stuff out. Thinking the replacement linkage was the problem, I installed some good factory/original linkage. Same problem. After comparing, the factory and replacement linkages are identical:thumbsup:

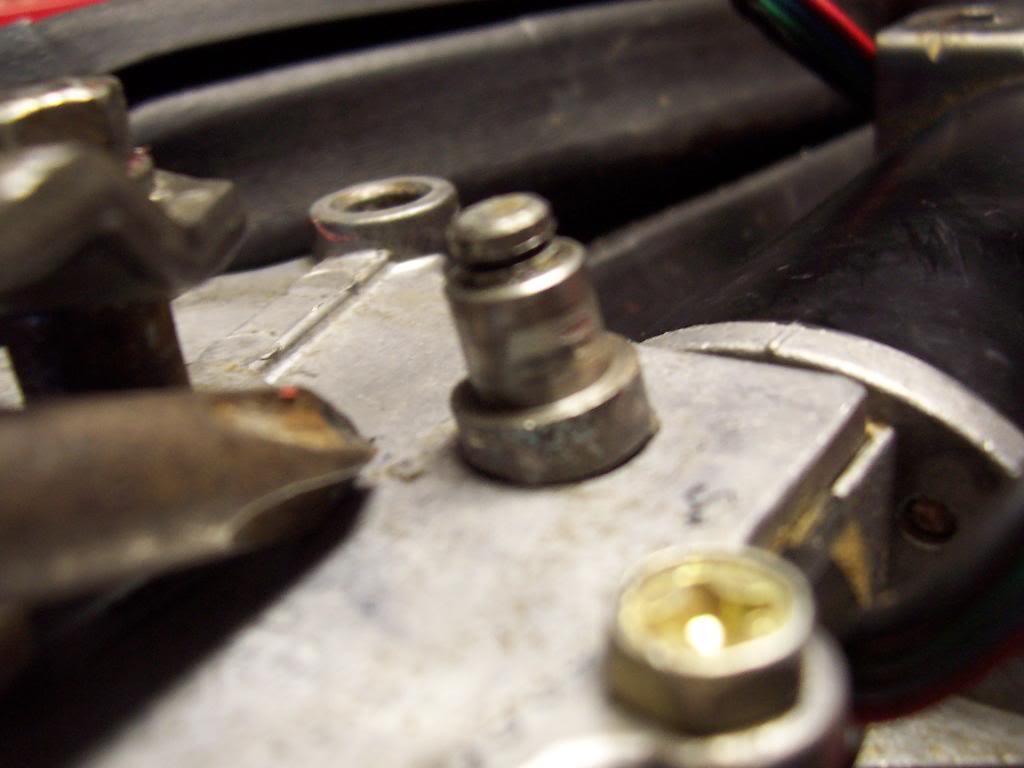
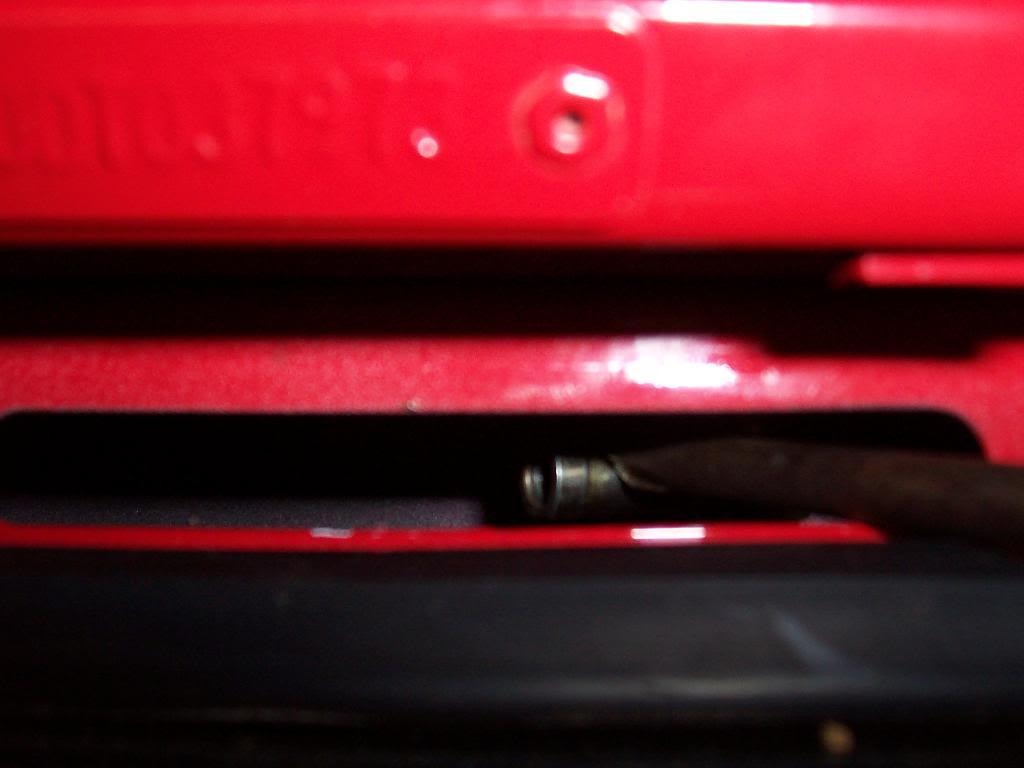
I think the problem has to do with where the the replacement windshield frames located the nutserts for the wiper motor. It seems like the wiper is about 2mm to close to the center of the jeep, causing the short motor to first pivot linkage to bind up.

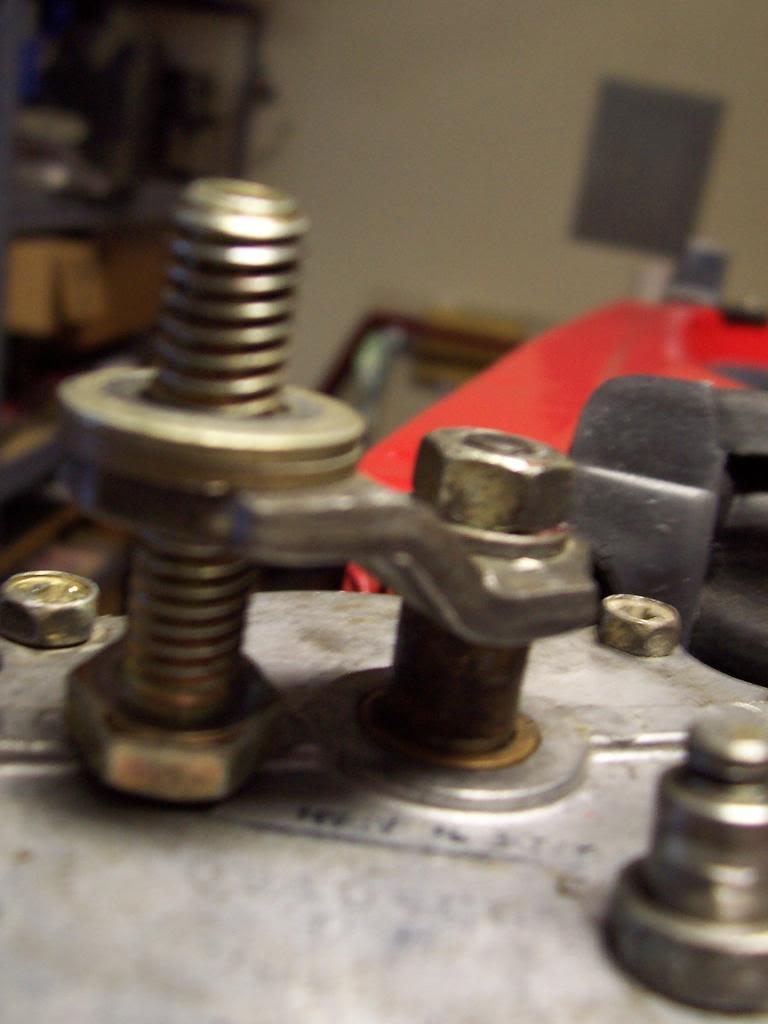
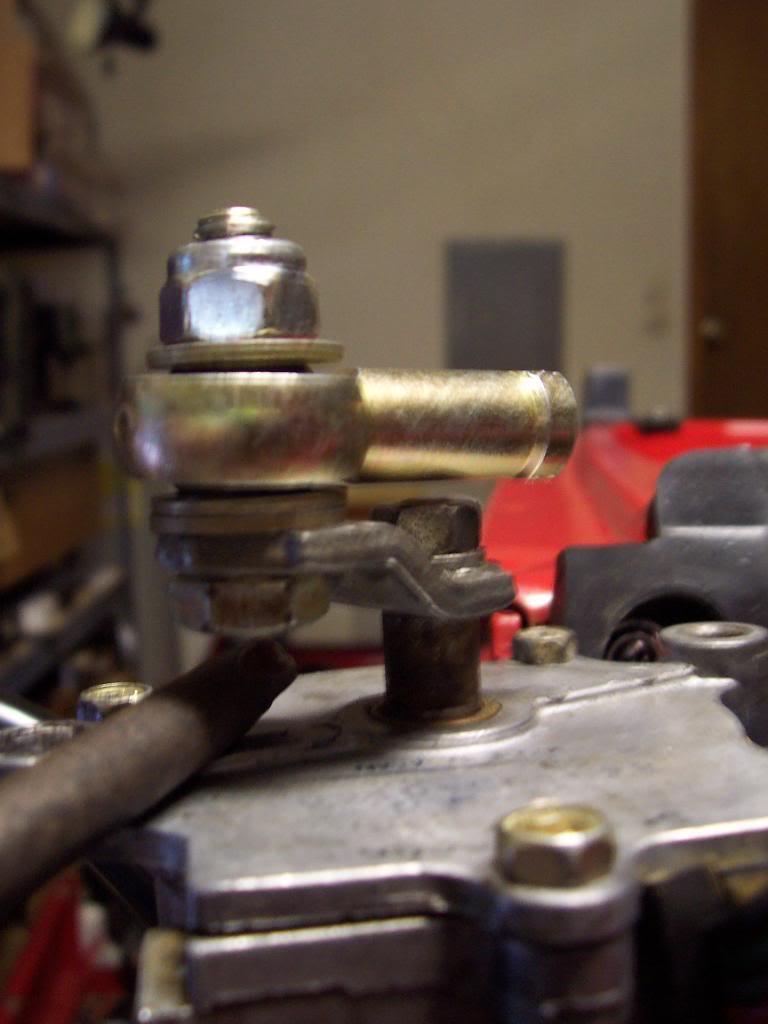
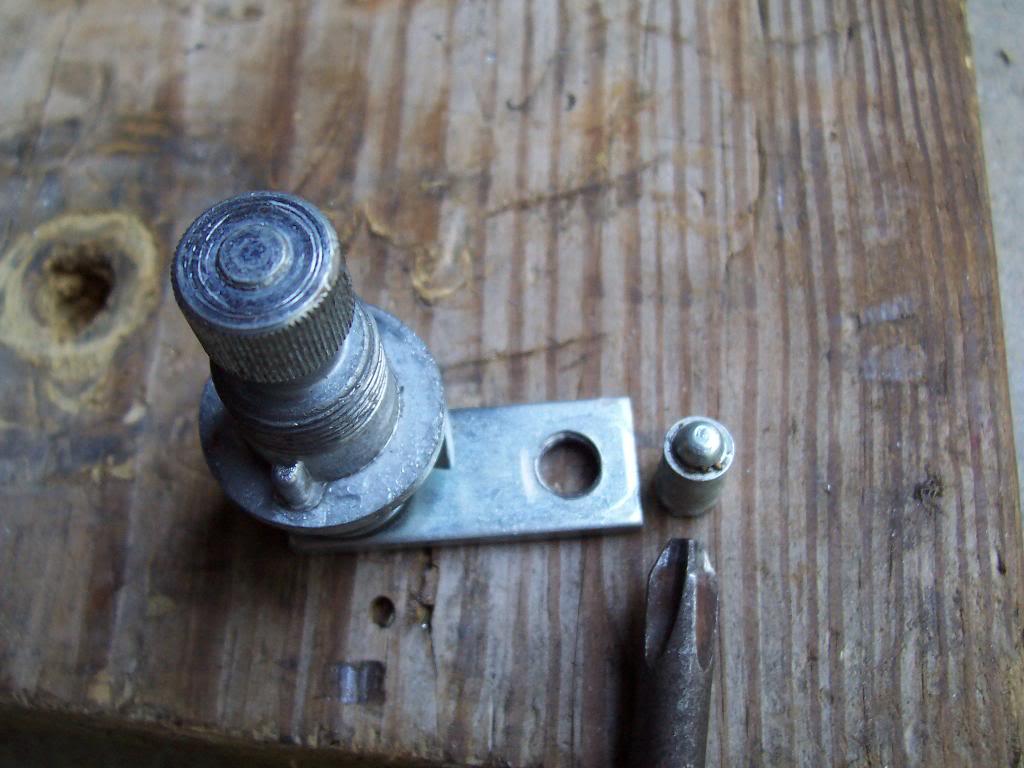
Since the motor has a slotted tab on one end, I drilled out the far opposite hole in the motor case to 3/8". I did not reuse the center mounting hole. I thought that by doing this, I could slide the motor over slightly to get the binding to stop. Well, it works, if you don't tighten the wiper motor mounting bolts down tightly. Now, instead of the linkage binding on the first pivot, the motor kinda "rocks" back and forth. If you play with the tightness/looseness of the mounting bolts, you can get all wiper "knocking" to stop. Also, the windshield frame will not flex at the pivot due to the linkage not binding.

But, this is not a solution. I figure loose mounting the motor will eventually lead to the nutserts that secure the mounting bolts to fail:(

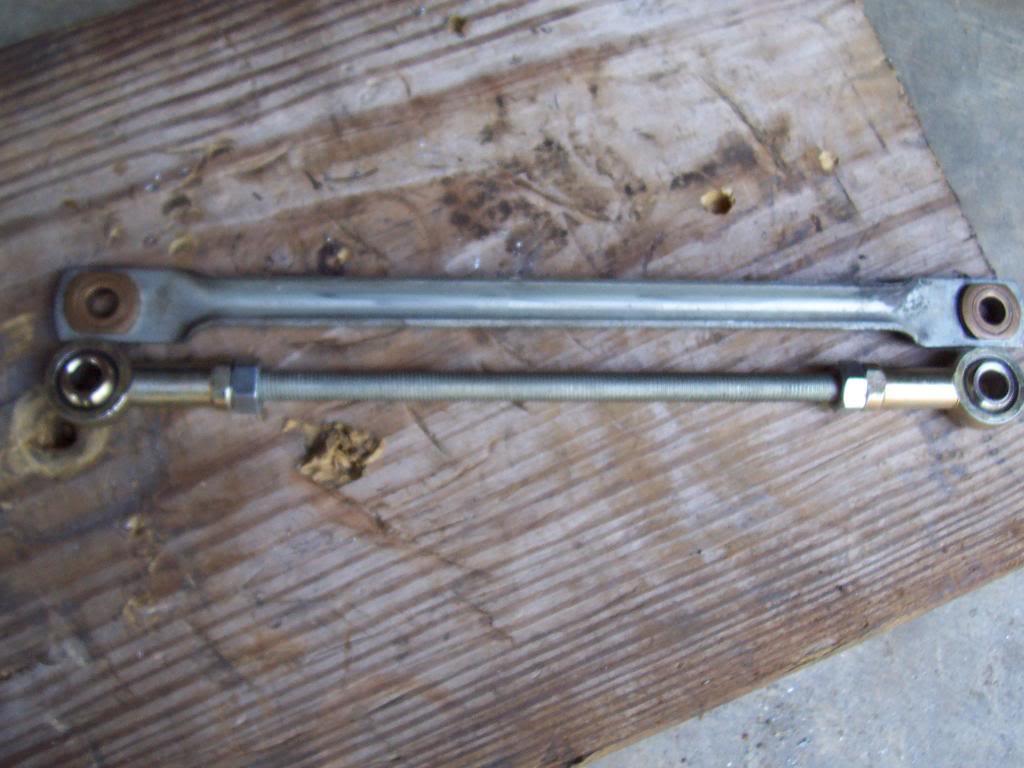
What I plan on doing to fix this problem is to make the short motor to first pivot linkage adjustable. I plan on cutting out about 1" out the middle of the arm, welding a piece of fine thread rod on ones side, and welding a threaded coupler on the other end. In this way, I can shorten the linkage as necessary to prevent the binding:thumbsup:

Anybody else solve the replacement frame/binding linkage problem:shrug:
 
While I was trying to eliminate this problem yesterday, I also experimented with the following:

I mounted the wiper motor to first pivot linkage every possible way, with no "correct" way found: 1) curve side down, 2) curve side up, 3) short linkage on top of long linkage 4) long linkage on top of short linkage, and every single combination, never could get it to stop binding:(

I tried "shimming" the motor up off of the windshield frame. I figured that by shimming the motor out, it would effectively shorten the motor to first pivot rod. I shimmed it with two washers, it still bound up. I figured that if I shimmed it out any further, I would have ran into angularity binding:(

I tried mounting the motor with and without the rubber isolator piece, no change:(

I tried mounting the motor with and without the "VIN" plate, no change:(


Instead of modifying the factory motor to first pivot linkage, I wonder if I could just build a new one out of a piece of threaded rod and two spherical ball ends. As long as the balls in the ends are the same "height" as the factory bushings, this should work. If the balls are too "tall", then they wont fit on the factory pivots:confused: I might be better off modifying the factory linkage:shrug:
 
I have that same knocking on one of my CJ7's. If you figure out how to "fix" it without replacing the whole windshield frame let us know!
 
I ordered two spherical rod ends today, they should be here tomorrow. I am going to attempt to build my own adjustable short wiper link. It is easier/quicker for me to try and build a new one vs. modifying the factory one. I will post up pictures and results, good or bad:fingerscrossed::fingerscrossed:

My first concern: I could not find a spherical ball end that has the same overall height as the factory bushing that is pressed into the arm. The rod ends that I ordered are approximately 9/64 of an inch too tall. I figure that i can grind/file the "ball" down to the correct height. Since there is not much of a misalignment issue, I am guessing this will work:shrug::fingerscrossed:

We shall see:fingerscrossed:
 
I inadvertently used longs screws in the windshield rubber on the bottom and they caught the arms and made noise as a result. Make sure those screws aren't too long too. I'm sure you've checked that, though.
 
I have tried everything that you did. I found that with my replacement windshield, not only did I have to move the motor 1-2 mm to he left, I also had to move it up slightly. When the rotating attachment point on the motor was at the 9 o'clock position it would be pushing the driver side pivot directly to the right. It would bind up often causing me to have to use a pen in the access hole to give it a shove every rotation. That got old very quickly. By moving the motor mounts up slightly, the short link.is never horizontal and both pivots in the same orientation. The wiper pivot is on its way downward toward 8 o'clock. Does that make sense?

At first the angle was a bit too much and the pivot on the motor would rub the top of he inside of the windshield frame, but it has come down and so far so good. Good luck. Let me know if I can explain what I did any better.

Dain
 
I inadvertently used longs screws in the windshield rubber on the bottom and they caught the arms and made noise as a result. Make sure those screws aren't too long too. I'm sure you've checked that, though.

That was the second thing I checked, right after i checked the defrost diffuser vent attaching screws :thumbsup::crazy::rotfl::thumbsup:
 
I have tried everything that you did. I found that with my replacement windshield, not only did I have to move the motor 1-2 mm to he left, I also had to move it up slightly. When the rotating attachment point on the motor was at the 9 o'clock position it would be pushing the driver side pivot directly to the right. It would bind up often causing me to have to use a pen in the access hole to give it a shove every rotation. That got old very quickly. By moving the motor mounts up slightly, the short link.is never horizontal and both pivots in the same orientation. The wiper pivot is on its way downward toward 8 o'clock. Does that make sense?

At first the angle was a bit too much and the pivot on the motor would rub the top of he inside of the windshield frame, but it has come down and so far so good. Good luck. Let me know if I can explain what I did any better.

Dain

That makes sense to me, especially after spending all day observing the "issue":crazy:

That's is interesting that yours was out of alignment vertically and horizontally. Mine is only out of alignment horizontally, thankfully:thumbsup:

When I go to slide the short arm over the driver side pivot, the hole in the pivot is too far over to the passenger side. I have to use a little pressure to get it on the pivot. Not a lot of force, just a little.

So, when my short arm pushes the pivot all the way over to the passenger side, the stroke is slightly too long, causing the little "bump stop" on the driver side of the driver side pivot to make forceful contact, causing the binding, and causing the sheet metal windshield frame to slightly flex. The driver side pivot bump stop does not make contact on the passenger side, during that rotation of the wiper motor. I tried trimming the bump stop, it got a little better. I removed the bump stop, bad idea. It now will extend the pivot too far over, and bind up completely. Good thing I have a spare pivot:eek:

The holes in my frame are just slightly off, so i can not drill new holes. The new holes would end up overlapping the existing holes. I could drill the existing holes out bigger, but then I would have to secure the motor attaching bolts with nuts, and I don't think there is enough room back there for me to get a wrench and nut in place:shrug:

Hopefully, my custom made adjustable short wiper link will fix my problem:fingerscrossed::fingerscrossed:
 
I made the holes slightly larger and went with nets to secure it. You can get wrenches in there. But it will drive you mad. I was using needle mose pliers to hold the nut to get it started. The third time taking it apart I got smarter and changed the orientation to have the bolt head on the inside and would hold it still outside of the frame while putting the nut on on the outside of the frame. Used lick washers to keep the bolt from spinning inside the windshield frame. Fun times for sure.

My bumpstops acted the same way. Double check that raising the motor (at least in the far side) won't help you. It just might. Good luck. The wipers have been the biggest pain in my but. I still don't fully trust mine and am scared to just let them run when it rains. I man the switch like a freak.

Good points, I will check to see if the vertical alignment of my motor has any bearing on my binding issue:thumbsup:

As for putting nuts back there, yep you are right, it can be done, but it wont be fun:angry: In similar circumstances in the past, I have placed the nut in the closed end of a wrench, taped the bottom side of the wrench so that the nut could not fall out, then slide the wrench in position. It would also be possible to silicone the bolt in place temporarily, then place the motor over the bolts:crazy:

I am hoping to leave the motor in place, though:fingerscrossed:. The thing that concerns me about drilling out oversize holes to adjust the motor position is that over time, with the torque of the motor working against just a nut/bolt clamp connection, the motor will start to move around again:( It might happen, might not. I hope that my adjustable arm works:fingerscrossed:

I received my spherical rod ends today, and the height of the ball inside the rod end is taller then the factory bushing that is pressed into the factory arm, meaning that the clip will no longer retain the arm to the pivot shaft:( But, I already planned on this and have a solution:D

I will update this thread with pictures and descriptions of what I am going to try to do, and the outcome, good or bad:popcorn:
 
Can't wait. My next step is to replace my windshield frame with an OEM one.
 
:popcorn: I know this is a PITA for lots of people, I always think I got off easy with my cheapo replacement frame never having had this come up :fingerscrossed:

And I assume you've already Rain-Xed the windhshield? That negates most of the need for wipers at all at any kind of speed in a CJ given the nice near vertical windshield orientation ;)

My CJ-7 that I sold to my buddy had two replacement windshield frames on it when I had it, and it never had this issue:crazy:

The Rain-X is probably a good idea, I will probably start to use it, too:thumbsup:

I had to go to a meeting last night, but I will work on this wiper issue tonight and post up pictures and results tomorrow:thumbsup:
 
Worked on my wiper fix last night, got it all installed, and it works perfectly:woot::woot:

Unforunately, I left my camera at work:(:angry:


I will take it all back apart, take pictures, and explain what I did step by step in the next few days:cheers:

So far, the modified arm woks perfectly, I used only common parts/tools, and this only cost me about $35.00, about the same cost as a replacement short linkage piece:thumbsup:
 
I'm gonna need some pics and a third grade level writeup on what you did!
 
OK, here is a description of what I used/did to get my wipers to function correctly on an aftermarket windshield frame. This worked perfectly on my Scrambler, your results may vary.

(x2) spherical rod ends, NAPA part #BK 7321128
(x1) length of FINE thread threaded rod (rod ends have fine threads)
(x2) 5/16 nylon lock nuts
Various 5/16 bolts, washers, etc (I forgot to write down the lengths)

Grab your two spherical rod ends, threaded rod, and your old wiper link. Make a new wiper link that is almost the same length as the original. Cut the threaded rod a little short so that you can shorten your new link arm shorter then the factory link. You have over 1" of threads inside the rod ends, so cut the threaded rod about 1/4" too short to leave some adjustment room.

01414-1.jpg


Since the spherical rod ends are taller then the factory bushings, the posts that hold on the factory short arm must be cut off.

You can use a puller and pull off the wiper motor arm and cut off the factory shoulder/stud. Drill the hole out to 5/16, and insert a bolt. Install your bolt before reattaching the wiper arm, as it will be impossible to put the bolt in place after the wiper arm is reinstalled on to the wiper motor.

Picture of the part that is cut off of the wiper motor arm.

01120-1.jpg


Picture of the arm reattached to the motor. NOTE - You must install the bolt with the head in this orientation for proper clearance. If you go the other way, the bolt threads and/or nut will make contact with the windshield frame, binding the system up. Install your bolt BEFORE reattaching the wiper arm, as it will be impossible to put the bolt in place after the wiper arm is reinstalled on to the wiper motor.


NOTE - Also note the two washers placed on the bolt. You must use these washers to space up the rod end to clear the motor case. You can see on the factory stud (which you removed previously, see above picture) how they moulded a "shoulder" on to the stud to space up the arm.

01218-1.jpg


Next step, install one of your spherical rod end on the motor. Tighten the nylon lock nut until the rod end binds, then back the nut off slightly. You want the rod end to pivot and rotate smoothly, but not loose. You must install this rod end, by itself, to the motor first. You can not install your complete, new arm all at the same time. The hole in the frame is not big enough to allow clearance for the entire assembly to be fed through at one time.

01512-1.jpg


You can now bolt the wiper motor.rubber cushion/VIN plate back on to the windshield frame.

01611-1.jpg


Next I modified the driver's side wiper pivot. I cut off the factory shoulder and drilled the hole out to 5/16.

01317-1.jpg


Now for the fun part. Remove the defrost diffuser piece. You can see the spherical rod end attached to the motor, screwdriver is touching it.

00142-1.jpg


Thread your threaded rod into the wiper motor rod end. I red lock tight-ed the wiper motor side jamb nut to the threaded rod BEFORE installing the rod. You might have to use a screwdriver, or similar object, to hold the spherical rod end still while trying to thread in the threaded rod. Make sure that you cut your threaded rod square, and remove any burrs, to ease this installation. Picture of the installed threaded rod.

00245-1.jpg


Next, loosely install your other spherical rod end. Leave the jamb nut loose for now.

00340-1.jpg


Before installing the driver side wiper pivot, tape your nylon lock nut to the back of the pivot arm. You can reach it with a box end wrench, but if you tape it in place, it will be easier to get the bolt started.

00438-1.jpg
 
Last edited:
Driver side pivot installed, with the short arm and long arm. You can just see the nut that faces the inside of the frame. Watch the length of your bolt, excess thread could scrape the inside of the windshield frame.

00630-1.jpg


Picture from the top. I used a "button head bolt" to make sure that I had clearance. A hex head bolt MIGHT make contact with the edges of the access hole.

NOTE - This picture shows the linkages installed CORRECTLY. Place the short linkage arm on TOP of the long arm. If you do not install them as shown, the long arm gets in a slight bind. The long arm must be placed below the short arm to keep it operating in a level plane. The excess thickness of the spherical rod end is just enough to cause some binding. PLACE LONG ARM BELOW THE SHORT ARM.

00729-1.jpg


And finished.

00925-1.jpg


And now my wiper work perfectly, no binding or clunking. This might not be the BEST way to fix them, but it worked perfectly for me.

If you attempt this, stop at each step and check for clearance. There is not much room inside the frame, so check as you go. For example, after reinstalling motor with the spherical rod end attached, turn the motor on. Make sure it rotates freely and is not hitting anything. After assembling your short arm, place it on the driver side pivot by itself. Adjust the over all length of the short arm to prevent it from binding BEFORE installing the passenger side arm. Take your time adjusting your short arm. Watch the "bump stops" on the driver side pivot. Note which side it "hits" on, and lenghten or shorten your arm as necessary to prevent contact.

I will update this thread from time time. If I have any problems with my set up, I will post them up. As of right now, they work perfect. I let them run for 10 minutes straight, so far so good.

NOTE - This is for informational purposes ONLY. Use at your own risk.
 
Last edited:
Great stuff! :thumbsup:

One thing I think needs a bit of clarification, the picture where you show what is cut off the wiper arm is AFTER you cut it off. The cut is so clean, I was trying to figure out what it was mounted on and why it was slightly out of plumb until I realized the actual arm is off the screen to the left. I've not been in there for a while messing with the wipers, so most people probably realized it immediately. I'm slow and I know it....

No problem, I am kind of taking for granted that i messed around with the wiper system for about 8 hours trying to figure this out:cheers:


In picture #2, you can see the wiper arm that is attached to the wiper motor. It is a splined arm, held on to the shaft with a metric nut. I removed the nut from the wiper motor shaft, used a 2 jaw puller, and puller the wiper motor arm off. The piece I cut off is attached to this wiper motor arm. I cut this part off the wiper motor arm with a dremel. After cutting this piece off, I center punched where it used to be, and driller through the wiper motor arm with a 5/16 bit.

Does that clear it up:shrug: I wish I would have taken a picture of this part before i modified it, but I forgot. If you pull the wipers apart, it should become apparent, I hope:fingerscrossed:

Just keep asking questions and I will try to explain:cheers:


EDIT - The piece I cut off used to occupy the space where the threaded part of the bolt is sticking up through the arm. The factory short arm slid over this stud, and was secured with a little clip.
 
Last edited:
Back
Top