
Bought an aluminum valve cover for my 85 Jeep Scrambler 4.2 258 6 CYL recently. What modifications will I have to do in order to make it fit right? I have read on previous posts about drilling with a tap and die set on the head...not to comfortable about that. And other posts say just buy a screw that shorter in size to compensate. Please expound on instructions to instal cover....Thank you

You are using an out of date browser. It may not display this or other websites correctly.
You should upgrade or use an alternative browser.
You should upgrade or use an alternative browser.
aluminum valve cover
- Thread starter big_o_
- Start date

mysunnshine
Legacy Registered User
- City
- Phoenix
- State
- AZ
Note to self: If you drill too far, it goes into the water jacket.....

- City
- God's Country
- State
- AR
Yeah, that's why instead of drilling I just used shorter bolts.Note to self: If you drill too far, it goes into the water jacket.....
You can't see the holes that need to be tapped till you take off the plastic cover
DirtyB Where did u bolt down the drivers side of the valve cover? I bought an aluminum one with the 4.2 letters and there is no lip to attach it to the studs like the plastic one had. The two holes on the head on the drivers side are not threaded.

- City
- Cave Creek
- State
- AZ
Those are the ones you need to thread - you'll need a bottom tapping bit and a bit holder, they run about $25 total and I really had to search around to find the bottom tapping bit...Ace hardware I think ended up having it. I had a couple of cow magnets:

that I put near the holes as I was threading them to help collect any shavings. (perks of the job, I guess) Didn't turn out to be too bad at all. I've read that someone just put a bunch of axle grease nearby to collect shavings, as well, then cleaned up the grease.
The hardest part I found was sealing the cover, mostly just being patient while the RTV set up and torquing down slowly to specs over a 24hr period, then rechecking periodically. Not too bad of a project and I'm very pleased with the results. I've done the cover, RMS, and oil pan gaskets and I hardly leak at all these days.
that I put near the holes as I was threading them to help collect any shavings. (perks of the job, I guess) Didn't turn out to be too bad at all. I've read that someone just put a bunch of axle grease nearby to collect shavings, as well, then cleaned up the grease.
The hardest part I found was sealing the cover, mostly just being patient while the RTV set up and torquing down slowly to specs over a 24hr period, then rechecking periodically. Not too bad of a project and I'm very pleased with the results. I've done the cover, RMS, and oil pan gaskets and I hardly leak at all these days.

- City
- Port Allen
- State
- LA
I've seen many people say that they've had to drill and tap the two holes on the right side, but mine came that way. Possibly the PO did it.
You can see in this picture the three holes on one side.
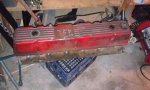
This picture shows the two on the other side that you may have to tap.
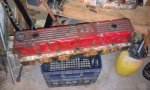
There's also one on each end.
You can see in this picture the three holes on one side.
This picture shows the two on the other side that you may have to tap.
There's also one on each end.
Going to cut the two studs off the rocker arm bridges and reuse them. Tap the two holes not drill on the drivers side and use a shorter screw size. Any suggestions on the tap size for the holes on the drivers side? Using the "Right Stuff" as a sealer with a cork gasket.
- City
- God's Country
- State
- AR
Nope, I left the studs. All I did was thread the two holes on drivers side and slap it on there. As stated, take your time with the gasket and torquing it down. I used RTV and don't have any leaks, but some folks say to use the right stuff.
I RTV'd gasket to cover and let it sit 24 hours, then RTV'd head and put cover on, and lightly tightened bolts, waited 24 hours, then torqued to spec.
I RTV'd gasket to cover and let it sit 24 hours, then RTV'd head and put cover on, and lightly tightened bolts, waited 24 hours, then torqued to spec.
Hey guys I am doing this same swap (already tried another plastic cover and it was garbage). Can anyone recommend an aluminum cover (there are several out there) with the least amount of tapping/drilling required? I have also read cork + RTV works best. Does anyone have the specs on how much torque I put into the new bolts? if anyone has any experience with this, would be much appreciated!
- City
- Cave Creek
- State
- AZ
I used the cheapest aluminum cover I found on eBay: CJ valve cover 4.2. It comes with instructions for tapping and torque. No matter what, these days you gotta thread. I only had to do two holes that were already drilled, quick and easy. I had a cattle magnet that I used to try to keep the shavings out of the head.
I went with a FelPro cork gasket, it has a thin metal strip embedded in the cork. The kit comes with cork, but I didn't install correctly so I had to get a new gasket. Don't know if the cork supplied with the kit works, but I expect it would.
If you want more details on installation, I'd be happy to post up what worked for me.
I went with a FelPro cork gasket, it has a thin metal strip embedded in the cork. The kit comes with cork, but I didn't install correctly so I had to get a new gasket. Don't know if the cork supplied with the kit works, but I expect it would.
If you want more details on installation, I'd be happy to post up what worked for me.
- City
- God's Country
- State
- AR
I used the cheapest aluminum cover I found on eBay: CJ valve cover 4.2. It comes with instructions for tapping and torque. No matter what, these days you gotta thread. I only had to do two holes that were already drilled, quick and easy. I had a cattle magnet that I used to try to keep the shavings out of the head.
I went with a FelPro cork gasket, it has a thin metal strip embedded in the cork. The kit comes with cork, but I didn't install correctly so I had to get a new gasket. Don't know if the cork supplied with the kit works, but I expect it would.
If you want more details on installation, I'd be happy to post up what worked for me.
Yep, 4.2 cheapie worked fine for me too. They're probably all made in the same place and you pay for whatever logo is on there. I used the supplied cork gasket and no leaks since I put it on in 2005(ish)

AJM81CJ8
Door Breaker
- City
- Kalamazoo
- State
- MI
I used the cheapest aluminum cover I found on eBay: CJ valve cover 4.2. It comes with instructions for tapping and torque. No matter what, these days you gotta thread. I only had to do two holes that were already drilled, quick and easy. I had a cattle magnet that I used to try to keep the shavings out of the head.
I went with a FelPro cork gasket, it has a thin metal strip embedded in the cork. The kit comes with cork, but I didn't install correctly so I had to get a new gasket. Don't know if the cork supplied with the kit works, but I expect it would.
If you want more details on installation, I'd be happy to post up what worked for me.
Walker- for what applications was the fel-pro gasket that you used? The original plain cork one on mine is leaking and I want to replace it.
Thanks
- City
- Cave Creek
- State
- AZ
I just picked one up for an '81 CJ with a 4.2 - Advance Auto Parts, I think. The holes all lined up with the new cover, so no worries there.

- City
- Dillon
- State
- Co
Yeah the holes are already there. Just tap and go. I did not use the cork gasket because I had no good luck with it 3 times before. I used "the right stuff" and can't believe that there are no leaks. As well as buying the cheapest metal cover.
I recently replaced my old leaky plastic cover with the "4.2" aluminum cover. On my 81 I had three existing threaded 1/4" holes on the passenger side. On the drivers side I had two existing holes that were not threaded. I was able to tap them with a 5/16" bottom tap. The holes were slightly oversize for a 5/16" tap, but, I was still able to put enough thread on them. I did need to drill and tap 1/4" holes for the front and back. If you are unfamiliar with drilling and tapping just find a chunk of scrap metal and practice on it. It's really not that difficult. I initially tried a cork gasket but it promptly leaked. Took that off and went with the Fel-Pro and it has so far not leaked.