• Notice for iPhone users: DO NOT use the image size reduction option when uploading photos to the forum. This causes portrait images to post as landscape. We have added a warning to the image insert pop-up as well.

1984 SL, Yard Scrambler II

Base plus initial to get the 28 degrees. It had a 10 degree vacuum advance to give it 38 degrees of total advance all in by 2800rpm.

Sent from my SM-G920V
 
Go put it on a Dyno and send the bill to Jeep Addict, he told me he approves any decision that we make on here for him :rotfl:

Seriously tho , appreciate detail like this. It makes you think that when you have a good running stock CJ all of the stuff that has to be working properly to achieve such a result. :bow: :bacon:
 
Go put it on a Dyno and send the bill to Jeep Addict, he told me he approves any decision that we make on here for him :rotfl:

Seriously tho , appreciate detail like this. It makes you think that when you have a good running stock CJ all of the stuff that has to be working properly to achieve such a result. :bow: :bacon:

Simmer down Baconator
 
Base plus initial to get the 28 degrees. It had a 10 degree vacuum advance to give it 38 degrees of total advance all in by 2800rpm.

Sent from my SM-G920V

Now that I have it running really well, and both curves within factory spec's, I think I can play with it some to see how much more responsive it becomes :thumbsup: :cheers:

I wanted to at least get a good base line, which I now have, before I screw it up :smokin:
 
Go put it on a Dyno and send the bill to Jeep Addict, he told me he approves any decision that we make on here for him :rotfl:

Seriously tho , appreciate detail like this. It makes you think that when you have a good running stock CJ all of the stuff that has to be working properly to achieve such a result. :bow: :bacon:

I would much rather mess with the stock stuff, at least I kind of know what it needs to be, and the FSM is helpful :cheers:

This made in China crap with no instructions makes it more difficult, one size fits all my azz :angry:


Yes, an all expense paid trip to visit mysunnshine, and let him tune this Scrambler, sounds like a great idea :popcorn::popcorn:
 
OK, time for a weekend update. Not the most interesting of stuff to post, but made great progress, and probably found/fixed the biggest performance problem.

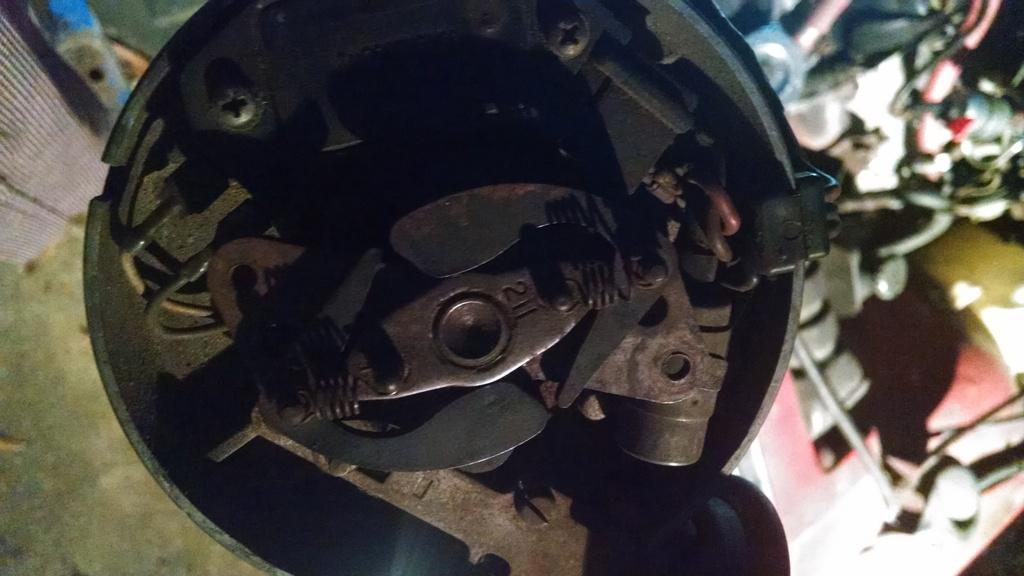
I "obtained" this distributor from work. It came out of an early 80's Olds/Pontiac. I did not realize this at first. I had to call the mechanic to ask him why everything was backwards compared to my AMC/GM distributor!!!!!!!

Anyway, counter clockwise rotation distributor I stole parts off of:

1_zpse60ac8cm-1.jpg


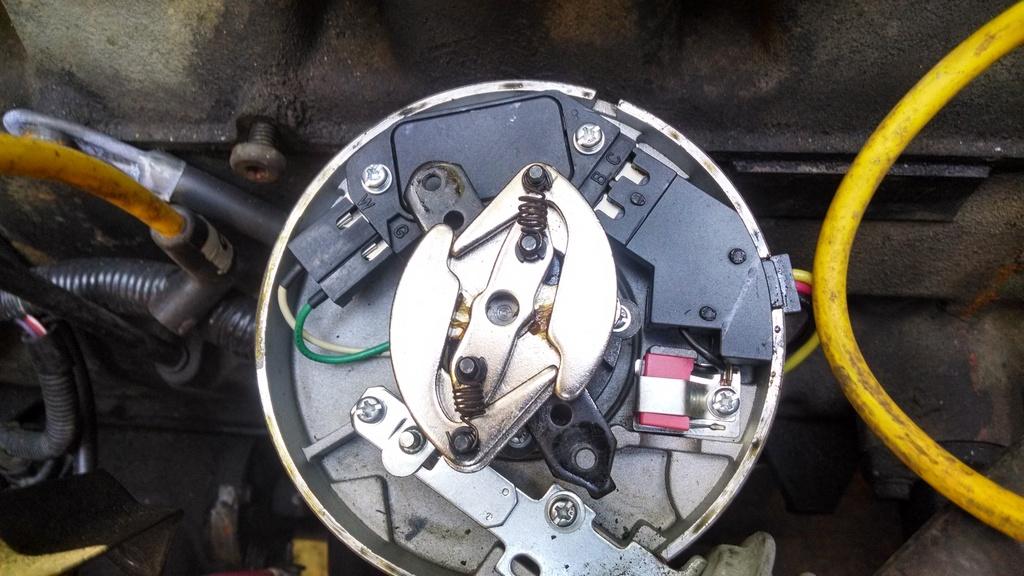
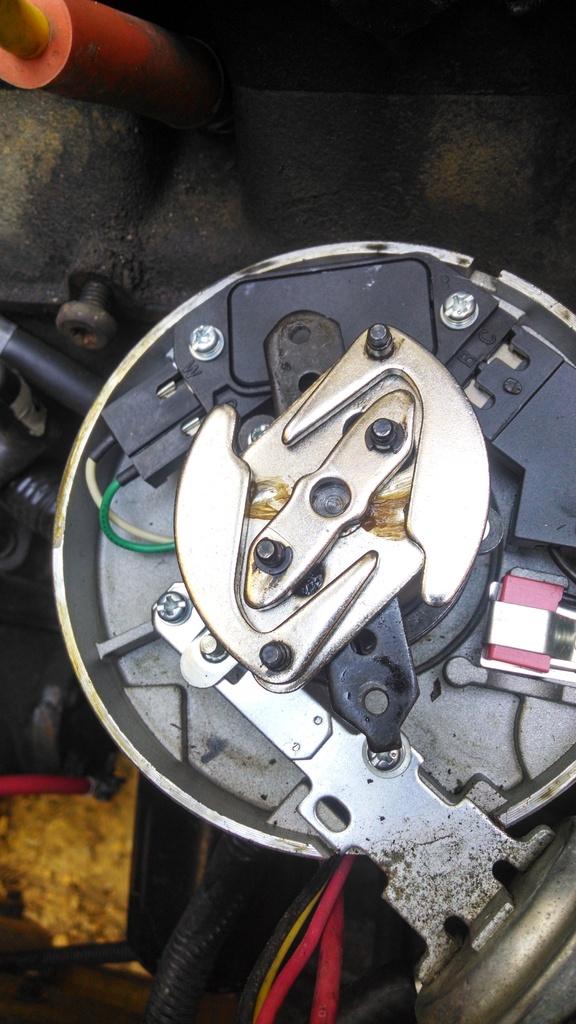
Clockwise GM/AMC distributor, Made In China. In this picture, the rusty used springs are installed.

2_zpssgxtv27e-1.jpg


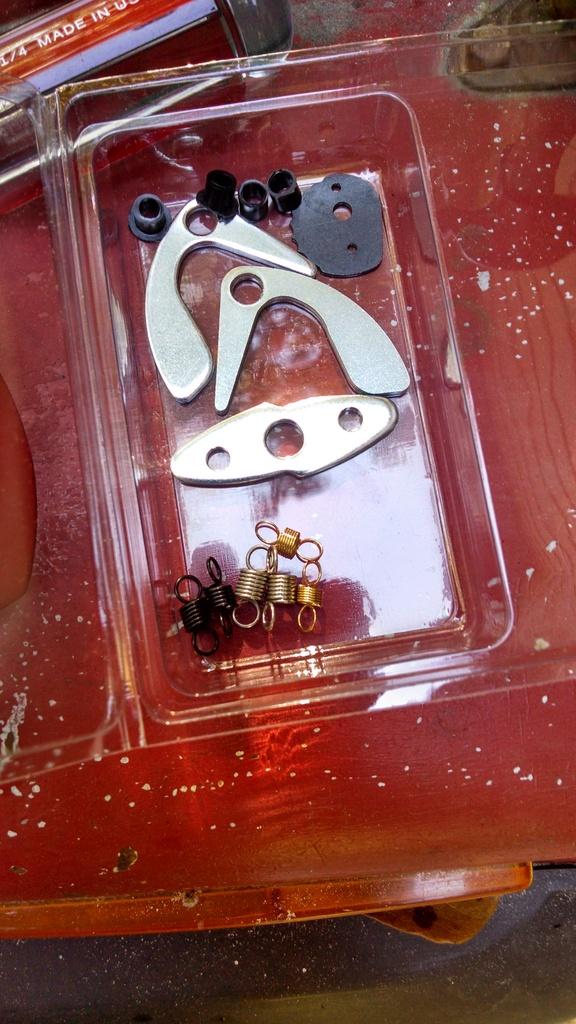
Pieces/parts that came with the Accel kit:

3_zpshrpowqgp-1.jpg


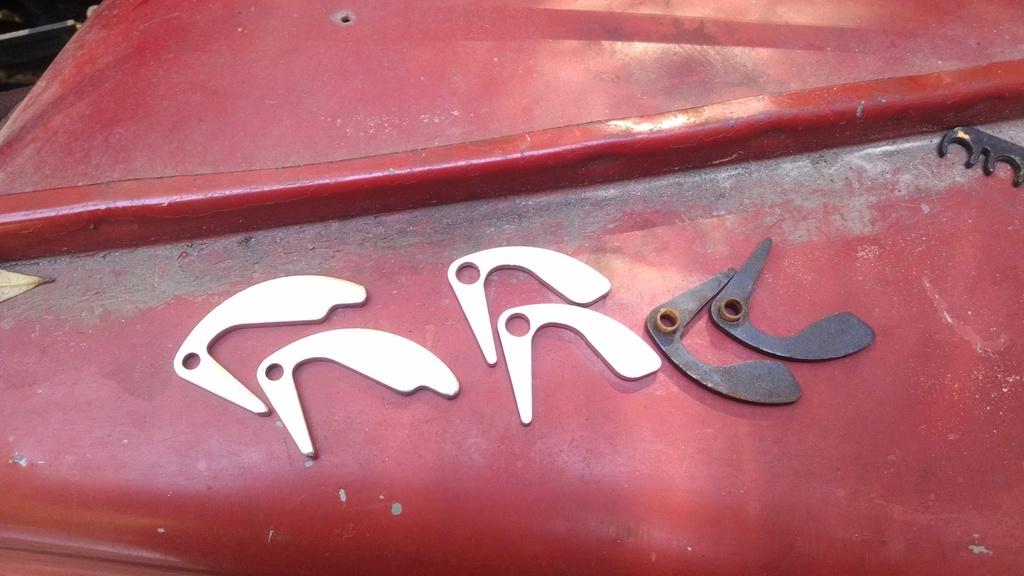
Notice the difference between the shiny Accel/Made in China weights, vs the stock GM weights. I ended up using the stock GM weights, after carefully reversing the bushings. More on this in a second.

7_zpshdex0lje-1.jpg


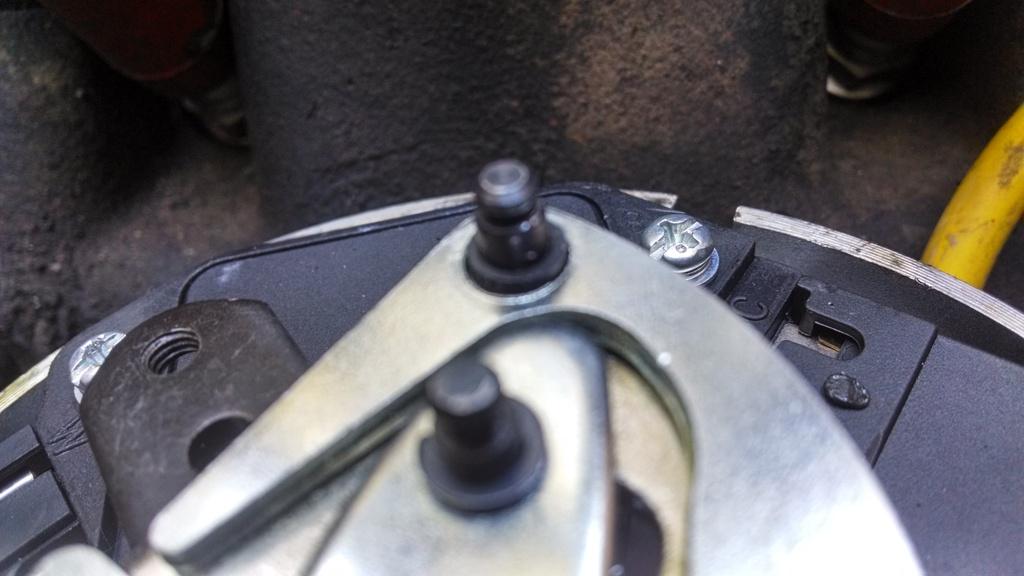
The Accel weights require installing the supplied bushings on the stock posts. They did not fit worth a crap:

5_zpsnw7osvb8-1.jpg


Even after trimming the bushings, I could not reuse the machined slots for the "e" clips:

6_zps2idgpuwj-1.jpg


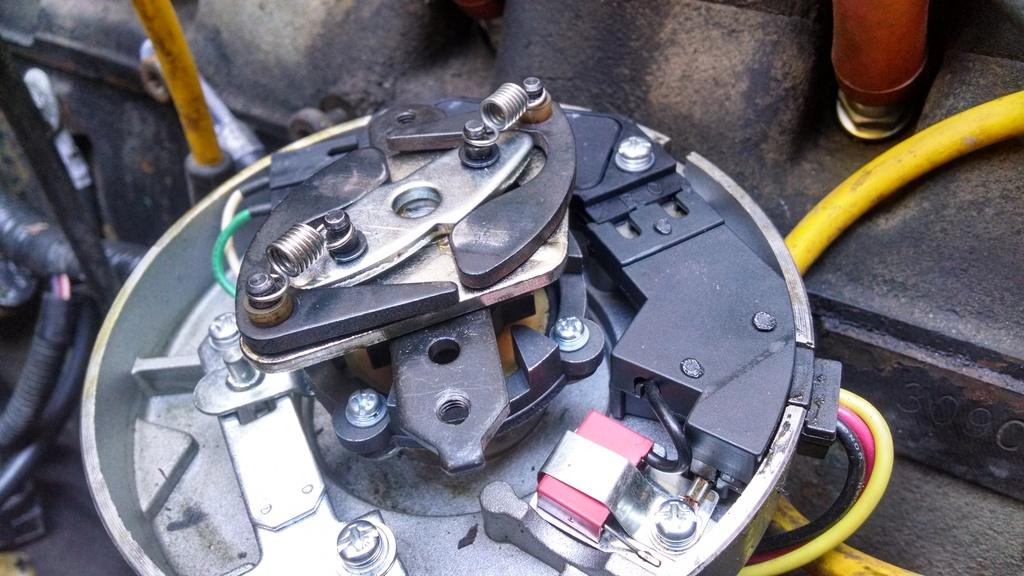
So, I reused the GM weights. The GM bushings stop just short of the machined spring slot, so the springs keep the weights from flying off:

8_zpsqhnpf5ee-1.jpg


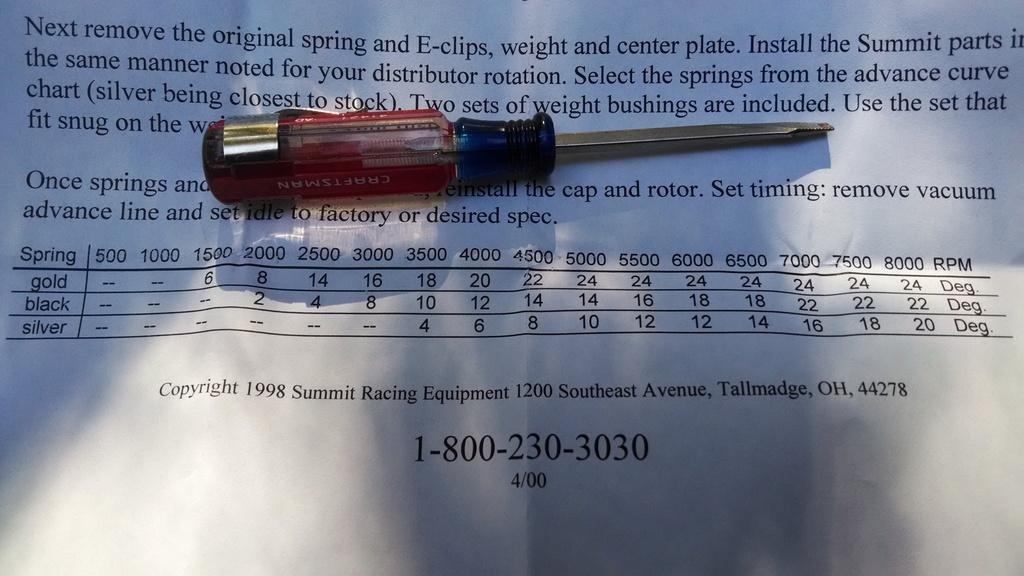
In the above picture, you can see that I installed the "Silver Springs", here is what the paperwork says about them:

4_zpsdolqifsr-1.jpg


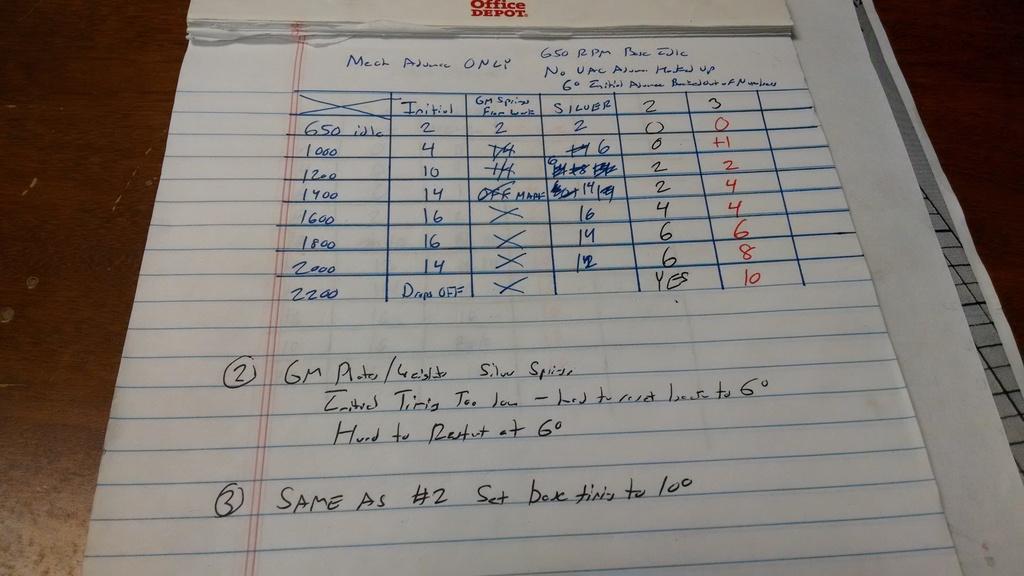
Here are some of my notes:

10_zpsgbkx6cs5-1.jpg


I ended up using the used GM weights and the Silver Springs. I did have to set the base timing to 10, it would not start easily at 6. More on this in a second. With that, close to 20 degree advance.

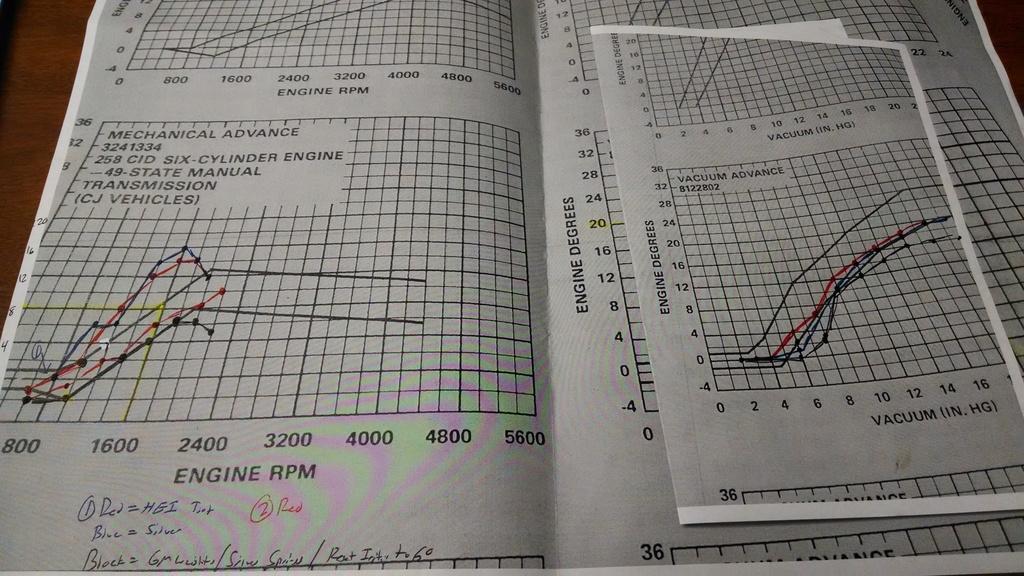
And charted out. I will make a new chart for future changes, too many lines on these now:

9_zpsawcoy5g7-1.jpg


You will see that each chart has a red line between the pre-printed stock black lines. So, close to stock, but also both are near the bottom of the acceptable ranges, so room for improvement.
 
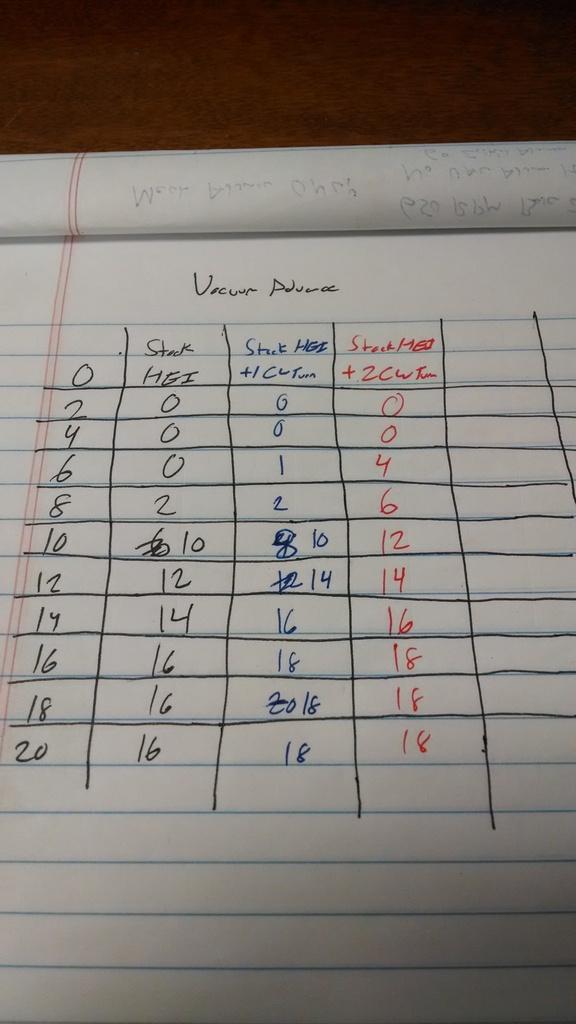
Ok, with the mechanical advance good, I fiddled with the vacuum advance, and made some gains there:

11_zpsg7amcw2d-1.jpg


The stuff in red is the last change. Much more linear advance curve. The Scrambler was driving better, but still not "right".

Before changing plug wires and plugs, I wanted to fix the leaking valve cover gasket. I did try the old "pull one wire off at a time" trick no change.

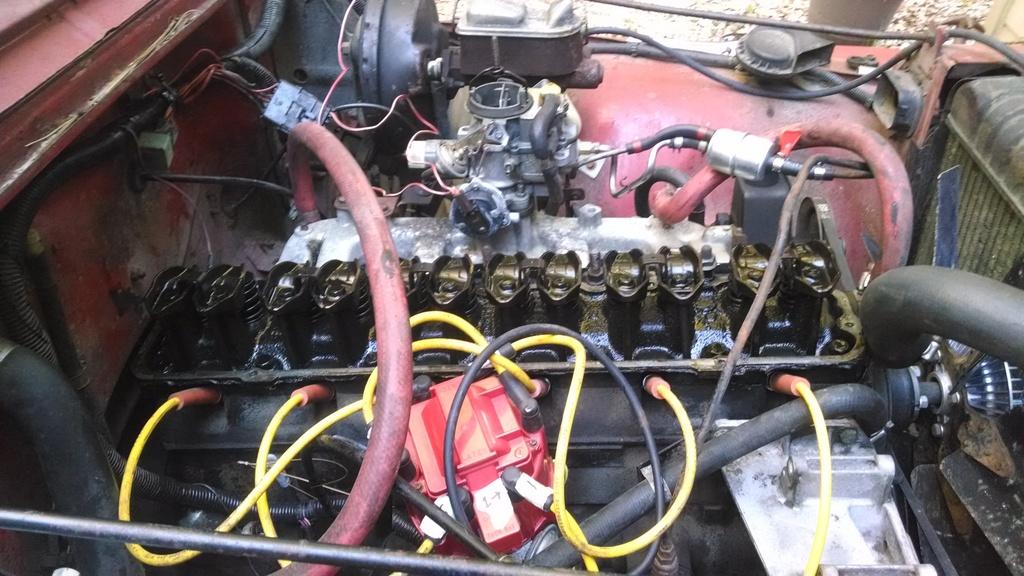
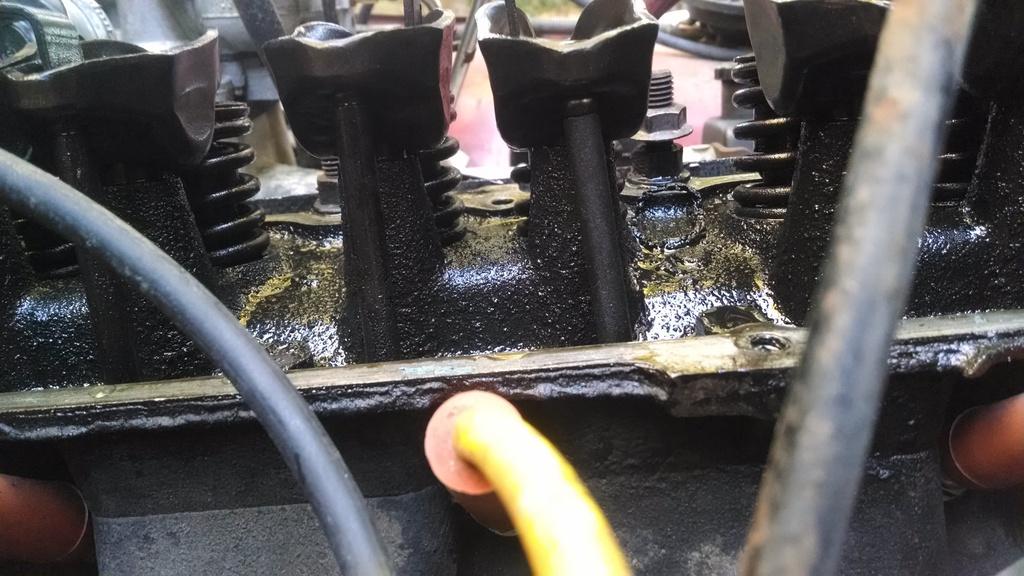
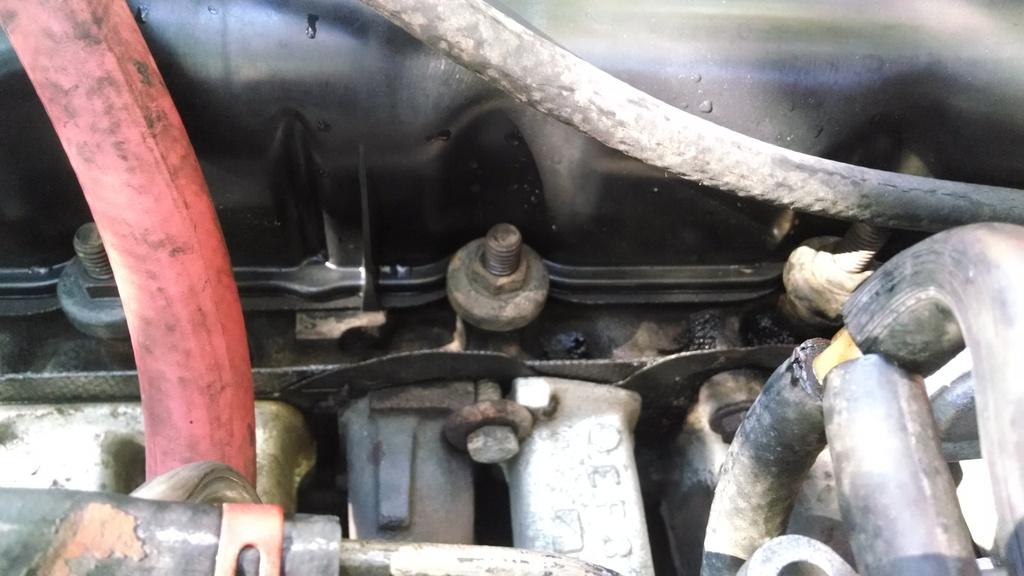
But, when I pulled the valve cover off, my problem was staring me in the face:

12_zpst8ig62h9-1.jpg


Hard to see in that one, this is a bit better:

14_zpsakv31seq-1.jpg


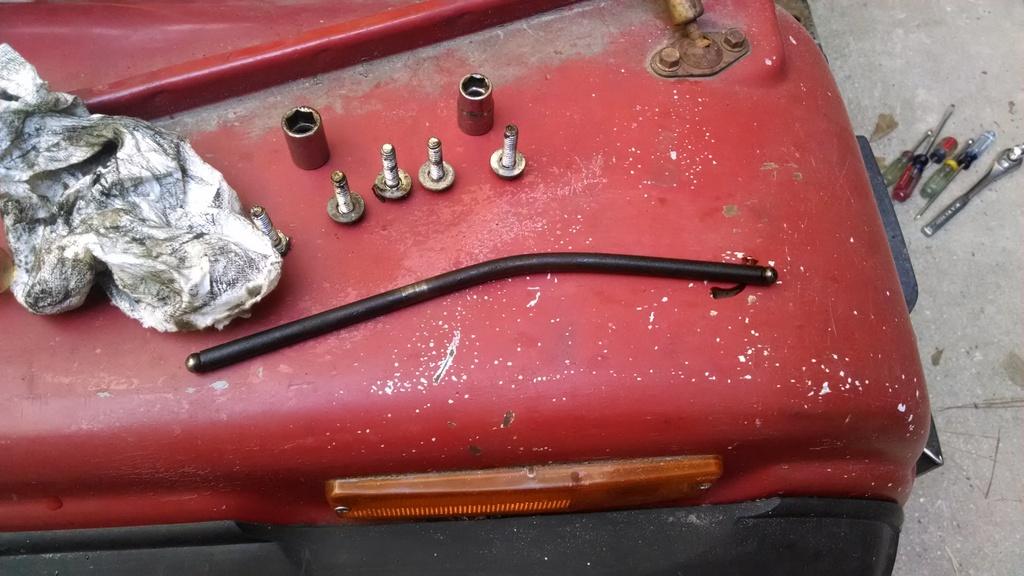
And this one should easily be interpreted:

15_zpsg2z53y2n-1.jpg


Yep, push rods should be straight. Anyway, that was the only bent push rod, so $3.95 later, we were back in action. I ran the engine briefly without the valve cover, after installing the new push rod, everything was moving/looking the same. Good flow of oil out the tops of the pushrods/rockers, made a big mess!!!!!!!!!!!

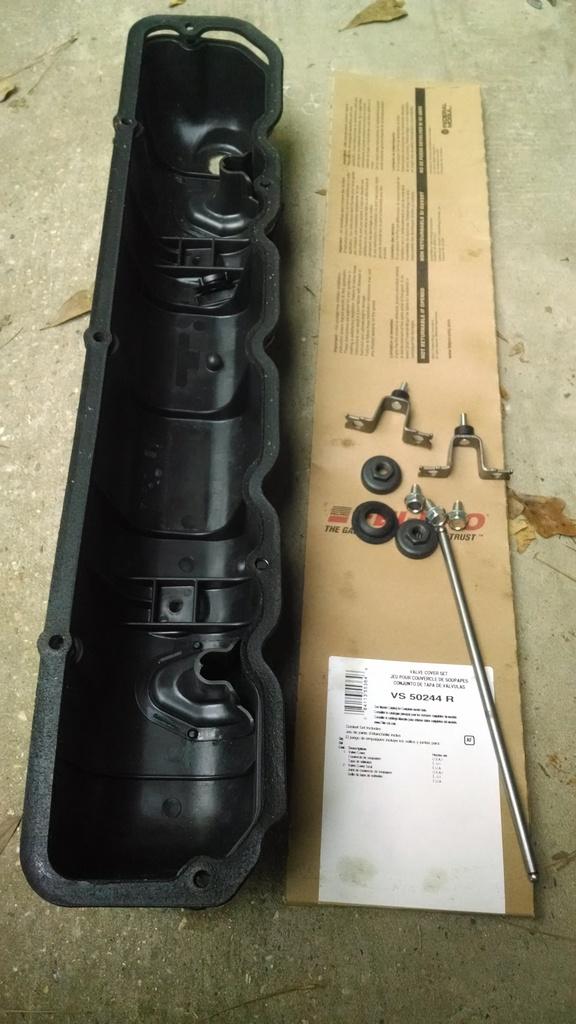
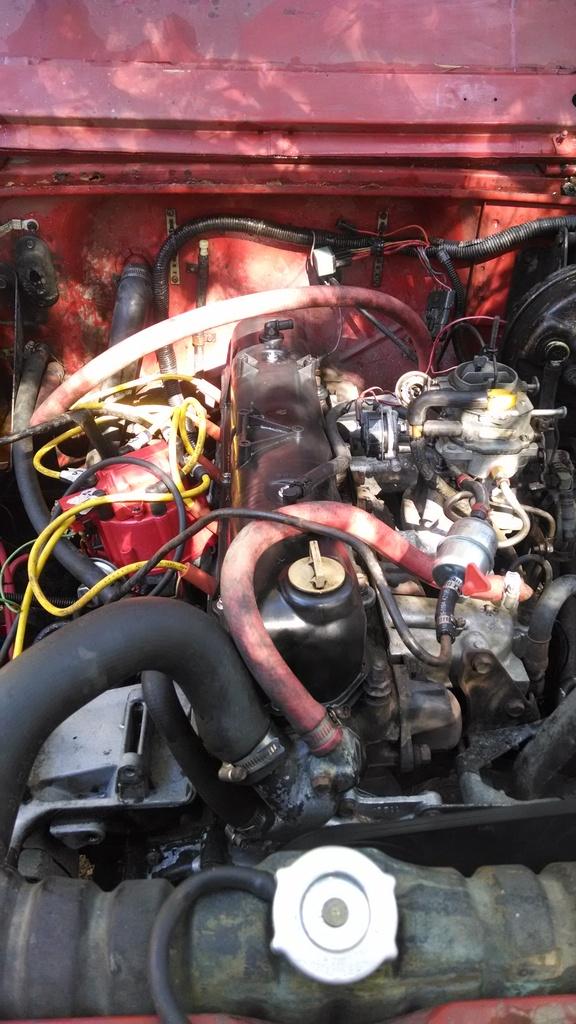
Cleaned up the mess, installed a new Mopar plastic valve cover and some sort of wierd valve cover gasket:

16_zpsyebucfcf-1.jpg


The previous owner had did not use the studded rocker bridges that go through the center of the valve covers, probably a good reason why it leaked. They just threaded bolts through the holes to seal them, not a good idea IMO:

13_zps4bwhkylg-1.jpg


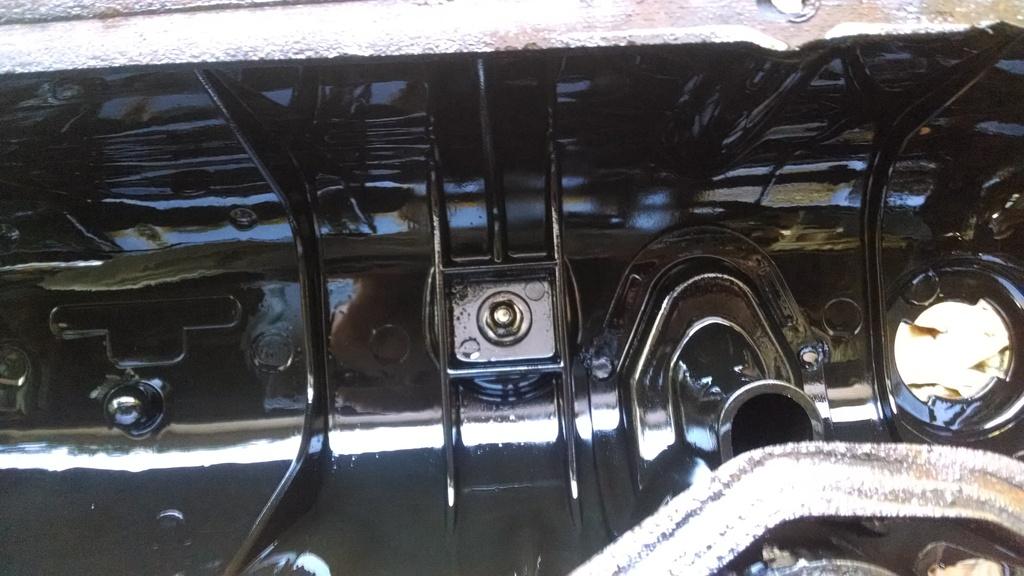
I also installed all five of the special nut/washer/clamp things on the driver side. The thread on to the head studs, and provide good clamping on this side:

18_zpsucs9rtic-1.jpg


Woila, new, leak free (for now) valve cover:

17_zps1xlnsnru-1.jpg


So now, all 6 cylinder are working properly, valve cover is not puking oil out all over the place, and the timing/curves close to stock, lets road test this jewel.

Much, much, much, much, much, much, better. Now, obviously getting all 6 cylinders working correctly was probably the biggest cause for improvement. But, the timing stuff greatly helped, too.
 
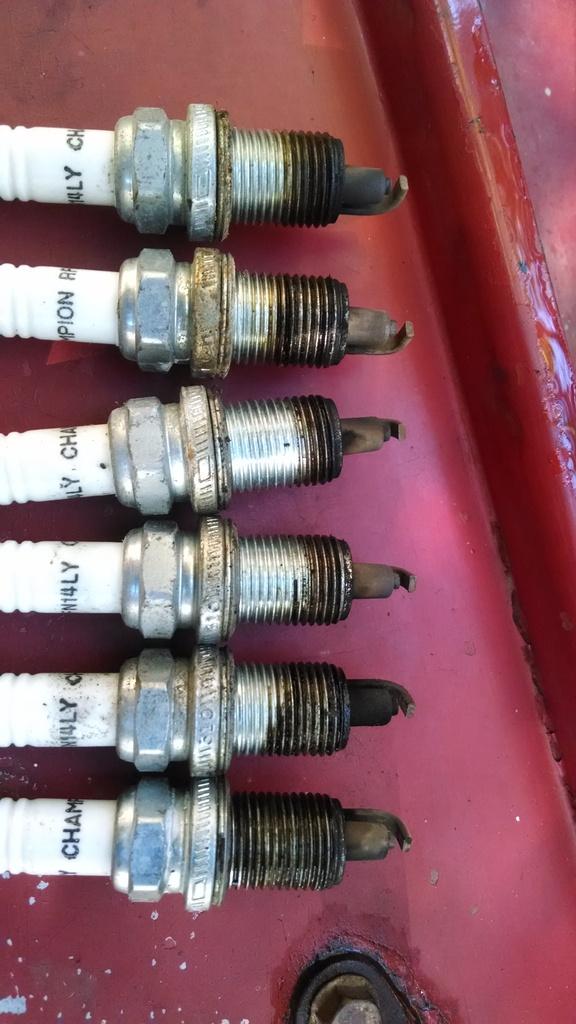
Not content to leave well enough alone, pulled out all 6 spark plugs:

19_zpsyofo9ogc-1.jpg


They were all pretty uniform, except #2, it was pretty black.

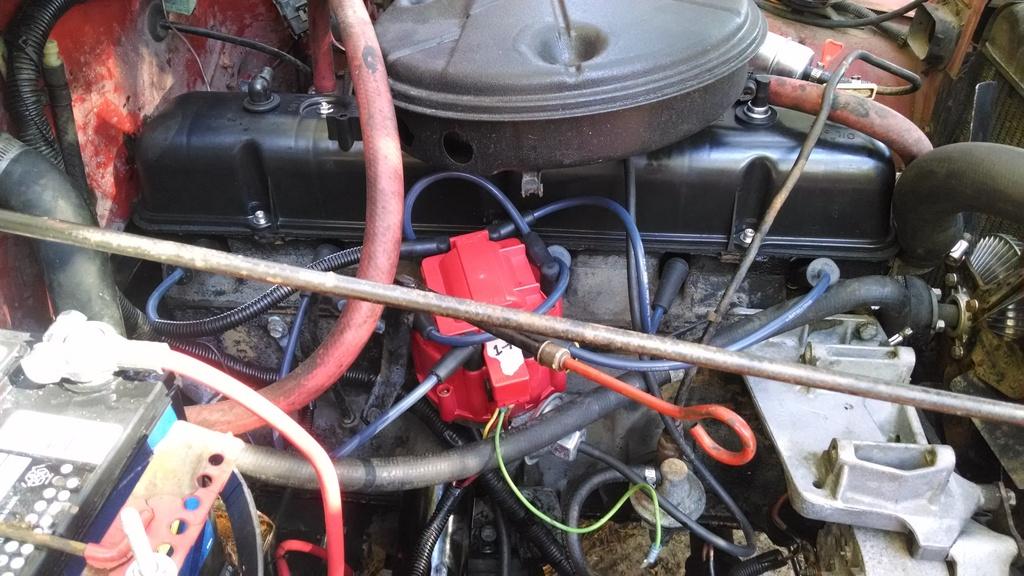
I also got rid of the ugly yellow plug wires, used some new 8mm wires from NAPA, I think I used wires for a Ford, did not have any GM inline 6 cylinder wire sets in stock, worked out good, looks better IMO:

20_zpscthqfz5v-1.jpg


So, up next, oil change. The oil is pretty dark, probably the rest of the old crud broke free. I also need to work on the brakes, now that it is running much better, the not good brakes are sketchy at best.

And, now that all 6 cylinders are firing correctly, I might play with the timing some more, see if i can improve upon the already running great Scrambler.

One last picture, winter in South Mississippi LOL:

21_zpsfkkqtnzu-1.jpg


That's it for now!!!:headbang:
 
It looks like a random patch of sand to me. Maybe Raymond spilled some of his playground sand there ...
 
You're right !!! Duh. He took it from the Dunes at Sanblast in MI... WINNER!!!

dba8cb3a4ea5e06b550a717aea54c5be-1.jpg


I thought I still had the one with me and Raymond on my phone (that's his 8 from 2015) but it's just my skinny arse in this one [emoji58]
 
Is that snow or sandblasting sand?? :eek:

I'm going to go with Mississippi mud. And not the ️Pie either

It looks like a random patch of sand to me. Maybe Raymond spilled some of his playground sand there ...

Hauling it in from the beach one tire tread at a time


Sent from my iPad

You're right !!! Duh. He took it from the Dunes at Sanblast in MI... WINNER!!!

dba8cb3a4ea5e06b550a717aea54c5be-1.jpg


I thought I still had the one with me and Raymond on my phone (that's his 8 from 2015) but it's just my skinny arse in this one [emoji58]

Some of it might be from Michigan, some from Utah, Kentucky, Arkansas, Louisiana, Alabama, South Dakota, Mississippi :crazy:

In all seriousness, the top layer of dirt in the yard is very sandy, then its gets to clay which is as hard as concrete. Not sure own anything grows :crazy:
 
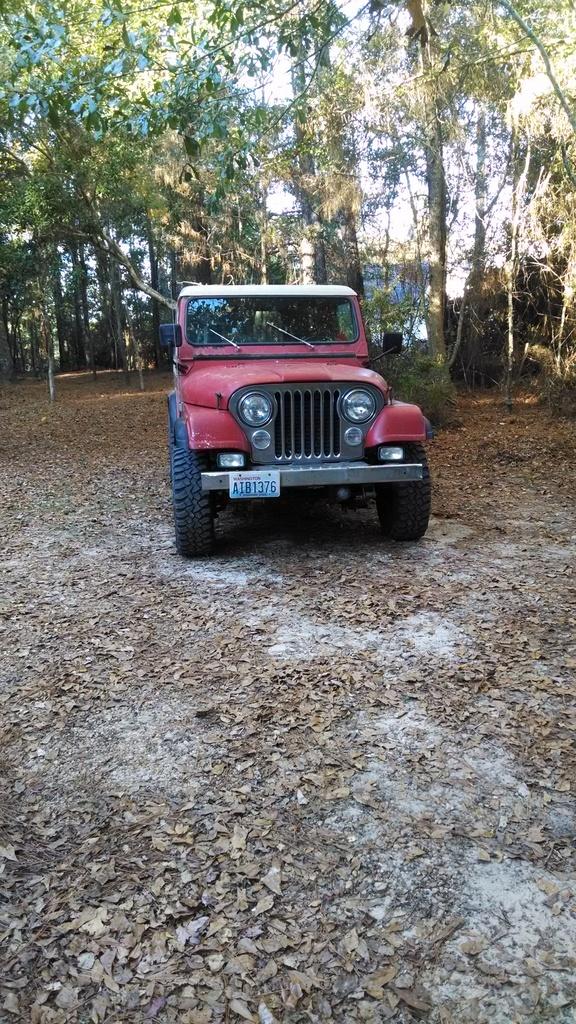
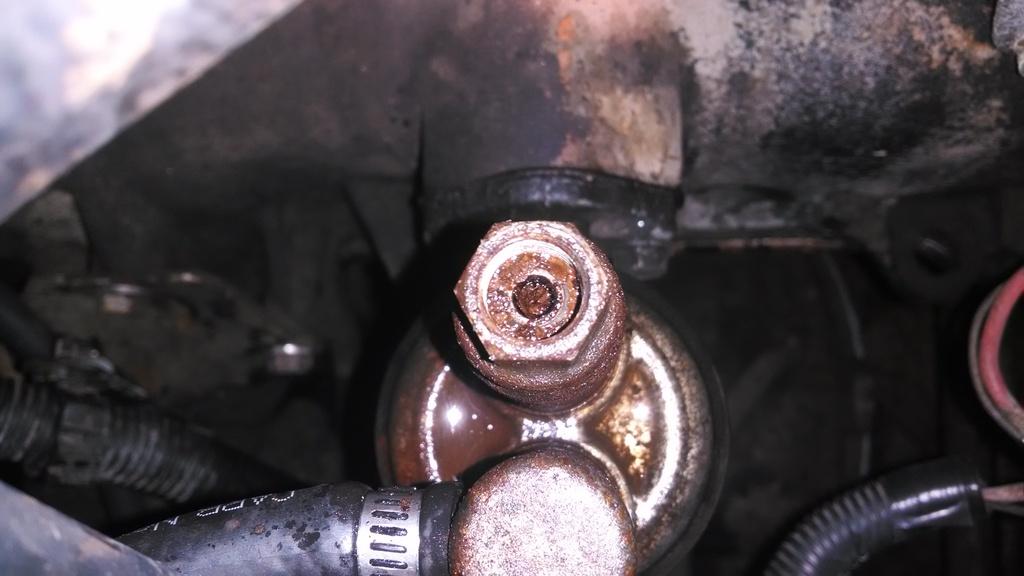
I was driving the Scrambler around the neighborhood to warm up the engine before an oil change, started smelling gas. When I got home , found this:

IMG_20161121_164011972_zpse7ne3maf-1.jpg


IMG_20161121_164015314_zpsuyrbvjxk-1.jpg


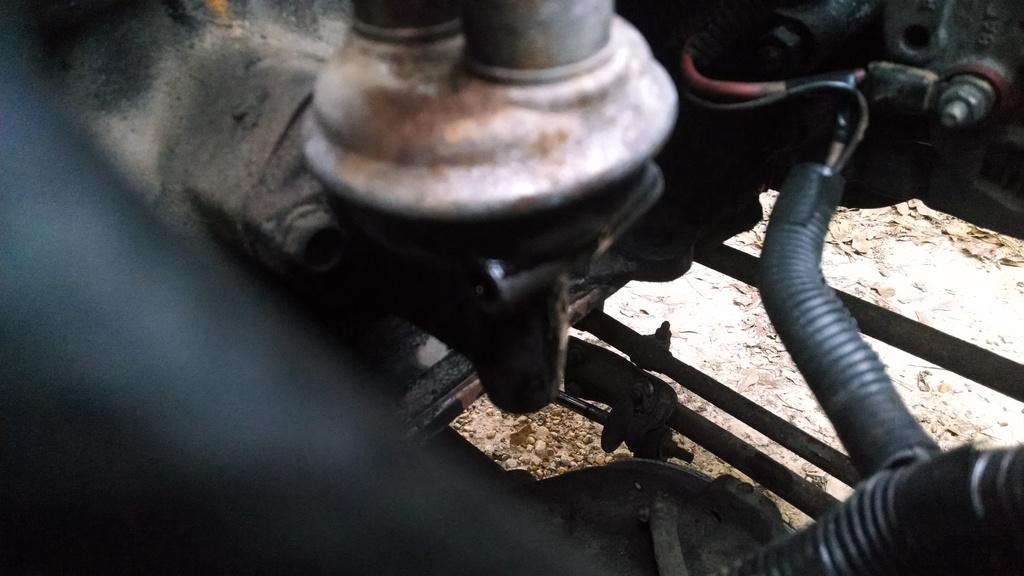
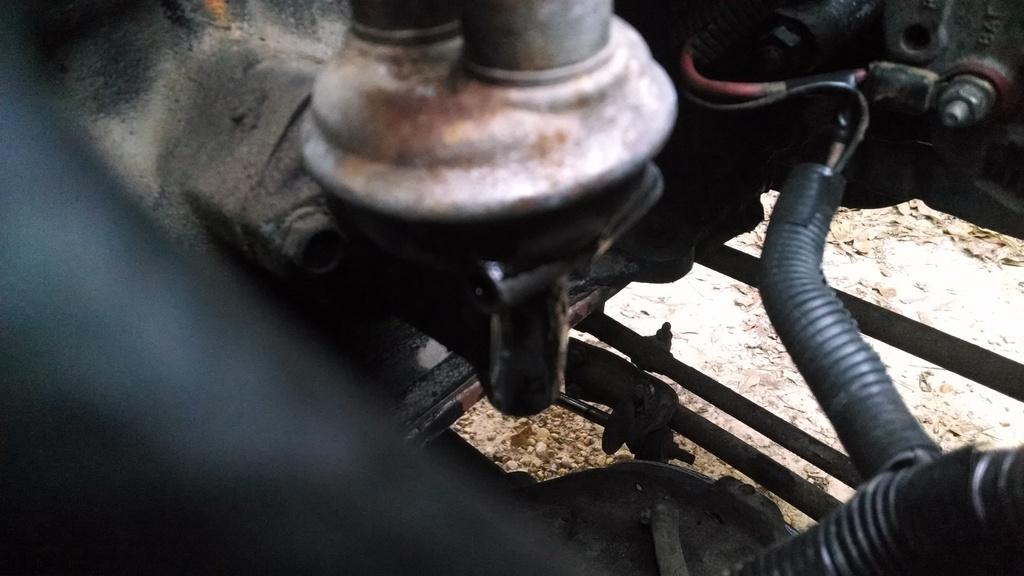
If you look close at the second picture, you can see fuel dripping out of that port looking thing on the fuel pump.

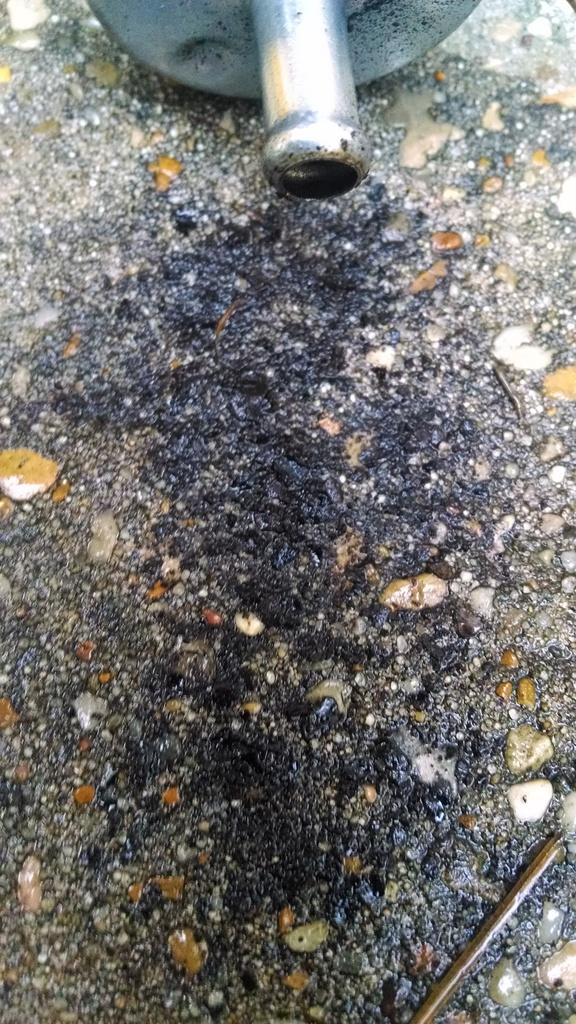
No big deal, will change the fuel pump. When I removed the metal line that runs out the top of the fuel pump, look what I found:

IMG_20161122_173945333_zpss8969csu-1.jpg


Yep, the fuel pump was packed up with crap. I should have thought to change this, after I found all the crap in fuel filters/tank/carb.

I am pretty sure this is just old junk, but i am going to run a clear fuel filter in front of the new fuel pump, so I can see if anymore crap is floating around, but there shouldn't be. I will also change the filter before the carb, I am sure it has been catching this crap, too.

Another easy fix:fingerscrossed:, that's it for now:thumbsup:
 
I was able to do a bit more work on Yard Scrambler 2 over the Thanksgiving holiday.

Luckily, all the crap from the fuel pump pictured below came out the inlet side of the fuel filter, nothing came out the carb side:

IMG_20161123_162708745_zpspkpfnfle-1.jpg


After the fuel pump/fuel filter swap, I moved on to the brakes, which felt like they had a lot of "fade". Not a soft pedal, pedal is/was firm, just didn't stop as well as it should.

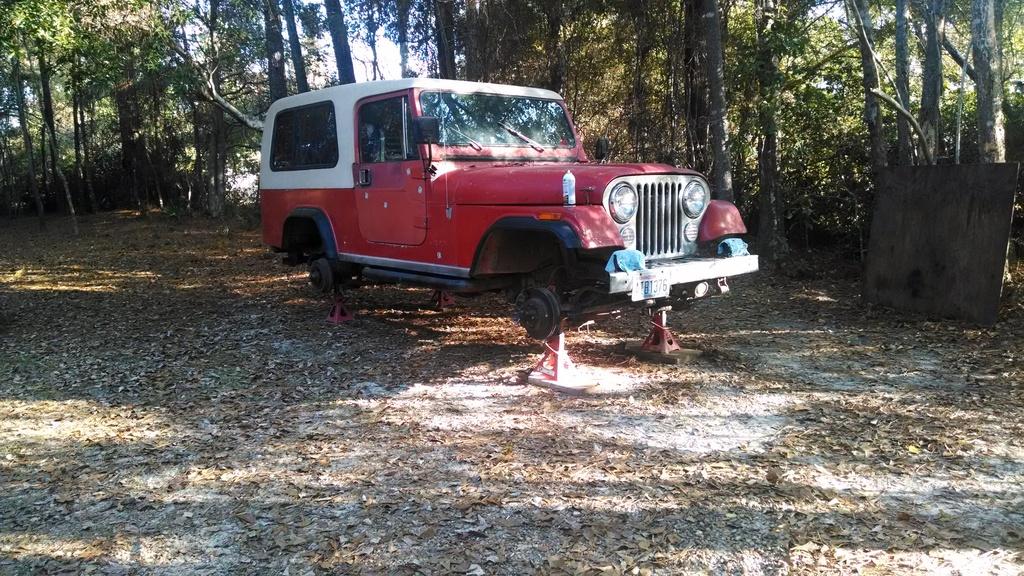
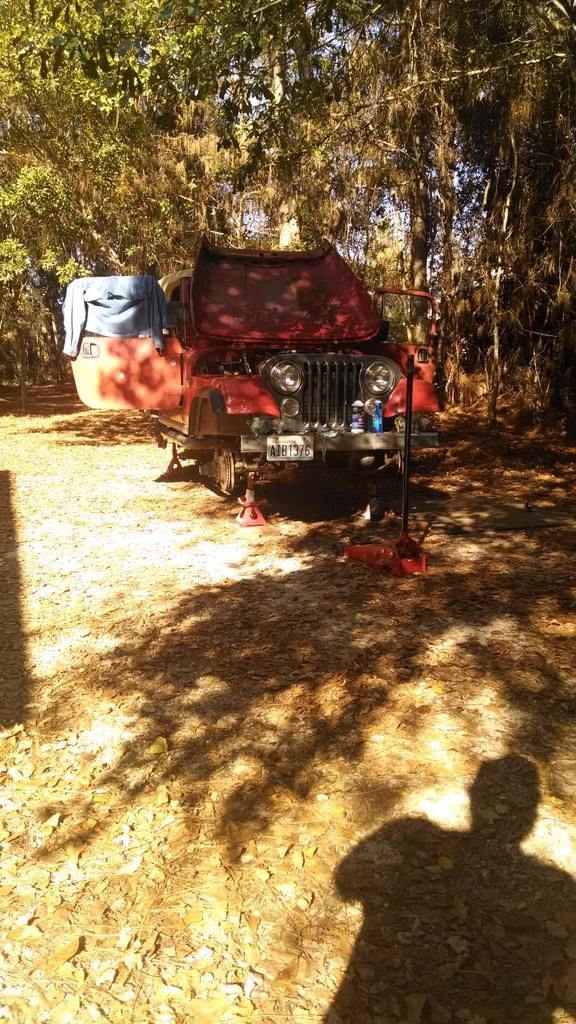
So, up on jack stands:

IMG_20161124_081007139_zpsk1jad2ql-1.jpg


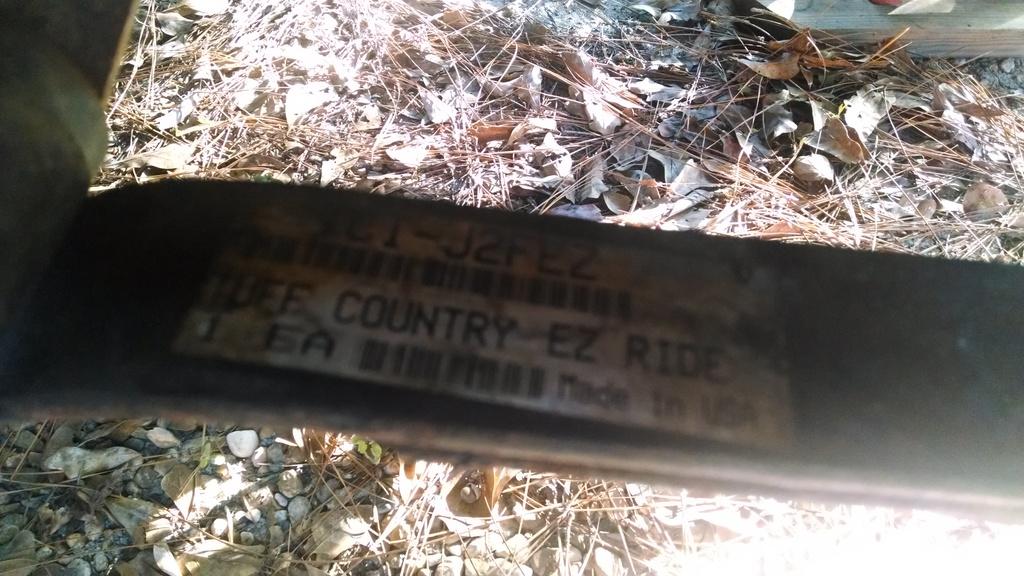
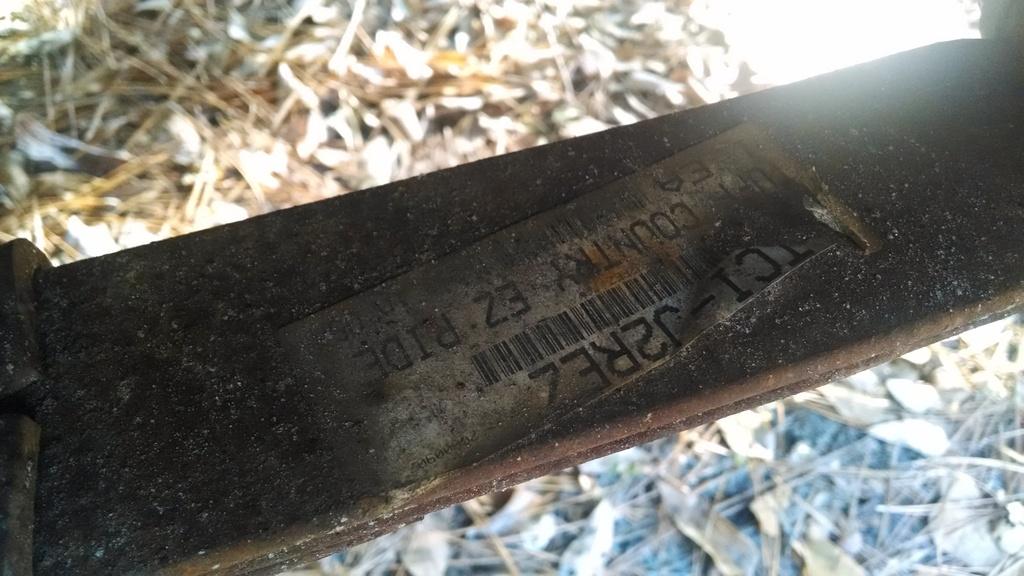
With the wheels removed, I noticed these stickers on the front/rear leaf spring packs:

IMG_20161124_081032127_zpsfsxfgoua-1.jpg


IMG_20161124_081049147_zpstnavzy88-1.jpg


I am assuming these are old 1-1.5" lift springs, no way are they 2.5". They ride very nice, maybe because they are old/wore out/broken in???


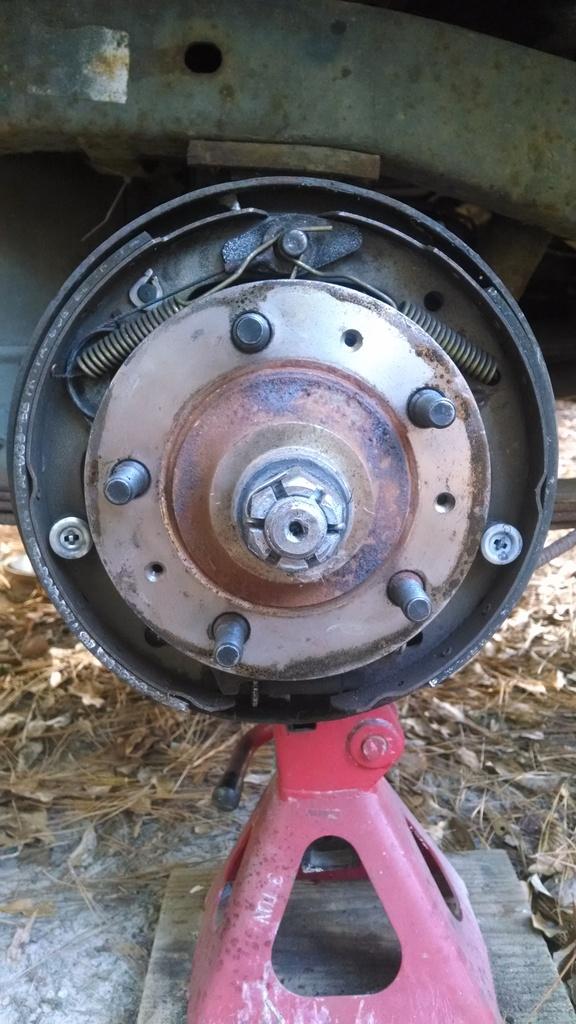
Moving on, I took the passenger side drum brake apart first. This side all looked new, pads and hardware. This wheel also had a center cap, which protected the hub/nut/axle end from rusting:

IMG_20161124_084427527_zpsd8yj2vjg-1.jpg


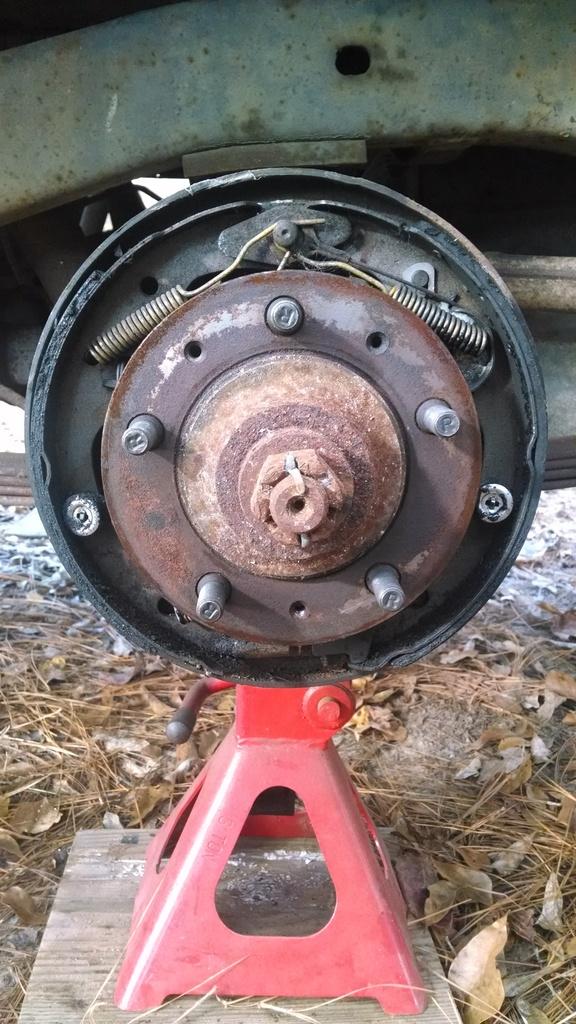
The driver side was a bit different. Lack of a center cap made the wheel hub/nut/axle end rusty. No big deal. The bigger problem was grease on the shoes. Not a lot, just a little:

IMG_20161124_084443221_zpsothlqoro-1.jpg


The outer seal did not appear to be leaking, and the inner seal must be good, no gear oil. I removed the dust cap to "look" at the outer axle seal. It looks new, and no grease leaking out:

IMG_20161125_103429260_zpsuhvxukgq-1.jpg


The grease I did find did not appear to be bearing grease, maybe it was grease from where the shoe rides against the backing plate? I will drive the Scrambler a bit, then pull the drum back off, to see if the seal is leaking grease. If it is, I will change the outer seal, no big deal. Well, no big deal if I get the right hub puller LOL.

I went ahead and changed out the shoes and springs on both sides. The drums looked OK. I think someone had messed with this rear axle before. Both outer seals looked new, pads and springs looked good, too. The passenger side axle/nut/hub/cotter pin looked new, and all the rear studs looked new, on both sides.


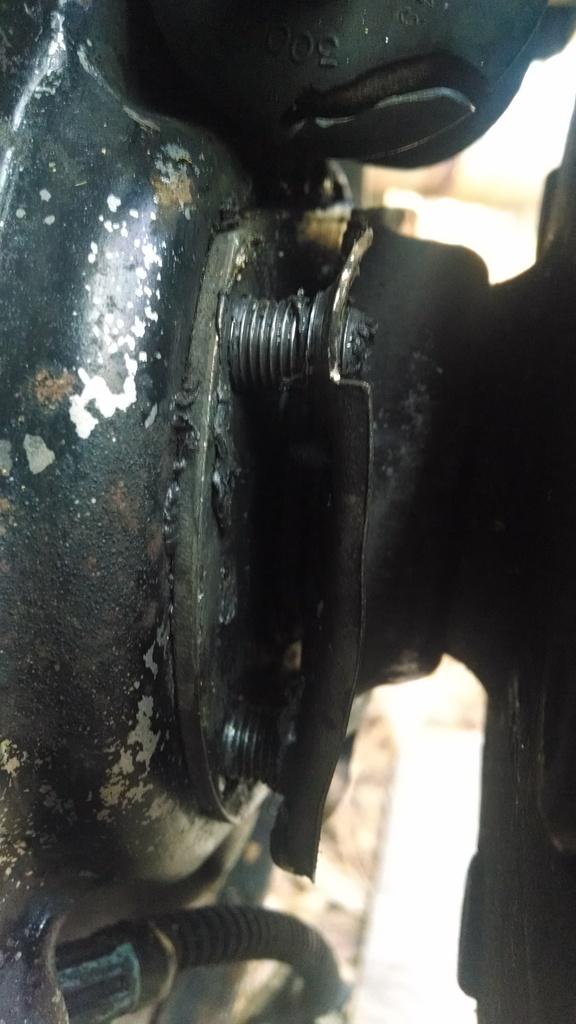
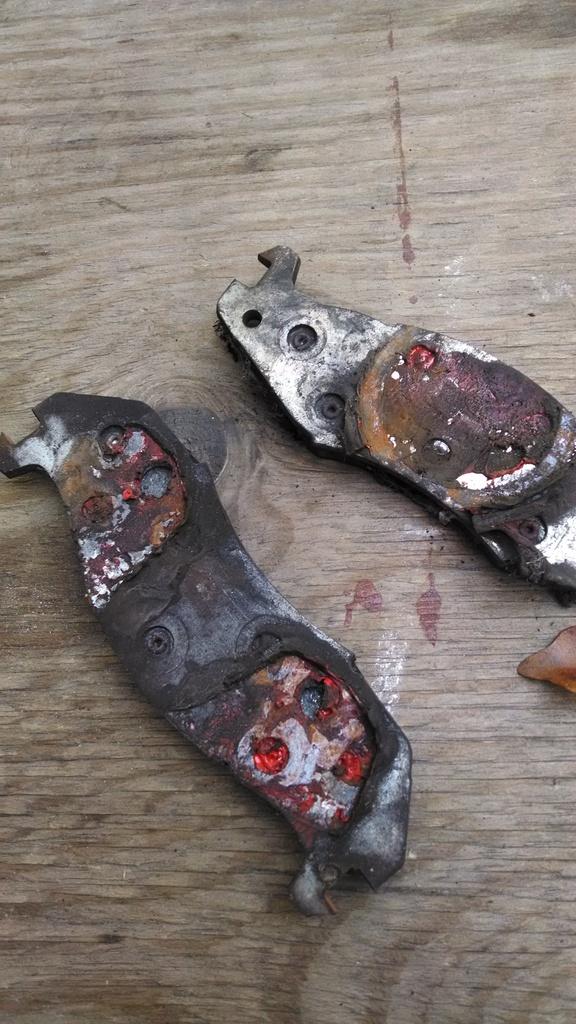
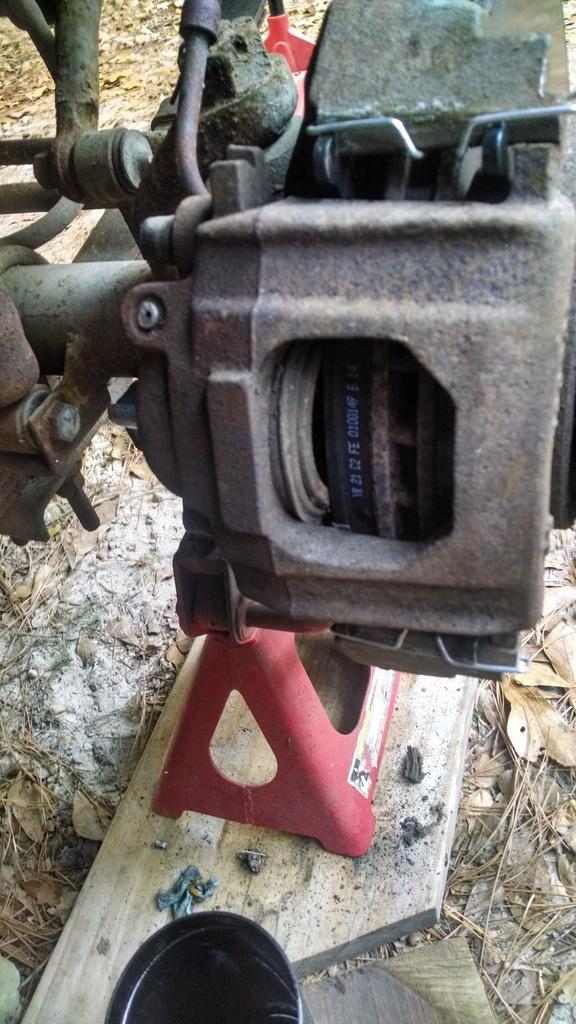
I went ahead and changed the front pads, too. They were about half way wore down, rotors looked OK. I did find this, on both sides:

IMG_20161125_113000549_zps4lrx1llt-1.jpg


For some reason unknown to me, the pads were siliconed to the calipers?? No idea on that one.


After changing all the brake pads, decided to flush out the brake fluid. The fluid looked very old, and was black.

In progress shot, love our harsh south MS winter:

IMG_20161125_131242464_zps7u5dtdxg-1.jpg


Basically, I gravity bled each corner, starting at the furthest from master cylinder, with the bleeder removed. On the rear, neither side had fluid coming out. So, I gently pressed the pedal down a few times to blow out a bunch of crap. After that, fluid would run out. I kept adding new fluid until clear fluid was running out the bleeders. I did this for all four corners. Everything went well, until the PS caliper bleeder bolt snapped off when I tried to loosen it:

IMG_20161125_151926532_HDR_zpspwevt2d7-1.jpg


So, one new caliper, two quarts of brake fluid, about an hours worth of bleeding, the brakes work great. I will just have to check on the driver side axle seal, fingers crossed.
 
So, now that the brakes work, and the engine runs well/not leaking oil out, I have been driving the Scrambler more and more. But, the brake lights do not work, so I needed to fix that.

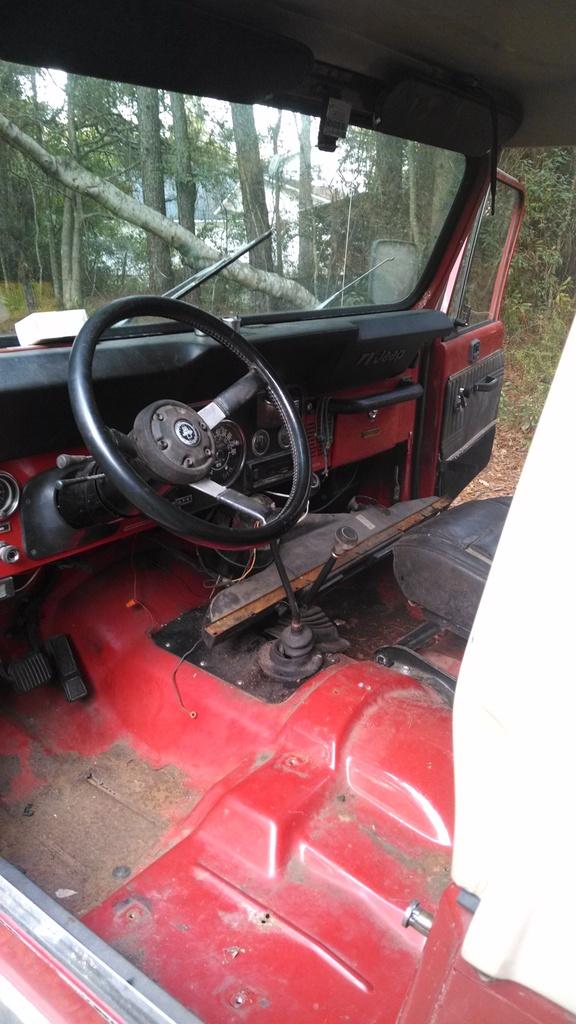
And of course, the brake light switch is a PIA to get to. Factory AC is just another thing in the way. Anyway, pulled out the driver side seat, lowered/slid the under dash AC unit out the way, now I can get to the switch:

IMG_20161126_155826524_HDR_zpsan6z10yr-1.jpg


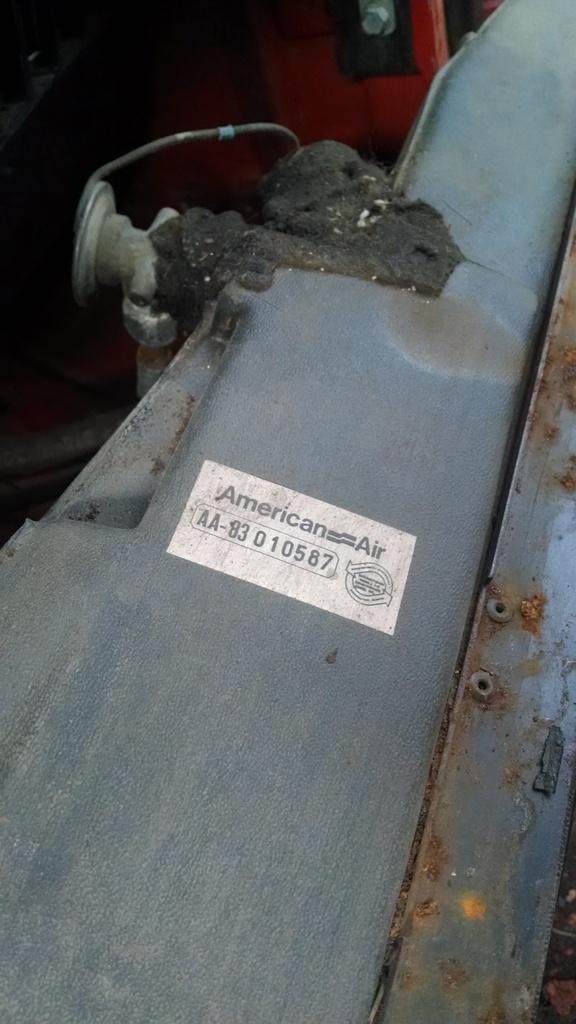
This sticker was on top of the under dash AC unit:

IMG_20161126_155832704_zpswebegxop-1.jpg


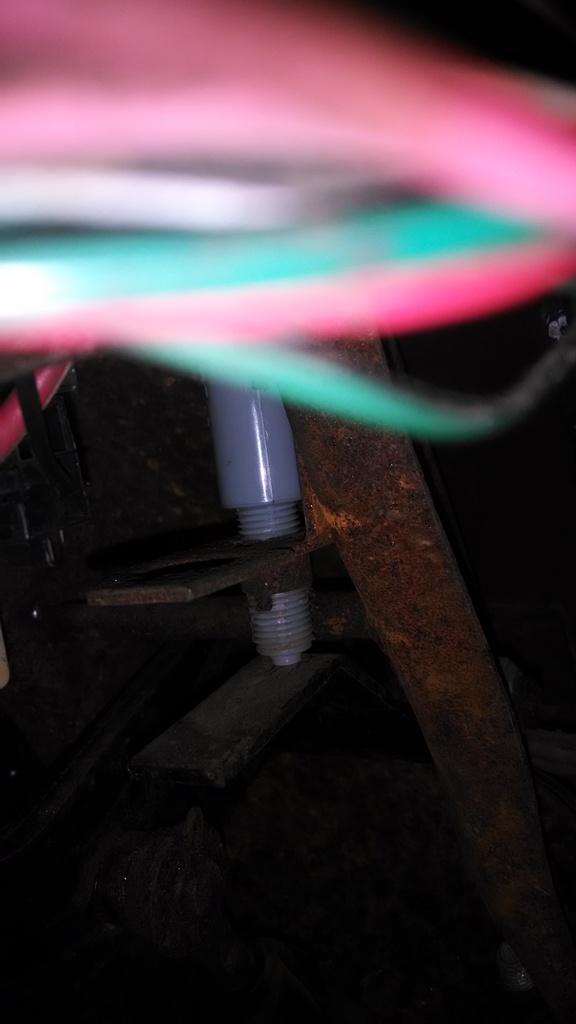
And the new switch installed:

IMG_20161126_155845872_zps7usdw87m-1.jpg


Besides fixing the brake lights, I also did some other electrical work, mainly new fuses, bulbs, and flashers. So now, all the following stuff works:

headlights (high/low and speedometer high beam indicator)
all running lights
brake lights
turn signals (including arrows in the speedometer cluster)
heater blower
windshield wipers (intermittent to boot) and windshield squirter
hazards
interior courtesy lights
4wd light in speedometer cluster

Unfortunately, the gas gauge is hit or miss, I suspect a ground issue. The oil pressure, voltage, temperature, and speedometer all work. The tach will not work with the HEI. The clock is currently not working, haven't messed with it, though.

Anyway, this one is about ready to head back to Jeep Addict, he doesn't want me to over board with it like the green Yard Scrambler :rotfl:

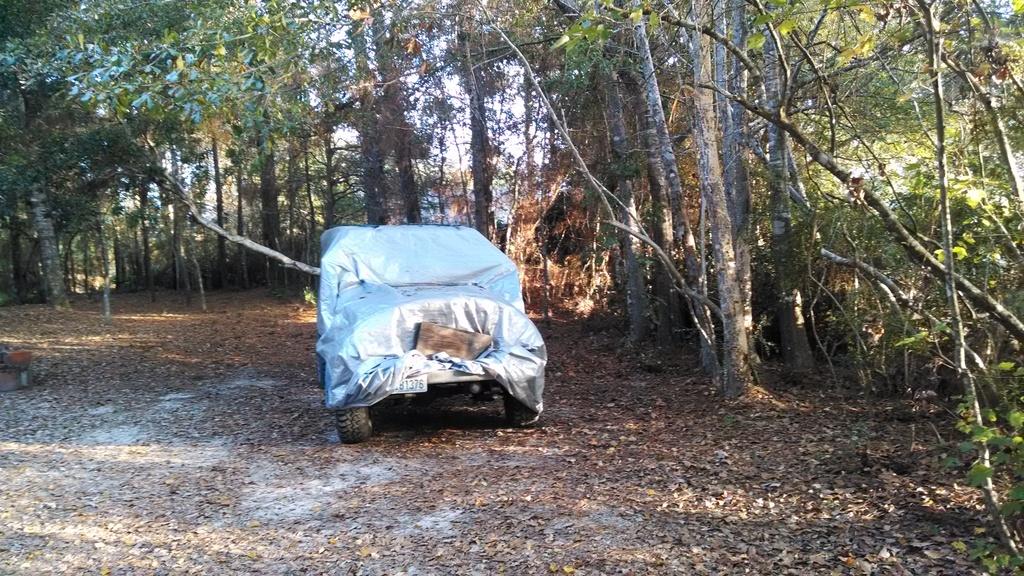
Since we have bad weather coming, I wrapped it back up like a Christmas present:

IMG_20161128_072318263_zpsmn7ypv2k-1.jpg


That's it for now :wave:
 
Back
Top