• Notice for iPhone users: DO NOT use the image size reduction option when uploading photos to the forum. This causes portrait images to post as landscape. We have added a warning to the image insert pop-up as well.

Heater Box Repair

Cut a piece of metal larger than the hole, drill two holes for pop rivets, epoxy the metal to the box, install pop rivets, epoxy around the broken edge, and when dry fill the recess with body filler. Sand and paint.
Thanks Kim!

If I understand correctly, the pop-rivets will still show after the repair?

Also, I do have a second lower heater box...
I'm attempting to make one good one from both (this is the nicer of the two housings). Is there another repair option knowing that I can use material from the other housing?
 
There are probably many ways to fix it. You could do it without the pop rivets. Or use countersunk rivets. Or grind down the heads of the pop rivets after the epoxy is dry and put filler over them. Or use screws to hold the metal in place until the epoxy dries, remove the screws and fill in the holes. You could use a piece of the parts housing to fill in the recess instead of body filler . . . epoxy it in place and epoxy and low spots or holes to fill and you won't need any body filler. Maybe use 3M texture spray to even out the repair surface. Put your favorite decal over it . . . maybe trail rated by RockTractor.
 
See if there is a recycle mark on it - i doubt it because of the age - if it did it would tell you what kind of plastic it is

It's probably Polyethylene of some variety LDPE or HDPE, these can be heat welded with a soldering iron or heat gun if you are careful
The heat weld will need some filling to look pretty and you would need to practice on some scrap before you tackled the real thing. Do you have the missing piece? If so it would be easy(ish). The trick here is to pick some material of the same type - dont try to fix HDPE with LDPE etc
Google search plastic weld repair and how to tell plastics apart
 
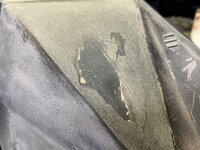
Here is where I ended up....

I cut three lengths of bailing wire that were just a bit wider than the hole. Then, from the backside, I used a soldering iron to heat up the wires and sink them into the plastic so that they spanned the hole in three different places. The idea here was to give something for the filler to "grab onto".

Next , I wrapped a piece of flat steel with wax paper and clamped it to the inside of the heater box at the hole location. I leveled the heater box, filled the hole with black JB-Weld Plastic Bonder, and let it dry.

After it was dry, I sanded it down, filled the small voids that were remaining with Bondo. I let the Bondo dry and re-sanded. Sorry - no pics up until this point,

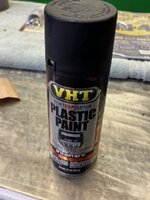
Finally, I painted the whole thing with high temp plastic paint.

All-in-all the repair seems very durable and is hardly noticeable from the outside.

The inside of the heater box:
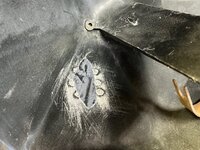
HeaterBox_2.jpg

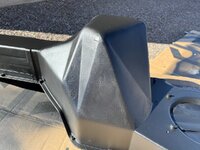
After Bondo and sanding:
HeaterBox_3.jpg

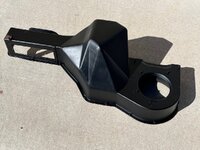
After paint:
HeaterBox_5.jpgHeaterBox_6.jpg

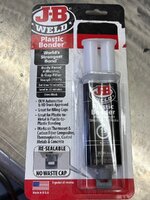
JB Weld and paint used:
HeaterBox_1.jpgHeaterBox_4.jpg
 
I found stainless steel replacement hardware for the heater box. So, I just thought I post these up in case anybody else is interested.

Screws for attaching the heater box metal back plate to the plastic box and for attaching the fresh air box to the front of the heater box:
McMaster-Carr PN 92400A510
https://www.mcmaster.com/92400A510/

Screws for attaching the blower motor and heater core to the backing plate. Also, for attaching the bottom duct diverter to the bottom
McMaster-Carr PN 90286A242
https://www.mcmaster.com/90286A242/

Shoulder bolt for attaching the bracket on the left side of the heater box.
(It has to be turned down in one section - but, otherwise, a perfect replacement)
McMasrter PN 97832A335
https://www.mcmaster.com/97832A335/
 
Back
Top