

You are using an out of date browser. It may not display this or other websites correctly.
You should upgrade or use an alternative browser.
You should upgrade or use an alternative browser.
1984 Alaskan Postal Scrambler Build
- Thread starter JeepScrambler
- Start date

- City
- Claflin
- State
- KS
Classic Enterprises parts are awesome. I typically always use Classic Enterprises panels when I can because they are always spot on with fitment and quality. Problem is they do not make every panel I need. Unfortunately, no other options exist when it comes to side panels. Would be fantastic if Classic Enterprises would start making the side panels!
I still do not understand how I can get so much variation with the MD Juan panels. I'm not asking they be 100% correct (like the classic enterprises stuff is), and I know issues will occasionally come up. I would just ask they make a consistent product and make it close enough to be usable. Jammer is correct, these panels and their issues basically render themselves useless.
After comparing several of the MD Juan side panels I can safely say, they have more aspects incorrect with them than they got right. My free time is extremely limited and it gets frustrating when I order parts planning to finally get some work done on the postal, only to have another set back because of the poor quality in the parts.
Sent via signal flare
I still do not understand how I can get so much variation with the MD Juan panels. I'm not asking they be 100% correct (like the classic enterprises stuff is), and I know issues will occasionally come up. I would just ask they make a consistent product and make it close enough to be usable. Jammer is correct, these panels and their issues basically render themselves useless.
After comparing several of the MD Juan side panels I can safely say, they have more aspects incorrect with them than they got right. My free time is extremely limited and it gets frustrating when I order parts planning to finally get some work done on the postal, only to have another set back because of the poor quality in the parts.
Sent via signal flare
Last edited:

- City
- Gonzales
- State
- La
Every time I see cancer on a Jeep it reminds me of all the work I put into my own rebuild and it gives me that same awful feeling in my gut that I had when I was seventeen years old and my girlfriend told me she was pregnant. Now thats a bad feeling.


- City
- Gordonsville
- State
- VA
Every time I see cancer on a Jeep it reminds me of all the work I put into my own rebuild and it gives me that same awful feeling in my gut that I had when I was seventeen years old and my girlfriend told me she was pregnant. Now thats a bad feeling.
 What he said!

- City
- BROOKLYN
- State
- NY
What I don't understand is he has every model jeep to reference his parts off of.. and that comes out.. But its not just to jeep parts he makes .In the military auto community his gas tanks and parts don't fit either ..quality control is the problem
Sent from my SM-N910P
Sent from my SM-N910P
- City
- Claflin
- State
- KS
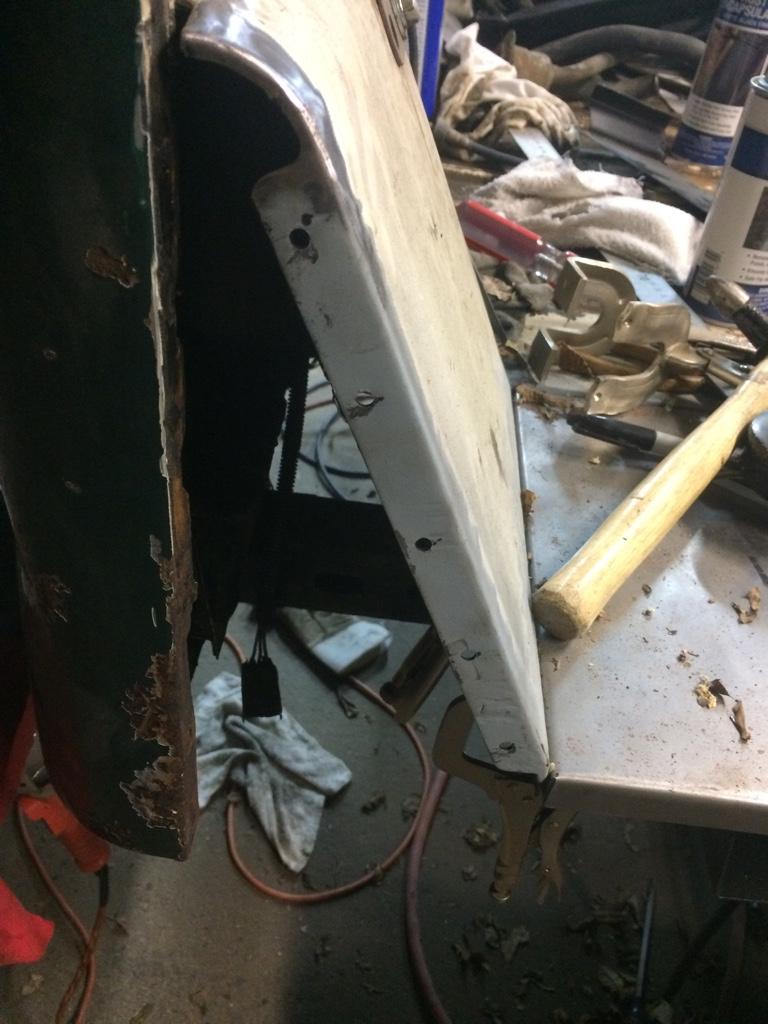
Time for a few small undates. After receiving my third right hand side panel, I've given up all hope for the MD Juan panels. They are total garbage. The third one has some major issues with the top lip of the panel as well:
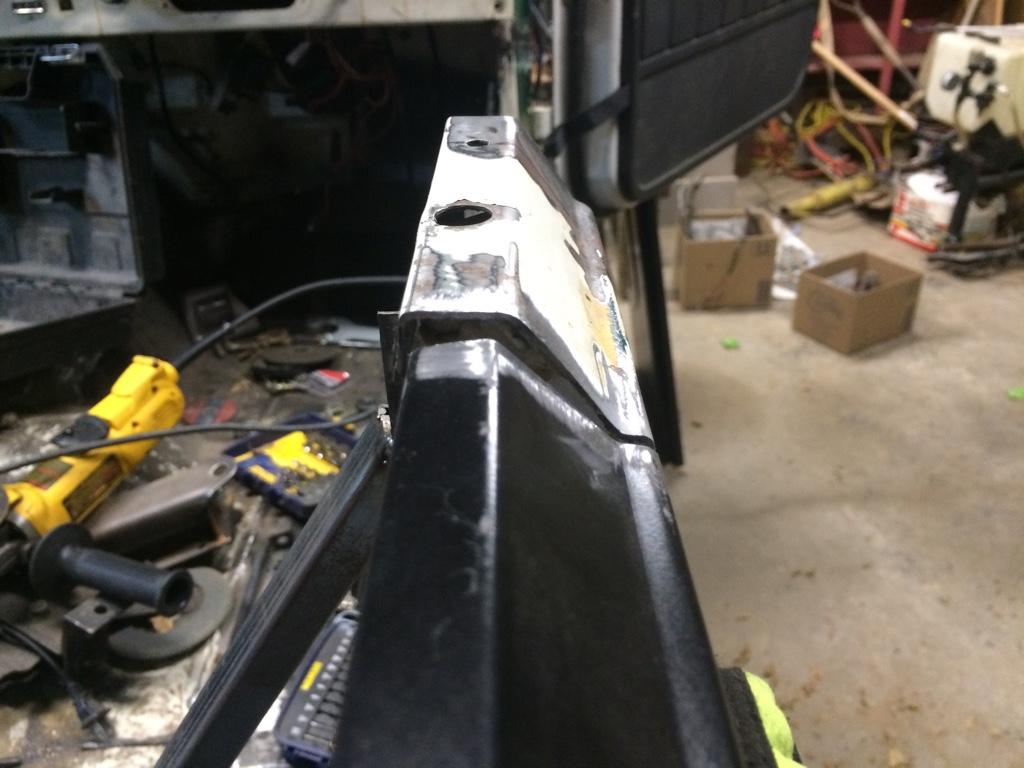
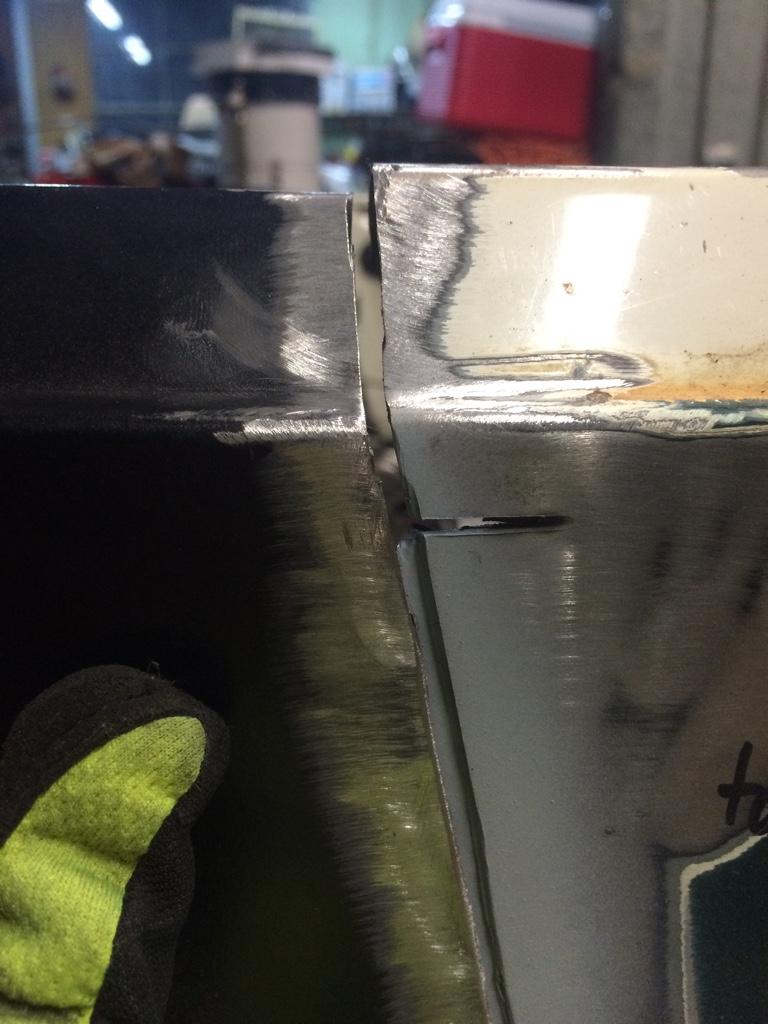
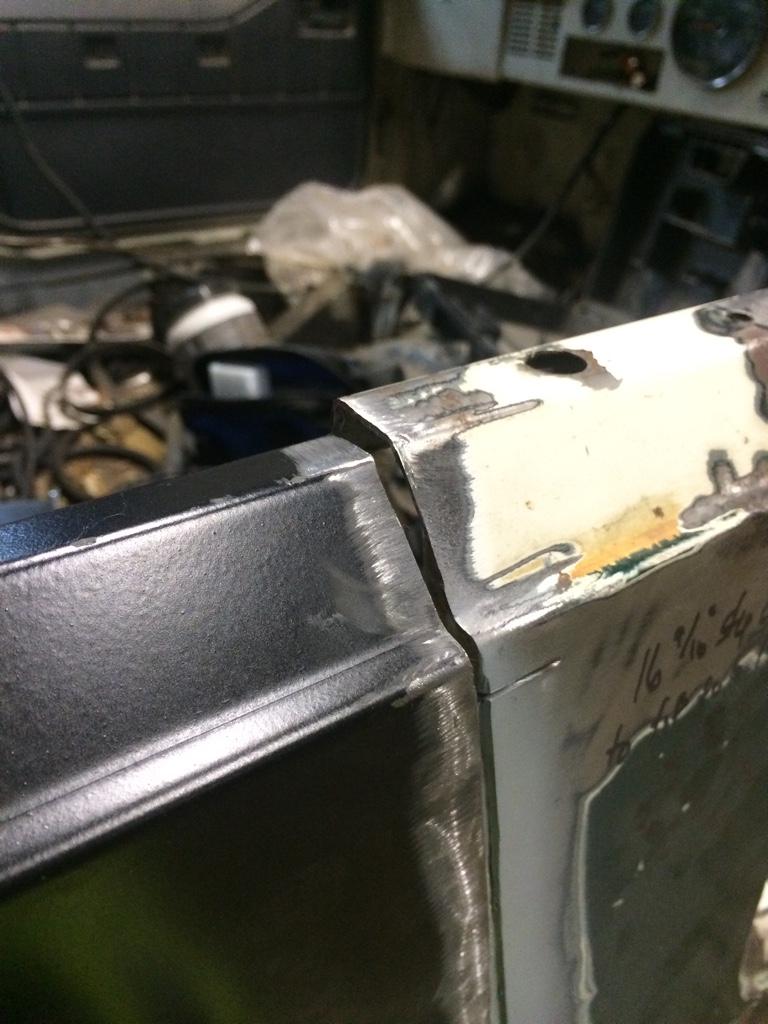
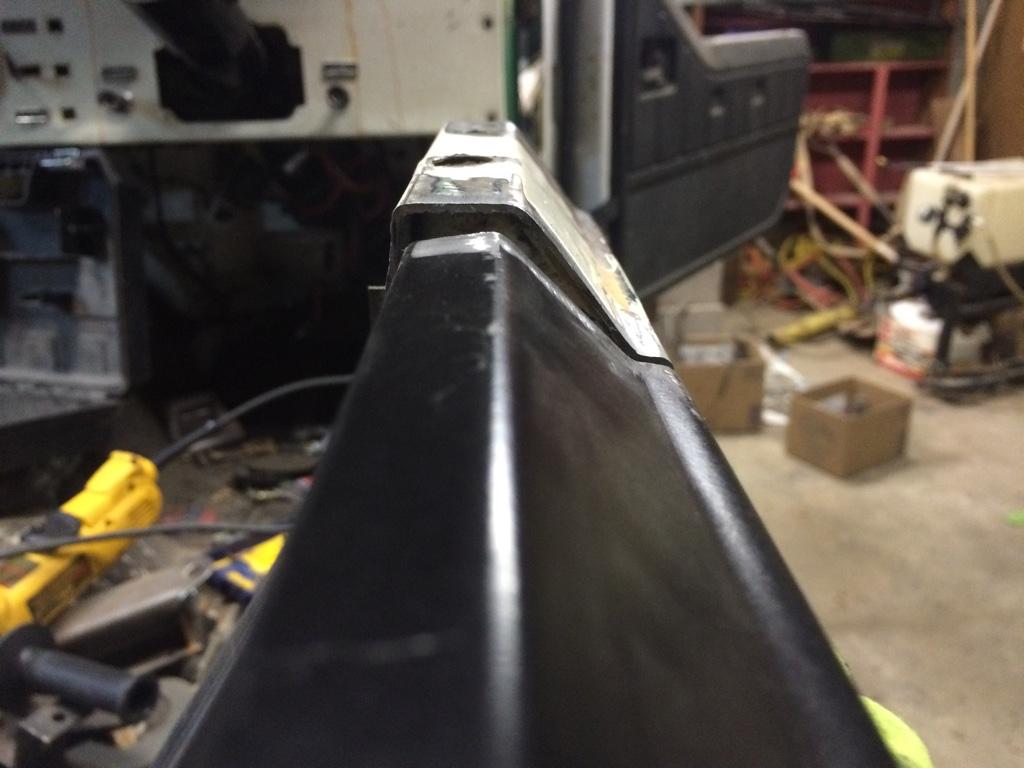
My advise to anyone doing a side panel replacement; use as much of your original panel as you can!
I've decided I will either have to get really creative with metal work and do some major cutting and fitting to the top lip of the panel or graft the top edge of the original side panel. Either way I'm to a point where I will have to use the majority of the MD Juan panel to replace the rest of the right hand side. Time to start prepping the panel and body for install. Don't mind the messy shop and Jeep loaded down with crap, been a while since I've gotten to work on it and the crap just seems to accumulate in it.
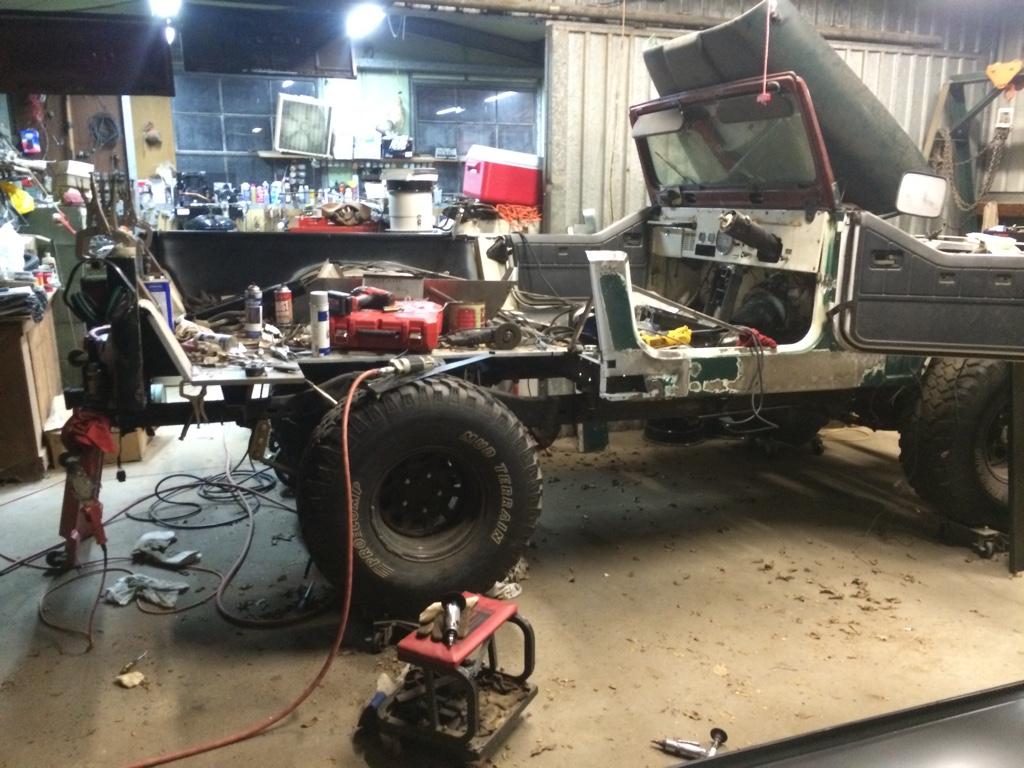
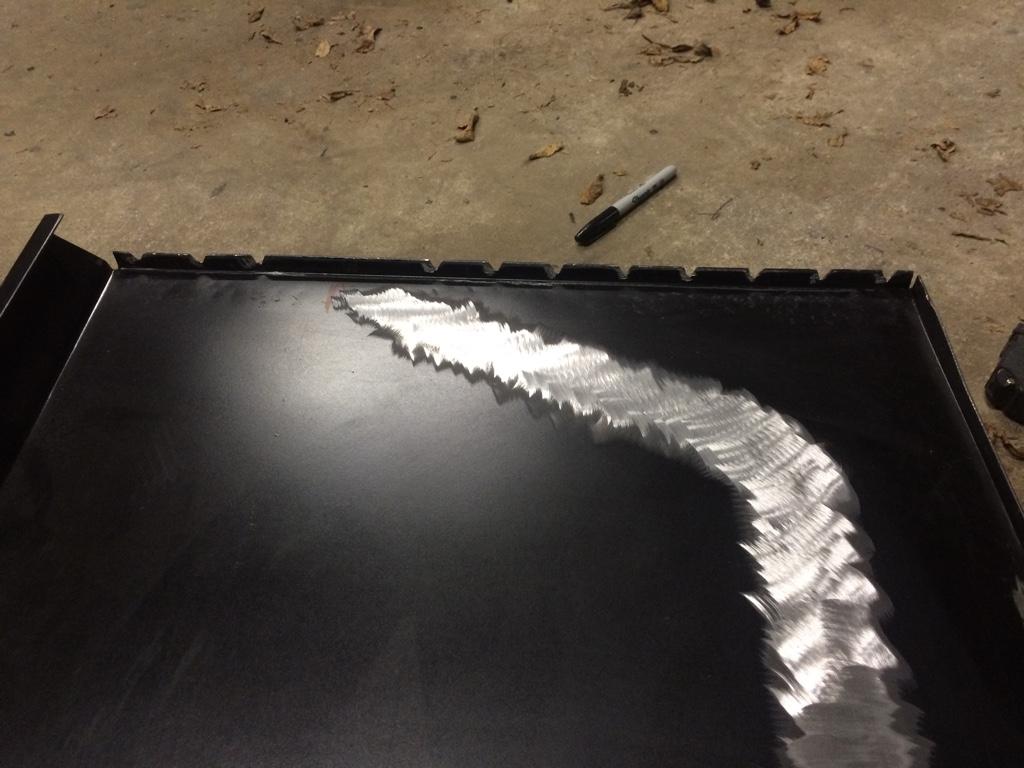
Panel cut down to fit and areas where spot wells will be have been taken to bare metal and cleaned with eastwoods pre paint prep:
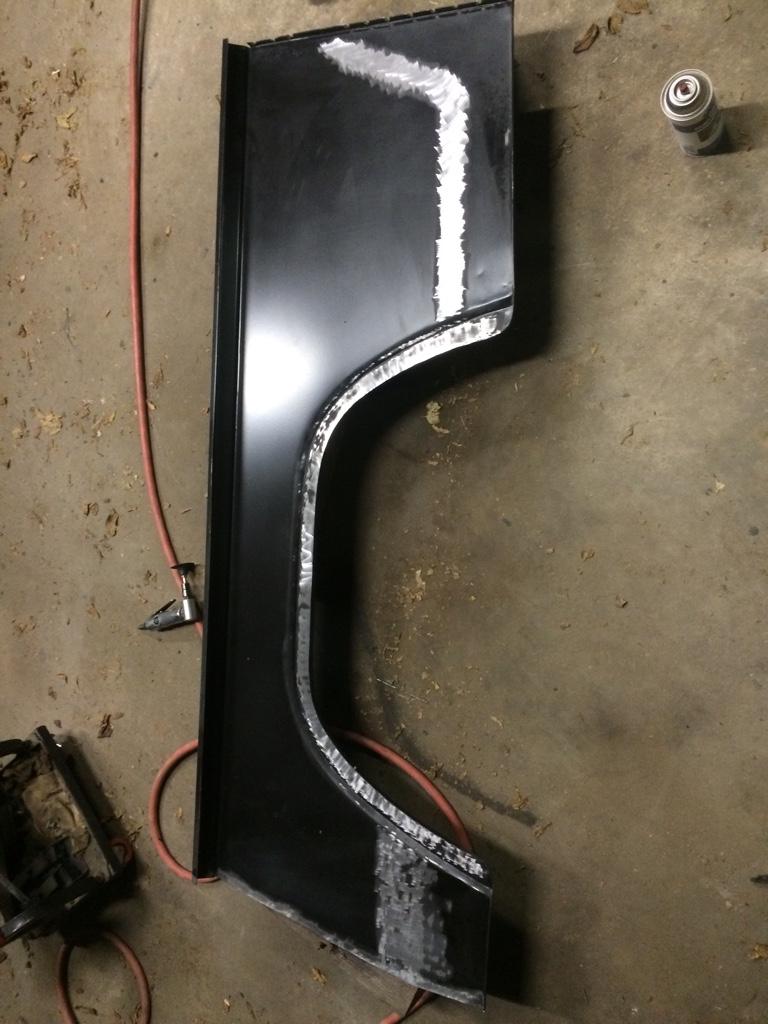
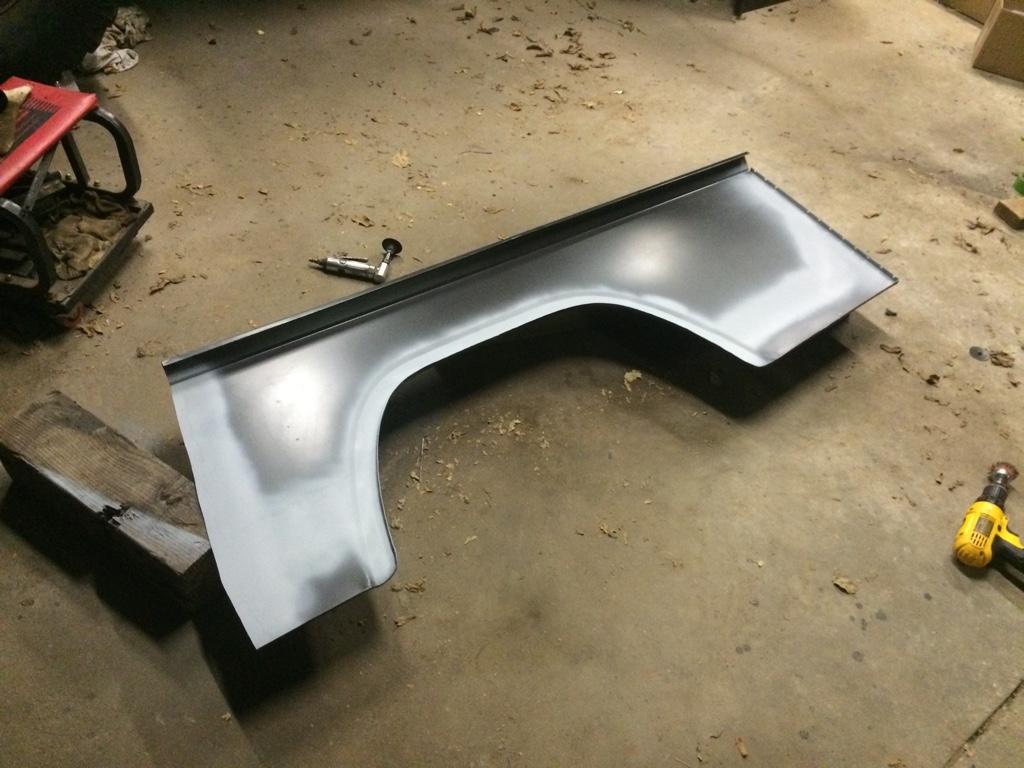
The MD Juan panels do not allow enough of a flange on the back vertical edge to make a hole for a spot weld to attach it to the rear tail light panels, so like I did on the other side, I made notches in the panel to weld into:
Two coats of weld through primer where the panels will meet:
Sent via signal flare
My advise to anyone doing a side panel replacement; use as much of your original panel as you can!
I've decided I will either have to get really creative with metal work and do some major cutting and fitting to the top lip of the panel or graft the top edge of the original side panel. Either way I'm to a point where I will have to use the majority of the MD Juan panel to replace the rest of the right hand side. Time to start prepping the panel and body for install. Don't mind the messy shop and Jeep loaded down with crap, been a while since I've gotten to work on it and the crap just seems to accumulate in it.
Panel cut down to fit and areas where spot wells will be have been taken to bare metal and cleaned with eastwoods pre paint prep:
The MD Juan panels do not allow enough of a flange on the back vertical edge to make a hole for a spot weld to attach it to the rear tail light panels, so like I did on the other side, I made notches in the panel to weld into:
Two coats of weld through primer where the panels will meet:
Sent via signal flare
Last edited:
- City
- Claflin
- State
- KS
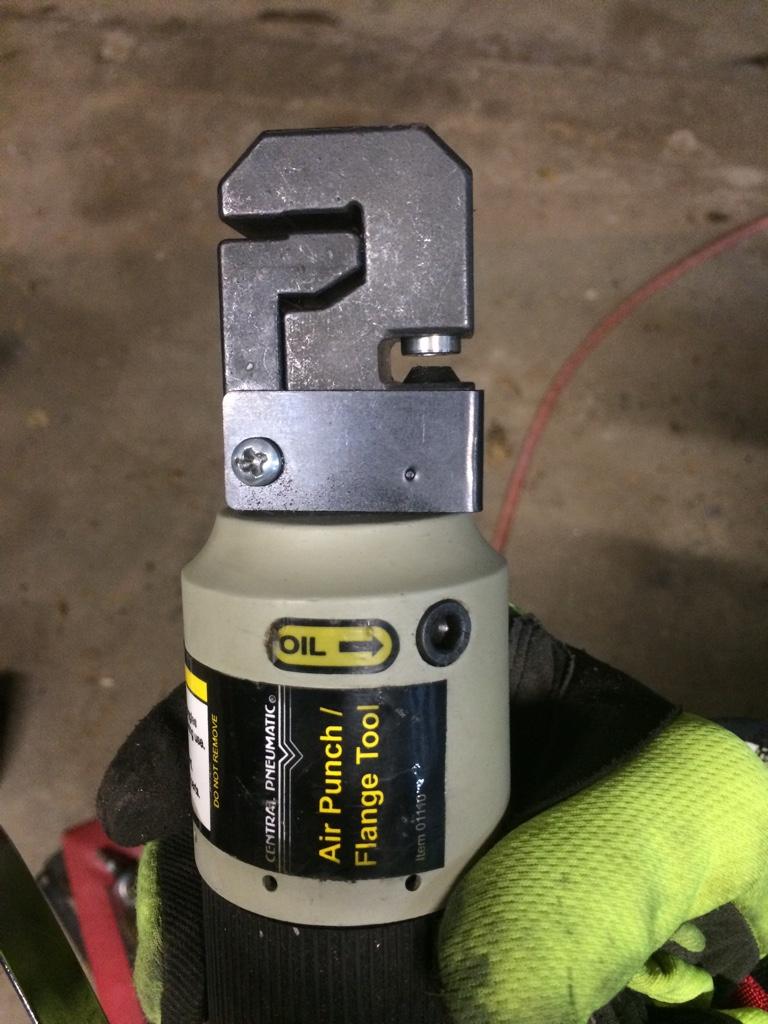
Anyone who has done this type of rust repair and has to make all the spot welds will know, or soon find out, just how many holes you have to end up drilling for the spot welds. Took me over half of the Jeep to finally decide to try one of The Harbor Freight air punch/flange tools. I believe the hole punch size is 1/4", which isn't large enough for a good spot weld, but it is a good size for a pilot hole for a drill bit!
One thing I quickly found is the depth of the opening for the hole punch is not deep enough, it places the hole to close to the edge of the metal. My solution, get out the 4 1/2" cut off wheel, disassemble the air punch head/flange portion, and grind away some of the excess metal on the inside. There are threads behind the area I was grinding where the head of the tool attaches to the handle. It took several assemble/disassemble cycles to finally get to where I removed enough excess material where I didn't get into the treads but still allowed the hole punch to slide far enough into the metal that it keeps the hole away from the edge of the metal.
First try, not enough metal taken out:
Disassembly:
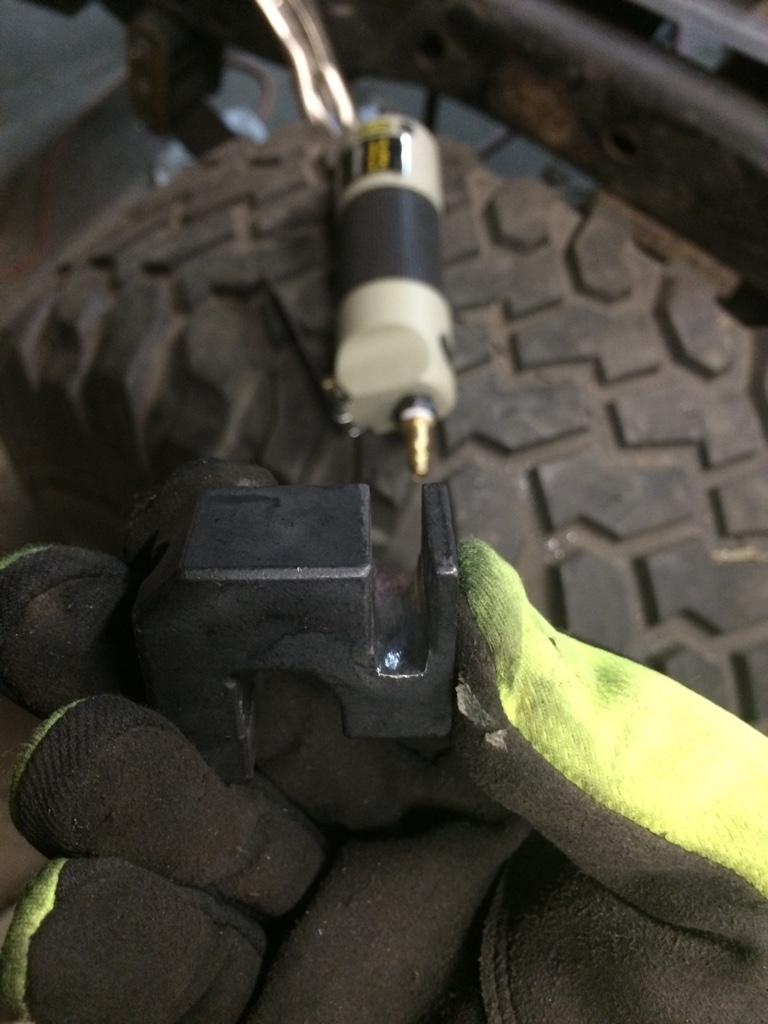
Final depth, you can see just how much metal I took out here:
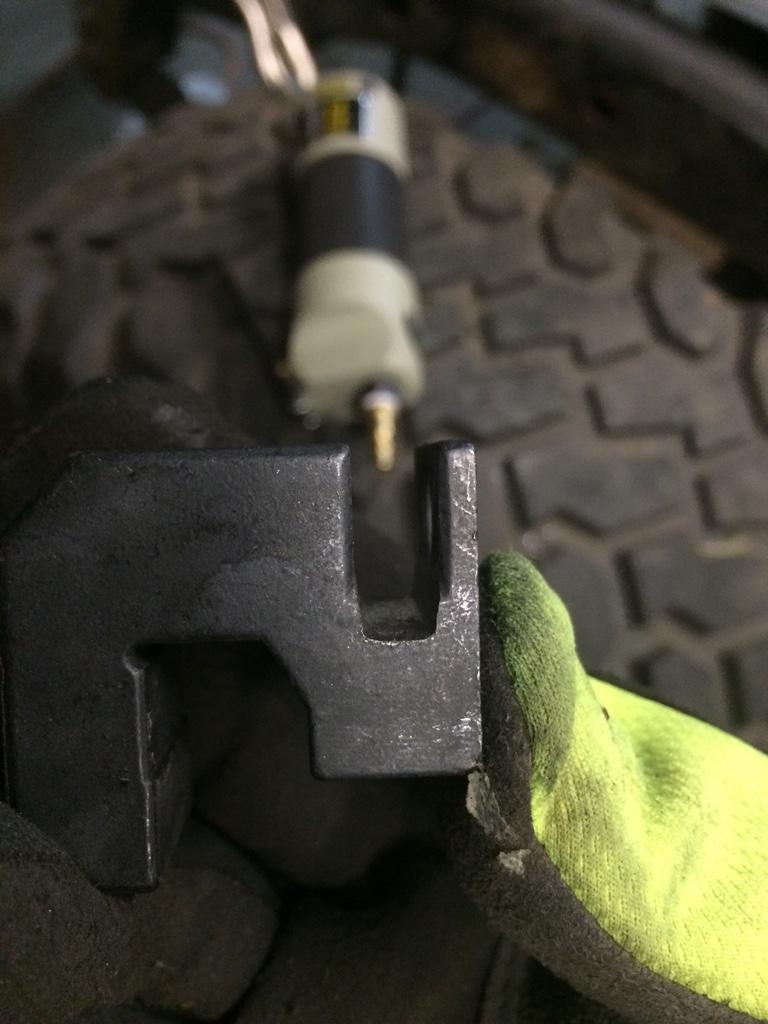
Final product:
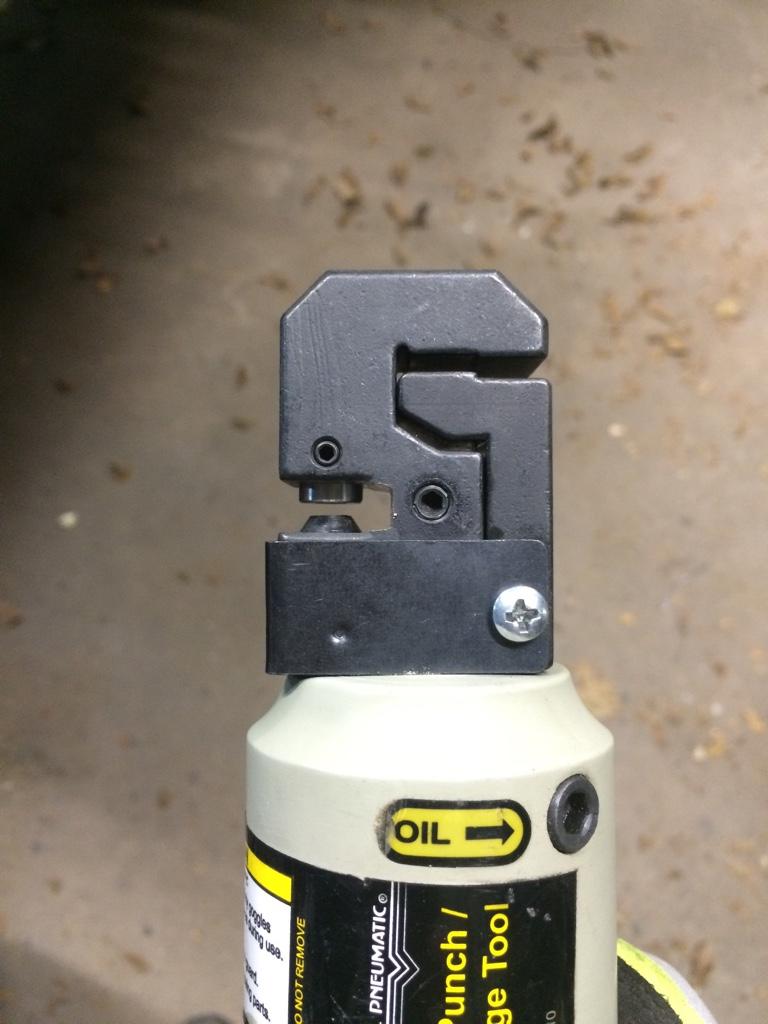
Test metal; you can see the first set of holes before any grinding in the 2nd and 4th position from the left. The 1st and 3rd holes are from my first round of grounding; still not there yet.
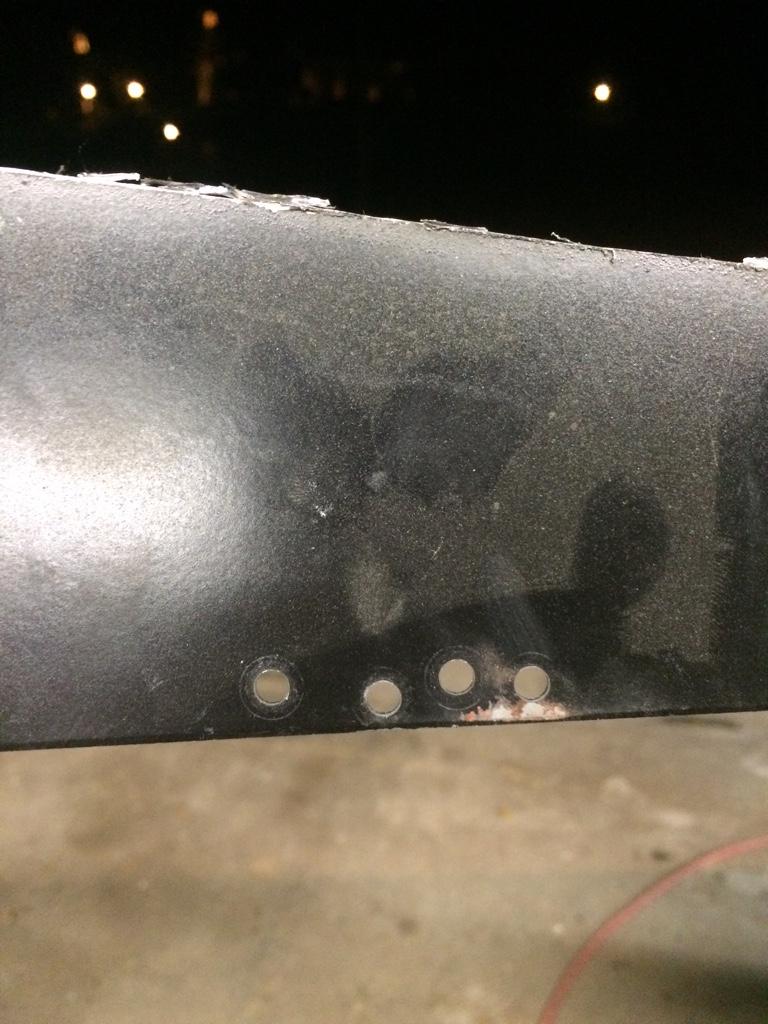
After the couple rounds of grinding, you can see the final product here in the two holes to the right. The farthest right hole has been drilled with a 5/16" bit which is the size I use for spot welds.
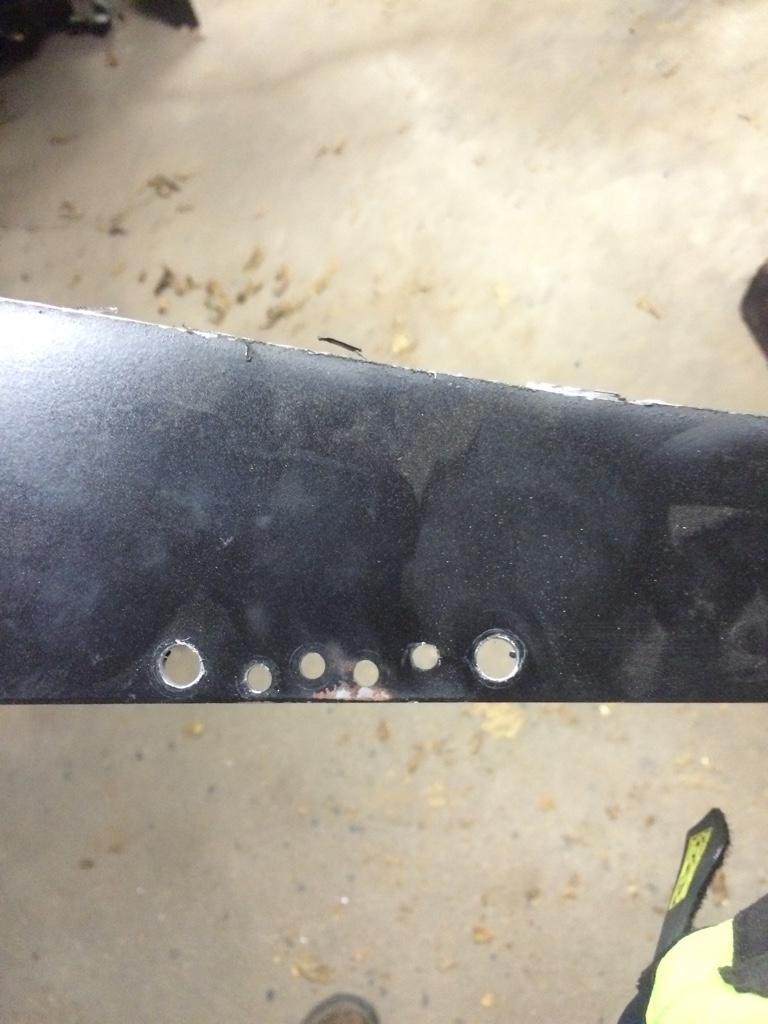
Will definitely speed up the panel prep time!!!
Sent via signal flare
One thing I quickly found is the depth of the opening for the hole punch is not deep enough, it places the hole to close to the edge of the metal. My solution, get out the 4 1/2" cut off wheel, disassemble the air punch head/flange portion, and grind away some of the excess metal on the inside. There are threads behind the area I was grinding where the head of the tool attaches to the handle. It took several assemble/disassemble cycles to finally get to where I removed enough excess material where I didn't get into the treads but still allowed the hole punch to slide far enough into the metal that it keeps the hole away from the edge of the metal.
First try, not enough metal taken out:
Disassembly:
Final depth, you can see just how much metal I took out here:
Final product:
Test metal; you can see the first set of holes before any grinding in the 2nd and 4th position from the left. The 1st and 3rd holes are from my first round of grounding; still not there yet.
After the couple rounds of grinding, you can see the final product here in the two holes to the right. The farthest right hole has been drilled with a 5/16" bit which is the size I use for spot welds.
Will definitely speed up the panel prep time!!!
Sent via signal flare
Last edited:

- City
- Claflin
- State
- KS
I'm not sure on the factory size, I've never really measured any. I will take a look at some of my original paint stuff and see.Good work. What's size are the factory spots? Aren't they around 1/4"?
Surely you don't use the 3/8" spot weld cutter to drill the holes for new spot welds in a new panel? Seems like a waste of an expensive bit if so!I still like my 3/8 spot weld cutter.
- City
- Gonzales
- State
- La
Surely you don't use the 3/8" spot weld cutter to drill the holes for new spot welds in a new panel? Seems like a waste of an expensive bit if so!
No. Not for new stuff. A 1/4" hole or 3/16" works much better. My mistake, I thought you were using your punch to remove spot welds.
- City
- Claflin
- State
- KS
Back at it again with the rust repair and panel replacement. Motivation is finally back after fighting with the junk MD Juan side panels and working on a few other projects.
I'm going to have to get creative with how to graft the top edge of the replacement side panels into the original panels near the B-pillars. I have somewhat of a game plan to try and do this and make it not look like total hell; more on this later. Will be a lot of extra work all because the replacement panels are crap.
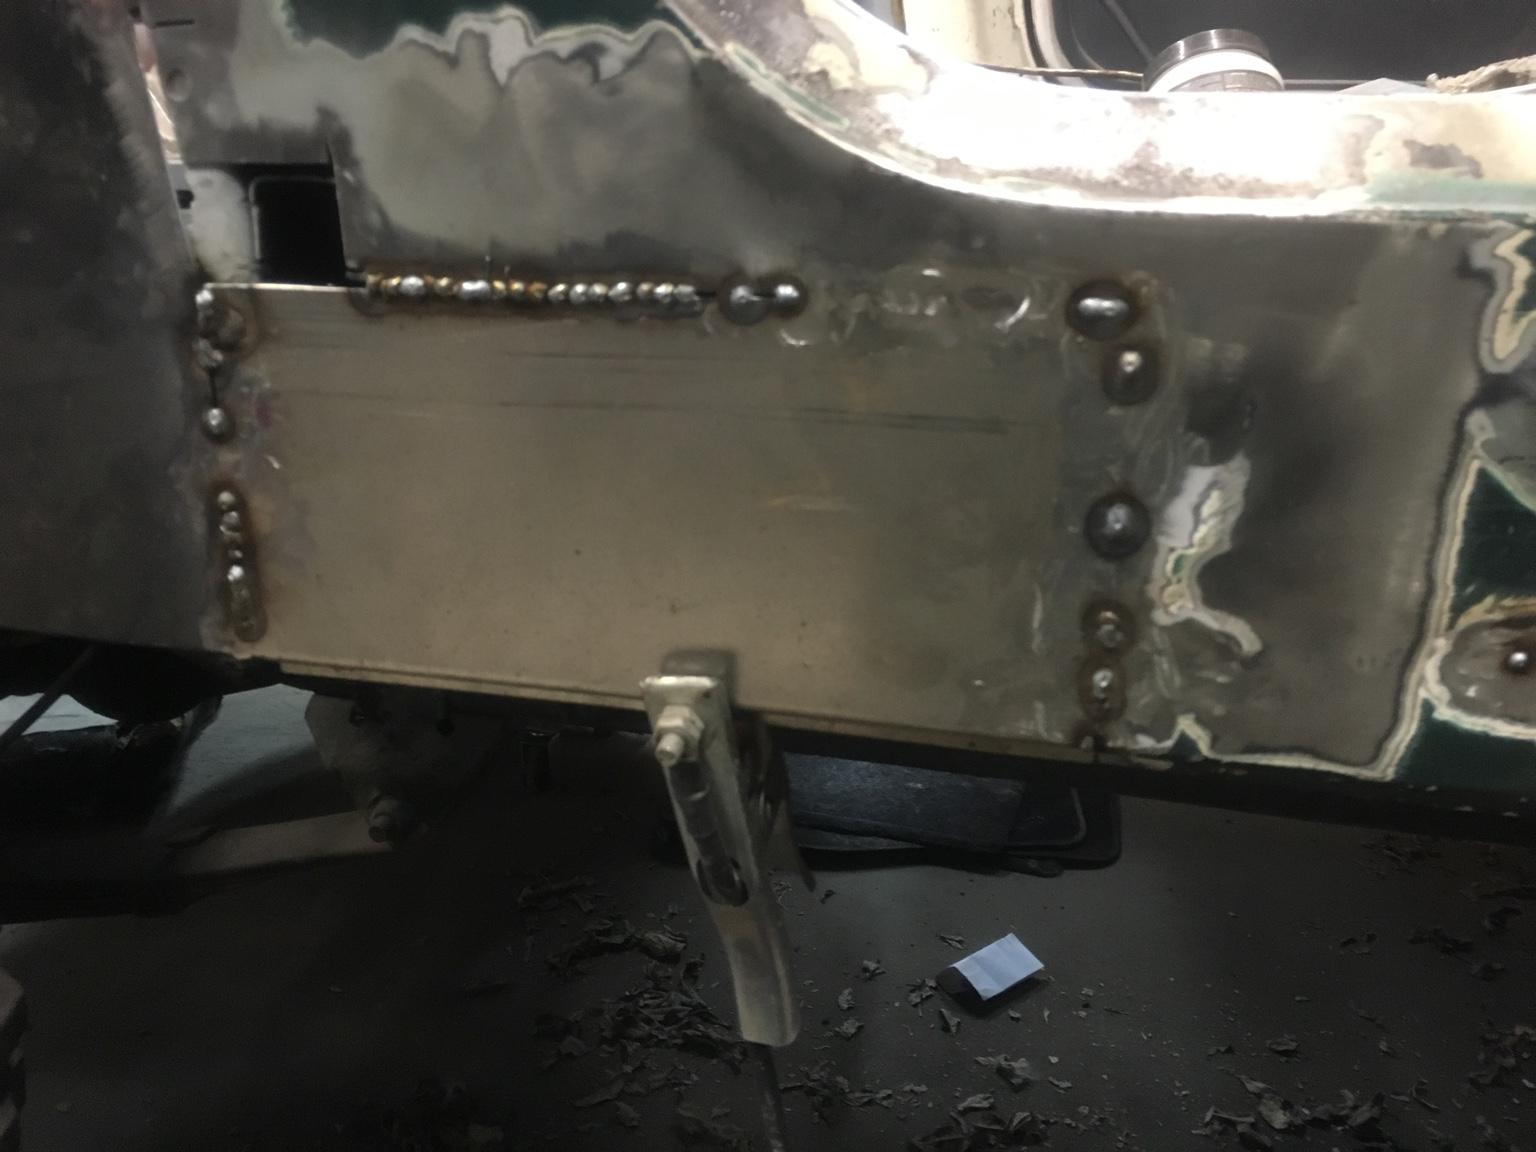
Finished up welding the right side panel. Welds have been cleaned up and ground down:
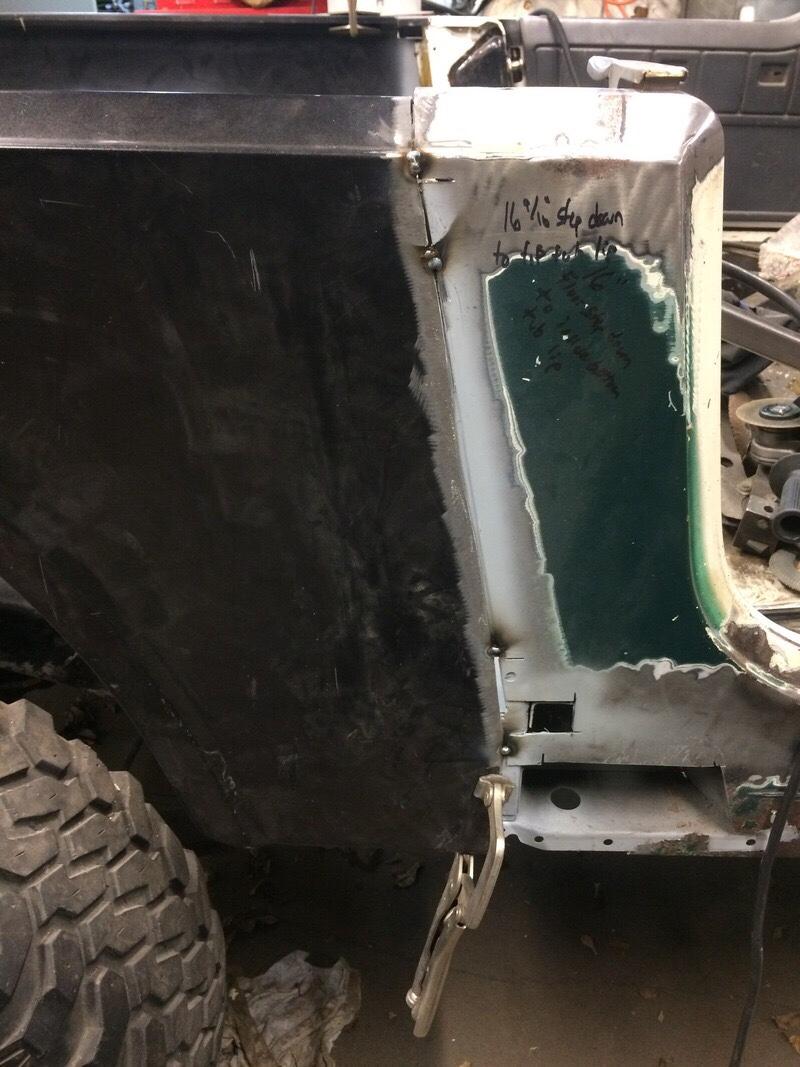
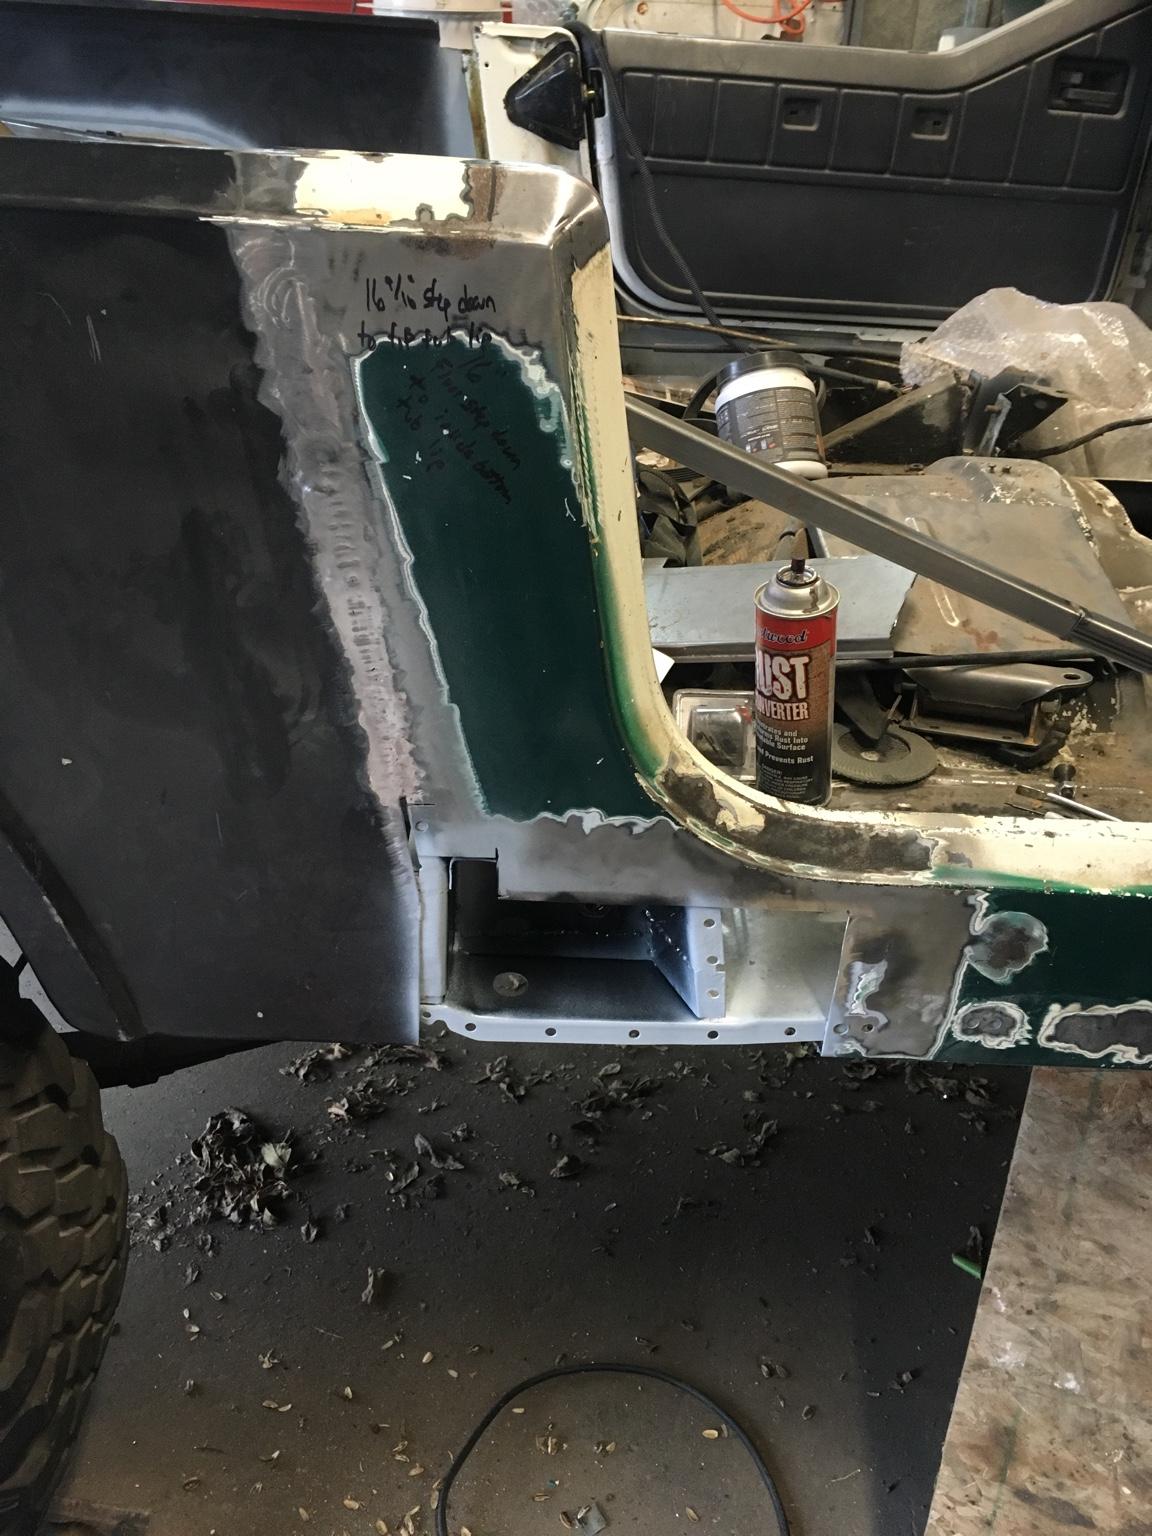
Needed to finish up the rust repair on the lower B-pillar area. Cleaned all the paint out from the B-pillar and applied rust converter, rust encapsulator, and weld through primer where needed.
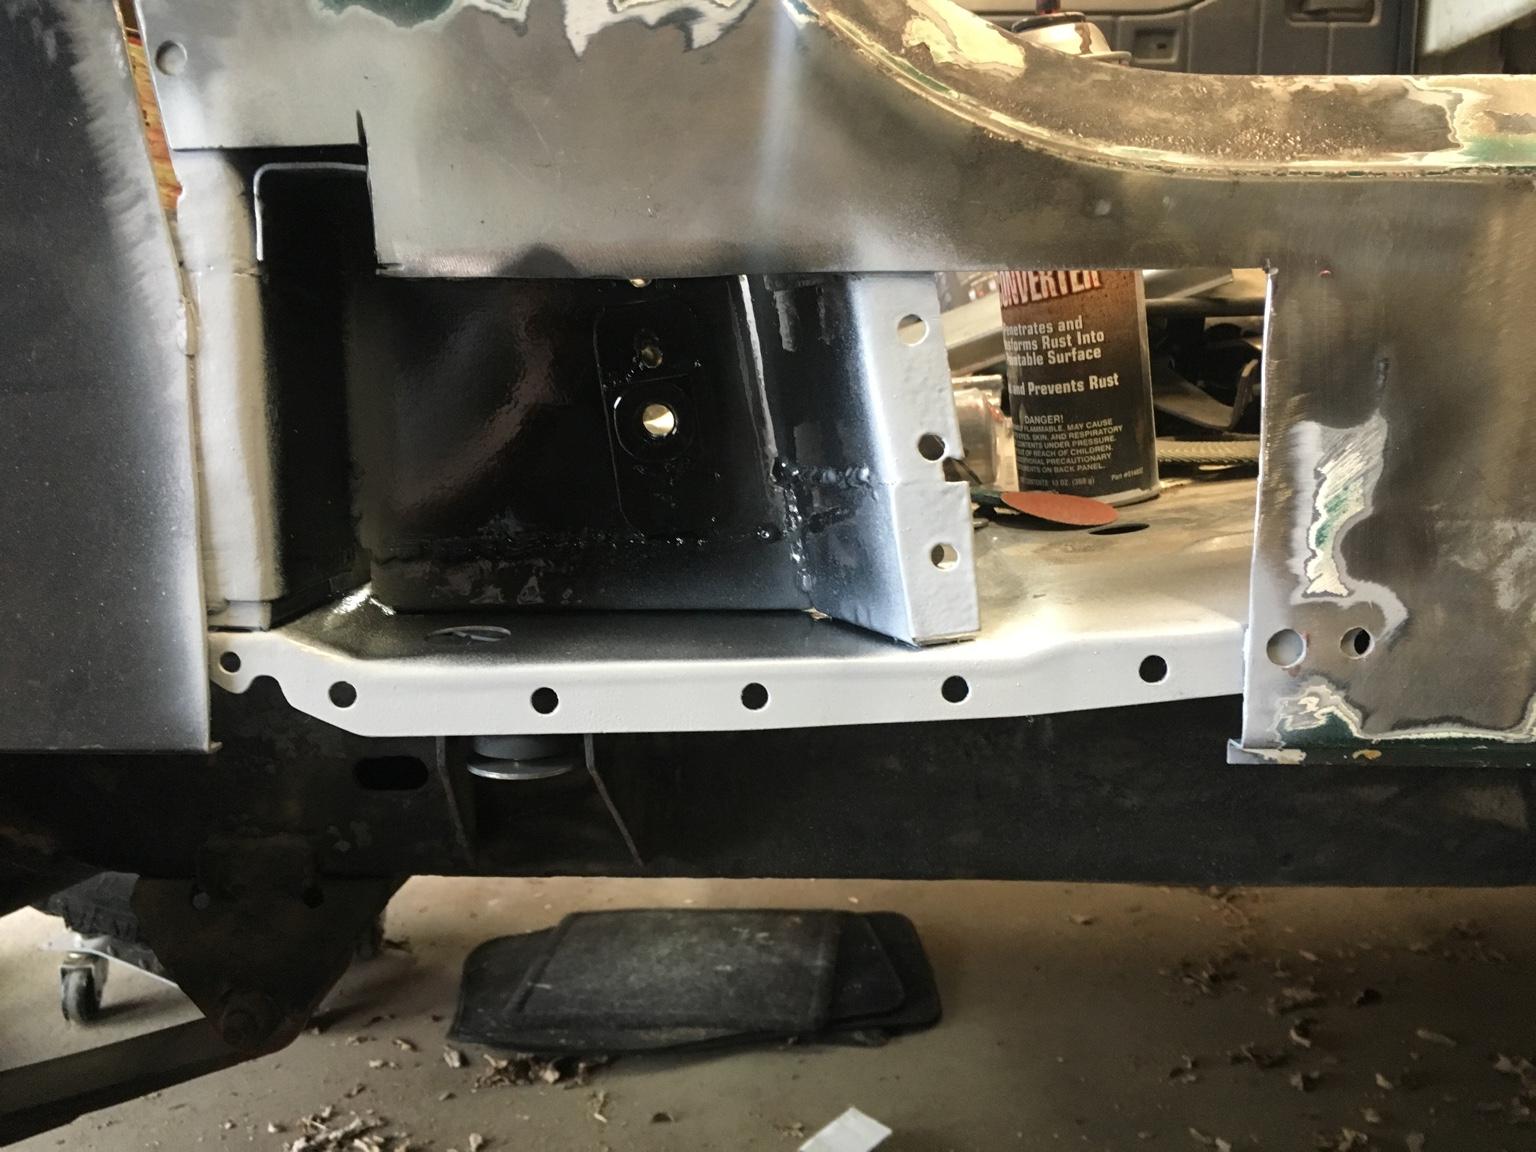
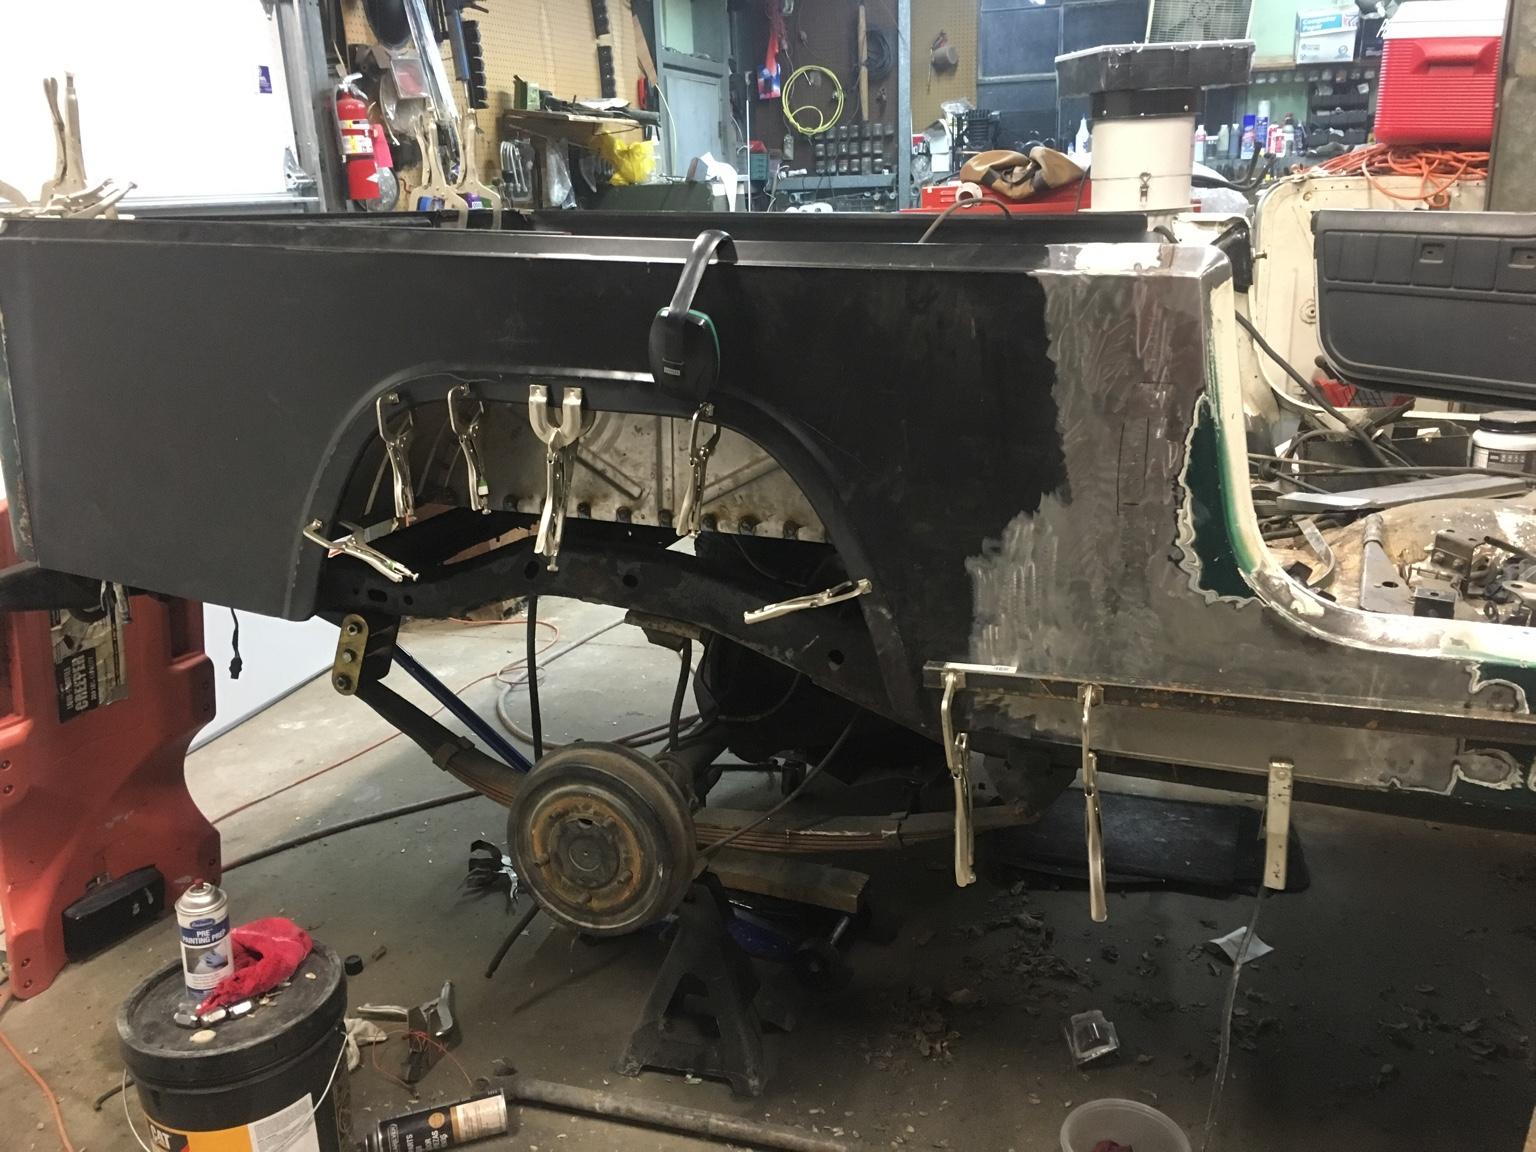
Before welding the panel in, I did have it clamped into place as well as a piece of a square tubing clamped along almost the whole side panel to keep everything even and smooth while tack welding into place. In the picture, the clamps and square tubing have been removed so I could begin cleaning up the welds as I moved along.
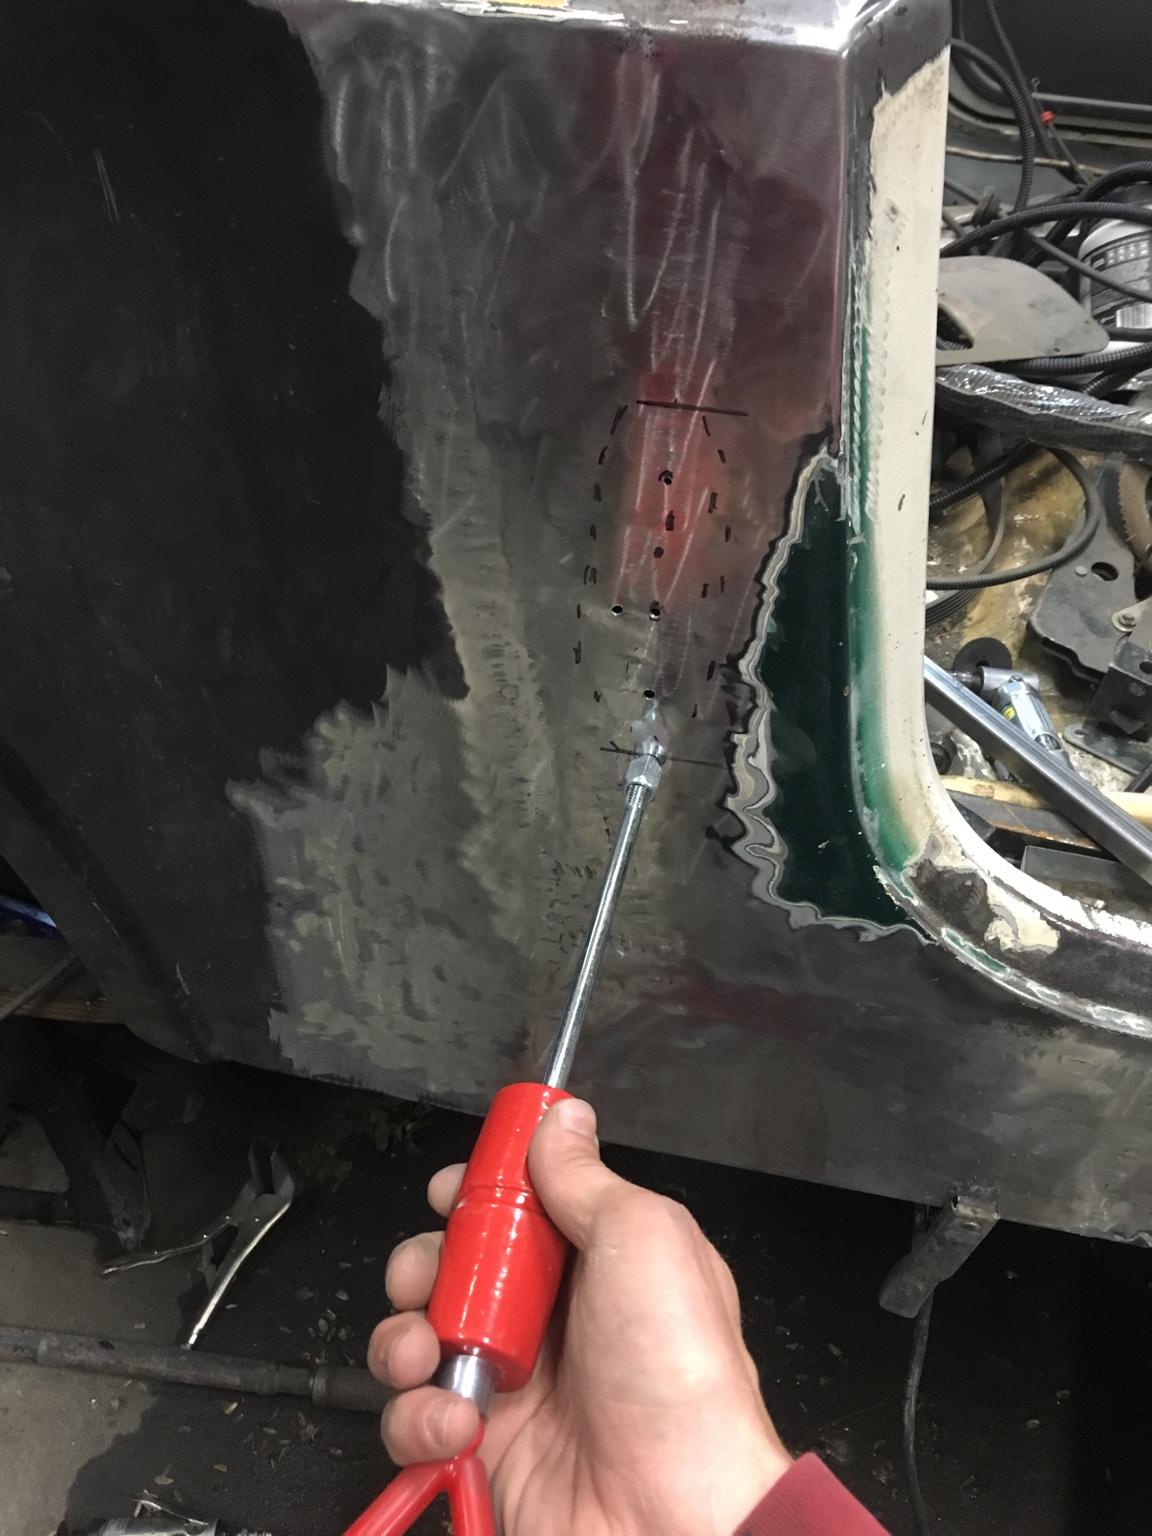
Got in a hurry and rushed a few of my spot welds. Ended up causing a slight bow in the panel; I outlined the dented area with a sharpie. Had to use a slide hammer dent puller to slowly work the concave area out. Started from the outside and worked towards the center of the dent. Still needs a little work but will wait until I get a better slide hammer dent puller tool that attaches to small rods which are spot welded to the panel.
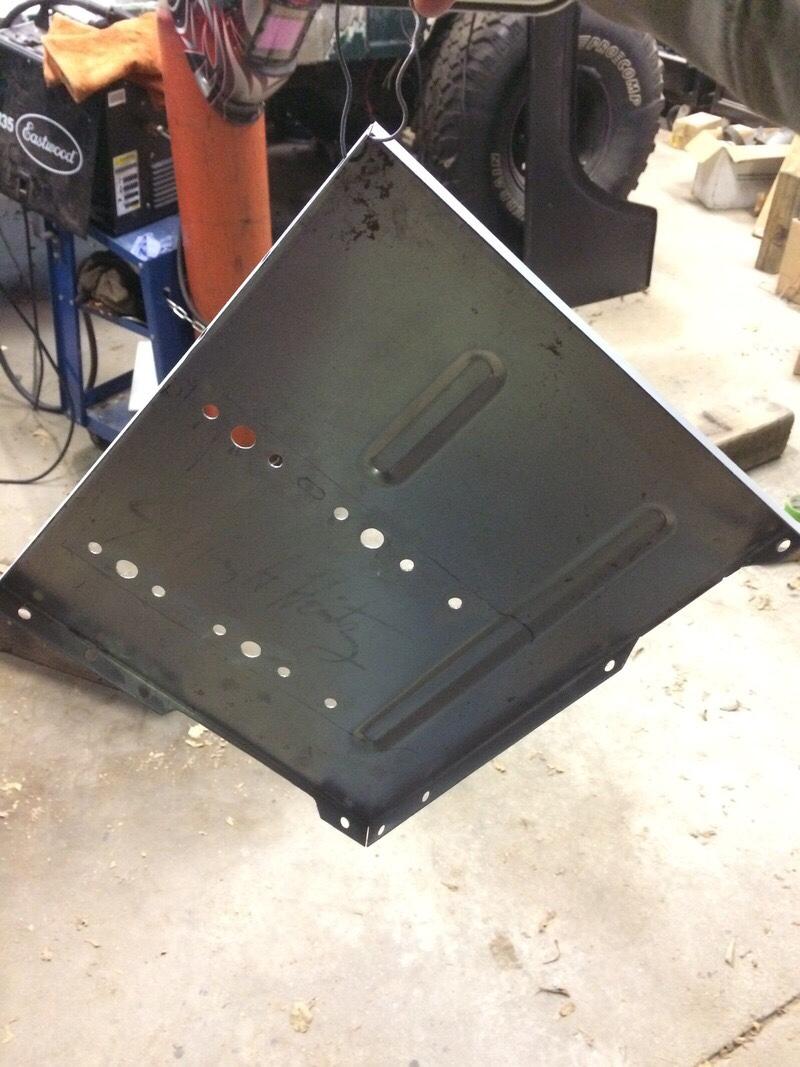
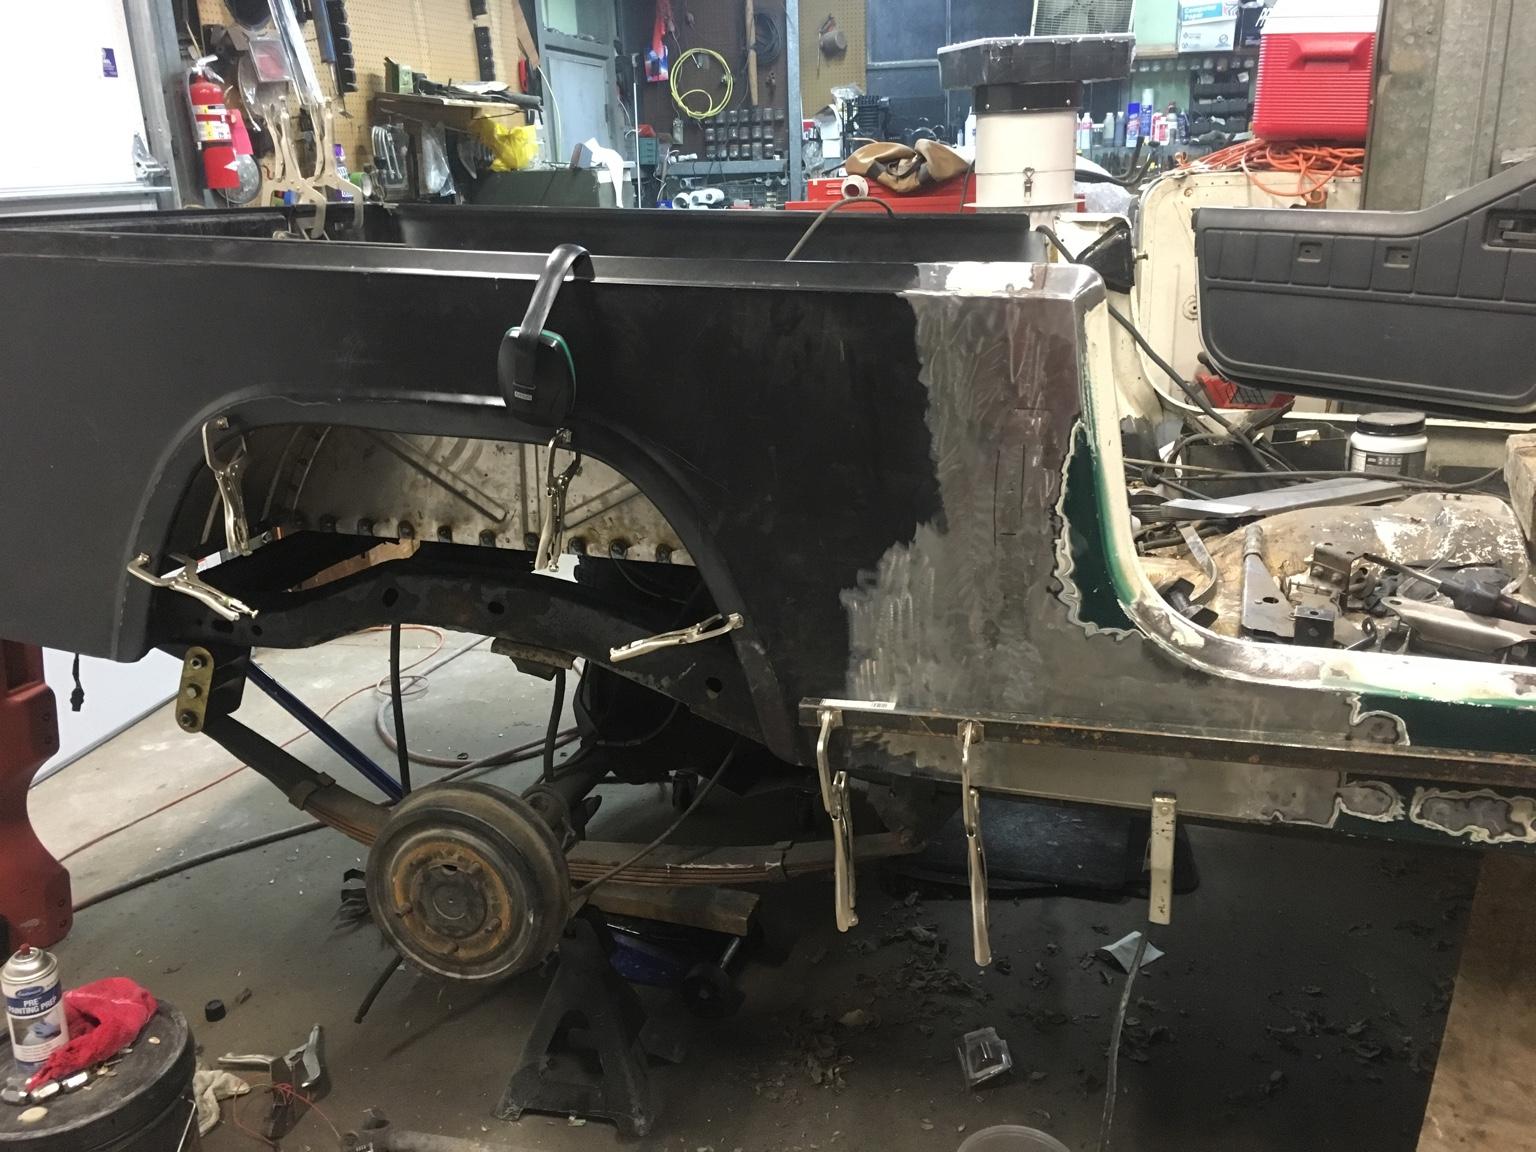
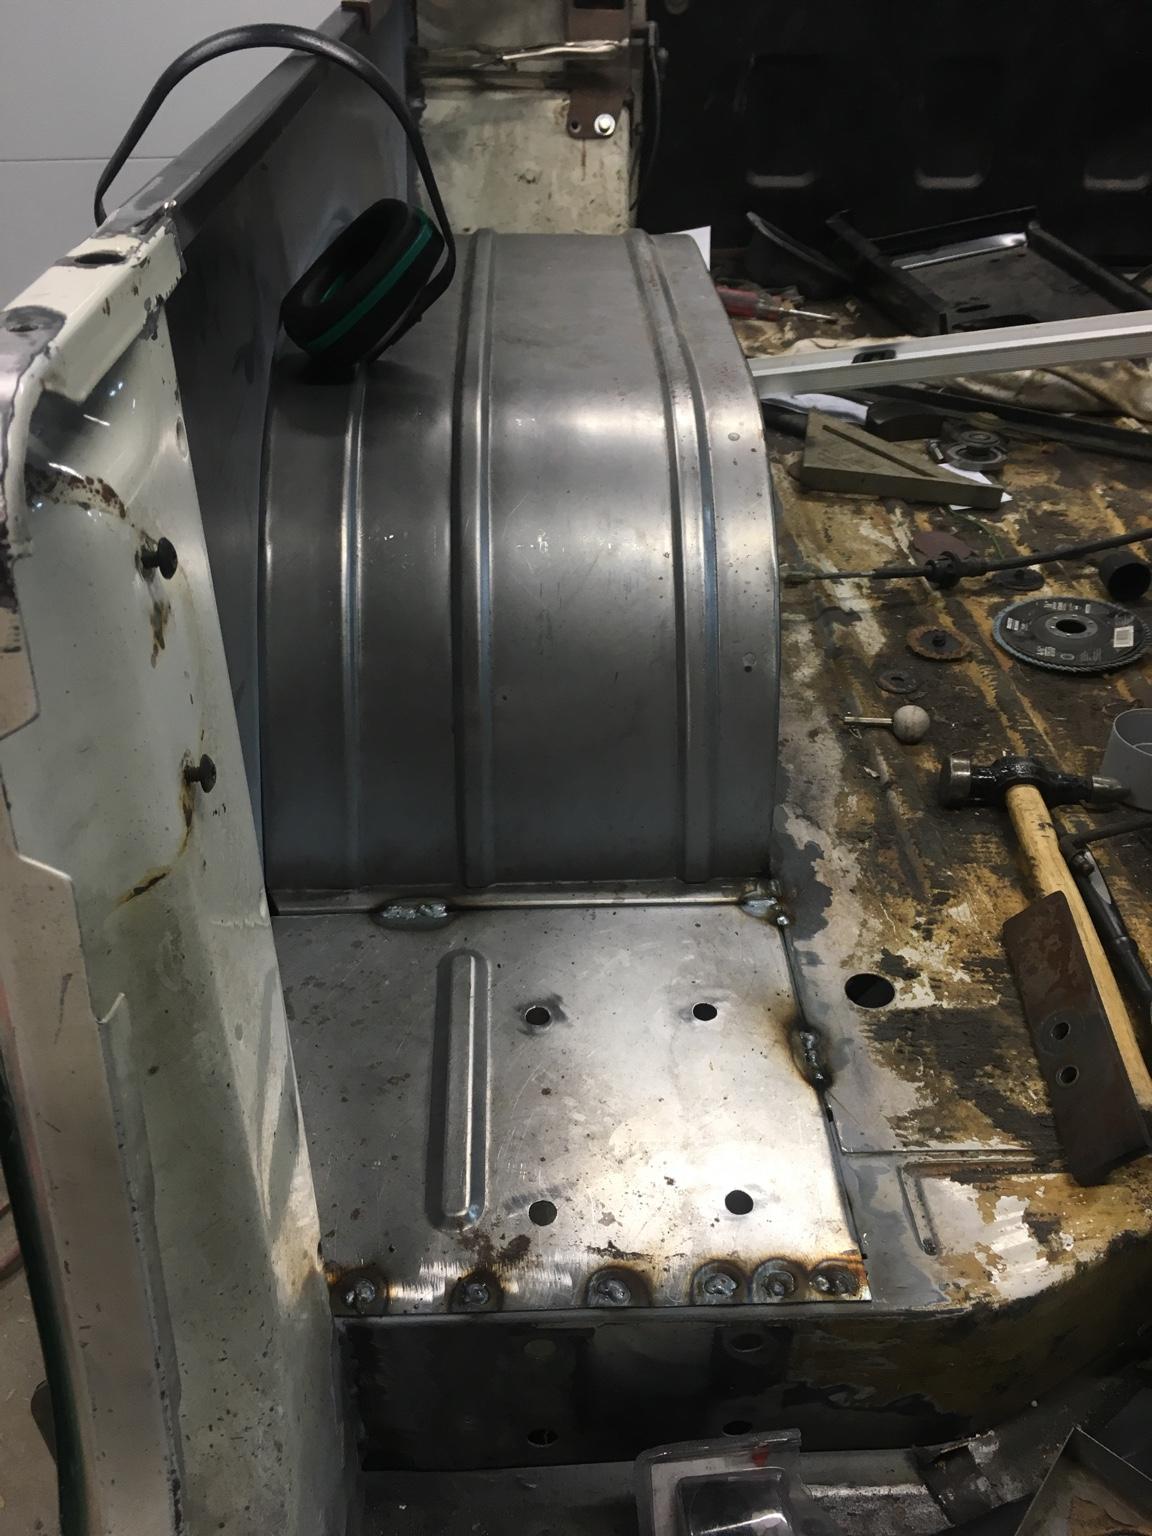
Inner wheel well and under rollbar floor panels test fitted and being spot welded in. You can see the square tubing I use to clamp along all the panels to help hold everything in place. This is clamped right behind where many of the spot welds will being going for the roll bar floor panels.
Sent via smoke signal
I'm going to have to get creative with how to graft the top edge of the replacement side panels into the original panels near the B-pillars. I have somewhat of a game plan to try and do this and make it not look like total hell; more on this later. Will be a lot of extra work all because the replacement panels are crap.
Finished up welding the right side panel. Welds have been cleaned up and ground down:
Needed to finish up the rust repair on the lower B-pillar area. Cleaned all the paint out from the B-pillar and applied rust converter, rust encapsulator, and weld through primer where needed.
Before welding the panel in, I did have it clamped into place as well as a piece of a square tubing clamped along almost the whole side panel to keep everything even and smooth while tack welding into place. In the picture, the clamps and square tubing have been removed so I could begin cleaning up the welds as I moved along.
Got in a hurry and rushed a few of my spot welds. Ended up causing a slight bow in the panel; I outlined the dented area with a sharpie. Had to use a slide hammer dent puller to slowly work the concave area out. Started from the outside and worked towards the center of the dent. Still needs a little work but will wait until I get a better slide hammer dent puller tool that attaches to small rods which are spot welded to the panel.
Inner wheel well and under rollbar floor panels test fitted and being spot welded in. You can see the square tubing I use to clamp along all the panels to help hold everything in place. This is clamped right behind where many of the spot welds will being going for the roll bar floor panels.
Sent via smoke signal
Last edited:
- City
- Claflin
- State
- KS
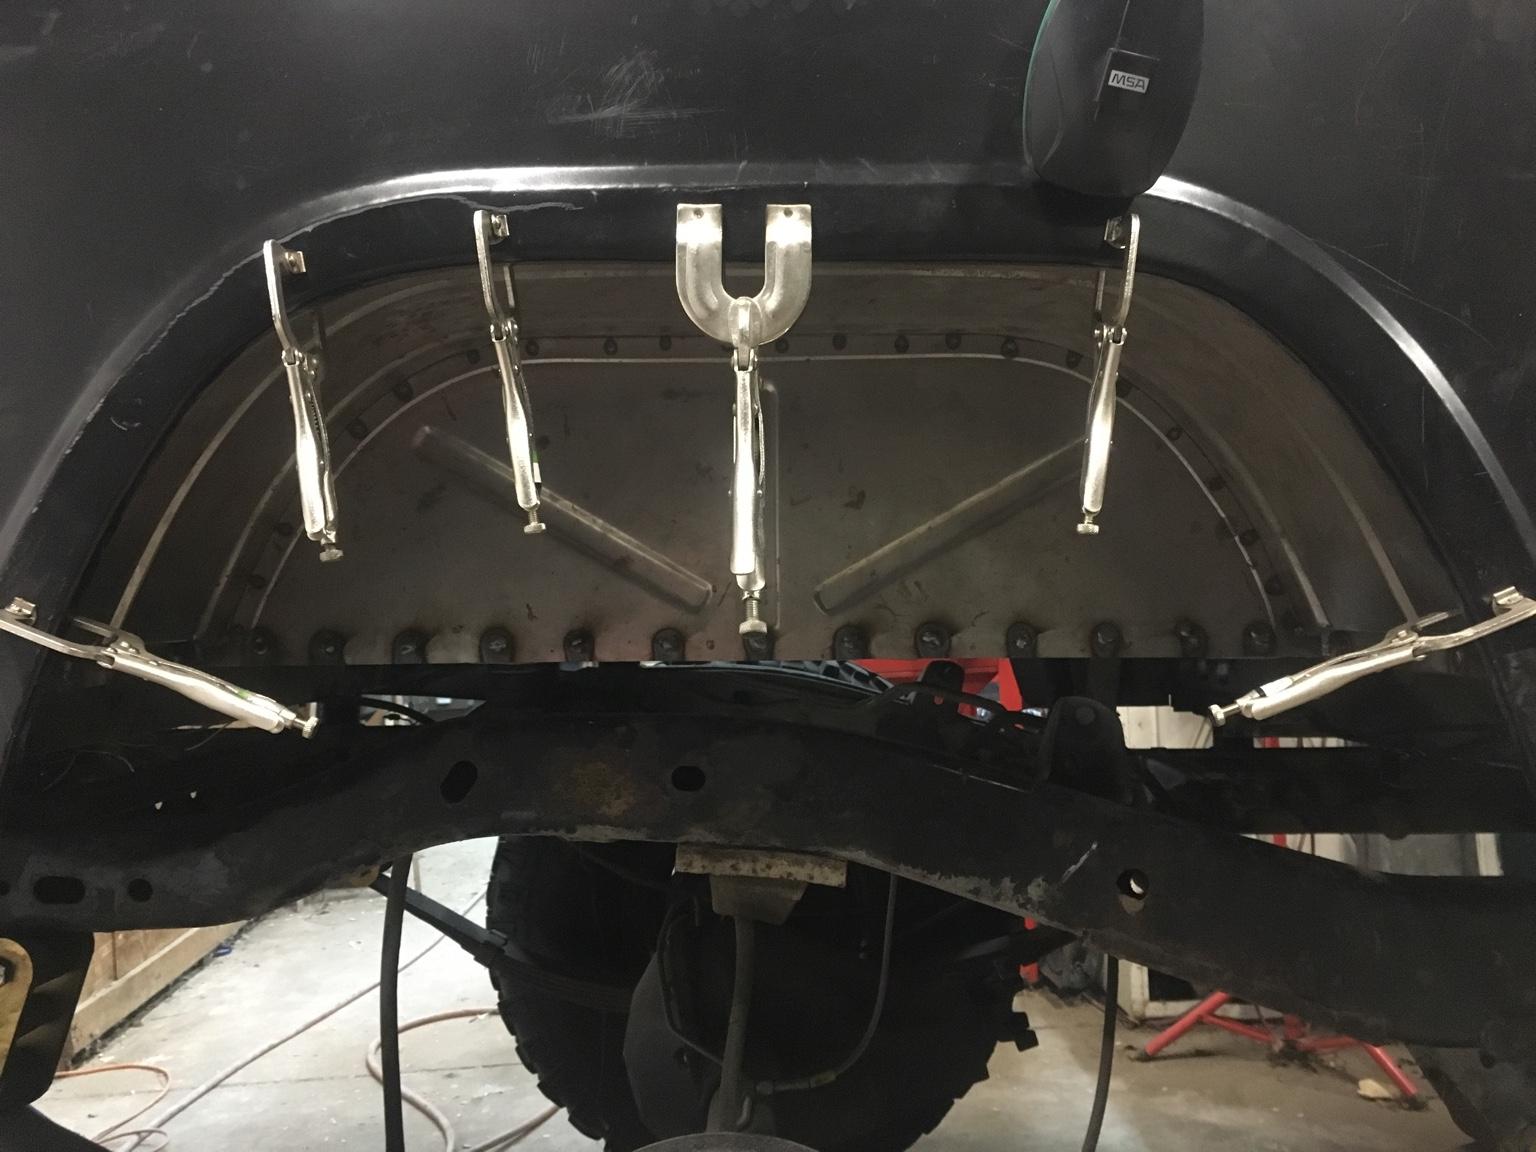
Plenty of clamps are a must:
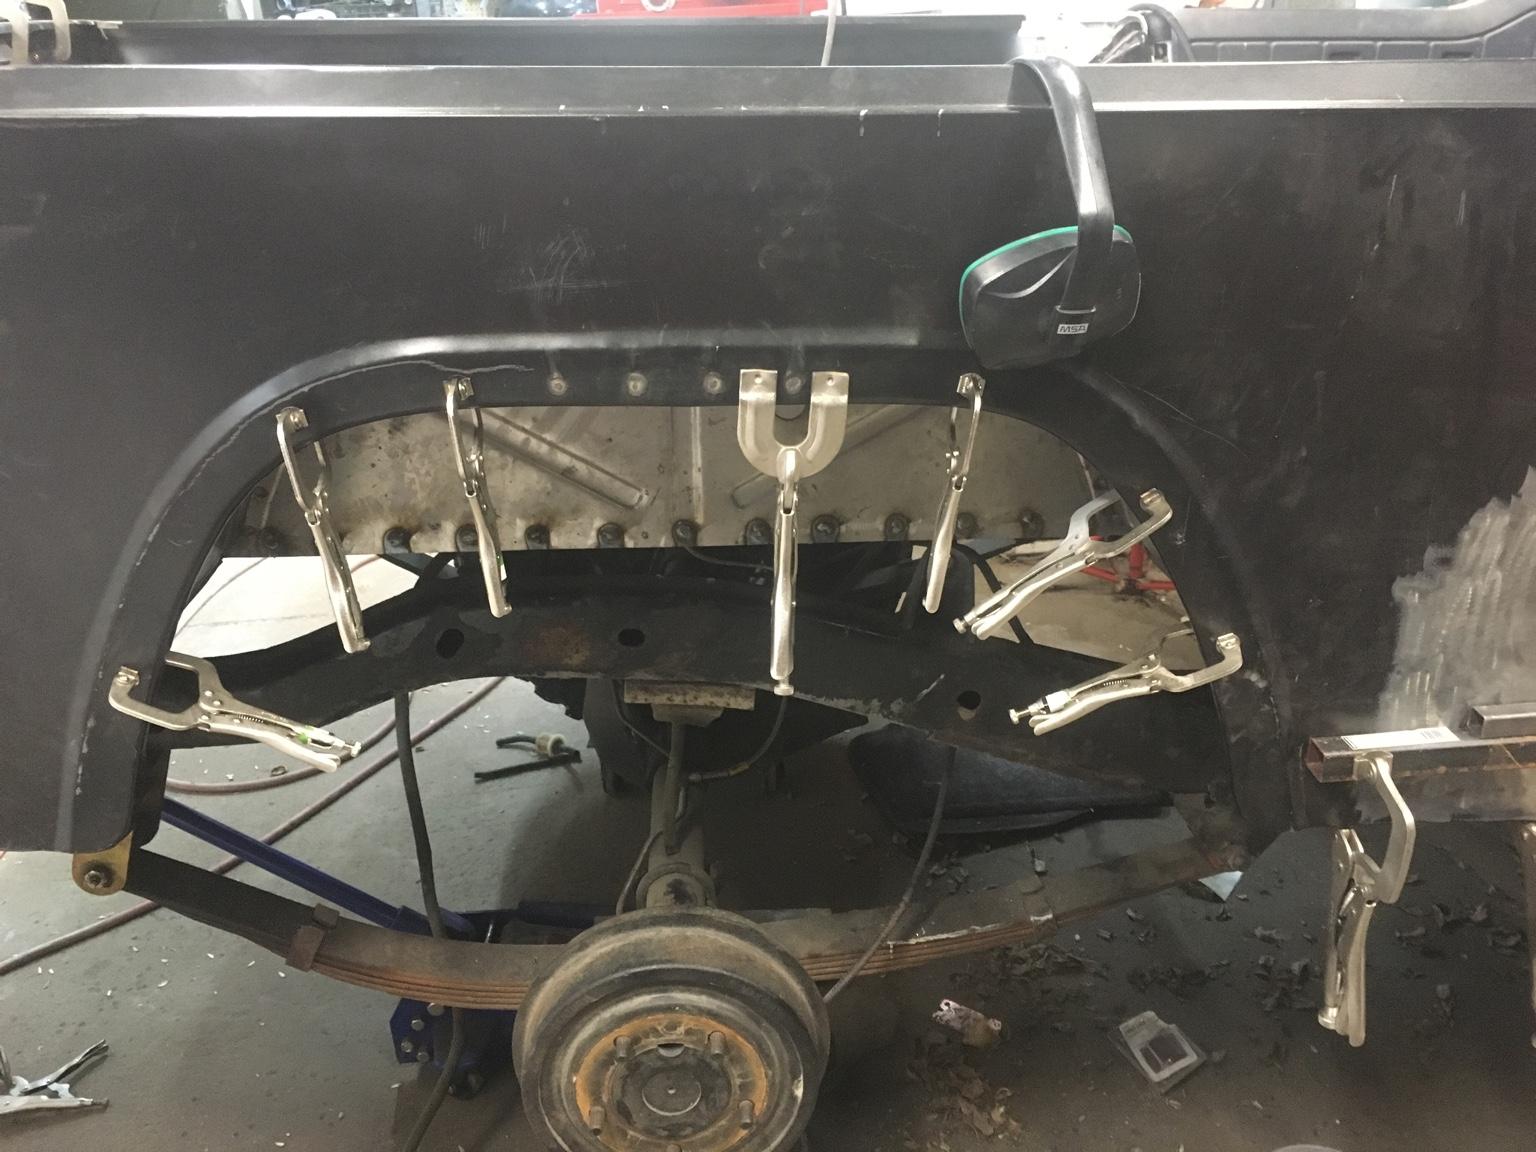
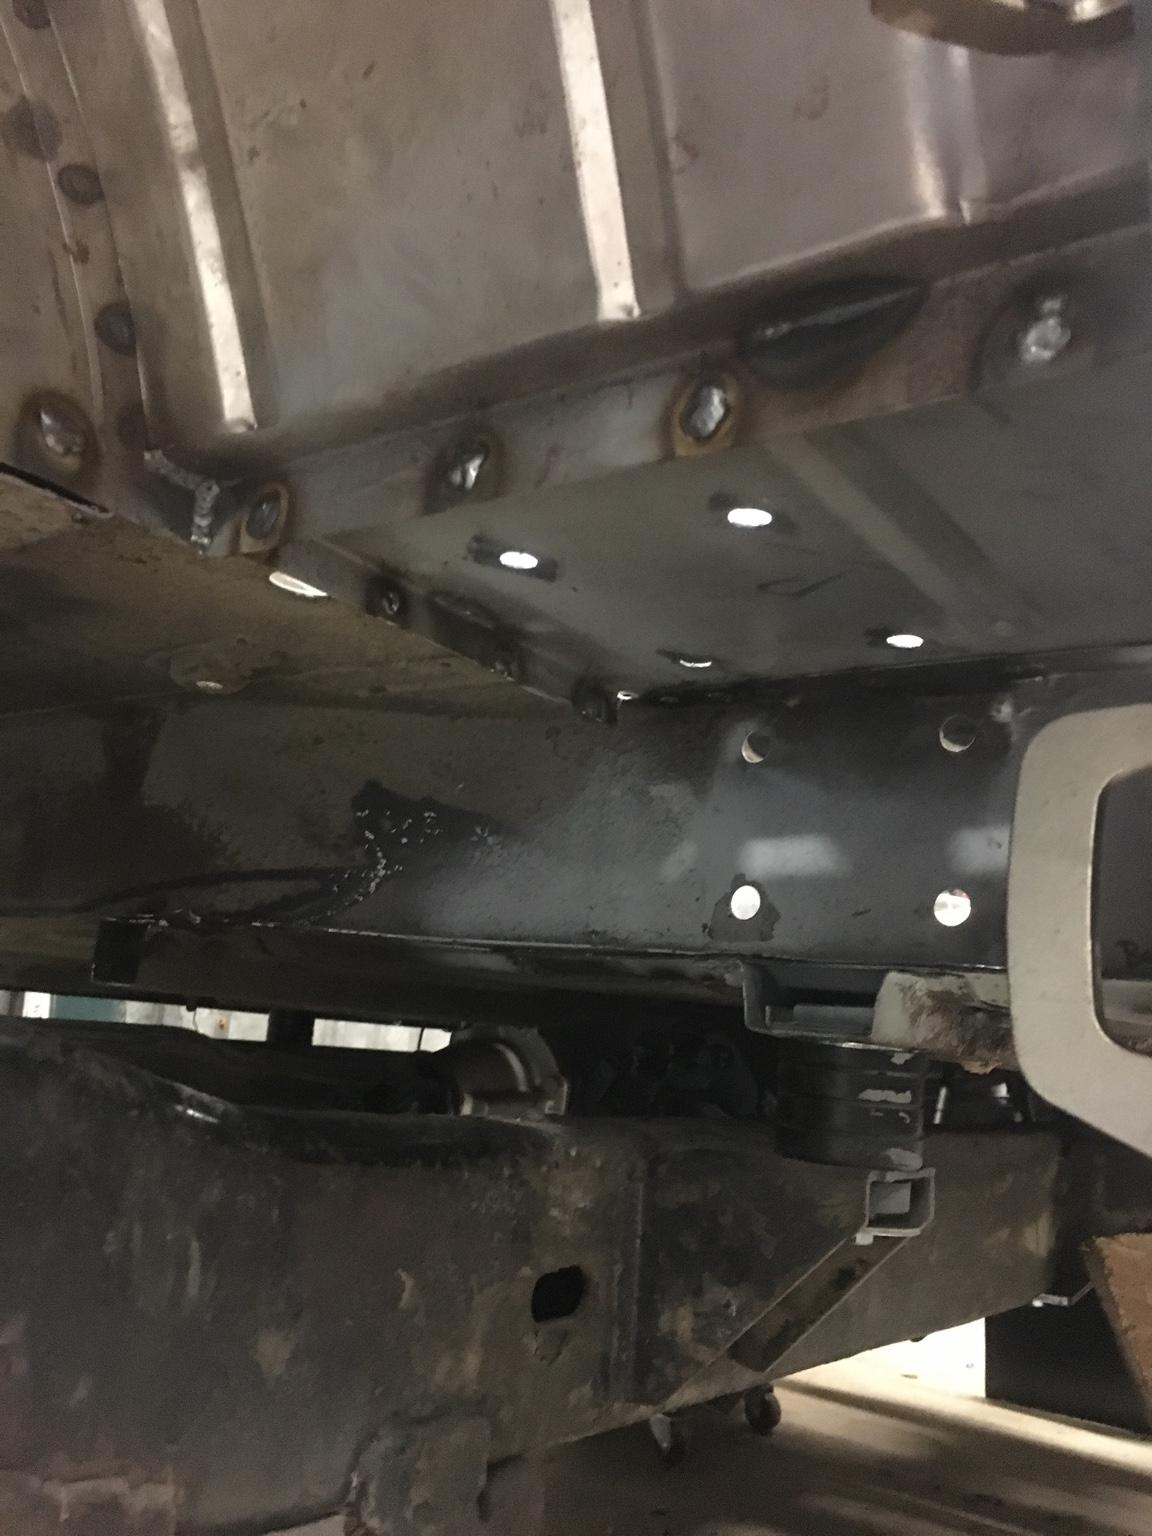
when spot welding, I scrape the hole clean of weld through primer and put a clamp or two right on either side of where I will be welding.
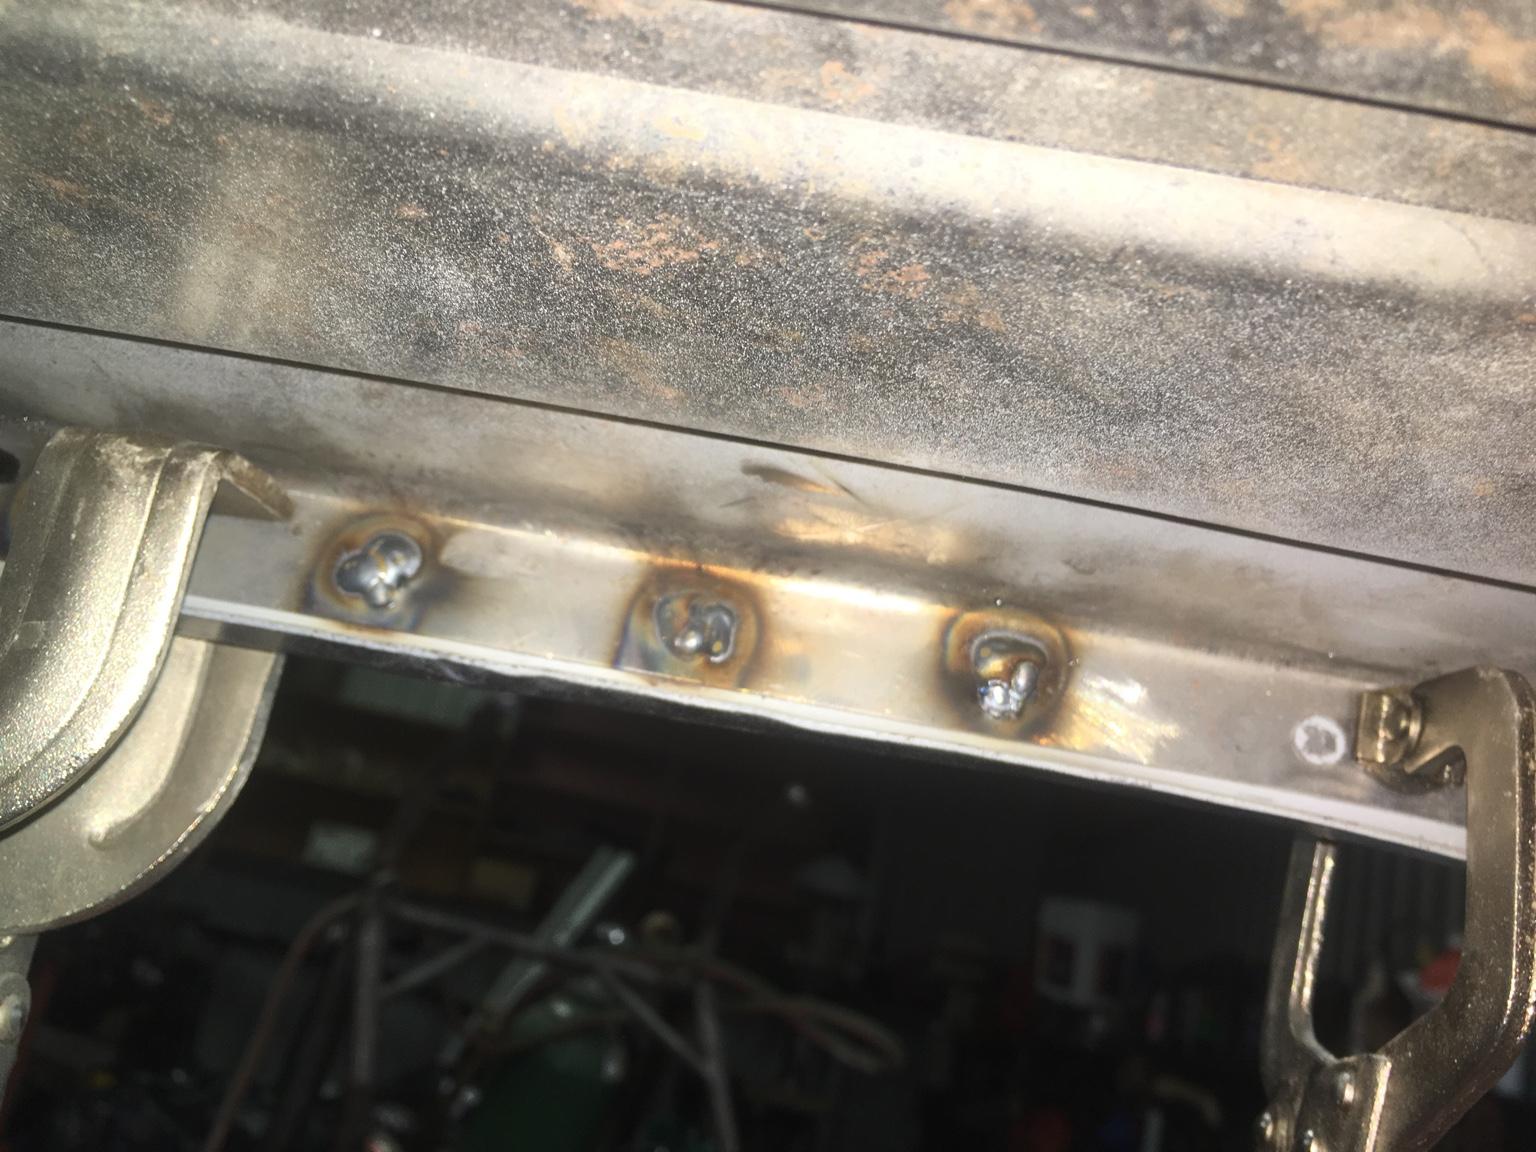
Spot welds almost all in and clamps/braces removed. The spot welding was all done from inside the wheel well and underneath the Jeep so you can see where the spot welds have burned the paint off on the outside of the new panel.
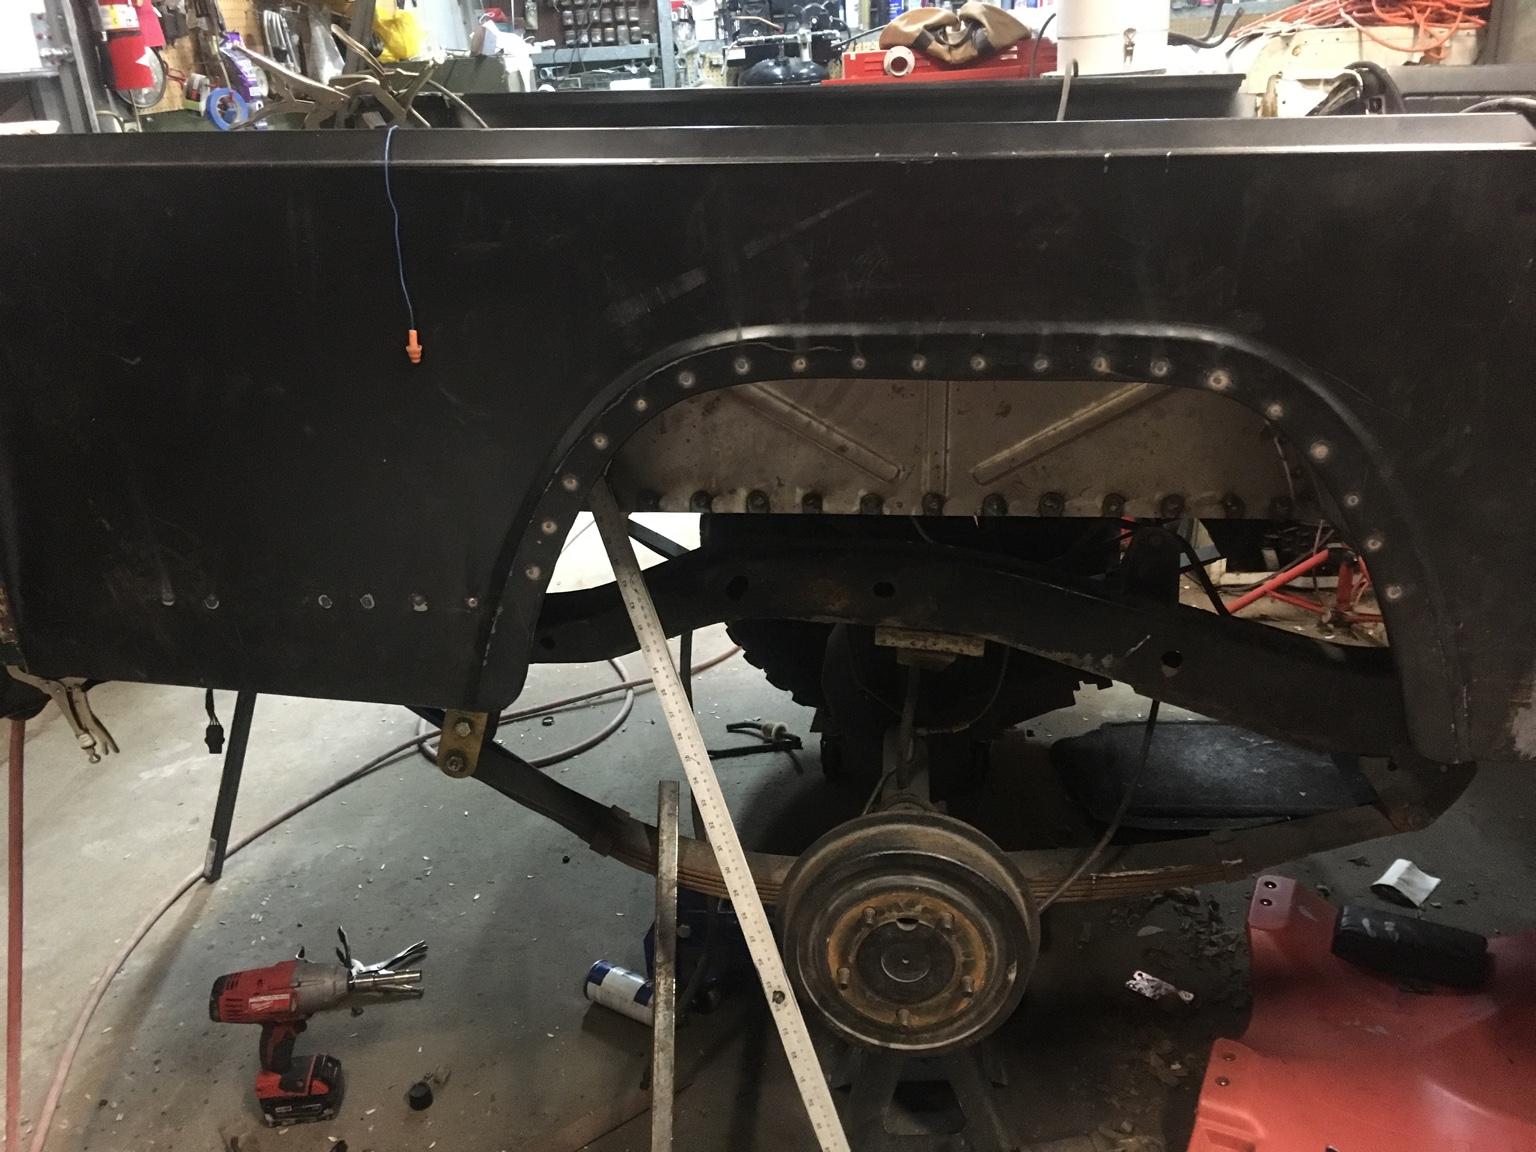
Onto the last major panel to be replaced:
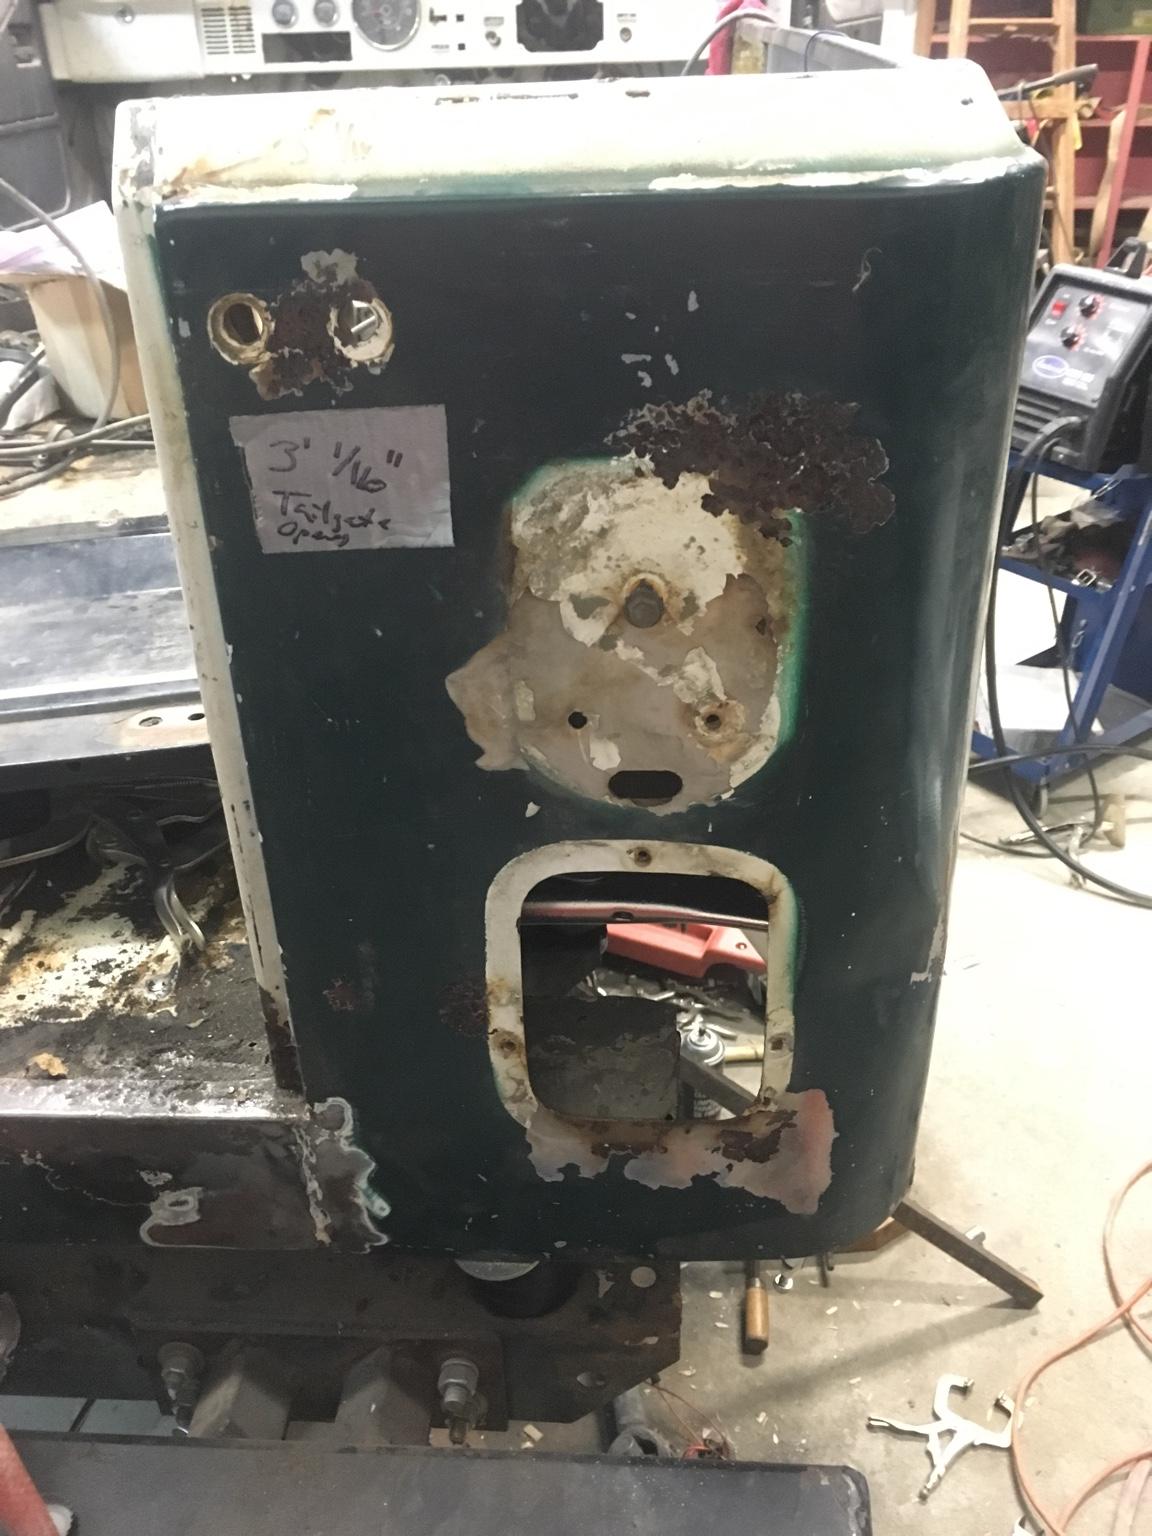
Finding all the spot welds can be fun after a prior repaint:
Sent via smoke signal
Last edited:
- City
- Claflin
- State
- KS
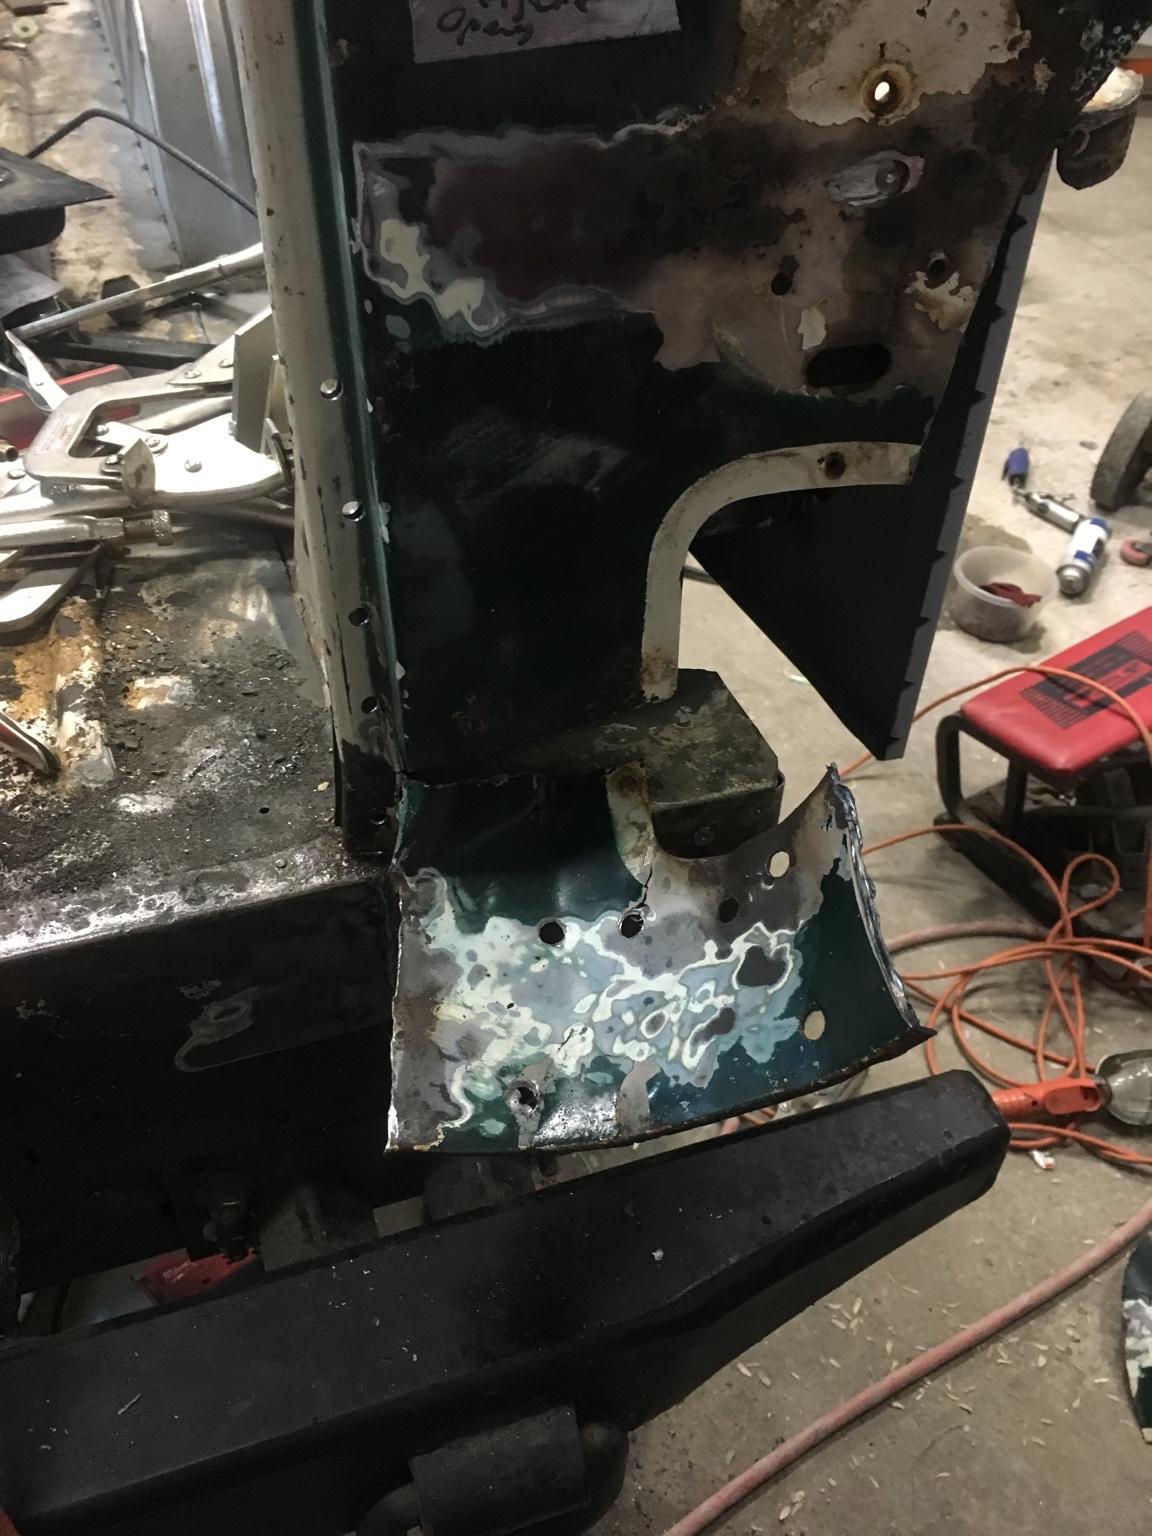
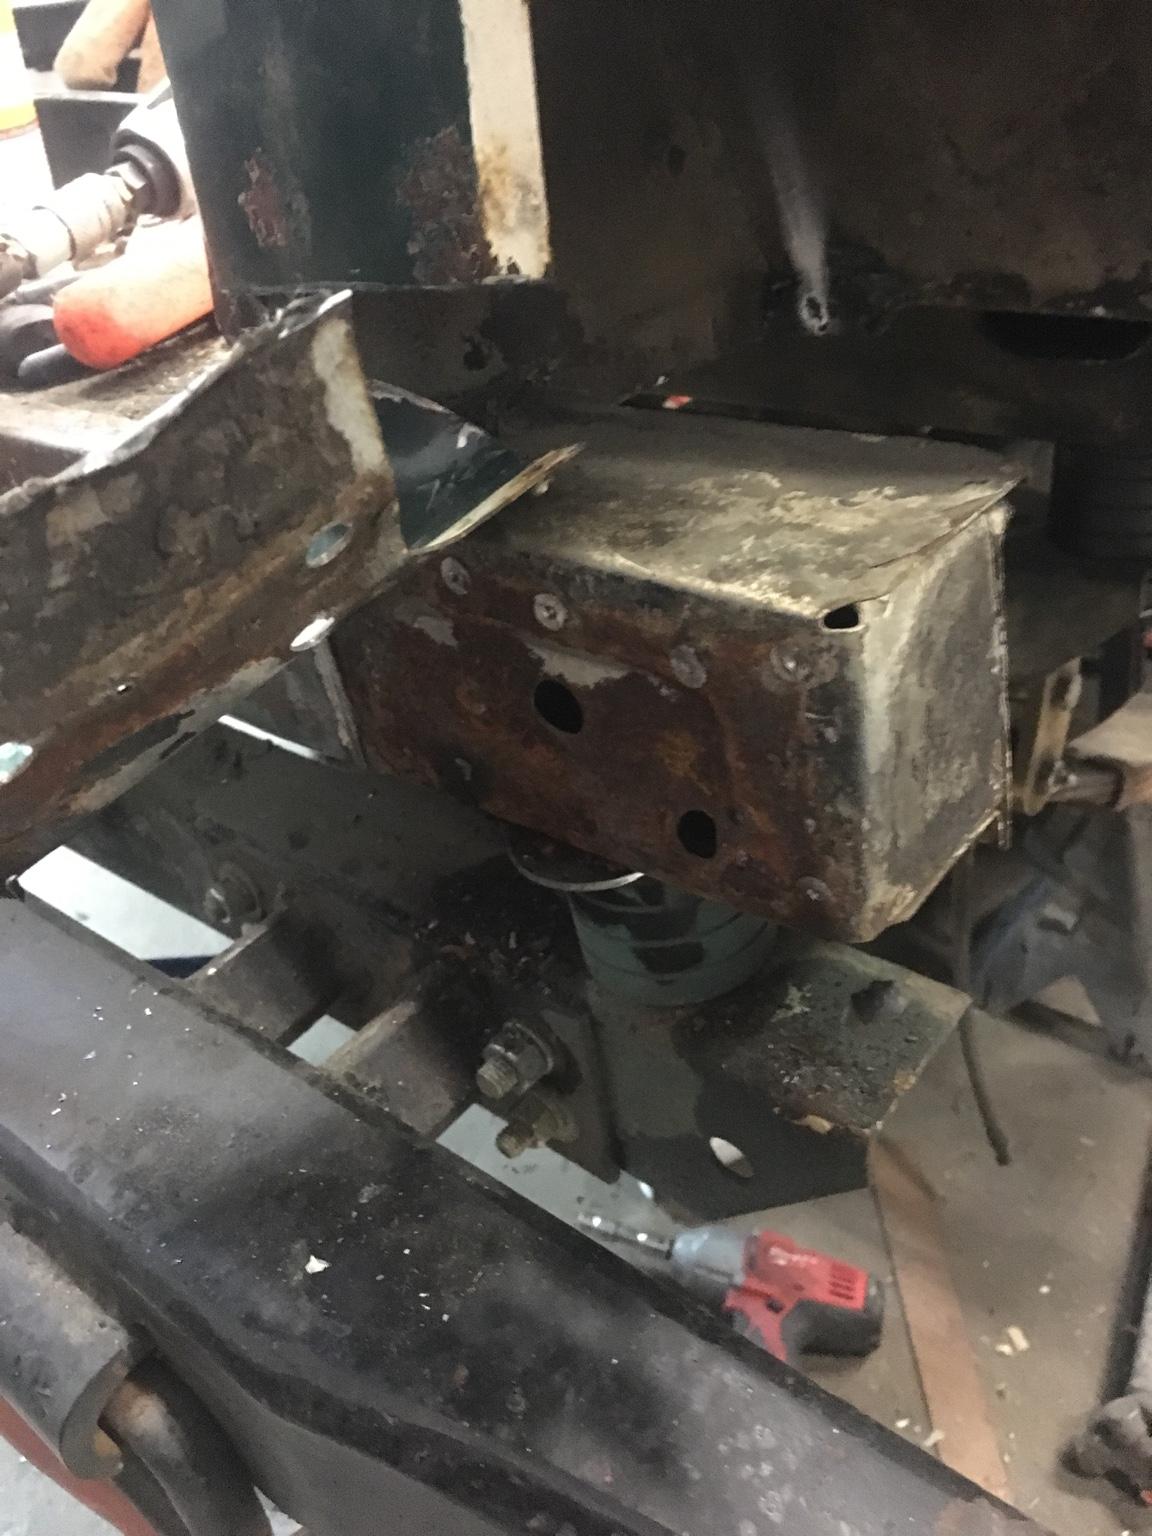
Just used a regular drill bit and drilled all the way through on this area. I will be using the holes in the panel still attached to the jeep for my new spot welds.
Off!
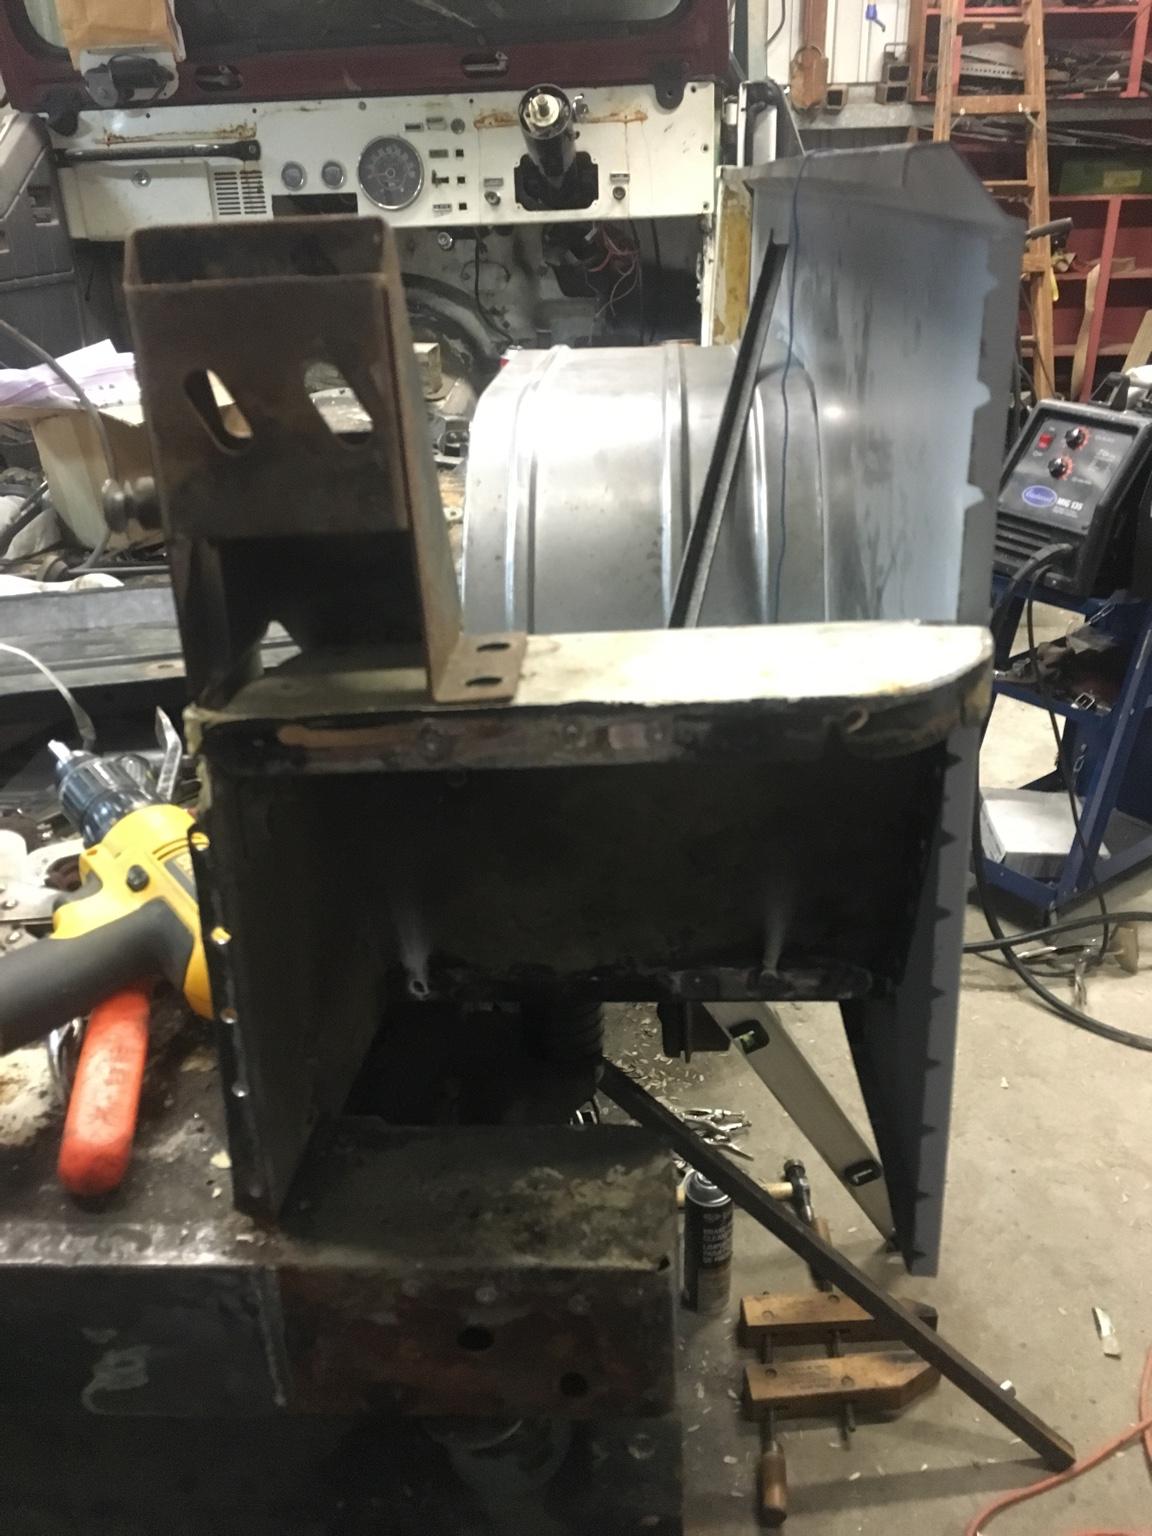
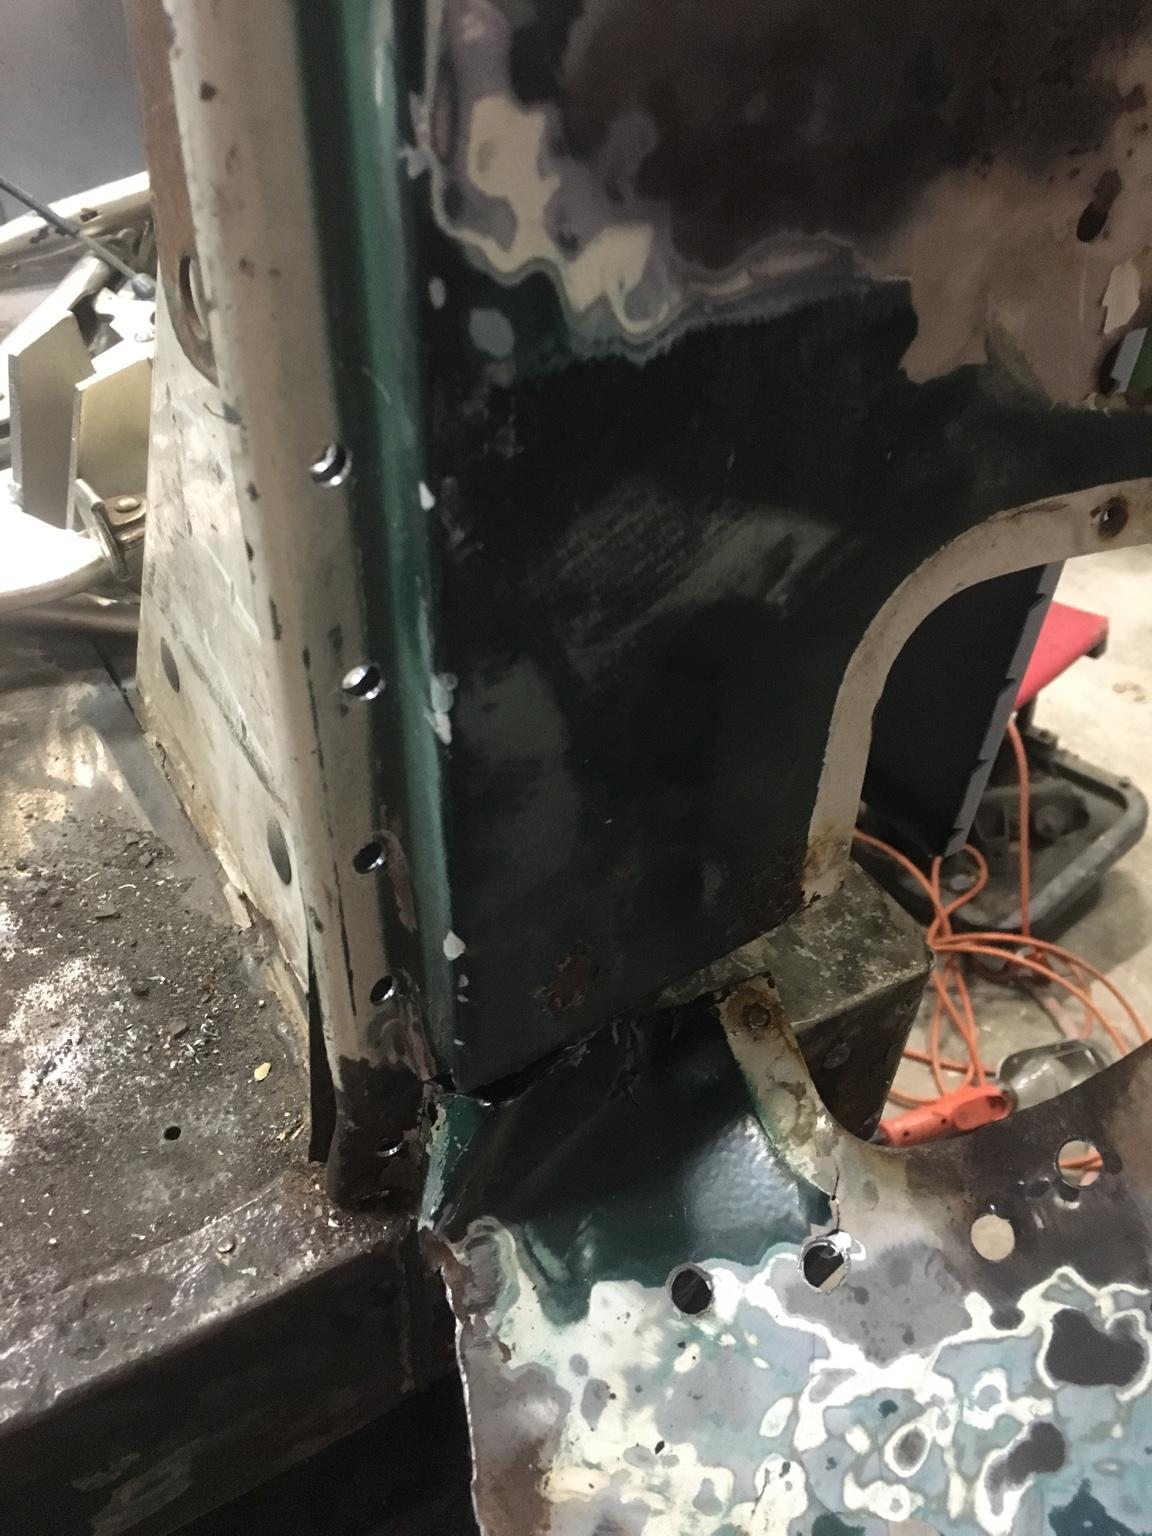
No rust through on this piece but the capture nut is broken so I needed to get into the panel anyways:
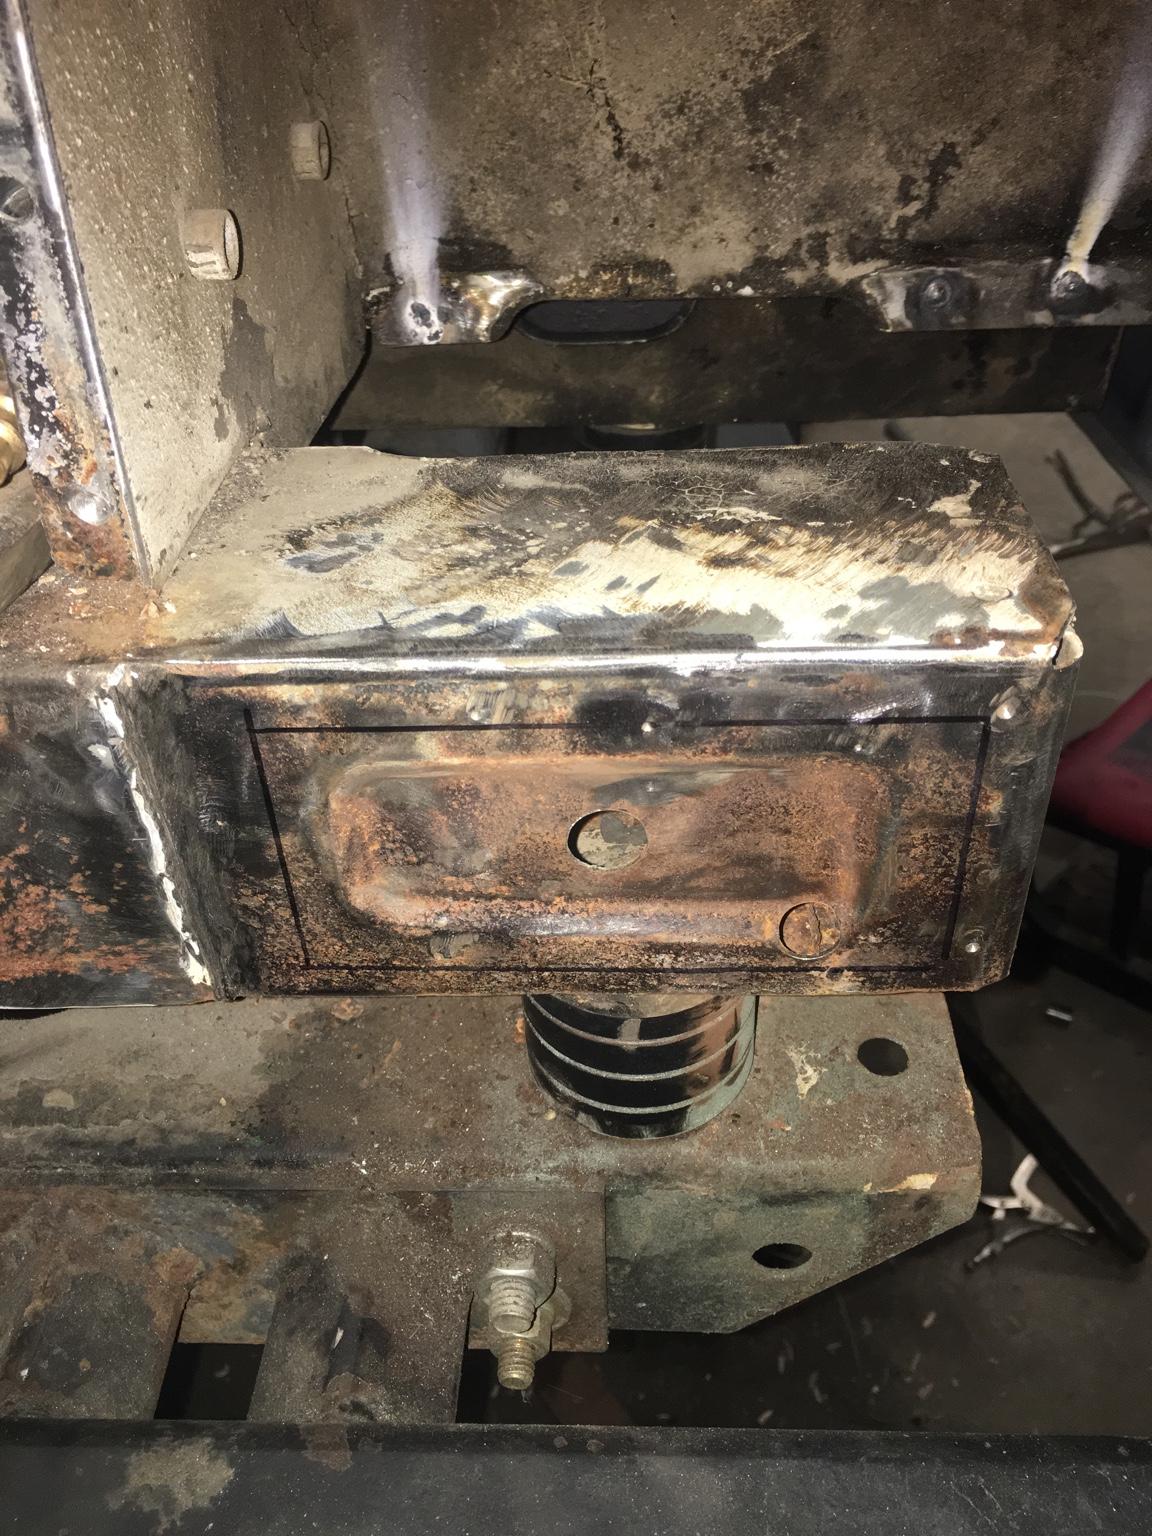
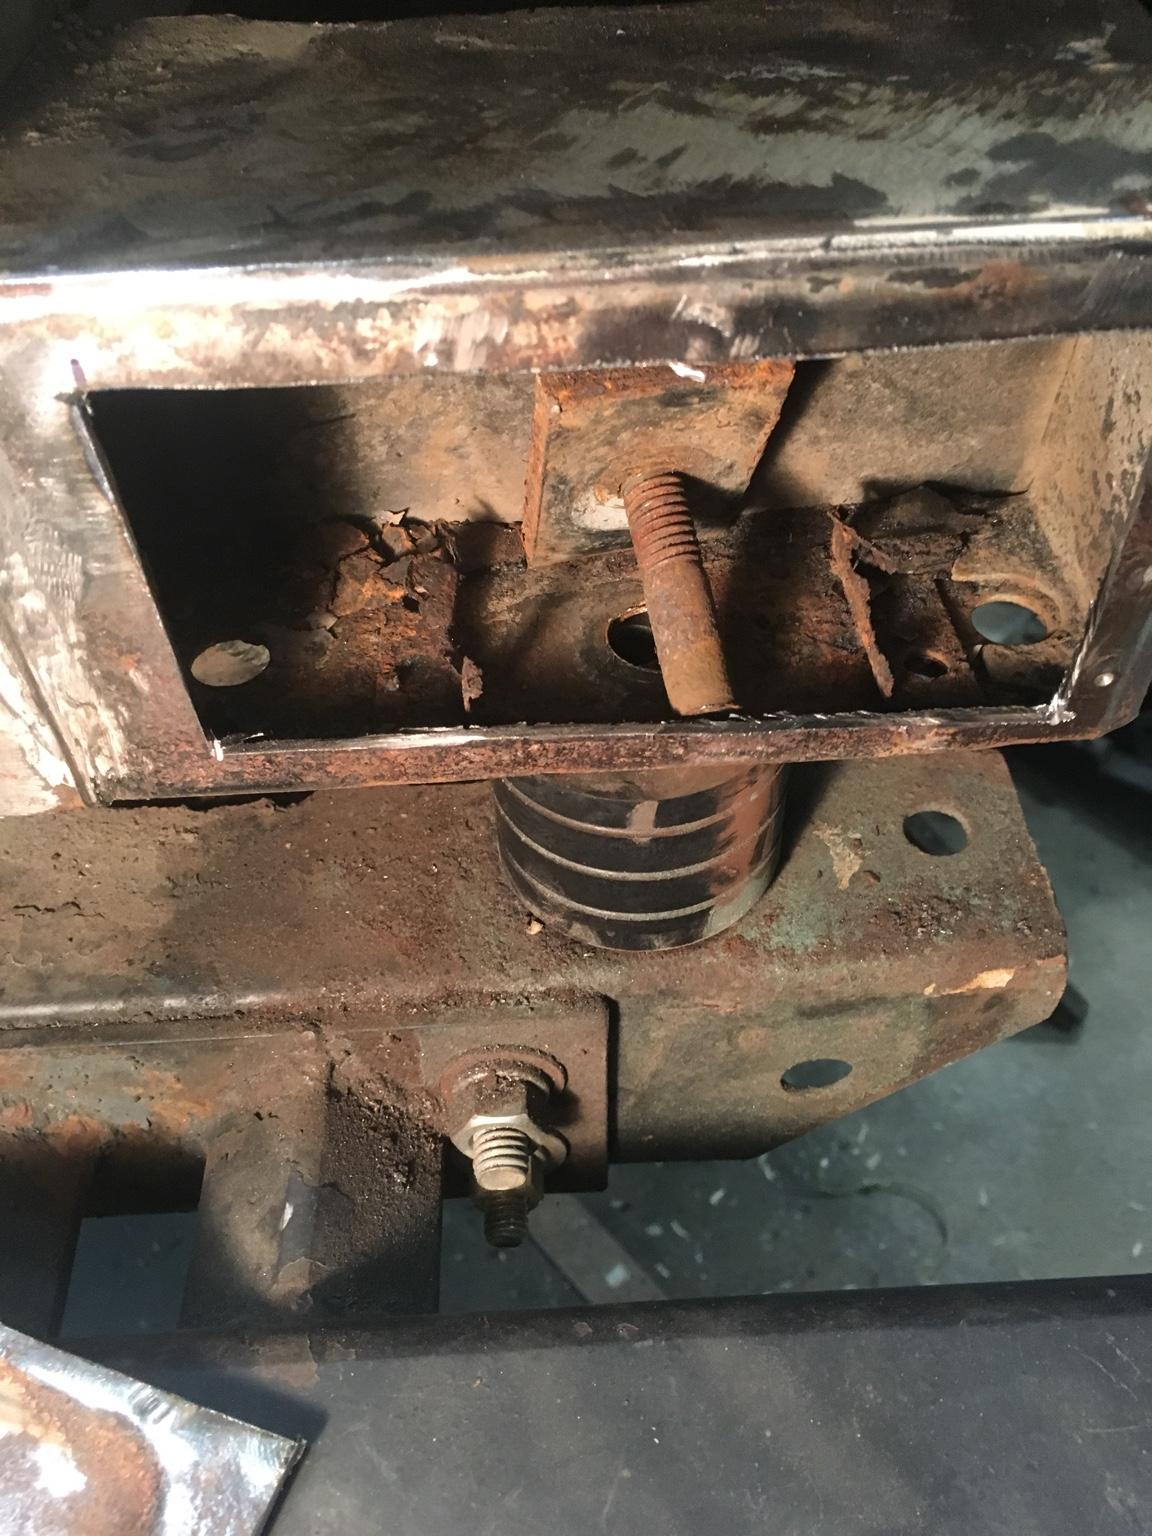
No pictures but I have cleaned out and applied rust converter, encapsulator, weld through primer into this side of the lower tailgate panel. Next will be to put back in the capture but and spot weld in a new capture it housing.
Sent via smoke signal
Off!
No rust through on this piece but the capture nut is broken so I needed to get into the panel anyways:
No pictures but I have cleaned out and applied rust converter, encapsulator, weld through primer into this side of the lower tailgate panel. Next will be to put back in the capture but and spot weld in a new capture it housing.
Sent via smoke signal
Last edited:

- City
- Bedford
- State
- NH
Looking great... hope to be back at it myself in another couple weeks... this is giving me motivation!
cb
cb

- City
- Claflin
- State
- KS
Been a while but finally back at more sheet metal replacement. Measured 20 times, clamped, remeasured, check to make sure its all square, remeasured several times, finished beer, remeasured to ensure its as close to perfect as possible, then started welding.
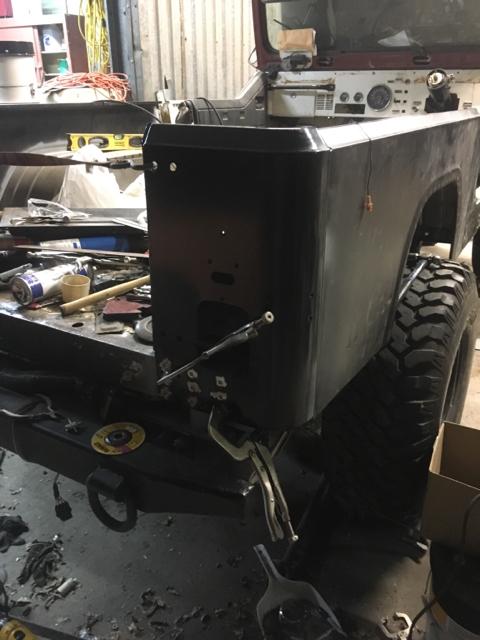
More issues with the MD Juan side panels:
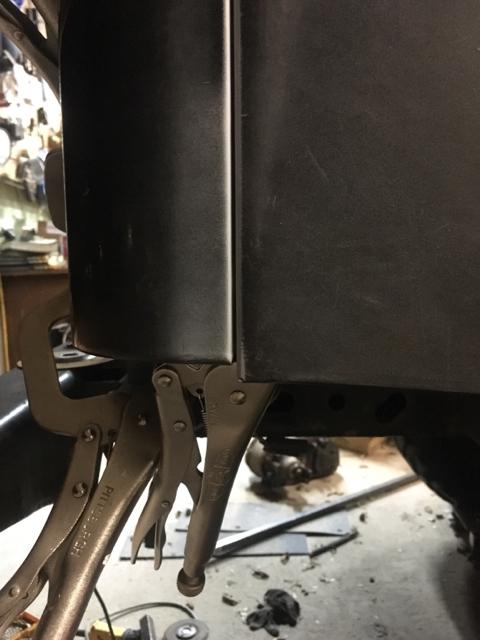
The measuring and getting it as perfect as possible takes longer than the panel prepping or welding:
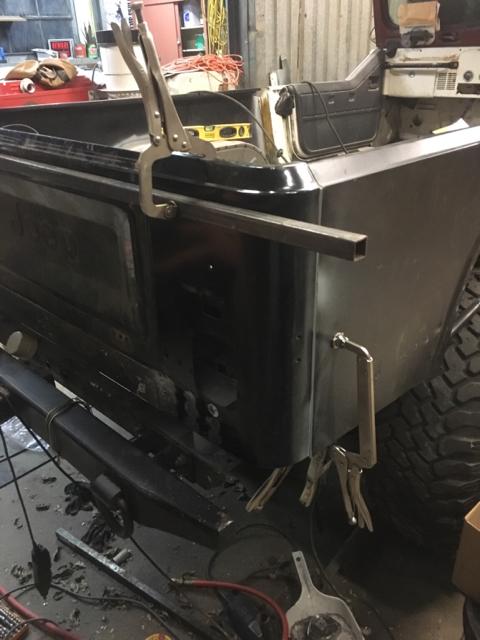
Not as detailed of a process as I did on the other side but it's coming together:
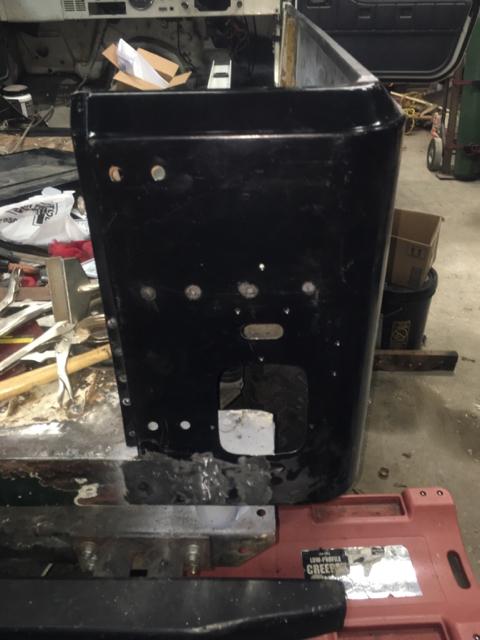
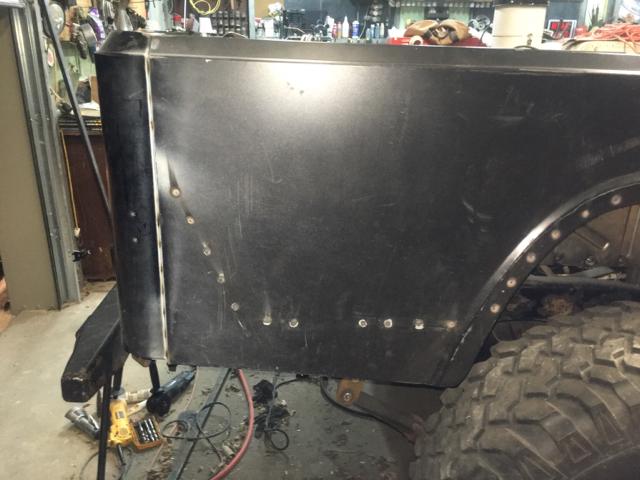
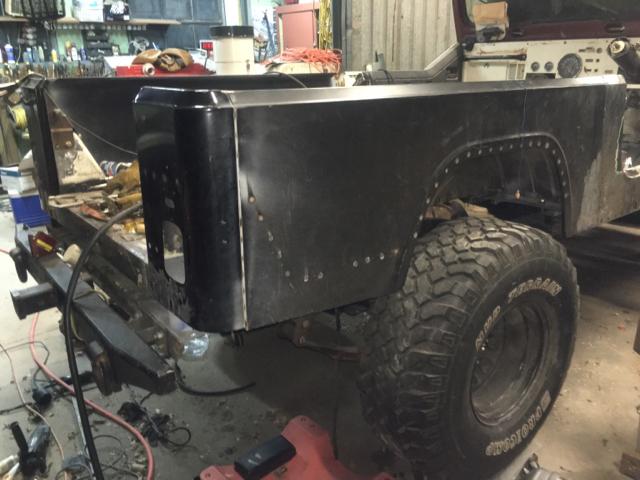
Now for the fun part, trying to graft the top rail do the crappy MD Juan panels to the original rail above the B-pillar. I couldn't be more disappointed in these replacement side panels.
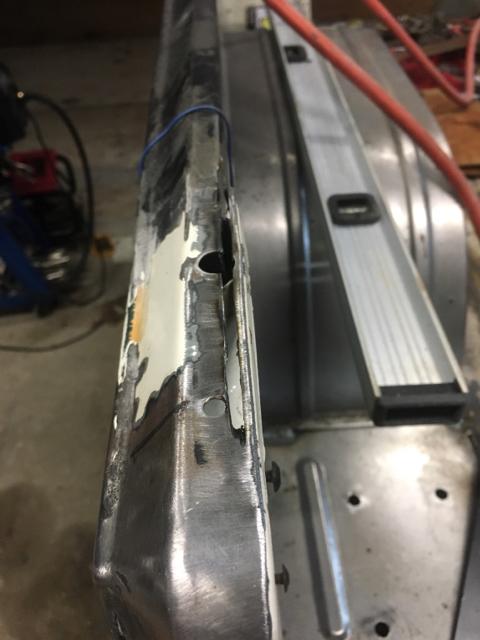
I'm having to trim up and narrow the original section above the B-pillar to match the MD Juan panels. Also had to remove some of the B-pillar and angle it in to allow for the narrower top of the rail.
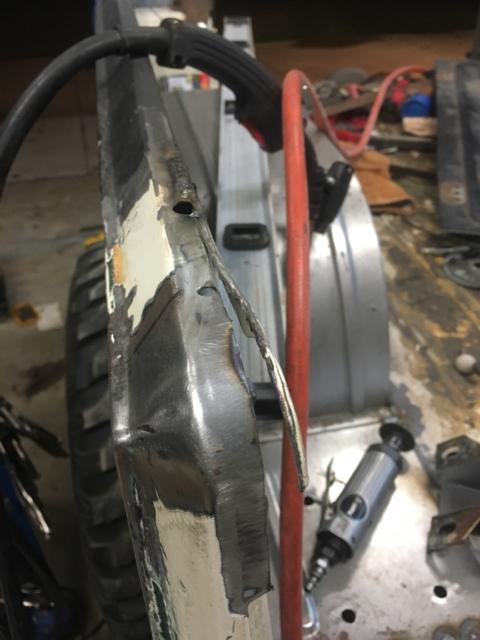
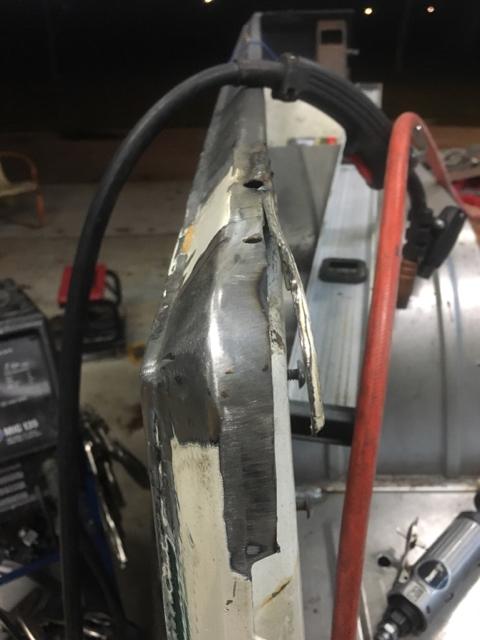
It's tacked together for now. The work so far doesn't look bad from the pictures but there is so much more work in trying to get these replacement side panels to fit and match up. I will document the left hand side as it will be even worse to try and match up.
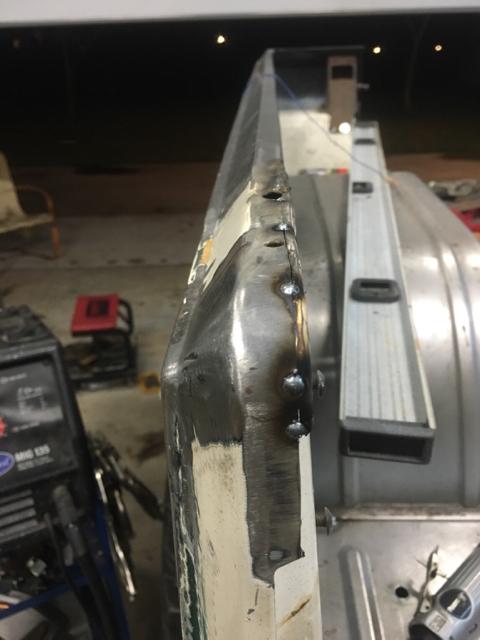
The replacement panel also had a slight "bow" and "angle" in the center and front edge of the rail. It took several nights of bending, clamping, heating, hammering, etc. to taking take most of it out. I'm ready to be done with this sheet metal work and get back to some other aspects of the build! What's sad is all the extra work involved just because of how bad the replacement side panels are.
Anyone who thinks they will be doing any side panel replacements in the future, do yourself a favor and shoot a quick email to classic enterprises and ask that they start making them. I know I've said it before but the fitment and quality of their panels is spot on.
Sent via smoke signal
More issues with the MD Juan side panels:
The measuring and getting it as perfect as possible takes longer than the panel prepping or welding:
Not as detailed of a process as I did on the other side but it's coming together:
Now for the fun part, trying to graft the top rail do the crappy MD Juan panels to the original rail above the B-pillar. I couldn't be more disappointed in these replacement side panels.
I'm having to trim up and narrow the original section above the B-pillar to match the MD Juan panels. Also had to remove some of the B-pillar and angle it in to allow for the narrower top of the rail.
It's tacked together for now. The work so far doesn't look bad from the pictures but there is so much more work in trying to get these replacement side panels to fit and match up. I will document the left hand side as it will be even worse to try and match up.
The replacement panel also had a slight "bow" and "angle" in the center and front edge of the rail. It took several nights of bending, clamping, heating, hammering, etc. to taking take most of it out. I'm ready to be done with this sheet metal work and get back to some other aspects of the build! What's sad is all the extra work involved just because of how bad the replacement side panels are.
Anyone who thinks they will be doing any side panel replacements in the future, do yourself a favor and shoot a quick email to classic enterprises and ask that they start making them. I know I've said it before but the fitment and quality of their panels is spot on.
Sent via smoke signal