

You are using an out of date browser. It may not display this or other websites correctly.
You should upgrade or use an alternative browser.
You should upgrade or use an alternative browser.
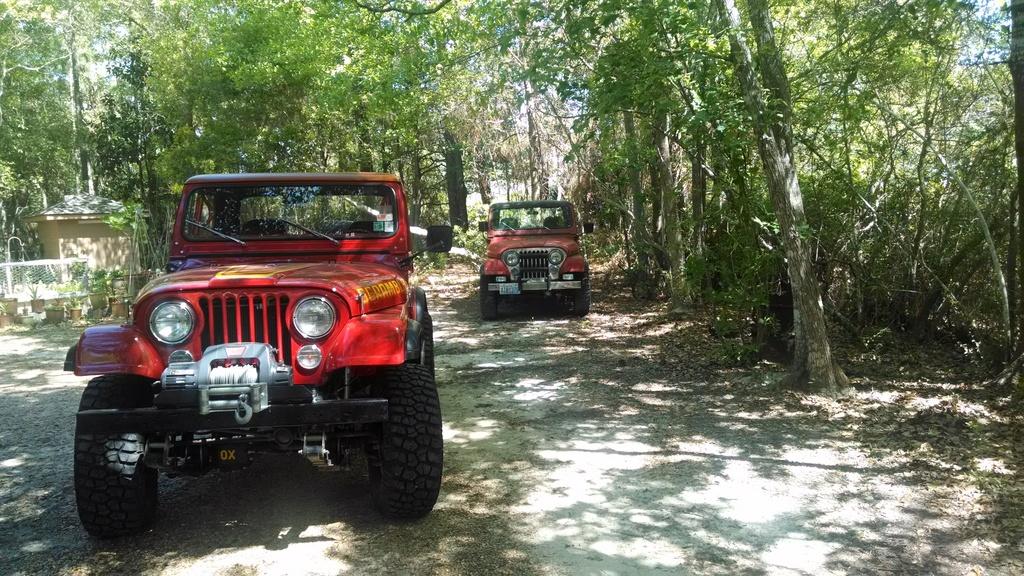
1984 SL, Yard Scrambler II
- Thread starter Jeep Addict
- Start date


- City
- Biloxi
- State
- MS
Nice pic!
Appreciate it


The Centerforce clutch in my Red Scrambler is rattling sometimes, maybe a broke spring/bent pressure plate finger, still works fine, just annoying, need to pull it out, but I think I will work on Yard Scrambler II (for here on out known as YS2) this weekend instead. I don't feel like pulling a transmission right now


So to begin, this Scrambler does run, drive, steer and stop. But, I have not run it much because all the coolant blows out around the water pump. PO said it needs a gasket, so I am going to start with the cooling system. The radiator is also blowing coolant out of the overflow line, so I need to check some other coolant stuff.
Plan to:
1) Install water pump gasket, and make sure the correct water pump is installed (V belt on this one)
2) New thermostat/gasket
3) Check all coolant hoses
4) Remove PO installed electric fan
4) Install a stock clutch fan
Once the coolant leakage/overheating issues are resolved, I can further diagnose the engine. PO mentioned that it needs a new engine, but from what I have seen, this engine runs fine, no bad noises, has oil pressure
 It does need valve cover work, massive oil leakage, but that's no big deal.
If I get the coolant stuff fixed, I plan on letting this Scrambler run/drive some before any other work. It still has old/bad gas in the tank, stinks terrible, but amazingly, it runs pretty damn good. Once I burn out/drain the old gas, plan on a carb rebuild, new fuel filter and hoses. Also plan on changing all the engine/drive train oils, too.
The PO mentioned that he thought it needed new syncronizers in the T5, but besides a bunch of play in the clutch linkage,
everything else seems fine, from my so far limited driving time. Worse case, I will pull transmission for rebuild/new clutch, but I think there is just too much play in the mechanical linkage.One of the PO's also started a "Nutter ByPass" on this one. Since they started, I will finish it. I will keep whatever emissions/carb/ignition/harness stuff taken off of this Scrambler and use the parts to keep JeepAddicts other stock CJ's running. He does have a Howell TBI kit floating around somewhere.....................................
So, quick recap on what is needed:
1) Cooling system issues
2) Valve Cover issues
3) Clutch linkage issues
4) Underhood fuel/ignition issues
I am sure more stuff will become evident, but so far, besides basic maintenance/previous owner issues, this one seems to be OK. But, it is hardly ever that easy. I am just going to get this one running again, catch up on maintenance, and fix what needs fixing.
That's it for now


- City
- God's Country
- State
- AR
When yall put those new floorboards in, I would love to see a very detailed step by step.
My tan CJ-7 was rust free when I had it repainted in 2002, and then parked it at the parents' house (had the green CJ in my garage).
It sat/was seldom driven for 7 years with rubber floormats in the front floors and leaky door seals. When I moved back to my hometown in 2009 and went to collect it I discovered some lovely rusty floors under those rubber floor mats.
My tan CJ-7 was rust free when I had it repainted in 2002, and then parked it at the parents' house (had the green CJ in my garage).
It sat/was seldom driven for 7 years with rubber floormats in the front floors and leaky door seals. When I moved back to my hometown in 2009 and went to collect it I discovered some lovely rusty floors under those rubber floor mats.
- City
- Biloxi
- State
- MS
When yall put those new floorboards in, I would love to see a very detailed step by step.
My tan CJ-7 was rust free when I had it repainted in 2002, and then parked it at the parents' house (had the green CJ in my garage).
It sat/was seldom driven for 7 years with rubber floormats in the front floors and leaky door seals. When I moved back to my hometown in 2009 and went to collect it I discovered some lovely rusty floors under those rubber floor mats.
I don't believe I will be putting floor boards in this one, I will leave that to JeepAddict, or the next owner

Passenger side is still very solid, just a 1.5" round hole, it could be patched without replacing whole panel.
Driver side is thin, tears in the creases, probably best to replace it. For now, its fine.
Only other rust on this one is the windshield frame and a small hole in the face of the cowl where the hood gutter is, both easy fixes.
This Scrambler is solid
 Wouldn't take much to make the body 100%.
If I was looking for one to restore back close to stock, this would be it. Very little rust, Laredo, lower production '84 model (compared to '81-'83), very nice Scrambler
- City
- Biloxi
- State
- MS
Well, finally got off my butt and started working on my newest "Yard Ornament", YS2. This one did drive off the trailer at least, but it had a pretty cool self emptying coolant system.
So, I decided to tear into the cooling system. The water was leaking from around the water pump, so i figured I would start there. This Scrambler also came with a new/non-operative electric fan, so I decided to kill two birds with one stone.
How it was, note the PO installed electric fan, HEI distributor, and nice oil build up around #1 spark plug!!!!!!!!!
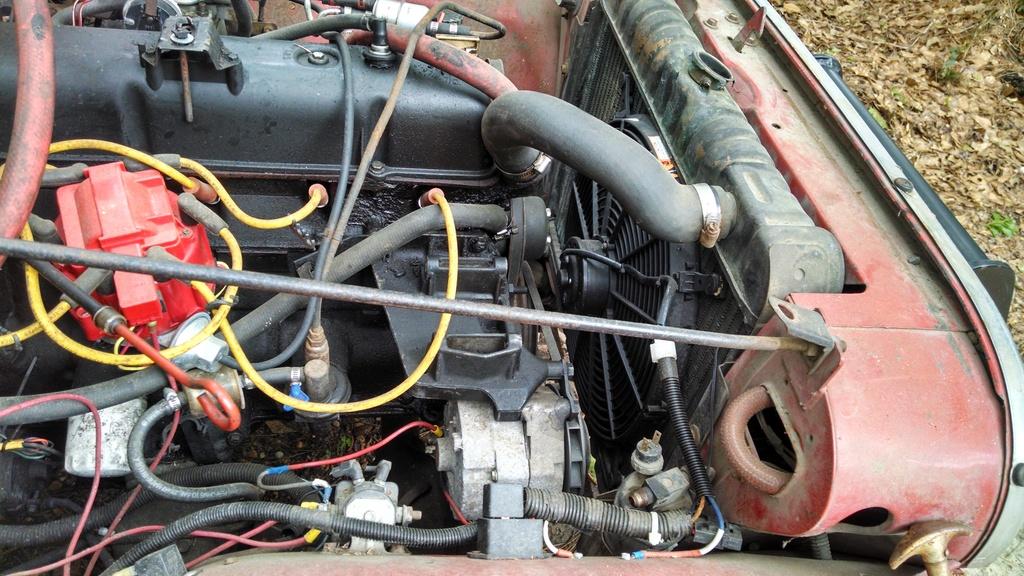
With radiator, electric fan, water pump, thermostat, hoses, etc removed, note all the oil/gunk. It took 3 cans of engine cleaner to get this engine clean enough to work on, it was pretty nasty. Looks like most of the oil is coming from the valve cover/gasket. Note the original "molded" heater hose. I cut the end of it off due to oil damage, the rest of it was still good/OK.
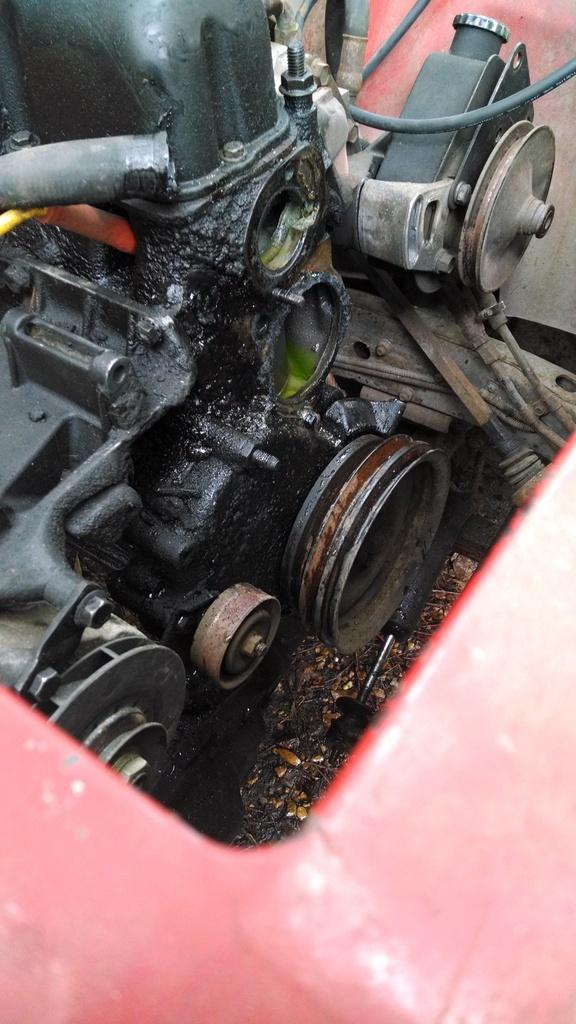
The inside of the water pump looked like this, not sure why, didn't look to good, so I replaced the water pump:
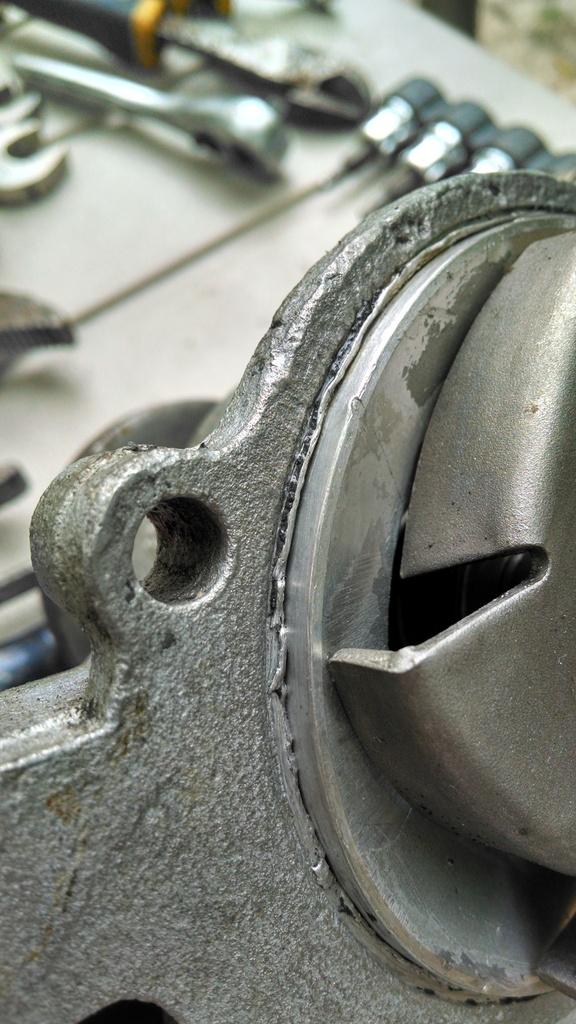
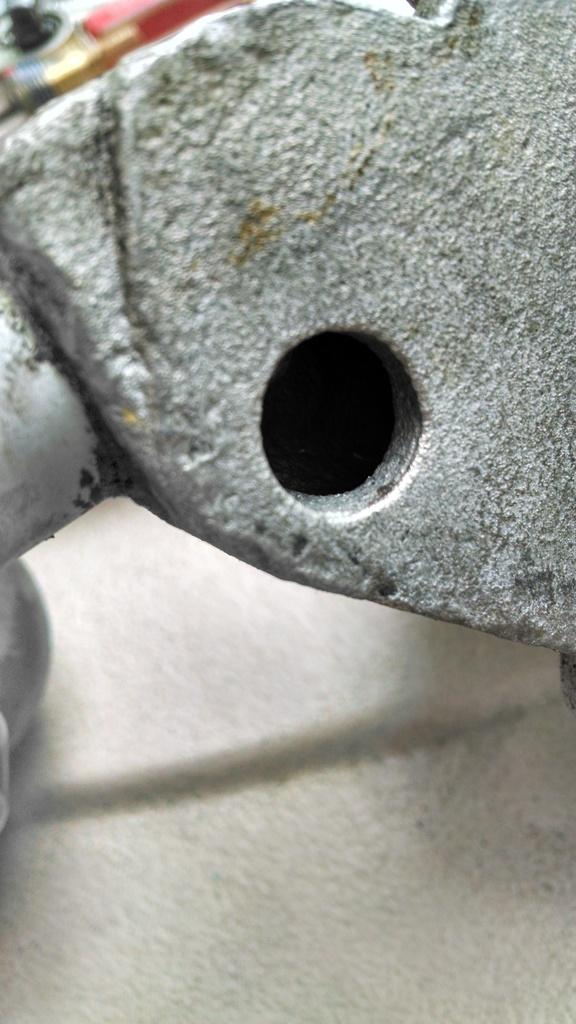
Besides the internal water pump flaw, the body itself was eroded pretty bad, I think this would cause a leak:
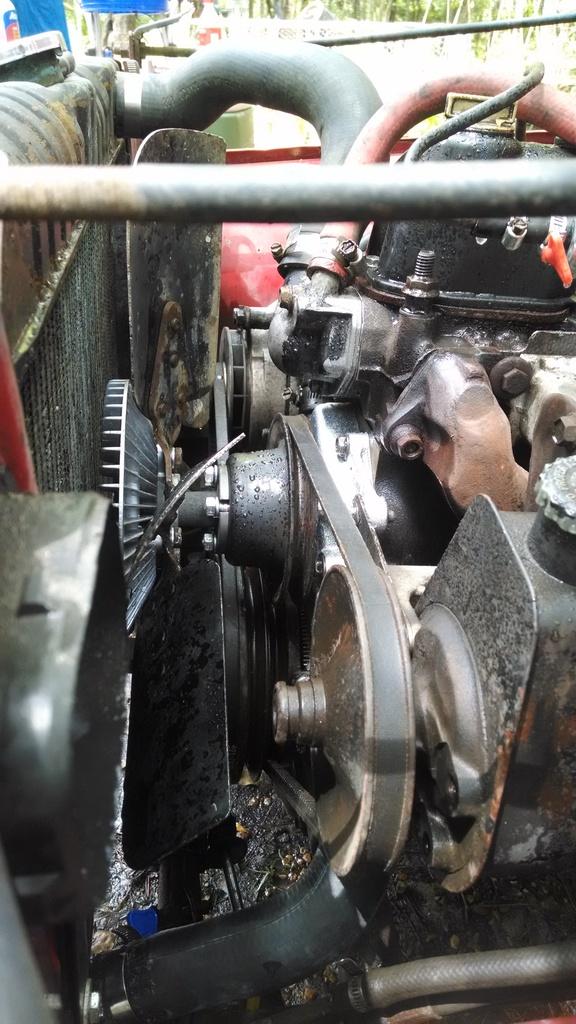
So, I installed a new water pump/gasket, new thermostat/gasket, radiator cap, and flushed the coolant system. I also installed a stock "HD" cooling fan. We had the fan left over from YS1. I did have to replace the clutch, it looked like the viscous fluid had been leaking. Lucky for us, this Scrambler had the "HD" 2 core radiator, so everything bolted up/fit fine.
With those repairs, the Scrambler no longer leaked coolant. I let the engine run for about 10 minutes, then changed the very nasty/old engine oil and filter. So, the engine runs, and surprisingly, runs pretty damn good considering that it is running off of some very old/nasty/stinky/black gasoline sludge. I would normally siphon the old gas out, but it is just too nasty/putrid. Now that this Scrambler runs, I think I am going to drive it till it sucks air, then drop the gas tank/clean it out. The old gas is vile!!!!!!!!!!!
Besides the now fixed coolant leak, still lots to do under the hood. For example:
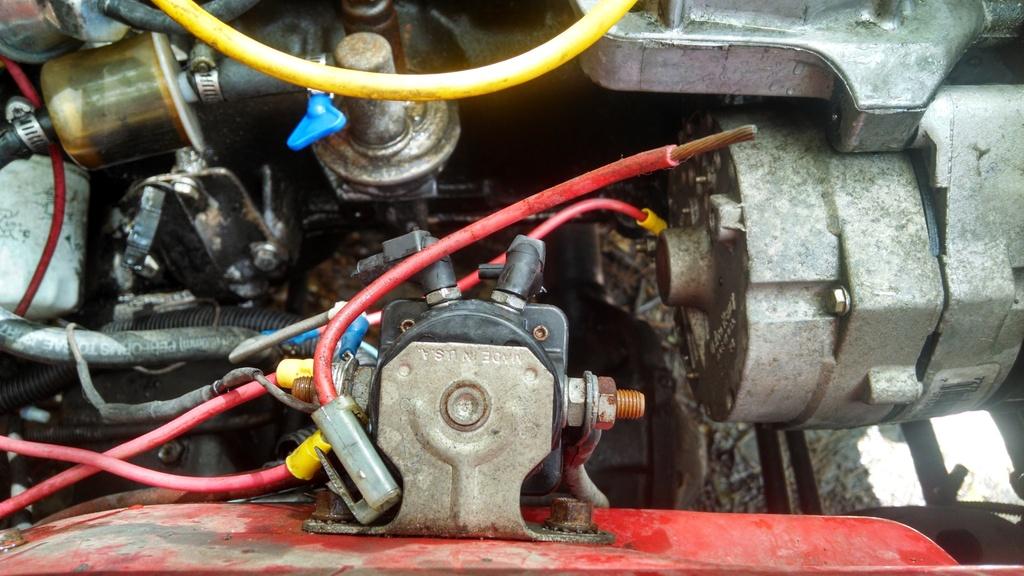
I found the alternator plug on the front axle. It had some "issue". I repaired the wiring, and the alternator is charging, but now the engine wont shut off with the key. Pretty sure this has to do with the PO's HEI install. Should be easy enough to install a diode on the alternator excitor wire to prevent back feed, if that is the issue, pretty sure it is.
The PO started to get rid of all the stock emission stuff, which I will complete. Most of the stock components are long gone, and the feed back harness has been butchered. The Scrambler did have an exhaust leak under the hood caused by this:
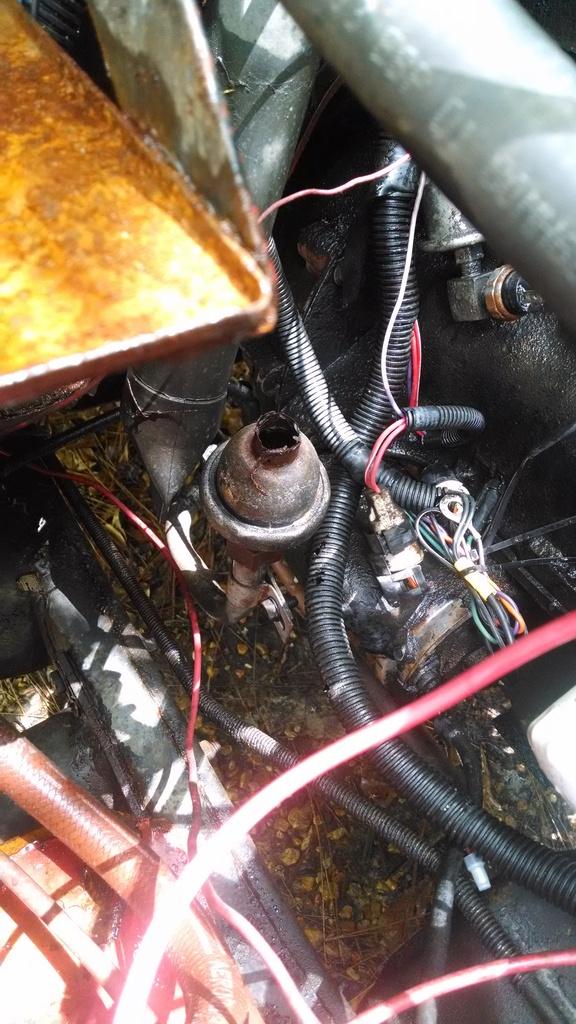
That is one of the "one way check valves" for the pulse air system. It is broken, so exhaust leaks through it. Don't laugh, but I wrapped duct tape around the opening, stopped the exhaust leak!!!!!!!!!!!! This Scrambler has a new exhaust - down pipe, cat, muffler, pipes, AND all the pulse air system pipes. I think I am going to swap this exhaust on to my '83, that is missing the pulse air/cat, and install my '83's exhaust on this one. I would normally keep all the feedback/emissions stuff on a stock Jeep, but this one has been cleaned out under the hood.
Anyway, after some oil, coolant, and duct tape:
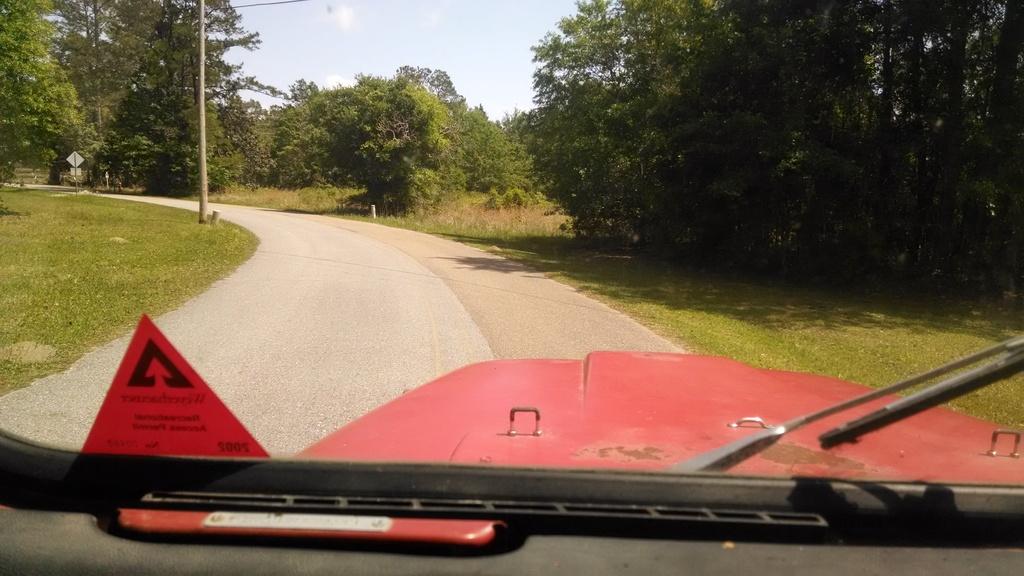
I was really surprised at how well this Scrambler runs/drives, especially considering the old gas. The engine runs smooth, accelerates great, transmission shifts fine through all the gears, suspension is smooth, no bad noises, no loose steering. Four wheel drive works fine in high and low range. The Scrambler feels "solid", if that make sense? No looseness, rattles, just feels good. About the only "bad", the brakes work OK/Good. It doesn't have a soft pedal, they just don't feel as good as they should. The brake fluid is black, so I will flush out the fluid/install new pads if necessary.
All in all, for a first drive, I was impressed. I think just some more basic maintenance will get this one back to running great.
That's it for now
So, I decided to tear into the cooling system. The water was leaking from around the water pump, so i figured I would start there. This Scrambler also came with a new/non-operative electric fan, so I decided to kill two birds with one stone.
How it was, note the PO installed electric fan, HEI distributor, and nice oil build up around #1 spark plug!!!!!!!!!
With radiator, electric fan, water pump, thermostat, hoses, etc removed, note all the oil/gunk. It took 3 cans of engine cleaner to get this engine clean enough to work on, it was pretty nasty. Looks like most of the oil is coming from the valve cover/gasket. Note the original "molded" heater hose. I cut the end of it off due to oil damage, the rest of it was still good/OK.
The inside of the water pump looked like this, not sure why, didn't look to good, so I replaced the water pump:
Besides the internal water pump flaw, the body itself was eroded pretty bad, I think this would cause a leak:
So, I installed a new water pump/gasket, new thermostat/gasket, radiator cap, and flushed the coolant system. I also installed a stock "HD" cooling fan. We had the fan left over from YS1. I did have to replace the clutch, it looked like the viscous fluid had been leaking. Lucky for us, this Scrambler had the "HD" 2 core radiator, so everything bolted up/fit fine.
With those repairs, the Scrambler no longer leaked coolant. I let the engine run for about 10 minutes, then changed the very nasty/old engine oil and filter. So, the engine runs, and surprisingly, runs pretty damn good considering that it is running off of some very old/nasty/stinky/black gasoline sludge. I would normally siphon the old gas out, but it is just too nasty/putrid. Now that this Scrambler runs, I think I am going to drive it till it sucks air, then drop the gas tank/clean it out. The old gas is vile!!!!!!!!!!!
Besides the now fixed coolant leak, still lots to do under the hood. For example:
I found the alternator plug on the front axle. It had some "issue". I repaired the wiring, and the alternator is charging, but now the engine wont shut off with the key. Pretty sure this has to do with the PO's HEI install. Should be easy enough to install a diode on the alternator excitor wire to prevent back feed, if that is the issue, pretty sure it is.
The PO started to get rid of all the stock emission stuff, which I will complete. Most of the stock components are long gone, and the feed back harness has been butchered. The Scrambler did have an exhaust leak under the hood caused by this:
That is one of the "one way check valves" for the pulse air system. It is broken, so exhaust leaks through it. Don't laugh, but I wrapped duct tape around the opening, stopped the exhaust leak!!!!!!!!!!!! This Scrambler has a new exhaust - down pipe, cat, muffler, pipes, AND all the pulse air system pipes. I think I am going to swap this exhaust on to my '83, that is missing the pulse air/cat, and install my '83's exhaust on this one. I would normally keep all the feedback/emissions stuff on a stock Jeep, but this one has been cleaned out under the hood.
Anyway, after some oil, coolant, and duct tape:
I was really surprised at how well this Scrambler runs/drives, especially considering the old gas. The engine runs smooth, accelerates great, transmission shifts fine through all the gears, suspension is smooth, no bad noises, no loose steering. Four wheel drive works fine in high and low range. The Scrambler feels "solid", if that make sense? No looseness, rattles, just feels good. About the only "bad", the brakes work OK/Good. It doesn't have a soft pedal, they just don't feel as good as they should. The brake fluid is black, so I will flush out the fluid/install new pads if necessary.
All in all, for a first drive, I was impressed. I think just some more basic maintenance will get this one back to running great.
That's it for now

- City
- Bedford
- State
- NH
Very cool news all around... very odd on the erosion, but expected I guess if it sat... clean all the black to new non-black oils/fluids/lubricants and look for leaks and you should be in good shape!
cb
cb
- City
- Biloxi
- State
- MS
Very cool news all around... very odd on the erosion, but expected I guess if it sat... clean all the black to new non-black oils/fluids/lubricants and look for leaks and you should be in good shape!
cb
Yep, this thing was definitely a good buy for Tommy
I am not sure how the face of the water pump got so eroded, there was no erosion on the block? The "black" fluids, including the gas, definitely need to be replaced
- City
- Biloxi
- State
- MS
I did a little bit of investigating/testing yesterday, figured out the "no tun off with key" issue.
The PO ran the HEI distributor power wire through a relay. For some reason, the relay will not shut with the key off once the engine is running. So, I pulled off the plug on the side of the alternator with the engine running, turned the key off, engine shut down. Voltage is back feeding through the stock excitor wire/harness back to the relay, preventing it from closing, keeping the distributor energized.
Easy/cheap $2.13 fix:
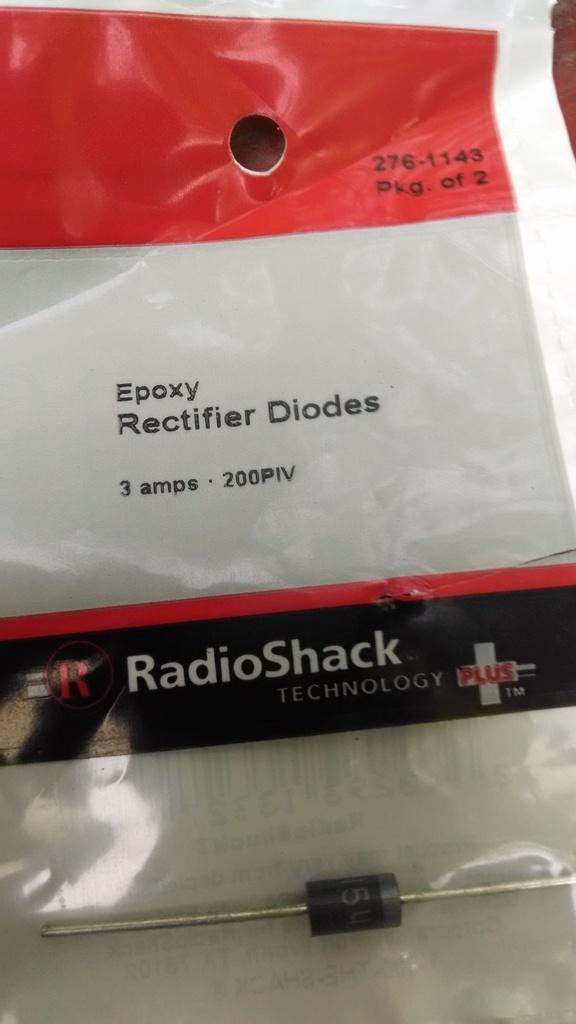
Proof of concept/red-neck temporary installation:
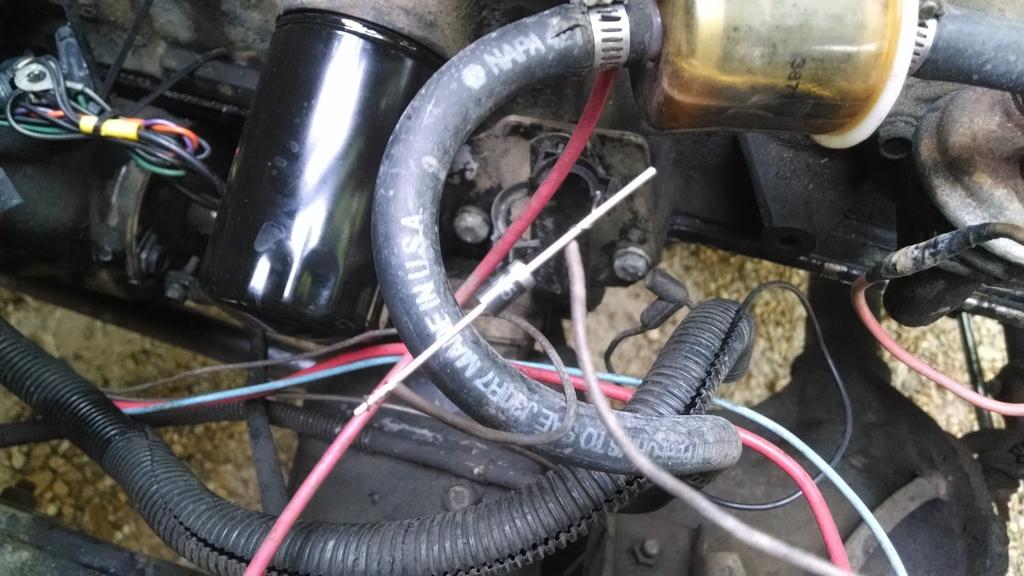
With the diode installed on the excitor wire, the engine shuts down when you turn the key off. Easy fix.
In the above picture, you can also see the cracked rubber fuel lines that need to be changed, general messiness of the under hood wiring, and black fuel in the PO installed pre-fuel pump fuel filter. All easy fixes, that need to be addressed before too much more driving.
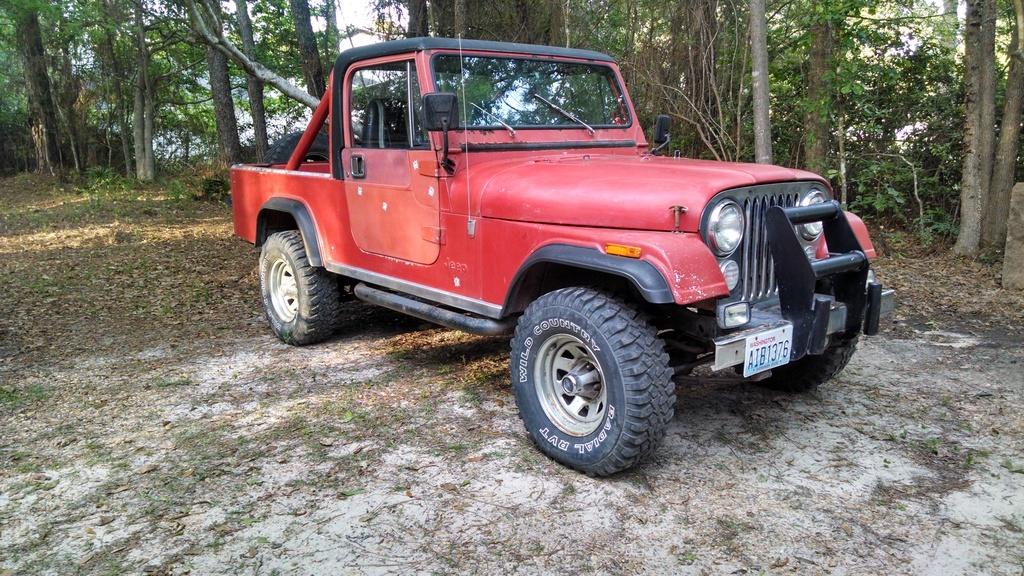
One last picture for now, still need to pull that stupid bull bar off the front bumper, I'm leaving the bullet hole stickers Need to air up that front tire, too 
The PO ran the HEI distributor power wire through a relay. For some reason, the relay will not shut with the key off once the engine is running. So, I pulled off the plug on the side of the alternator with the engine running, turned the key off, engine shut down. Voltage is back feeding through the stock excitor wire/harness back to the relay, preventing it from closing, keeping the distributor energized.
Easy/cheap $2.13 fix:
Proof of concept/red-neck temporary installation:
With the diode installed on the excitor wire, the engine shuts down when you turn the key off. Easy fix.
In the above picture, you can also see the cracked rubber fuel lines that need to be changed, general messiness of the under hood wiring, and black fuel in the PO installed pre-fuel pump fuel filter. All easy fixes, that need to be addressed before too much more driving.
One last picture for now, still need to pull that stupid bull bar off the front bumper, I'm leaving the bullet hole stickers
Need to air up that front tire, too

- City
- Baton Rouge
- State
- La
That looks great.
- City
- Biloxi
- State
- MS

LetchcoreCJ7
Legacy Registered User
- City
- Nashville
- State
- TN
I am confused how a clutch fan worked on that radiator. Normally the clutch fan only works on the radiators and have the core that sits deaper into the grill shell. There was two radiators factory. Maybe three but one has a distance of 16 3/4 between the tanks and the core sits deeper inside the grill to make room for the clutch fan. The other radiator is 15 3/4 between the tanks and the core sticks out further toward the engine. It has become almost impossible to find someone that makes the 16 3/4 radiator that has metal tanks and is the right dimensions.
- City
- Biloxi
- State
- MS
Hehehe

I am confused how a clutch fan worked on that radiator. Normally the clutch fan only works on the radiators and have the core that sits deaper into the grill shell. There was two radiators factory. Maybe three but one has a distance of 16 3/4 between the tanks and the core sits deeper inside the grill to make room for the clutch fan. The other radiator is 15 3/4 between the tanks and the core sticks out further toward the engine. It has become almost impossible to find someone that makes the 16 3/4 radiator that has metal tanks and is the right dimensions.
To tell you the truth, I'm not sure. I was kind of worried about all the stuff we had working together, but it did, seems to fit and function fine
One thing that is strange with this radiator - it has the "center" fill, not the offset. I thought the two cores all came with the offset fill
This could be some kind of "repaired/modified" radiator, but it is really old looking This Scrambler also came with factory installed AC, so I don't think you could offset the radiator forward into the grill without interfering with the AC stuff,but I could be wrong there
I have also read that there are different length water pump snouts, not sure if that is just a regular vs reverse flow thing or not
I do know that NAPA is screwed up with the part numbers on water pumps, so be careful. My parts guy found this out the hard way when he installed a reverse flow pump on a v belt system. Make sure you match up the impeller direction of your old vs new pump before you leave the store
- City
- Biloxi
- State
- MS
Worked on YS2 some more this past weekend, about 8 hours. I needed to replace all the battery/starter/ground cables, they were either in poor shape or missing. While I was messing with wires, also pulled out what was left of the original Carter feedback carb wiring harness, and an electronic trailer brake wiring harness, electric fan wiring, another trailer wiring harness..............................
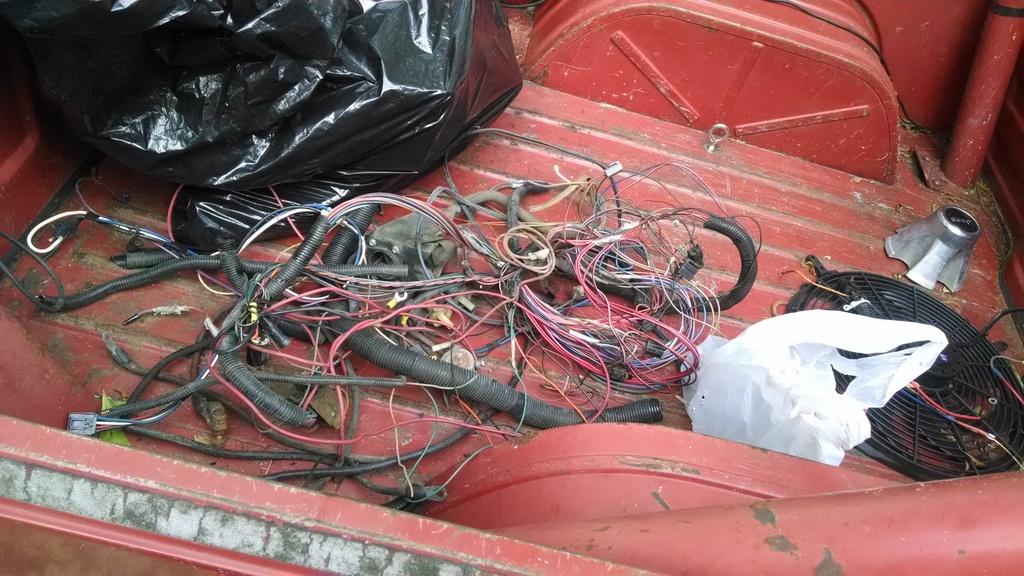
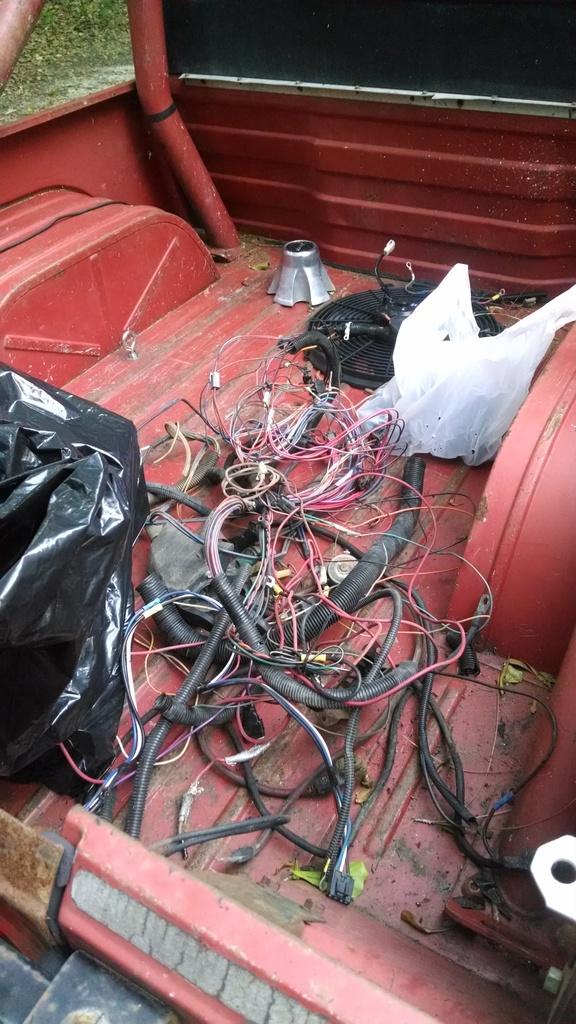
That was all a bunch of unnecessary wiring. Since the PO put on the HEI distributor and "Nuttered" the carb, a bunch of under hood wiring was no longer needed. This Jeep came with a HD rear hitch. It is a bolt on 2" receiver. I guess this Scrambler used to pull some heavy trailers, since it had electronic trailer brake wiring added. But, I can't imagine pulling a heavy enough trailer with a Scrambler to necessitate trailer brakes Most of the wiring removed was "suspect" or partially installed, removing all this really helped clean things up.
Went from this:
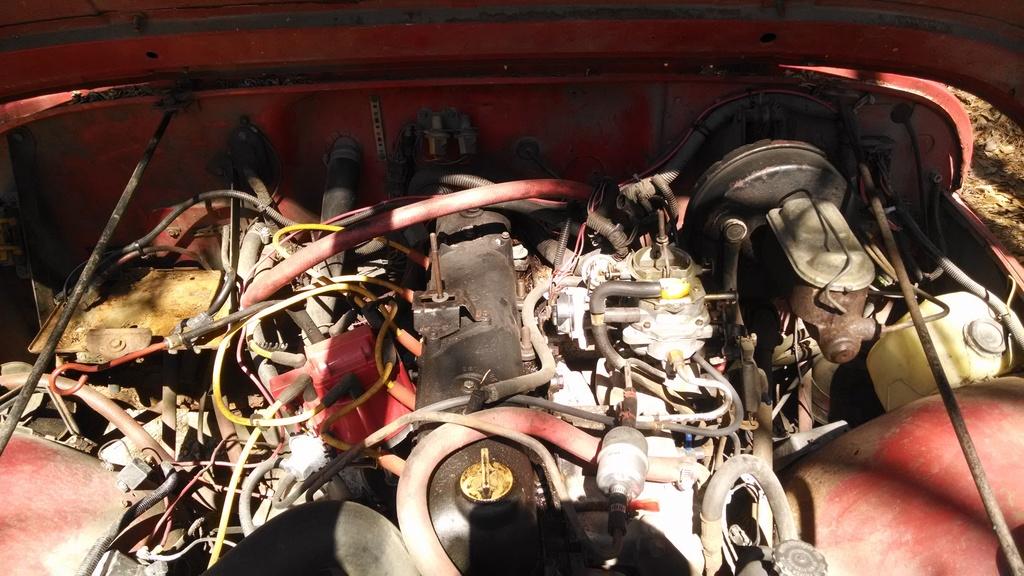
To this:
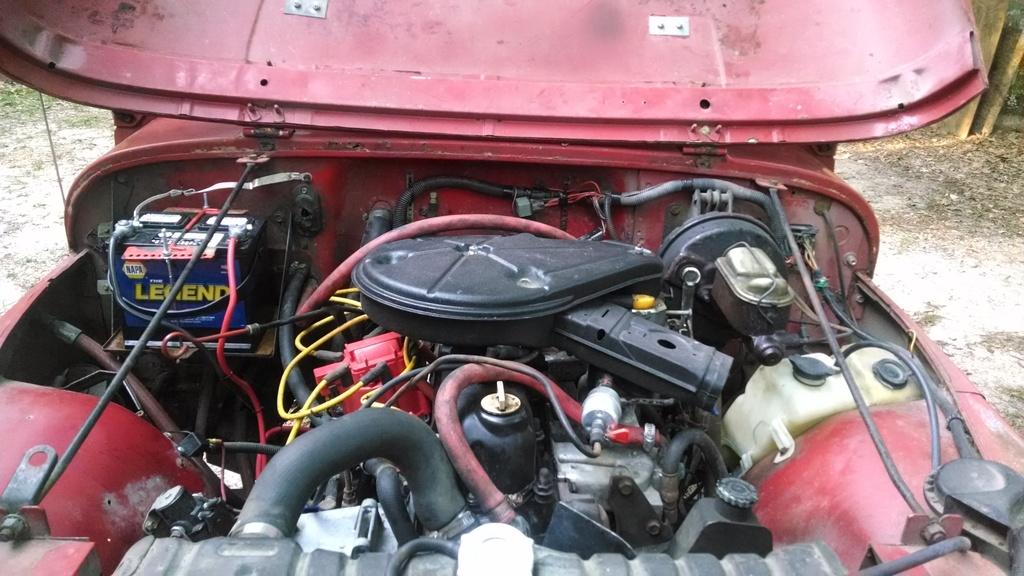
All in all, much neater/safer, should be easier to work on/trace things, if needed. I also soldered in the diode into the alternator wiring to enable shutting off the ignition with the key, always a nice feature. Cleaned up the HEI wiring some, too:
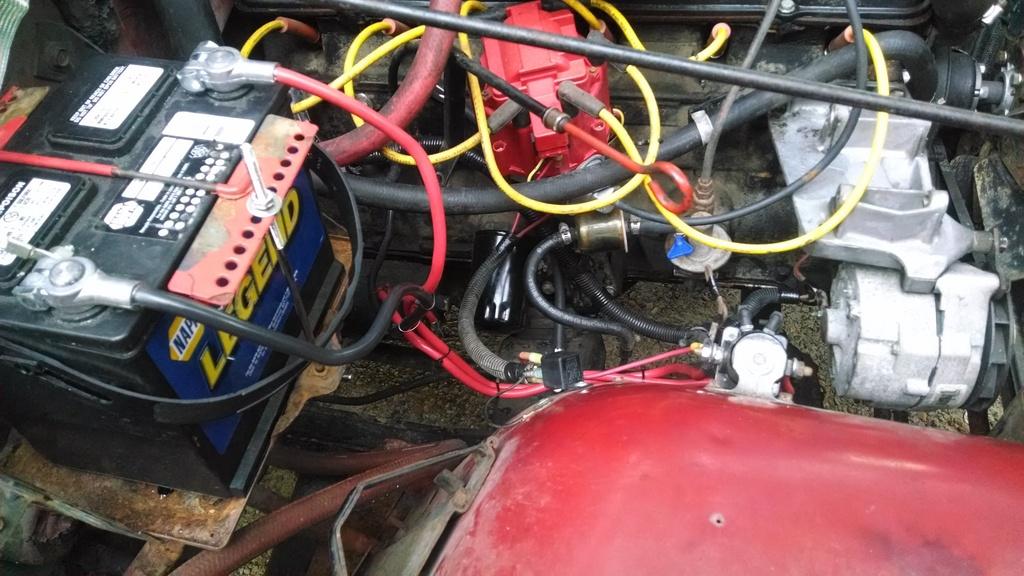
Plan on changing the under hood rubber fuel lines next, so I can safely drive this thing till it runs out of old gas. Then, drop fuel tank, clean it out, change rubber gas tank lines (supply, return, vent), change fuel filters, rebuild carb, adjust timing, seal up valve cover, look at the brakes...............................
All in all, for the little bit of work put into this one, it has improved tremendously. I am still amazed how well it runs on the old nasty gas. A few more seals, little bit more clean up, a few more rubber hoses, belts, little brake work, and a tune up, this one will be ready to head back to Baton Rouge
That's it for now
That was all a bunch of unnecessary wiring. Since the PO put on the HEI distributor and "Nuttered" the carb, a bunch of under hood wiring was no longer needed. This Jeep came with a HD rear hitch. It is a bolt on 2" receiver. I guess this Scrambler used to pull some heavy trailers, since it had electronic trailer brake wiring added. But, I can't imagine pulling a heavy enough trailer with a Scrambler to necessitate trailer brakes
Most of the wiring removed was "suspect" or partially installed, removing all this really helped clean things up.Went from this:
To this:
All in all, much neater/safer, should be easier to work on/trace things, if needed. I also soldered in the diode into the alternator wiring to enable shutting off the ignition with the key, always a nice feature. Cleaned up the HEI wiring some, too:
Plan on changing the under hood rubber fuel lines next, so I can safely drive this thing till it runs out of old gas. Then, drop fuel tank, clean it out, change rubber gas tank lines (supply, return, vent), change fuel filters, rebuild carb, adjust timing, seal up valve cover, look at the brakes...............................
All in all, for the little bit of work put into this one, it has improved tremendously. I am still amazed how well it runs on the old nasty gas. A few more seals, little bit more clean up, a few more rubber hoses, belts, little brake work, and a tune up, this one will be ready to head back to Baton Rouge
That's it for now
- City
- Baton Rouge
- State
- La
That looks great.
- City
- Biloxi
- State
- MS
That looks great.
What are you talking about, you can't even see that diode anymore
- City
- Biloxi
- State
- MS
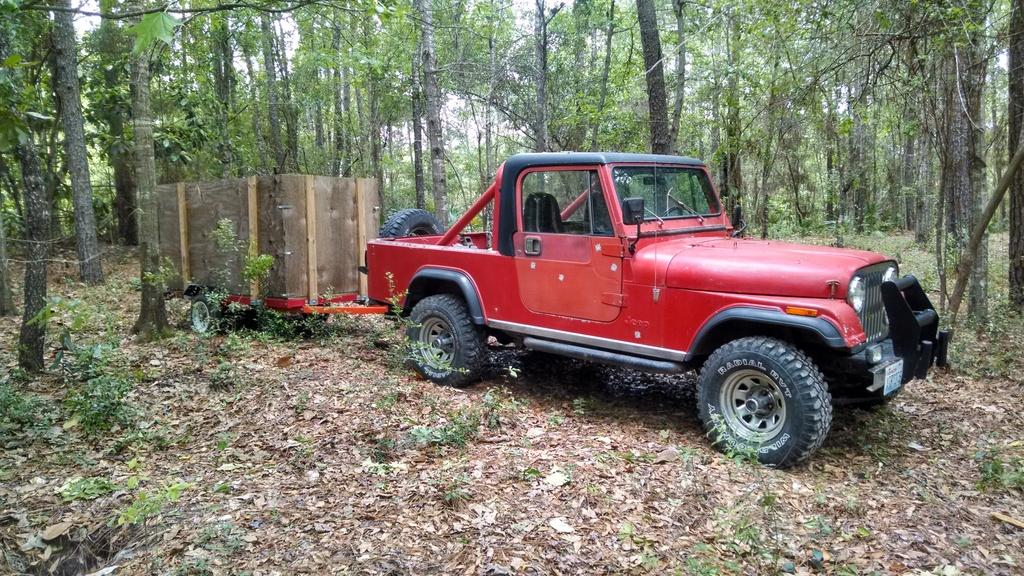
12" of rain/hail/strong wind Thursday morning, another 6" of rain over the weekend, no work on YSII. BUT, I decided to put it to work. YS2 spent most of Saturday/Sunday (in between rain) cleaning up the yard:
I have been letting the engine run a bunch, trying to burn up the old gas. Not sure how much is left, need to figure out the gas gauge issue. Surprisingly, 80% of the time, it is starting/idling/running fine, on the old nasty gas. At this point, I am going to keep driving/running it till it hits empty. Besdies all the 4 low usage in the yard, it has been making the 2 mile trip round the neighborhood. Besides the brakes kind of sucking, it is running and driving fine, like this pin that's on the windshield frame:
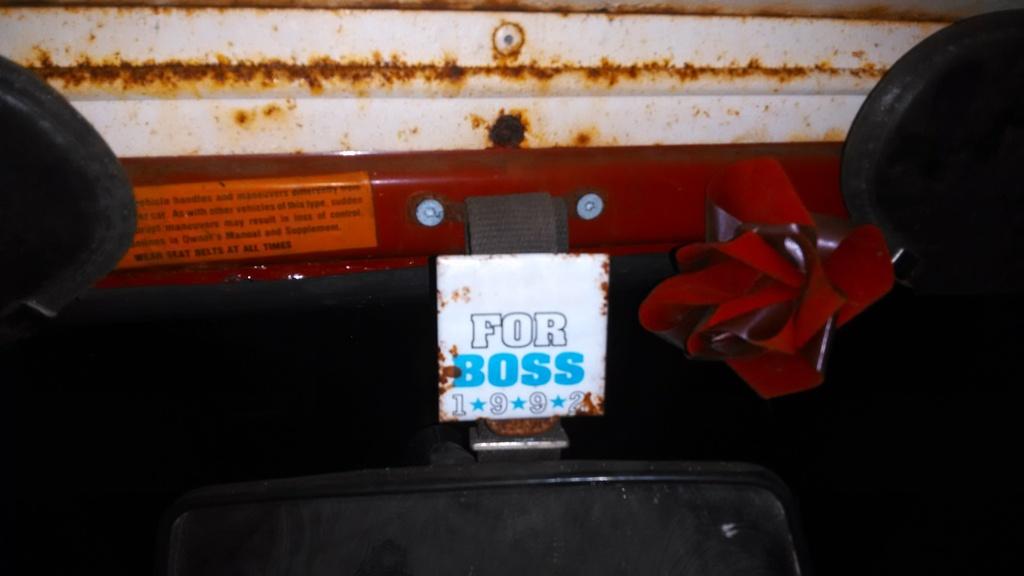
Springsteen reference
The choke hot wire was not hot the other day, turned out the "back up light" fuse, that also handles the choke power, was corroded, but not blown. A new fuse fixed the choke, new fuses might fix some other minor electrical gremlins:
fuel/temp gauge act random
no running lights, but turn signal lights work
blower motor is intermittent
no dash or courtesy lights
So brakes, minor electrical gremlins, valve cover leak, old gas/fuel lines still to do. For now, I am going to keep working it, not the other way around
That's it for now
I have been letting the engine run a bunch, trying to burn up the old gas. Not sure how much is left, need to figure out the gas gauge issue. Surprisingly, 80% of the time, it is starting/idling/running fine, on the old nasty gas. At this point, I am going to keep driving/running it till it hits empty. Besdies all the 4 low usage in the yard, it has been making the 2 mile trip round the neighborhood. Besides the brakes kind of sucking, it is running and driving fine, like this pin that's on the windshield frame:
Springsteen reference
The choke hot wire was not hot the other day, turned out the "back up light" fuse, that also handles the choke power, was corroded, but not blown. A new fuse fixed the choke, new fuses might fix some other minor electrical gremlins:
fuel/temp gauge act random
no running lights, but turn signal lights work
blower motor is intermittent
no dash or courtesy lights
So brakes, minor electrical gremlins, valve cover leak, old gas/fuel lines still to do. For now, I am going to keep working it, not the other way around
That's it for now
- City
- Biloxi
- State
- MS
Since my red Scrambler is dead right now, decided to work on this red yard ornament. I mainly wanted to get it driveable again before I make two trips this summer. I didn't want to leave it "dead" in the yard during hurricane season. Decided to do some "quick" work to it before I concentrate on getting my Tan Scrambler ready for South Dakota and Sand Blast in Michigan.
I had been driving YS2 for the last few weeks, mainly using it to pull a trailer in the yard, trying to burn up the old gas. Well, a few weeks ago it quit idling, then would not run anymore period. I "think" I finally ran it out of the old nasty gas
So, put 2-3 gallon of new gas in it, try to start it, no go. I disconnect the fuel line from the carb, turn it over, no gas. Pull off the fuel filter, gas. The old filter had become completely impacted, where no gas would flow to the carb, it would all go out the return port. Put a new filter on the fuel line, hook everything back up, no go. Needle stuck. So, pulled the needle out, cleaned it the best I could, put it back together, go to start, it starts, BUT the needle sticks open, gas is flowing out the top of the carb
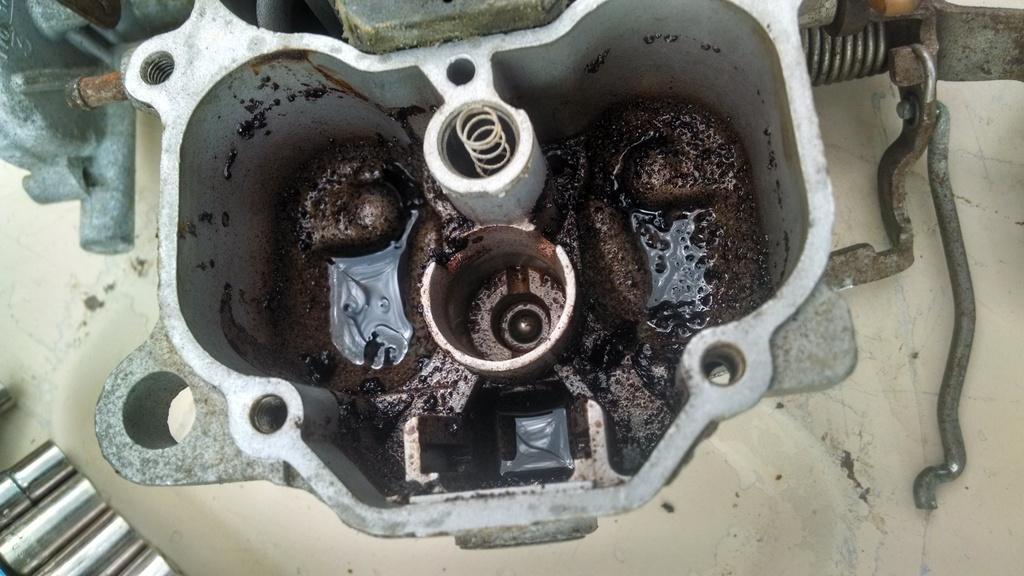
So, time for a carb rebuild. When I first got to the bowl, I could see a little "funk":
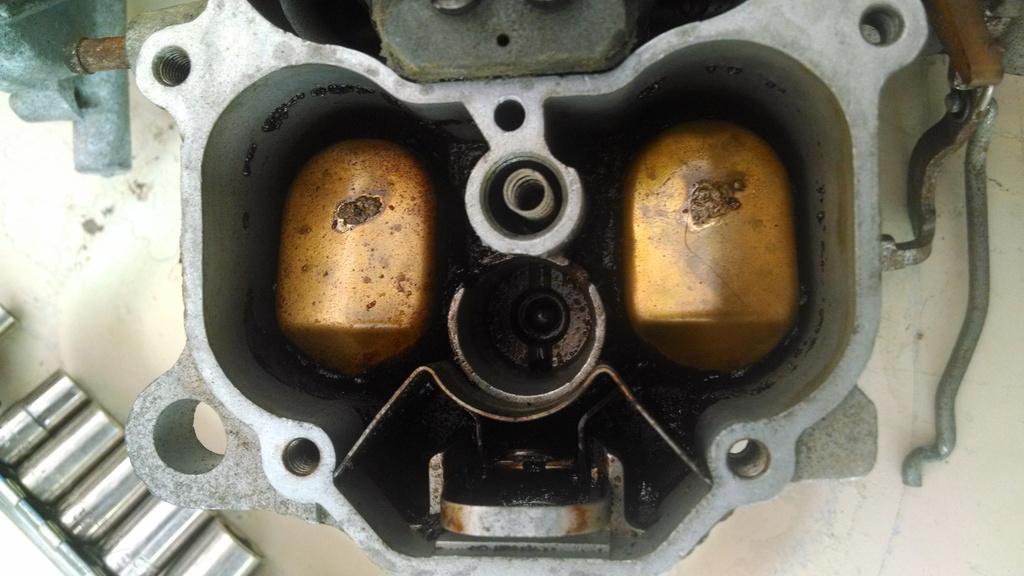
Pulled the float, there is a problem:
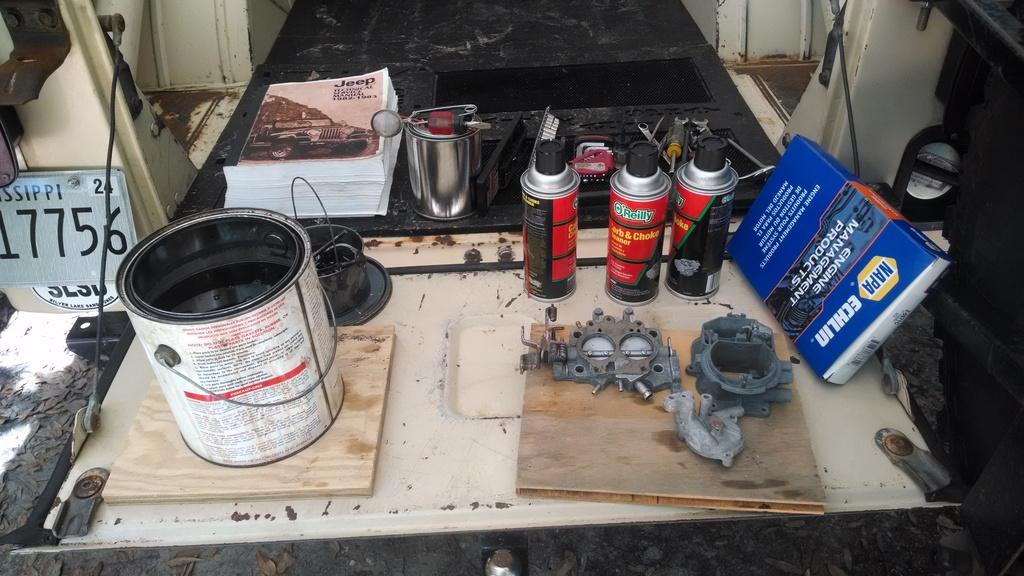
Soaked all the carb parts for 24 hours in the one gallon can of carb de-funker juice:
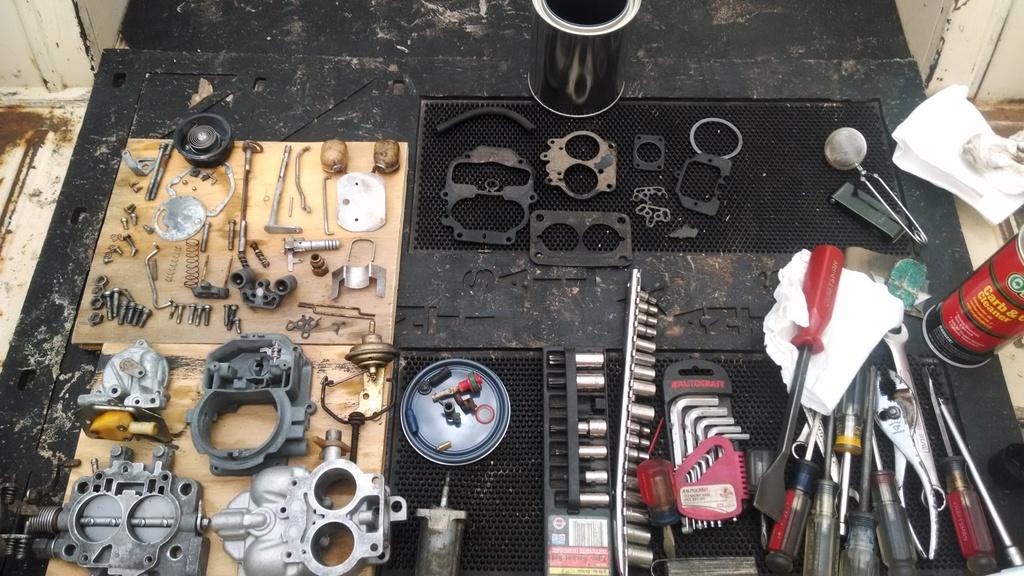
Quick picture of all the parts, I kept the old parts until after the rebuild:
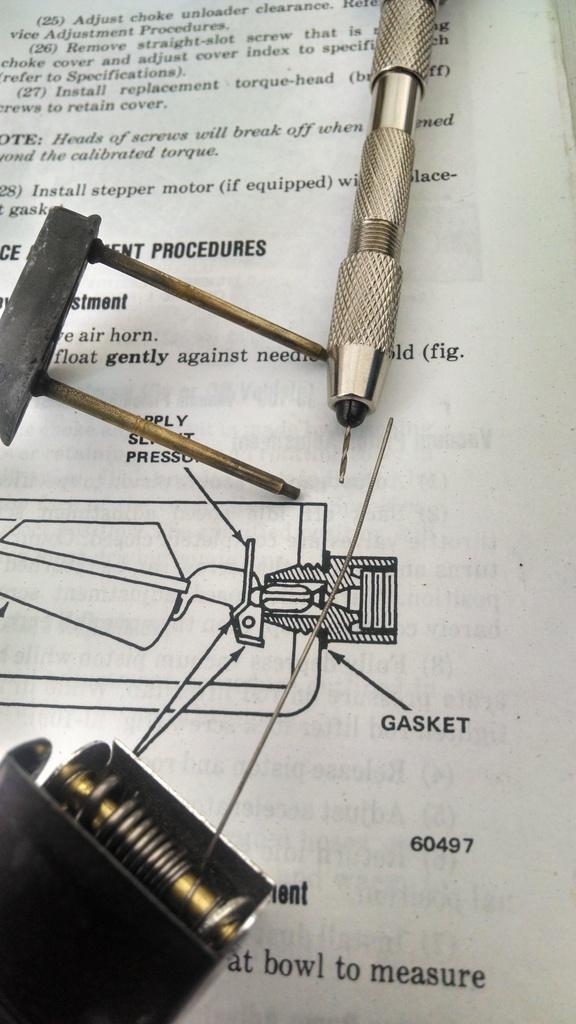
I am not going to do a step by step carb rebuild, but figured I would show this. I drilled out the idle tubes with a .032 bit. I then used a torch tip cleaner to clean out the tubes. The tip cleaner wire thing is something to keep in your tool box if you have a BBD, I keep this little thing in my green Scrambler at all times. Those tubes can get clogged easy, and then the idle goes to poop.
And with the miracle of pictures/internet, the rebuilt/adjusted carb:
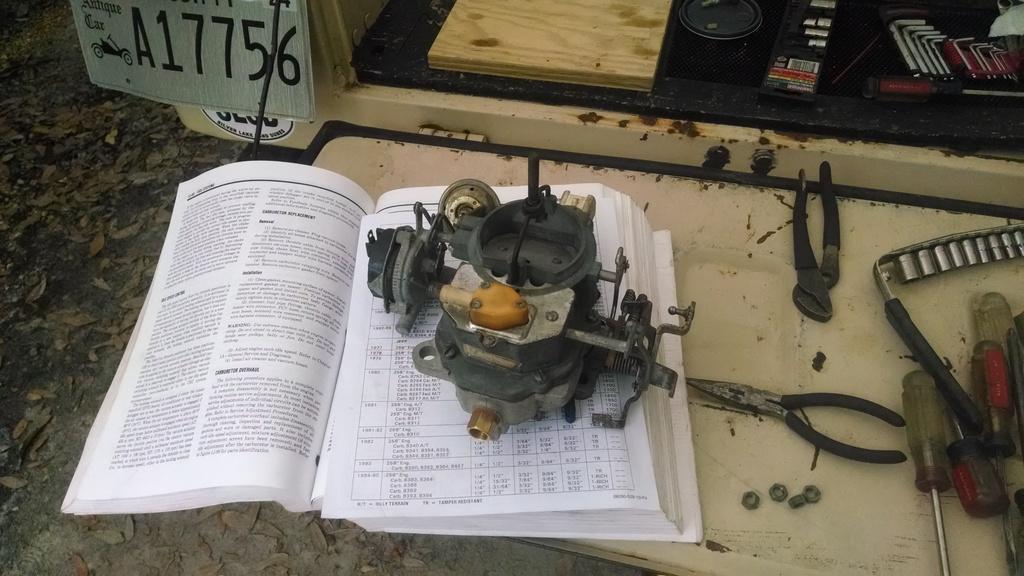
I had the mixture screws out 2.5 turns, cranked for 5 seconds, no start. Sprayed a quick blast of carb cleaner down the throat, hit the key, fired right up!!!!!! Easiest start since this pile got dropped off in my yard. I let it warm up, adjusted the idle to around 6-700 with my ear, turned in the mixtures screws to around 1.5/1.25, seems to be idling great, and starts up fine.
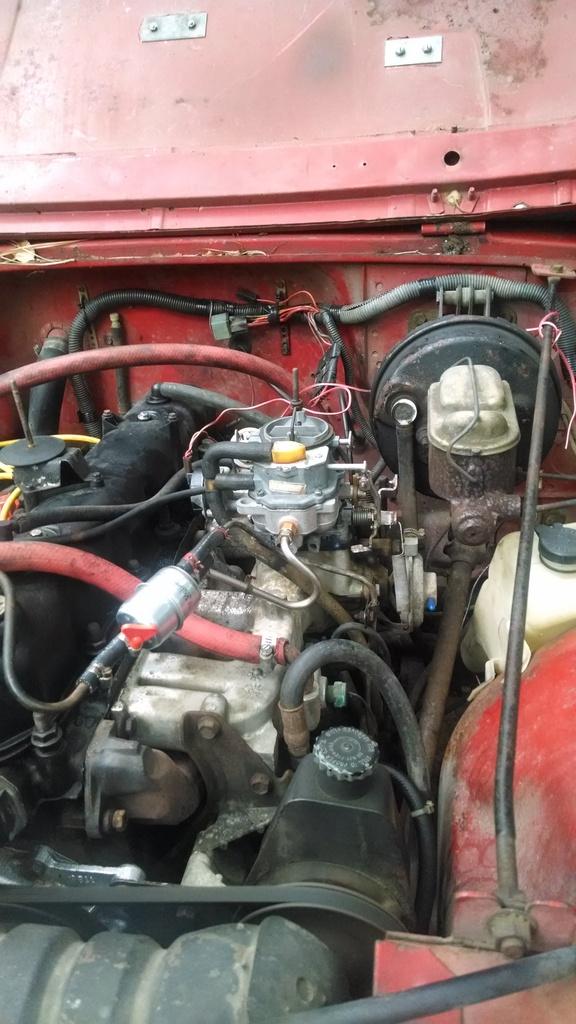
I ran it around the neighborhood once, it still bumbles while accelerating, so still needs some work/adjustments. But, I am not going to run it again until I drop/flush the gas tank. It will stay like this until after South Dakota. It does start and run again, which is all I wanted to do right now; not good to have non-running jeeps in the yard during hurricane season, just in case.
So, no updates here for awhile
I had been driving YS2 for the last few weeks, mainly using it to pull a trailer in the yard, trying to burn up the old gas. Well, a few weeks ago it quit idling, then would not run anymore period. I "think" I finally ran it out of the old nasty gas
So, put 2-3 gallon of new gas in it, try to start it, no go. I disconnect the fuel line from the carb, turn it over, no gas. Pull off the fuel filter, gas. The old filter had become completely impacted, where no gas would flow to the carb, it would all go out the return port. Put a new filter on the fuel line, hook everything back up, no go. Needle stuck. So, pulled the needle out, cleaned it the best I could, put it back together, go to start, it starts, BUT the needle sticks open, gas is flowing out the top of the carb
So, time for a carb rebuild. When I first got to the bowl, I could see a little "funk":
Pulled the float, there is a problem:
Soaked all the carb parts for 24 hours in the one gallon can of carb de-funker juice:
Quick picture of all the parts, I kept the old parts until after the rebuild:
I am not going to do a step by step carb rebuild, but figured I would show this. I drilled out the idle tubes with a .032 bit. I then used a torch tip cleaner to clean out the tubes. The tip cleaner wire thing is something to keep in your tool box if you have a BBD, I keep this little thing in my green Scrambler at all times. Those tubes can get clogged easy, and then the idle goes to poop.
And with the miracle of pictures/internet, the rebuilt/adjusted carb:
I had the mixture screws out 2.5 turns, cranked for 5 seconds, no start. Sprayed a quick blast of carb cleaner down the throat, hit the key, fired right up!!!!!! Easiest start since this pile got dropped off in my yard. I let it warm up, adjusted the idle to around 6-700 with my ear, turned in the mixtures screws to around 1.5/1.25, seems to be idling great, and starts up fine.
I ran it around the neighborhood once, it still bumbles while accelerating, so still needs some work/adjustments. But, I am not going to run it again until I drop/flush the gas tank. It will stay like this until after South Dakota. It does start and run again, which is all I wanted to do right now; not good to have non-running jeeps in the yard during hurricane season, just in case.
So, no updates here for awhile
- City
- Biloxi
- State
- MS
Wow, I haven't worked on this one in a long while. One of my buddies is supposed to be buying this one from JeepAddict, but before it goes, I wanted to finish up a few more repairs/maintenance. I don't want to let go of it until I at least finish a few more simple tasks.
I am not supposed to be back to "work", but this was some relatively simple/"light" work. So, I took my time, no problems.
Anyway, the pictures.
I had rebuilt the carb in this one back in June. I did not want to drive it anymore, due to the nasty old gas. Well, finally dropped the gas tank. Judging from the original crimps on the fuel lines/sending unit, I don't think this gas tank was ever removed:
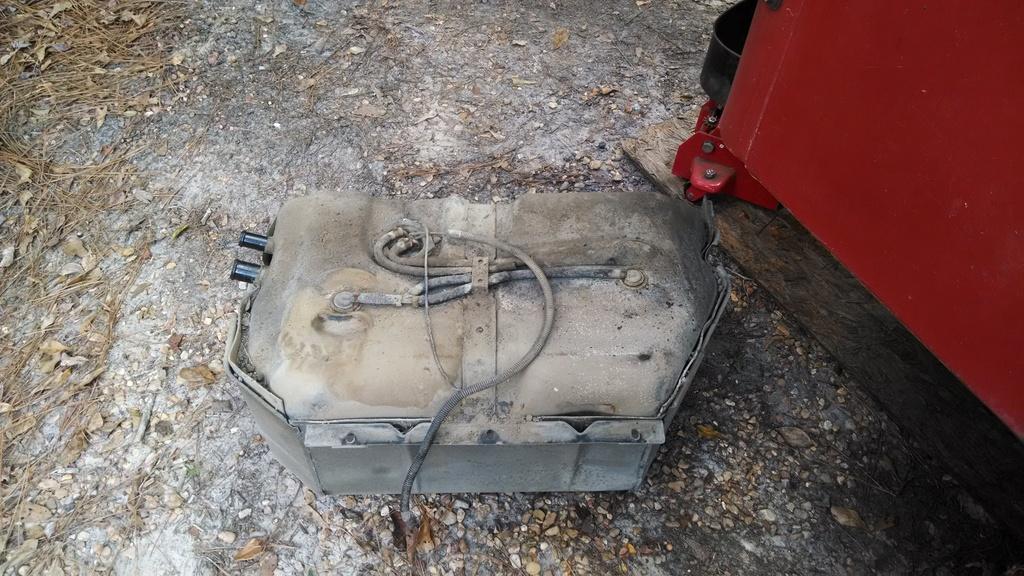
Very dusty/dirty. Once the tank was freed from the skid plate, pleasantly surprised by the lack of rust inside the skid plate.
Anyway, here are the "dirty" pictures. About 1 gallon of this came out, I thought gas was supposed to be clear:
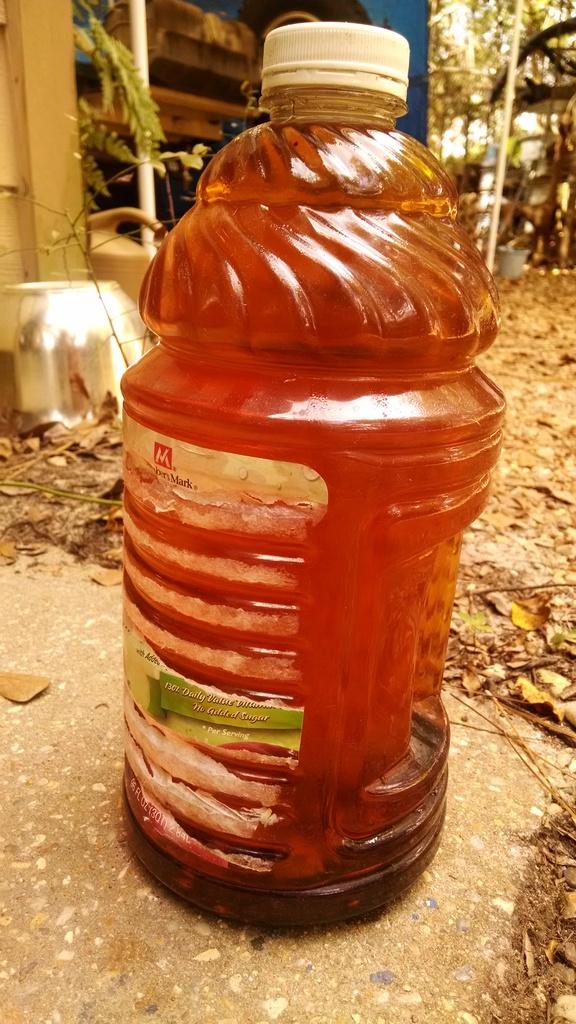
About a 1/2 gallon of this came out, black as used motor oil:
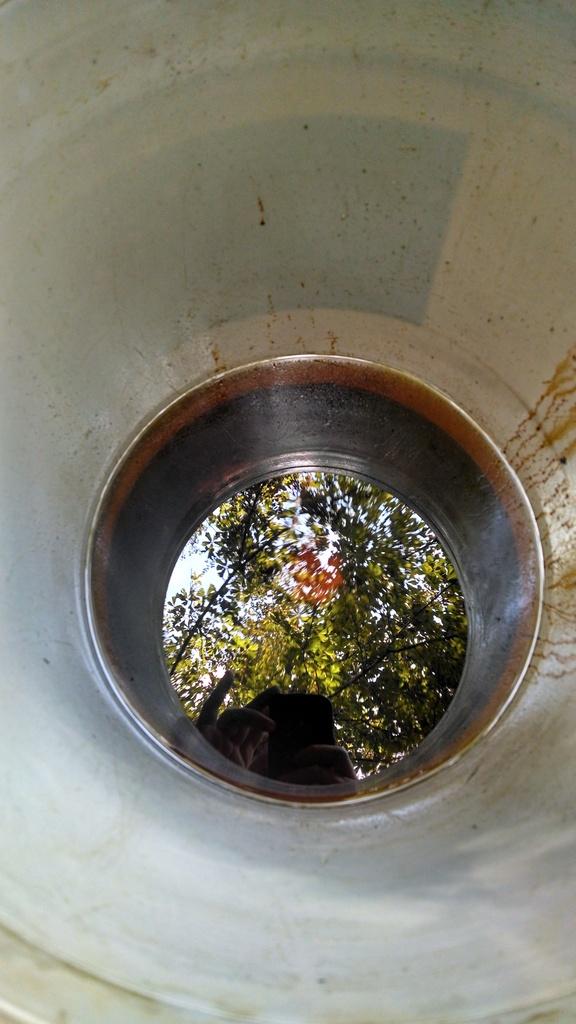
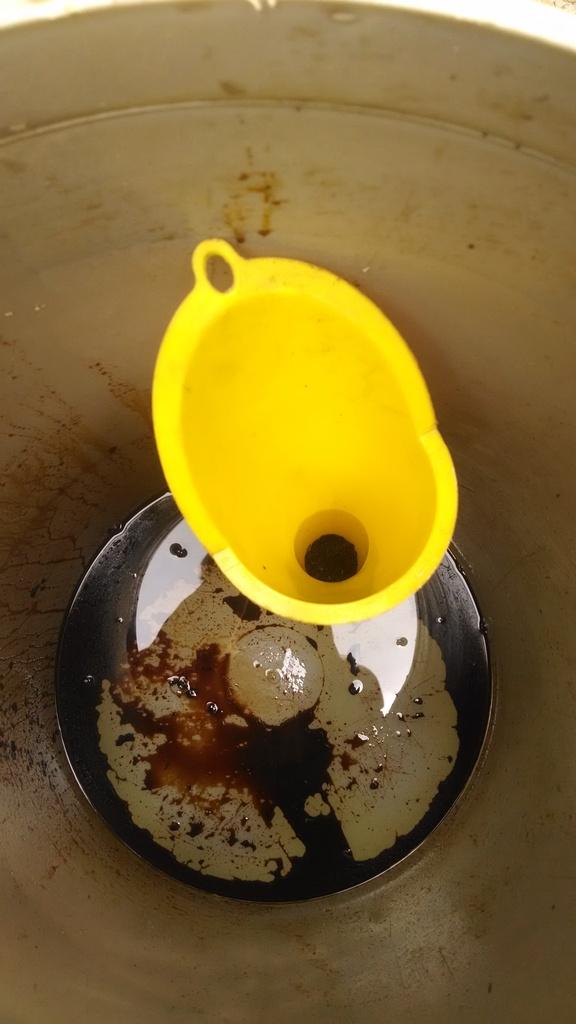
And the best part, look at the sludge in the bottom of the bucket, and all the trash in the funnel:
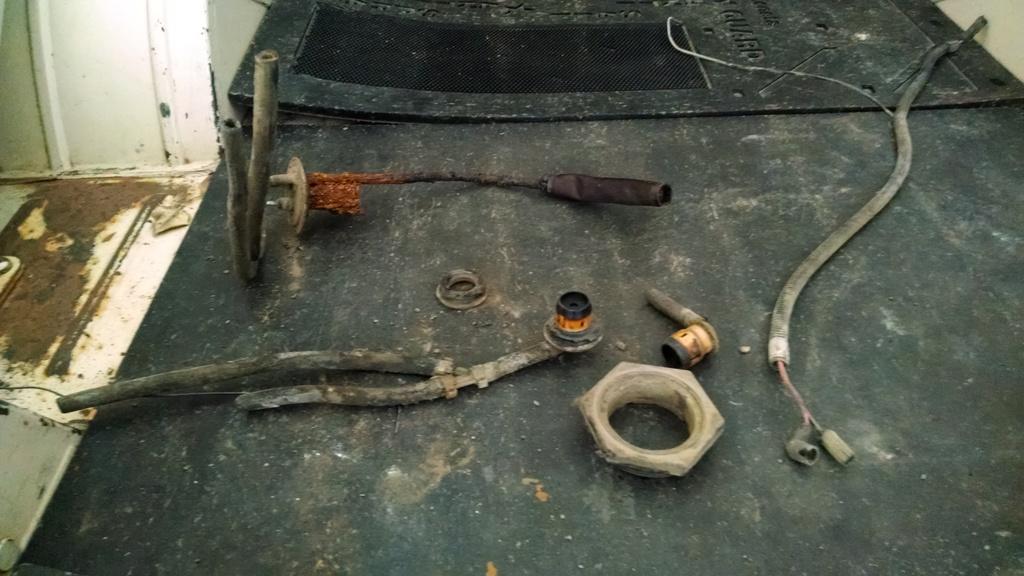
Not surprisingly, the original sending unit is trashed. And, the vent valve grommets are gooey. But, the valves are still good:
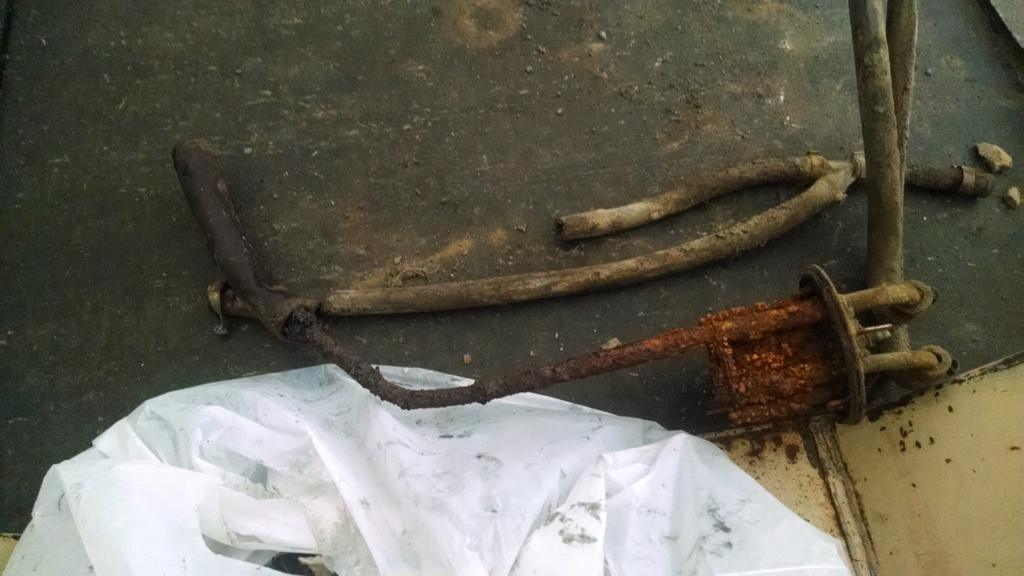
I guess this is why the fuel gauge didn't work, the float arm completely dissolved!!!!!!!!!!! There was a bunch of junk in the bottom of the tank, but no evidence of a float, either!!!!!!!
My buddy took the skid plate and fuel tank to a car wash to pressure wash. No way was I blasting that nasty crap out in the yard. Also ordered a new sending unit, brass float, and two new vent valve grommets. Once these parts come in, I can reinstall the fuel tank. I imagine this thing will run much better on good/clean fuel. I also am replacing the fuel supply, return and vent lines back here. I am going to install fuel injection hose and clamps on the supply and return, at least it will be ready if it is ever upgraded.
I also drained/cleaned/inspected and resealed the front and rear differentials.
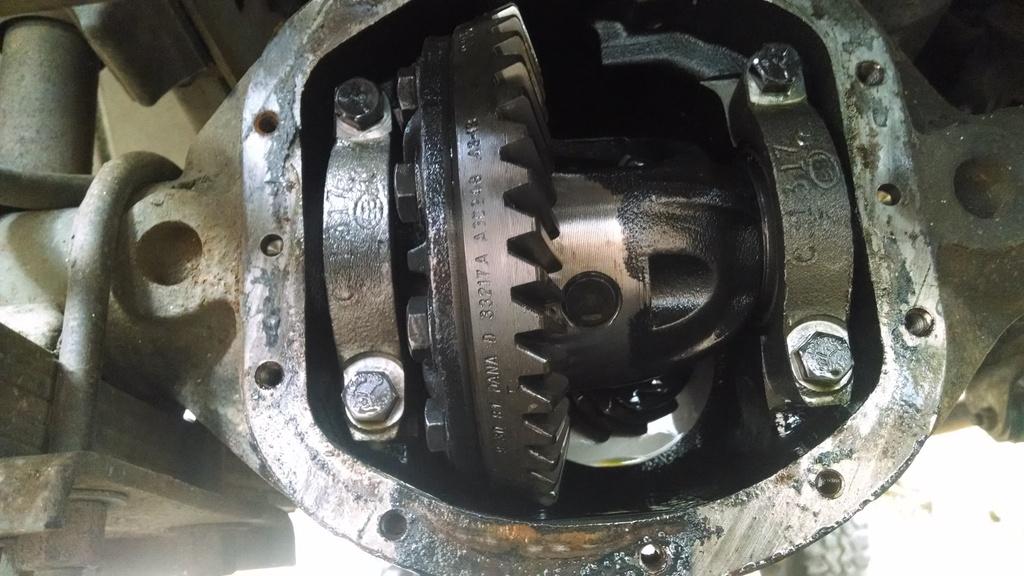
Front Dana 30, 3.31 gears, open diff. Looks great, and old oil wasn't too nasty:
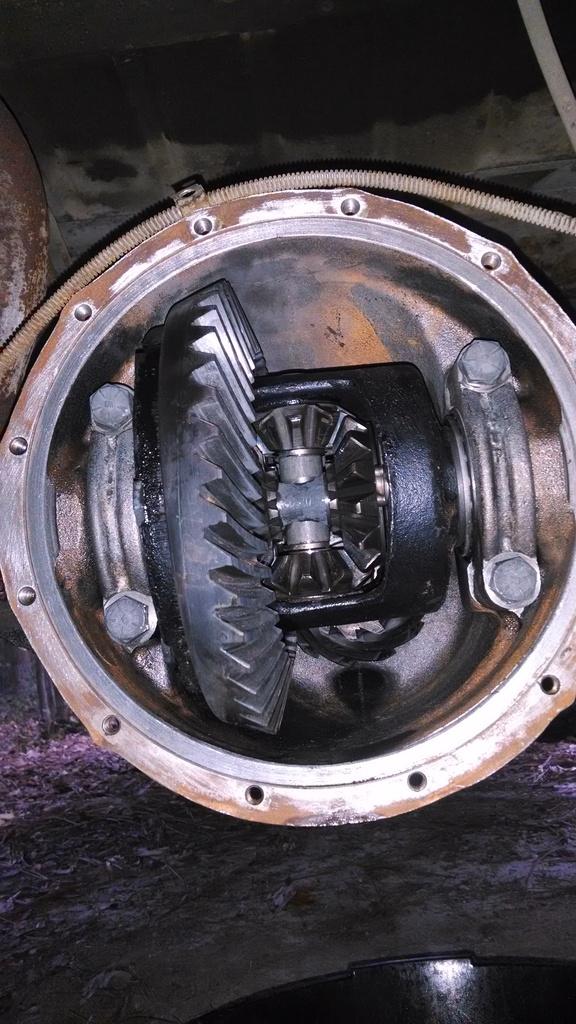
Rear AMC 20, 3.31 gears, Trak-Lock. Same as front, looked good:
The rear ring and pinion were not stamped like the front. The ring gear had "43" stamped on it, plus these markings:
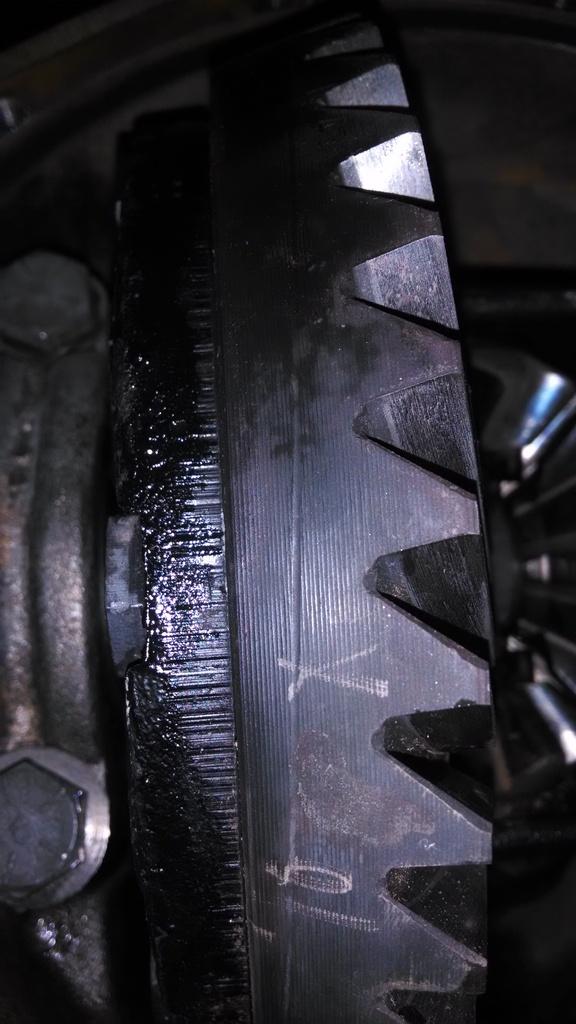
So, I had to count the teeth. IIRC, 43 on the ring gear and 13 on the pinion, so 3.31.
I always let the diff gaskets cure for 24-48 hours before adding gear oil. So, besides gear oil and a gas tank, this will conclude my work on this one. I will post up a few more final pictures once i reinstall the gas tank.
That's it for now
I am not supposed to be back to "work", but this was some relatively simple/"light" work. So, I took my time, no problems.
Anyway, the pictures.
I had rebuilt the carb in this one back in June. I did not want to drive it anymore, due to the nasty old gas. Well, finally dropped the gas tank. Judging from the original crimps on the fuel lines/sending unit, I don't think this gas tank was ever removed:
Very dusty/dirty. Once the tank was freed from the skid plate, pleasantly surprised by the lack of rust inside the skid plate.
Anyway, here are the "dirty" pictures. About 1 gallon of this came out, I thought gas was supposed to be clear:
About a 1/2 gallon of this came out, black as used motor oil:
And the best part, look at the sludge in the bottom of the bucket, and all the trash in the funnel:
Not surprisingly, the original sending unit is trashed. And, the vent valve grommets are gooey. But, the valves are still good:
I guess this is why the fuel gauge didn't work, the float arm completely dissolved!!!!!!!!!!! There was a bunch of junk in the bottom of the tank, but no evidence of a float, either!!!!!!!
My buddy took the skid plate and fuel tank to a car wash to pressure wash. No way was I blasting that nasty crap out in the yard. Also ordered a new sending unit, brass float, and two new vent valve grommets. Once these parts come in, I can reinstall the fuel tank. I imagine this thing will run much better on good/clean fuel. I also am replacing the fuel supply, return and vent lines back here. I am going to install fuel injection hose and clamps on the supply and return, at least it will be ready if it is ever upgraded.
I also drained/cleaned/inspected and resealed the front and rear differentials.
Front Dana 30, 3.31 gears, open diff. Looks great, and old oil wasn't too nasty:
Rear AMC 20, 3.31 gears, Trak-Lock. Same as front, looked good:
The rear ring and pinion were not stamped like the front. The ring gear had "43" stamped on it, plus these markings:
So, I had to count the teeth. IIRC, 43 on the ring gear and 13 on the pinion, so 3.31.
I always let the diff gaskets cure for 24-48 hours before adding gear oil. So, besides gear oil and a gas tank, this will conclude my work on this one. I will post up a few more final pictures once i reinstall the gas tank.
That's it for now