I forgot...
Its been so long since I've actually worked on my Jeep I kinda forgot how much fun it is. I got up at 0530 to make breakfast and get coffee-nated and then headed back to post to start wrenching. As I'm driving in I see all these people running a marathon on post and thought "not today! I got better things to do!"

It didn't dawn on me that the marathon would impact access to the shop but it turns out they had the access roads blocked. Not allowing anything to stop me I just parked the car and walked the last bit. I had the forethought to push the Jeep in a bay Friday at closing time and am glad I did. Seems people were already lined up and had arrived before the roads were blocked. I felt a little like an @$$ just strolling into my bay with a cup of coffee while the others looked at me but... well, Whats the saying? Fortune favors a prepared mind?
First thing on the hit list was getting the last stubborn bolt out of the rear transmission cover thingy. I had soaked it with PB friday but didn't think it would have any effect since these bolts are loc-tighted in also....I dropped the tranny end down enough to let the new wrench have a little room and then wrapped a rag around it. After bracing myself on the creeper and saying a few short prayers I gave it a good dose of old man strength and... BINGO! I was so happy I almost banged my head on the frame.
Then I happened to notice that that was not the only bolt left...!


Thankfully that one came out a little more normally and I was able to tap the cover off with a dead blow hammer. Victory!

I spent a little while cleaning the cover up and scraping gasket gunk etc and then went into reassembly mode.My intent was to use the regular 6pt bolts I bought and throw the stupid torx things in the trash... glad I didn't. Seems the engineers use those things for a reason. The heads of the 6pt ones would be to big to allow them to have a socket put over them. Dang! So I spent a little while longer cleaning up the dumb torx ones and then used them. Anyone need some 6pt grade 5 bolts? haha! The end result that I car about is that I hope this stops the leak. The factory uses a very thin, clear gasket material but I couldn't see where it was compromised.I did notice some very fine lines inside the cover that made me wonder if maybe they were cracks? I hope not but there isn't anything to be done for that now so I pressed on.
Next came getting the BlackBox installed. I had messed with the clocking of this a bit back when I was first trying to get it all together so it seemed fairly correct. I hope it is but there are not any real instructions for it even on the company's website. But the end result is that at least it is in now. I have the lever that operates it at about the 3 O'clock position and since everything is cable operated I don't see where it will have any interference issues...yet? Haven't gotten that far into it so I will know that later.
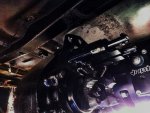
Next came the t-case and this is where the issues have shown up. The recent addition of the clocking ring is what solved the problem of getting it to fit onto the range box. Before I had almost a 1" gap where the t-case bearing retainer was bottoming out in the BBox case. NorthWest fabs sent me the ring and a mounting foot to take up the difference and I had intended on running both. The ring as more a spacer and the foot for extra mounting point support. Well, I must have put the t-case in and out 20 times while laying on my back and trying different ways. Somewhere, somehow I have either mis-installed something (changed) or something isn't right. The t-case uses 6 bolts in a circular pattern to mount. The back of the Black box also has 6 holes with accesses to put on the nuts and washers. But rotate as I may... I could only get 5 of the t-case bolts (now studs) to line up with the box!?! And believe me... I tried rotating everything! I really don't know what I have done wrong or if maybe I have some odd ball ring or something but no matter what I tried I can't get all 6 to line up to install. To that I did what I know is truly a "hack" and VERY temp. fix.... I pulled the one stud that doesn't line up and installed the t-case without it.

If I were at home in the states and wasn't under such time restrictions I could have taken a deep breath and started over and gone very slowly. But here it is difficult to get time to work and evey day it just sits in the parking lot it costs me 3 bucks. If you add that to almost 8 months worth of sitting it adds up and is all just wasted money. At this point I really just want it to move under its own power again and not leak. That way if i get deployed I can put it in storage (at govt. expense) and then hopefully be headed stateside after the deployment. THEN I can tare it apart again and take my time fixing it right. Sad huh? But anyway...here is where its at.
The t-case is in using only the clocking ring. I couldn't see a way to run the mounting foot that made any sense, let alone worth another pair of surfaces that could potentially leak. Plus I would have needed longer studs and there is very little room in the access area of the Black box to get the nuts on so they would have to have been a specific size.?. So my other option and the one I think I will go with until I am stateside is to make a new and very custom mounting design off the back side of the t-case. I have to fab a new cross member anyway so this will just be one more thing. As I looked at it (and despite conventional wisdom/input) there is very little distance between the mounting foot on the end of the NV4500 and where the newly supplied one would have gone. And in my mind, it seems like supporting the back of the case would be much stronger than trying to sandwich another foot and still hang the t-case weight off the back.?. We'll see how this works but again.. if it just solves the short term need of moving it around, its ok. One thing about the supplied foot I didn't like is how it fit. If I installed it with the dog leg pointing to the rear it touched the t-case pan. Not only could that cause wear from vibration but it would require the t-case to be pulled just to change that pan gasket. If I flipped the foot around the other way it was no where near flat. Given the way it is slotted to allow rotation it only allowed the leg to sit about 20* to the drivers side. This may have been due to whatever else is causing a misalignment and the lack of the 6th stud fitting but I don't know.?.And while this will eat at me I am compelled to just get it all together and hope for the best.
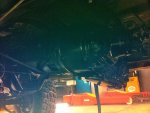
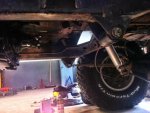
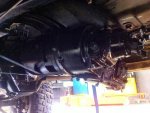
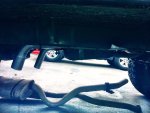
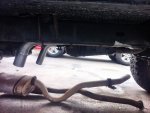
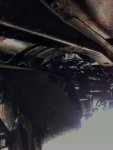
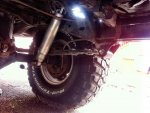
So the pics are of how it is now... all heavy, major components are installed. There is still a LOT of stuff to do and the list goes a little like this...
-Fab a cross member and t-case support
-Fab an exhaust system and maybe re-use some of what came off.
-Install all three shifter cables and their assemblies.
-Install the hydraulic clutch master/slave deal.
-think about the drive shafts.
-And eventually install new ball joints and a correct pitman arm.
With the topic of driveshafts... I raised the tranny/BB/t-case up to about where it should sit and pulled a rough number for the rear shaft. Looks like I'm at about 20 1/2"s with how it sits now....all droopy butt. If it sat level maybe i would gain a half inch to an inch in static length. Does anyone know what the length of a factory CJ5 or 7 rear shaft is? If I get to where I will have a custom shaft made I will likely have it built with a much longer travel ability using longer splines and slip. I'm just not sure if I will need a CV on it or not? Take a look at the pics and toss me your opinion.
One funny thing of note is after I was cleaning up and getting the jeep rolled back outside I did something stupid. Since I don't have a cross member yet I had it all supported by a ratchet strap. Once I had it pushed into a parking spot I decided to see if the battery had taken any charge or if it would start. By some miracle (this new yellow Optima has been DOA most of the last few months, slow drain somewhere) it did in fact actually turn over! A few pumps of the gas pedal and it started, ran for about 45 seconds, and then POW! My dumb self forgot that the nylon ratchet strap was running just behind the cut off exhaust! DOH!!! Only took a moment for that to melt and snap and then the entire drivetrain dropped! Thankfully it didn't hurt anything and I used a bigger strap to get it back up but...PHEW!! Scary seconds there!

So back to work week and waiting for next Sat to continue the saga. I have block leave coming up in the end of June. By then I hope to have whatever parts and much of the work done and can just tinker on it for fun....