

You are using an out of date browser. It may not display this or other websites correctly.
You should upgrade or use an alternative browser.
You should upgrade or use an alternative browser.
Gazzo's Down-under CJ thread
- Thread starter gazzo
- Start date


Dave The Sparky
Rebuilding my CJ8 very,very slowly...
- City
- Halifax
- State
- UK
Which bracket do you need cobber? depending on which one i may have one spare

- City
- Fremantle
- State
- WA
Which bracket do you need cobber? depending on which one i may have one spare
Ah thanks Dave. I'm good. I got spares from the 10s around here somewhere. It's not so bad I can use it, just wouldn't meet Concourse


- City
- Fremantle
- State
- WA
Ok so got the tinny on today including the back door. I've been hangin to see how the weight of the top and back door/wheel affected the ride and I'm happy to say that those pesky "too firm" Rancho 2.5" lift springs ride juuuuust right with the load. The jeep hardly dropped at all with the added weight and, apart from being a bit slower, it behaves nicely. A smoother ride to be sure. View attachment 49586View attachment 49587
- City
- Fremantle
- State
- WA
- City
- Fremantle
- State
- WA
Managed to address another item on the Overlander list. That spot at the rear left where the heat from the exhaust wrecks everything and promotes rust got a patch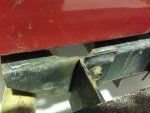
I burred out the rust, made a patch with a big hole and glued it in. Good enough for the next little while.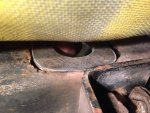
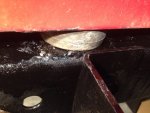
Next job is whatever is clunking around in front. This is the axle/spring setup out of my 7 and it seemed fine when it was in that jeep but now it's banging around suggesting a bottom ball joint perhaps. Hope not.
I burred out the rust, made a patch with a big hole and glued it in. Good enough for the next little while.
Next job is whatever is clunking around in front. This is the axle/spring setup out of my 7 and it seemed fine when it was in that jeep but now it's banging around suggesting a bottom ball joint perhaps. Hope not.

- City
- God's Country
- State
- AR
. Also found I have some work to do in the rear of the seats, all the steelwork is rusted out which is a massive disappointment.
I had the same problem with a couple of my seats. I got a piece of flat steel, and two pieces of angle iron, and made a cradle of sorts l_____l which I then bolted to the bottom rear of the seat frame. Did them both back in the late 90's and both are still sturdy. I didn't have access to a welder so I had the bits cut at the local machine shop and bolted it all together.
- City
- Fremantle
- State
- WA
Started my front flare project today. I got our poly welding people to form some 20mm sheet over a form I made to suit the wheel arch. They flame heated the material at the bends and burnt it a bit so pretty much this one will be for concept only. This of course means I can be rough as guts with it, just good enough to get a visual.
These tyres stick out a long way, this is a 6" flare and it covers perfectly, maybe could be an inch narrower (pretty ugly at this point).
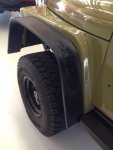
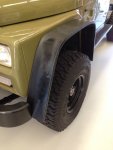
Anyway I cut the ends back and splayed the front edge down to meet the width of the bumper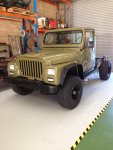
At the rear it will stay full width and have a stock Jeep mud flap hanging from it. With the flap on it all looks quite good. Pics tomorrow on that.
I think it does look a bit square but sort of suits the blocky look of a CJ10 fender. I will radius the top outer edge maybe 15mm radius. So when they make the real ones they sit the strips in a hot tub of glycol until the plastic completely loses it's memory, the memory that wants it to be straight and flat. It can then be slump over my profile and will stay the way forever. They'll make four so I can make a second set.
Fingers crossed.
These tyres stick out a long way, this is a 6" flare and it covers perfectly, maybe could be an inch narrower (pretty ugly at this point).
Anyway I cut the ends back and splayed the front edge down to meet the width of the bumper
At the rear it will stay full width and have a stock Jeep mud flap hanging from it. With the flap on it all looks quite good. Pics tomorrow on that.
I think it does look a bit square but sort of suits the blocky look of a CJ10 fender. I will radius the top outer edge maybe 15mm radius. So when they make the real ones they sit the strips in a hot tub of glycol until the plastic completely loses it's memory, the memory that wants it to be straight and flat. It can then be slump over my profile and will stay the way forever. They'll make four so I can make a second set.
Fingers crossed.

Cpittman428
Basic User
- City
- Fort Collins
- State
- CO
[emoji106]🏻[emoji106]🏻 looks good to me!! I'd drive it Gary!

- City
- Dallas
- State
- tx
[emoji108]

- City
- Fremantle
- State
- WA
Yesterday I replaced the busted dipstick tube on the Renegade. Whilst doing that it dawned on me why so much oil was bleeding out there. The crank rotated real nice to sling oil straight up and out of that little hole! I broke it when I was bending the support bracket to install the DUI monster diz. So then I welded up the broken one, painted it then put it into the engine I stole the non broken one from. Big deal. Little jobs that make a big difference.
- City
- Fremantle
- State
- WA
Finally committed myself to sorting the handbrake today on the CJ10. The chassis, being from a real J10 is about 8" longer than the Waggie that my rear diff came out of (AMC23?). As such the E brake cables attached to that are 8" too short. I made an enlengthener (Google that new word of mine) so I could keep it all sort of stock and besides all 6 of the cables that came out of 3 CJ10s were knackered or rusted.
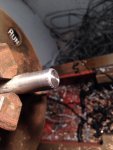
So I got some 1/2" stainless tube and welded in some bungs which I cut from a 10mm stainless bolt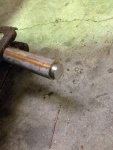 .
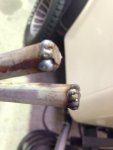 prettied that up in the lathe.
Drilled a hole in the centre of that bung then went at it with the cutoff wheel. Cut a groove lengthways deep as the centre for the cable then went 90 degrees and cut in the opening for the lump end bit.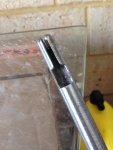
The lump end is just like a "marriage" fit so when the lump is inserted it pulls back into its receptacle all snug and yummy.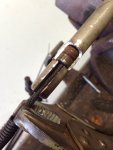
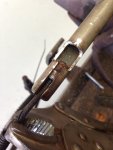
Then when it's all installed minus painting it looks like this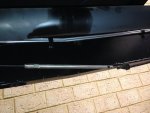
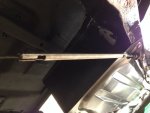
Giving myself all pats on the back but I've actually made them about 50mm too long and I'm pretty much out of adjustment on the front two pull rod things
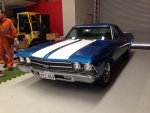
Then I got a visitor and I stopped worrying about jeep handbrakes for a little while.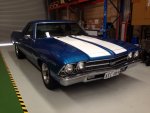
So I got some 1/2" stainless tube and welded in some bungs which I cut from a 10mm stainless bolt
. prettied that up in the lathe. Drilled a hole in the centre of that bung then went at it with the cutoff wheel. Cut a groove lengthways deep as the centre for the cable then went 90 degrees and cut in the opening for the lump end bit.
The lump end is just like a "marriage" fit so when the lump is inserted it pulls back into its receptacle all snug and yummy.
Then when it's all installed minus painting it looks like this
Giving myself all pats on the back but I've actually made them about 50mm too long and I'm pretty much out of adjustment on the front two pull rod things
Then I got a visitor and I stopped worrying about jeep handbrakes for a little while.