• Notice for iPhone users: DO NOT use the image size reduction option when uploading photos to the forum. This causes portrait images to post as landscape. We have added a warning to the image insert pop-up as well.

Gazzo's Down-under CJ thread

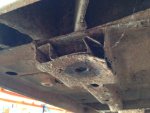
Ok so that's a good question. Early on I mentioned the flex these things have "designed" into the chassis. Well that flexibility causes this at the rear mounts on the tub
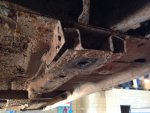
ImageUploadedByTapatalk1424773294.202865.jpg
ImageUploadedByTapatalk1424773373.052120.jpg
The closed chassis ends about halfway along the tub.
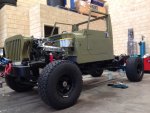
What I plan to do is utilize the amazing twist resistance of SHS or square hollow section or box section as some call it. I'll make a rectangular frame using 4" SHS with mitred corners. I'll then lay that along the chassis and make whatever connections I need to make to connect it to each of the 10 (I think) supports. I'll then build my tray on that.
The thinking is the rigid SHS portal will make flex a thing of the past. Like an exoskeleton.
It'll have drop sides and a cage with a canvas cover with sides I can roll up. I see the rolled up setting as my day to day settings. I've always like the convenience and "safari" look of rolled up sides. Fridge, swag, grill. I'm going camping.
Aluminium checker plate floor screwed down to achieve a balance between strength and weight.
That's the plan anyway. Thanks for asking.
 
I like the idea, I have two flat bed pick ups and if your going to seriously us it you can't beat the flatbed. If you were doing it as a restore then a bed (similar to a pickup would look neat).
 
When you say bed do you mean like a well body? If so we don't have them here
 
Man he's a legend. Such vision. No that well back is not for this truck although I really like them. Rare as hens teeth in these parts, actually I've never seen one in the flesh. I considered for about 9.25 seconds using one off a land rover. I want the space only a tray can offer. Like I said, fridge, sleeping room for two (my son and me, wifey might take some encouragement) and a couple of tackle boxes.
 
I agree his work in incredible. I'm with you on the tray (I call a flat bed). I got so much more room (about 6' x 8') vs a 4' x 8' with wheel wells.
 
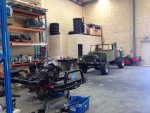
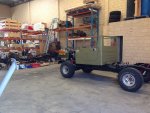
Bit of a cleanup day yesterday. Had to get the truck out of the business workshop and back next door to the jeep oasis. Got old mates stuff all packed away and made some room for the old manImageUploadedByTapatalk1425165222.296854.jpgImageUploadedByTapatalk1425165249.063021.jpg
Reassembly can continue in earnest. Have started getting the wiring into the engine bay. Trying to fit a 6 cylinder harness onto a v8 with minimal or no splicing is a mission but I think I'll get there.

Away for the weekend now so it's Overlander time! Yippee
 
You have a killer shop! And some killer rigs. Having a good amount of space makes all the difference.
 
Finally got some time in on my tenner.
Sway bar hung up (no bushes for the rods though) can I use shocky bushes?
Drivers seat belt installed
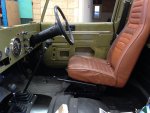
Drivers (right/correct/not left) seat brackets buffed, painted in installed
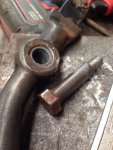
4wd lever rebushed (home made), painted ind installed
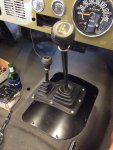
T176 stick heated with the gas axe and bent 4" at 45degrees towards me, SOOO much nicer
Cover plate sanded, painted installed
Shifter twin boot cleaned installed
Amc23 cover reinstalled with new crown seal (had to cut it unfortunately since it was too big and would stay in the recess :grrrr:
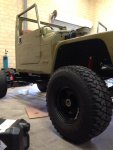
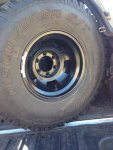
And my freshly powdercoated mags and second hand coopers fitted up. Picture time:
ImageUploadedByTapatalk1427534574.188375.jpgImageUploadedByTapatalk1427534595.688465.jpgImageUploadedByTapatalk1427534612.838492.jpgImageUploadedByTapatalk1427534629.306043.jpgImageUploadedByTapatalk1427534646.422275.jpg
The funds have pretty much been cut for this vehicle now so it's time to get creative. Things like seat covers or reskins rather than reupholstered, reusing old parts (which frankly I prefer anyway). Luckily the bulk of it is either done or bought now so all I need really is more timeImageUploadedByTapatalk1427534890.188295.jpg
 
Hoping to get some time on the truck today. Yesterday had my own little sandblast yesterday before coming home. "Graffiti'd" a perfectly good dune structure with the Overlander. Unfortunately the phone went flat and the go pro got full early on. Did get a sweep though
http://youtu.be/MhlCjo7V6-4
Heaps of Top Gear style power slides in 2X on firm wet sand. Lots of circles. Great fun with no one around

So I have a great lead on a Renegade. Original owner (the guys dad). Full decals 258 auto, all original with books!!! Brown with the yellows (presumably). Not for sale but can be bought for 7k I'm told. Frothing about this. Will have pictures this week and it's not far from me. Stay tuned
 
Edit: got to see the 80 cj7. No good. To much rot, old poor bodywork yadayadayada
 
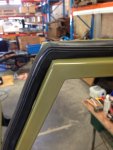
Jeep day yesterday. Doors all came together and i managed to get the new seals converted from rounded corners to pointy.
First installed the bottom half, the clips supplied all go in real nice and are perfectly spaced.
Then some Loctite cyanoacrylate adhesive (Superglue) for two inches at the bottom of the rear part of the window frame to fix the seal. Then run the seal up the front section and around the front corner.ImageUploadedByTapatalk1429401612.304280.jpg
Apply another two inch run of glue along from the front corner rearwards and push the seal into place.
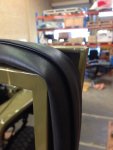
Now stretch the seal over the back pointy corner and mark with chalk if necessaryImageUploadedByTapatalk1429401634.636279.jpg
Take it off the frame and cut the seal at that point. Then you'll need to cut the ends at a touch less than 45 degrees.
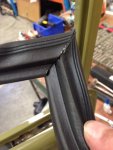
Get your glue and without mucking around glue the ends together and leave for couple of milliseconds while that pesky stuff driesImageUploadedByTapatalk1429401858.054042.jpg
If you're like me you will have become part of your jeep now.
Anyways once you have surgically removed yourself from the seal apply glue to the top groove and install the seal there the do the vertical one and finish installing. I think it came out real nice and the glue should take the load of the glued mitered corner. Time will tell how successful I've been.
With the doors all back together with new seals they close with a pretty nice "Volkswagon Golf" style THUNK as they say in the ad.

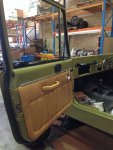
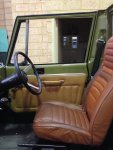
Cpittman's Honey door trims just look so beautiful against the Commando. I'm now going to look for Bestop covers in Honey. What are my chances?ImageUploadedByTapatalk1429402196.319574.jpg
The new Crown cranks are very good but the screw they supply has a metric thread 4mm rather than the 3/16 original. Back to the screw bucket I go
ImageUploadedByTapatalk1429402392.165200.jpg
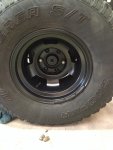
Another little item yesterday was the wheel weights. The second hand Coopers were way out on a couple and the weights were just to in your face so I masked them up on one for a trial and spayed with POR15 top coat. Looks way betterImageUploadedByTapatalk1429402542.915190.jpgImageUploadedByTapatalk1429402558.732036.jpgImageUploadedByTapatalk1429402574.231762.jpg

So another couple of steps closer.
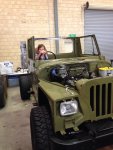
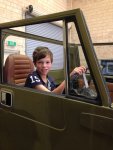
Mini Me wanted in for a shotImageUploadedByTapatalk1429402805.881887.jpgImageUploadedByTapatalk1429402821.598589.jpg
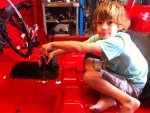
Here he is a couple years back before he discovered iPads and wanted to help outImageUploadedByTapatalk1429402968.848913.jpg
 
Nice craftsmanship on the seals! I am really glad (and agree) that the honey panels look awesome with the commando paint!


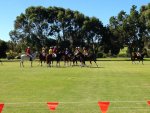
I slipped away this weekend and partook in a Polocrosse event at the Country Club (rather). ImageUploadedByTapatalk1430126694.136142.jpg
Off field filly (mates daughter)ImageUploadedByTapatalk1430126736.952623.jpg
And yesterday was just THE best afternoon but no one to share it with but the old red long carImageUploadedByTapatalk1430126806.151525.jpg
Got back into town this morning and snuck to the shop for teeny bit of work on the lorry. I got the rear window all scrubbed up back to black rubber and installed. There was thirty years of farm dust and snot baked on the the gasket. A bit of silicon oring grease on the inner face then pulled it in bit by bit with a bit of electrical building wire (the wire we use to build electrical control panels, thin in diameter and very strong). No pix I'm afraid.
 
Jeep day yesterday. Doors all came together and i managed to get the new seals converted from rounded corners to pointy.
First installed the bottom half, the clips supplied all go in real nice and are perfectly spaced.
Then some Loctite cyanoacrylate adhesive (Superglue) for two inches at the bottom of the rear part of the window frame to fix the seal. Then run the seal up the front section and around the front corner.View attachment 48081
Apply another two inch run of glue along from the front corner rearwards and push the seal into place.
Now stretch the seal over the back pointy corner and mark with chalk if necessaryView attachment 48082
Take it off the frame and cut the seal at that point. Then you'll need to cut the ends at a touch less than 45 degrees.
Get your glue and without mucking around glue the ends together and leave for couple of milliseconds while that pesky stuff driesView attachment 48083
If you're like me you will have become part of your jeep now.
Anyways once you have surgically removed yourself from the seal apply glue to the top groove and install the seal there the do the vertical one and finish installing. I think it came out real nice and the glue should take the load of the glued mitered corner. Time will tell how successful I've been.
With the doors all back together with new seals they close with a pretty nice "Volkswagon Golf" style THUNK as they say in the ad.

Cpittman's Honey door trims just look so beautiful against the Commando. I'm now going to look for Bestop covers in Honey. What are my chances?View attachment 48084
The new Crown cranks are very good but the screw they supply has a metric thread 4mm rather than the 3/16 original. Back to the screw bucket I go
View attachment 48085
Another little item yesterday was the wheel weights. The second hand Coopers were way out on a couple and the weights were just to in your face so I masked them up on one for a trial and spayed with POR15 top coat. Looks way betterView attachment 48086View attachment 48087View attachment 48088

So another couple of steps closer.
Mini Me wanted in for a shotView attachment 48089View attachment 48090
Here he is a couple years back before he discovered iPads and wanted to help outView attachment 48091

What brand/color green is that? I really like that color. :)
 
Cool isn't it. Thanks. It's 2013 JK colour "Commando". You have to drive around with no jocks on
 
Back
Top