
I would put the tub together on a table. Something that is flat and solid. Mounting the tub on the frame brings too many variables into play. Bushing differences, body mount height differences, etc. When you go to mount onto the frame when you are done there is enough movement between the bushings and the movement of the bolts that you can get it mounted (mounted with the bolts loose you can move the tub almost 1/2" in different directions on the frame and when you tighten the bolts you can level the tub (if the tubs a hair off). Having it on a table (even sawhorses with wood under the tub) allows you to have a solid foundation to work off.

You are using an out of date browser. It may not display this or other websites correctly.
You should upgrade or use an alternative browser.
You should upgrade or use an alternative browser.
Hayduke's Operation: Scrambled Scrambler
- Thread starter Hayduke
- Start date


- City
- Withrop Harbor
- State
- IL
Jeep Corner Welding has begun!
I scored some YJ half doors, hood hinges and tire stop at the Boneyard this weekend and used the door to line up the door opening. I welded on some of the backing plates and then we lined up the two parts. I also installed the rear wall/bulkhead, windshield frame, hood, seat bracket, and center shifter plate.
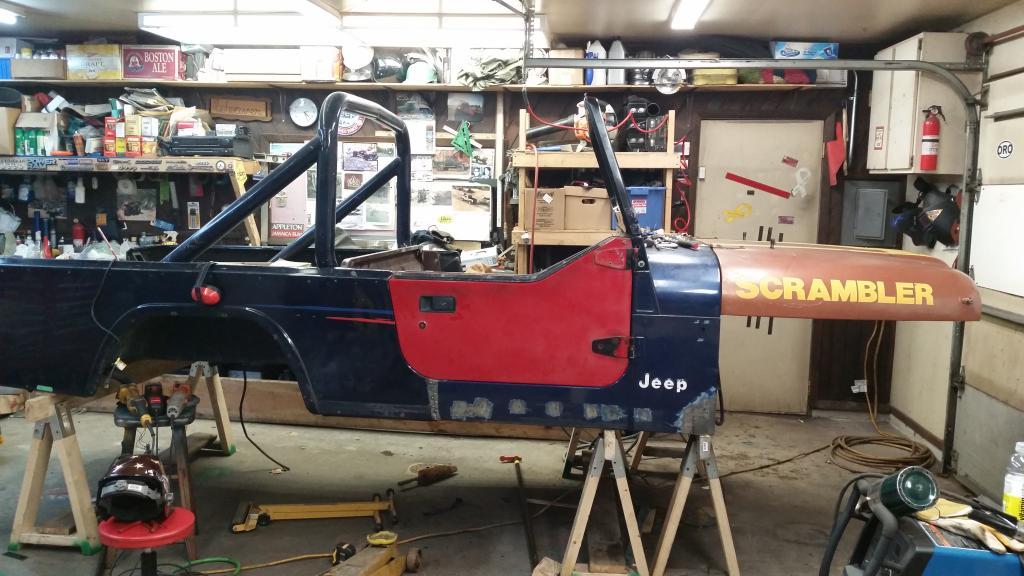
We got the door working nicely and the gap decent and then tack welded the rocker panel in place. Did a lot of measuring before tacking different sections in place...
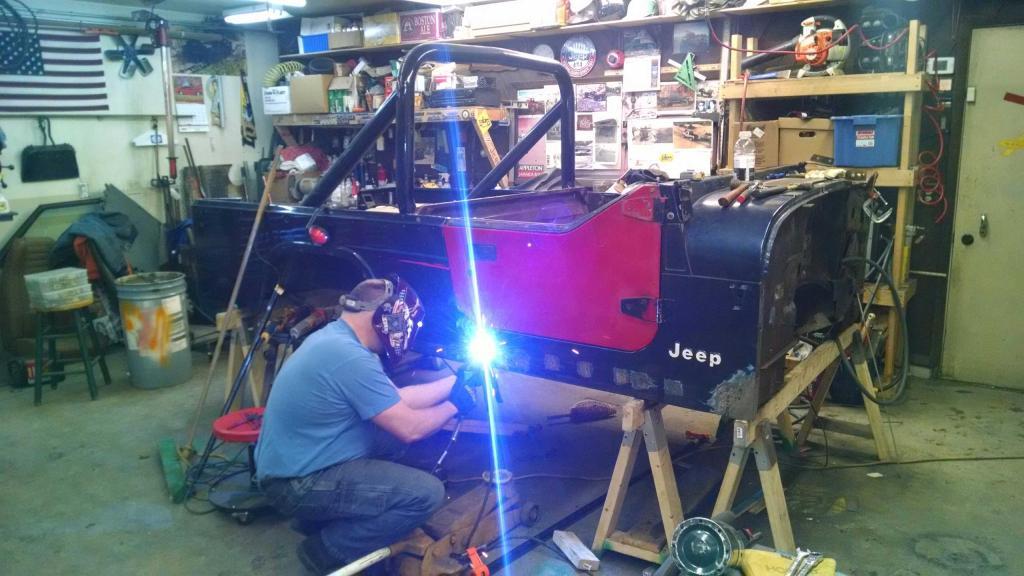
From their I moved on to the floor tacking every so often...
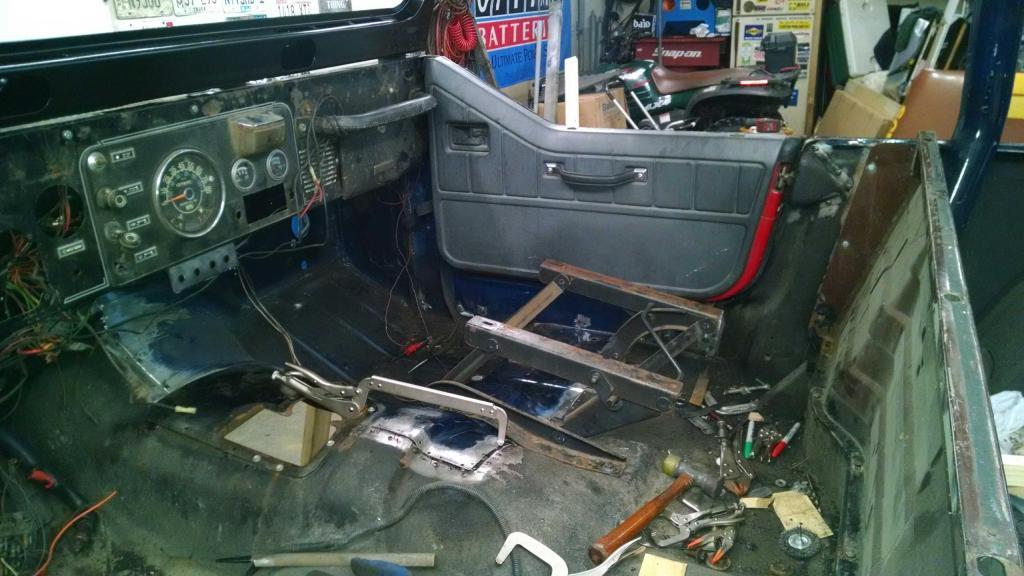
The rear and center of the floor is now 80% welded, and I'll next center up the cowl and then work down the firewall. The top of the cowl where the windshield sits will be the biggest challenge as it's still a bit tweaked forward....
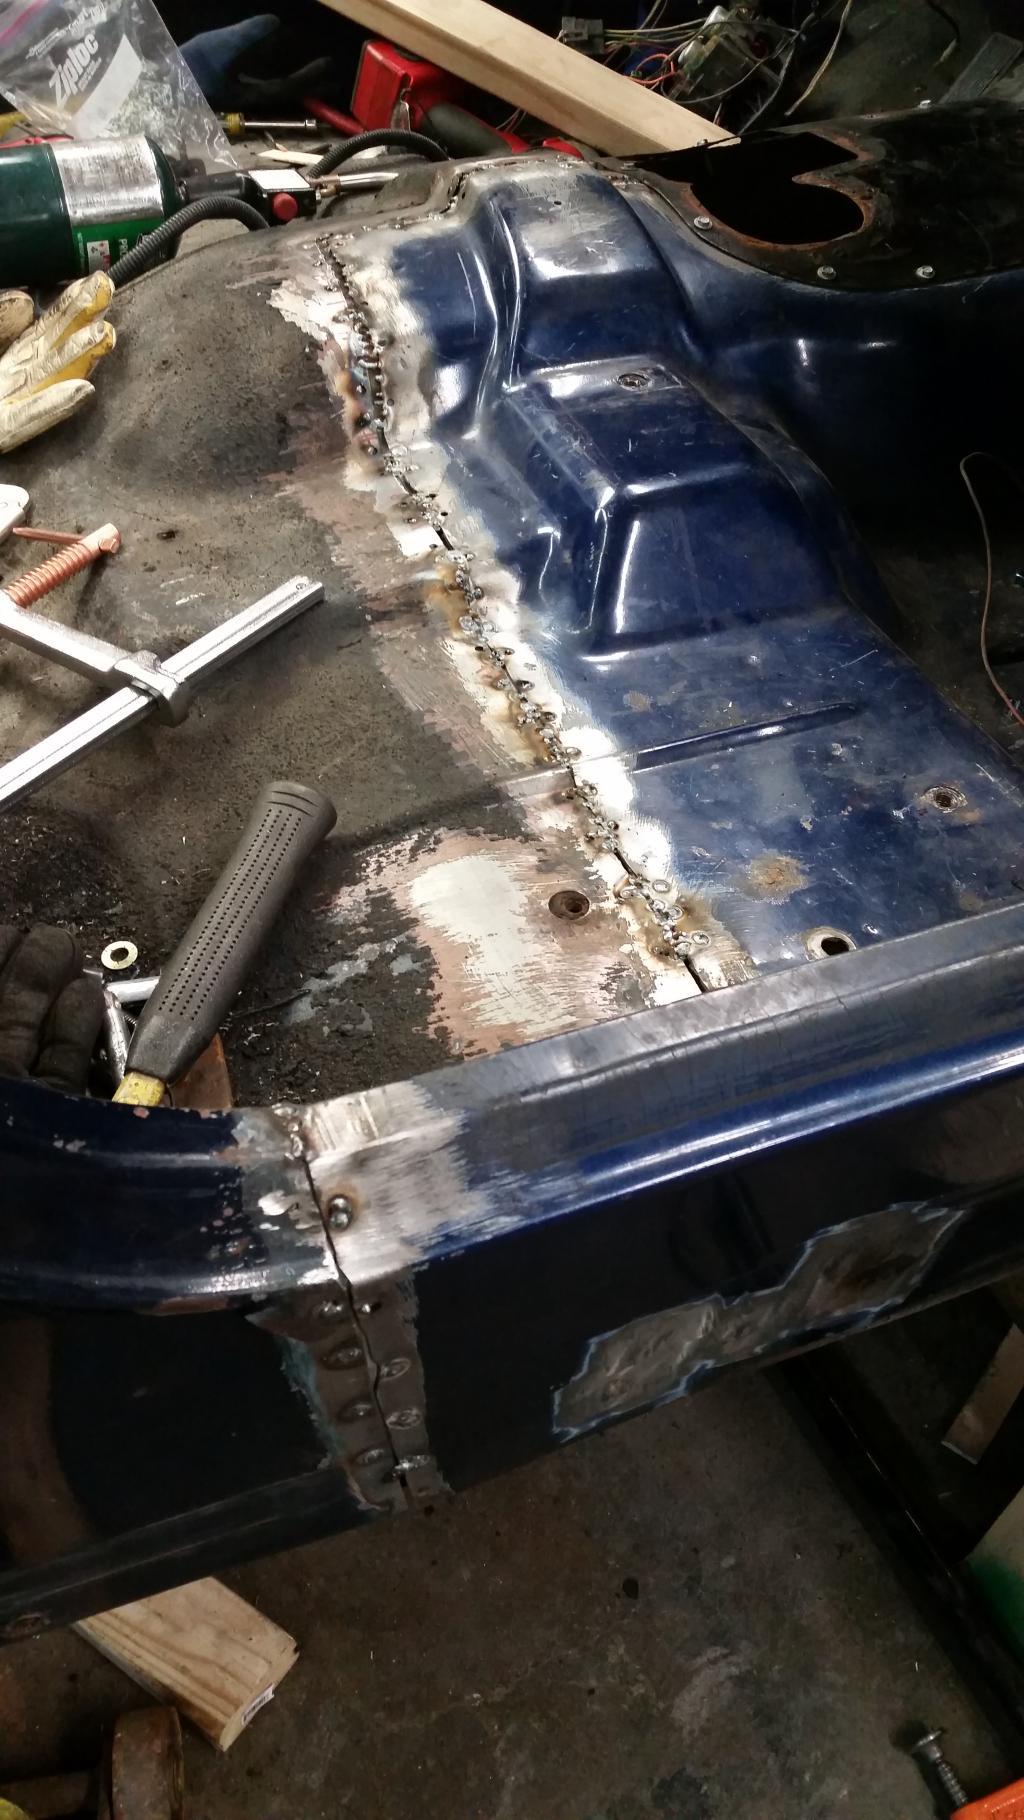
Soon I will have a complete tub....
I scored some YJ half doors, hood hinges and tire stop at the Boneyard this weekend and used the door to line up the door opening. I welded on some of the backing plates and then we lined up the two parts. I also installed the rear wall/bulkhead, windshield frame, hood, seat bracket, and center shifter plate.

We got the door working nicely and the gap decent and then tack welded the rocker panel in place. Did a lot of measuring before tacking different sections in place...

From their I moved on to the floor tacking every so often...

The rear and center of the floor is now 80% welded, and I'll next center up the cowl and then work down the firewall. The top of the cowl where the windshield sits will be the biggest challenge as it's still a bit tweaked forward....

Soon I will have a complete tub....
Last edited:

- City
- Bedford
- State
- NH
I feel your pain with this... I really do.
Keep chipping away at it, looking good.
cb
Keep chipping away at it, looking good.
cb
- City
- Withrop Harbor
- State
- IL
I found a little work time last night... The cowls are interesting due to differences in age and manufacture. The cowl top-to-firewall and firewall-to-floor on the YJ were put together with large gaps, as the CJ was much tighter so I needed to adjust to make the seams as good as possible. I chose not to drill and re-weld them, but just make it work. I matched up the front lip of the cowls so the overhang will be hidden under the heater vent. I ground down the welds, but didn't hit it with the flap wheel grinder to smooth them out yet:
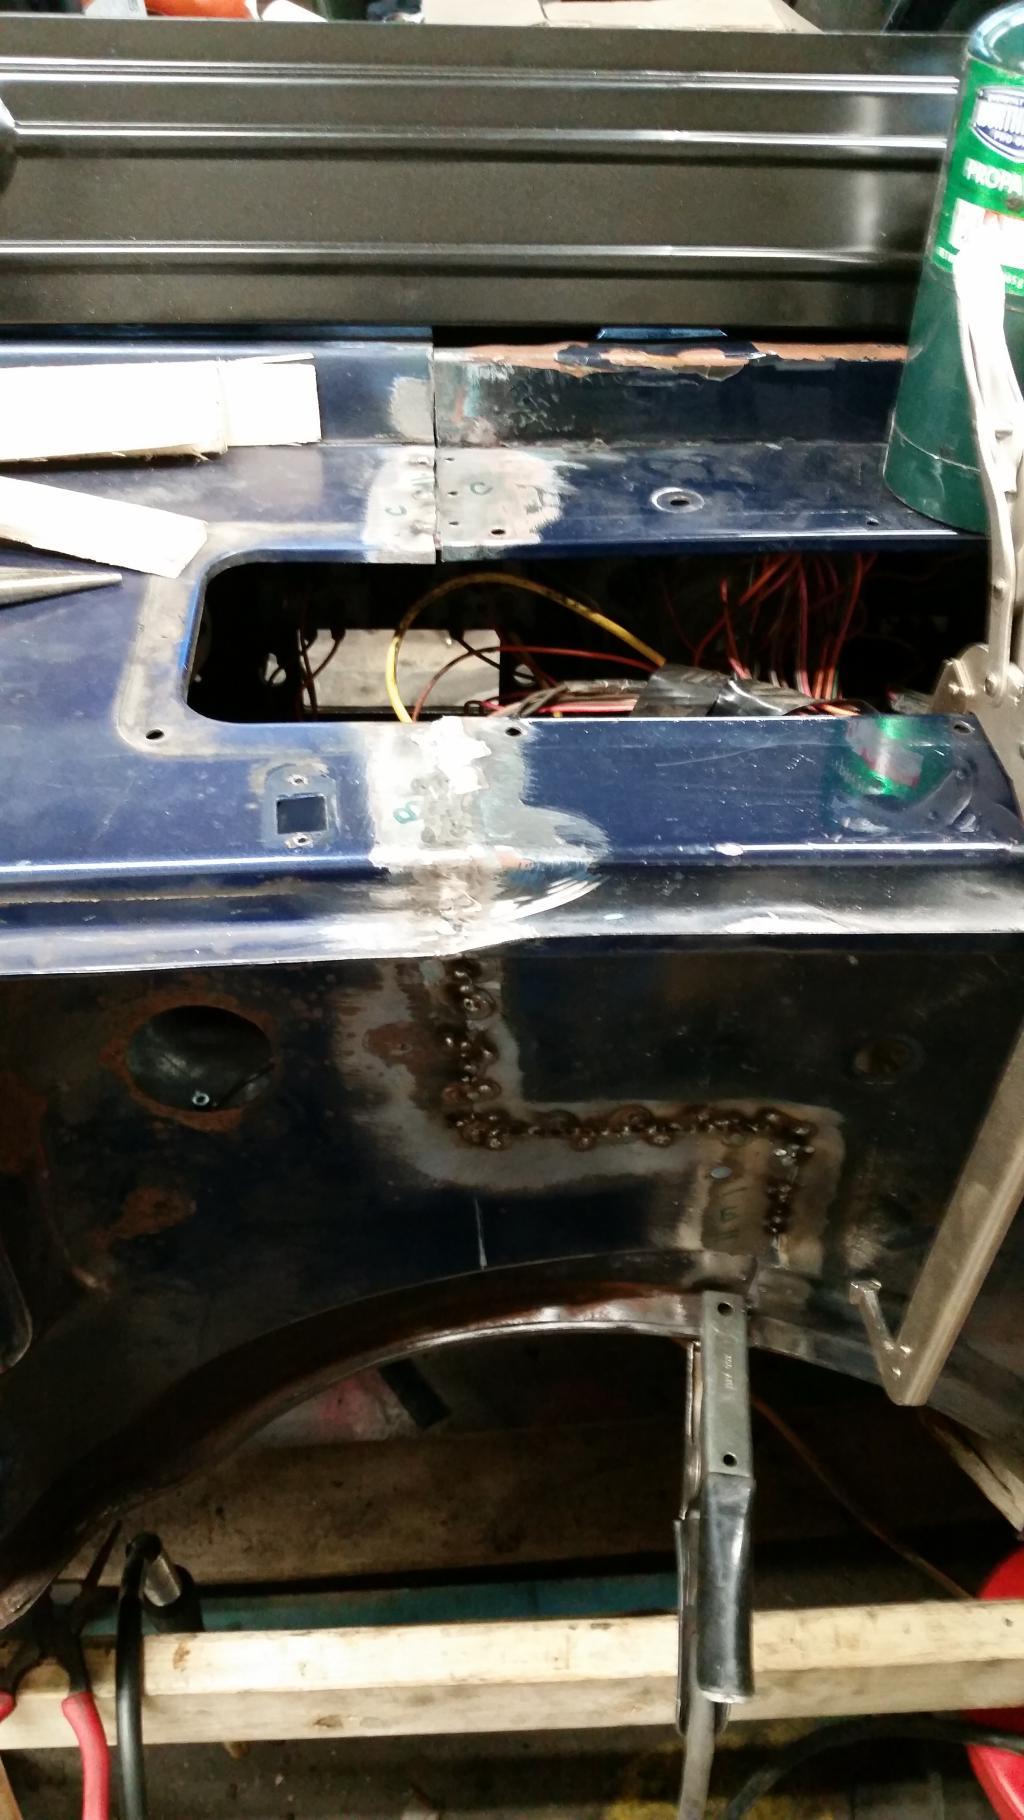
I then welded the floor section in front of the shifter cover, and started tacking the firewall in place.
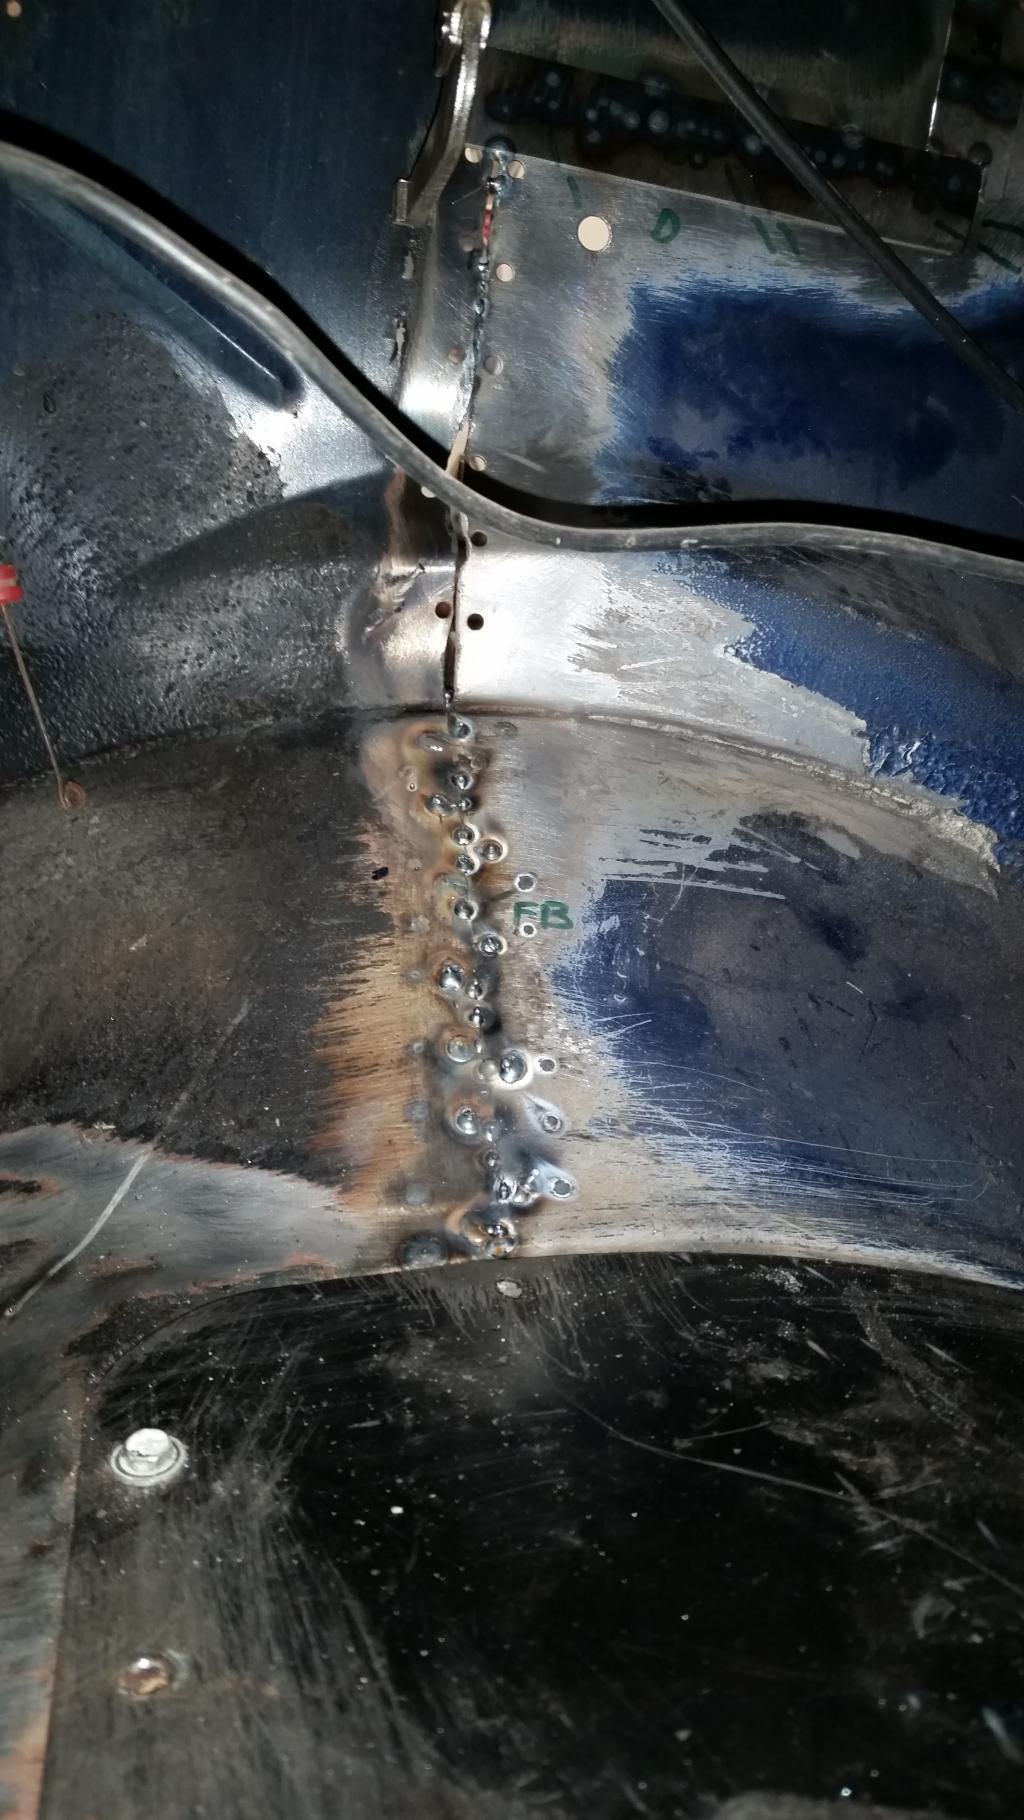
Here's a view of what the underside looks like, I tacked the edges. I need to finish the firewall and cowl top.... Soon I will have much grinding to do followed by finishing welding the underside of the tub....
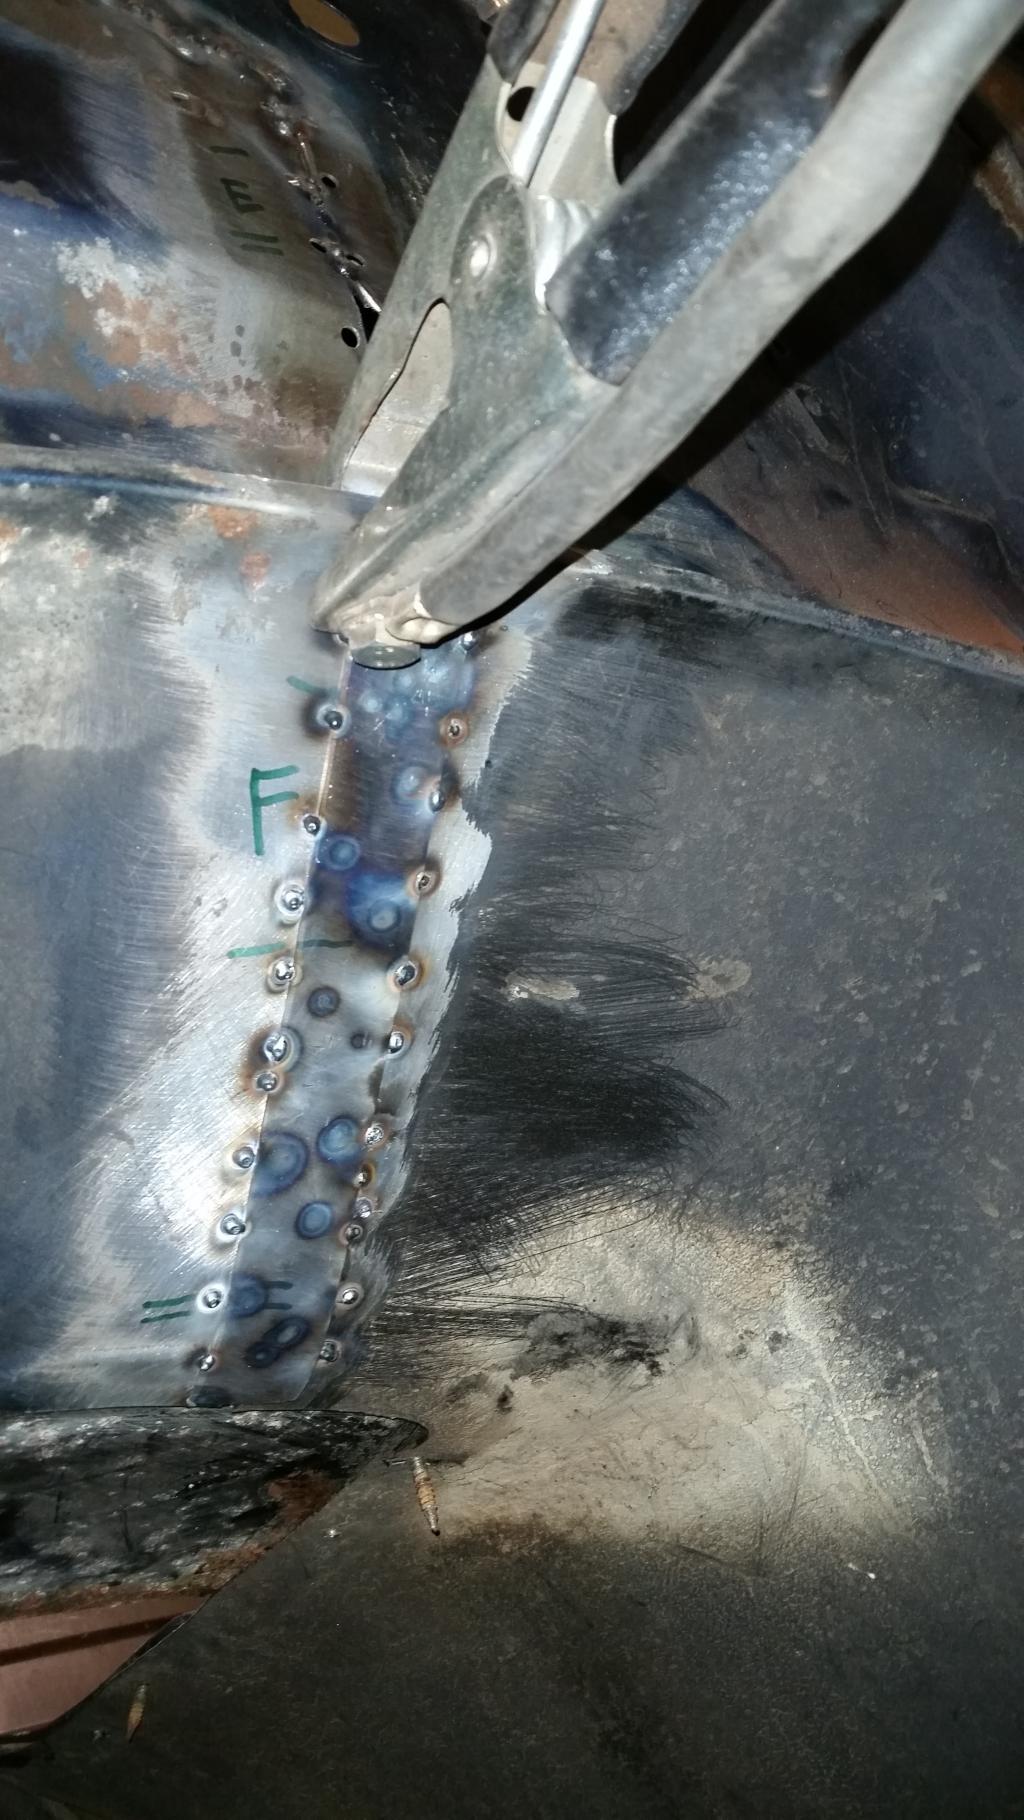
I plan to set the tub on it's side to do the underside work. Do I need to worry about bending sheet metal? I know I need to account for the rear wheel flares.... Any tips?

I then welded the floor section in front of the shifter cover, and started tacking the firewall in place.

Here's a view of what the underside looks like, I tacked the edges. I need to finish the firewall and cowl top.... Soon I will have much grinding to do followed by finishing welding the underside of the tub....

I plan to set the tub on it's side to do the underside work. Do I need to worry about bending sheet metal? I know I need to account for the rear wheel flares.... Any tips?
Last edited:
I see guys setting the tub on it's side in a couple build treads. I don't trust it (don't care to do extra body work if something went wrong or bent). I ended up making a cheap rotisserie to keep it off it's sides and top. If you have the funds the 2 engine stands are easier to work with.
- City
- Withrop Harbor
- State
- IL
Update: The top of the cowl where the windshield frame sits was twisted so it was a challenge. after much work I got is fairly straight. A little body filler and work should hopefully make the front look straight.
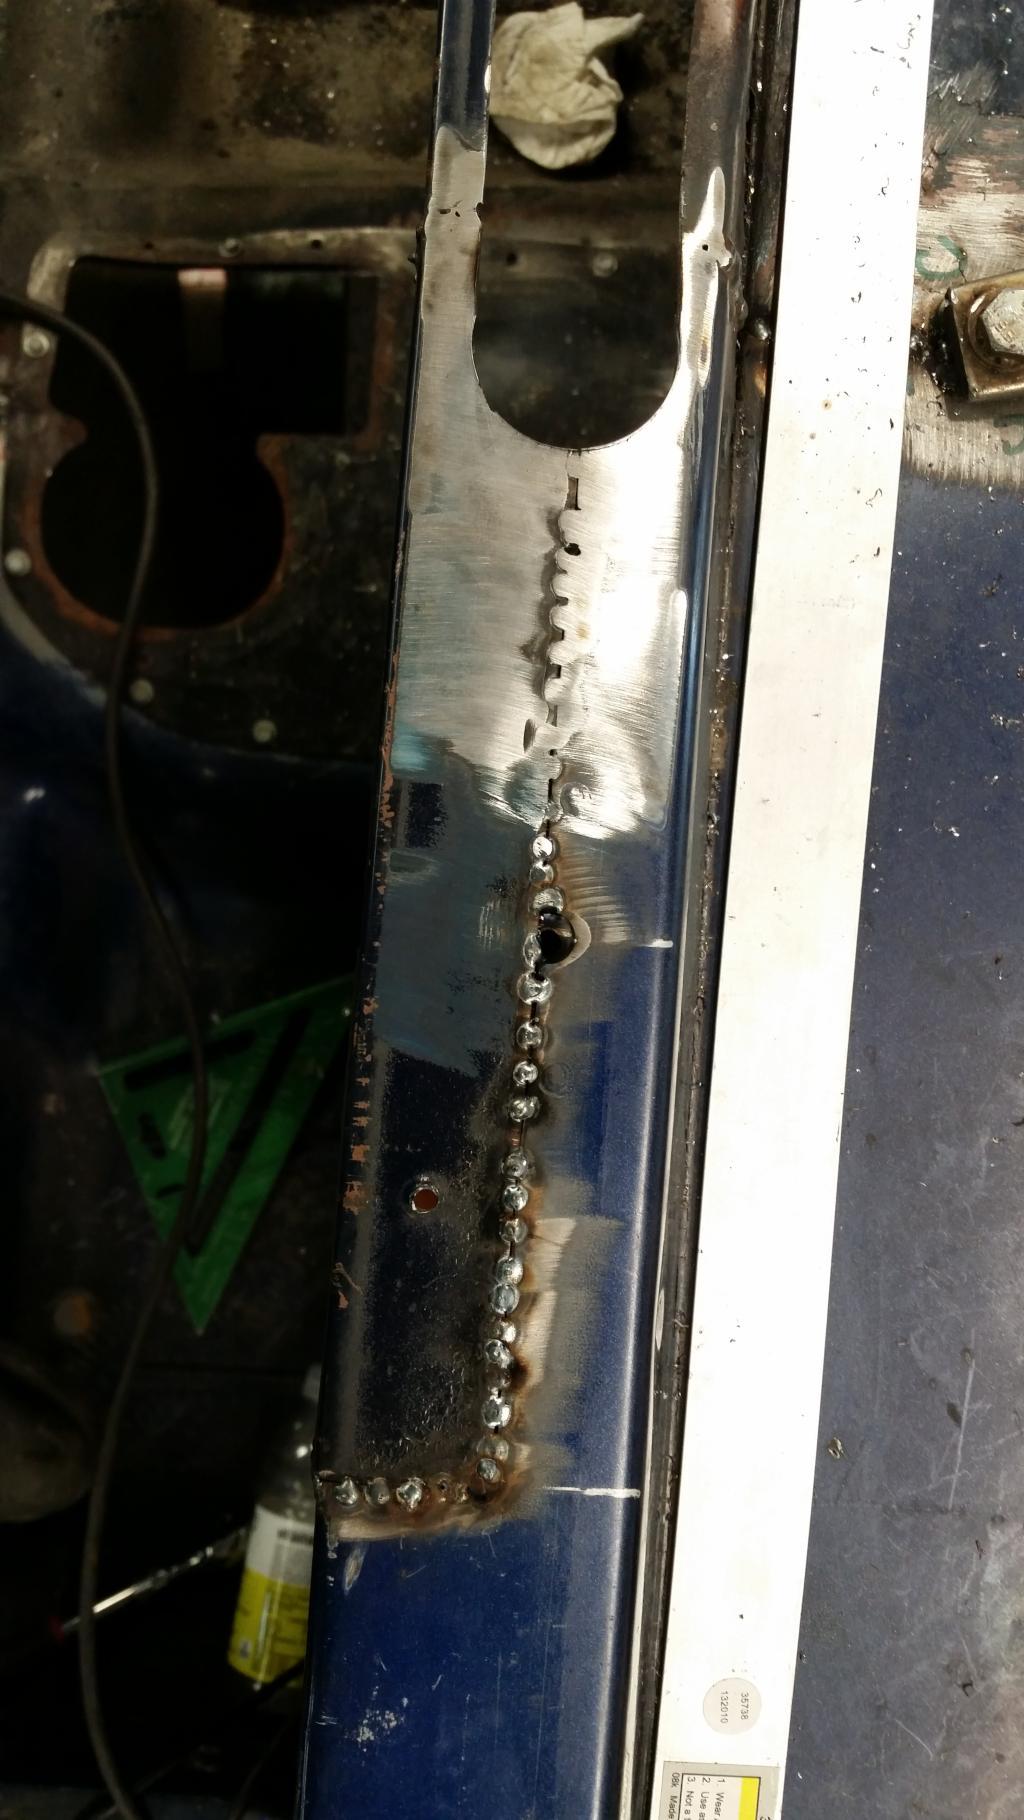
The YJ side is a different shape in the center (narrower) so we cut a section out of the old CJ, welded it in then remade the hole for the defroster duct, We even got the dash bolt hole to line up correctly.
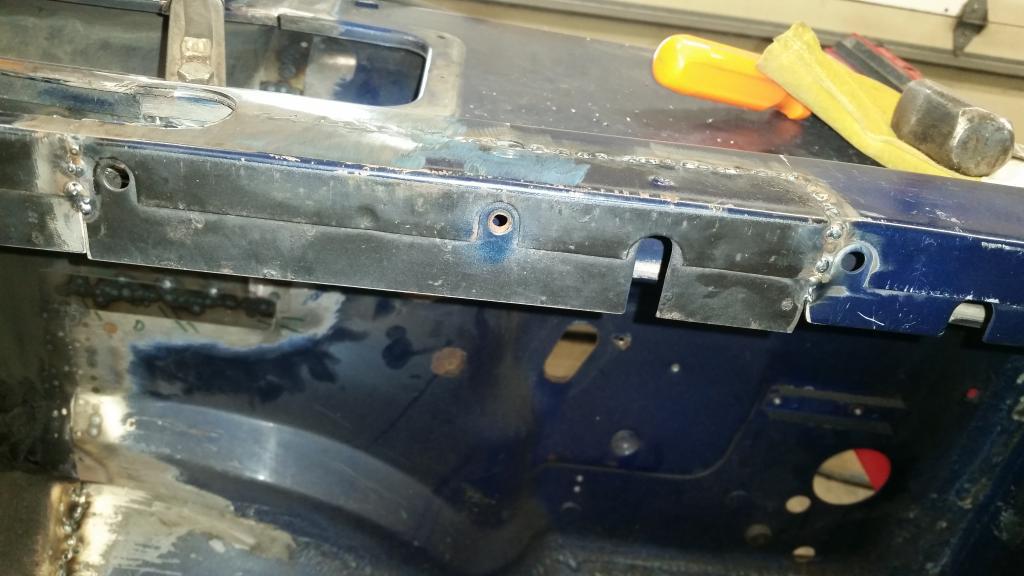

The YJ side is a different shape in the center (narrower) so we cut a section out of the old CJ, welded it in then remade the hole for the defroster duct, We even got the dash bolt hole to line up correctly.

When you do the filler on the top of the cowl make sure you put a straight edge across the top (side to side) and also front to back. On the fiberglass bodies most leak because their not straight. On my cj7 I had 1/4" dip when I put a 6' straight edge on (it always leaded into the defrost duct). I also had a 1/8" difference from front to back. After I got everything straight with body filler (used dura glass in case of water) everything is nice and dry. You probably will have this problem on where your welds are. What you've done looks great.
- City
- Withrop Harbor
- State
- IL
GrindFest! or tired arms....
I finished up welding the topside and ground down the welds for bodywork (body filler, fiberglass, seam sealer)
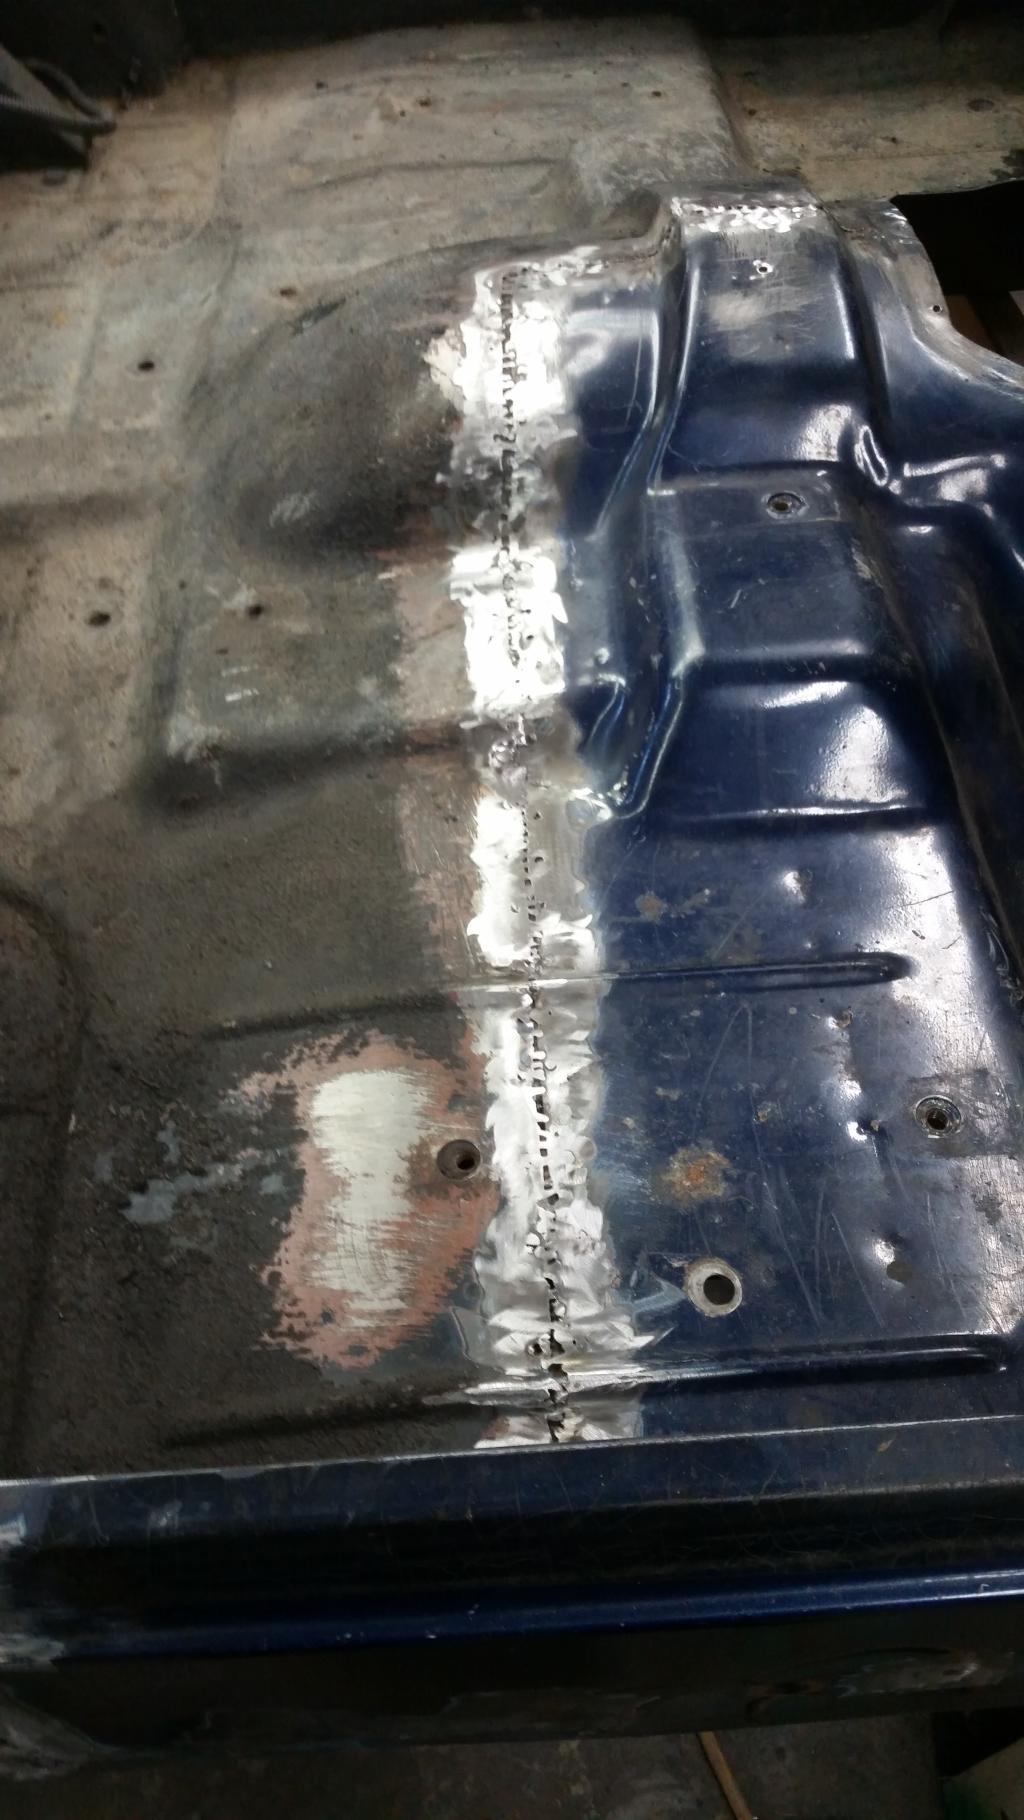
But first I plan to weld the bottom side before any finish work...
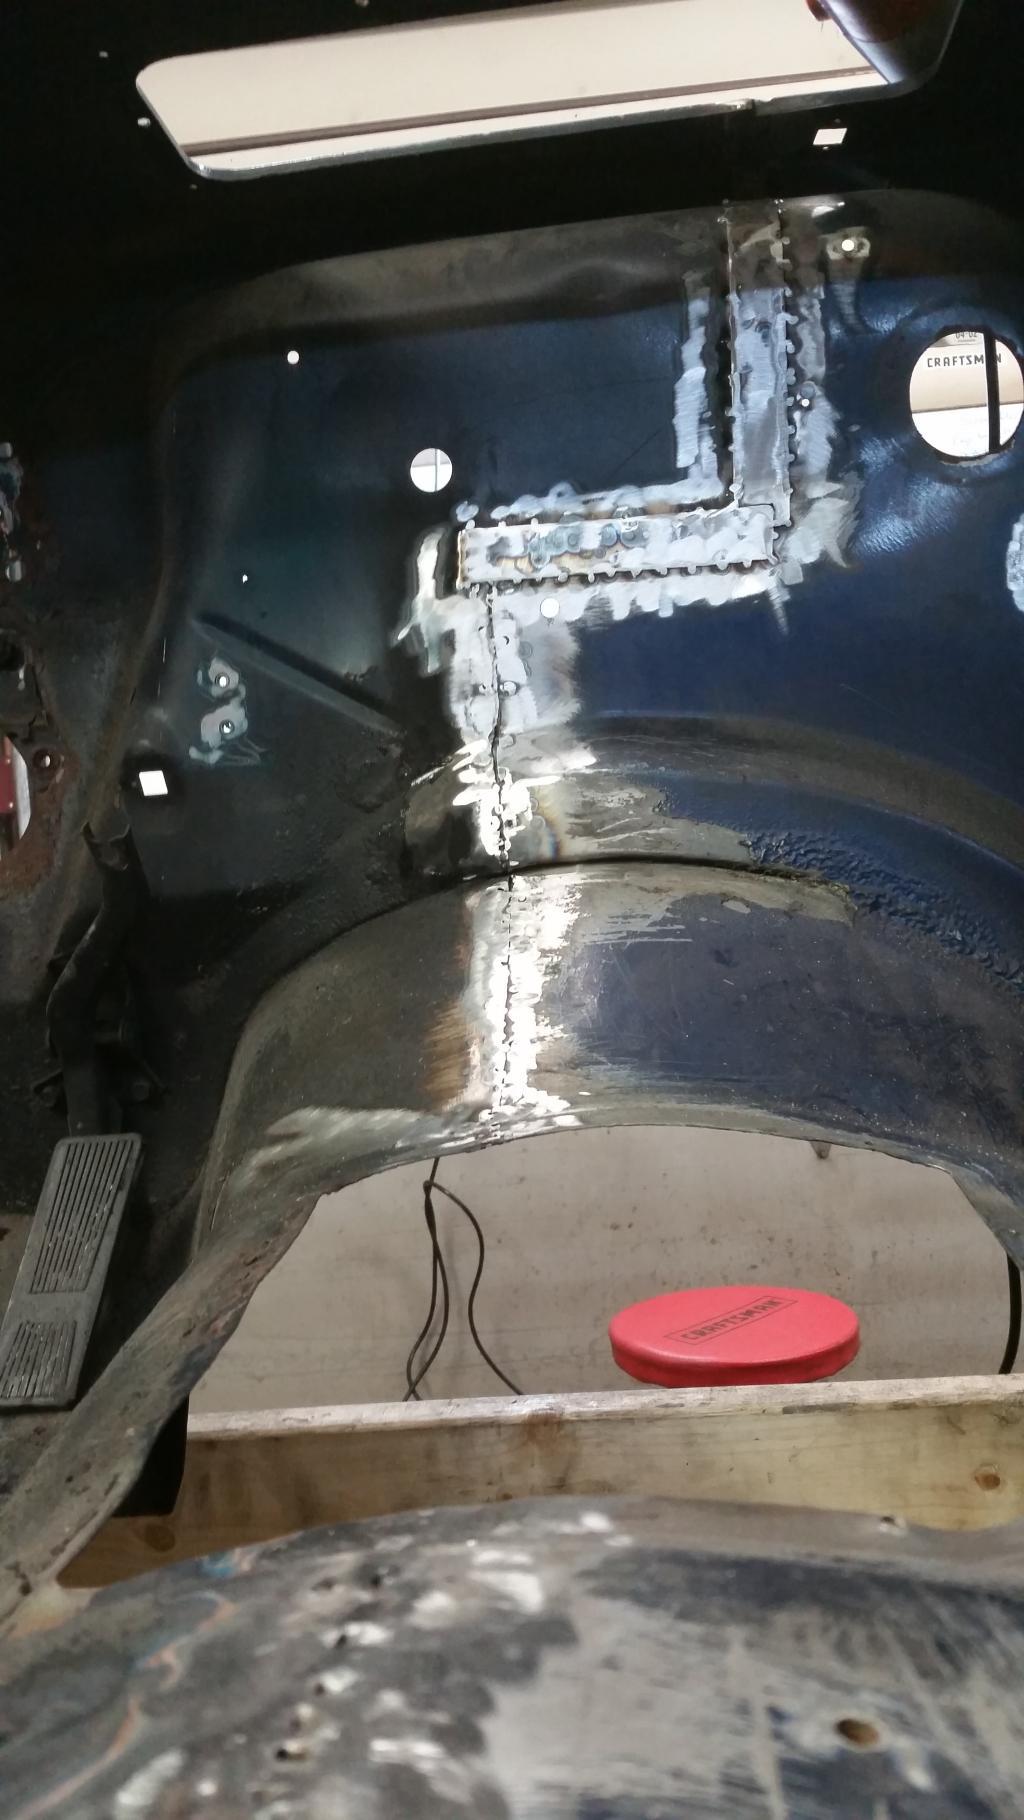
Almost all the seams have backing strips so I'm not worried about strength...
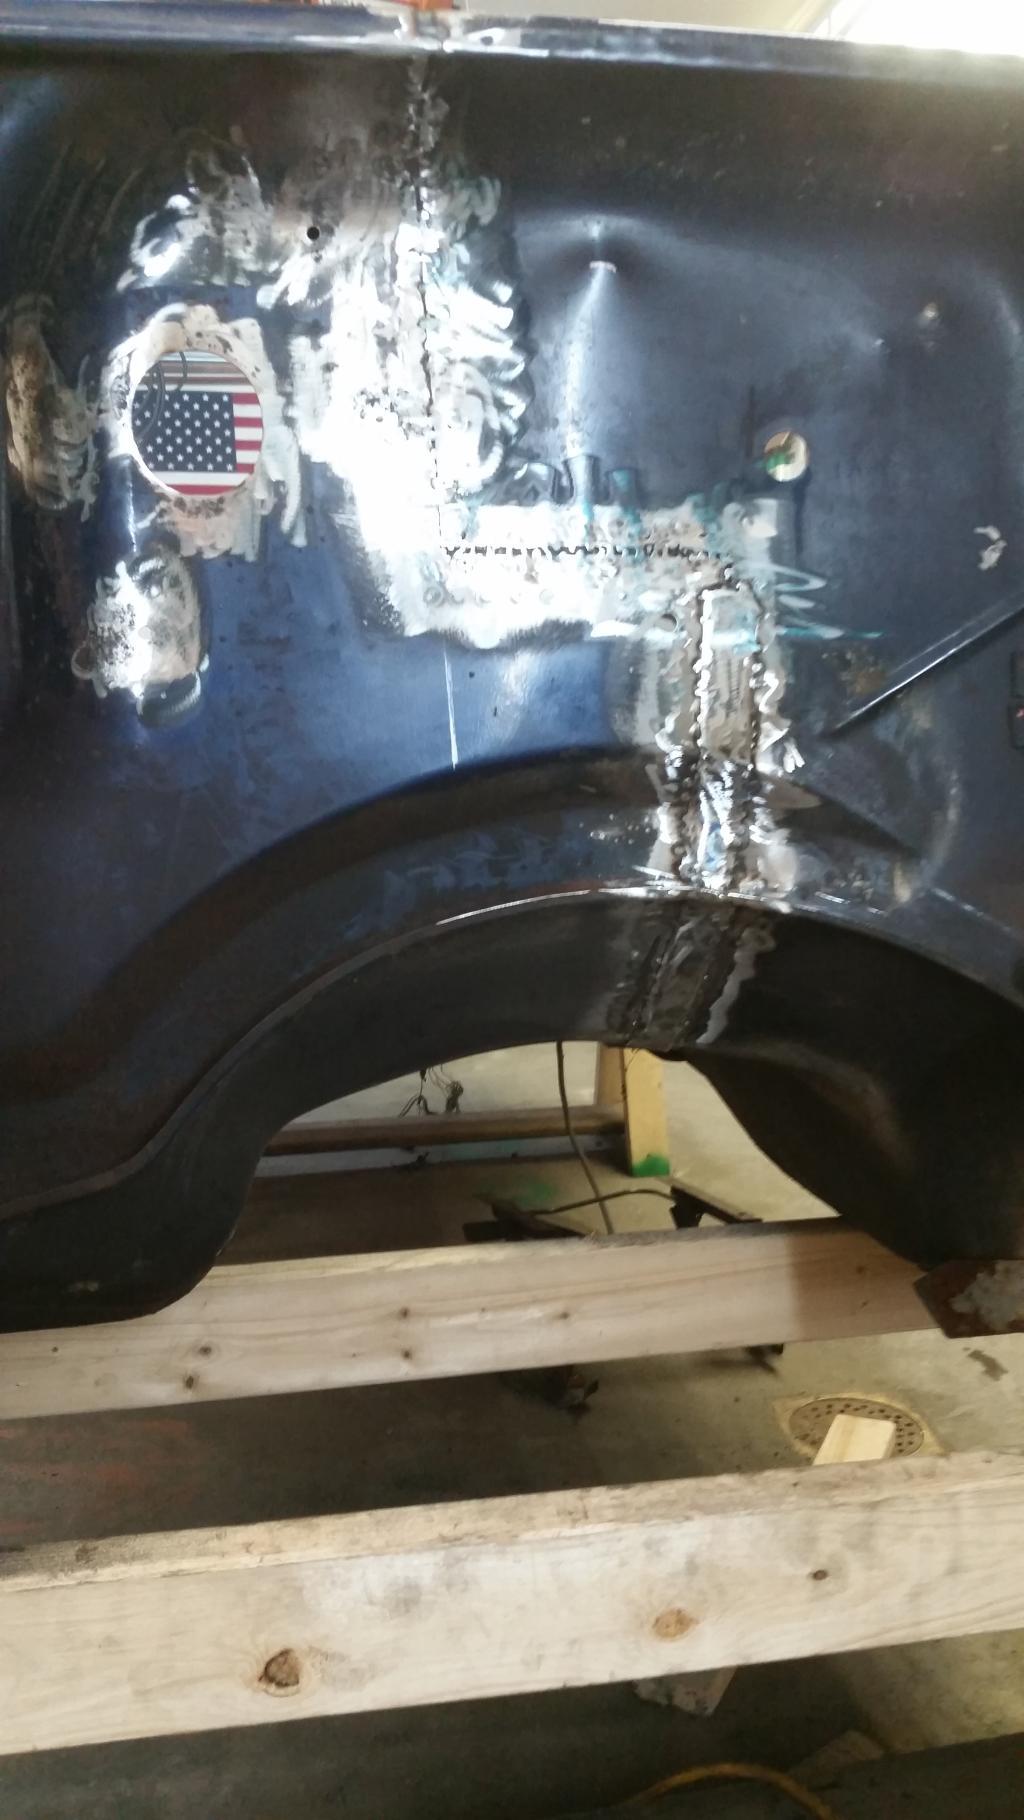
I still haven't decided if I'll farm out some of the body finish work or not. Any suggestions on what best to use for bodywork? I know some if not all body filler (bondo) will absorb water....
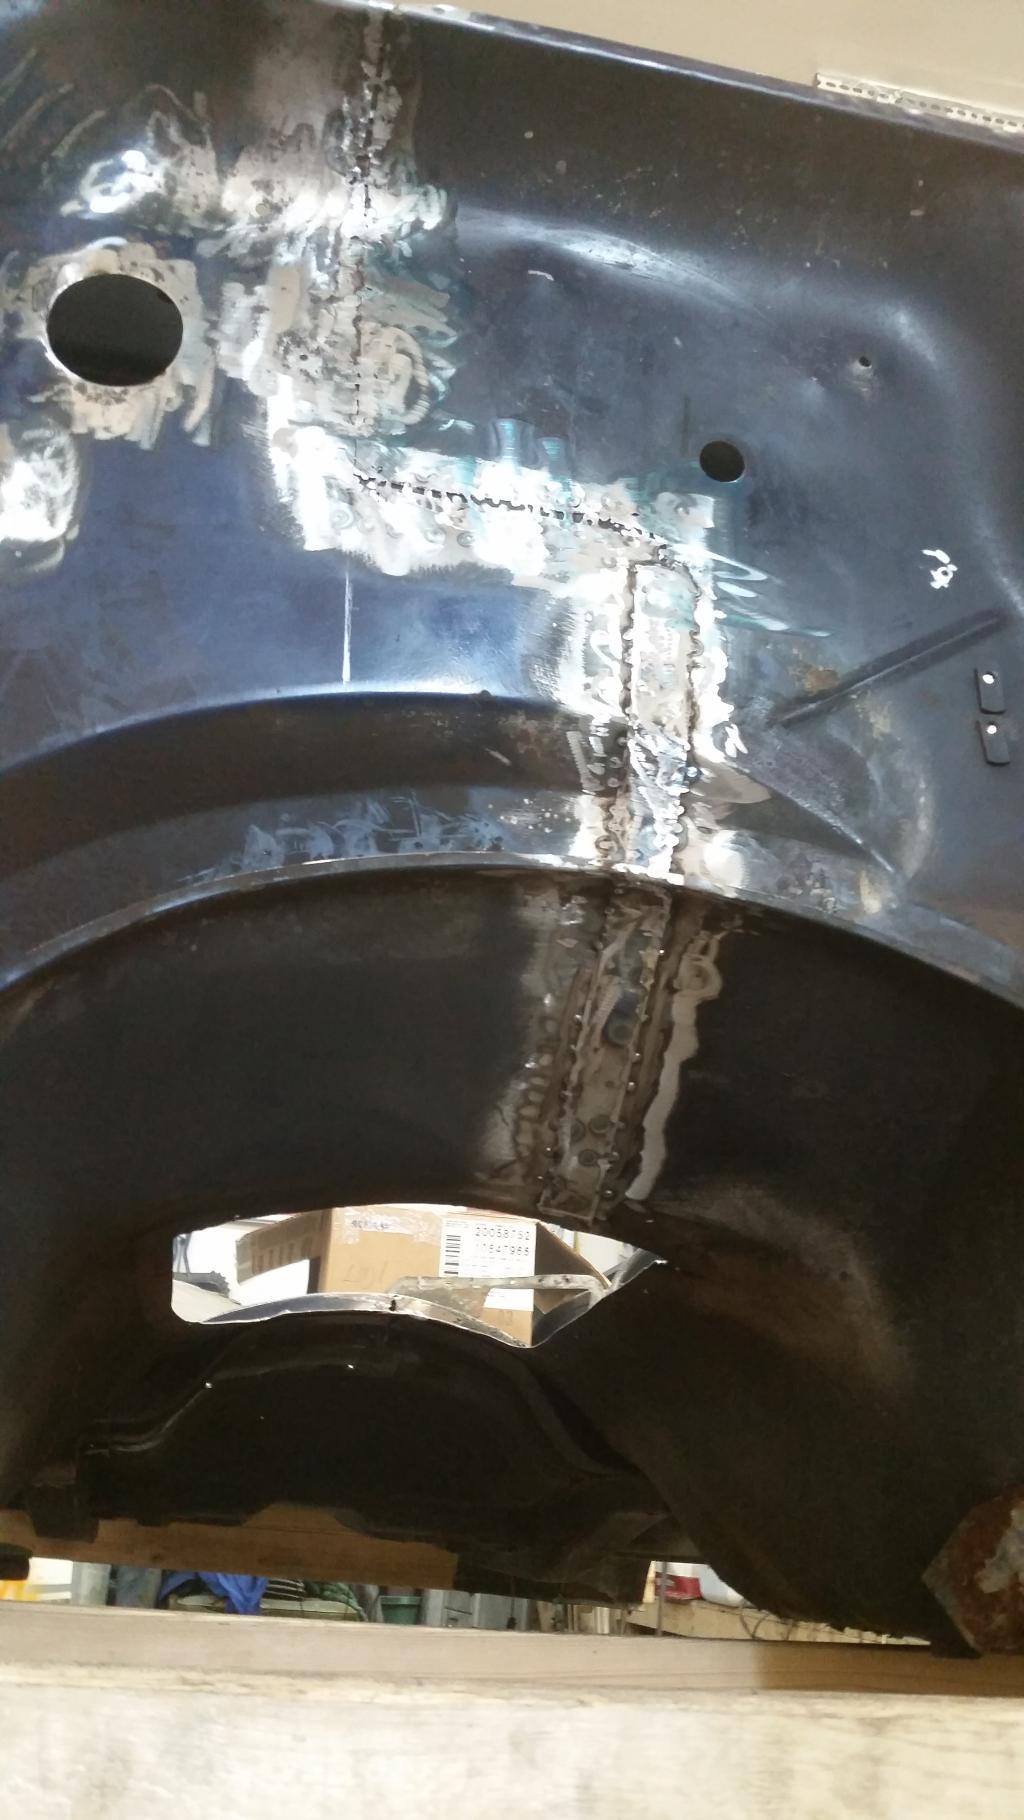
I finished up welding the topside and ground down the welds for bodywork (body filler, fiberglass, seam sealer)

But first I plan to weld the bottom side before any finish work...

Almost all the seams have backing strips so I'm not worried about strength...

I still haven't decided if I'll farm out some of the body finish work or not. Any suggestions on what best to use for bodywork? I know some if not all body filler (bondo) will absorb water....

That's why you shoot a 2k epoxy on the metal then body fill. Then 2k fill primer, when sanded straight shoot a reduced coat of epoxy as a sealer. The epoxy holds up to water very well. The 2k primer will also hold up well (not like lacquer which absorbs water). The epoxy will also get into the cracks and holes that body filler won't. They make a body filler called Dura Glass which has strands of fiberglass and is a bear to sand when it sets up. You've got to catch it when it's setting up.

- City
- Wilbur by the Sea
- State
- FL
Along the lines of what jammer1 said but I would do it in a different order.
First sand back the paint about 2-3" to feather the edge and give the coatings some bite. Then spray a self etching epoxy primer directly to the metal especially the weld bead. You want the epoxy in the crevices of the weld. You do not have to sand the primer before you apply the putty if you work within the stated curing times. Once the epoxy primer has cured you can apply filler with the first coat focused on pushing into the weld bead area. The duraglas would be a good choice primarily in the weld area but I would not use it beyond say 1" to either side. It's a strong filler with fiberglass strands incorporated so it will withstand cracking due to flexing of the joints. Work with small amounts at a time because it kicks fast and when it hardens, it hardens. Grind that down trying not to remove the primer too far outside the weld area. With that smoothed out and any high spots in the metal worked out then apply more epoxy primer to any exposed metal. Then apply the second smoothing coat of filler. For the second coat I would use a conventional "Bondo" or fill putty as it's easier to work. Once the filler is sanded out, you will probably apply more as you work it to your liking, then the 2K primer.
Sanding in the areas you're working can be done with a DA sander. Cut the fillers with 40 grit on the initial knock down passes. When you have it close then switch to 80 grit. Each time you apply another coat of filler stay at the 80 grit level and let the filler dry or you'll pull it off in chunks and clog the paper. When you're happy with the filler finish go over the area with a 150 grit. Then apply the 2K. Now switch to 220 grit and sand the primer down to expose the filler but dont go thru to the metal outside the filler areas. Apply a second coat of 2K straight or depending how well your finish work is you can cut it and apply a thinner coat which would then get the paint.
2K is typically grey so if your painting a darker color you'll want to seal the paint with a black primer/sealer. If the color will be light yo can spray right over the lighter color primer.
I prefer the epoxy line from Southern Polyurethane Inc. (SPI) They supply a very good product and easy to understand directions from a working mans perspective.
The prefered method of applying filler now a days is to not remove the surface coatings if they are in good condition. Instead you apply an epoxy primer/seal coat and then work from that finish outward. If the surface coating has been removed such as in your case the self etching primer chemically digs into the metal sealing it, and the SPI epoxy has a rust prohiibitor and is designed to allow filler application to over it.
The 2K is a filling primer, also called a high build primer and is designed to fill sanding scratches and minor surface wobbles. It can be block sanded and treated like a very very thin filler. Also an epoxy, it dries faster, and can be thinned to use as a basic prime coat/sealer prior to paint.
First sand back the paint about 2-3" to feather the edge and give the coatings some bite. Then spray a self etching epoxy primer directly to the metal especially the weld bead. You want the epoxy in the crevices of the weld. You do not have to sand the primer before you apply the putty if you work within the stated curing times. Once the epoxy primer has cured you can apply filler with the first coat focused on pushing into the weld bead area. The duraglas would be a good choice primarily in the weld area but I would not use it beyond say 1" to either side. It's a strong filler with fiberglass strands incorporated so it will withstand cracking due to flexing of the joints. Work with small amounts at a time because it kicks fast and when it hardens, it hardens. Grind that down trying not to remove the primer too far outside the weld area. With that smoothed out and any high spots in the metal worked out then apply more epoxy primer to any exposed metal. Then apply the second smoothing coat of filler. For the second coat I would use a conventional "Bondo" or fill putty as it's easier to work. Once the filler is sanded out, you will probably apply more as you work it to your liking, then the 2K primer.
Sanding in the areas you're working can be done with a DA sander. Cut the fillers with 40 grit on the initial knock down passes. When you have it close then switch to 80 grit. Each time you apply another coat of filler stay at the 80 grit level and let the filler dry or you'll pull it off in chunks and clog the paper. When you're happy with the filler finish go over the area with a 150 grit. Then apply the 2K. Now switch to 220 grit and sand the primer down to expose the filler but dont go thru to the metal outside the filler areas. Apply a second coat of 2K straight or depending how well your finish work is you can cut it and apply a thinner coat which would then get the paint.
2K is typically grey so if your painting a darker color you'll want to seal the paint with a black primer/sealer. If the color will be light yo can spray right over the lighter color primer.
I prefer the epoxy line from Southern Polyurethane Inc. (SPI) They supply a very good product and easy to understand directions from a working mans perspective.
The prefered method of applying filler now a days is to not remove the surface coatings if they are in good condition. Instead you apply an epoxy primer/seal coat and then work from that finish outward. If the surface coating has been removed such as in your case the self etching primer chemically digs into the metal sealing it, and the SPI epoxy has a rust prohiibitor and is designed to allow filler application to over it.
The 2K is a filling primer, also called a high build primer and is designed to fill sanding scratches and minor surface wobbles. It can be block sanded and treated like a very very thin filler. Also an epoxy, it dries faster, and can be thinned to use as a basic prime coat/sealer prior to paint.
Surfjeepzx good write up, I just did a quick outline. I'm switching over to spi when I run out of my stock. The epoxy primer they have for lightly rusted metal, Is that the etching primer? How do you like it for sanding? I use Kirker epoxy and their is no induction time, do you know what the induction time does? Does it just need time to "kinda gell"? Thanks.
- City
- Wilbur by the Sea
- State
- FL
http://www.southernpolyurethanes.com/
I tried to link to the products section of their website but the work computer wont cooperate. It is self etching and contains a rust inhibitor. It sands easy when dry and I think induction time is short. I've mixed it and used it within a few minutes for small stuff, and have let it sit for a while before spraying and haven't noticed a difference either way. It has a long potlife so there's no hurry to work with with it but it sets up nicely after spraying. It can be worked with, not sanded, about an hour after spraying if you do one light coat. If you do two coats it is best to wait overnight.
The 2k dries in an hour or so depending on the weather and sands nicely for leveling. I have a catalogue and follow the instructions. I like the way the instructions are written for each of their products. Easy to understand regarding setting up your gun, spray times, wait times etc. They were written by a jobber and not a chemist.
On the products page all the way t o the bottom is the primer I use mostly.
I tried to link to the products section of their website but the work computer wont cooperate. It is self etching and contains a rust inhibitor. It sands easy when dry and I think induction time is short. I've mixed it and used it within a few minutes for small stuff, and have let it sit for a while before spraying and haven't noticed a difference either way. It has a long potlife so there's no hurry to work with with it but it sets up nicely after spraying. It can be worked with, not sanded, about an hour after spraying if you do one light coat. If you do two coats it is best to wait overnight.
The 2k dries in an hour or so depending on the weather and sands nicely for leveling. I have a catalogue and follow the instructions. I like the way the instructions are written for each of their products. Easy to understand regarding setting up your gun, spray times, wait times etc. They were written by a jobber and not a chemist.
On the products page all the way t o the bottom is the primer I use mostly.
Last edited:
- City
- Withrop Harbor
- State
- IL
Moving on to the dark side...
I'll have to research Epoxy coatings and consider it. I'm not much of a body work guy and don't have much spray gun experience. I'm assuming these are coatings I would shoot with a detailing / mini spray gun.....If not a Prevail set-up, as it's only a small area to coat....... to be continued.
This weekend I removed most of the parts from the tub and laid it on it's driver side to finish welding the bottom seams.
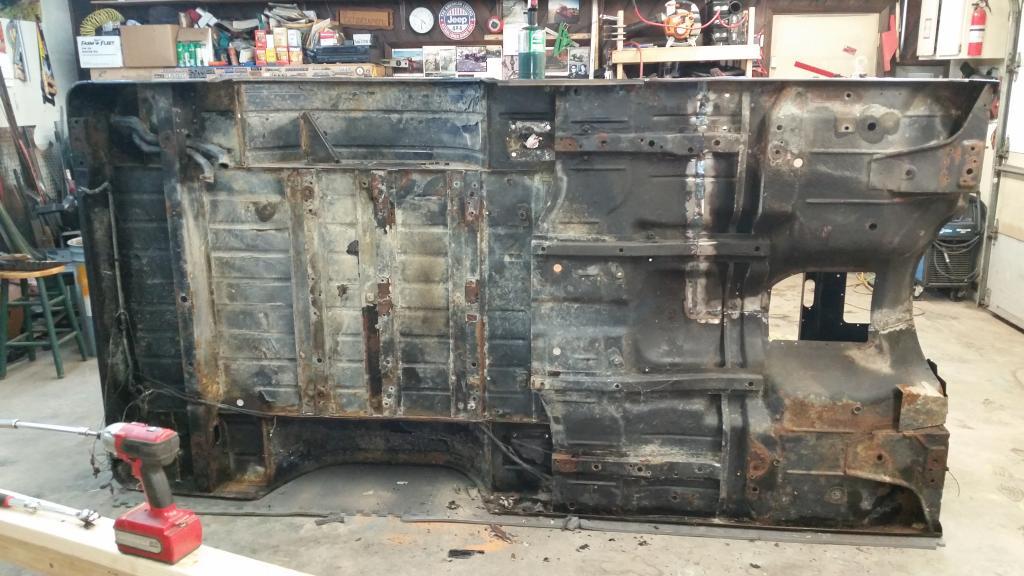
I finished welding the edges of the backing strips, and then wrapped the support members and welded them. Everything seems good and sturdy.
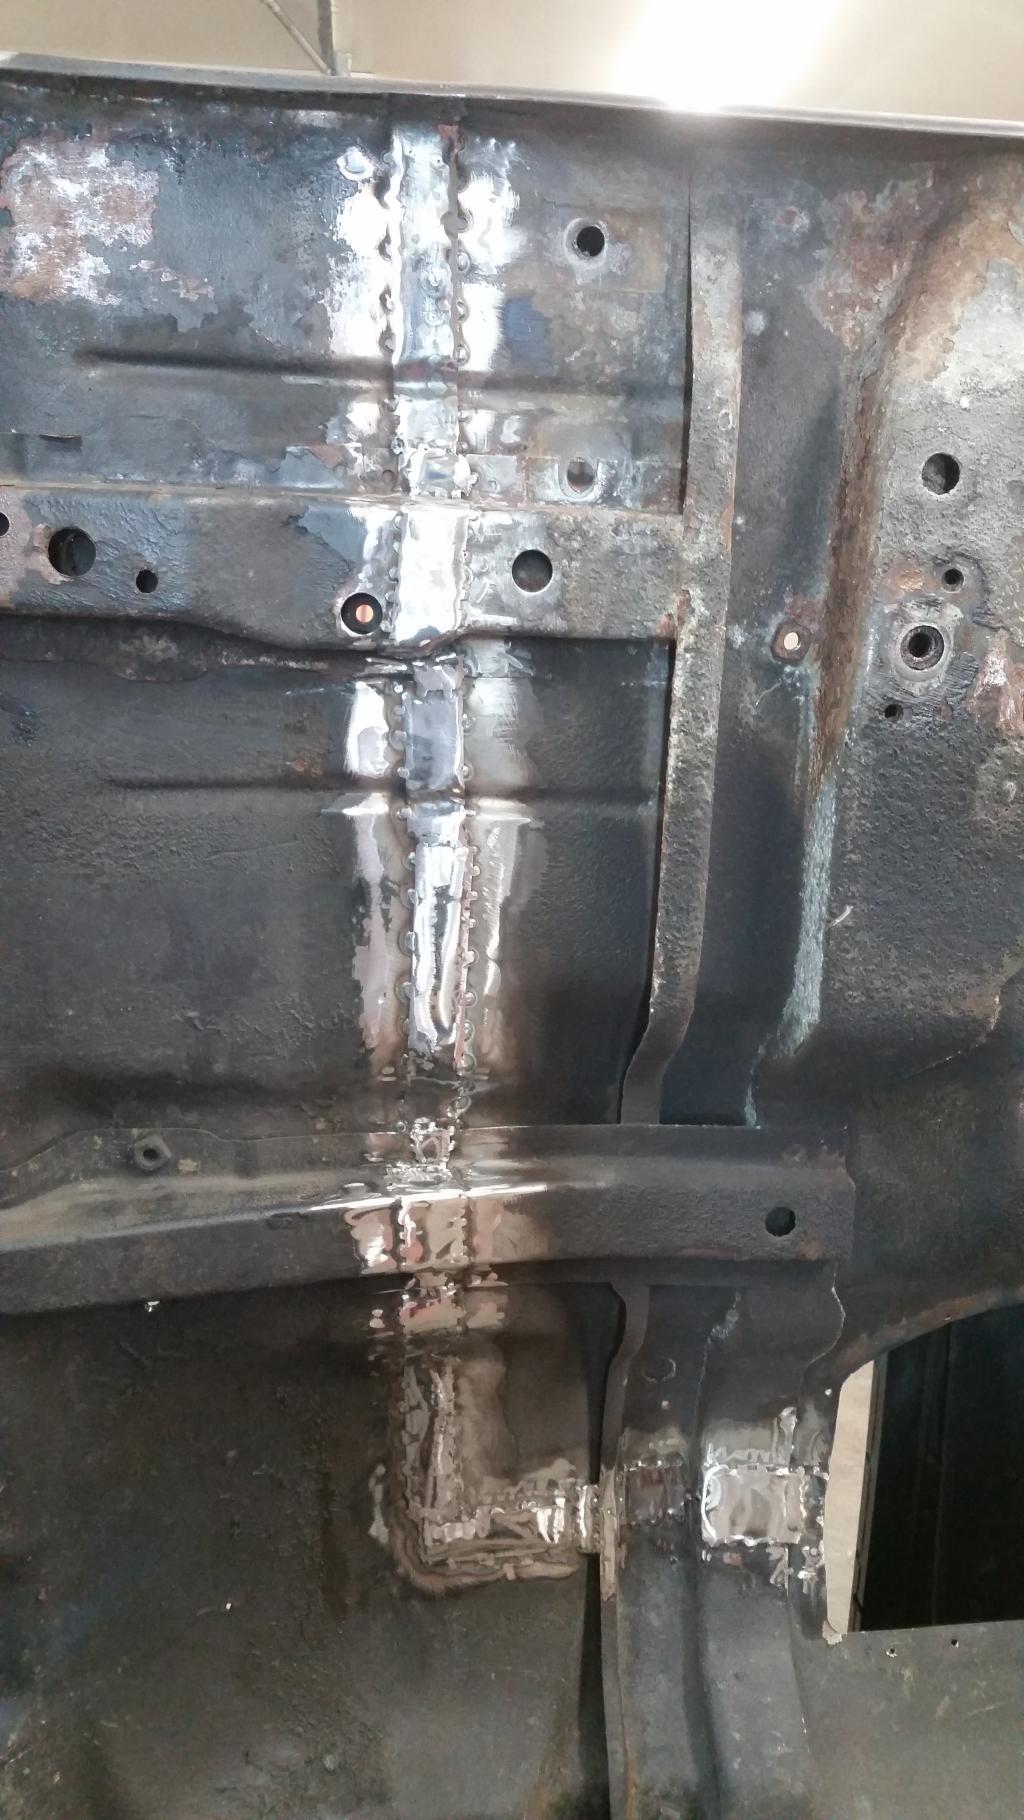
I also took some time to adjust and re-weld the tub front corner I added as it was not quite straight. Now it's much better.
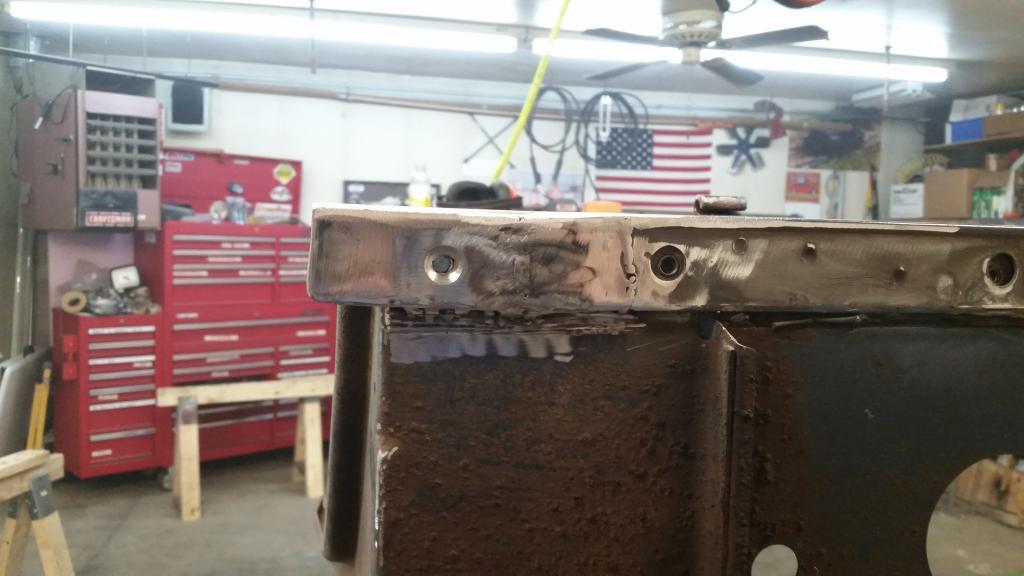
I'm also removing the rollbar support pieces to clean and repair the area. There are rust holes under the roll bar I need to fix. I'd really like to get the ugly bed coating off the tub interior, but have not found a efficient way to remove it.
Next I have a lot of cleaning up the bottom of the tub to do. At some point a black coating of some point was added that's falling off. I think after it's all removed I may choose to POR-15 the bottom before I paint it.
I'll have to research Epoxy coatings and consider it. I'm not much of a body work guy and don't have much spray gun experience. I'm assuming these are coatings I would shoot with a detailing / mini spray gun.....If not a Prevail set-up, as it's only a small area to coat....... to be continued.
This weekend I removed most of the parts from the tub and laid it on it's driver side to finish welding the bottom seams.

I finished welding the edges of the backing strips, and then wrapped the support members and welded them. Everything seems good and sturdy.

I also took some time to adjust and re-weld the tub front corner I added as it was not quite straight. Now it's much better.

I'm also removing the rollbar support pieces to clean and repair the area. There are rust holes under the roll bar I need to fix. I'd really like to get the ugly bed coating off the tub interior, but have not found a efficient way to remove it.
Next I have a lot of cleaning up the bottom of the tub to do. At some point a black coating of some point was added that's falling off. I think after it's all removed I may choose to POR-15 the bottom before I paint it.
Last edited:
regular guy
Basic User
- City
- Cameron
- State
- NC
Your work on this is amazing. Every time I see an update and read this thread again, I am astounded, once again, at the fact that you replaced an entire corner. A front corner, no less!
Keep up the awesome work. It's gonna look awesome when you're done.
Keep up the awesome work. It's gonna look awesome when you're done.
- City
- Withrop Harbor
- State
- IL
Epoxy Questions:
Before I put any epoxy coating/primer on, do I need to know what paint I'm going to use? Do I need to worry about compatibility with different finishes?
I haven't gone to the paint store to discuss my color and type (metallic) of paint yet so I don't know what I plan to use...... I'll be shooting it the factory AMC Chestnut Brown Metallic.
I decide to paint it myself I'll also need to buy a paint gun as I've only used Harbor Freight ones which are questionable quality. I'm a very good painter with spray cans so with a gun and a little practice I think I might do a decent job. Any advice from painters out there?
Before I put any epoxy coating/primer on, do I need to know what paint I'm going to use? Do I need to worry about compatibility with different finishes?
I haven't gone to the paint store to discuss my color and type (metallic) of paint yet so I don't know what I plan to use...... I'll be shooting it the factory AMC Chestnut Brown Metallic.
I decide to paint it myself I'll also need to buy a paint gun as I've only used Harbor Freight ones which are questionable quality. I'm a very good painter with spray cans so with a gun and a little practice I think I might do a decent job.
Any advice from painters out there?