• Notice for iPhone users: DO NOT use the image size reduction option when uploading photos to the forum. This causes portrait images to post as landscape. We have added a warning to the image insert pop-up as well.

How to fix: Cracked sheet metal near body mount (and sheet metal gauge?)

MomoJeep

Basic User
City
Seattle
State
WA
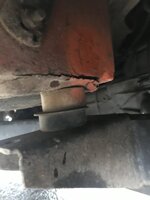
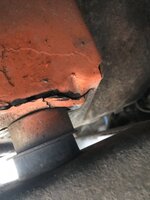
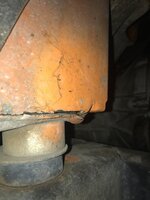
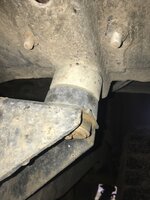
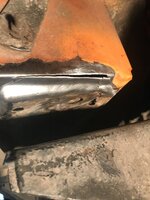
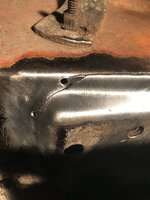
I have a crack under the front passenger foot well area. There's a body mount under there, just before the sheet metal bends 90 degrees upwards turning into the firewall. The crack is right in the 90 degree bend. Any suggestions on how to weld/fix it?

Does anyone know the gauge of the oem body tub sheet metal?
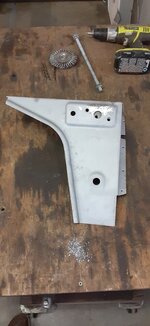
 
Just repaired one with a crack along the bend. Must flex a bit. Mine was from a donor vehicle so it was removed and cleaned up. Pretty much just used a cut off wheel and ground out the crack. Followed by filling back in with a mig welder and then clean up.
20210228_201306.jpg
 
Here's my situation. Could I weld in a little piece of angle on the inside? Or would that be too stiff?
 

Attachments

  • IMG_7462.JPG
    IMG_7462.JPG
    66.1 KB · Views: 22
  • Crack body mount.JPG
    Crack body mount.JPG
    103.9 KB · Views: 22
Is the crack from rust or just from flexing. If it's from flexing you may be able to remove the body pucks, pull it back into shape, clean up and tack it all together. I would probably have some metal bent up to act as a strong back over the crack. Replacement is, in my opinion, probably the better option. I like to play, so would see how things fall in place by manipulation/welding before removal and replacement. Definitely fixable if it is caused by fatigue. My 2C's.
 
I don't think it's rust. Washboard roads at 40mph might have done it!? Forgetting to disconnect swaybar a few times (more frame and body flex going over rocks) might have done it!?

I'm not sure I understand "replacement". Maybe I need to look closer but this seems to be and integral part of the body tub..

I was thinking the same thing. Bend up an angle and put it on the inside of the crack, and weld from the outside..
 
Drill the spotwelds, remove it, put in a new piece and be done with it... that is a crack and looks somewhat rusty as well as water/dirt pools inside there depending on the wheeling you do.

Unfortuantely if this happened, other places are probably also starting to weaken.

cb
 
Drill the spotwelds, remove it, put in a new piece and be done with it... that is a crack and looks somewhat rusty as well as water/dirt pools inside there depending on the wheeling you do.

Unfortuantely if this happened, other places are probably also starting to weaken.

cb
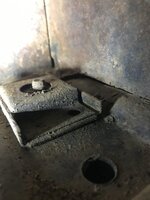
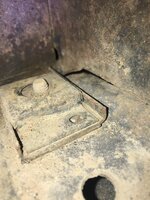
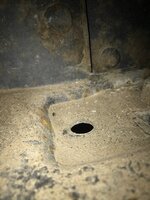
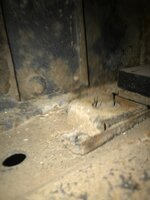
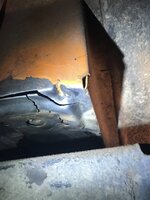
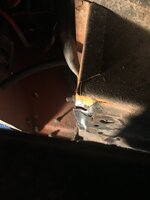
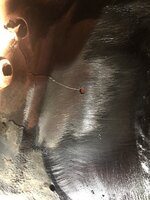
Here's pics of the cracked mount from the inside. Doesn't seem very rusty to me(?) What do other think?
 

Attachments

  • IMG_7508.JPG
    IMG_7508.JPG
    96.9 KB · Views: 13
  • IMG_7509.JPG
    IMG_7509.JPG
    169.2 KB · Views: 13
  • IMG_7510.JPG
    IMG_7510.JPG
    102.1 KB · Views: 13
Here's pics of the cracked mount from the inside. Doesn't seem very rusty to me(?) What do other think?

Drill the spotwelds, remove it, put in a new piece and be done with it... that is a crack and looks somewhat rusty as well as water/dirt pools inside there depending on the wheeling you do.

Unfortuantely if this happened, other places are probably also starting to weaken.

cb
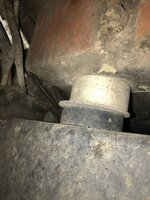
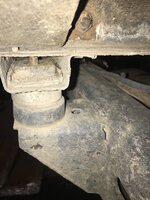
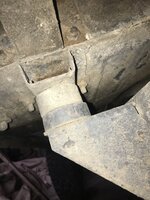
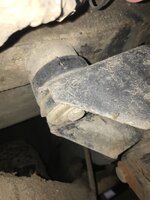
And here are some of the other mounts. I never thought there was significant rust. Correct me if I am missing something...
 

Attachments

  • Driver side front tub mount inside view.JPG
    Driver side front tub mount inside view.JPG
    126.3 KB · Views: 11
  • Driver side front tub mount inside view2.JPG
    Driver side front tub mount inside view2.JPG
    81.3 KB · Views: 11
  • Driver side front tub mount.JPG
    Driver side front tub mount.JPG
    132.9 KB · Views: 11
  • IMG_7515.JPG
    IMG_7515.JPG
    136.8 KB · Views: 12
  • IMG_7516.JPG
    IMG_7516.JPG
    159.8 KB · Views: 12
  • IMG_7517.JPG
    IMG_7517.JPG
    165.2 KB · Views: 12
  • IMG_7518.JPG
    IMG_7518.JPG
    126.6 KB · Views: 11
I just loosened that body mount bolt, and there was a lot of "pre-load" pulling down on the sheet metal, that could have lead to cracking. When I repair it I might consider using shims if there is a gap, rather than pulling the sheet metal down to close the gap. Thoughts?
 
Looks like a stress crack to me, aggravated by the additional torquing of a body mount.
After welding, if you have a gap use shims instead of pulling the gap shut.
You might want to loosen all the body bolts to see if there’s issues (gaps) elsewhere.
 
Last edited:
Looks good. If things popped back or close to it, remove the pucks, clean up the outside, grind the ends of the crack, tack weld as you manipulate and when happy weld it. Then if you can, die grind or sand blast the inside of the support mount and weld the backside of the crack. Heat will be your enemy. Take your time and let cool. Otherwise you will have gremlins.
 
Looks good. If things popped back or close to it, remove the pucks, clean up the outside, grind the ends of the crack, tack weld as you manipulate and when happy weld it. Then if you can, die grind or sand blast the inside of the support mount and weld the backside of the crack. Heat will be your enemy. Take your time and let cool. Otherwise you will have gremlins.
This is a great set of instructions, thanks! I drilled holes at the end of the cracks, about 1/8". Do you think that's big enough?
 
That works. All you are doing is preventing the crack from propagating further. Welding alone will not stop it from growing. Take some pics of the progress.
 
That works. All you are doing is preventing the crack from propagating further. Welding alone will not stop it from growing. Take some pics of the progress.
I have a MIG, I assume use the thin guage welding wire? In addition to gas, would flux-core be a good idea?
 
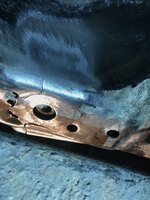
Prepped for welding. Once I removed the mount and wire-wheeled my way to bare metal... I found more cracking than I thought. There's a great layer of undercoating, like 3.32" think black gooey stuff, takes awhile to wire wheel thru it. But I'm glad it's there (no rust!). This was the MORE 1" body lift kit. I noticed these two front tub mounts have an extra washer on top that the other mounts don't have. So shimmed up a bit. Not sure if it was supposed to be that way. But there was definitely too much upwards pressure (combined with washboard vibration) that caused this cracking.
 

Attachments

  • IMG_7603.JPG
    IMG_7603.JPG
    111.4 KB · Views: 17
  • IMG_7612.JPG
    IMG_7612.JPG
    124 KB · Views: 19
  • IMG_7609.JPG
    IMG_7609.JPG
    75.5 KB · Views: 20
  • IMG_7611.JPG
    IMG_7611.JPG
    150.1 KB · Views: 20
  • IMG_7618.JPG
    IMG_7618.JPG
    138.3 KB · Views: 20
  • IMG_7619.JPG
    IMG_7619.JPG
    157.9 KB · Views: 20
Flux core burns hotter so have to be a little more careful. In my mind, for that repair, whatever gauge wire is in your rig should be ok. I like .030 in mine but also have a spool of .024. And prefer the argon mix vs straight CO. Costs more little cleaner.
Cracks with gap can try to squeeze a little closer together. Cracks with no gap should be gouged a bit. Tack it in spots to hold shape.
Many different techniques to weld it shut. I like spot to minimize burn thru. Nice round spot one after another with overlap stopping for temp control. Look on the backside to see how effective your weld is so you can adjust accordingly.
 
Last edited:
Nice prep. Don't know if your going to weld additional plate or angle to reinforce it. I you don't at least put a piece of 1/4 flat stock ( something like 4" x 4") to reinforce but also to give more surface area to the rubber mount. Place between the rubber mount and tubs mount that your repairing. Looks good.
 
I had the same problem on the passenger side of my scrambler, maybe not quite as bad as yours. I welded mine up and patched with 14ga, but looking back it would have been easier to just buy the replacement from Classic Enterprise. It wasn't a hard repair, but when you factor in the time and effort to make things right, buying new complete sections is usually the easier and better solution. I had to replace the entire floor pan anyway, and the toeboard support is just spot welded in place so it's easy to replace the entire thing.

I also notice slight cracking on my drivers side, but since I won't be replacing the floor pan on that side I'll probably just weld up the crack and call it a day.
 
Back
Top