• Notice for iPhone users: DO NOT use the image size reduction option when uploading photos to the forum. This causes portrait images to post as landscape. We have added a warning to the image insert pop-up as well.

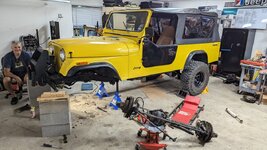
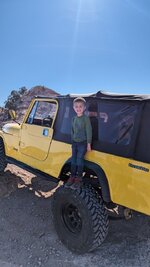
Pappy's Adventure - 1981 restomod

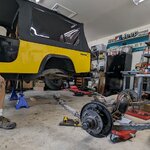
Without being there it is hard to say. Most of the axles I work on are 44, 60, 14 bolts and sterlings. What I normally do is whack the pinion on until the nut has a few threads of engagement then use an impact to tighten it down. From your picture your post dead blow position is where I would impact the pinion home. That said... I wouldn't go too far and make sure you can still pull the yoke off as you need to get depth and preload set.
 
Without being there it is hard to say. Most of the axles I work on are 44, 60, 14 bolts and sterlings. What I normally do is whack the pinion on until the nut has a few threads of engagement then use an impact to tighten it down. From your picture your post dead blow position is where I would impact the pinion home. That said... I wouldn't go too far and make sure you can still pull the yoke off as you need to get depth and preload set.
I did exactly that and destroyed the threads on the pinion nut and some threads on the pinion. I was able to chase the threads on the pinion enough its still useable. I had to put the axle in my press to press the pinion out of the housing it was so tight on the yoke.

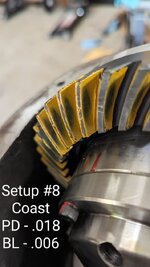
I spoke to a tech at a shop here in N Texas and he stated the spline mesh is not right. Going to be sending them back to Revolution for inspection.
 
Busy busy couple months. Finally got some work done. Got the D30 set up with the replacement gears from Revolution. Started pulling the narrow tracs out. Waiting for new fill and vent hoses for the fuel tank. Replaced all the other rubber vent lines to the check valves and such. Running new brake lines from inline tune. Great quality so far I can see. Waiting on new u bolts to put the wide trac back in. Getting excited!

IMG_20230715_152958_134.jpg

PXL_20230706_170255893~2.jpg
 
Whew... where to begin. What a project! I don't know how y'all do the full off restorations 🤣

After we got the rear axle out I replaced all the brake lines and rubber fuel lines. The ones from the tank to the check valves were cracked and leaking when I filled the tank.

Went through a few hoses for the main fill and vent tank before I got the right ones from MTS for an 81.

Go the OX locker cable ran the way we wanted and buttoned up the rear. PXL_20230803_185142785.jpgPXL_20230722_201351319.jpg

PXL_20230803_192103625.MP.jpg
 
After we got the front axle out I worked on all the front brakes lines and the prop valve. That prop valve turned out to be a SOB. One of the nuts on the inside of the frame broke off and had to cut the bolt and figure out a way to reattach it. Not a great location. If I were to do it again I'd run my own lines and move the prop valve into the engine bay.

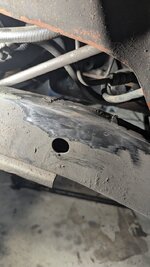
Ended up cutting off the short shock towers for a set of rocky road taller mounts. Fun and nervous first time cutting on a frame for me.

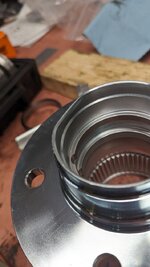
When it came time to assemble the front components I was met with damaged hubs from shipping. I hadn't caught it when they arrived a few months earlier. Luckily Randy's had another set and shipped them out. Again one showed up damaged. For such a $$$ product I suggested they should change up their packaging...PXL_20230805_012442090.MP.jpgPXL_20230815_142749959.jpgPXL_20230824_145553893.jpgPXL_20230901_004954254.jpg
 
Finished up the front hub conversion then moved into bleeding the brakes. The prop valve strikes again. The centering pin had moved during the process and blocked the rear lines. Ended up having to disassemble the prop valve, clean up the insides a bit then used one of those screw in centering pins tools to keep all lines open. Grrrr what a pain.

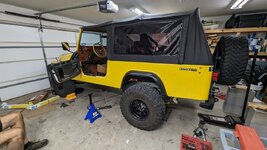
Buttoned everything up and Pappy is back on the road! The first couple of gear break in drives went flawless. Steering needs some tweaking still and a proper alignment. Prior to all the work my castor was less than 3*. I put in 6* shims. Will be interested to see what the actual castor is on the rack. Feels good going down the road. Used MORE drag link and tie rods with heim joints. Need to swap the drag link on the pitman arm to the top for better alignment.

Drove to a local welder to get the shock towers on. Embarrassed to share the finished product. One of the worst welding jobs I've seen. Might have them cut off and redone by someone else down the road. They're definitely on there but they're ugly AF. Won't be going back to him. PXL_20230905_205006884.jpgPXL_20230919_203445092.jpgPXL_20230919_203439590.jpg
 
LOVING the 3.31 to 4.56 gear ratio. The engine used to bog when starting out in 1st. With the 4.56 the clutch grabs much better and the engine doesn't drop rpms near as much. Shifting more often and lost some top end speed but it's an off-road toy not a daily driver.

Going to continue the gear break in over the next month. Going to take it out for some light offroading in a few weeks to test everything out before our trip to Merus in October. Still need to tweak the locker engagement cable, alignment, D300 Speedo screw. I'm sure there will be some more things to tweak but after 9 months of working on these axles I'm happy to be done with this swap. Learned a lot, cussed a lot and bleed a little but all worth it on that 1st test drive.
 
More break in drives. Going well. I need to find a gravel road to run the front hubs locked for a little while. Give them a few heat cycles. The rear diff is running about 160-180* with a thermal temp gun. Pretty standard from what I've read.

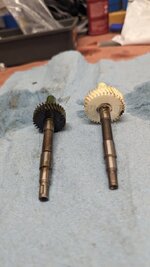
Got the speedometer gear changed. I went with a 37 tooth gear up from a 31. The Speedo never read correctly since I bought it due to the oversized tires and PO never changing the gear.

Found this formula online...

Speedometer teeth = 270.29 × Axle Gear Ratio ÷ Advertised Tire O.D.
Speedometer teeth = 262.19 × Axle Gear Ratio ÷ Actual Measured O.D.

My advertised tire diameter is 33" which yields 37.3
My actual tire diameter is closer to 32 which yields 37.4

I also found this gear chart on Novak's website that's pretty accurate in my experience. download.png

On my test drive my odometer clocked 12.3 miles. My GPS odometer on my phone clocked 12.1 miles. So the Speedo/odometer is reading 1.6% faster. I noted this as about 1 MAYBE 2 mph faster on the Speedo than actual. I'm happy.

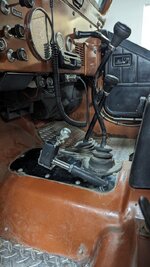
Gear wise with my 33s (32 actual measured) I'm running 52mph at 2500rpms in 4th on the SR4. Ill get back into the 60s range whenever I swap out to a 5 speed.
PXL_20231003_152237273.jpg

PXL_20231003_152640592.jpg
 
Last edited:
Also got it properly aligned. The castor before with the lift springs from the PO was around 4*. Steering return wasn't great, not terrible. During the swap I got .75" longer shackles and went with 6* castor shims. Castor settled in at 7.3*. Perfect.
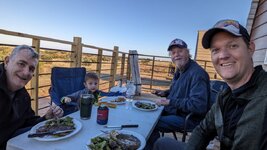
They set the toe after I took the picture. Still needs some tweaking as it drifts just a tad still. I also noticed a lot more tire scrub noise even post alignment. I take it that just because the tires are sticking out more with the wide tracks and I hear it more vs before? Who knows.

PXL_20230928_181909061.jpgIMG-20230928-WA0006.jpg
 
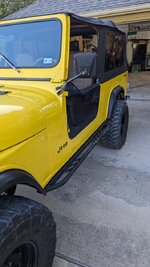
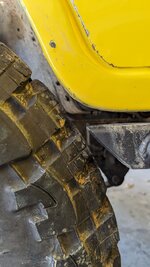
Got my sliders welded on a few weeks ago. These are the rocky road flat out sliders. After the fact I would not recommend them. They're designed to be bolted on but I had to cut their mounting plates considerable to get them lined up properly. Ended up getting them welded on. They're also too long as I'll point out in a picture later. They look good but at full stuff my left tire rubs them baaaad. My fault for not catching that before install. I found my go to guy in my area for welding though... 1000035954.jpg
1000035935.jpg
 
Took Pappy out to Northwest OHV park to do a real break in run of all the components. Here's where I discovered the issue with the sliders contact. Seems peculiar it's only on the left side. Everything else worked great. Lockers engaged properly, incredible increase in traction. Loving the 4.56 crawl ratio. Nothing broke and felt good in preparation for our trip to MERUS in a few weeks.


1000036010.jpg

You can see not much clearance when turned full left on level ground. Adding in the articulation it's not great. Reversing with the tire stuffed catches the lugs of the tire. Knowing this now I can be more aware in future excursions until I think of a fix.

1000036228.jpg
 
Last edited:
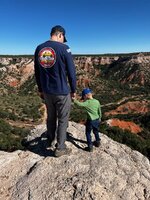
So with everything in working condition we headed out to MERUS adventure park in Palo Duro Canyon. I can't recommend this place enough. We had a blast and the scenery and terrain was a lot of fun. We stuff to mostly blue (medium) trails as I didn't want to push any of the new parts too hard on the first adventure after all that $$$$. Lots of creek beds winding around. The most tricky part was a climbing right turn, off camber ledge to the left out of one of the creek beds on the Lonesome dove trail😬😬😬 . Still getting used to wheeling a CJ and it was definitely a butt pucker for me. Overall a great trip and can't wait to go back.


1000036882.jpg

1000036902.jpg


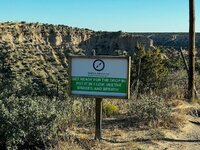
The drop in from the rim to the canyon was super fun. Very wide and lots of room but incredibly steep. I'd guess 15*-20* drop down. The 4.56 once again making me happy.
1000037184.jpg

1000037166.jpg
 
Last edited:
Here's the climb out on that Lonesome Dove trail. Whew.


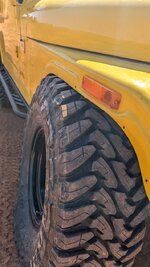
Flexed out on one of the ruts on one of the trails. As you can see my articulation is fully stuffed in the fenders. I'm thinking the solutions would be flat fenders for the up travel limit.? And maybe a YJ spring conversion would push the axle a little bit forward for more turning clearance?
1000036927.jpg

1000036920.jpg
 
Looks like you are having a great time. I had the same issue with flexy springs and 35" tires. I used metal cloaks CJ fenders. Not cheap, but solved my clearance issues. Glad to hear Merus is a fun place. We will probably try to visit there next year.
 
Been hearing about Palo Duro for decades. On my list. Best pictures of it I have seen.
 
Well it's not always all fun and games. My fuel pump diaphragm disintegrated and went downhill from there. Replacement fuel pump failed within 20 miles. Now the 258 won't idle. Extremely rich black smoke from the tail pipe and plugs all fouled up. Guessing part of the diaphragm made it past the filter and gummed up the carb? Who knows. 3rd fuel pump is from US motorworks. Before we fired up again we're doing some other work.

Checked the fuel return line and I'm able to blow air all the way back to the tank. I've got an inline fuel pressure gauge to check pressure once I can get it running again. Decided to rebuild the carb. The venturi jets/ports what we you want to call them were dropping fuel down into the intake not vaporizing. Part of the rich issue I guess.

So I've got it apart and waiting to dunk it in some cleaner and a rebuild kit in the mail from Napa. Question though is one spring plunger type device on the choke side of the carb broke during disassembly. Can't determine what part # it is from various diagrams. Originally a Colorado jeep. Any ideas from the brain trust?

1000039092.jpg

1000039116.jpg

 
Back
Top