• Notice for iPhone users: DO NOT use the image size reduction option when uploading photos to the forum. This causes portrait images to post as landscape. We have added a warning to the image insert pop-up as well.

Project Panel Replacement

frame 103.jpg

I had saved this schematic from an old thread, but it appears to lay out the dimensions a little different and doesn't go to the same points. Maybe it helps.
 
View attachment 103911

I had saved this schematic from an old thread, but it appears to lay out the dimensions a little different and doesn't go to the same points. Maybe it helps.
I had not seen this, but I like it a lot more than the other one as it has dimensions that aren't on them... hood cut away is different as well.

cb
 
I moved a lot of things around last night as it was raining out pretty heavily.
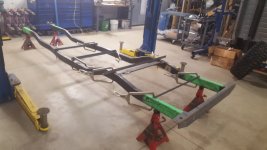
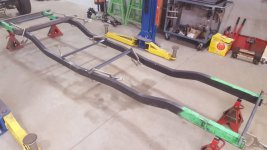
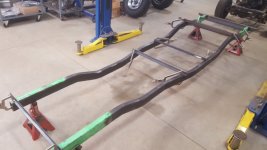
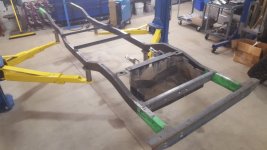
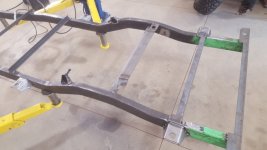
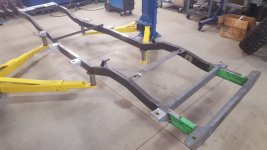
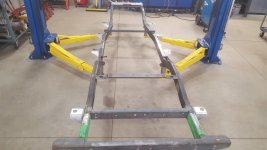
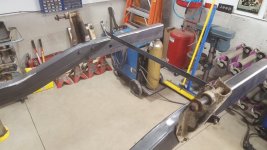
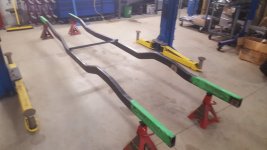
The rails are in place, marked for the "center" from what the old frame had.
I have about an inch in the front and 3 in the back that is extra and will be cut off.

Right now I was working on getting them correct distance apart and then square.

I am about 5/16" out of square at the moment, so pretty close.
I need another set of hands for the last tweaking... I got it close, but with the 95% humidity and all the moving around by myself, I called it a night.

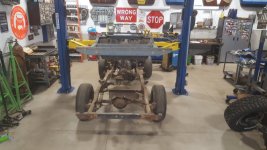
Snapped a couple.
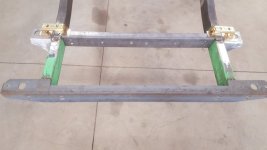
The angle iron is at the mid point... it is almost square as well to the rails.
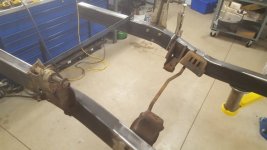
Plan is to get it square and tack weld in 4 pieces of angle iron front/rear and 2 spread so I can get it up on the lift.
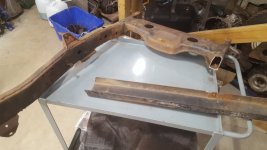
I will then roll the old frame in place once the drive train is removed and start to hang plumb bobs + the measurements from all the pics provided and get it all where it needs to be.

I figured this would take a bit, so it is on par with what I expected... gonna be a lot of head scratching to come.

20220718_185349_resized.jpg


20220718_185358_resized.jpg

cb
 
Don't sweat it. Your "aha moment" is coming and when it does the puzzle pieces will fall together. Shop looks great with plenty of work space and room to walk around and scratch your head............
 
Sounds like a big window unit would be pretty handy right about now. You cutting with a portable band saw or the old hard way ?
 
It was a hot one yesterday... I had to mow the lawn to boot, so I didn't have a lot of time, but it is square, it is locked in place... I know where to weld in temp bracing, I know what I need to cut... now it is to get to it!

I really am having a good time with it... the juices are flowing again... I had been out of it a bit, so this is good to get the focus back.

A big unit would be probably overkill as the garage is built into the ground pretty good and it is a big cold sink... the temp when I went in was 70 degrees... but as soon as you open a door to the outside, the other garage, or the big garage door, it is all over and it quickly gets to the outside temp.

20220719_185504_resized.jpg

20220719_185514_resized.jpg

20220719_185527_resized.jpg

20220719_185537_resized.jpg

cb
 
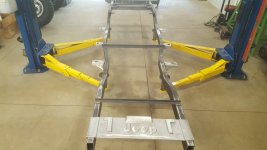
I got the rear cut down, the rear tied together... the rest is tacked in.
I put the front gas tank support in place and that seems to be in the right spot... still more figuring on that.

I was completely 100% square corner to corner and now I am about 1/2" out after putting it up on the lift to see if it was "rigid" enough.
I have to put it back down and see what is going on... I have watched and read enough that you don't ever want to fall out of square.
front to back is spot on at 165.25" on both sides, but the diagonals are off by 1/2".

Now, that said, this is me measuring by myself... I need a second pair of hands across this distance and will try to enlist some help tonight.

I haven't measure the old frame either... and wonder if I am worrying too much... that one probably is out by 2 inches :)

The best news though is that this is in one piece and I can raise this up and put something under it instead of leaving anything outdoors.

20220720_191613_resized.jpg

cb
 
Last night was steamy again, but was able to get the 20 gallon tank mounted and figured.
I used the @CHIEFWAHO crossmember I got a while back for the CJ5 project and now it is on the Scrambler fuel tank area.
Cut it down, welded it in and mounted up the fuel tank.

20220721_185244_resized.jpg

Ran into already cut holes on the TDK brace mount for the body... it contained 3 holes or a 15 gallon I guess already cut... so those need to be welded up and then where I drilled from the bottom up, holes drilled for the front of the gas tank skid... not a big deal, just some more work.

20220721_185254_resized.jpg

A little hard to see, but the holes are there next to the big ones.

20220721_191241_resized.jpg

All in all, happy with the results. I got the rear area welded pretty good for now so it is solid.

20220721_191354_resized.jpg

The main purpose this week was to get the stuff in a state I can see how it lines up, as well as nightly storage.

20220721_191717_resized.jpg


20220721_192231_resized.jpg

That is it for now...

cb
 
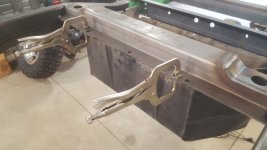
Finally got to try out the new magnets... worked pretty well.

20220722_170731_resized.jpg

Dad : "Did you fix it?"
Kid: "Yeah"

20220722_173125_resized.jpg

Dad: "Did you DAD fix it?"
Kid: "Ummmmmm"

20220722_173529_resized.jpg

You can fix the issue, or you can FIX the issue...

20220722_180519_resized.jpg

Upper shock mounts done and in place as are the next set of body mounts... The rear most are locked in, the fronts are going to remain tacked for a bit for movement... the rears are what they are... aren't moving them anymore as it was measured 45X so far.

20220722_180530_resized.jpg

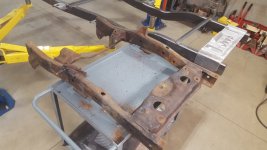
Next up is some mroe drilling on the rear cross member, cleanup of a few things... the rest of the body mounts and finally dealing with the front crossmember plate... going to use the original one from a CJ, so that will require a lot of cutting/grinding/fitting.

So far so good, just very hot and time consuming.

cb
cb
 
If this project doesn’t define the phrase “built not bought” I don’t know what would!
 
More work on the frame.
All the body mounts are on and tacked in place where they "should" be.
Front rails are cut down to size and the brace moved back so the front plate can be fit this week.
Rear cross member now matches the Rear gas tank support with the holes drilled to make it look closer to OEM.

20220724_163553_resized.jpg20220724_163619_resized.jpg20220723_174821.jpg20220724_163649_resized.jpg

Special thanks to @Kim Dawson for the frame cover.
All my measuring for the width of the rails, etc. and the frame cover dropped right on and fit perfect.

Once I get the front figured out from the old frame (grille / power steering mount / front bumper) I will flip it and start putting holes in the bottom for shackles, skid plate, weld in the spring hangers, bump stops, sway bar mounts... and I am sure there are others I am forgetting.

cb

EDIT: I forgot about the sides... front shock towers, engine mount holes, brake line holes... emergency brake. There really are a lot of things on this frame when you have to make/add each one.
 
This is the whole... "take what is from column A and put it in column B" idea.

20220725_172948_resized.jpg

Started off strong with the brake line brackets being transferred.

20220725_182804_resized.jpg

Drilled, tapped, put a hole for the line to pass through and then did the other side

20220725_182814_resized.jpg

Then went to do the shock towers and realized the front clip I was using was a 1979 vintage... with shorties for the shock towers.

DOH!

So, I then remembered that they changed the brackets.

20220725_182832_resized.jpg

So I gave up at this point... they changed the brackets because they were too long and would hit the shock tower.

So, tonight I need to do some measuring.


I also found my 20 gallon gas tank protector... although I think I will need to make a new one.
This one is a bit crispy and you can see through it in parts.

20220725_183225_resized.jpg

cb
 
Chipping away an hour here and an hour there.
Moving parts from the old from clip to the new one.
Drilling is a bit more challenging through this brand new 2x4 frame with wall thickness that is 2x the OEM frame.

Shock Towers
20220726_185638_resized.jpg

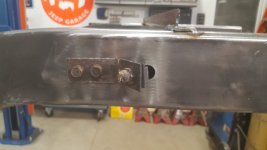
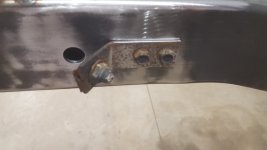
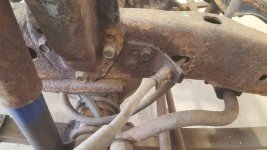
Relocated brake bracket... re-used a hole, will have to weld up the "red" one.

20220726_185647_resized.jpg

20220726_185720_resized.jpg

Motor mounts are next up on deck... 12 holes per side (inside and outside of the frame rails)

20220727_163707_resized.jpg

Removing them proved more painful then drilling... bolts were in there good with some locktite I guess

20220727_182024_resized.jpg

cb
 
Making progress in removal of parts from the old one... need to get the front plate off soon...

20220728_172824_resized.jpg

Next up is frame sectioning in the front...

20220728_174235_resized.jpg

This is needed as the OEM frame is 3.5" tall and this is 4" tall... doesn't sound like a lot at .5", but when you want to run the stock front bumper, as well as the OEM front plate, it all has to be the same size.

Mostly on the front frame plate.
The power steering box connects to it on the top as well as the under frame rails.
The frame rails top to bottom need to be at the correct 3.5" or else it won't work.
There are 3 holes as well for the power steering bracket, as well as the front shackles... and then the sway bar holes/mount.

A lot going on in a tight place.
You don't really notice (or appreciate) this when you have a frame that has it already.
The only time you notice it is when a captured nut spins, or you snap a bolt.
If you are making an entire frame, you see the entireity of what goes into it... and quite honestly, it is a lot... and it is exhausting!

However, it is probably one of the more rewarding things I have done in a while.

cb
 
Back
Top