- City
- miami
- State
- ok
Started down this road a few years ago. Started setting parts back for a LS powered scrambler. Had dana 44’s, spring over with 35’s. Wanted to build a jeep that I could drive anywhere and wheel. After driving it, which it did great, I decided if I were going to make any concessions (rattles mainly are what drive me crazy which is standard on any cj....haha) I decided it was going to be on tons and 40’s.
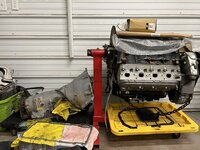
I have bought a few things here and there that I have been setting back. Have been sitting on a 6.0/4l80 for a few years that will find its home in the new one. Bought a TDK frame and tub in ft worth, had a set of Rubicon express extreme duty spring over leafs (didn’t work out on the crusty jeep, made it sit to high). Had a set of 40” MTR’s on trail ready beadlocks, and a set of one tons being a Chevy 60 and 14 bolt. After selling the d44 LS powered 8 (crusty looking leftovers jeep......twice actually). At some point I bought a 3.8 atlas driver drop atlas after deciding to go super duty front, wanted to try my hand a driver drop with the ability to spot the possible diff catcher on approach. Somewhere in there I ended up with a set of air shocks, then at some point ended up with coilovers.
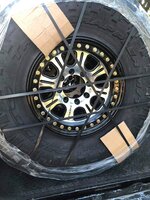
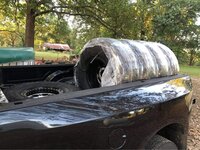
Decided I was going to build a wheeler and do it right vs throwing it together with what I had. So with that mindset finally somewhat had made up my mind so I sold off extra parts and finalized the plans. Ordered a set of ORI’s, picked up a set of racelines with a dot tire I’m hanging onto for when I pick the kids up from school lol. Going to throw the dot tires on another wheel and pick up a set of soft compounds for the racelines. Also picked up some rock sliders of Starkebaum and a set of poison spyder rear aluminum corner guards. Had some Tj aluminum highline fenders I was going to adapt as well.
Being the tub I was going to use was rusty I planned on doing a buggy style aluminum floor. While daydreaming about how to tie the new floors into the existing setup I started thinking about cutting up the new tdk frame.....seemed like a shame to cut the rear off a $2200 frame (I didn’t pay that, but someone did!) to gain the uptravel I wanted. Had a buddy try to start selling me on the idea of a tube chassis. Sounded nice but I didn’t want to spend a year building my frame.
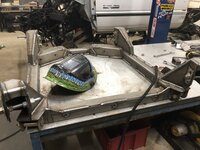
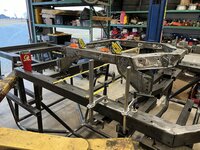
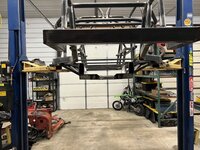
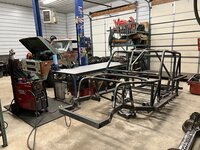
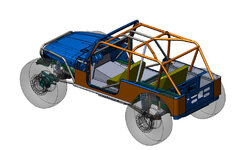
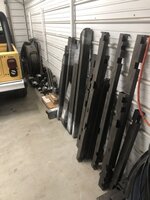
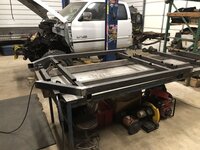
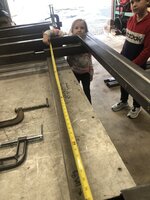
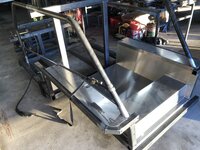
Then I ran across the goat built website. They offered a few different chassis options. After looking at it it seemed like the route to go. With the cost of metal currently and the time to had to do something then re do I felt like it was the ticket. Ordered the chassis in June, just showed up two weeks ago. Went with their 115” wheel base “LJ” Chassis. I would have wanted to bob the scrambler anyways. Opted for the kit that came with all the floors, sub frame, skid plates, rear trailing arms, corner guards etc. essentially need to add a grill, hood, cowl, windshield frame and door surrounds. It was designed for a Tj body, but I’m going to skin it all with cj metal.
Currently have been cleaning up around the shop and getting everything squared away. Hoping to have some progress on the chassis this week. A lot of welding in my future!
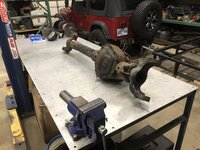
Started cleaning up the super duty axle yesterday while on shift. Only used a porta-band. Still have lots of clean up to do with the grinder.
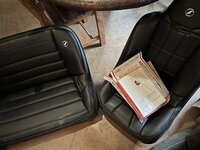
After selling my crawler I went on a shopping spree and spent a few dollars. Front truss, diff covers front and rear, front upper link mounts, front and rear gears and setup kits, front arb, Holley terminator x max, improved racing baffle for the f body oil pan, and an art cart shifter for the 4l80 have all showed up. Still waiting on the rear arb, us quick shift 4 transmission controller to show up. Have a new set of corbeau front suspension seats on the shelf and was able to latch onto the rear corbeau out of my crawler.
Lots of work to do, chomping at the bit currently for some extra time to get started!
I have bought a few things here and there that I have been setting back. Have been sitting on a 6.0/4l80 for a few years that will find its home in the new one. Bought a TDK frame and tub in ft worth, had a set of Rubicon express extreme duty spring over leafs (didn’t work out on the crusty jeep, made it sit to high). Had a set of 40” MTR’s on trail ready beadlocks, and a set of one tons being a Chevy 60 and 14 bolt. After selling the d44 LS powered 8 (crusty looking leftovers jeep......twice actually). At some point I bought a 3.8 atlas driver drop atlas after deciding to go super duty front, wanted to try my hand a driver drop with the ability to spot the possible diff catcher on approach. Somewhere in there I ended up with a set of air shocks, then at some point ended up with coilovers.
Decided I was going to build a wheeler and do it right vs throwing it together with what I had. So with that mindset finally somewhat had made up my mind so I sold off extra parts and finalized the plans. Ordered a set of ORI’s, picked up a set of racelines with a dot tire I’m hanging onto for when I pick the kids up from school lol. Going to throw the dot tires on another wheel and pick up a set of soft compounds for the racelines. Also picked up some rock sliders of Starkebaum and a set of poison spyder rear aluminum corner guards. Had some Tj aluminum highline fenders I was going to adapt as well.
Being the tub I was going to use was rusty I planned on doing a buggy style aluminum floor. While daydreaming about how to tie the new floors into the existing setup I started thinking about cutting up the new tdk frame.....seemed like a shame to cut the rear off a $2200 frame (I didn’t pay that, but someone did!) to gain the uptravel I wanted. Had a buddy try to start selling me on the idea of a tube chassis. Sounded nice but I didn’t want to spend a year building my frame.
Then I ran across the goat built website. They offered a few different chassis options. After looking at it it seemed like the route to go. With the cost of metal currently and the time to had to do something then re do I felt like it was the ticket. Ordered the chassis in June, just showed up two weeks ago. Went with their 115” wheel base “LJ” Chassis. I would have wanted to bob the scrambler anyways. Opted for the kit that came with all the floors, sub frame, skid plates, rear trailing arms, corner guards etc. essentially need to add a grill, hood, cowl, windshield frame and door surrounds. It was designed for a Tj body, but I’m going to skin it all with cj metal.
Currently have been cleaning up around the shop and getting everything squared away. Hoping to have some progress on the chassis this week. A lot of welding in my future!
Started cleaning up the super duty axle yesterday while on shift. Only used a porta-band. Still have lots of clean up to do with the grinder.
After selling my crawler I went on a shopping spree and spent a few dollars. Front truss, diff covers front and rear, front upper link mounts, front and rear gears and setup kits, front arb, Holley terminator x max, improved racing baffle for the f body oil pan, and an art cart shifter for the 4l80 have all showed up. Still waiting on the rear arb, us quick shift 4 transmission controller to show up. Have a new set of corbeau front suspension seats on the shelf and was able to latch onto the rear corbeau out of my crawler.
Lots of work to do, chomping at the bit currently for some extra time to get started!
Attachments
-
 2ADC9324-8D7F-4178-AB3D-31F0D0241122.jpeg122.7 KB · Views: 50
 -
 195B410B-B589-4E1C-96D8-1A855C0D02B5.jpeg104.1 KB · Views: 53
 -
 0DBCF544-5D70-4062-A216-69F0CE6E0CED.jpeg114.8 KB · Views: 55
 -
 2D9267A7-A121-4BBD-8D0F-39FCF200BAAE.jpeg122.6 KB · Views: 52
 -
 0A6CCA27-5DB6-4379-8E90-EDC8795760F6.jpeg145.9 KB · Views: 52
 -
 CAA4EFDE-F31C-4529-889F-A92F4ACFF438.jpeg159 KB · Views: 51
 -
 4710F1C4-6172-43FD-8338-5E5DDCFEE51C.jpeg189.9 KB · Views: 47
 -
 AB5DF7E6-ED72-4A4A-A5DD-70A8AA27746A.jpeg139.2 KB · Views: 43
 -
 FE12C1FD-227E-4C7A-8787-BF30B117D568.jpeg232.1 KB · Views: 47
Last edited:





 .
.