

You are using an out of date browser. It may not display this or other websites correctly.
You should upgrade or use an alternative browser.
You should upgrade or use an alternative browser.
Replacement crawler
- Thread starter mxracer919
- Start date

- City
- miami
- State
- ok
Finally got some time to work on it. Made me remember I don’t actually like welding……apparently I only like welding flat on a workbench, lol.
- City
- miami
- State
- ok


- City
- miami
- State
- ok
had to get a little creative to get the truss angle right. Truss was designed to use on a spidertrax axle. Was able to get it setup for the time being till I can check the driveline angle.
Attachments


- City
- miami
- State
- ok


Belizeit
CJ-8 Member
- City
- River Ridge
- State
- La
When it has a CJ grill.At what point does a jeep become a jeep?


- City
- Dexter
- State
- MI
When you've spent more money than you have any right to on it.At what point does a jeep become a jeep?
- City
- miami
- State
- ok
Well put a check mark next to this one…..When you've spent more money than you have any right to on it.
- City
- miami
- State
- ok
Hang up has been measuring for links. Going with aluminum and at the costly mistake of messing up I just have opted not to do it…..lol. Finally buckled down and started finalizing some stuff so I can get them measured and ordered. Looking like it’ll be 22ish belly on the 39’s. Goal is 43” stickies so will gain a little there.
Attachments


- City
- miami
- State
- ok
Was all fired up and ready to work on it. Ordered all my links and a driveshaft kit from wide open design who advertise their best in industry turnaround time at 6-9 days. Was a few days short of a month from the time that I ordered them until they arrived. By that time I’d moved onto another project. Finally got around to messing with them thisafternoon. Determined my rear pinion angle and pulled the rear axle out to do the rest on the bench. Much easier that way. A few more cool parts showed up as well. The Truck Norris cam showed up, the front carrier bearing driveshaft kit from WOD, and also was able to secure a set of 43” stickies.
Attachments


- City
- miami
- State
- ok
Been a slow go and lacking motivation. Funny thing is before taking delivery of the chassis I had plans of wheeling it that year…..but was burned out on spending so much time in the shop. Was supposed to be a fun project, so when it wasn’t fun I walked away. Have been tinkering with it here and there. Need to finish building the track bar. Only real motivation I have at this point is freeing up my lift, as it’s turned into a set of jack stands for longer than I’d like to admit.
Attachments


- City
- miami
- State
- ok

- City
- miami
- State
- ok
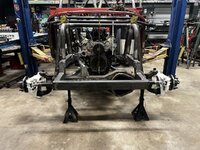
Slowly making progress checking things off the list that I haven’t wanted to do. Measure twelve times cut once. Front ORI’s are mounted. The brackets I sourced from goatbuilt were goofy. Ordered several from a couple of different companies trying to find what worked the best. Mounting the steering box next so I can finalize the track bar.
Attachments


- City
- miami
- State
- ok
Had a little motivation to suffer through committing on some things so I could move it off my lift. Still need to tweak some things…..but have a roller! Next step is mounting the steering box then onto the track bar.
Attachments
-
 IMG_9469.jpeg127.4 KB · Views: 19
 -
 IMG_9473.jpeg162.9 KB · Views: 16
 -
 IMG_9474.jpeg167.6 KB · Views: 17
 -
 IMG_9476.jpeg134.6 KB · Views: 16
 -
 IMG_9484.jpeg162 KB · Views: 17
 -
 IMG_9492.jpeg164.7 KB · Views: 17
 -
 IMG_9664.jpeg257.4 KB · Views: 17
 -
 IMG_9663.jpeg216.5 KB · Views: 18
 -
 IMG_9661.jpeg185 KB · Views: 19
Last edited:
- City
- miami
- State
- ok
Seems the decisions that I know are going to affect me from here on out are the hardest to make. Have a hard time committing. Have been eyeballing the steering box situation. Want to go hydraulic assist so I have a physical steering linkage. I know had I gone full hydro I’d be way further down the road as far as progress but making sure I get the box placement/geometry correct has been a huge road block.
Used a CJ box I had laying around with a stock pitman arm for mock up. My first version of the mounting plate was pretty crude, have since cut two pieces out of 3/8 that I’ll use on both sides of the frame, have some 1/2” DOM that I’ll sleeve the bolts that have to go through the frame.
The stock cj pitman arm yielded almost being able to go from steering lock to steering lock. The pitman arm needs to be slightly longer so that way it matches the distance between the pivot point on the knuckle and the tie rod mounting point on the high steer arm. The arms were setup to run the tie rod and drag link in the same plane but with the drag link being behind the tie rod it was difficult to package. Going to mount it on top of the knuckle and add some metal to the top to make it double shear like it should be.
One of the options for the steering was to move the knuckle mounting location back to match the pitman arm length but figured the shorter distance wouldn’t do me any favors when trying to turn the 43’s. Figure I need all the mechanical advantage I can get. Initially planned on using the genright twisted pitman arm off my stretched Tj but it’s even shorter. So plan is to build one similar to the genright arm with the double shear setup so I can run a heim joint. Was chasing a machined sector shaft “biscuit” but with the cost and after seeing the underside of the genright arm looks like cutting up a factory arm will work just fine.
Posted another thread about if anyone recognized a scrambler from South Dakota. I purchased the jeep towards the end of this week. Sold my stretched TJ that I picked up in Colorado summer of 23 that was supposed to be a temporary wheeler as I’ve been taking way too long on this project. The scrambler needs some things but thinking I can have another fill in rig with minimal work.
Used a CJ box I had laying around with a stock pitman arm for mock up. My first version of the mounting plate was pretty crude, have since cut two pieces out of 3/8 that I’ll use on both sides of the frame, have some 1/2” DOM that I’ll sleeve the bolts that have to go through the frame.
The stock cj pitman arm yielded almost being able to go from steering lock to steering lock. The pitman arm needs to be slightly longer so that way it matches the distance between the pivot point on the knuckle and the tie rod mounting point on the high steer arm. The arms were setup to run the tie rod and drag link in the same plane but with the drag link being behind the tie rod it was difficult to package. Going to mount it on top of the knuckle and add some metal to the top to make it double shear like it should be.
One of the options for the steering was to move the knuckle mounting location back to match the pitman arm length but figured the shorter distance wouldn’t do me any favors when trying to turn the 43’s. Figure I need all the mechanical advantage I can get. Initially planned on using the genright twisted pitman arm off my stretched Tj but it’s even shorter. So plan is to build one similar to the genright arm with the double shear setup so I can run a heim joint. Was chasing a machined sector shaft “biscuit” but with the cost and after seeing the underside of the genright arm looks like cutting up a factory arm will work just fine.
Posted another thread about if anyone recognized a scrambler from South Dakota. I purchased the jeep towards the end of this week. Sold my stretched TJ that I picked up in Colorado summer of 23 that was supposed to be a temporary wheeler as I’ve been taking way too long on this project. The scrambler needs some things but thinking I can have another fill in rig with minimal work.
Attachments


Last edited:
- City
- miami
- State
- ok
Was able to get my temporary wheeler picked up. Made sure to do the touristy stuff on a fast and furious trip to Rapid City, SD. Went and checked out Mount Rushmore and the Badlands national park. Both were pretty neat, but my kids say the Badlands takes the cake. Pretty spectacular. Also stopped and did most of the touristy stuff along i90 for bathroom breaks. Had a great trip.
Now time to do a few things to get it wheelable. Transmission only has reverse, needs seats and harnesses amongst other things. I have a set of sliders from Mike At 4x4 land and also a set of aluminum corner guards that were going to be used on this project before it snowballed into a tube chassis. Struggling with the idea of using them though, haha! Have some tnt front tube fenders and have a rear set as well. Lots of details, little more work than I initially thought but shouldn’t take long. Have been eyeballing an event this summer that’s hosted by a drag race page that does an event called king of the open road. They are hosting an off-road event that’s kinda ultimate adventure style. King of the off-road on FB.
Now time to do a few things to get it wheelable. Transmission only has reverse, needs seats and harnesses amongst other things. I have a set of sliders from Mike At 4x4 land and also a set of aluminum corner guards that were going to be used on this project before it snowballed into a tube chassis. Struggling with the idea of using them though, haha! Have some tnt front tube fenders and have a rear set as well. Lots of details, little more work than I initially thought but shouldn’t take long. Have been eyeballing an event this summer that’s hosted by a drag race page that does an event called king of the open road. They are hosting an off-road event that’s kinda ultimate adventure style. King of the off-road on FB.
Attachments


Last edited:
- City
- miami
- State
- ok
Was able to get it home and pull the transmission. Jeep came with an extra th350 that was supposed to be good, plas was to install it. Pulled the transmission out that only had reverse and then realized at that point the output shaft had been swapped for the Dana 300 adapter. Pulled the bad transmission apart with intention of rebuilding myself. Think I found the problem, lol! Forward clutches were smoked, also the pump was trashed along with I only had about half the reverse clutch plates I should have as they were welded together. Fortunately the other transmission had a good pump since the th350 pumps are getting hard to find. Have a local transmission guy that a really good guy. Took it over to him for help on what I needed to order and in the end I just left it with him, figured my time would be better spent getting seats and harnesses in it. Along with cage tie ins and other odds and ends.
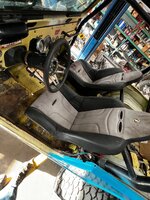
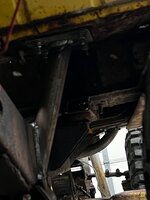
Little mix of using what was there and making some changes. Picked up a set of cheap used suspension seats off marketplace with Tj sliders on them. Make some mounts that tied to the old mounts, guessing “square” when they built it initially was merely a suggestion.
Little mix of using what was there and making some changes. Picked up a set of cheap used suspension seats off marketplace with Tj sliders on them. Make some mounts that tied to the old mounts, guessing “square” when they built it initially was merely a suggestion.
Attachments



Last edited:
- City
- miami
- State
- ok
Started brainstorming for a shifter mount and went to the google machine for some inspiration. Just so happens goat built offers a cup holder/shifter base for an art carr that I liked the style. Even if I had an art car I don’t think I could’ve turned loose of the money for something so simple. Used some leftover metal scraps and some $10 cupholders off Amazon. Turned out good.
Attachments


- City
- miami
- State
- ok
$140 was able to fix my exhaust leaks and rusted out flowmaster problems. Sounds surprisingly good. Had planned on running the duals all the way out the back but the 2.5” pipe wasn’t having it on the passenger side between the tank and the shackle. I had already welded up the driver side, otherwise I could have saved a muffler. Oh well, it worked out.


