• Notice for iPhone users: DO NOT use the image size reduction option when uploading photos to the forum. This causes portrait images to post as landscape. We have added a warning to the image insert pop-up as well.

Replacement crawler

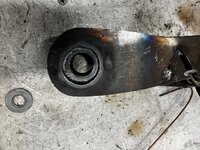
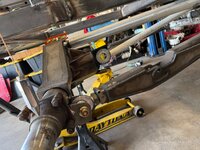
Nearly a year later, 🤣, I finally have tackled the steering gear mount and pitman. I wish I would have spent more time laying out the 1/4 I cut out, didn’t spend much time cleaning it up. Figured I was going to have to do it a couple of times to get it right. I crudely cut the 1/4 plate out, didn’t want to waste a whole bunch of time but put it all together and was on the money. Initially had a pvc drag link and couldn’t quite hit both steering locks. But found some junk pipe and was able to mock up a drag link. Steering goes lock to lock setup that way. Now that I know my drag link length I can build my track bar to the same length to keep it all happy.

Plan on twisting the rod end of the pitman arm to limit out the travel of the heim that way I have plenty of travel in the misalignment spacer for droop. Some shaping needs done to it as well as more metal to make it double shear.
 

Attachments

  • IMG_9925.jpeg
    IMG_9925.jpeg
    2.1 MB · Views: 21
  • IMG_9924.jpeg
    IMG_9924.jpeg
    2.1 MB · Views: 21
  • IMG_9916.jpeg
    IMG_9916.jpeg
    970 KB · Views: 21
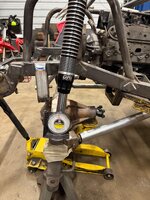
Finally fought its way out of the back corner and made it onto the lift. Had to move the shock mounts again. Pushed them out to top of the knuckle, the bodies were hitting the shock hoop brace at droop before when on top of the truss. Plenty of clearance now.
 

Attachments

  • IMG_0193.jpeg
    IMG_0193.jpeg
    1 MB · Views: 18
  • IMG_0182.jpeg
    IMG_0182.jpeg
    1.6 MB · Views: 18
  • IMG_0187.jpeg
    IMG_0187.jpeg
    1.1 MB · Views: 18
  • IMG_0183.jpeg
    IMG_0183.jpeg
    1.8 MB · Views: 17
  • IMG_0191.jpeg
    IMG_0191.jpeg
    1.9 MB · Views: 16
  • IMG_0188.jpeg
    IMG_0188.jpeg
    1.6 MB · Views: 17
So I dove in and started figuring out the drag link. At first I twisted the pitman arm slightly to allow the misalignment spacer enough travel for droop. Then decided to put a 22* bend in the drag link to allow enough travel on the knuckle side misalignment spacer. Then proceeded to build the track bar to the same length so I don’t have bump steer.
 

Attachments

  • IMG_0562.jpeg
    IMG_0562.jpeg
    1.7 MB · Views: 9
  • IMG_0565.jpeg
    IMG_0565.jpeg
    1.1 MB · Views: 9
  • IMG_0564.jpeg
    IMG_0564.jpeg
    1.4 MB · Views: 9
  • IMG_0563.jpeg
    IMG_0563.jpeg
    1.3 MB · Views: 9
  • IMG_0566.jpeg
    IMG_0566.jpeg
    1 MB · Views: 9
  • IMG_0633.jpeg
    IMG_0633.jpeg
    1.6 MB · Views: 9
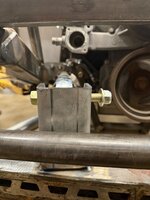
The next day I realized I overcomplicated it. Would prefer to have a straight drag link. Tore it back apart and hogged the hole out on the knuckle a little bit to allow the bolt to tilt a few degrees (before with a straight arm it was limiting out the travel of the misalignment spacer on the heim). It only needed a little bit to allow for the needed travel. Had my buddy machine up some custom weld washers to make the seat for the misalignment spacer and where the nut will clamp down level. 1.5ā€ diameter with a .75 hole. 1/4ā€ tall on one side down to 1/8ā€ on the other. Will go in on top of the heim and add a bracket with come bracing to make it double sheer.

Much happier with how it looks. Just need to cut the drag link. Like to double check before cutting at $10/foot šŸ˜‚!
 

Attachments

  • IMG_0726.jpeg
    IMG_0726.jpeg
    1.7 MB · Views: 13
  • IMG_0730.jpeg
    IMG_0730.jpeg
    1.6 MB · Views: 12
  • IMG_0740.jpeg
    IMG_0740.jpeg
    1.7 MB · Views: 12
  • IMG_0741.jpeg
    IMG_0741.jpeg
    1 MB · Views: 13
  • IMG_0745.jpeg
    IMG_0745.jpeg
    870.2 KB · Views: 13
  • att.NScMp5xm3zv15vO13gfPlzzKrOxVNE1oWrORbSmM50s.jpeg
    att.NScMp5xm3zv15vO13gfPlzzKrOxVNE1oWrORbSmM50s.jpeg
    132.3 KB · Views: 13
The angled weld washers worked as planned. Need to weld them on then cut the permanent drag link out of the 1.5 .250 wall DOM and make it permanent. From there it’s making the rest of the pitman arm and boxing it along with making the drag link mount in the knuckle double shear.

Finished up clearancing the rear shock mounts. The bodies on the ORI’s are huge. They were hitting the brackets at droop on the rear.
 

Attachments

  • IMG_0823.jpeg
    IMG_0823.jpeg
    910 KB · Views: 12
  • IMG_0770.jpeg
    IMG_0770.jpeg
    891.8 KB · Views: 11
  • IMG_0771.jpeg
    IMG_0771.jpeg
    887.4 KB · Views: 12
  • IMG_0766.jpeg
    IMG_0766.jpeg
    1.8 MB · Views: 12
Finished up my version of a genright twisted pitman arm. Had theirs been the right length I would’ve gone that route. Could’ve saved me from cycling the suspension and going steering lock to lock probably 60 times. Top and bottom plate are made out of 1/4ā€. Cut up a factory pitman arm for the splines. Preheated before welding the cast. Wrapped it in 3/16.
 

Attachments

  • IMG_1389.jpeg
    IMG_1389.jpeg
    1.4 MB · Views: 12
  • IMG_1426.jpeg
    IMG_1426.jpeg
    2.1 MB · Views: 12
  • IMG_1419.jpeg
    IMG_1419.jpeg
    936.6 KB · Views: 14
  • IMG_1452.jpeg
    IMG_1452.jpeg
    952.8 KB · Views: 15
  • IMG_1484.jpeg
    IMG_1484.jpeg
    1.3 MB · Views: 14
  • IMG_1518.jpeg
    IMG_1518.jpeg
    1.1 MB · Views: 13
Hung the poly tank, the bracket they offer lined up perfectly with the antirock sleeve.
 

Attachments

  • IMG_1593.jpeg
    IMG_1593.jpeg
    1.4 MB · Views: 8
  • IMG_1601.jpeg
    IMG_1601.jpeg
    1.1 MB · Views: 8
  • IMG_1608.jpeg
    IMG_1608.jpeg
    1.1 MB · Views: 9
  • IMG_1609.jpeg
    IMG_1609.jpeg
    983.7 KB · Views: 8
  • IMG_1621.jpeg
    IMG_1621.jpeg
    1.3 MB · Views: 8
  • IMG_1624.jpeg
    IMG_1624.jpeg
    1.3 MB · Views: 8
  • IMG_1623.jpeg
    IMG_1623.jpeg
    1.4 MB · Views: 8
  • IMG_1620.jpeg
    IMG_1620.jpeg
    1.4 MB · Views: 8
  • IMG_1619.jpeg
    IMG_1619.jpeg
    1.4 MB · Views: 8
Finished up my version of a genright twisted pitman arm. Had theirs been the right length I would’ve gone that route. Could’ve saved me from cycling the suspension and going steering lock to lock probably 60 times. Top and bottom plate are made out of 1/4ā€. Cut up a factory pitman arm for the splines. Preheated before welding the cast. Wrapped it in 3/16.
Been awhile since I held a pitman arm but that thing looks massive!
 
Been awhile since I held a pitman arm but that thing looks massive!
It is beefy. It’s the same length as a cj arm pretty much as far as mounting holes. Having to set it up double shear for the heim added quite a bit of material.
 
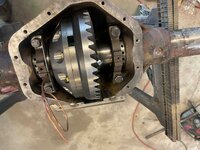
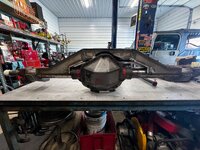
14 bolt is shaved and geared. 5.13 gears and an ARB locker. Complete with an upside down Revolution logo, haha!

Super duty 60 is up next!
 

Attachments

  • att.Rn_IXArnaRKgKJ7nBOmoUmgohFcjSCMWrkNVtatQgxg.jpeg
    att.Rn_IXArnaRKgKJ7nBOmoUmgohFcjSCMWrkNVtatQgxg.jpeg
    1.4 MB · Views: 18
  • IMG_2380.jpeg
    IMG_2380.jpeg
    1.7 MB · Views: 17
Rear axle is obviously done. Front has been shaved and ring gear machined. Went to install and realized I had thick gears which won’t work with the ARB. Figured no big deal, I’ll order some standard gears. Non existent. 5.13 is pretty much the only ratio that standard thickness isn’t offered in. Ordered all the axle parts 5 years ago and I didn’t catch it nor did my buddy I ordered through.

So now I get to redo with 5.38’s. I could have done a different locker, but after having an air locker in the scrambler front I’m hooked on the turning radius when unlocked! Wouldn’t be like every other project if I didn’t get to do a couple of things two or three times 🤣!
 

Attachments

  • att.kY3XcGZiTSvnULTAiDUtNxiKKNKTw7sbSu1JacifGSo.jpeg
    att.kY3XcGZiTSvnULTAiDUtNxiKKNKTw7sbSu1JacifGSo.jpeg
    1 MB · Views: 8
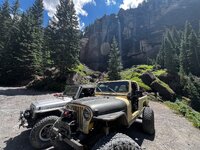
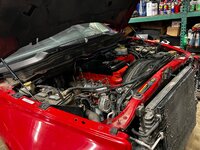
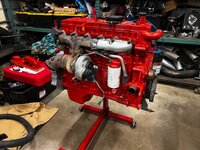
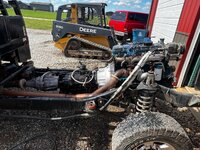
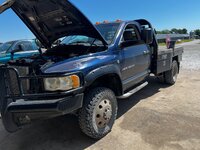
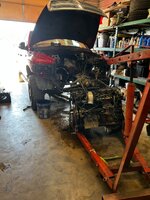
Had to take a break from the chassis for most of the summer. In early May I got serious about fixing the engine in my 2005 cummins since I needed a truck to haul the yellow scrambler and dad’s LJ to the scramble in Ouray. I had cracked a ring on it the December before. Pulled the engine out of it and disassembled, the day before I planned on taking it to the machine shop my buddy (local Cummins guru) posted his truck with a rebuilt engine for sale. Made more sense to buy his truck and part it out than rebuilding my own.

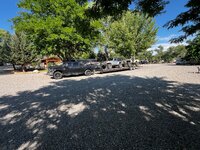
Took my time and did it right. Re sealed the engine and painted up nice (would have rather not but it had been painted before when he rebuilt and the blue wasn’t going to work in my red truck). Get it all back together and crank no start. Fortunately I’m irresponsible and had bought another truck that I was able to pull the trailer to Colorado with.

Have tested everything and it should start (injector return test, cp3 output, sent ecm off, etc). Have replaced half the engine harness, waiting on the other half I just ordered off eBay to show up now. If that doesn’t fix it I guess I’m going to drop it off at Dodge (my Cummins guru buddy is even stumped).

Anyways had a great time at the national and was good seeing several of my old friends and making several new!
 

Attachments

  • IMG_4646.jpeg
    IMG_4646.jpeg
    2.2 MB · Views: 14
  • IMG_4500.jpeg
    IMG_4500.jpeg
    3 MB · Views: 14
  • IMG_4116.jpeg
    IMG_4116.jpeg
    1.7 MB · Views: 14
  • IMG_4025.jpeg
    IMG_4025.jpeg
    1.6 MB · Views: 14
  • IMG_3397.jpeg
    IMG_3397.jpeg
    2 MB · Views: 13
  • IMG_3037.jpeg
    IMG_3037.jpeg
    1.6 MB · Views: 13
  • IMG_2737.jpeg
    IMG_2737.jpeg
    1 MB · Views: 14
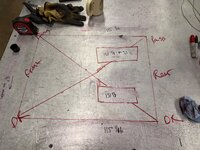
That being said my spare time to work on the chassis has been non existent until last week. Slid the front and rear axles back under it after their shave. Have everything squared back up. Link bars have been tightened down and truss welded back on.

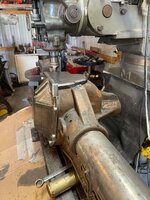
Hoping tomorrow to finish up the Barnes truss bridge modification. Had to cut it up quite a bit to make it fit the goat built truss.
 

Attachments

  • att.1cJhN9S-5tsVUXb-gs5qZxvbaka586IjEgqDNiuu3I0.jpeg
    att.1cJhN9S-5tsVUXb-gs5qZxvbaka586IjEgqDNiuu3I0.jpeg
    224.6 KB · Views: 7
  • IMG_6165.jpeg
    IMG_6165.jpeg
    1.5 MB · Views: 7
  • IMG_6196.jpeg
    IMG_6196.jpeg
    1.9 MB · Views: 7
  • IMG_6197.jpeg
    IMG_6197.jpeg
    941.5 KB · Views: 6
  • IMG_6198.jpeg
    IMG_6198.jpeg
    657.7 KB · Views: 6
Back
Top