• Notice for iPhone users: DO NOT use the image size reduction option when uploading photos to the forum. This causes portrait images to post as landscape. We have added a warning to the image insert pop-up as well.

Spankrjs 1986 "Ploy-Boy" CJ-7

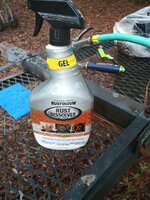
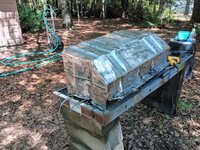
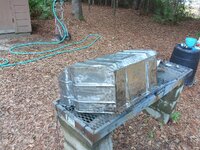
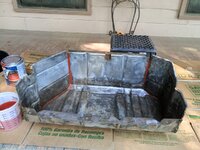
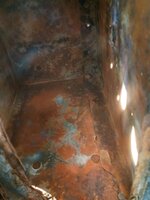
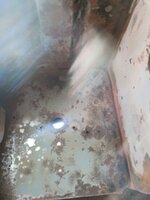
After washing off the paint stripper, sprayed some more of this stuff on it, what the hell!!

IMG_20240830_184427769.jpg

It clings well, fizzes up, seems to stick better to wet metal versus dry metal.

IMG_20240830_184436963.jpg

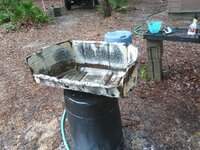
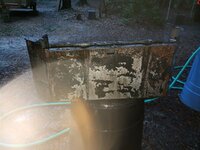
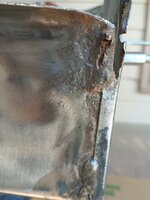
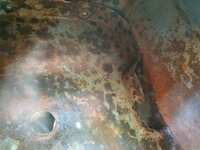
Rinsed it off, seems like it removed some more of the light rust.

IMG_20240830_192208576.jpg

IMG_20240830_192215370.jpg


IMG_20240830_192228176.jpg

IMG_20240830_192235681.jpg

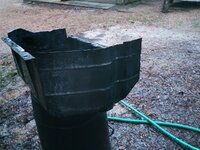
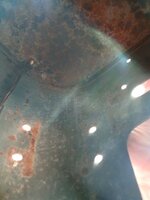
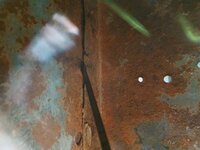
Did not do much on the heavier rust on the bottom, could be due to the fact it was sitting in water on top of the trash can.

IMG_20240830_192257989.jpg

The wire wheels should remove the rest. Hope to at least get this thing primed this weekend, depending on weather.

That's it for now!!
 
Finished cleaning the skid plate today, about five hours of work!!! Started off with the rust buster pad on the drill, pictured below, then worked up to various wire wheels on the drill, and eventually the Dremel to get into the tight spots

IMG_20240901_111016860.jpg

IMG_20240901_120419970.jpg

Had to use the wire wheels to remove the heavier corrosion.

IMG_20240901_120432646.jpg

IMG_20240901_153615265.jpg

But it eventually cleaned up really well. No holes, no stress cracks, and really only a few larger pits, mainly small pits primarily on the bottom plate, exterior and interior sides. Came out pretty good considering what I started out with, just a bunch of work to reuse the OEM fuel tank skid plate.

IMG_20240901_153643958.jpg

IMG_20240901_153650352.jpg

Cleaned it off with two cans of brake parts cleaner, will do a final wipe down with Acetone before I prime it. Ready for primer, ran out of time today. Don't want to leave it like this too long due to the high humidity, might need to move it inside the house.

IMG_20240901_164638784.jpg

I'm trying to keep this Jeep mostly original/stock. If I was planning on really wheeling this one I would have purchased a Gen-Right skid plate like I have installed on my Red Scrambler. They are expensive, but really heavy duty. But, as far as expense, by the time you figure all the time and materials I am burning though to redo this OEM skid plate the aftermarket unit doesn't look that bad!!!

That's it for now.
 
Got the first coat of primer on the fuel tank skid plate earlier today. Wiped it down with Acetone, ready for primer. It already had a few brown spots on the bare metal from sitting overnight in the garage.

IMG_20240902_100038773.jpg

Close up of some of the worst spots. Short of acid dipping or sand blasting this is as clean as I can get it. Pretty happy with the the prep work results.

Factory shit booger welds:

IMG_20240902_100043843.jpg

Seams pretty clean, a little overnight brown developed in some of the pits:

IMG_20240902_100048698.jpg

The worst pits, on the bottom side, just two or three deeper pits, so really not terrible shape.

IMG_20240902_100059697.jpg

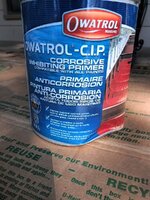
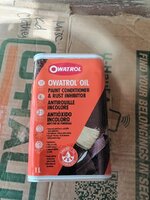
I found this stuff on the Internet a year or two back and bought some. I was probably Googling "best rusty metal primer" or some such nonsense. You can look into it, seems to be a good product. It is oil based, kind of thin, so it really creeps into pits and seams.

IMG_20240902_100111480.jpg

I am actually brushing it on, might get a small roller for the second coat for the larger flat areas. You can also spray it. I have used spray Rust-Oleum in the past with good results. BUT, this Jeep has a lot of pitting and I am really worried about the seams. I wanted to try something that I could really work into the seams. So, figured I would try this stuff.
 
I brushed it on following the same method I use for spraying, get the small hard to get to areas first. I used a 3/4" throw away artist brush and brushed the primer right into the seams.

IMG_20240902_101002443.jpg

I then followed up with a good 1" brush:

IMG_20240902_103230608.jpg

Then used a good 2" brush for the remaining areas:

IMG_20240902_104510815.jpg

Two things, hind sight:

1) could have skipped the small brushes. This primer is thin and really creeps into spots.

2) should have added some of this to the primer to eliminate brush strokes/add to the chip in time

IMG_20240902_113918404.jpg

First coat down. A few bare spots, lots of brush strokes. This stuff lays down thin, so the slight translucent finish does not bother me. The second/third coat will build it up solid.

IMG_20240902_113850170.jpg

IMG_20240902_113911128.jpg

IMG_20240902_113853335.jpg

Just like any paint/primer, build it up in thin coats. The brush strokes concerned me, BUT the primer did lay down flat after the initial 6 hour "dry to touch" time. I need 24 hour drying time before the second coat of the same stuff. So, first coat down, a little translucent, brush strokes, a few bare spots. But, confident the second and third coat will improve the visual finish without the need for sanding. This is my first time using this product, and first time brush painting this large metal surface areas. I plan on brush painting this same primer on the bottom side of the entire Jeep, so I am using the gas tank skid plate as my guinea pig. So far I like this stuff, especially how thin it lays down. It really does creep down into the crevices/pits/seams which is what the bottom side of the body tub really needs.

My little shed makes a good drying booth, too!!

IMG_20240902_164703052.jpg

Will update with more pictures/thoughts after the next few coats. So far, pretty happy with the product, I just need to work more on my technique.

That's it for now.
 
Withe the amount you spent on products to remove rust, I think it's time you invest in a sandblaster... Also, I trust you're collecting all the hazardous chemicals and correctly disposing of them.. :ROFLMAO:
Good use of the Canadian Tire bucket!
 
Withe the amount you spent on products to remove rust, I think it's time you invest in a sandblaster... Also, I trust you're collecting all the hazardous chemicals and correctly disposing of them.. :ROFLMAO:
Good use of the Canadian Tire bucket!
You notice the primer is in a 2.5 liter can 🇨🇦

That's my favorite bucket of all time 💕

I did collect all the stripper/paint goo and threw it in the trash. All the dust from wire wheeling not sure where it went it just disappeared 🤔

I definitely won't be using stripper under the Jeep due to the mess it would make and also because there is no paint left down there 😞
 
Last edited:
Sand blaster would be nice, but then I would need big compressor/tank and more better PPE. And I would probably mess up sheet metal with it. Better solution is I'm not going to ever mess with doing this type of work on a really rusty Jeep. Promise :cry:

If I was going to totally take this Jeep apart I would take the tub somewhere and pay them to blast it. But, don't really have anywhere to store all the parts if I take the whole Jeep apart at one time so I've got another plan for underbody access, still working out the details. And besides it a 7 not an 8 so less square meters to clean up 😂
 
Last edited:
@spankrjs your post are always the best, thanks for the details. I have a big plastic tote that soak large parts to remove rust. That gas tank skid would half fit and flip. Items flash rust as they come out so I hit with primer as soon as dry. I have tied several, they all work similarly. I like the concentrated one because of the value. Here is link to the product I use, https://www.amazon.com/gp/aw/d/B0031HQJWW?psc=1&ref=ppx_pop_mob_b_asin_title
 
Added 4 ounces of the oil to 8 ounces of paint, much better.

IMG_20240903_170534691.jpgIMG_20240903_170529307.jpg

IMG_20240903_170538420.jpg

IMG_20240903_175135270.jpg

IMG_20240903_175221578.jpg

No runs, went on smooth, minimal brush stroke marks. Still a bit translucent but that's OK, like the instructions say it is a primer coat not a finish coat, you just really need a good film coating.

Adding the oil to the paint is definitely the trick. It really let the paint flow off the brush and greatly added chip in time. I was around 30% oil to 70% primer, the can said you could go up to 50% oil to primer.

Regardless, pretty happy with the outcome of brush painting steel, something I have never really attempted. I have 7 days max for top coat so will probably paint it Friday/Saturday depending on rain. Plan on rattle canning it.

So pretty happy so far with this experiment/product/technique. The fun part will be replicating this on the bottom of the body tub!!!

That's it for now.
 
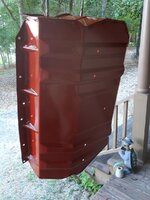
So, I put the second coat of primer on last Tuesday evening. It has either rained or been near 100% humidity non-stop since then. I had been storing the primed skid plate in the outdoor shed, but it still never felt "right". Not really "tacky", but not solid. Moved the skid plate into the garage Saturday morning, it immediately started feeling better about 2 hours later (less humid inside the garage). I could still smell it off gassing Sunday, so left it alone all day. This morning, no more smell and it felt "good". Decided to paint it first thing this morning while I had a small window of low humidity/no rain. I put the skid plate on a piece of cardboard in the back of the Red Scrambler and took it to work with me. The skid plate did not stick to the cardboard, figured its now or never!!!

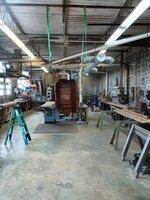
Painted it inside our old cabinet shop building. I had placed a thermostat/humidistat inside this building on Friday. This morning, humidity was 60% and temperature was 80 degrees, not going to get any better than that down here this time of year unless you have a paint booth!!

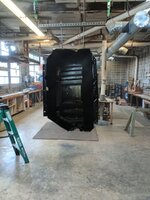
Hung it from the steel bar joists with some ratchet straps, easy spray access all the way around/under/top/inside:

IMG_20240909_090212439.jpg

Ended up using two can of this:

IMG_20240909_091952506.jpg

IMG_20240909_091958222.jpg

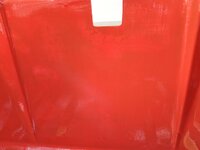
These cans are a little taller than the normal sized cans. They also spray out way more paint than the normal cans so you have to move the can a little quicker to avoid thick coats/runs. I used two full cans on this skid plate, one lighter tack coat and a heavier final coat. This is oil based paint, so should work fine with my oil based primer. I would have preferred "satin" black since the rest of the Jeep is "gloss" black for a little contrast, but Wal-Mart is the only place that stocks the "satin" color, but they only had one short can in stock and I did not feel like ordering spray paint off of the internet. I really wanted to get a coat of paint on it before the rain. I can always go back and top coat this finish with satin after 48 hours if I desire.

First lighter tack coat:

IMG_20240909_092004849.jpg

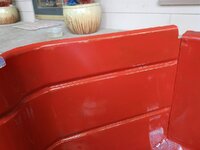
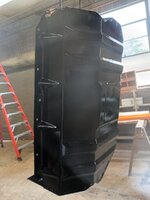
And after the second finish coat:

IMG_20240909_093814272.jpg

IMG_20240909_093819059.jpg

IMG_20240909_093824111.jpg

Came out pretty good, and obviously way better than before. The only "issue" I have with it, and I am going to let it slide:

IMG_20240909_093829348.jpg

My first primer coat had visible brush marks. My second primer coat lessoned them, but they were still there. Well, like any paint job, if that primer coat is not perfect any flaws will transfer through the finish coats. So, I have a slightly textured/brush stroked finish. It is smooth to the touch, but the brush strokes do show through. I'm not worried about it on this skid plate, but I will be much more cautious on more visible areas, like the rear wheel wells. I might have to shoot a regular primer coat over the rust primer coat and sand it smooth before paint. Or, spray a lightly "textured" finish everywhere underneath, but that might be a bitch to clean?

Anyway, got the paint down, it was tack free in about two hours, which was good because it started raining again about 4 hours after the last coat of paint went down and looks like rain all this week.

That's it for now!!

 
So, I put the second coat of primer on last Tuesday evening. It has either rained or been near 100% humidity non-stop since then. I had been storing the primed skid plate in the outdoor shed, but it still never felt "right". Not really "tacky", but not solid. Moved the skid plate into the garage Saturday morning, it immediately started feeling better about 2 hours later (less humid inside the garage). I could still smell it off gassing Sunday, so left it alone all day. This morning, no more smell and it felt "good". Decided to paint it first thing this morning while I had a small window of low humidity/no rain. I put the skid plate on a piece of cardboard in the back of the Red Scrambler and took it to work with me. The skid plate did not stick to the cardboard, figured its now or never!!!

Painted it inside our old cabinet shop building. I had placed a thermostat/humidistat inside this building on Friday. This morning, humidity was 60% and temperature was 80 degrees, not going to get any better than that down here this time of year unless you have a paint booth!!

Hung it from the steel bar joists with some ratchet straps, easy spray access all the way around/under/top/inside:

View attachment 114954

Ended up using two can of this:

View attachment 114955

View attachment 114956

These cans are a little taller than the normal sized cans. They also spray out way more paint than the normal cans so you have to move the can a little quicker to avoid thick coats/runs. I used two full cans on this skid plate, one lighter tack coat and a heavier final coat. This is oil based paint, so should work fine with my oil based primer. I would have preferred "satin" black since the rest of the Jeep is "gloss" black for a little contrast, but Wal-Mart is the only place that stocks the "satin" color, but they only had one short can in stock and I did not feel like ordering spray paint off of the internet. I really wanted to get a coat of paint on it before the rain. I can always go back and top coat this finish with satin after 48 hours if I desire.

First lighter tack coat:

View attachment 114957

And after the second finish coat:

View attachment 114958

View attachment 114959

View attachment 114960

Came out pretty good, and obviously way better than before. The only "issue" I have with it, and I am going to let it slide:

View attachment 114961

My first primer coat had visible brush marks. My second primer coat lessoned them, but they were still there. Well, like any paint job, if that primer coat is not perfect any flaws will transfer through the finish coats. So, I have a slightly textured/brush stroked finish. It is smooth to the touch, but the brush strokes do show through. I'm not worried about it on this skid plate, but I will be much more cautious on more visible areas, like the rear wheel wells. I might have to shoot a regular primer coat over the rust primer coat and sand it smooth before paint. Or, spray a lightly "textured" finish everywhere underneath, but that might be a bitch to clean?

Anyway, got the paint down, it was tack free in about two hours, which was good because it started raining again about 4 hours after the last coat of paint went down and looks like rain all this week.

That's it for now!!
I really like the Tractor Supply implement paint for black stuff. I bought a gallon of it and added hardener when I swapped axles in my tan CJ7, and it took forever to harden up, but it's rock hard now.

They sell the implement paint in rattle cans, but it doesn't have hardener in it. That's what I use on ATV frames etc. That said, the stuff has gone from $6.99 a can to $10.99 a can in the last year or so! NUTS
 
We finally got some cooler/dryer weather so decided to do some de-rusting/priming/painting work on this one. Going to try to get the "cubby holes" behind the tail lights and the inner rear fender wells knocked out this weekend/next week.

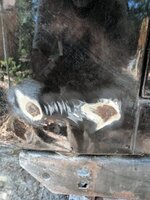
One reference picture for me, location of rear axle vent hose inside the passenger rear cubby hole. Amazingly the clamp and screw were still intact.

IMG_20240927_172638419.jpg

Looking up to the top of the passenger side rear cubby hole. You can make out the two stainless steel bolts I installed that secure the rear portion of the roll bar to the rear fender/inner fender.

IMG_20240927_172655235.jpg

Not the best pictures, I'll get some better before and after pictures this weekend. The rear cubby holes are a million times worse then the rear fender wells. As bad as they are, still solid, just a bunch of loose/flakey rust/undercoat/paint. The plan is to get these areas completed first, then I will move on to the bottom of the rear floor boards which are in much better shape. I am kind of breaking this work up into bite size chunks as opposed to pulling the entire body off the frame like I have done in the past. This approach may take longer/more work but I just don't have the time/space to blow this whole Jeep apart in one big step right now. I am going to concentrate on getting the entire rear underbody finished first before moving forward of the rear wheel wells/rear riser. The rear underbody of this Jeep tub really needs to be preserved ASAP. I am going to pull the power train out eventually, and the entire frame out from under the body, to de-rust/prime/paint everything. Just going to bust it up into bite size chunks. There is a plan.....

Anyway, removed all the parts that were in my way, got the Jeep up at a more comfortable working height. The jack stands are on top of 4" thick concrete pads, solid level ground. Jeep is secure.

IMG_20240927_184333179.jpg

Going to knock out the rear cubby holes and rear inner fenders, then will readjust some things before proceeding with the bottom of the rear floor plans. I am not going to waste anytime cleaning up the tailgate support beam since I am going to replace it once I get a bunch of other preservation work completed. The Jeep has not gained any rust since arriving at my house but it doesn't make sense to let it just sit out here and get worse. So, hit the worst spots first, get everything stabilized and protected, then move on to more involved work.

All of my previous remove old/install new hardware work is really paying off. I can easily take the entire Jeep body tub apart with no problems.

That's it for now.
 
Last edited:
If you like rust removal, well you will love all the pictures that I'm about to post up!

Tools of the trade:

IMG_20240928_083316197.jpg

IMG_20240928_083322797.jpg

Working on both rear wheel wells and the rear cubby holes behind the tail lights.

Passenger side cubby hole before:

IMG_20240928_083358080.jpg

IMG_20240928_083407143.jpg

Passenger side rear wheel well:

IMG_20240928_083410588.jpg

IMG_20240928_083421955.jpg

IMG_20240928_083430177.jpg

IMG_20240928_083435710.jpg
 
We finally got some cooler/dryer weather so decided to do some de-rusting/priming/painting work on this one. Going to try to get the "cubby holes" behind the tail lights and the inner rear fender wells knocked out this weekend/next week.

One reference picture for me, location of rear axle vent hose inside the passenger rear cubby hole. Amazingly the clamp and screw were still intact.

View attachment 115085

Looking up to the top of the passenger side rear cubby hole. You can make out the two stainless steel bolts I installed that secure the rear portion of the roll bar to the rear fender/inner fender.

View attachment 115086

Not the best pictures, I'll get some better before and after pictures this weekend. The rear cubby holes are a million times worse then the rear fender wells. As bad as they are, still solid, just a bunch of loose/flakey rust/undercoat/paint. The plan is to get these areas completed first, then I will move on to the bottom of the rear floor boards which are in much better shape. I am kind of breaking this work up into bite size chunks as opposed to pulling the entire body off the frame like I have done in the past. This approach may take longer/more work but I just don't have the time/space to blow this whole Jeep apart in one big step right now. I am going to concentrate on getting the entire rear underbody finished first before moving forward of the rear wheel wells/rear riser. The rear underbody of this Jeep tub really needs to be preserved ASAP. I am going to pull the power train out eventually, and the entire frame out from under the body, to de-rust/prime/paint everything. Just going to bust it up into bite size chunks. There is a plan.....

Anyway, removed all the parts that were in my way, got the Jeep up at a more comfortable working height. The jack stands are on top of 4" thick concrete pads, solid level ground. Jeep is secure.

View attachment 115087

Going to knock out the rear cubby holes and rear inner fenders, then will readjust some things before proceeding with the bottom of the rear floor plans. I am not going to waste anytime cleaning up the tailgate support beam since I am going to replace it once I get a bunch of other preservation work completed. The Jeep has not gained any rust since arriving at my house but it doesn't make sense to let it just sit out here and get worse. So, hit the worst spots first, get everything stabilized and protected, then move on to more involved work.

All of my previous remove old/install new hardware work is really paying off. I can easily take the entire Jeep body tub apart with no problems.

That's it for now.
Looks great
 
Driver side before pictures. This side is worse than the passenger side for whatever reason.

Driver side cubby hole, forgot to pull this wire harness out Friday night.

IMG_20240928_083449325.jpg

IMG_20240928_083456796.jpg

IMG_20240928_083513663.jpg

Driver side wheel well:

IMG_20240928_083522410.jpg

IMG_20240928_083528690.jpg

IMG_20240928_083535003.jpg

Passenger side cubby hole in progress, I started here.

IMG_20240928_085415544.jpg

Got interrupted, had to install a new battery in my mom's 2016 Volkswagen Jetta, the original finally died after 8 years!!!

IMG_20240928_091740480.jpg
 
Passenger side cubby hole in progress:

IMG_20240928_095357760.jpg

IMG_20240928_095458384.jpg

Some exfoliation at this seam, passenger side cubby hole, where the screw driver pointing:

IMG_20240928_095647627.jpg

IMG_20240928_095659886.jpg

And corresponding bubbles on the exterior paint:

IMG_20240928_095714302.jpg

IMG_20240928_101030193.jpg

Goodbye pretty paint job, let's see how bad the cancer is!! Dug out the rear corner to side panel joint, not too bad at all:

IMG_20240928_101239646.jpg
 
Passenger side corner, know turning back now, popping bubbles!!!

IMG_20240928_101242957.jpg

IMG_20240928_101440098.jpg

IMG_20240928_103835027.jpg

IMG_20240928_103838673.jpg

Back side of the last picture above:

IMG_20240928_103845780.jpg

Notice all that white Bondo right over rust the last guy did? Good job buddy.

Driver side wheel well, no surprises here luckily!

IMG_20240928_112146865.jpg

IMG_20240928_121042727.jpg

No corrosion at OEM seam sealer that I could tell so I left it intact for now.

IMG_20240928_121049421.jpg

IMG_20240928_121108261.jpg

All in all, passenger side not terrible, just a few small holes. Unfortunately, my luck would not hold out on the driver side.
 
Big bubbles on driver side corner piece where it sits against the rear body mount/tail gate support box beam. This beam is gone, so figured there would be an issue here. But, notice how previous guy slapped that Bondo right on top of rust!!

IMG_20240928_132636261.jpg

That Bondo is thick, almost a 1/4" here.

Close up, Bondo directly over rusty metal. Good body work.

IMG_20240928_132641579.jpg

Not the best picture, but this is the tailgate support/rear most body mount box beam. It is gone on the two ends. It is rusting away directly on to the back corner pieces. Passenger side is good, driver side as pictured above is fuct.

IMG_20240928_132706895.jpg

Inside of rear wheel well, driver side, rust hole through to the inside. Previous body guy caulked over this hole on the inside and paint over it.

IMG_20240928_132716438.jpg

Rust hole driver side corner panel. More how thick Bondo is.

IMG_20240928_133343856.jpg
I already purchased the rear tailgate support beam, might need to order a driver side corner panel, too. If that were the only problems back here I wouldn't sweat it too much.

But ..........
 
Driver side wheel well, more screw driver through the metal. This hole is below the floor panel so no big deal.

IMG_20240928_134820136.jpg

The rear of the bottom edge is OK, almost. I beat on this seam with a block of 2x4 and a large hammer to smooth it out .

IMG_20240928_134823281.jpg

But, this is through hole into the passenger compartment.IMG_20240928_134828582.jpg

And where the last guys body guy caulked/painted over seam rust.

IMG_20240928_134842299.jpg

IMG_20240928_140034451.jpg

So, at the bare minimum, looks like I will be ripping out all the seam sealer the last guy did. There is so much trash/bubbles on the interior floor paint no great loss, more worried about what it might be hiding. That's why I'm starting at the bottom and working my way up and out.

Through rust holes driver side wheel well at the fold and tumble seat bracket bolt plate.

IMG_20240928_135036589.jpg

Rear driver side wheel well/cubby hole cleaned up shots.

IMG_20240928_161853032.jpg

IMG_20240928_161907479.jpg

IMG_20240928_161912434.jpg

And another previous owner body shop guy Bondo directly over rust, this is driver side rocker panel right forward of the rear wheel well.

IMG_20240928_161920469.jpg
 
Pretty happy with the progress, not happy about the driver side surprises, especially caulk/seam sealer over rust by the last guy.

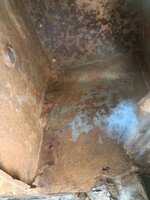
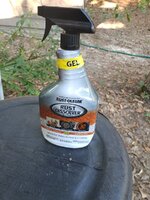
I have it all down to solid metal, a sand blaster could do a bit better, but even with that it won't really get into all the seams. I sprayed both cubby holes and wheel wells down with this stuff, rinsed it off about an hour later.

IMG_20240928_164343948.jpg

It really clings well!!

IMG_20240928_164352910.jpg

I need to wipe these areas down with some oil since I won't be able to prime these areas till next week.

Plan is to prime and paint the cubby holes/rear wheel wells next. Then, clean up the bottom of the rear floor pans all the way forward to the riser step piece. If I don't find any more God awful problems I will pull the engine/transmission/transfer case out and finish my investigation/de-rusting/priming and painting all the way forward to the firewall.

This tub has some issues, but surprisingly it still feels solid. I am going to try my best to salvage/preserve this tub. I have gave up on the idea of this tub ever being perfect or some kind of concourse restoration. I think I am just going to have to be happy with cleaning it up and making it as solid as possible. This Jeep will never be some museum piece, even with less than 7,000 miles on it. I guess I'll just try to make it into a daily driver. Not sure yet. I could swap another tub on it, but there goes the originality of it all, and its not that bad, yet. The seams concern me. That's why I want to clean it up, pop all the current bubbles, see what happens. If it keeps popping, well????

That's it for now.

IMG_20240929_151103716.jpg
 
Back
Top