• Notice for iPhone users: DO NOT use the image size reduction option when uploading photos to the forum. This causes portrait images to post as landscape. We have added a warning to the image insert pop-up as well.

Tammy Scrambler Gets a Facelift

oregonscrambler

Basic User
Silver Member
City
hood river
State
OR
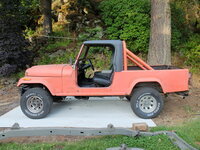
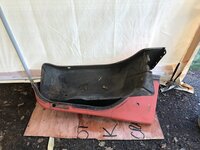
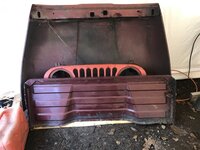
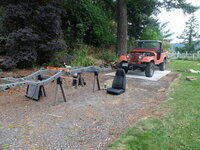
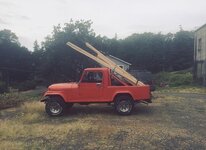
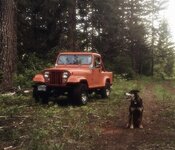
I wanna start by introducing myself and my girl, Tammy Scrambler. I stumbled upon this beautiful rusty heap almost exactly 6 years ago in Klamath Falls, OR. It popped up on Craiglist the day I got cash in hand for my POS Toyota Pickup, so naturally I sent the seller a pic of cash as I coerced my partner to drive me 6 hours south and watch me make an incredibly childish decision. After wiping crusty grease and chunks of orange steel from my face, I handed him the cash and proceeded to drive the 6 hours back north. The exhaust pipe had been hacked just under foot, dumping fumes into the cab. The transmission howled like a banshee in 3rd gear. The brakes shuddered when I tried to stop for gas in Bend. The jerry rigged pressure line for the power steering burst as I tried to merge back onto hwy 97. The wipers failed to clear the squall storm from my cracked windshield. A hair raising first adventure in what would prove to be many for me and my now new daily commuter. Countless days with my tool kit strewn along the side of the road and me just scratching my head. My mechanical skills were pretty much limited to learning to fix things as they broke.

Fast track to last summer. I'd replaced what seemed like everything but the VIN tag. The frame was within two potholes away from snapping at the rear hangers. The bondo and rust bubbles under the rattle canned orange was starting to cover up the oil stains in my driveway. I needed something more reliable, so decided to go outside and take one last drive up the hill, take some pictures, and post her for sale and move on. But when I got on Craigslist, a frame was posted for sale, rust free merely an hour away. I called, I blindly said I'll take it, and I picked it up within a day of deciding to sell Tammy to the highest bidder. The tables had turned and again I stood scratching my head wondering why I continue to make childish decisions.

I've been religiously reading this forum and watching everyone build amazing machines. I've used it as a resource for every ailment Tammy has had. I am now just under a year into my build and decided maybe I should finally join the conversation. I'm starting with the original pics, but over the next couple of months as I finish up my build, I'll post my process and when it gets down to the final stages, probably ask about a million questions.

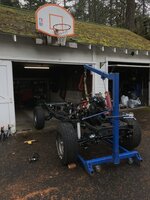
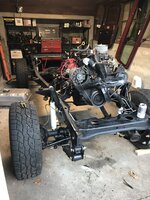
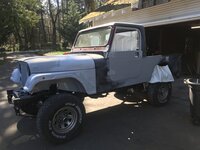
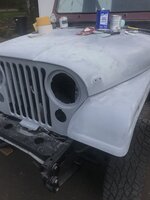
Currently I am at the paint stage, with completely rebuilt rolling chassis and engine sitting in the garage waiting for the body to be put back on. More pics and stories to come. Thanks everyone that inspired me to try what I did not know I could do on my own.
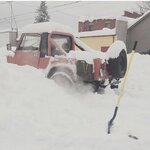
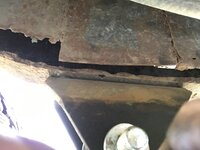
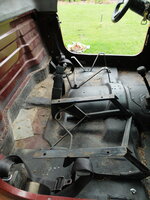
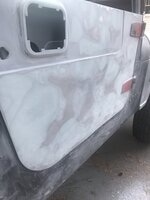
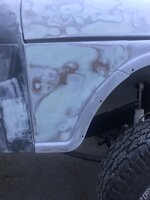
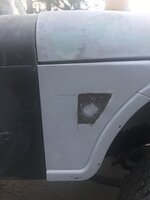
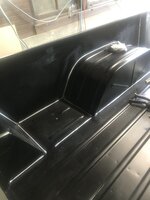
IMG_E0427.JPGIMG_E0428.JPGDSCF2892.JPGIMG_E0423.JPG
 

walkerhoundvm

Just trying to stay upright
Lifetime Member
City
Cave Creek
State
AZ
Welcome!

Replacement frame, but what did you end up doing with the body?

You and @Randyzzz know each other?
 

Randyzzz

Blown Budget
BENEFACTOR
Gold Member
Lifetime Member
SOA Member
City
Redmond
State
OR
Welcome! Another Oregon Scrambler! There’s actually quite a few of us across this state, probably 12 or so here in Central Oregon. I’d like to get a meet planned sometime this summer or fall.
So- I’m sure you know it but we all like pics. Lots of ‘em. And if you need any help, be sure to ask!

Good looking pup too!
 

Chamba

Not obsessed: focused.
Member
City
Vero Beach
State
FL
What's the back story on Tammy? She's obviously not an Oregonian with all that rust. You're really close to Aqualu in British Columbia, an aluminium tub is about the perfect addition to any Scrambler in my opinion......

Obviously we need more pics
 

oregonscrambler

Basic User
Silver Member
City
hood river
State
OR
I knew there'd be a million questions with the lack of pics. I'm currently sorting through 500+ resource pics I've taken.

Tammy started in Maine. 1984 Metallic Garnet Laredo as far as I can tell. Traveled to Wyoming and lived there for a bit until she was "rebuilt" and sold off to someone in AZ. Looks like she then transferred to Northern Cali, couldn't pass smog because of the hack job on the emissions system, crossed the border to Oregon and sat there until I came upon her. I have extensive receipts dating back to Wyoming and carfax showed me the rest.

Here's a pic of the frame that started this whole thing
IMG_0476.JPG

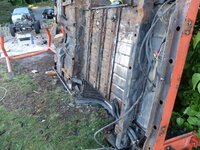
As for the tub, yes it is a disaster. Riveted patches over rusted holes in the interior, then covered in about 50 layers of brushed bed liner. The underside was held together with silicone caulking, black paint and a prayer. The entire bed had been covered by a sheet of 16 gauge galvanized and then bed linered. A full on polished turd.
DSCF2910.JPG
DSCF2966.JPGIMG_9123.JPG

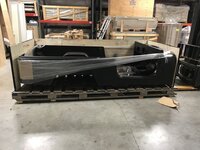
After a lot of reading and back and forth on fix vs buy I decided it was best to get new steel. I really wanted to lean in on an Aqualu, but cost as well as other issues made me go with the often bemoaned MD JUAN import. There will be more on this part of the build later when I get it painted.IMG_0143.JPGFor the most part, all the other steel was salvageable with a little (lot of) work. The windshield frame was the only piece I had replaced in the last 6 years.

IMG_0334.JPGIMG_0335.JPGIMG_0336.JPGIMG_0337.JPG
 

oregonscrambler

Basic User
Silver Member
City
hood river
State
OR
I'm gonna kinda just skim over the tear down. Pics tell a thousand stories on this one.
Special things to note are the engine mount drivers side - Only 1 bolt backed, most the way out. Yes this is how I found it while tearing down. Yes I was 2 freeway commutes away from becoming a twisted tangled mess on the side of the road. The engine had been torquing against the firewall for sometime now and the aftermarket valve cover shows the wear on the backside.
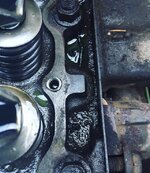
Also note the heli-coil in the head. Yes that's coolant and yes the previous builder had drilled all the way through the water jacket when installing the aluminum cover.
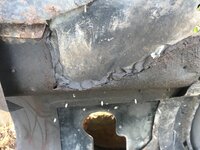
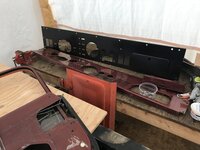
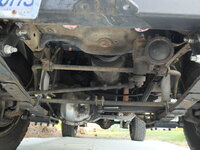
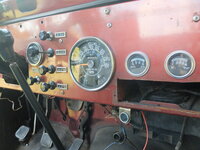
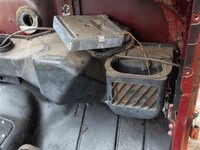
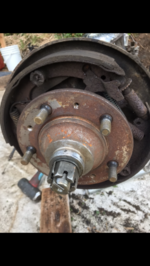
Birds nest for a heater box. Seized drums. Oh and yes, this is when I started realizing the frame I bought on a whim had a pretty wicked twist and goober gobbed weld repair over some damage and under the new shackle reversal hangers. Standard stuff I guess..... This is about when I realized I was in the deep end and my patience and my pocket book was going to be drained.

Teardown - missing bolt engine mount.JPGTeardown - back of engine.JPGteardown - helicoil coolant valvecover.JPGteardown - jeep full with new frame.JPGteardown - under from front.JPGteardown - rear fender close up.JPGteardown - dash panel.JPGteardown - birdsnest heaterbox.JPGteardown rear axle.JPGteardown - drum brakes old.PNG
 

walkerhoundvm

Just trying to stay upright
Lifetime Member
City
Cave Creek
State
AZ
I'd say you're lucky to be alive after having driven that 6hrs home.

I've been in your shoes. You can only go up from here!
 

oregonscrambler

Basic User
Silver Member
City
hood river
State
OR
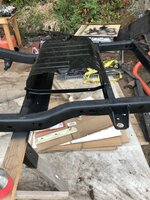
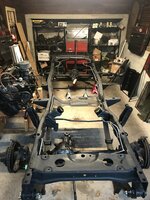
Now for the fun! Still skimming along, but with the rebuild. Started this teardown Aug 5 2020. My goal was to have a roller in my tiny garage bay by the first snow. Frame was stripped, fixed and welded new spring hangers, tossed on a local shop's rack and straightened. Multiple cans of Eastwood rust encapsulator and then chassis black. Slowly put everything back together with a little nudging and fighting.
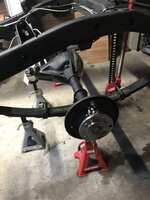
Had the axles gone through rebuilt and re-geared to 4.10s and dropped an ARB locker in the rear and solid Nitro chromoly shafts. Shout out to Graeme Tydes on that one. Somehow my brother is friends with what I now understand is a wheeling god.
New stainless brake and fuel lines rerouted. Rebuilt rear drums. New rotors and calipers up front were done a year ago.
New to me OME springs and yj conversion done a year ago so reused those as well. Too much time and parts to list or put pics in, but here's a glimpse. I'm prboably missing something. Got the engine in and rolled up into her bay for the winter just before the first major December storm.

Keep in mind, I'm rebuilding this as a cross between a daily I can be proud of and a capable Eastern Oregon hunting rig. Any input is welcome and if you see something weird, please lemme know. I'm doing this on my own and before last year, my vehicle mechanics were still limited to break and fix knowledge.

Also, a little hint to the direction I'm going is in the background on the parts shelves.

rebuild frame.JPGrebuild gas skid plate.JPGrebuild spray booth parts.JPGrebuild chassis before wheels.JPGrebuild amc20 .JPGrebuild with wheels.JPGrebuild engine hoist.JPGrebuild engine in.JPG
 

Randyzzz

Blown Budget
BENEFACTOR
Gold Member
Lifetime Member
SOA Member
City
Redmond
State
OR
Graeme- are you talking about Graeme from Bend- 4Locked Films? I haven’t seen or heard of him for awhile. He had a Scrambler he bought from a member here years back, it became a full on rock crawler.

Your progress looks great. You have got a lot done in the last year!
 

oregonscrambler

Basic User
Silver Member
City
hood river
State
OR
Yeah, same guy. He's just about the nicest human on the planet and crazy knowledgable/talented. Still doing 4locked and Sketchy Oregon Boys. My brother worked with him at Deschutes, he got excited I had a Scrambler project and I gave him a holler with some axle questions. Simple questions leads to me throwing the axles in my van and dropping them on his doorstep.

That Scrambler you speak of that he rebuilt is pretty wild- full custom fab everything. He built it for a client I think. I have some pictures I'll try and round up.

Thanks. I have a self imposed September deadline, minus the finer details. Been following along on your project l pretty closely, taken some notes on the painting and assembly stage to apply in my build these coming months.
 

Belizeit

CJ-8 Member
Gold Member
City
River Ridge
State
La
Looks like you have come a long way from what you started with. Looks like you were hooked by the Jeep bug. Great times ahead !
 

jpnmaine

Well-known member
Member
City
East Wilton
State
ME
She has personality. Wonder where in the black fly state she started out in. I feel your pain...I'm doing the long build myself, with about the same. It will be fun to follow.
 

Chamba

Not obsessed: focused.
Member
City
Vero Beach
State
FL
She has personality. Wonder where in the black fly state she started out in. I feel your pain...I'm doing the long build myself, with about the same. It will be fun to follow.
I love Maine. I love overnights in Maine. Great people, great food, beautiful scenery.

But anywhere in Maine is bad news for a Jeep. I think even putting a Maine plate on a Jeep can make it rust.
 

oregonscrambler

Basic User
Silver Member
City
hood river
State
OR
just got word from my friend that he's picking up paint this weekend, has secured a booth, and we are going to paint this next week. in the spirit of me celebrating with multiple glasses of spirits, I've compiled a look back on the work leading up to this.

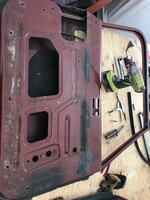
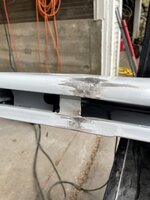
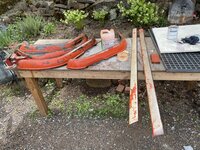
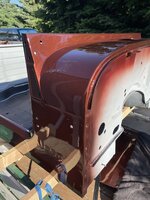
I started pre fitting all the body parts in January, seeing what lined up with the MD tub and taking notes on what needed to be fixed on the original body parts. After everything made sense and I knew what I could re-use, I had a friend had access to media blasting booth clean up and spray so I could see what I was actually working with. I was pleasantly surprised, but found some work needed to be done.

I took my COVID Cash and decided to use it as a sort of government sponsored education. You see, I've never welded or done body work before, so I went out, got myself a little Hobart 140 and a tank, a quart of filler and some cans of 2k primer and got to work gettin learned up. This process was tedious and I questioned what the hell I was doing every night.

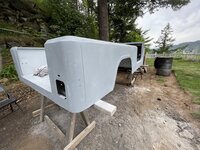
When I dropped with my painter for the urethane blocking primer coat, I was pleasantly surprised that I did a halfway decent job. Some things I would have done differently, but to the layman it'll pass and I think I can sleep at night with how flat this jeep will be.

Blocking out all the parts has also been a learning curve. I went after it hard trying to flatten it immediately, but found I just burned through in spots. Baby steps and a light methodical hand proved the winner. This was knocked down first at 320 grit then 400 as per my painters request.

I want to address some issues specifically with the aftermarket tub. This one was from C&C out in Indiana, not a WO tub. I think I will do this in a separate post. Overall I think I've had an ok experience with some hickups, but maybe I have no frame of reference since I've never done this and my other tub was a complete pile. I'll save that for later to maybe open discussion if anyone is interested.

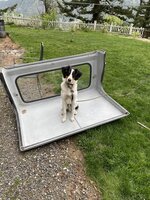
Oh and I got a puppy and he thought the top was his bed, so that's cute I guess.
mock befoer final prime.jpegbodywork workbench.jpegdoor bodywork.jpegfender bodywork.jpegfender rust hole preweld.jpegcauld bed.jpegdoor welded grind.jpegfender rocker strip.jpegsanded side1.jpegtop puppers.jpeg
 

designerRob

CJ-8 Member
Silver Member
City
Allen Park
State
MI
It has to be very fulfilling to look back over the whole process. Are you painting the factory Garnet color or something else? I love that Garnet red color. Nice job. 👍
 

oregonscrambler

Basic User
Silver Member
City
hood river
State
OR
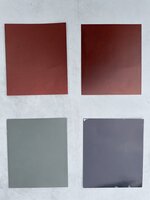
It has. I stay up a little too late looking at all the pictures of the last year. I initially was gonna go stock 3c and it was the plan all along, but then I saw a color on the road I really liked. I got some cans mixed of the four candidates and sprayed on a card and carried em around with me for a while. The lighter of the two on top is 3c. The left is a Nissan color, Forged Copper. To throw a curveball to my brain I added the Jeep Midnight and the Toyota Lunar Rock colors to the final contenders. The Forged Copper ultimately won out. It's just a touch warmer paying homage to Tammy's rattlecan orange past and looks darker in some light. Just don't tell anyone it's a Nissan color and I'll be ok with it.
 

Attachments

  • COLOR SWATCHES.jpg
    COLOR SWATCHES.jpg
    94.3 KB · Views: 26

oregonscrambler

Basic User
Silver Member
City
hood river
State
OR
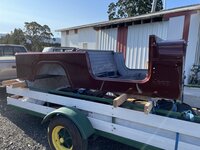
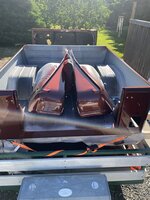
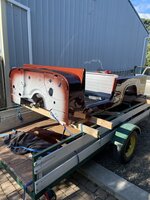
Pretty big morning! the 2 mile drive back home was the scariest drive I’ve made! So happy with how it turned out. I can see a few things I overlooked now but I’ll keep the mudflaps off to cover it up. Now I gotta watch the rain for the next week while I wait to paint interior Lizard skin, the raptor liner bedliner and under carriage and firewall black. Will also do wheel wells and under hood black.

A11670BD-1F73-4253-BF39-02A48795173B.jpeg10AC93FB-E2DB-4FC7-96EF-72618AC98316.jpeg7BD023B4-48A0-4370-B246-6985CCBDF141.jpeg0FF7ED4A-9849-4BEA-83EF-7D3CE231A3B8.jpeg0855A277-244A-458D-9147-492719C927FB.jpeg
 

Pman

Busted Knuckles
Lifetime Member
City
Mount Pleasant
State
SC
Sweet mother of quick work! Good grief, that’s amazing how fast you’ve moved on this. That color is fantastic. Can’t wait to see the finished product!
 
Top