

You are using an out of date browser. It may not display this or other websites correctly.
You should upgrade or use an alternative browser.
You should upgrade or use an alternative browser.
The beginning.. the end.... and a fresh start
- Thread starter surfjeepzx
- Start date


- City
- Wilbur by the Sea
- State
- FL
Thank you all very much! I'm really happy with the wheel and tire combo. The next little mini project is getting the center caps fitted. Then next month I'll get the axles for the rear so I can start driving it. The left rear has a slight wobble to it and with all new brake parts I don't want to mess em up. On another note, after 2.5 years I broke down the temp garage "tent" next to the house so I have my driveway back. I got so used to looking at it that now the house looks bare when I pull up.
- City
- Wilbur by the Sea
- State
- FL
Pep Boys had a Futura Scrambler tire back in the 90's. Just checked, it's still available but in limited sizes and a street type tread pattern...I like the Goodyears much better.
View attachment 44429
I like the Goodyears too. It would be cool if tire manufactures offered custom sidewall lettering. Of course they would come with an additional cost and waiting time but for projects like this they would be worth the wait, but maybe not the expense if it was too much.
- City
- Wilbur by the Sea
- State
- FL
After looking at the Jeep again it dawned on me that I haven't painted in the Jeep logo on each side of the tub. Actually my daughter reminded me last week, then it dawned on me :-)
So that will be the next little paint project but it will have to wait for a couple weeks.
So that will be the next little paint project but it will have to wait for a couple weeks.
- City
- Wilbur by the Sea
- State
- FL
A little progress
I've been tinkering with a couple other projects in order to clear space and make some extra dough, so I haven't had anything to report lately.
Last week I got motivated to tighten up the hardtop with the final little tidbits. I refinished the forward mounting strip that attaches to the upper windshield frame and got that installed. It was a little project in itself as it was surface rusted and had way too many holes drilled in it over the years. So I sandblasted it, welded in all the holes except the main ones across the bottom. Then gave it the never gonna rust again treatment and painted it. I bought some 3M weatherstripping at Ace and stuck that in place so I'll see how that works out once the top is on. Still have to wait till after the holidays before I can spring for a sliding window.
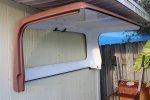
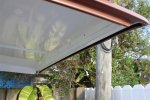
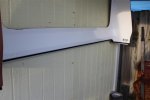
I've been tinkering with a couple other projects in order to clear space and make some extra dough, so I haven't had anything to report lately.
Last week I got motivated to tighten up the hardtop with the final little tidbits. I refinished the forward mounting strip that attaches to the upper windshield frame and got that installed. It was a little project in itself as it was surface rusted and had way too many holes drilled in it over the years. So I sandblasted it, welded in all the holes except the main ones across the bottom. Then gave it the never gonna rust again treatment and painted it. I bought some 3M weatherstripping at Ace and stuck that in place so I'll see how that works out once the top is on. Still have to wait till after the holidays before I can spring for a sliding window.
- City
- Wilbur by the Sea
- State
- FL
The Clock
Like most of us I was scanning Ebay and I came across a listing for some visors. The initial pic showed a dash that was weathered and rusted, as I looked at the listing I spied a clock still installed in the dash. It looked so lonely and since "it" wasn't listed I contacted the seller. I just received it this morning for $35 to the door. I little rusty and faded like most look after 30+ years I had a nice little project for the day. I managed to get the bezel removed with a set of small nippers that worked out perfect for relieving the bend and apart it came. The insides were in good shape so I cleaned the connectors but no luck. Then I started toying with all gears and such just to see what made it tick. I eased a little silicone spray into the mechanisms and kept moving stuff. Pretty soon she was running like the fine non-swiss watch it is. I had it jumped off the Jeep battery for a few hours and she kept time perfect.
Then I polished the plastic lens with some fine grade polishing compound. Next will be sandblasting the housing and reassembly.
Eventually I plan on getting new gauges but for now at least I can plug the hole in my dash that keeps bugging me.
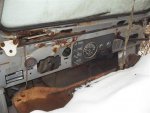
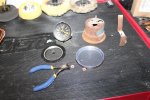
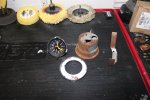
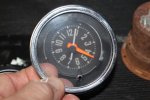
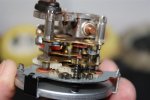
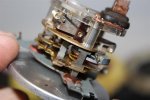
Like most of us I was scanning Ebay and I came across a listing for some visors. The initial pic showed a dash that was weathered and rusted, as I looked at the listing I spied a clock still installed in the dash. It looked so lonely and since "it" wasn't listed I contacted the seller. I just received it this morning for $35 to the door. I little rusty and faded like most look after 30+ years I had a nice little project for the day. I managed to get the bezel removed with a set of small nippers that worked out perfect for relieving the bend and apart it came. The insides were in good shape so I cleaned the connectors but no luck. Then I started toying with all gears and such just to see what made it tick. I eased a little silicone spray into the mechanisms and kept moving stuff. Pretty soon she was running like the fine non-swiss watch it is. I had it jumped off the Jeep battery for a few hours and she kept time perfect.
Then I polished the plastic lens with some fine grade polishing compound. Next will be sandblasting the housing and reassembly.
Eventually I plan on getting new gauges but for now at least I can plug the hole in my dash that keeps bugging me.
- City
- Wilbur by the Sea
- State
- FL
I know everyone's been sitting at the edge of their seats waiting for more progress on the clock, but I was taking my time..... 
It's done and this is all I have to show. It's a little accomplishment and until I can spring for a new set of gauges these are still nice to look at.
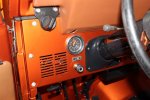
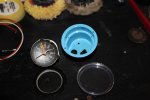
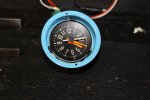
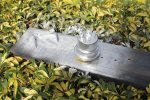
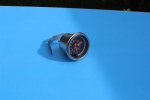
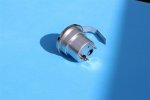
It's done and this is all I have to show. It's a little accomplishment and until I can spring for a new set of gauges these are still nice to look at.
- City
- Wilbur by the Sea
- State
- FL
During the install I realized there's no light wiring in this dash harness for a clock. I'll have to source one from the local Jeep shop unless someone reading this has one hanging around?

- City
- Surf City
- State
- NC
I have a couple old harnesses in a box from my previous CJ7 build that I replaced with Painless as well as 2 that came with my Scrambler in a box. I will look tonight if I have time and see if they have it. My CJ7 had the clock but the wiring was so butchered I honestly don't know if it was still there.
- City
- Wilbur by the Sea
- State
- FL
Thanks, I appreciate your time.
- City
- Wilbur by the Sea
- State
- FL
Ok, I'm going in!
After a little break I'm starting to get the ball rolling again and the next items on the list are to regear the axles. Currently they are 2.72 and I've decided to go open 4.10. For the front I picked up a "like new" Dana Spicer R&P and associated carrier, bearings, and shims that were in the diff it was removed from. So I'll probably still need more shims and I'm going to change out the axle seals while I'm in there.
It sounds like I know what I'm doing but I have a confession, I've never messed with gear set ups so this should be fun and challenging. I've been reading a lot and looking at some videos. I have most of the necessary tooling, large beam torque wrench, dial micrometer with mag base, digital calipers, seal and race drivers. I still need a 1/4" drive beam torque wrench which I'll buy next week. I fabbed a yoke brace for setting the preload on the pinion bearings. And I'll need to pick up some gear paste .
Here's the disassembly that went smoothly. Man gear oil stinks, the whole garage is fumed. Wifey aint diggin it while she was doing laundry.
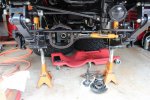
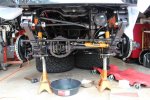
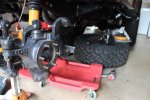
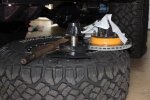
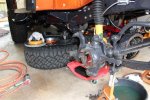
After a little break I'm starting to get the ball rolling again and the next items on the list are to regear the axles. Currently they are 2.72 and I've decided to go open 4.10. For the front I picked up a "like new" Dana Spicer R&P and associated carrier, bearings, and shims that were in the diff it was removed from. So I'll probably still need more shims and I'm going to change out the axle seals while I'm in there.
It sounds like I know what I'm doing but I have a confession, I've never messed with gear set ups so this should be fun and challenging. I've been reading a lot and looking at some videos. I have most of the necessary tooling, large beam torque wrench, dial micrometer with mag base, digital calipers, seal and race drivers. I still need a 1/4" drive beam torque wrench which I'll buy next week. I fabbed a yoke brace for setting the preload on the pinion bearings. And I'll need to pick up some gear paste .
Here's the disassembly that went smoothly. Man gear oil stinks, the whole garage is fumed. Wifey aint diggin it while she was doing laundry.

- City
- Bedford
- State
- NH
Very cool... looking forward to what you think of the ride with the 2.72 vs. the 4.10s as this is coming up next on my list when I get the money for the front ARB locker. I was able to get the rear and the pump/compressor already and just really looking for a good deal. I am considering 4.56 vs. 4.10 with the 35's... looking forward to your trip report.
cb
cb
- City
- Wilbur by the Sea
- State
- FL
The tool
Here's the yoke brace I made for torquing the pinion nut and setting bearing preload. The idea is to let the long end press against the spring while I torque it. This will work for the rear diff when I get there . As of now I don't have any parts for the rear but the plan for the AMC 20 is also a locker diff with 4.10's and one piece axles.
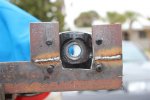
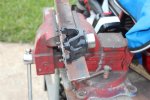
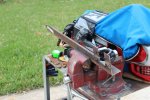
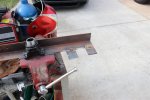
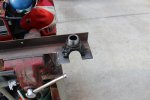
Here's the yoke brace I made for torquing the pinion nut and setting bearing preload. The idea is to let the long end press against the spring while I torque it. This will work for the rear diff when I get there . As of now I don't have any parts for the rear but the plan for the AMC 20 is also a locker diff with 4.10's and one piece axles.

- City
- BROOKLYN
- State
- NY
I made the same thing out of scrap when I did my 44 and 8.8 . I even made a case spreader. the 8.8 it uses a crush sleave for the preload and a inch pound torque wrench. Never did a amc20 yet..I'll be following your on this one.. Yea that oil is the most nastiest stuff everrrrrr
🔩🔧🔨💰
🔩🔧🔨💰
- City
- Wilbur by the Sea
- State
- FL
Will do although it may be a while until the rear gets done cause I'm looking for a deal too. 
My original Scrambler had 3.54's that I gave away during the decon phase. Wished I'd kept the rears cause I wouldn't be looking for a carrier now. The ole Jeep had 32's and with the T-5 it was a perfect all around gear except the T-5 didn't agree. When the T-176 arrived the missing overdrive was really felt. Around town and off road was great but highway wasn't happening.
Currently the 2.72 is very longwinded. I could drive around town and never leave 2nd gear. Kinda like a 3 speed and then some with the V-8 and 33's.
My original Scrambler had 3.54's that I gave away during the decon phase. Wished I'd kept the rears cause I wouldn't be looking for a carrier now. The ole Jeep had 32's and with the T-5 it was a perfect all around gear except the T-5 didn't agree. When the T-176 arrived the missing overdrive was really felt. Around town and off road was great but highway wasn't happening.
Currently the 2.72 is very longwinded. I could drive around town and never leave 2nd gear. Kinda like a 3 speed and then some with the V-8 and 33's.
- City
- Wilbur by the Sea
- State
- FL
While I wait for a few small items to arrive I've been convinced to remove the axle from the Jeep to perform the install. That way I can give it a good cleaning and make it easier during assembly. So after the weekend I'll pop it out and start the process.
- City
- Wilbur by the Sea
- State
- FL
Dana 30 cont..
I know for many of you swapping gears is old hat, but for me it's special... this is my first time
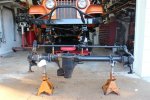
Anyway front end is out and all cleaned up and the front seals have been installed here's a few picks so far. I'm waiting for my bearing and shim set to arrive so in the interim I'm studying and looking at lots of pictures.
Out and spotless
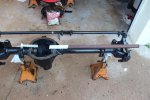
I set the seals in the inner tubes with a race driver and a "tool"
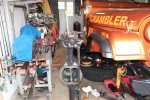
Then seated them with another "tool"
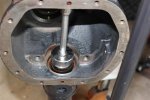
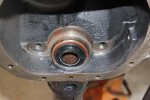
I know for many of you swapping gears is old hat, but for me it's special... this is my first time
Anyway front end is out and all cleaned up and the front seals have been installed here's a few picks so far. I'm waiting for my bearing and shim set to arrive so in the interim I'm studying and looking at lots of pictures.
Out and spotless
I set the seals in the inner tubes with a race driver and a "tool"
Then seated them with another "tool"
Last edited:
- City
- Wilbur by the Sea
- State
- FL
Next week I'm buying a press to help with bearing R&R. Also, I'll be making set up bearings from some good used bearings. I'll take pics of that along the way too. I've purchased a few tools to help with the process but it's money well spent. After the DAna 30 I still have the AMC 20 rear axle to tackle. I should be a pro by then 
- City
- Wilbur by the Sea
- State
- FL
Dana day
I squeezed in a few hours this morning on the gears. Once started the process isn't that bad. I planned on getting a press but as it's worked out so far I can put that off another week or so until I get the AMC 20 build underway.
I used a dremel with a small sanding drum and made quick work of the set-up bearings and race. A guy at work buys and sells used tools so I picked up a dial indicator and base, digital micrometer, and bearing splitter for a good deal. I purchased a nice used inch pound torque wrench from ebay. After all the reading I've done online and some good advice from a gear guru. I followed all the tips and the Dana 30 FSM I printed from online and went for it.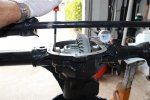
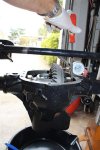
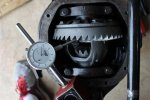
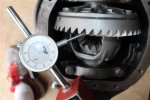
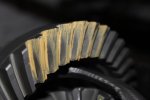
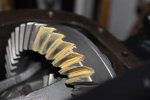
I squeezed in a few hours this morning on the gears. Once started the process isn't that bad. I planned on getting a press but as it's worked out so far I can put that off another week or so until I get the AMC 20 build underway.
I used a dremel with a small sanding drum and made quick work of the set-up bearings and race. A guy at work buys and sells used tools so I picked up a dial indicator and base, digital micrometer, and bearing splitter for a good deal. I purchased a nice used inch pound torque wrench from ebay. After all the reading I've done online and some good advice from a gear guru. I followed all the tips and the Dana 30 FSM I printed from online and went for it.