• Notice for iPhone users: DO NOT use the image size reduction option when uploading photos to the forum. This causes portrait images to post as landscape. We have added a warning to the image insert pop-up as well.

walkerhoundvm's rebuild thread

Headlight upgrades

So most of you are probably aware of the H4 headlight upgrade, along with the more important addition of relays to allow for increased power to the lights. I'm no electrician, so this was a first for me, but I do have some understanding of how electrical things are supposed to work. There seem to be a lot of products out there, including some "kits," which I had to weigh the +'s and -'s of. Probably the most popular kit can be found here: Daniel Stern Lighting kit

I chose to do a DIY kit, using parts I found on Amazon:

1. Inline fuse holder, 10awg

2. Bosch 5-pin relay

3. 5 pin relay socket

4. 10pc heat shrink tubing

Total cost, $20 and change after shipping. Next time, I'd try to find the 4-pin relays, but I think these will work for now.

Also got rid of the old enclosed bulb headlights, in favor of some affordable Autopal off of eBay from this seller: eBay autopals OK, I know they're not Cibies or Hellas or whatever. But they are cheap ($40 shipped) and easy to replace. I can't remember the last time I ever broke a headlamp, but let's just wait for the scientific results before we start criticizing...

Stock headlamps, no relays:

headlight1.jpg


Autopal headlamps, 55/60W, no relays: (this photo used nearly the same settings, but with a slightly shorter exposure, so expect that the lights are a tad bit brighter than they appear relative to the last photo)

headlight2.jpg


Autopal headlamps, 55/60W, with relays: (this photo was taken using the exact settings used for the stock set-up, no relays)

headlights3.jpg


OK, so there are the objective results. Subjectively, I estimate 2-3X as much light is coming out of these, and it's a white light. It's incredibly better.

I also had to pick up about $10 in electrical gear from HD - including split loom tubing, about 20 feet of 12g stranded wire, some basic connectors, hardware to repair the headlamp bucket, etc.

I found a great spot to mount the relays, just inside of the fresh air intake, behind the D side headlamp, using the stock holes that the intake gasket mounts to:

relays.jpg


Grounds are not dedicated and use the factory headlamp ground sites just under the fresh air intake. Other than the extra set of wires, you wouldn't even know they were in there:

fuses.jpg


forum


You'll also notice the two-barrel horn set I picked up from the scrap yard, $15 from a 80's era F-150 I mentioned above. It does for the horn what these relays and headlamps did for the lighting situation.

Final cost, somewhere in the neighborhood of $100. It was a fun project, took a weekend or so in between running for parts, watching the Giants mess the bed on Sunday, and trouble shooting a broken headlamp bucket. I'd give this upgrade a :thumbsup:
 
Last edited:
TBI installation, intake and exhaust overhaul

So in November of last year our state senators decided that northern Colorado should again be subject to emissions testing, using standards set for the Denver metro area, which are based on California's standards. We've had basic emissions testing before, about 5 years ago, but since then it's been zilch, zero, nada. So there's more than a few guys who've bought older vehicles who are now stuck with potentially failing vehicles with not much they can do about it, one of them being me.

This CJ came from Colorado's southwest, where there's nothing in the way of emissions testing or strict government in general, so it had more than a few modifications that left me out on a limb - Clifford intake manifold (with a cracked water jacket) and dual output headers, no catalytic converters, complete absence of any smog equipment, EGR, CTO, etc. Talking with the local emissions center, my only option was a TBI installation, unless I wanted to try to scrounge around for antiquated parts and hope it'd pass. I had been saving for a new tub, but now all that spare change has been spent on keeping me legal.

While I was doing it, I thought I'd replace the cracked intake manifold and go with a single output exhaust system (they're in the books as a single exhaust, so if emissions laws ever get stricter it'll be safer to keep it as close to stock as possible). I picked up a new Clifford intake and single output header package from a guy on the CJ forum selling them as new, got them installed at home (still running the carb at this point) and had a friend finish the exhaust. Got her home and pulled the carb only to find this manifold had an internal water jacket crack as well! I peaked down in the intake and saw what looks to be a factory repair job with a mesh patch. On top of that the exhaust headers had to be bent out to keep from burning into the oil pan.

Bottom line - I have zero confidence in Clifford products and would never recommend them to anyone.

So I'm carrying on with the intake out of the coolant loop yet again.

I got the TBI installed after about a weekend of slow work. No troubles really except for having to lengthen the temperature and O2 sensor lines so they could reach the sensor locations. Also used a relay to control the power to the unit, as opposed to a direct line from the fuse box. Figured since my fusebox was already junk this would save me a headache or two. Ran into some brief trouble with a fuel pump acting up, but have put about 150 miles on her since the install.

Howell sent a chip programmed to run best with the Clifford manifold, as well as a California-compliant chip. I was running with the Clifford chip, but it had been idling high for about 20min before settling down (1300 eventually down to curb @ 750). Oil pressure also seems to be high, and so far the mileage has been worse than what I was getting with the MC2150 (14.5mpg vs. 15.5 mpg), so I haven't been all that excited with the "upgrade." I switch over to the California chip tonight, so we'll see if mpg's change, but so far it seems to be idling a little lower.

Enough babbling, on to the pics:

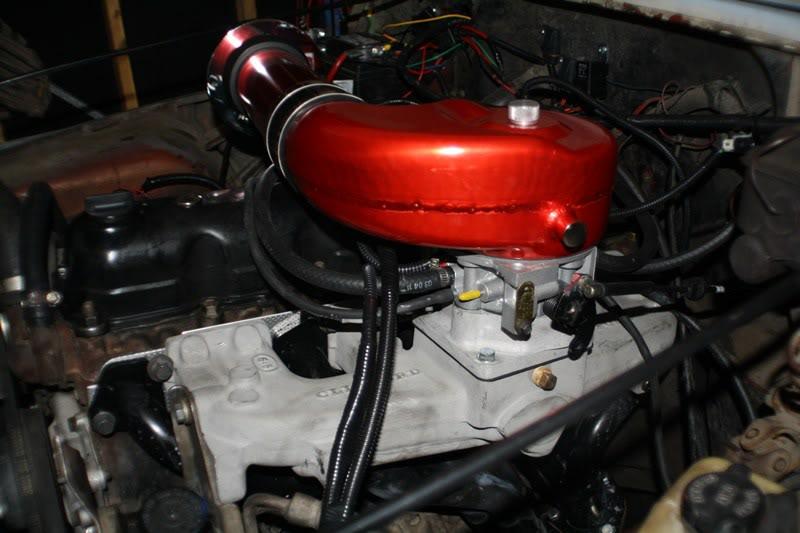
Front view of the I6. I picked up a new short ram air intake off of eBay, it looks pretty but I'm not sure if it's helping her run any better. Was hoping the collection from the passenger side of the engine might help.

engine1-1.jpg


Profile view - I was sure excited about having a cooled intake manifold, and it sure did look pretty with all the new gear in there :(

engine2-1.jpg


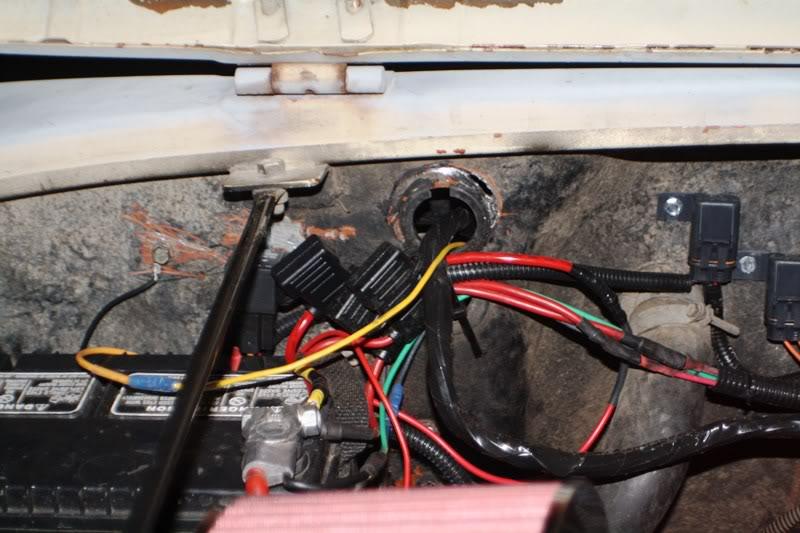
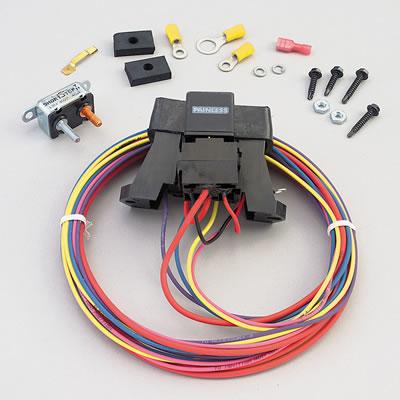
I now have a mess of fuses near the battery - for the TBI and the headlight relay modification. I picked up a Painless kit #70213 which will eventually replace this mess sometime in the coming weeks:

engine3-1.jpg


painlessfusebox-1.jpg


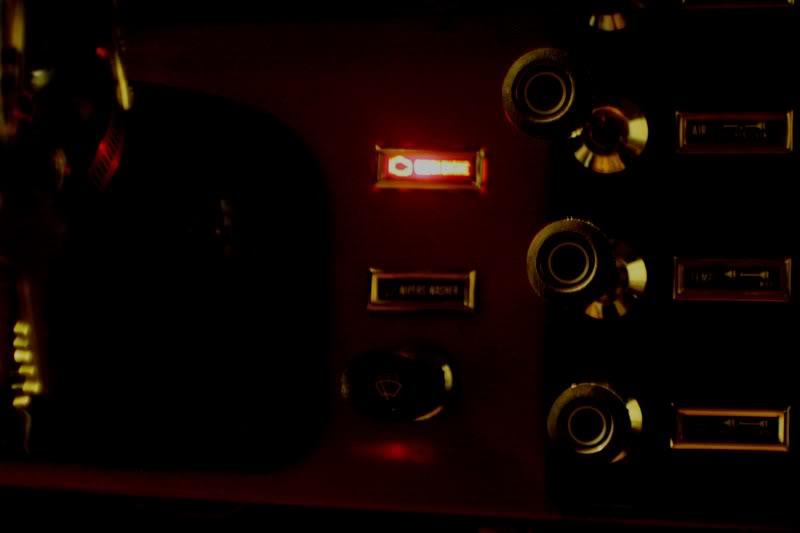
Lastly, I installed one of my very own "Check Engine" lamps. OK, it's not exactly level, because as I think I mentioned, I'm not very good at "measure twice, cut once." But it looks good otherwise, I think.

IMG_1666-1.jpg
 
bummer about the intakes being cracked, that's incredible that both would be similarly cracked like that, I dont blame you for your opinion of Clifford. If you find that you need to preheat the mixture in the intake you can find a coolant plate that goes between your Throttle Body and manifold that does more or less the same thing although not encomapassing the entire mainifold from Jegs or Summit. I had to get one for my Holley TBI set up on a 304 years ago. Thats why they run coolant through the intake anyway, to heat the manifold up so the fuel doesnt condense out.

no chance at licensing in an attainment area that is inspection exempt?
 
I'd think it might be worth rotating that air intake forward as far as you can. To my thinking (no proof at all) as you're driving, the hot air in the engine bay would end up moving back to the firewall and that side, but closer to the grille might be an improvement.

Just a thought. Sorry to hear about the manifold issues. :banghead:
 
It's been a while, and I'll be honest I had some cheating thoughts over the holidays - thought hard about buying a Jeepster to work on and restore - but in the end I realized I need to finish this project before starting with another one. That motivated me to get more work done on the Scrambler and think on whether a new tub is in my future or not.

Went down to a local restoration shop, Mike's Restoration, and talked to Mike about what he's done in the past, what he could do for me, and how much everything would cost. My real purpose was to convince him to let me come in and sweep floors in exchange for teaching me some things about restoration, which he seemed pretty receptive on. He told me I should come back in the spring/summer, and I could work on small projects like my doors, the hood, and fenders and learn how to sandblast, weld, and paint. I'm pretty excited about it!

I also talked to Jay at W-O about tubs. They're not as expensive as I had imagined, and I think in the long run that a W-O modified tub is a better option than trying to fix what I've got - too much rust and a bunch of loose seams. My goal is to save up as much as I can over the summer and pick up a tub towards the end that I can start working on in the early fall. I'm hoping to do most of the work myself to try and save as much as I can.

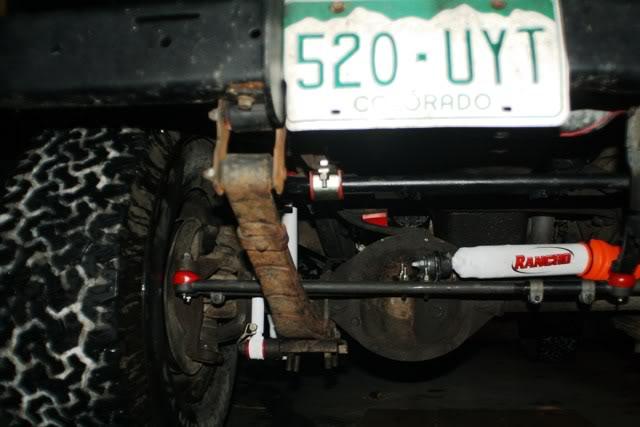
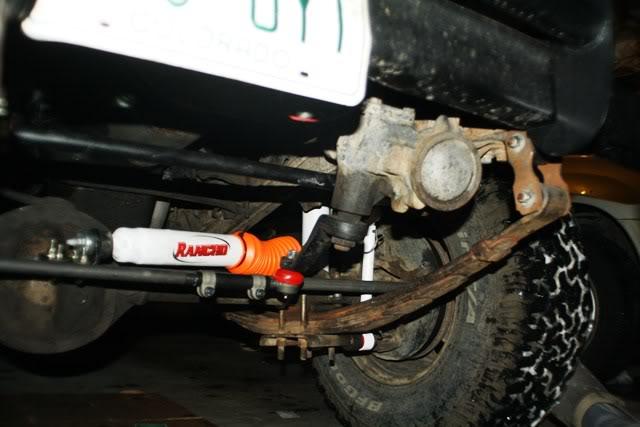
In the meantime, I made some small purchases to keep the motivation going and get geared up for a tub swap, including a set of Prothane bushings for just about everything, a new steering dampener, and what turned into a new tie rod and drag link. My intention was to put on as many of the bushings as I could now, including the sway bar bushings, the disconnect bushings, and the tie rod end bushings.

I thought the tie rod and drag link would come out easily...boy was I wrong. After a couple hours of pickle fork prying and hammering (using a trick reversing the castle nut and hammering the end out), I finally got both out but the ends were toast. I picked up a new set from Oconee Off-Road, a mixture of Rugged Ridge and Omix Ada parts, and I was pretty pleased with them when they arrived. As far as I could tell, just as beefy as what was on there before, which I have to assume was stock.

The install when pretty smoothly, the hardest part was doing the alignment. I had a board long enough, a way to set the height, and a level to make sure everything was level. I had to drop the axle and take a spin around the block, then come back in and recheck/realign, but over all it took about 3 hours to install and align. I'll recheck the alignment in 50-100 miles to make sure everything is in order.

I repainted the sway bar in black enamel, and the disconnects went from raw steel to white enamel. Also put in a Rancho steering stabilizer and picked up a set of 5 fluorescent orange boots. The rest of the boots I'll hold on to until the body swap.

Some pics of the undercarriage:

uc1-1.jpg


uc2-1.jpg


The new steering linkage has much less flex than what was in there before, so I'm thinking it was about due for a refurbish. We got about a foot of snow in this recent storm, so I won't be driving her much for a while, but I'm hoping to get her out early next week to shake things loose.

Also managed to loosen one of the brake hoses up front, and had brake fluid everywhere on the garage floor. Picked up a pair of new calipers, as the P side seemed to have a slow leak going on as it was. Plan to install those either tomorrow or sometime early next week. This'll be my first time having to bleed, so hoping it goes smoothly. It'll be good practice for an eventual brake booster upgrade at some point.
 
Last edited:
Hey Walkerhound didn't I buy some wood rails from you last year? If so they fit and look great.
 
That's great, Dennis, glad you like them! But I'm skeptical about how they look until you post some pictures ;)

While we're waiting for those, I spent some time this weekend replacing the front calipers and ran into a few problems.

1) If you've got an '81, most parts stores will sell you calipers from '82-86, they don't know any better. So make sure you know whether you've got a floating or sliding caliper, and whether you've bought the right caliper.

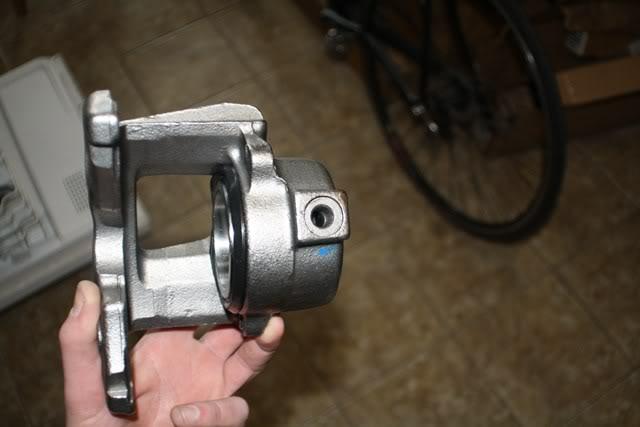
2) When you buy new calipers from the parts store, which are VERY inexpensive reman jobs, it looks like the factory(s) that do them simply take what they get in, clean very well, and throw them in the box and no one thinks of correct application. I got two different front calipers, one gold, one gunmetal, and only one worked. The problem was the mating surface for the brake hose - the gunmetal one had a ring that didn't allow the hose to seat properly (see pic) and needless to say I got brake fluid all over the place. On top of that, the gold one had US hardware, and the gunmetal one had metric. Not that I think color makes a difference, but it means to me they clean 'em, reman 'em, paint 'em and throw 'em in a box to ship.

IMG_1738-1.jpg


3) The hardware that comes with them is questionable, at best. I had to reuse my retaining screws because the ones that were in the box were junk.

Bleeding was a snap, I used a one-man bleeder kit and rebled a few times just to be sure. I used just under a quart of brake fluid.

All in all, it took me a day to do, mostly waiting on parts, running back and forth to the parts store, and cleaning the garage floor after spilling fluid all over the place. The fact that the calipers are two colors kinda bugs me, but I figure the next I dink with them, I'll paint them.
 
Rebuilt the front end using Moog, Timken, and Dana-Spicer parts as per this thread: Front axle rebuild thread and installed a Borgeson power steering wheel. Drives like a dream.

Next step: front shackles from Rugged Ridge. I had a bit of a problem with these shackles from the get-to. According to a rep, they had a mismatch on hardware and I ended up going to the store to pick up lock nuts for the greasable bolts. The rep has offered to send me replacement nuts, for what it's worth. Have not yet installed them, but here's an image:

4008.jpg


I have bushings already from the prothane bushing kit. Will attempt to install them next week after I get some more much-needed miles on the CJ since it's been down 7 out of the past 10 days.
 
Got the Rugged Ridge shackles on last week, plan to do the rears sometime soon, too. Picked up a tube of Prothane grease for the shackle greasable bushings and went to town.

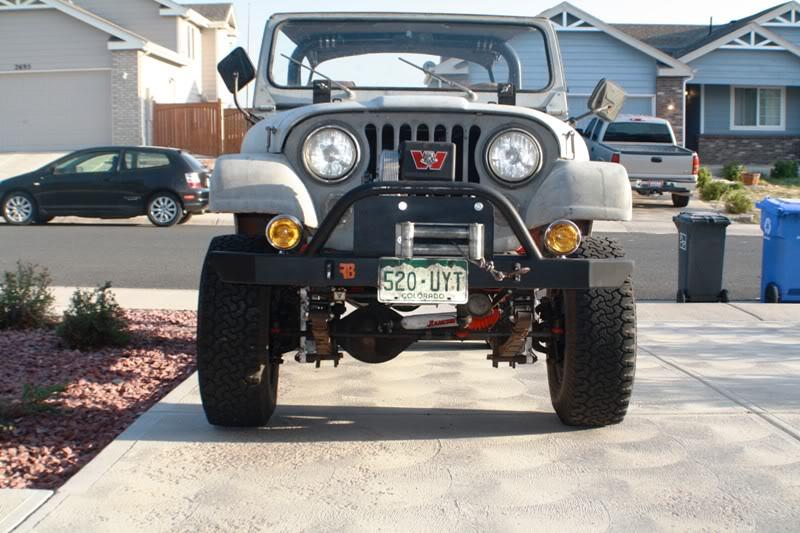
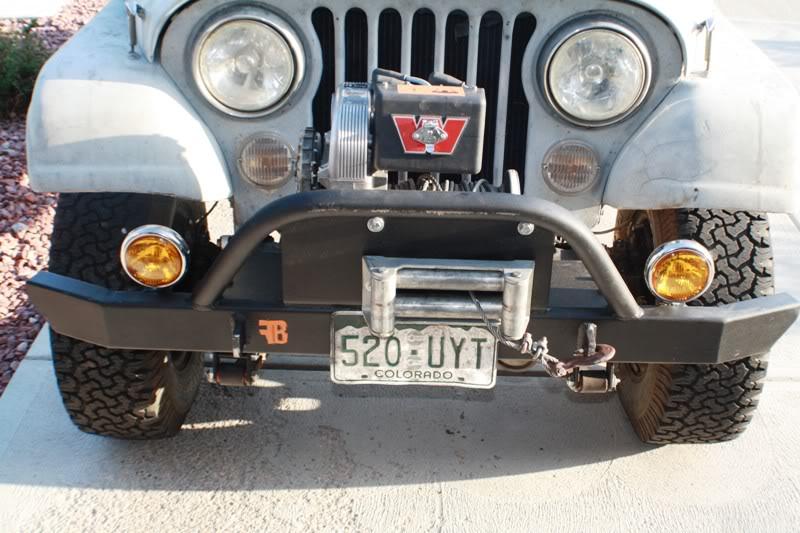
Some other progress: got all wheels and shocks painted white, new orange shock boots all around, and a new front bumper and fog lights for the Warn 8274 I picked up last month. Front bumper looks great, picked it up from a local fabricator: http://fessybuilt.com; the plan is to have him make a rear bumper with a swing-away tire carrier, hi-lift and jerry can mount this coming month. The fogs are retro chromed amber lights I got off of eBay and are a really nice touch: eBay amber fogs.

I had the bumper fabricator add some down plates for the outer side of the frame, and I really had to beat on them to get them to flair out enough to mate with the frame. Now she needs some touch-up paint :)

F1-1.jpg


F2-1.jpg


S1-1.jpg
 
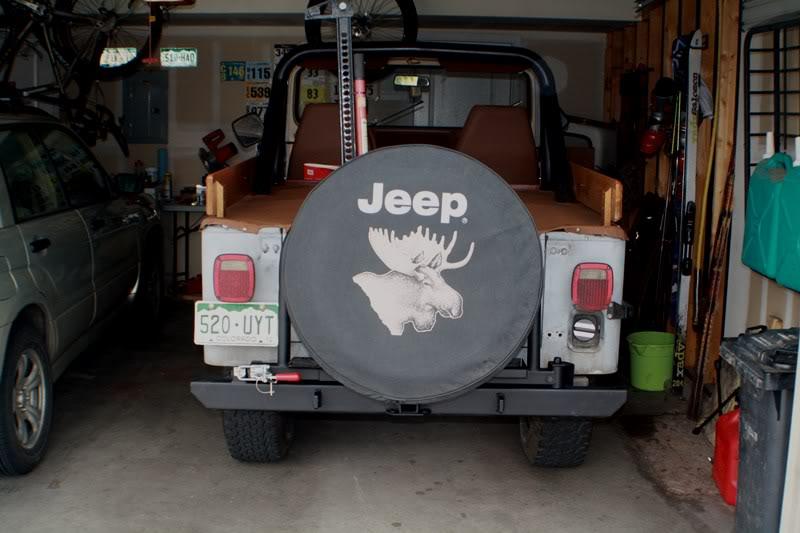
After a little bit of a wait, I picked up a rear bumper from fessybuilt.com and installed it this weekend. Still have to find some bolts to secure it to the bottom of the frame, but like it so far:

IMG_1908-1.jpg
 
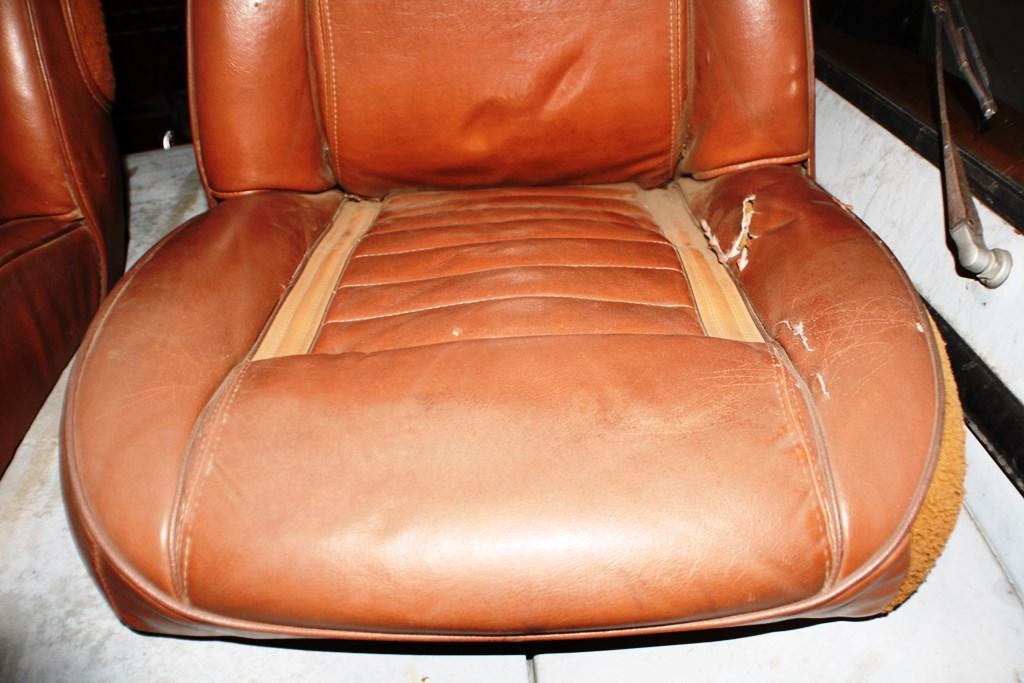
Some progress on this since last summer: I've decided to throw a bunch of Laredo parts at this until I can work on the tub. So far I've gotten an OEM clock and tach, an OEM Laredo dash, nutmeg Laredo seats, nutmeg dash pad, and nutmeg grab bar. The seats needed some restoration; the passenger was in good shape but the driver side was in typically rough condition.

IMG_2359_zps60e7775f-1.jpg


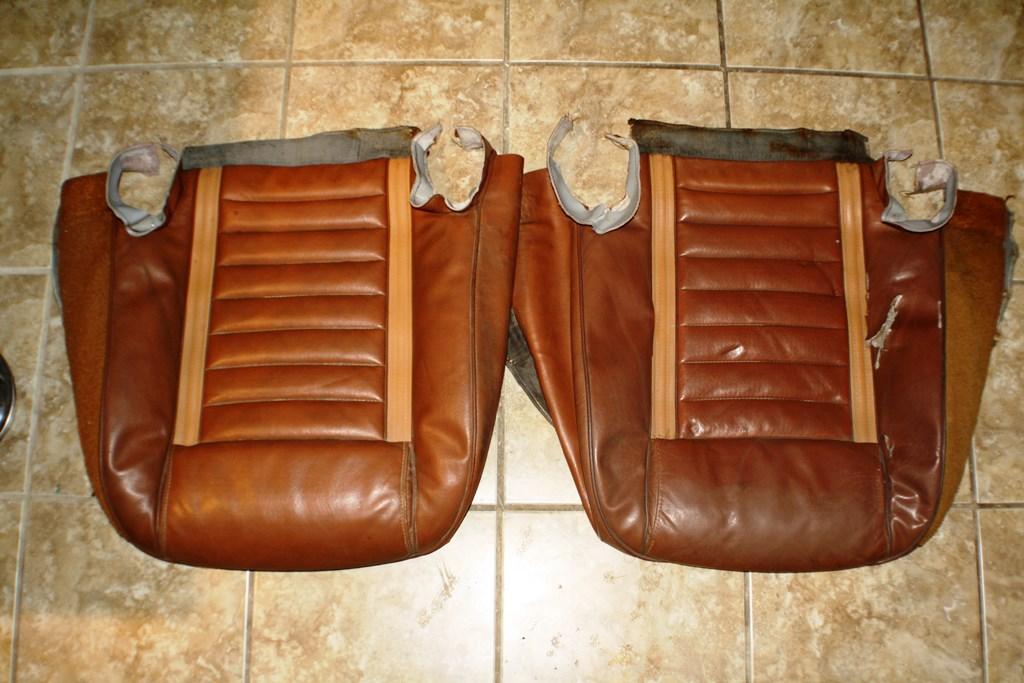
Getting the bottoms off was fairly straightforward, I ended up taking an angle grinder to all of the hog rings and carefully cut them off to get the seat bottoms removed.

IMG_2363_zps741e3a22-1.jpg


Once the bottoms were off, I ordered up some seat bottoms from George (CJLaredo on eBay), which were pricey but once they got in, I was certain they were worth every cent. A lot of work went into these seat covers, I can't believe he doesn't charge more. Feel free to use this post as a "How To" for installing either new or replacement seat skins. George recommends that this be done by a professional. Whenever I hear that, I remind myself that I am a professional :) The most difficult part of installation is ringing the seat butt (two strips under the yellow Laredo stripes) to stays in the seat frame. Patience, sweat and blood was involved - sorry no pictures but I found it a little easier to semi-close the hog rings, then set them, then clamp them.

Anyway, things you'll need:
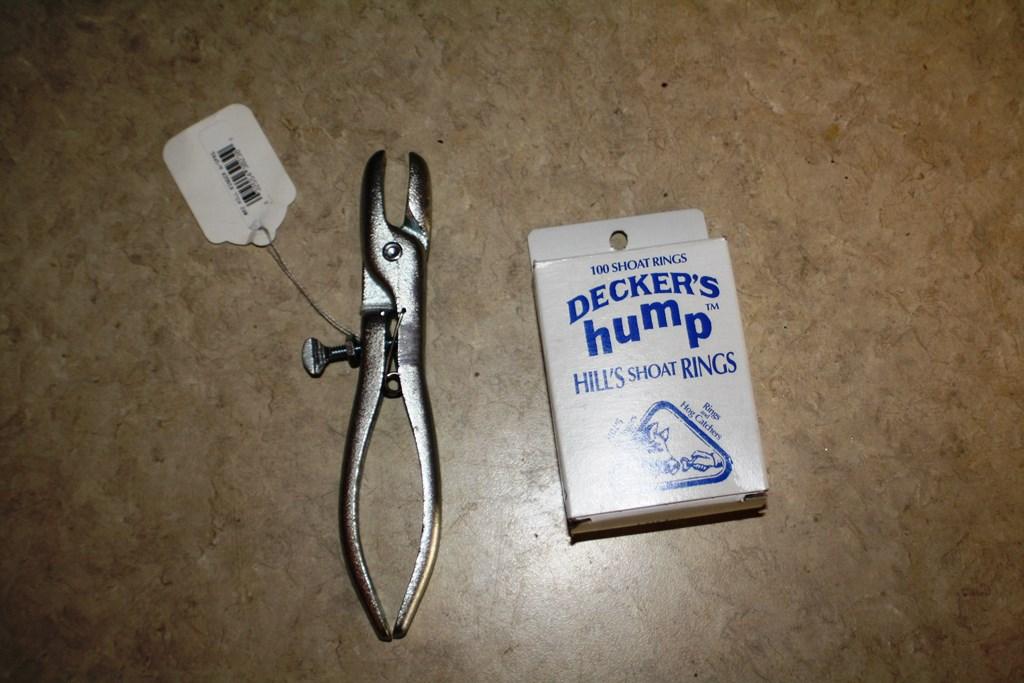
1. Hog rings and clamp, about $15 at my local Ace hardware

IMG_2364_zpsec0b6391-1.jpg


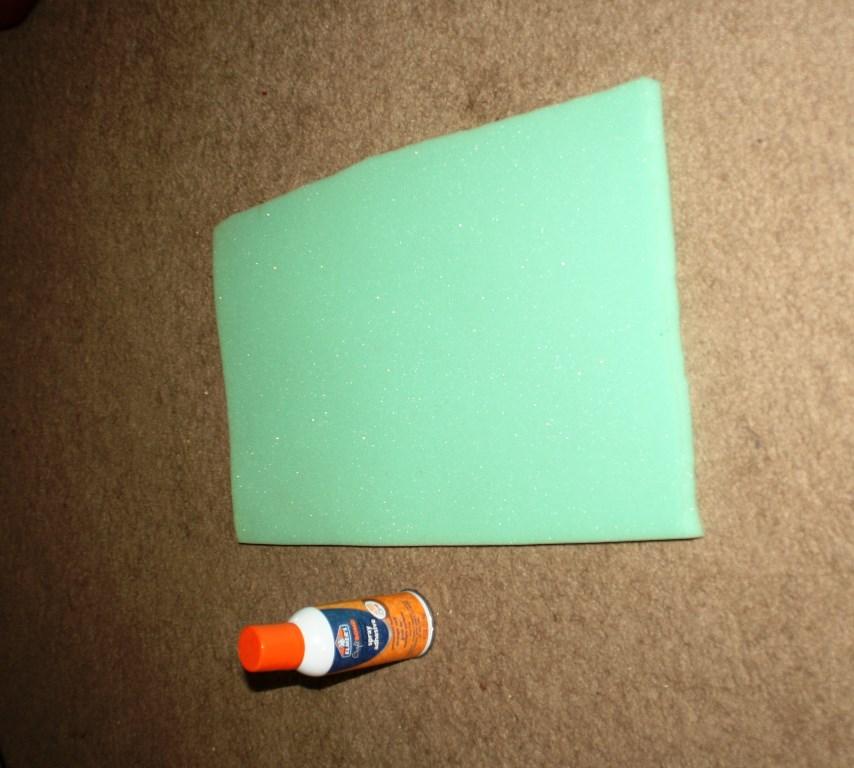
2. High density foam and tachy spray. I used about 2yds of 1/2" foam, which ran about $10, while the spray ran another $10.

IMG_2379_zps0aea022f-1.jpg


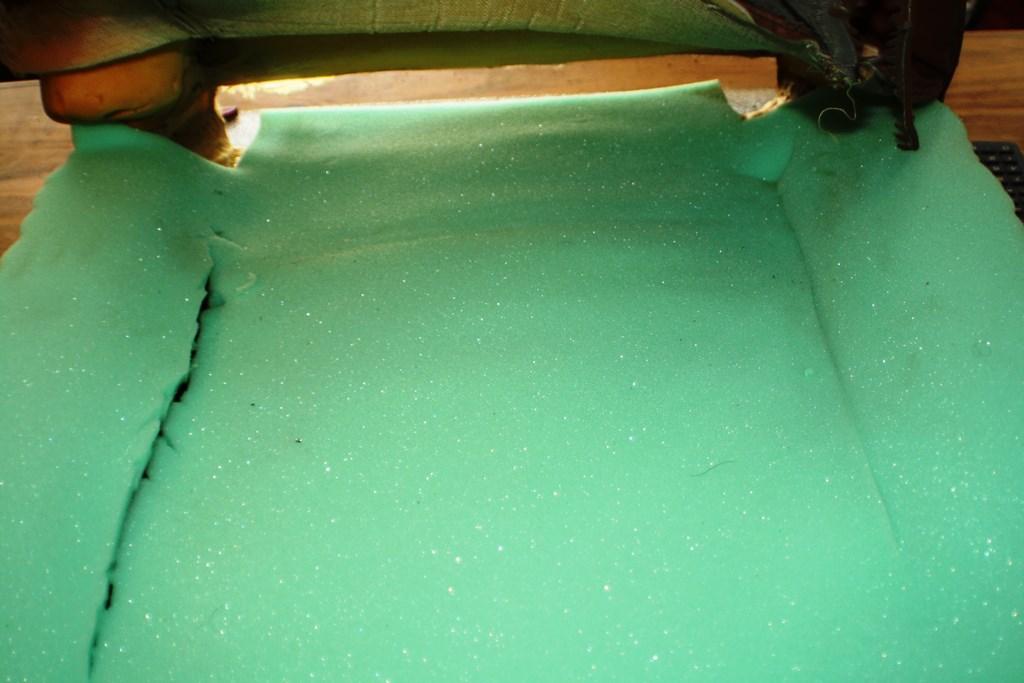
I sprayed tachy glue on both the foam and the seat cushion, then applied and allowed to dry. I only did the seat top, not the sides or seat back.

IMG_2376_zps9066ca8d-1.jpg


3. Non-chlorinated brake cleaner and shop towels to clean the seat back skin: $6.

Next, I stapled the seat back to the rear of the seat, same way it came off, then the seat butt strips to the frame. After that, I just went around and re-stapled the seat cover as it was stapled before I pulled the lower skins.

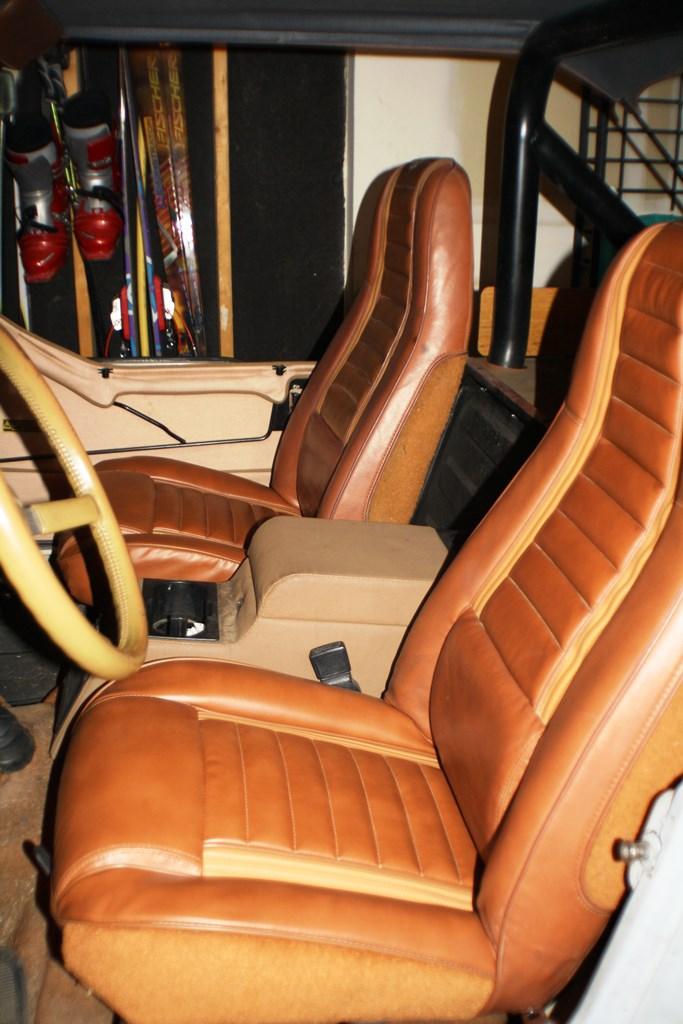
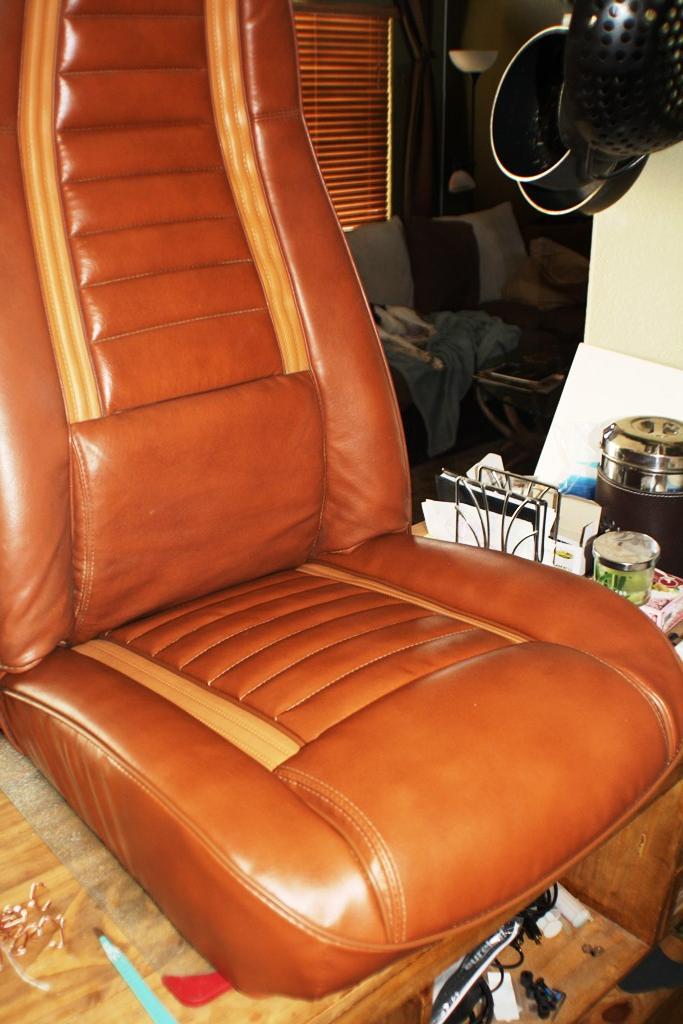
Here's a photo of the after:

IMG_2377_zpsa268e79e-1.jpg


I'm very happy with the results. All I have to do next is chase the seat bracket threads to make sure the brackets will install without a hitch (several were frozen rusted on when I removed the bracket). Then install!

As I mentioned, George recommends this be done by a professional (any idea what that would cost - at least $100, I'm guessing?), but he does include instructions that are fairly easy to follow, and if you pay attention to how things are attached when you pull the skins, it's easy to retrace your steps when you install.
 
Last edited:
Durn nice looking. I've been debating on whether to buy a pair of the lowers for the future, might just do it now. Thanks.
 
I would totally recommend it, Dave. You definitely get your money's worth, and if you can do the install yourself you'll save yourself some coin on top of it. One of the better outcomes that I sorta mentioned was that I was able to swap the driver and passenger seats by using the opposite skins. The driver seat was in pretty good shape, but the frame was a little bent.

Call him directly for a 5% discount when you do order.
 
Back
Top