• Notice for iPhone users: DO NOT use the image size reduction option when uploading photos to the forum. This causes portrait images to post as landscape. We have added a warning to the image insert pop-up as well.

Retitled: 83 Scrambler resto-mod finally gaining momentum

Awesome, sorry for the OT, but looks like it was totally worth it ;)

no worries.. nice to have a chance to show off the wife and her car for a change.. she's taken an interest in the Q7 SUV model lately and we're starting to look for something with 7 seats.. I like the TDI option but the price.. ouch! :eek:
 
no worries.. nice to have a chance to show off the wife and her car for a change.. she's taken an interest in the Q7 SUV model lately and we're starting to look for something with 7 seats.. I like the TDI option but the price.. ouch! :eek:

I was actually going to get that A7 when it came out but the tires cost thing turned my nose on that idea. Actually bought as a daily driver the Yukon Denali AWD (short one)....which was good bit cheaper and it drives great. It is an 07 and now has 90K miles on it and I love driving it for a daily driver...very comfortable....and the tires are $800 and last for 60K miles.

Jeep looks great...keep the post coming. Also...if you could post pictures of the CJ factory fender braces...I would be most appreciative...as mine are gone and I need to fabricate something to go in its place. Thanks, CH
 
Also...if you could post pictures of the CJ factory fender braces...I would be most appreciative...as mine are gone and I need to fabricate something to go in its place. Thanks, CH

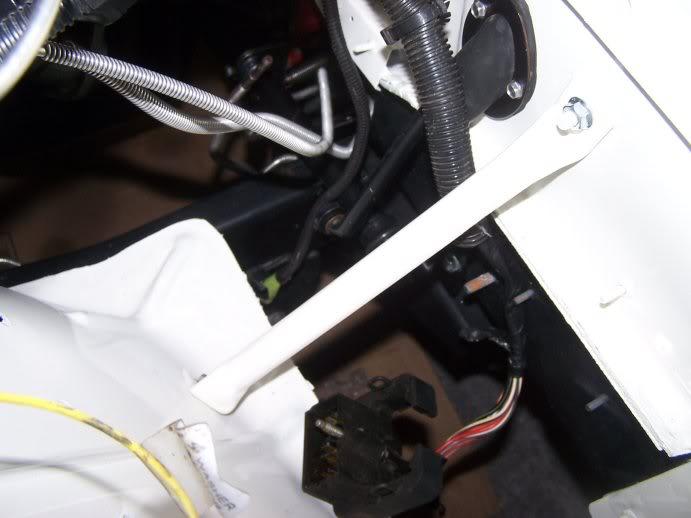
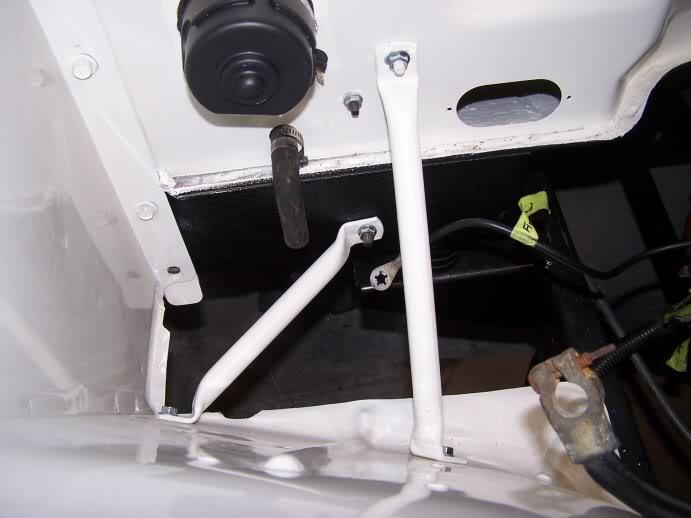
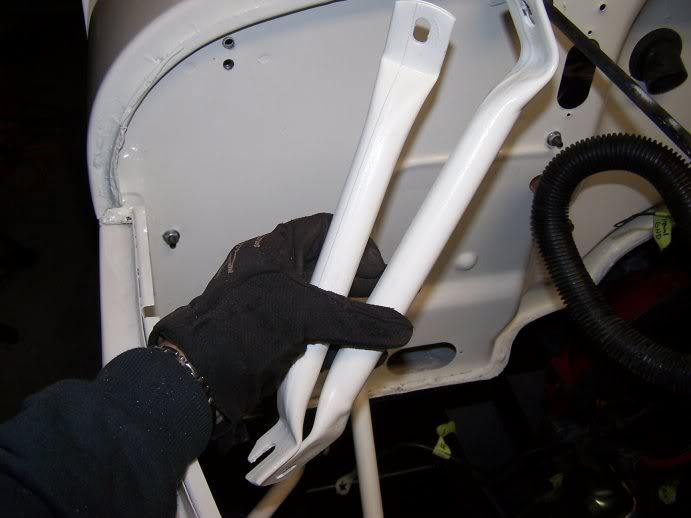
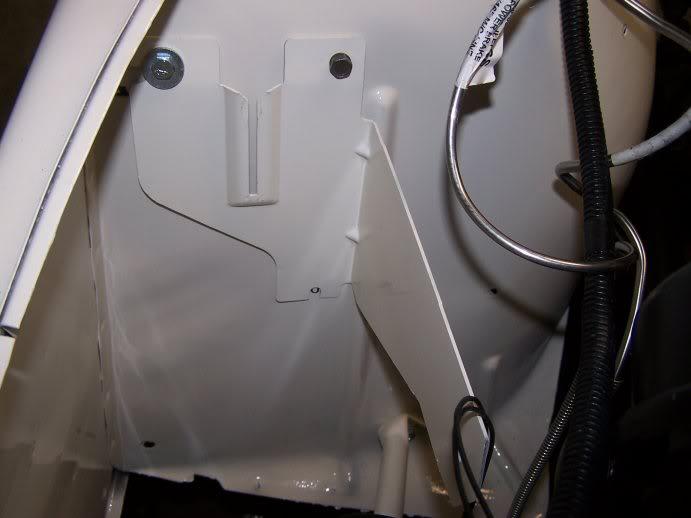
here's a few shots of the CJ factory braces... so far I've ended up using three of the total five, as my YJ battery tray is not an exact replacement, and two of the original five on the CJ supported the tray.. they may fit, but I have not yet reinstalled the tray..

here's the DS brace:
100_3313-1.jpg


here are the PS lower braces:
100_3314-1.jpg


here are the two for the battery tray that I haven't yet installed
100_3315-1.jpg
 
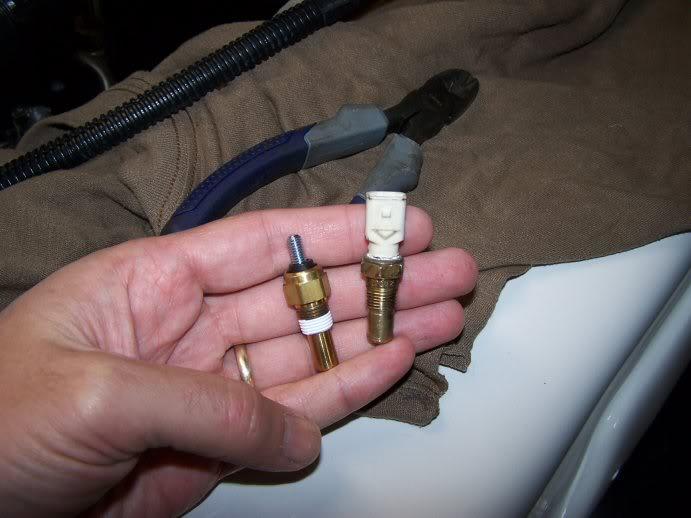
a few sending units to use the original CJ gauges:

water temp sending unit (old YJ version on the right, CJ replacement on left)
100_3311-1.jpg


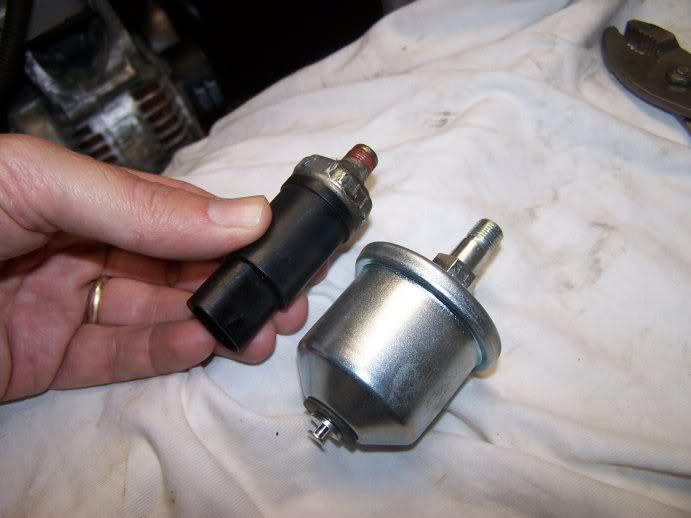
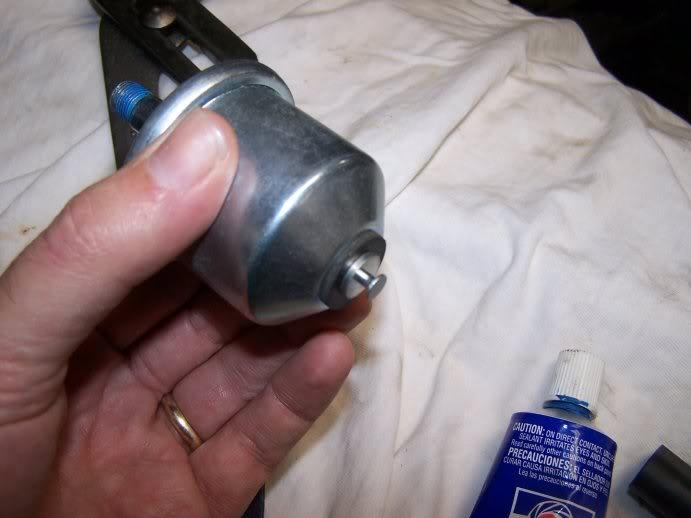
oil pressure sending units, YJ on left, CJ on right.. I don't recall the one on my CJ7 being this size/shape, but this was the local parts store replacement item.. I'm not sure what kind of connector goes on this thing?
100_3316-1.jpg

100_3317-1.jpg
 
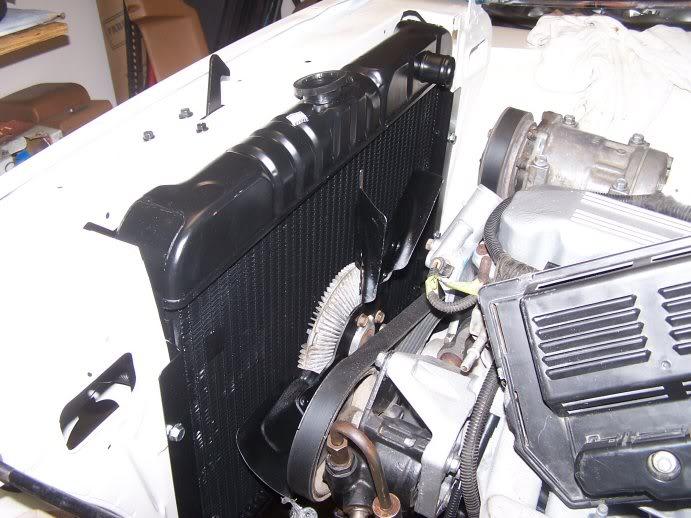
had my old radiator tested at a good local radiator shop before I installed.. and it failed in at least four ways so... replacement radiator installed:
100_3312-1.jpg


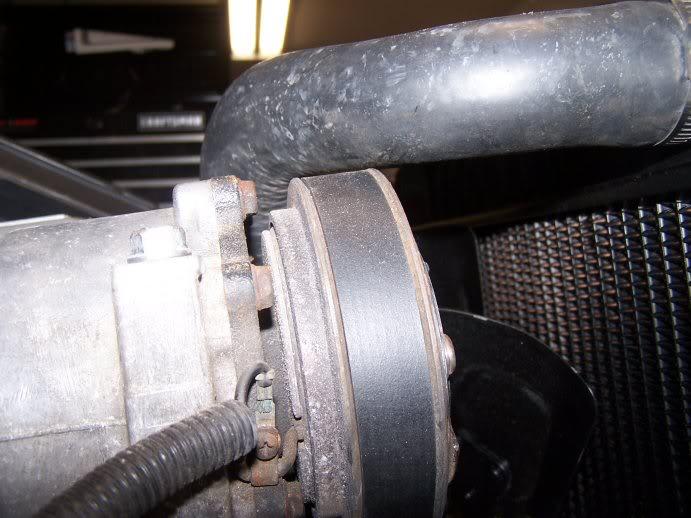
the orginal CJ hoses do fit, but the clearance on the YJ A/C compressor pulley is EXTREMELY close (looks like it's touching here but there's probably a 3/16 inch clearance.. I messed around with twisting/tightening it for a few minutes but never really acheived better clearance.. this concerns me because if the motor twists under torque, I can see this pulley rubbing on the hose.. I need to check the YJ replacement at a local store to see if it's different..
100_3319-1.jpg


I pulled that mesh grill out from the backside of the grille because it was (slightly) interfering with the hood release.. I'd still like to get it installed but.. project for another day..

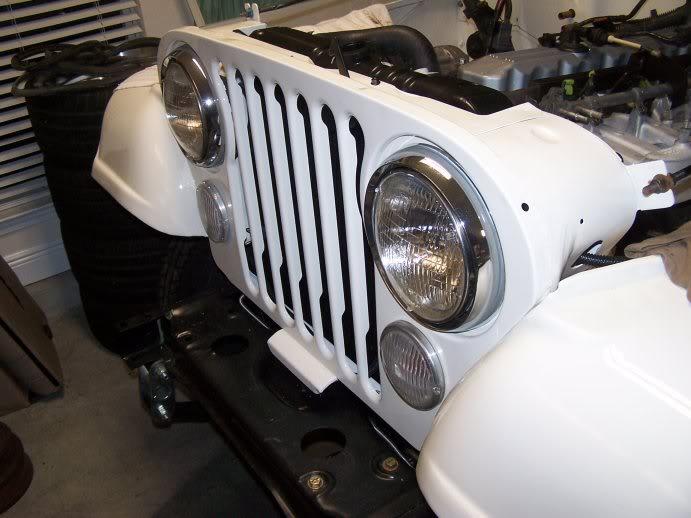
polished and installed my headlight rings and headlights only to discover one of the rings is broken (the little tab that secures it to the top is falling off, so it's only secured right now by the lower screw)..

and my two lower signal/running lights look like a bag of arse.. and one is cracked completely.. add that to the list of "fix later".. maybe with a complete light upgrade package..
100_3323-1.jpg


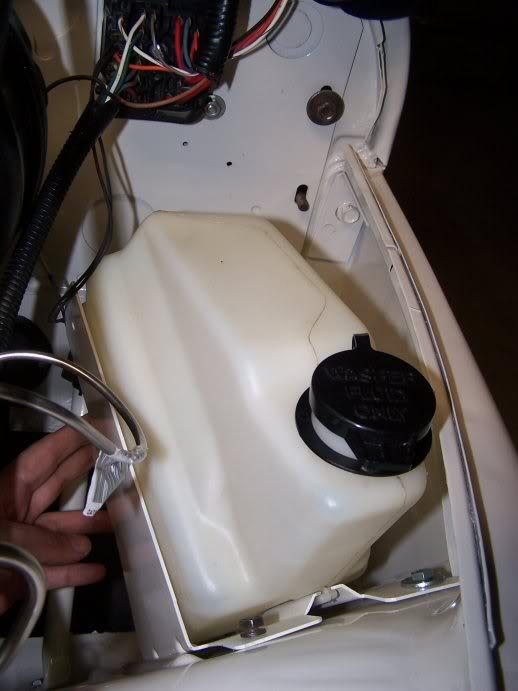
I found that the YJ washer bottle braces matches up to two of three existing holes on the CJ DS fender, so I'll drill a new one in the brace to mount it:
100_3321-1.jpg


I put the CJ washer motor on the YJ bottle and dry-fitted it (to see if the charcoal cansiter and anything else would be affected).. seems as though it's going to work fine
100_3322-1.jpg


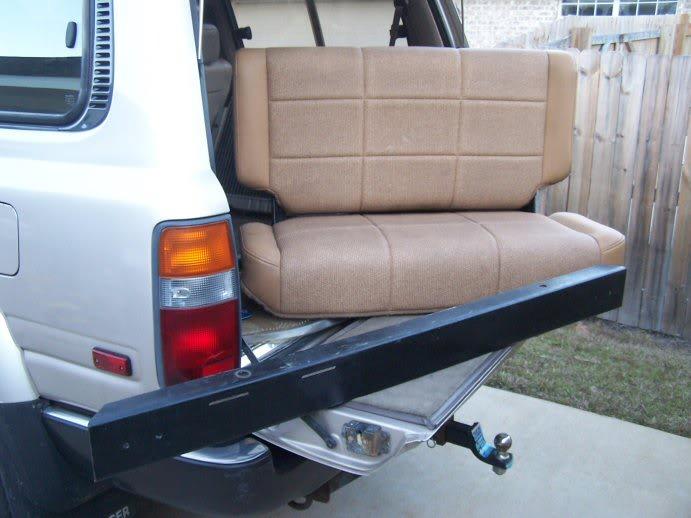
local CL score.. YJ front bumper (more on that) and a fold/tumble rear seat in great shape
100_3308-1.jpg


anyone have a set of fold/tumble seat mounts (the ones that go under the seat) they want to sell at a member rate? :)
 
Last edited:
will a YJ bumper fit on a CJ?

the answer is "yes", a YJ bumper can be retro-fitted to a CJ, but it requires some minor drilling and grinding

my old (bent and rusted) chrome bumper on the right, and the new (to me) YJ bumper on the left (in my preference: black).. note that the mounting holes on the CJ bumper, and the little "cut outs" along the back edge (you're looking at the bottom of each bumper) are inboard of those on the YJ (due to the YJ's wider frame specs).. otherwise the size and shape of the bumpers are nearly identical

100_3324-1.jpg


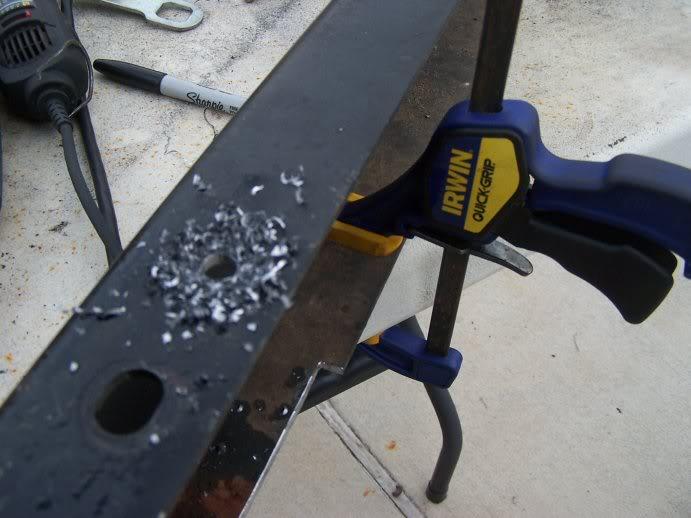
measured up and drilled four new mounting bolt holes, and then used my angle grinder, a cutting wheel, and then my trusty dremel to make/clean up some new cut-outs on the bottom edge (the cutouts are there to clear the front spring shackes under the very forward frame rails)
100_3325-1.jpg


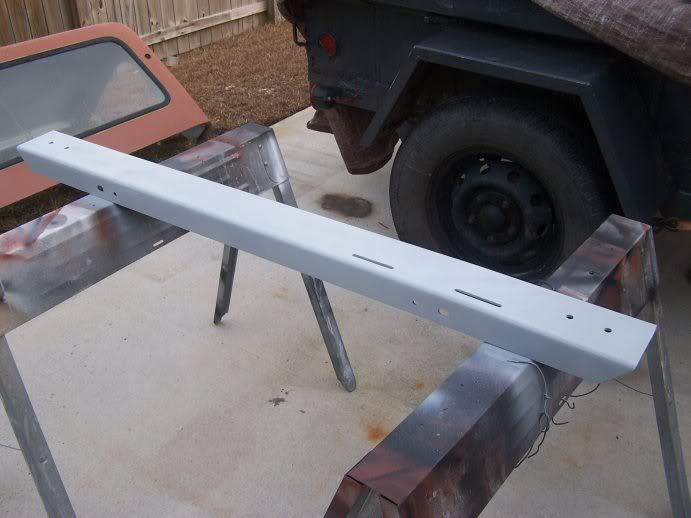
then sanded, cleaned, and primed:
100_3326-1.jpg


plan is to base-coat today and then Duplicolor bedline it to match my other exterior accessories (tire carrier, side steps, rear bumper, etc)
 
mounted my (new) windsheild and gasket and was pretty happy that they all fit together nicely, as these are new replacement parts from Qtec.. I was a little wary about how far off their specs might be, but it fit with no problems
100_3327-1.jpg


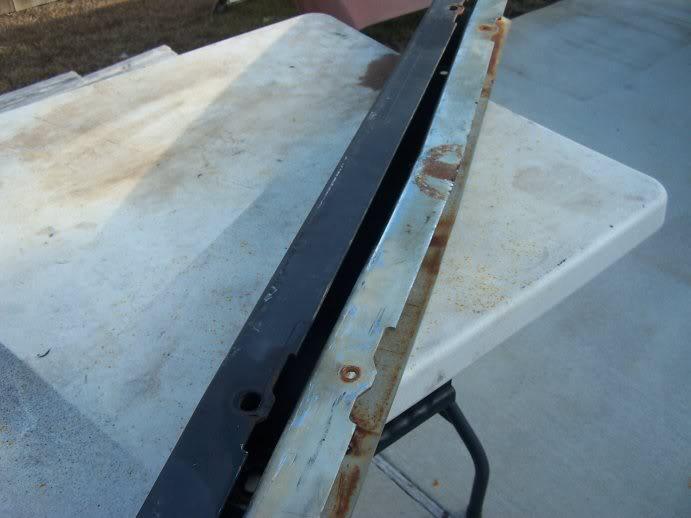
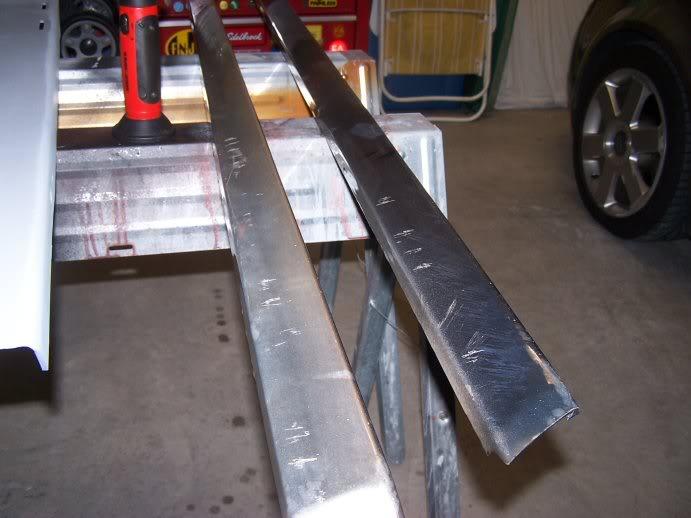
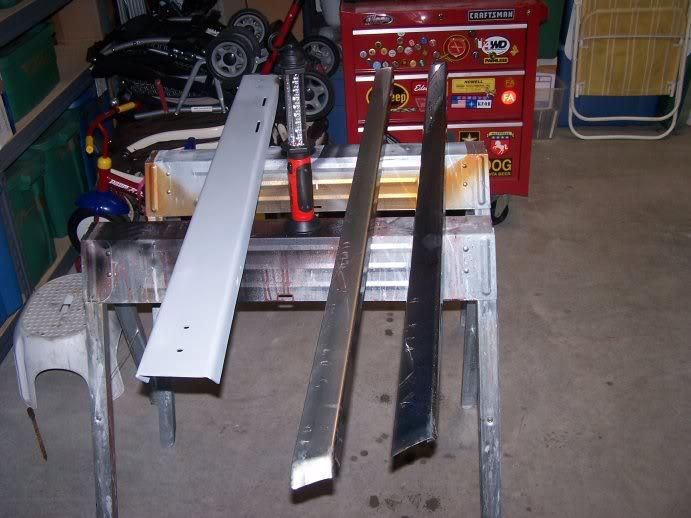
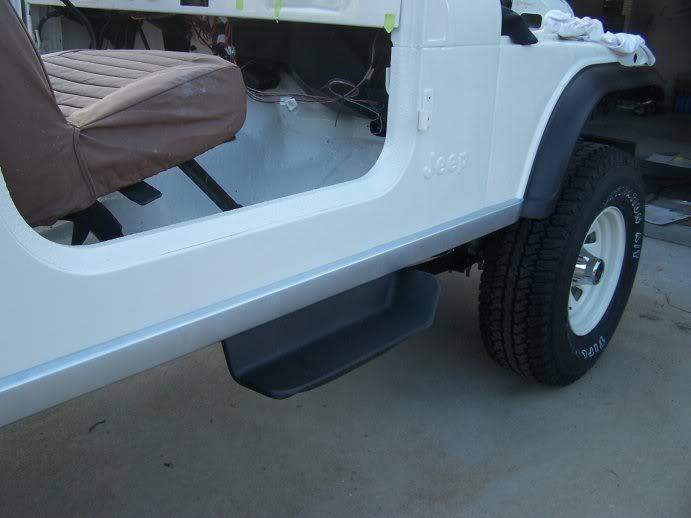
pulled my rocker guards out of storage and cleaned them up (these pics are AFTER the cleaning).. I was hoping they'd clean up and I'd just re-install them, but they look pretty bad, so the plan for today is to prime, sand, and then shoot them with some Duplicolor silver wheel paint
100_3328-1.jpg

100_3329-1.jpg
 
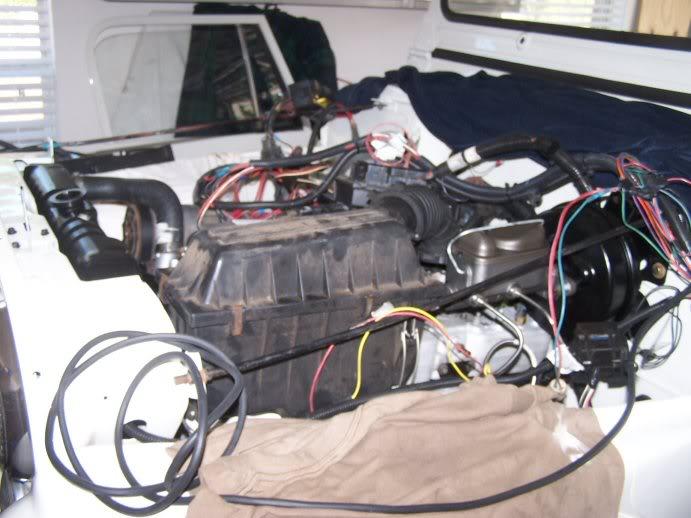
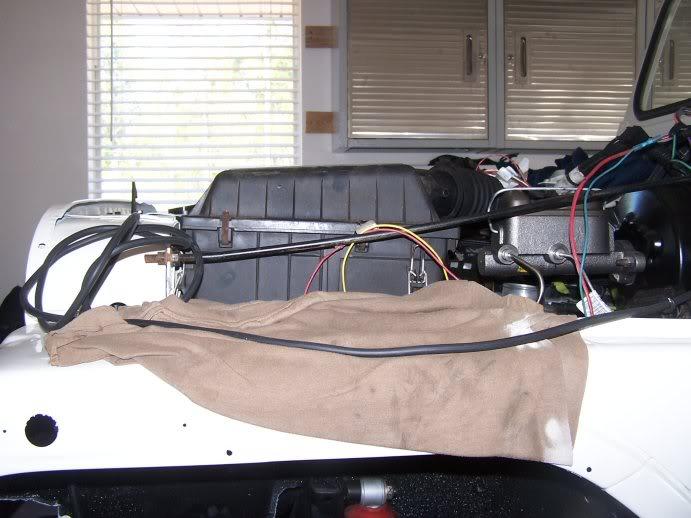
I was planning on using the YJ factory air intake, but I haven't been able to contort it into the engine bay in such a fashion that I think it will fit.. here you can see it sits a bit high and I don't think the hood is going to close over it, and even if it did, it's basically resting between the intake plenum and the fenders.. I don't have the YJ anymore to look at it, but the extra frame width on the YJ must make for some better engine compartment room... so, I'm going to have to fab up some kind of air intake... too bad, cuz I liked the factory look of the YJ kit
100_3331-1.jpg

100_3330-1.jpg


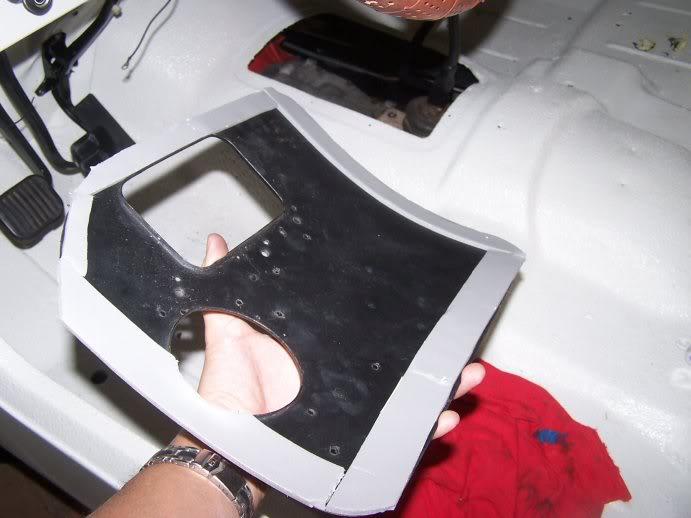
I also intalled my (holey) original trans shifter cover over my two repainted shifters last night... I need to replace this once I come across a better one... add it to the "fix later" list!
100_3332-1.jpg
 
Last edited:
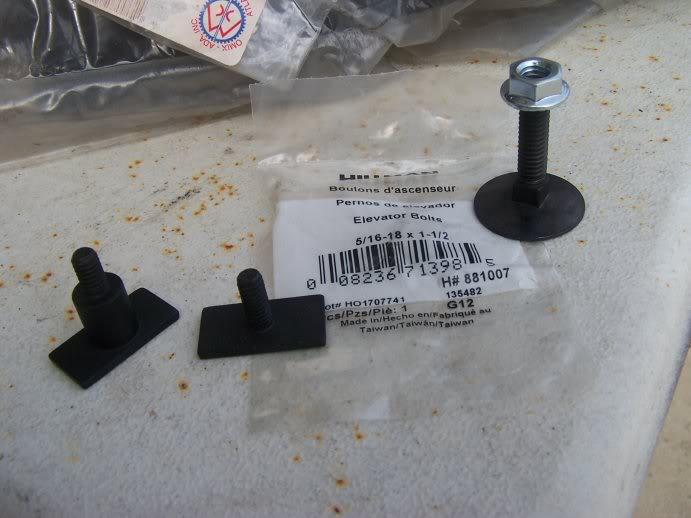
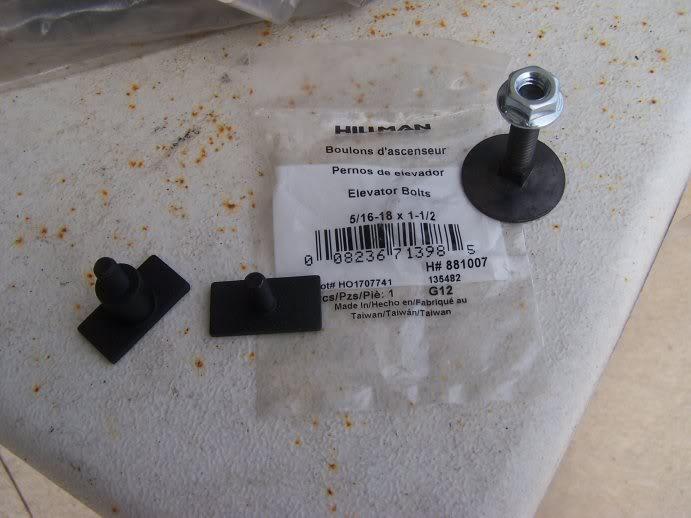
I painted the factory rocker trim last night, and also painted the little bolts that come with it to preserve them.. at which point I realized there are two different types (one is the flat square hed with just a threaded bolt, and the other six per side have the fatter bushing at the bottom of the threaded bolt).. see the two types below here...

100_3333-1.jpg


the one without the fat lower part goes to the very forward mounting hole, which is the only one on the fender, which is slightly wider because of the steel fender trim, and therefore has no bushing at the bottom..

in any event, I was short one, and found an "elevator bolt" at Lowes hardware aisle that's the exact outer dimensions as the square flat bolt head on the factory bolts, and slides right into the rocker guard.. it is ROUND, so it doen't provide the counter-rotational torque of the square head once it's seated, but I was able to hand tighten it and use it.. .90 cent solution, and local ;)
100_3334-1.jpg
 
painting my hard top

I don't have a good representative photo, but my original hard top in the medium brown/tan color looked terrible.. as I'm running out of time before I move, I debated about doing anything with it 'til later... but decided (in lieu of an actual restoration), to give this a shot..

the top is flaking, chipped, faded, boogered up with years of old gasket material and silicone, but otherwise solid.. here's a pic after wash #1 with some Simple Green
100_3335-1.jpg


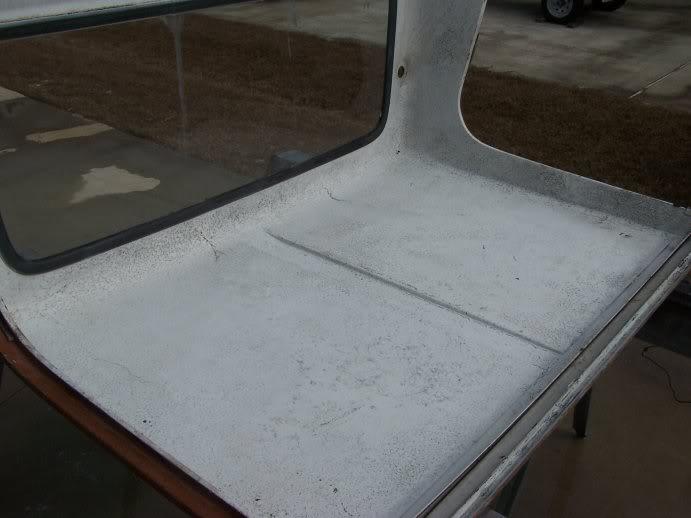
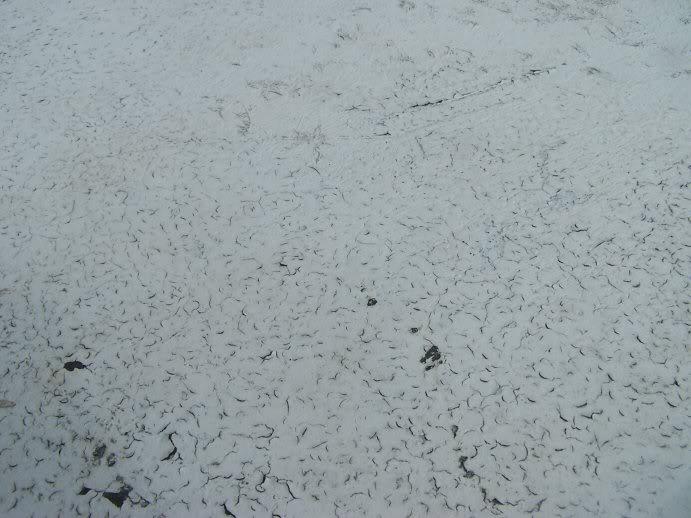
the inside is actually worse: the fiberglas woven material is showing through, and the paint looked terrible and dirty, and PO(s) had done some no-mask spray paint jobs in there so.. here's some before shots including a close-up:
100_3336-1.jpg

100_3337-1.jpg


I don't have any "after" shots of the inside, but all I did was SimpleGreen it, rinsie and blow it out with my air compressor, and then spray bomb it with some rustoleum white semi gloss.. I only had (most of) one can of paint, so I did a very light top coat to even out the color a bit and cover up the stains.. what the inside really needs is probably a skim coat of bondo, a good sand, and then a better paint job.. and maybe a carpet kit a'la Stu Olson's website DIY.. more "for later" jobs!

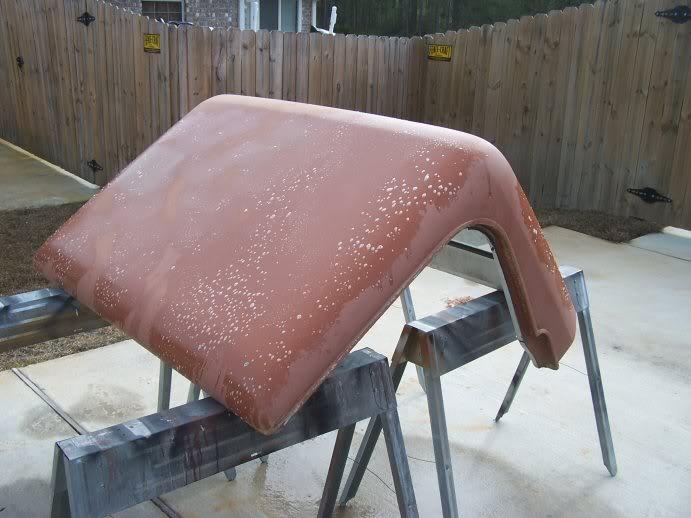
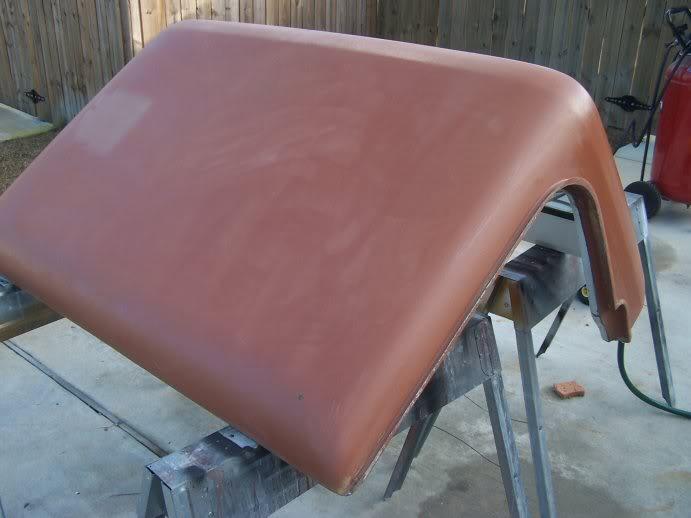
on the outside, I rinsed and blow-dried it, then did about three wipe downs with some acetone (which was mostly just pulling off the old original paint/dye).. here's after the acetone:
100_3347-1.jpg

and then started my 15$ solution:
this is one coat (will probably do three total) of a Valspar (yes, that's exterior home paint from Lowes) product called "Duramax", which is latex, but reportedly their toughtest finish in a color called "Cowboy Suede".. sounds ghey, but the color was about DEAD ON for the factory tan top.. I used a 2 inch nap roller for the main body and a 1 inch foam brush to cut in the edges..

100_3348-1.jpg


I can see some streaks/uneven paint coverage from the first coat, but the nap of the roller left a good textured finish (I was a bit afraid at first 'cuz it had THOUSANDS of air bubbles in it, but they all settled out), and one pretty good coat took less than 1/3 of the quart of paint that I bought... super easy to apply, not very messy (easy clean up), and the actual paint job only took about ten minutes.. the longest part of the whole day was letting the top air dry after I rinsed it, but I was working on other stuff at the same time (see below)

I'll do at least one, probably two, more coats and then install it.... and report back at a later day on how it holds up.. if it doesn't work out, not a big deal because I (a) plan to go with a full length top to replace this, and (b) it's a simple repaint with something else later if this doesn't work, and the top really needs a full resto anyway ;)

I also have a nearly un-attached metal strip on the winsheild edge of the hard top and need to figure out how to reattach it... I bought a rivet gun kit today, but have never used one before, and am afraid of damaging the fibreglass even worse :confused:

I'll have to do some online research and see what I can come up with

 
Last edited:
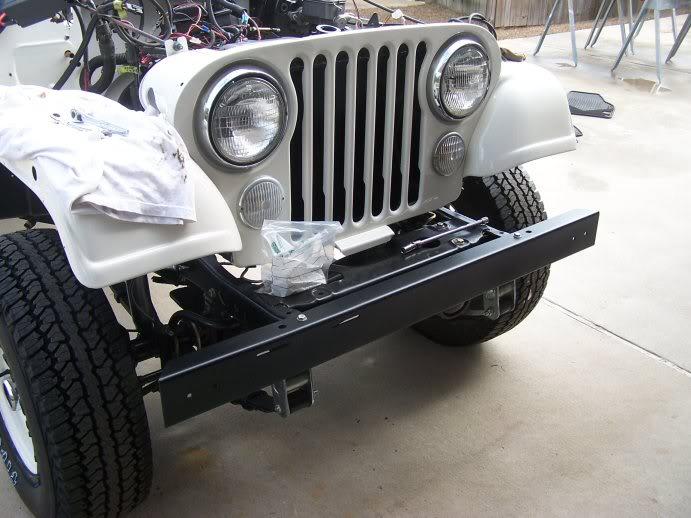
got my front (yj) bumper finished in paint last night and did the Duplicolor bedliner finish on it today, and then mounted it.. the winch is soon to follow ;)
100_3338-1.jpg


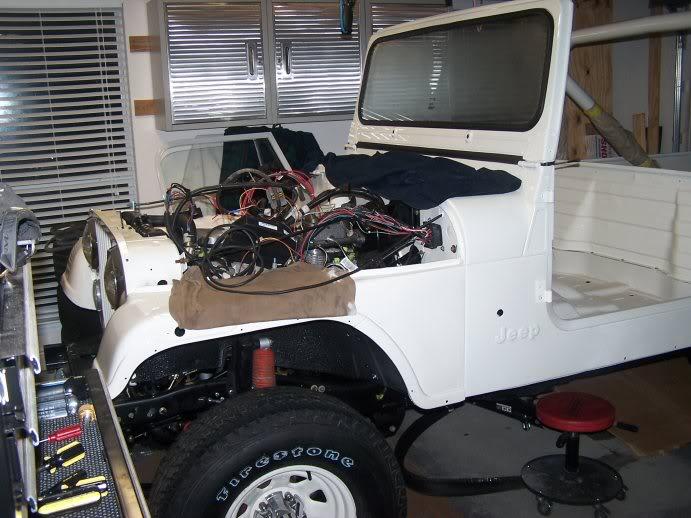
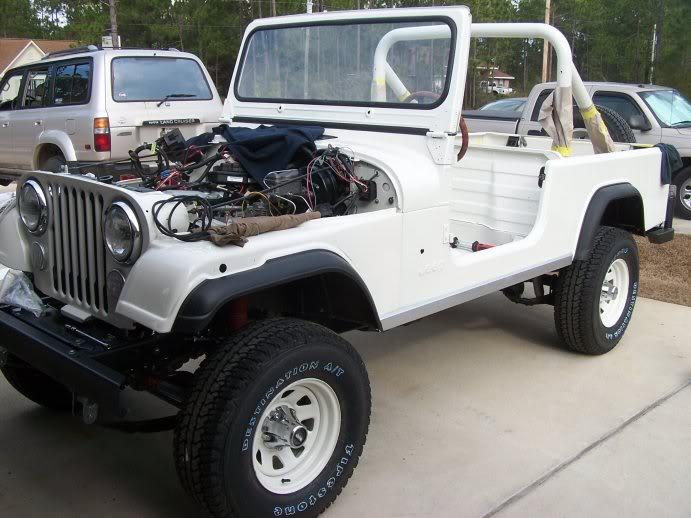
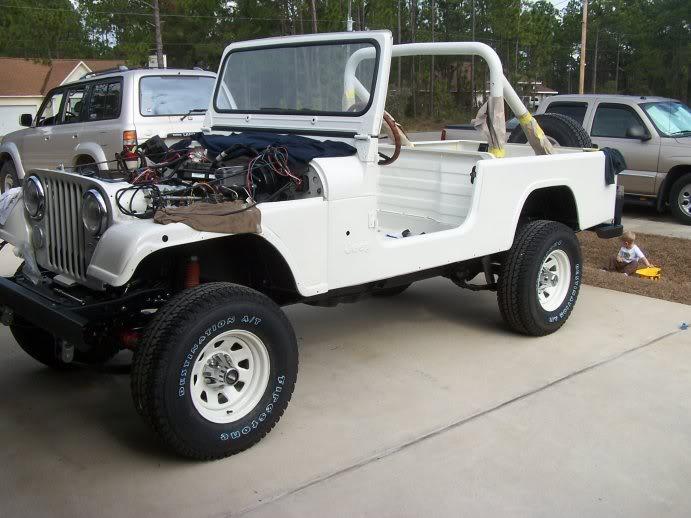
this is the first time I've seen the truck out of the garage since I put the tub on it.. VERY excited about how it's looking ;)
100_3339-1.jpg


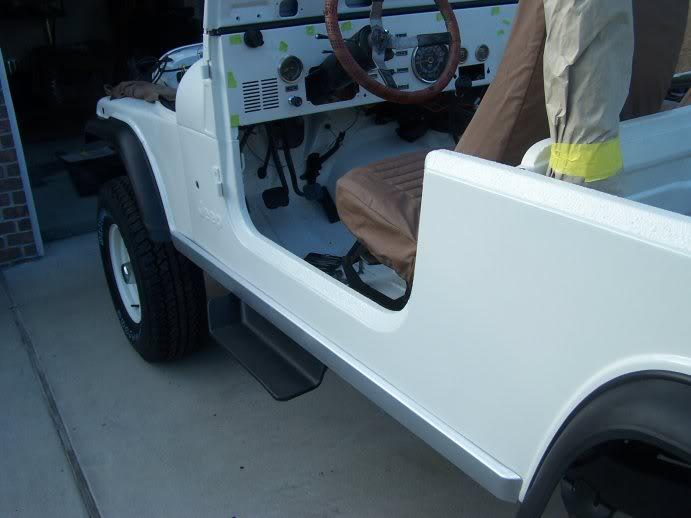
put on my newly painted rocker guards and some NIB fender flares I bought off a forum member here :thumbsup: they really do make for a more finished look but, on that note, is there anything more annoying to install than these things? I've done it several times and those rubber body nuts are just a PITA for a simple bolt-on...
100_3340-1.jpg
 
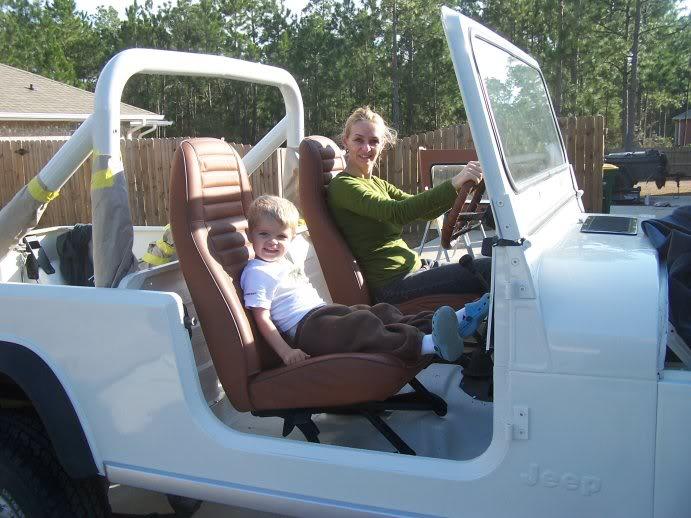
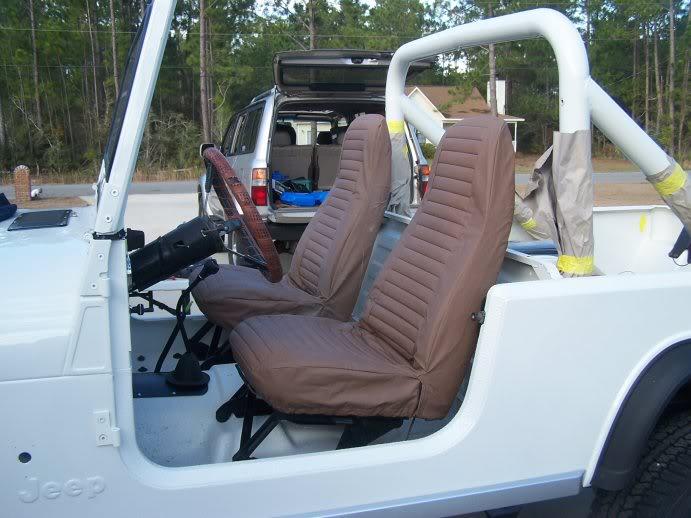
seats are in (and tested):
100_3341-1.jpg


they're in fair shape, but have rips, so I kept a set of Bestop Spice seatcovers from my CJ7.. they're not a perfect fit, but a good (and fast) solution so, I put them on..
100_3346-1.jpg

also painted and bed-lined these side steps.. not sure if I really want them for the long term, but installing them for now:
100_3344-1.jpg

100_3345-1.jpg
 
The top looks great from here! Well done.

Just saw you posted more pixs while I was posting. The whole Jeep looks great!
 
Last edited:
thanks Randy and Dain... the progress feels good, and I do need to do it ALL, but I'm sort of procrastinating on hacking up the two wiring harnesses for the CJ/YJ merge as well..

the bottom line is: I'm leaving here in two weeks so, the more I can consolidate the truck into one moving piece, the better off I am, but I'm not dead-set on the idea of having it running by then because it's going to ride a trailer to CO either way
 
Looks great in white, very 'clean" looking, plus "bright" out in the sun:drool:

Let us know how the hard top paint works out, looks pretty good so far:thumbsup:

Yep, those fender flare plastic things are a PITA:angry:
 
and then started my 15$ solution:
this is one coat (will probably do three total) of a Valspar (yes, that's exterior home paint from Lowes) product called "Duramax", which is latex, but reportedly their toughtest finish in a color called "Cowboy Suede".. sounds ghey, but the color was about DEAD ON for the factory tan top.. I used a 2 inch nap roller for the main body and a 1 inch foam brush to cut in the edges..

100_3348-1.jpg

UPDATE: well, this may not work out.. we had rain last night (or at least some very heavy condensation as is the norm here in the Florida winter following very warm days, and most of my paint had literally "washed" off in the night and directly onto my driveway... it's a weird look, like about 50% of it had cured and the rest simply rinsed off.. it's suppossed to dry in one hour and cure in four for top-coating, but it appears it might never have cured.. :banghead:

so... I'm a bit stuck with whether to try it again (bring it inside the garage and see if I can get it right in a controlled envrionment), or just sand it down again and use a rattle can lacquer..
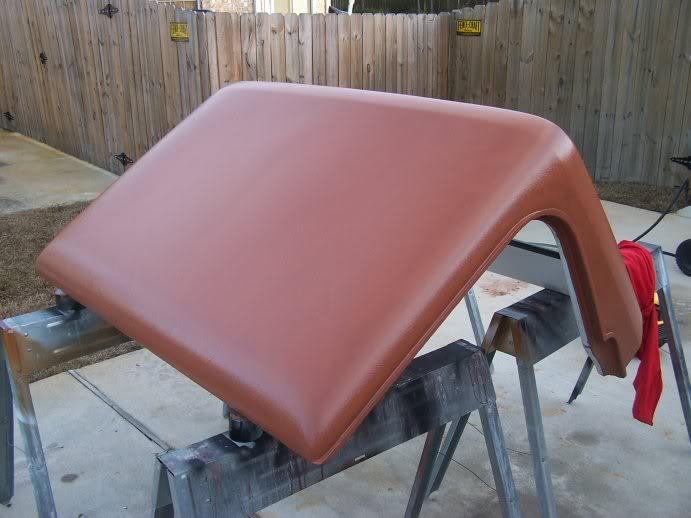
the long term concern I have is with the paint or dye washing off/streaking down onto the Jeep after I mount the top, obviously not good with white paint!
 
Back
Top