• Notice for iPhone users: DO NOT use the image size reduction option when uploading photos to the forum. This causes portrait images to post as landscape. We have added a warning to the image insert pop-up as well.

FlagJeep Build - A Rookie Build

Rear Seat and Dash

This week, the third row seat was installed, along with the dash.

attachment.php

attachment.php

attachment.php


I would be interested to know what people's opinions are for the best way to recondition the dash pad. I would like it to be back to a solid dark black color, but not be slick/slimy to the touch. Any product suggestions?

The kids are probably enjoying this project more than me. My youngest daughter has grown a lot since the time I bought the starting material of this project.

attachment.php


I guess at this point, I am caught up with where I am actually at on the build. Feel free to comment or make suggestions, and I may or may not incorporate them.

I would like to hear people's suggestions for tire size / rim size on this build. I had been thinking 33/12.5/15, but my wife has been suggesting 35 inch tires on 17 inch rims. I intend for this Scrambler to get a lot of use and not to be a garage show piece, so let me know your thoughts.
 
Thanks!

Let me know if you have any questions on adapter kits I used or anything. I think this drivetrain helped keep advanced adapters in business.
Headers, engine mounts, clutch set (LS engines have a .400 greater crank recess than regular SBC), Bellhousing, Adapter between trans and transfer case. I think that was it?

The only adapter I bought from Advance Adapters for this swap is the nv4500 to dana 300. Everything else I am using are GM parts. GM trucks with either the 4.8L or 6.0L had the NV4500 as an option. Stock clutch and belhousing from one of those trucks works with the 5.3L. As for exhaust, I am using stock manifolds from an LS3 Camaro. Motor mounts, I'll be building my own.

Your build is SWEET! I wish your pictures were bigger.
 
The only adapter I bought from Advance Adapters for this swap is the nv4500 to dana 300. Everything else I am using are GM parts. GM trucks with either the 4.8L or 6.0L had the NV4500 as an option. Stock clutch and belhousing from one of those trucks works with the 5.3L. As for exhaust, I am using stock manifolds from an LS3 Camaro. Motor mounts, I'll be building my own.

Your build is SWEET! I wish your pictures were bigger.

Did the bellhousing you found have the clutch (is yours hydraulic or mech linkage?) access on the driver's side? When I was looking into this combo I think I kept finding only passenger side access on the bellhousing and I didn't have the confidence to try that out and go for it.

On the pics, I resized them all down to fit in the thread nicely.
 
So how far down does the transmission hang? If you have a picture that would be great.

Brian
 
Did the bellhousing you found have the clutch (is yours hydraulic or mech linkage?) access on the driver's side? When I was looking into this combo I think I kept finding only passenger side access on the bellhousing and I didn't have the confidence to try that out and go for it.

On the pics, I resized them all down to fit in the thread nicely.

The one I have is passenger side hydraulic. It came with the transmission. If it doesnt work, I'll look for a drivers side one.
 
So how far down does the transmission hang? If you have a picture that would be great.

Brian

It hangs down probably less than an inch below the frame. I have the t-case lowering case from the rubicon express lift kit, and the mounting setup for the advance adapter transmission to tcase adapter.

I left these pictures at the full resolution vs. sizing them down like the other ones, so I didn't show them in the text.
 
Looks to me like you could take those pucks out between the frame and skid! Better yet, build a flatter skid plate!! Tons of room under there!!

and you need to get a Camaro oil pan. ;) doesnt hang down like the truck pan.
http://www.summitracing.com/parts/NAL-12628771/
 
Had to use the plastic pucks to allow for clearance up in the dome of the body. The top of the transmission and tcase don't have much clearance at all.

I do need to replace the oil pan, the stock one is aluminum, probably will change it out at the next oil change.
 
Thanks for posting the pictures.

I have a similar setup but went with the NV3500 so I wanted to see the difference. I debated about going with the NV4500. The size, weight and drivability of the 3500 just seemed to make more sense for my use since I don't plan to abuse it too much. I may regret my decision someday we'll see - I have to get it back together first....

I think you can defintily gain some ground clearance if you remove those pucks and rework your trans - skidplate mounting.
 
Thanks for posting the pictures.

I have a similar setup but went with the NV3500 so I wanted to see the difference. I debated about going with the NV4500. The size, weight and drivability of the 3500 just seemed to make more sense for my use since I don't plan to abuse it too much. I may regret my decision someday we'll see - I have to get it back together first....

I think you can defintily gain some ground clearance if you remove those pucks and rework your trans - skidplate mounting.

After buying and during the rebuild of the NV4500, I did more research and it seemed like the NV3550 was more practical. It has a low first and an overdrive, and is similar to the AX15 and has actually been used in some Jeeps stock from what Novak's site says. Since I already had a NV4500 at that point, and I was pretty sure it would work and be pretty bulletproof, I went with it. It definitely is a bit bulky though.

The additional ground clearance will be something I will look at down the road after the project is in a driving state and after I replace the oil pan. Thanks for the idea.
 
Looks to me like you could take those pucks out between the frame and skid! Better yet, build a flatter skid plate!! Tons of room under there!!

and you need to get a Camaro oil pan. ;) doesnt hang down like the truck pan.
http://www.summitracing.com/parts/NAL-12628771/

It says in the description of the pan that it is aluminum, then in the bottom says that it is steel painted black. If it is a steel one that sounds like a good idea, just can't drop the money on it right now.
 
Its aluminium. I bought it for mine. The oil pan is a structural part of the engine. I would stay away from the stamped steel pans.
there are lots of articles that the oil pan is not structural, but I read it in a GM manual that it is. I'll go with what GM says.
 
April is slowing my progress

Was sick for about a week, and progress is getting slower as my boy gets closer to his due date as I have to re-organize things around the house.

One issue I have run into is connecting the drive shafts, seems like it should be simple but it has proven a progress slower for me.
https://www.cj-8.com/forum/showthread.php?35144-Driveshaft-CV-Yoke-connection

Steering system is now intact, short of power steering hoses. Most of the harness for the Vortec engine is connected, now time to work on the Jeep harness and see how I will marry the two together.

Also, got my full doors fit on, although they still need built up. Gotta find the vent window somewhere in my storage system.

driver side.jpgpassenger side.jpg

Also, I am still curious on anyone's thoughts on rim and tire size for this project (4 1/2" RE Spring Lift, no body lift).
 
Last edited:
Painting Complete!

It has been a long, interesting, learning experience/journey, but the painting is finally complete. Finished painting the top of the hood with my brother-in-law in Tucson last weekend.

hood painting.jpg

Ordered C-V yokes today to match my driveshafts from Tom Wood's driveshafts. Also bought a bunch of other small parts. With any luck, and some long hours, the hope is maybe the engine could run by the end of next weekend.

It would be nice to get it running this month since we are expecting a son due in less than a month.
 
Last edited:
And now it runs!

:woohoo:

My brother-in-law was kind enough to fly into town and help me work on the Scrambler this weekend.
My wife was kind enough to let that happen without any complaints, on mother's day, less than 3 weeks from her due date for our baby boy.
My mother-in-law was kind enough to help talk my brother-in-law into coming up after watching me go a little crazy when working late nights on the Scrambler.

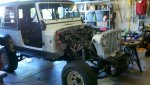
Anyhow, at the start of the weekend, the engine (5.3L Vortec from a 2004 GMC Truck) had a stand alone harness, not connected to anything. The rest of the Scrambler had a painless wiring kit that was mounted to the firewall with the fuse panel. The painless set was made for the Straight-6 engine that used to be in there, and carberated. The two harnesses needed married together, and many of the wires on the painless kit were not going to be used, but which ones? That is what Saturday was spent on. A long and tiring day of wire tracing and connecting. From breakfast until 10pm, wiring. At 10pm, the engine briefly started with some starter fluid. With the open headers, and being a nice neighbor, we shut it down and got some sleep.

early day sunday.jpg

Today we started up around 11 am, had an extended mid-day break, and then by mid-afternoon it was running, but not quite like hoped. The theory was that we had too much fuel pressure, so we sought out to find a pressure regulator for the fuel line at O'reilly's. Unfortunately, they didn't have one that would work for us. we did however check out a fuel pressure testing kit (free tool rental), went back to the house and proceeded to find we had like 12 psi fuel pressure, not the 60psi or so that we hoped for. So the problem was low fuel pressure, not high. The pump was one that was already in the tank, which I bought from mysunnshine. I guess I should have asked what tupe of system it was previously used for. Oh well, more work for another day.(Any ideas for a pump/regulator combo to use?)

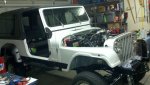
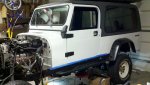
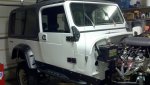
Once the engine was running, we put on the fenders for a feel good touch. I think it is starting to look like a Jeep again.:bacon:
late day sunday.jpg

The jeep could move around the neighborhood if I had a throttle cable, any ideas for a manual throttle cable for the 5.3L in the Scrambler?

Off to sleep, then the brother-in-law flies back out of town and I hopefully will have energy for going to work tomorrow.:ZZZ:

I figure I will try to figure out how to upload video of the engine running tomorrow to youtube and link that to this thread.
 
Congradulations! A big step getting the wiring done. :thumbsup:

:wave:
 
That was a 15psi TBI pump in the tank. Get a Buick Grand National pump and put it in there....
 
Back
Top