• Notice for iPhone users: DO NOT use the image size reduction option when uploading photos to the forum. This causes portrait images to post as landscape. We have added a warning to the image insert pop-up as well.

Shocks and Body Roll

Ah....

Is there any reason for those swaybar drop brackets? They aren't part of the RE kit, were they on there with a previous lift?

Your swaybar links are longer to make up for the lift, so they're leaning well back because of those drop brackets. Stands to reason that your swaybar links are rotating between the pivot points rather than actually actuating the swaybar properly. Hold a pencil between both hands with the pencil vertical. When you move the lower hand up, it's going to push the top hand up. Now put the pencil at an angle like you have on your links and push the lower hand up, the pencil is just going to want to rotate in space.

This effect is enhanced because the links are leaning rearward. The axle is going to move forward as the suspension compresses, moving that end of the link forward as it comes up. I think you're basically driving it as if there's no swaybar at all.

I'd put the swaybar back in the stock location, and get some new polyurethane bushings to swap in at the same time while you're at it and see what that gets you.

My scrambler didn't have a sway bar when I got it, and when I picked up the sway bar I think I got those brackets, and not knowing any different I connected them. Should the swaybar be mounted to the frame and not dropped by those brackets? if that is the case I could see that having an impact. The sway bar disconnects at the end of the bar are from the RE lift kit, so I think they are supposed to be on there, right?

Thanks again for the input
 
That would explain it.

The end links look a bit longer than may be needed and after you relocate the swaybar you may be able to get things sorted even better by shortening them or trying shorter links. That would rotate the end of the bar down toward the axle and maybe get your links closer to vertical. The key is to get those end links to be as close to vertical as you can so the swaybar is doing as much work for you as possible.

Simply unbolt the two bolts holding the swaybar mount to that drop bracket on each side, unbolt the two bolts at the top of the drop bracket and then put the mount where the top of the bracket sat. That's the stock location. Those brackets are for a lift that doesn't give you longer end links so the combo doesn't work as you have it.

Take a before and after picture looking side-on to the swaybar end links so we can see what you get after you move them. Depending on the condition of your current swaybar bushings, poly replacements may not be needed and you could certainly try it without them easily, but if you're having issues with roll, they can't hurt and are relatively cheap :shrug:
 
My scrambler didn't have a sway bar when I got it, and when I picked up the sway bar I think I got those brackets, and not knowing any different I connected them. Should the swaybar be mounted to the frame and not dropped by those brackets? if that is the case I could see that having an impact. The sway bar disconnects at the end of the bar are from the RE lift kit, so I think they are supposed to be on there, right?

Thanks again for the input

The links also look long from that angle.

Here is a link to JKS for link installation:
http://4x4media.info/instructions/jks/JKS5006-5007-9300-9400.pdf

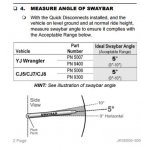
Here is a snip about swaybar angle.
sway.JPG
 
Still have the stock steering shaft, how would I gauge "tightness" in it?

I'll take one of those custom rear sway bar set-ups you have, I am sure they must be affordable right? :D

With the engine off, have one of the kids rock the steering gently and see if the shaft moves more than the bell. While you're at it, check your tie rod ends, shackle side to side movement, feel for wheel bearing noise, etc.....

I do have that Currie Anti-Rock sway bar that I took off the front of mine still for sale. ;) With that sway bar, you don't have to disconnect it when you go wheeling because it will not limit travel with your RE springs.......
 
With the engine off, have one of the kids rock the steering gently and see if the shaft moves more than the bell. While you're at it, check your tie rod ends, shackle side to side movement, feel for wheel bearing noise, etc.....

I do have that Currie Anti-Rock sway bar that I took off the front of mine still for sale. ;) With that sway bar, you don't have to disconnect it when you go wheeling because it will not limit travel with your RE springs.......

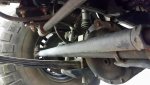
I'll try that this weekend. If I don't get things steadied out I'll think about your Currie one. Is the only advantage of that one not disconnecting on trail or is it better at minimizing sway also?
 
It's probably about the same tension(or less) than the stock unit. It worked well on mine with the RE springs. Without it, it drove like a trophy truck.
 
I'm doing much better now...

That would explain it.

Take a before and after picture looking side-on to the swaybar end links so we can see what you get after you move them.

So I took out the drop brackets, replaced the one trashed bushing and bracket, and apparently there is something to this sway bar thing. Took it out for a quick spin, in the wind (had a wind advisory going) and it isn't going crazy with the body roll anymore. Got the speeds up (to the upper 60s mph) and I think there is still some work to do with the steering and maybe caster. It doesn't roll anymore, but does like to randomly take off on an unplanned vector. It did that before, in the middle of body rolls, so it is really not that unnerving now, but is something I can work on per the advice on this thread.

Thanks everyone for the help.

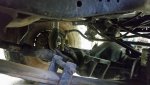
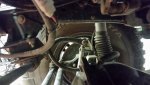
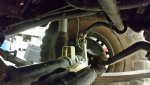
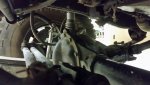
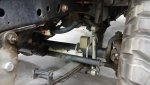
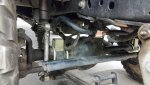
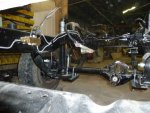
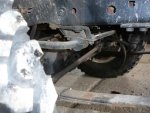
Per request:
Before
20180210_154355.jpg20180210_154507.jpg20180210_154609.jpg20180210_154650.jpg

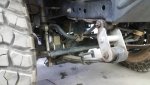
After


20180210_180128.jpg20180210_180151.jpg20180210_180204.jpgresize.jpg
 
Someone really messed that one up. Remove the extension bracket, move the sway bar bracket to under the frame and mount directly to the frame. That will bring the sway bar link back into position and hopefully correct some of the problems that were left. Here's some pics to hopefully help.
 

Attachments

  • P1010153.jpg
    P1010153.jpg
    56.1 KB · Views: 32
  • P1090375.jpg
    P1090375.jpg
    43.1 KB · Views: 31
  • P1090376.jpg
    P1090376.jpg
    42 KB · Views: 31
Someone really messed that one up. Remove the extension bracket, move the sway bar bracket to under the frame and mount directly to the frame. That will bring the sway bar link back into position and hopefully correct some of the problems that were left. Here's some pics to hopefully help.

I am not getting much detail from your pictures. Is my sway bar mount incorrect in the "after" pics? I would certainly be happy for it to get even better.
 
I am not getting much detail from your pictures. Is my sway bar mount incorrect in the "after" pics? I would certainly be happy for it to get even better.

You already fixed this. Guessing he replied before getting all the way through the thread, based on your first pics.
 
My bad. Bracket stays. Links are too long. Here's a better pic. Should be more horizontal.
 

Attachments

  • P1020073.jpg
    P1020073.jpg
    47.5 KB · Views: 38
My bad. Bracket stays. Links are too long. Here's a better pic. Should be more horizontal.

Is there an engine in it in the final picture? I have the sway bar links from the lift kit which appear to be the same as yours, is it from an RE 4.5 lift?

Just wanted to check, I am trying to dial it in the best I can and if I need to chop down the disconnect links to improve it I can. If you are missing some of the weight it may settle in at a little different height.
 
Is there an engine in it in the final picture? I have the sway bar links from the lift kit which appear to be the same as yours, is it from an RE 4.5 lift?

Just wanted to check, I am trying to dial it in the best I can and if I need to chop down the disconnect links to improve it I can. If you are missing some of the weight it may settle in at a little different height.

Did you look at this post and/or visit the link?
Here is a link to JKS for link installation:
http://4x4media.info/instructions/jks/JKS5006-5007-9300-9400.pdf

Here is a snip about swaybar angle.
View attachment 61609
 
The pic above is of the stock cj7. The others are without engine (engine will push the frame down, not expecting like yours when done). I have the RE4.5 lift also. I know with the extra travel the links will be longer (compromise). When done I hope I won't have the same problem.
 
I do not think the links are too long, the bar looks to be close to horizontal now to me in your after pics.
 
Did you look at this post and/or visit the link?

Yeah I looked at it. Without a protractor, I am guessing I am at 10-15°, but there isn't really any adjustment to change that. I am guessing the winch, heavy bumper, engine all weigh things down a bit to create more angle. But like I said, removing that drop bracket seemed to make it driveable at higher speeds and other issues in the steering can be troubleshot later.

Thanks again for the help
 
Yeah I looked at it. Without a protractor, I am guessing I am at 10-15°, but there isn't really any adjustment to change that. I am guessing the winch, heavy bumper, engine all weigh things down a bit to create more angle. But like I said, removing that drop bracket seemed to make it driveable at higher speeds and other issues in the steering can be troubleshot later.

Thanks again for the help

The removal of the unnecessary brackets definitely looks like it helped with the angle.
Obviously I can't tell much from the pics, that's why I'm throwing ideas at you to check.:twocents:

Changing the length of the links will change the angle if more adjustment is needed.

As mentioned, improper caster angle can have negative effects on the steering.

Just a suggestion;
You can download a free protractor app to a smartphone that can be used to check the angle of the sway bar as well as the caster angle. :thumbsup:
 
Back
Top