• Notice for iPhone users: DO NOT use the image size reduction option when uploading photos to the forum. This causes portrait images to post as landscape. We have added a warning to the image insert pop-up as well.

Meet Red, my 81 Restomod Build

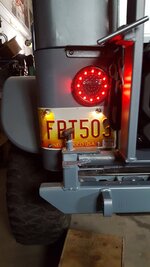
If you wanted a balanced look and symmetry with the gas fill, you could fab a mounting bracket off of the spare carrier that would position it similar to the factory location but not so much as to overhang the corner. It wouldn't interfere with the tailgate drop because it would move with the carrier/spare. Just a thought. And no drilling into the body.
That’s a good idea. I’ll look into that. Thank you!
 
That’s a good idea. I’ll look into that. Thank you!
A down side I thought of is it could be in the way (sticking out) when swinging the tire carrier open. Could the bracket fold against the tire tread if desired? Hmmm
Another option could be to fab a bracket that mounts to the rear cross member independent of the bumper or body. The problem with that is getting the plate to not over hang the body and not interfere with the tailgate drop.
 
A down side I thought of is it could be in the way (sticking out) when swinging the tire carrier open. Could the bracket fold against the tire tread if desired? Hmmm
Another option could be to fab a bracket that mounts to the rear cross member independent of the bumper or body. The problem with that is getting the plate to not over hang the body and not interfere with the tailgate drop.
When you get around to it, these are what I used on the CJ6.

Lite'N Boltz™ LED License Plate Lighting Kit

View attachment 91147
All great thoughts. I’ll come up with something...
 
I am planning on using the LS compressor. I have not heard of any issue. However, I haven’t fired it up yet. I know Dennis Stump Jumper used a Vintage Air unit with his LS, maybe he has some insight.

-Edit- I just did a quick search and there are tons of conflicting reports on the web. Most of them are in reference to variable displacement car compressors, and the consensus is they won’t cool as well due to the Vintage Air units pressure differential. Something about the compressor running full stroke all the time at a lower pressure. Makes no sense to me. The few I found referencing truck compressors seemed to indicate they work OK. I’m going to run the truck compressor and hope for the best.
I've been running the LS compressor that came on my 5.3 engine that had 100,000 miles on it. Ran it for 4 years and it quit working in September. I'll just put another one and hope for the best.
 
I don't know if this would be of interest to you or not. Says TJ/LJ.....maybe able to fab a bracket from the normal tail light mounting on a CJ to hold this.

 
Hung the spare tire carrier today. I really like the way it looks. But I can’t imagine covering the wheel with a license plate. I might have to find a way to build it into the bumper. The tail light doesn’t have illumination for a plate, and I don’t like the way it would hang out anyways.
I found new rubber bumpers and end plugs for the carrier, but I can’t find the rubber wedge at the latch. Any ideas?

View attachment 90984
That rubber wedge at the latch has been obsolete for a decade or more, I can't figure out why they don't make an aftermarket on it either. Only good used and the rare NOS find remain at this point...
 
That rubber wedge at the latch has been obsolete for a decade or more, I can't figure out why they don't make an aftermarket on it either. Only good used and the rare NOS find remain at this point...
Thank you, Eric! You wouldn’t happen to have a really nice one would you? Mine is, well, sort of crusty.
 
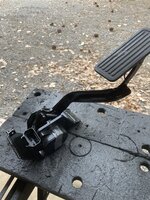
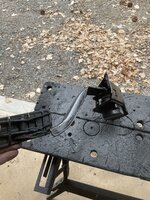
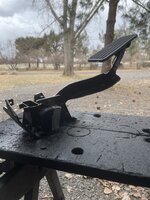
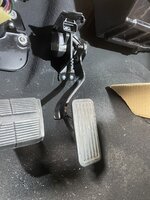
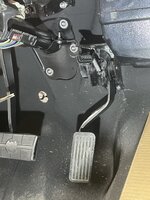
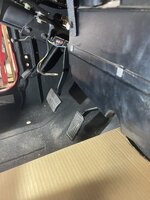
Finally got back at it. I tackled the drive-by-wire pedal assembly. I had a pedal assembly from a early 2000’s Silverado. Every time I do one of these it seems to come out a bit better. I ended up cutting the pedal arm into 3 pieces, and inverting the center piece so the pedal angled to the left. Many cut/tack weld/fit cycles were involved here. I wanted the pedal to be a bit lower than the brake, have full swing, and clear the carpet. I finally hit on the finished combination and finish welded it. I ended up using a spacer for the top mount, it bolts through one of the pre-threaded holes in the firewall. On the lower edge I cut and then bent the backing plate to follow the firewall contour. Secured the bottom with 2 bolts. I’m pleased with the finished product. 9A34BFBC-054F-429E-93EE-D1B6AE52921B.jpeg30390692-37CA-46BB-8D36-231B66AA3D7A.jpegDF1E146D-DC04-4527-A9DA-C717AD3C185B.jpeg7F99866D-967F-45E5-9D62-DC840213A564.jpegEAEF9DA9-9ACF-4319-A237-8D92465B6882.jpeg1EA0F6C2-1068-45D4-BD97-37A7DA5834A1.jpeg
 
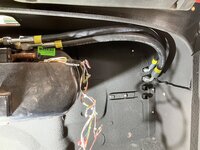
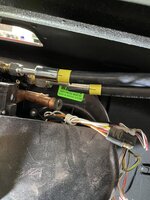
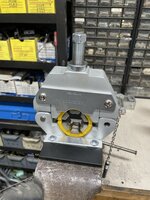
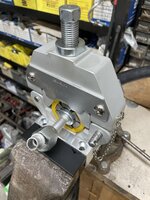
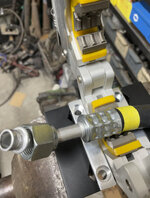
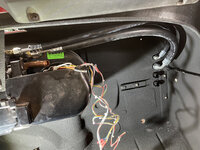
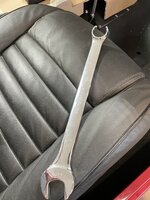
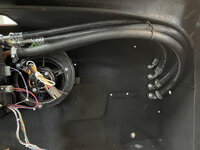
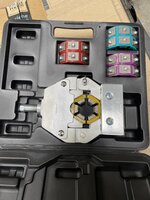
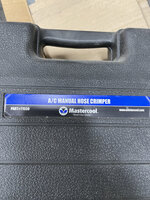
Put the Summit delivery to good use. After installing a new water pump, I started on the under dash plumbing. First step was to size the a/c lines. Once the length and angle was correct, I wrap tape around the ends and draw witness lines so the fittings crimp on at the correct angle. There’s no twisting the lines once they’re made. 05CDC912-7121-4074-92E1-EAEC55B5DF02.jpegDA6F9AA8-8306-455D-987C-0496D4828541.jpegNext step is to crimp the ends on the lines. I have a Mastercool crimper that does a great job. It was a bit pricey but I bought it back in my hot-rod building days... anyways, first make sure the hose is seated in the fitting ( there’s a small hole at the base to check through). Then with the appropriate size dies, crank the tool down and presto- it’s done!33AE7F57-3D70-4FD5-ABEA-0224C05CF11B.jpeg3A1D5976-BBB1-430F-921F-A1D1207955BA.jpeg85FD7AC5-8B8F-456F-9DBA-C1C1FB440EA7.jpegAll that’s left is lubing up the o-rings and tighten them in place! Having a “custom” line wrench helps.A3B72A1E-17E7-4064-9EFE-D3693DCB0284.jpeg45838770-0783-4FD6-8339-212E22A9FF03.jpegNext, heater hose. Much easier. Cut and clamp.A1A534D0-E431-4236-9752-9CEC47EA3959.jpegHere’s a couple pics of the crimping tool. I was paying $20 a crimp before I got this. Well worth it if you’re doing more than one system. 8AD78C68-7D0F-48BC-B074-116D8AC08FE7.jpeg77B79407-1601-4808-BBC9-ECEF8A5C3D80.jpegNow I’m waiting on more parts- adapters for the Wilwood proportioning valve and radiator mounts.
 
Why not put crimp fittings on the heater hoses, too? That would look super clean!
 
Why not put crimp fittings on the heater hoses, too? That would look super clean!
I had thought about that. But- none of this will be visible once the dash is on, and these are easily serviceable in awkward positions. Now under the hood I’ve been looking into those Gates heat shrink clamps. Although, those have zero serviceability. I have no problem with hose clamps, they just all have to be aligned and pointing the same way when they are visible.
 
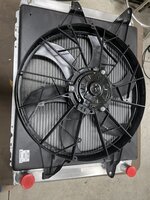
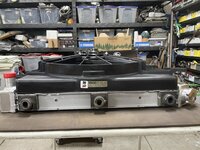
Wow! That’s a big fan, but it fits the core nicely. I’m going to have to take 1” off the flange as it sits in about 5/8” too deep. Not a lot of room to play with.

8409AC49-6B9A-4FB1-BFD9-663CFD55ED80.jpegECE587B4-7215-45D8-836F-80C8D0D1B406.jpeg
 
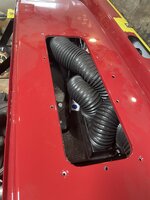
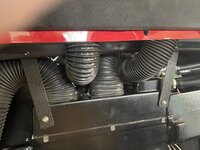
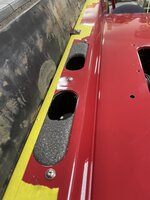
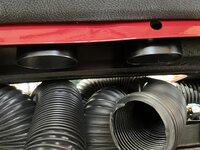
I have been asked why I didn’t just fill in the cowl vent since I’m not using it. Because I really needed to get in there to run the duct work. Would have been next to impossible without the access. I’ve done that on hot rods before and it sucks to say the least.

Years back someone produced a cowl vent block off plate that was thick ball milled aluminum. Sort of like the stock vent but without the holes. Anybody know of one of those available? 41DE9A01-50BA-4710-B89A-B0FD41CF36A8.jpegB94A2765-C4BA-4296-AA53-73714B608935.jpegThe third vent will be one of the Vintage Air plastic 180* tubes. It will line up perfectly with the dash vent.

 
Built the defroster duct adapter. The Vintage Air unit has 2 ducts for defrost, 2” in diameter each. There’s no way the factory plastic piece would work, or clear. Unfortunately, I didn’t take pictures while building. I took two stubs of thin wall 2” tube, squashed them to oval shape, and welded them to a piece of sheet with the proper openings cut out. Painted and added a thin layer of self adhesive foam for a seal. Drilled a hole for a center screw for support. Installed and done. After pics-8D7DE563-B05E-445F-ACF0-9E5A2204E593.jpeg2F6E6179-9C9E-45AA-B51F-4D6CE817E637.jpeg
 
I have been asked why I didn’t just fill in the cowl vent since I’m not using it. Because I really needed to get in there to run the duct work. Would have been next to impossible without the access. I’ve done that on hot rods before and it sucks to say the least.

Years back someone produced a cowl vent block off plate that was thick ball milled aluminum. Sort of like the stock vent but without the holes. Anybody know of one of those available? View attachment 92386View attachment 92387The third vent will be one of the Vintage Air plastic 180* tubes. It will line up perfectly with the dash vent.
I used the block-off plate from Motobilt.
 
Back
Top