• Notice for iPhone users: DO NOT use the image size reduction option when uploading photos to the forum. This causes portrait images to post as landscape. We have added a warning to the image insert pop-up as well.

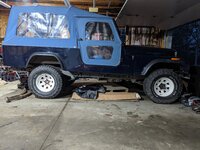
My Blue Jeep

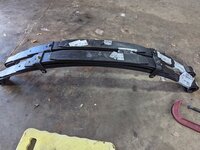
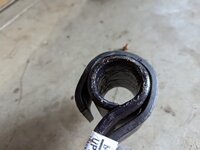
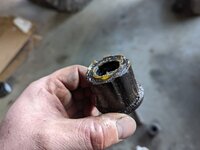
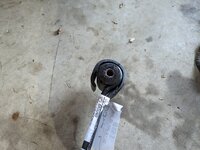
So I called BDS and the guy I spoke to said the the kit doesn't come with the clamps and the new springs don't come with new main eye bushings. Part number for those bushings is 074009 if you need them. Last night I didn't get too far, but I started dismantling one spring. For those of you doing this for the first time, unbolt the 2 alignment clamps. Then put a C clamp on near the middle of the spring first. Then loosen the bolt a bit then the c clamp. Don't take the center bolt off right away because the springs are under a good amount of pressure. If your c clamp accidentally slips off at least the bolt would still be there as a safety measure.
View attachment 101256
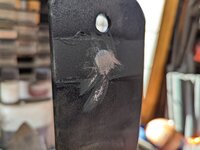
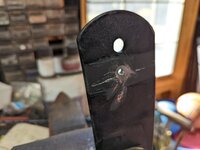
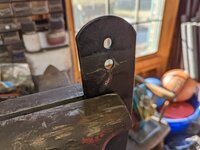
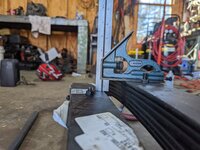
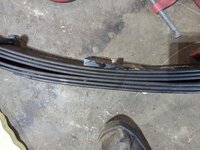
I put the pads on the add a leaf and popped off the pads on the leaf with the clamps so I can get to the rivots.
View attachment 101262View attachment 101263View attachment 101264
Then you can grind the rivots off.
View attachment 101265
So is your plan to replace the clamps with longer ones once the AAL is in, or just go without?
 
So is your plan to replace the clamps with longer ones once the AAL is in, or just go without?
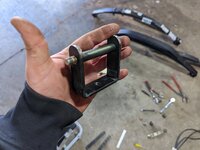
I'm going to replace them with longer ones. I definitely wouldn't trust not running them. I don't want the pinch style clamps and much to my surprise I was having a really hard time finding the bolt style (like what it's replacing) that would fit the extra leaf. I'll likely just make some. It's not that hard. I have a feeling this is going to add a ridiculous amount of lift. We'll see how much. Not sure if I will get away with just an add a leaf in the front or if I will need to go to a 4" lift spring. I really hope not. I really don't want to spent that much money on this setup anymore. Within the next year or 2 I'm going to 35s and very likey spring over. I have a Dana 44 and a Toyota 8" waiting to go in. So this setup is kind of temporary ish.
 
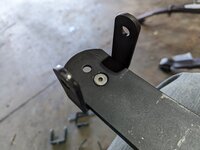
Once the brackets are off you need to grind the rest down until flat while being careful not to grind into the spring itself.
PXL_20220313_210225749.jpg
Once that is done drill a hole in the middle and then you can tap the rest out.
PXL_20220313_210515767.jpgPXL_20220313_211130376.jpg
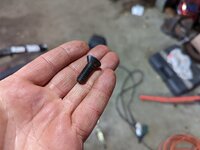
To replace these rivots I just used some hardened flat head bolts. Grade 5 maybe? Not sure.
PXL_20220313_184624533.jpg
Even though the hole in the spring is 3/8, it wasn't countersunk deep enough. A 3/8 bolt sticks up too high.
PXL_20220313_184648655.jpg
I used a 5/16 bolt instead. This also was a little high, but just barely. I just ground down the top until it was recessed below the surface of the spring.PXL_20220313_184659069.jpg
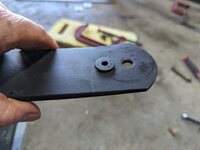
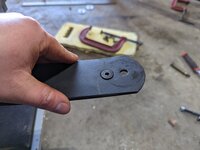
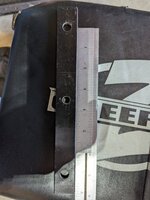
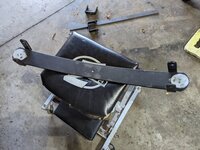
The holes in the brackets are 3 1/2" between each hole.
PXL_20220313_184535371.jpg
Hey! It kinda looks right.
PXL_20220313_193042557.jpg
 
My 8 year old (Noah) wanted to help so he bolted the brackets on and reinstalled the pads.
PXL_20220313_201705052.jpgPXL_20220313_202513018.jpg
Oh man this kid is trouble.
PXL_20220313_224052428.jpg

And all back together again. It sits almost 1" higher than the other new untouched pack. Plus it is definitely much stiffer.
PXL_20220313_204755558.jpgPXL_20220313_204952419.jpg
That's it for now. I'll install them in the Jeep within the next few days.
 
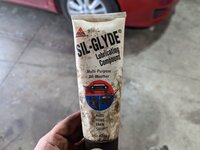
Beautiful day today. It was 66 and sunny so of course I had to get out to the garage. Put my bushings in and greased the crap out of them with this stuff Sil-Glyde. I've been using this stuff for the last 17+ years on everything bushing related and have always had fantastic luck with it.
PXL_20220315_230452707.jpgPXL_20220315_230823044.jpgPXL_20220315_230828444.jpgPXL_20220315_231003953.jpg
I also swapped over the angle shims. But I'm going to take them out again. I assumed they were needed. I was wrong.
PXL_20220315_233022577.jpg
And back on all 4.
PXL_20220317_002018829.jpg
Just for a quick visual, here is the gap with the old springs...
PXL_20220216_000757735.jpg
Vs the new ones... LolPXL_20220316_233810165.jpg
In fairness I do now have slightly longer shackles now. But they are only 1" longer than stock. So that's only a 1/2" lift.
 
That's some gap !
Yup, I kind of figured that would happen too. Right now it's measuring as a 3.5" lift. I almost wish I drove it for a month or 2 to let the springs settle just a bit before doing the add a leaf. But I just didn't want to do it twice. I'll put some sand bags or something back there to speed it up. But I definitely do like the back just a little higher than the front. Because once you add passengers and whatever else in back then it levels out. I hate how it would squat down like a dog taking a crap. I haven't driven it yet so not sure on the ride quality just yet. I need to see what's going on with my driver rear. I can move the axle shaft in and out a little bit. Bad bearing maybe?
 
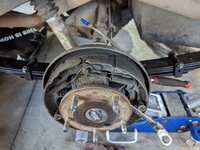
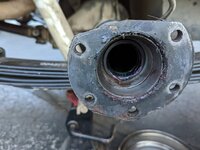
It's a beautiful day today so I figured I'd see what the in and out play is on the LR. Good grief it's dirty in there. Total laziness on my part. I need to be better about cleaning after I go wheelin.PXL_20220320_183405658.jpg
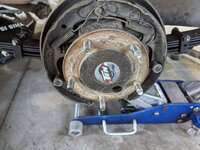
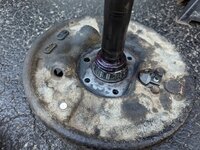
Undid the brake line and the 4 bolts for the backing plate.
PXL_20220320_184224922.jpg
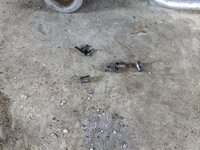
The second I pulled at the axle, these little guys fell out...
PXL_20220320_184345196.jpg
Lol, that's not good.
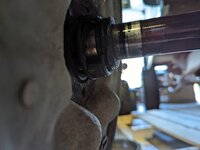
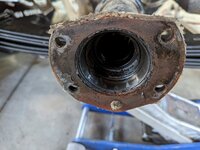
PXL_20220320_184457042.jpg
It was chocolate milkshake in there. So water definitely got in there. Good grief Drummond Island is destructive. 😏
PXL_20220320_184643591.jpg
 
Ok, now I'm confused. I got the new Timken set 9 bearing and seals. Had a shop press it on a couple of weeks ago, I then replaced the shoes, drums, hardware, and wheel cylinders. I thought all was good. Now that I've been driving it I wanted to re adjust the brakes. I jacked up rear and found a little play on the driver rear again. Hmmm. So I pulled it apart again and I found the bearing in 2 pieces again.
PXL_20220518_010659024.jpg
PXL_20220518_010701845.jpg
What the hell!?!?!?
It's worth mentioning I DID check the amount of bearing "stick out" and it was .040 from the outer race to the face of the axle. Which is well within spec. I checked with a level to see if I had a bent axle tube and I don't. What's going on? Am I missing something super obvious?
 
I want to add to this. The play I felt was very small. Like what you would feel on a very well set up trailer bearing. I could remove the shim that's in there to take up the slack if needed. When I drove it the bearing never got hot. It felt completely normal like the other side. Right now it's basically just like a trailer bearing and race right? Is there an issue here that I'm missing?
 
Did you remove the centering block in the differential?

Should be no play in the rear bearings used with the one piece axles??
 
Nope, don't have the center thrust block things. It does have an Aussie in there though.
 
I really do not like the recommended "bearing stick out" recommendations. For example, Moser calls for anywhere from .02 - .08, pretty large range.

Your .04 is "in the range", but that is still a pretty large amount :twocents:

If the bearing stick out is too much, when you tighten up the brake backing plates, it puts a lot of pressure on the bearing, even to the point of seizing them.

The only things I can think of:

1) make sure the brake backing plates are still straight
2) reinstall new bearings with the .04 stick out, slowly tighten up the brake backing plate, checking the bearings for free movement as you tighten
3) if the bearings start to bind with .04, add some original AMC 20 axle bearing shims to the end of the housing to decrease the preload on bearings
4) do the bearings fit "tight" into the axle tube ends, or are they "loose"? If loose, maybe "punch and hammer" the inner tube to keep bearings from spinning
5) supposedly the press ring that comes with "Set 9"bearings is not correct for the one piece axles, you are supposed to use a press ring from the axle manufacturer (I have never compared, I just always use the bearings/kits Moser supplies, never had an issue??)

Hard to tell from the pictures, but the first "failure picture", looks like the bearing was not pressed all the way down the shaft?? The gap between the outer edge of bearing/brake backing plate looks excessive, I could be wrong????

I usually press the bearings on first, make sure they "bottom", and then press on the lock ring after the bearing is pressed on :shrug:

That's all I can think of :shrug:
 
Last edited:
Found this, too:


I did not click the video link, but supposedly they discuss the "bearing stick out"/"rotate the axle as you tighten up the brake backing plate" to check for bearing binding issue I was thinking of.

Direct link to install video:


These "one piece axle kit" bearings are also "one piece", so they have their needed play built in. With the bearing pressed all the way down the shaft, the inner race is locked into place. The outer race is stationary in the axle tube, AND the outer face of the bearing is pressed tight to the backing plate. Lock ring keeps bearing from walking "in", brake backing plate keeps bearing from walking "out". The roller end play is built into the bearing assembly. But, the brake backing plate does need to slightly "pre-load/push on" the bearing assembly to keep the outer race held tightly in place. You are not really "pre-loading" the rollers, BUT preloading the entire bearing assembly, to keep the outer race on tight, if that makes sense?

Even though these bearings are "1 piece", if you fiddle with them some the outer race will come off. You do not want that to happen while driving, obviously, LOL.

That's all I can think of, maybe your preload was too tight (or too loose), allowing the bearings to fail. The first failure, where the rollers fell out, something is not right, either too tight, or too loose :shrug::twocents::shrug:
 
I really do not like the recommended "bearing stick out" recommendations. For example, Moser calls for anywhere from .02 - .08, pretty large range.

Your .04 is "in the range", but that is still a pretty large amount :twocents:

If the bearing stick out is too much, when you tighten up the brake backing plates, it puts a lot of pressure on the bearing, even to the point of seizing them.

The only things I can think of:

1) make sure the brake backing plates are still straight
2) reinstall new bearings with the .04 stick out, slowly tighten up the brake backing plate, checking the bearings for free movement as you tighten
3) if the bearings start to bind with .04, add some original AMC 20 axle bearing shims to the end of the housing to decrease the preload on bearings
4) do the bearings fit "tight" into the axle tube ends, or are they "loose"? If loose, maybe "punch and hammer" the inner tube to keep bearings from spinning
5) supposedly the press ring that comes with "Set 9"bearings is not correct for the one piece axles, you are supposed to use a press ring from the axle manufacturer (I have never compared, I just always use the bearings/kits Moser supplies, never had an issue??)

Hard to tell from the pictures, but the first "failure picture", looks like the bearing was not pressed all the way down the shaft?? The gap between the outer edge of bearing/brake backing plate looks excessive, I could be wrong????

I usually press the bearings on first, make sure they "bottom", and then press on the lock ring after the bearing is pressed on :shrug:

That's all I can think of :shrug:
A agree, those "stick out" measurements really are a wide range. In the tool and die world that's like a mile. When I tightened down the backing plate, I try to do all 4 bolts in little increments to keep it even. From what I could see the backing plate looked like it was in really good shape. But I will definitely check it again. After I had it tight I always spin it. It seemed to spin fine but certainly had preload on it. As far as fitment, they aren't tight, but just a snug ish slip fit. I saw no evidence of a spun bearing race or any other damage. Yes, both times the bearing was pressed on all the way, the picture just makes it look goofy. I used the factory supplied collar both times. The one that comes with the bearing is too thick. Overall I think your right about the amount of preload. Even .040 is an awful lot.
 
A agree, those "stick out" measurements really are a wide range. In the tool and die world that's like a mile. When I tightened down the backing plate, I try to do all 4 bolts in little increments to keep it even. From what I could see the backing plate looked like it was in really good shape. But I will definitely check it again. After I had it tight I always spin it. It seemed to spin fine but certainly had preload on it. As far as fitment, they aren't tight, but just a snug ish slip fit. I saw no evidence of a spun bearing race or any other damage. Yes, both times the bearing was pressed on all the way, the picture just makes it look goofy. I used the factory supplied collar both times. The one that comes with the bearing is too thick. Overall I think your right about the amount of preload. Even .040 is an awful lot.

I am almost wondering if they really mean .002-.008, but that is not much??

I didn't watch the entire video, but the guy uses a feeler "strip" to check stick out, so maybe it is "thousandths" and not "hundredths"??

I put Moser one piece axles in my green Scrambler, but I did not take pictures/notes. Same set up as yours, same bearings. I have about 7-8k miles on them with no issues. I did have to pull the centering block, I do not remember "excessive bearing stick out" when I reassembled??

I love you Ron, but I am not going to pull out my axles to check the bearing stick out LOL :thumbsup:

But, I will check for "play" the next time I am messing with it. Throw the dial indicator on there and check "endplay", if any :shrug:

EDIT - it was 10 years ago I put the Moser axles in my green Scrambler!!!!!! Around the same time I installed them in Jeep Addicts '82 Jamboree, it probably has 3 miles on the install LOL. I do remember pulling the differential out to remove the centering block, AND having the neighborhood mechanic shop guy Todd (RIP) machining down one of the bearing spacers. IIRC, one axle tube end on the Jamboree was slightly narrower then the other side. A file would have took forever, Todd turned the spacer down in a lathe.
 
Last edited:
I’ve got the Moser bearings in mine and never had any problem with mine. At least 25 or more years. I’m thinking over 125K miles. I have a set of seals and bearings in the storage area, because 1 seal has a little seepage. Hasn’t been enough to take back apart.
 
Ok, I finally just had a minute to watch the video that you posted. So in that video he actually purposely separates the bearing the way mine did on its own. Very interesting. I think I'm going to shim it to just take up the slack and try to run it. Unless I'm missing something, I can't see it hurting anything. It's just a tapered bearing. I'll keep a close eye on it. I did also check the backing plate again, it's in good shape.
 
Ok, I finally just had a minute to watch the video that you posted. So in that video he actually purposely separates the bearing the way mine did on its own. Very interesting. I think I'm going to shim it to just take up the slack and try to run it. Unless I'm missing something, I can't see it hurting anything. It's just a tapered bearing. I'll keep a close eye on it. I did also check the backing plate again, it's in good shape.
If you shim, between the axle tube end and the brake backing plate, you will be increasing the end play.

Where do you want to shim it?
 
If you shim, between the axle tube end and the brake backing plate, you will be increasing the end play.

Where do you want to shim it?
My bad, I didn't word that very well. I want to re shim with a thinner shim than what's currently in there.
 
Back
Top