• Notice for iPhone users: DO NOT use the image size reduction option when uploading photos to the forum. This causes portrait images to post as landscape. We have added a warning to the image insert pop-up as well.

1984 SL Restoration

spankrjs

Scrambler Junkie
Lifetime Member
SOA Member
City
Biloxi
State
MS
Knocked #1 off my list, ran the rear wire harness.

Used these wire loom clips to secure the harness under the tub:

20200617_150854.jpg

Cleaned the harness, placed it in new loom. I did not want to force the loom through the rubber grommet, so I ran the harness from the front, and stopped the loom at the bulkhead:

20200617_155820.jpg

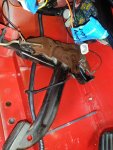
Plugged in, added two ties just to keep it out pf the parking brakes swing arc:

20200617_160636.jpg


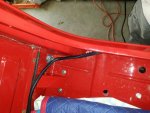
Ran down like so, secured under the door lip with the OEM metal "tangs":

20200617_160741.jpg

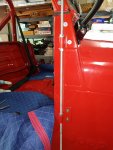
Left some slack here to clear the seat belt assembly:

20200617_160758.jpg

Once I ran the entire harness, I went back and cut the loom at the rubber plug. I used black RTV to help seal the wire hole, both sides:

20200617_173906.jpg

20200617_173920.jpg

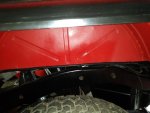
I do not have the original plastic wire molding for the driver side wheel well. I have a piece of a molding, but it's three holes would not line up with the holes in the wheel well. For now, secured the wire loom with zip ties through the screw holes. Works, but need to revisit this.

20200617_173937.jpg

New plastic clips securing the wire loom:

20200617_174000.jpg

20200617_174011.jpg
 

spankrjs

Scrambler Junkie
Lifetime Member
SOA Member
City
Biloxi
State
MS
A weekend filled with drilling and tapping holes.

The windshield hinge bracket holes for the rear view mirrors were not threaded, holes too big for the OEM sized screws. So, drilled and tapped for metric:

20200619_165225.jpg

Reinstalled hinges, top of hinge flush with top of cowl:

20200619_171027.jpg

8 tapped holes:

20200619_171453.jpg

I had to cut the bolts short, all 8, they were too long:

20200619_190439.jpg

Side rear view mirrors installed. I am sure I will take them back off, they get in the way.

20200620_095137.jpg

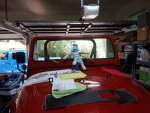
Antennae time!!!!!!!!

20200620_100010.jpg

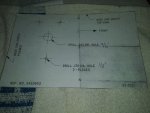
Marking the back side of the paper:

20200620_100016.jpg

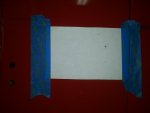
Taped in place:

20200620_100306.jpg

No going back now:

20200620_105343.jpg

20200620_105655.jpg
 

spankrjs

Scrambler Junkie
Lifetime Member
SOA Member
City
Biloxi
State
MS
Close to the heater box on the inside, but it clears. one screw is a bit crooked, will have to fix:

20200620_110717.jpg

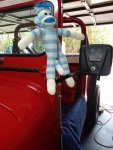
Part's Monkey Approved:

20200620_110707.jpg

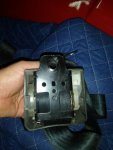
Seat belt time. The seat belts that I have do NOT have the little peg/spike, like the one below pictured has.

20200620_115532.jpg

The one's that I have to install are like this:

20200620_115538.jpg

Not sure how critical the little peg is? I would rather have it, then not. Without the peg, the retractor portion of the seat belt will rotate on it's mounting bolt. The belt is still secured at three other spots: the female latch end, the upper roll bar bolt, the lower bolt on the floor. I will probably get JeepAddict to give me the correct belts later on. I bolted these on for now. They work fine, so not really sure how important the little pegs are? I would rather have them.

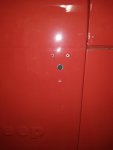
This is a 1981 body tub, so originally had lap belts. The shoulder belt retractor will use the same hole. The body has a lower hole, but not the upper hole for the retractor "peg". Easy enough to drill a hole later on.

20200620_115549.jpg

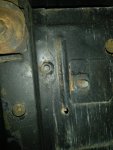
The 1981 body also does NOT have the hole in the floor, or the welded nut on a plate, for the lower web bolt.

20200620_115557.jpg

My green 1983 Scrambler's floor bolt hole/plate/nut, lower right on the below picture:

20200620_123736.jpg

I am going to replicate the OEM attachment point. Some people might use one of the bolts that holds the body tub bracket in place to the floor, the Scrambler specific bracket that goes under the rear bed, under the roll bar. Problem with this, that is only a 5/16 bolt. The OEM seat belts use 7/16 hardware. On my red Scrambler, I cheated. I used the same bolt/hole that holds the retractor in place to the side of the body. My in cab cage covered up the OEM floor hole/nut. I should probably revisit this.

Anyway, since this is NOT my Jeep, decided to match OEM. Marked the floor, drilled the holes:

20200620_124731.jpg

20200620_130856.jpg

The factory just used a piece of heavy gauge sheet metal, with a nut welded to it, about 3" by 3"/ I made my plates out of 3/16" thick steel plate:

20200620_144824.jpg
 

spankrjs

Scrambler Junkie
Lifetime Member
SOA Member
City
Biloxi
State
MS
"Redneck Ray" fabrication shop:

20200620_153901.jpg

No picture of my finished steel plates with holes in them, sorry. Anyway, painted them up, installed, seat belts in for now, Part's Monkey approved:

20200621_094341.jpg

Getting ready to hang the doors, made a jig to mount the lower hinge in the "correct" position:

20200621_095049.jpg

Top of top hinge to top of lower hinge, 12-3/4":

20200621_095133.jpg

Installed:

20200621_095831.jpg

I had roughly this dimension, from the front face of the lower hinge to the front edge of the body tub:

20200621_102531.jpg

Both lower hinges installed, Part's Monkey approved:

20200621_102659.jpg

Did a little organizing/sorting/shopping.

Steering column parts to reinstall:

20200621_113745.jpg

Way too many hinges for the available doors?

20200621_113752.jpg

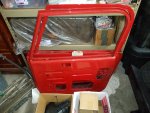
Door hardware, as it came from JeepAddict:

20200621_113801.jpg
 

certifiablejeep

Definitley Certifiable
Lifetime Member
City
Bedford
State
NH
I wrestled a lot with that with the new floor... used the originals and measured 10x and drilled once... looks like you got it pretty good.

cb
 

spankrjs

Scrambler Junkie
Lifetime Member
SOA Member
City
Biloxi
State
MS
"Red Solo Cup, I fill you up" with door hardware, from JeepAddict:

20200621_113812.jpg

Besides a bunch of door crap, not too much stuff left in the bed:

20200621_113817.jpg

Decided to hang the doors next:

20200621_113832.jpg

Note to self - remove all primer/paint from the door hinge pins FIRST before trying to install the doors:

20200621_115901.jpg

Passenger door hung, note gap at top hinge. No big deal. Step 1, loosen the already installed hinge screws adjust hinges. Step 2, strip out all 6 Torx heads!!!!!!!!!!!!!!

20200621_121049.jpg

I needed some new drill bits, so went shopping and bought a bunch of new hardware for the doors:

20200621_125131.jpg

To remove the stripped Torx bolts, this is what I did.

1) Drilled a 1/8" pilot hole straight down the middle, all the way through the bolt
2) Followed the 1?8" hole with a 3/16" drill bit, all the way through
3) Used the drill bit that came with the screw extractor, drilled the first 1/4" of the Torx head with it, used extractor to bust head off bolt
4) Drilled remaining bolt out with 17/64 bit
5) Re-tapped hole with 5/16 tap
6) Repeat 5 more times

Picture of one hole, head of bolt broke off with extractor:

20200621_130455.jpg

20200621_130501.jpg

After final drill/tap:

20200621_130655.jpg

One down, 5 to go:

20200621_130947.jpg
 

spankrjs

Scrambler Junkie
Lifetime Member
SOA Member
City
Biloxi
State
MS
I wrestled a lot with that with the new floor... used the originals and measured 10x and drilled once... looks like you got it pretty good.

cb

I got lucky. I started to pull measurements, then just eyeballed it. The holes go between the side/floor seam, and the bracket, a bit forward of the support bracket bolts. I just "winged it", came out good :thumbsup:
 

spankrjs

Scrambler Junkie
Lifetime Member
SOA Member
City
Biloxi
State
MS
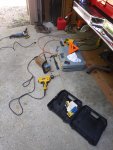
Tools I used for Torx bolt extraction:

20200621_131004.jpg

New hardware, with old/missing hardware:

20200621_153400.jpg

My favorite picture from this weekend, the remains of 6 OEM Torx bolts!!!!!!!!!!!!!!!!!!!!!!!!!!!!!!!!!!!!!!!!!

20200621_154710.jpg

I thought it was funny that the extractor actually removed the last bolt I worked on LOL!!!!!!!!!!!!!!!!!!!!!!!!!!!!!!

6 new bolts installed, now I can adjust door, PM approved.

20200621_154718.jpg

Only good thing about a Torx bolt - the stripped head makes it easy to center up drill bits!!!!!!!

20200621_155142.jpg

20200621_155149.jpg

Aftermarket door gasket way too thick at cowl/WS area:

20200621_164602.jpg

Passenger door installed. Initial adjustments made. From inside, rear gap looks too big:

20200621_172214.jpg

20200621_172221.jpg

Outside, front gap is a bit too wide IMO, but this is as good as it gets. Hard to get the doors exactly centered AND function properly IMO:

20200621_172233.jpg
 

spankrjs

Scrambler Junkie
Lifetime Member
SOA Member
City
Biloxi
State
MS
Passenger door installed, initial adjustments OK, Part's Monkey Approved:

20200621_172334.jpg

All of the painted Torx headed bolts I have removed, for safe keeping:

20200621_173252.jpg

A few reasons for pulling the bolts:

1) I prefer stainless
2) OCD
3) Piss off JeepAddict
4) Most important - the more you try to remove/reinstall painted bolts, the more likely the paint will be chipped off, especially Torx!!!! With all the adjustments needed, the paint on these bolts would be destroyed. Ideally, all of these major adjustments wold be made PRIOR to paint. Prime everything, including hinges. Reassemble and adjust. Final Paint. Final assembly. Live and Learn.
5) I hate Torx bolts with a passion.

That's it for now :wave:
 

Jeep Addict

Scrambler Junkie
Lifetime Member
City
Baton Rouge
State
La
#3 should have been #1
So much for an OEM resto but I guess that went out the window with the RE 4.5
 

onesourcemike

CJ-8 Member
Gold Member
City
Wilmington
State
NC
Passenger door installed, initial adjustments OK, Part's Monkey Approved:

View attachment 84662

All of the painted Torx headed bolts I have removed, for safe keeping:

View attachment 84663

A few reasons for pulling the bolts:

1) I prefer stainless
2) OCD
3) Piss off JeepAddict
4) Most important - the more you try to remove/reinstall painted bolts, the more likely the paint will be chipped off, especially Torx!!!! With all the adjustments needed, the paint on these bolts would be destroyed. Ideally, all of these major adjustments wold be made PRIOR to paint. Prime everything, including hinges. Reassemble and adjust. Final Paint. Final assembly. Live and Learn.
5) I hate Torx bolts with a passion.

That's it for now :wave:

Part's monkey looks very excited!!! :D LOL
 

spankrjs

Scrambler Junkie
Lifetime Member
SOA Member
City
Biloxi
State
MS
I have abandoned this project, and poor Part's Monkey, long enough!!!

I quit working on this one to work on both of my Scramblers prior to the Michigan trip. I have been side tracked by yard work the last few weeks, time to get going, again.

I have been waiting on some parts from JeepAddict, got tired of waiting, finally drove over to Louisiana to pick them up two weeks ago:

20200809_132157.jpg

So, I have some of the parts I have been waiting on, will get back to work real soon.

Besides, not much activity on this site, we need more pictures LOL!!!!!!!!!!!!!!
 

spankrjs

Scrambler Junkie
Lifetime Member
SOA Member
City
Biloxi
State
MS
OK, let's "ease" back into this one, with a few "easy" tasks.

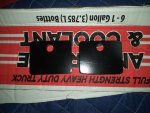
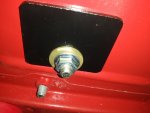
I installed my homemade under floor seat belt reinforcing plates. These mimic the thin plates used by the factory on shoulder belt models. This 1981 tub did not have any, so I made some. Two months for the paint to cure should be more then enough LOL!!!

The two plates:

20200829_100426.jpg

Installed:

20200829_100757.jpg

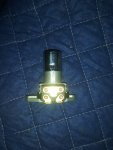
Another "easy" task, repairing/replacing the high/low beam clicker.

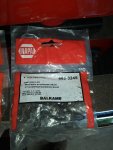
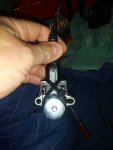
Replacement from NAPA:

20200829_101248.jpg

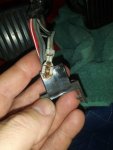
One of the thin metal contacts on the OEM one broke off inside the harness connector:

20200829_101308.jpg

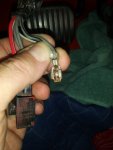
Used the green handled tool to get the spade connector out of the harness connector:

20200829_101951.jpg

20200829_102003.jpg

Gently pried up one side of the spade, got the broke piece out:

20200829_102404.jpg

Pretty rusty:

20200829_102417.jpg

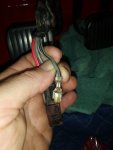
Cleaned it up with some emery cloth, reshaped the spade connector, good to go:

20200829_102725.jpg

The problem with the replacement clickers: the part that the harness connects to does not stick out far enough from the main body for the OEM connector to "snap" into place. So, I zip tie the connector, like so, to keep the connector on tight. If it were mine. I would cut the clips off, but it is not, so I left them.

20200829_103609.jpg
 

spankrjs

Scrambler Junkie
Lifetime Member
SOA Member
City
Biloxi
State
MS
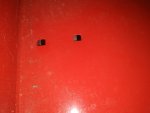
Another problem with this body: it is missing the OEM plastic lugs that the high beam clicker screws thread into. I have two 3/8" by 3/8" square holes where the plastic bits should be:

20200829_103947.jpg

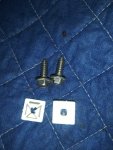
Easy fix, some generic license plate bracket thingies, and some big stainless screws:

20200830_125213.jpg

Snap the plastic things into the holes, screw on the clicker, done:

20200830_125458.jpg

I will probably "straighten" out the white plastic things, they are crooked and it is driving me crazy!!!!!

One easy task done. Then, it goes sideways, as usual!!!!!!!!
 
Top