• Notice for iPhone users: DO NOT use the image size reduction option when uploading photos to the forum. This causes portrait images to post as landscape. We have added a warning to the image insert pop-up as well.

1985 4 cylinder Base Model CJ-7

Piddled around with this one some more this weekend.

Quick wash to get the tree sap off:

20220604_092211.jpg

There were only two non-operative electrical items left to repair: the horn did not work, no interior dash lights.

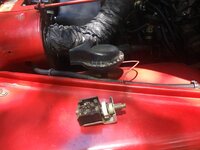
Dash lights were easy, new headlight switch fixed that issue. On the horn, I had to pull the column apart, remove some corrosion from the horn contactor parts, and now the horn is working!!
20220604_124133.jpg

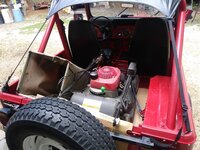
Since this one has fuel in the tank, I used it to haul around my Honda lawn mower to go cut some grass. Lawn mower fits perfect in the bed, with room to spare for a 5 gallon gas can. The lower bed height makes it easier for me to load/unload the heavy self propelled lawn mower by myself. So, put it to work:
20220604_144504.jpg

The bad thing about hauling the lawn mower in the bed: Once you finish cutting grass, and you load back up and get on the road, you will get covered by all the lawn debris flying off the mower and the bag!!!! So, I think I will go back to hauling the lawn mower in the bed of a Scrambler!!

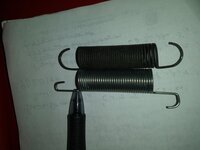
The throttle return spring was getting soft, and not really an easy way to add an additional spring. So, fabricated up a new, slightly tighter return spring, works perfect:
20220605_103828.jpg

For some reason on these YFA carburetors, the throttle return springs can be touchy. There is a fine line between too soft and too tight, Well, in my experience anyway.

I have been driving this Jeep regularly, and it has been running/operating great. Pretty fun little CJ to drive, IMO. I filled it up with fuel a few weeks back, I wish I would have wrote down the mileage. But, and I am "guessing" , I would say this thing is averaging over 20mpg as it sits now. With the cost of fuel, not too bad at all. I will record the next fill up mileage and report back on the MPG.

Since this one sits outside, it is usually the first Jeep i jump into to drive. And, it has gas in the tank!! Both Scramblers need fuel, I was hoping gas prices would drop, but I don't see that happening anytime soon. So, this one will continue to be my "knock around" Jeep for the foreseeable future, or until @Jeep Addict steals it back!!! It is a simple little Jeep, but that is what makes it so fun to drive around. Just a honest little CJ.

Well, enough of that. One problem finally reared its head again - the clutch master cylinder started leaking:
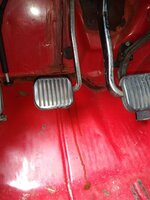
20220605_142730.jpg

It has not leaked a drop over the last few weeks, but it started gushing yesterday after driving it around for over 2 hours:

20220605_142730.jpg

Washed out the brake fluid, parked it behind the house, going to have to take it "off line" for a bit:
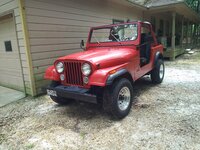
20220605_143208.jpg

I had been "assuming" that the master cylinder under the hood was the original Girling unit. After closer inspection, it is not. It does not say "Girling" anywhere on it:

20220605_143400.jpg

It does have these markings cast into it:

20220605_143418.jpg

More on this in a bit.

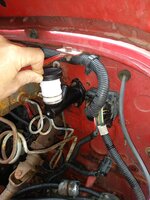
To remove the brake master cylinder, pretty easy: loosen the hydraulic line, remove two nuts off the fire wall studs, and pull the cotter pin/washers off the clutch pedal assembly (like a manual brake master cylinder).

Picture below was for me: cotter pin, then thick washer, then master cylinder rod (where my finger is), and finally a wave washer:

20220605_152701.jpg

I was worried about the hydraulic line, but it came out no problem. Removed the clutch master cylinder, and again, washed off all the spilled brake fluid:
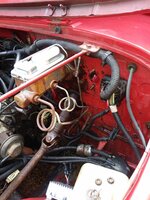
20220605_153628.jpg
 
When Jeep Addict first received this Jeep, the clutch master cylinder was empty, except for a bunch of gunk. I wiped it out, filled it with Dot 3, the clutch worked. The clutch master cylinder has leaked off and on since then.

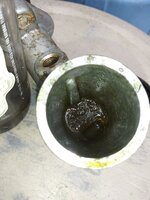
Pulled the master cylinder off, dumper out the fluid, yeah, pretty bad!!!!!!!!!!

20220605_153642.jpg

Some more gunk inside the master cylinder:


20220605_153648.jpg

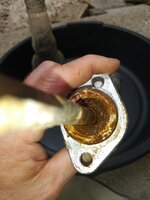
Pulled the big "dust boot" off the rod end, revealing more crud:

20220605_154110.jpg

Scraped this gunk out, revealed the snap ring that holds it together. Not the best picture, but there is a snap ring in there!!


20220605_154446.jpg

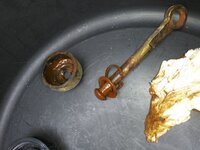
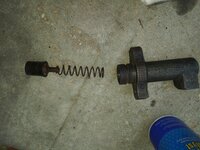
Pull the snap ring off, the rod comes out, covered in rust/gunk:
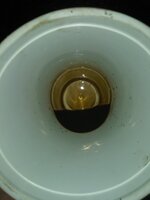
20220605_154527.jpg

All this gunk is "external" to the fluid chamber, so not too concerned about it. Basically, once that piston seal starts leaking, brake fluid accumulates on these steel parts, corroding them. The outer dust boot keeps this fluid/gunk trapped, until the boot fills with fluid and leaks out the weep hole/around the rod shaft.

A little bit of corrosion where the steel washer/retaining clip fits in the bore. Again, the seal does not travel this far outward, so not too concerned about this area of corrosion.

20220605_154650.jpg

To remove the piston assembly, I sprayed the cylinder with some penetrating fluid, let is soak for a bit, then smacked this part pf the cylinder with a hammer, which knocks out the piston:

20220605_160549.jpg

Do this over a bucket or towel so that parts do not go flying everywhere!!!!

The piston assembly, with the important seals in place:


20220605_160556.jpg
 
  • Like
Reactions: SKT
Did a quick cleaning job, the internal bore looks smooth, no pits or rough spots. I would guess that the seals just wore out/shrunk with age/use??

20220605_160604.jpg

20220605_160609.jpg

20220605_160613.jpg

I would imagine a quick "hone job" would get this bore usable again. There are a few pits way down deep in the cylinder, but again, pretty sure the piston/seal will not travel this deep into the bore??

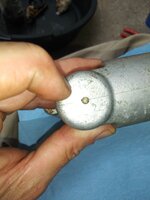
The only markings on the master cylinder body:

20220605_160624.jpg

20220605_160641.jpg

To disassemble the piston assembly, you gently pry up the little steel "wings" on this black piece:


20220605_162717.jpg

Again, be careful, parts can go flying.

The disassembled piston assembly:

20220605_162821.jpg

20220605_163439.jpg


And all of the clutch master cylinder components:

20220605_163453.jpg
 
Unfortunately, all of the above work may be purely academic. I can not find a rebuild kit for this master cylinder? There are a few on eBay, but none of the seals/parts they contain are similar to the one that came off of this Jeep.

I am 99% sure that the above master cylinder is an aftermarket replacement unit. The listing below, from eBay, shows a NAPA clutch master cylinder that looks exactly the same as the one I took apart:


Hard to see, but the date on the NAPA box in the above listing is "2012".

Anyway, I prefer the "look" of the master cylinder I took off of this Jeep to the more current readily available units. In hind sight, I should have bought the unit I listed above off of eBay. It more closely resembles the original "Girling" unit. More importantly, I like how the reservoir is part of the master cylinder, not a separate part, with a seal, that could leak :twocents:

I already bought a "new" master cylinder from NAPA, same part number as the eBay listing, BUT note the "date" on the box:

20220605_164056.jpg

So, some time between 2012 and 2020 the master cylinders change.

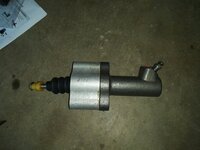
What a current 72308 looks like compared to the old 72308:

20220605_164103.jpg

20220605_164113.jpg

I thought there would be a fitment issue, but it will fit just fine. Seems to be almost identical dimensions.

Quick mock up:

20220605_164800.jpg

So, the unit will work, I'm just not crazy about the appearance. I will install my "new" master cylinder, give it a whirl. It could always be swapped out again later, easily, for aesthetic purposes.

Since there was so much crud in the master cylinder, I am going to assume that the slave cylinder can not be in any better shape. I ordered a new slave cylinder today, I will swap them both on at the same time. I will clean/inspect the original steel hydraulic line. If I have doubts about it, I will install a new line, too.

I "might" see if I can get some new seals for the old clutch master cylinder. I believe some new seals would have it leak free again. The eBay listing is tempting, but the seals in that "new" unit are at least 10 years old. Same with some of the slave cylinder rebuild kits I am seeing, new old stock, at least 10-15 years old.

Since I am a "newbie" to hydraulic clutches (well, my 2005 TJ Wrangler had a hydraulic clutch, but I never had any issues out of it, so it doesn't
count!!) I am thinking new master/slave cylinders will give me the best odds of success.

That's it for now :thumbsup:
 
Got diagnosed with Covid last Tuesday, but never really got too sick. Anyway, felt a little better this weekend so finished up the hydraulic clutch work.

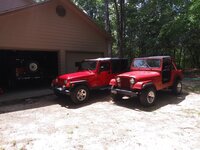
As I left it last week (damn red Jeeps sprouting up like weeds here, bought my LJ back the other day):

20220610_161220.jpg

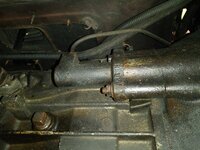
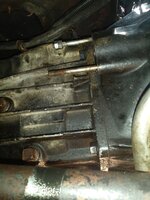
Since the clutch master cylinder was pretty nasty internally, decided to swap out the slave cylinder, too. The slave cylinder on the AMC 2.5 liter engine is on the passenger side of the bell housing:

20220611_132138.jpg

Since the slave cylinder is on the passenger side, and the master cylinder is on the driver side, you get this really long/strange hydraulic line that crosses over the engine to connect the two components. You can see it leaving the slave cylinder in the picture above.

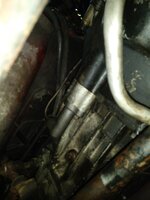
It then goes up and over the bellhousing. You can just see it, in the picture below. It is visible to the right/above the wire loom, behind the cowl drain hose.

20220611_132212.jpg

One of the upper block to bell housing bolts secures this line to the engine. (an "L" bracket bolts to block, a screw holds a small tab that is crimped around hydraulic line)

Past this connector, the line is rubber, and then changes back to steel. The 2nd steel tube is screwed to the fire wall near the the brake lines that run down to the brake proportioning valve:

20220611_132248.jpg

This line then runs vertical, makes a loop, and enters the top of the clutch master cylinder:

20220611_132235.jpg

The slave cylinder on this Jeep looked original, and had the 'Girling" info stamped on to it. The clutch master cylinder was aftermarket. That being said, some one had messed with the slave cylinder/line before. The hex fitting on the slave cylinder was a bit boogered up; the upper block to bell housing bolt that secures the line "L" bracket was loose.

I had to lower the slave cylinder, with the line still attached, to break the line loose:

20220611_143010.jpg

With the upper block bolt out, AND the lower firewall screw out, AND the clutch master cylinder removed, there is enough slack with the hydraulic line to lower the slave cylinder with the line attached, no worries about damaging the line.

Original slave cylinder:

20220611_144235.jpg

Wise choice, it was leaking, too:

20220611_144255.jpg

Fluid inside the slave cylinder was black and full of crud:

20220611_144423.jpg
 
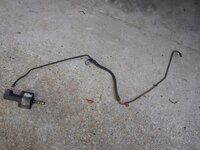
The above mentioned hydraulic line:

20220611_145723.jpg

In the picture above, the slave cylinder end of the line is next to the slave cylinder.

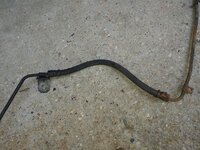
Since part of this line bolts to the block/bell housing, and the other end bolts to the fire wall, there is a short section of rubber hose to allow for drivetrain/body flex:

20220611_145729.jpg

I blasted this line out with brake parts cleaner to clean it out. I did this until cleaner came out clean. This line is still OK, but if a new line was readily available for this application, I would probably swap it out. I did not look everywhere, but I could not find a reproduction line available for this application? A braided line with AN to brake line fitting adapters would work in a pinch, too? Anyway, I cleaned this line out and will reuse it.

I bought a new "made in CHINA" slave cylinder from O'Reilly's:

20220611_153140.jpg

Well, at least it is "externally mounted", so easy enough to swap out!!!!!!!!!!!

But, something is different:

20220611_153150.jpg

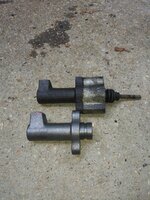
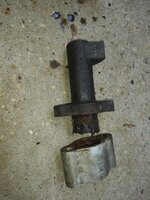
There is an aluminum "spacer" that mounts between the slave cylinder/bell housing. On this Jeep, a combination of crud/time/melted rubber fused the spacer to the old slave cylinder. I had to twist/smack the spacer off the old slave cylinder!!

20220611_155334.jpg

I do not know what formed this hard/honey colored film/gunk, but it sure bonds stuff together!!

20220611_155345.jpg

20220611_160050.jpg

Cleaned the spacer up and set it aside.

The new slave cylinder has a retaining clip to keep the piston from popping out. The old one is supposed to have a clip, but it completely rusted away to nothing!!

New:

20220611_162447.jpg

Old:

20220611_162432.jpg

Realistically, the piston can not overextend once installed due to the push rod contacting the throw out bearing arm. Still pretty cool the old clip had completely rusted out!!
 
  • Like
Reactions: SKT
Just for the hell of it, I took apart the slave cylinder. I used one of those "cans of dusting air" to force out the piston from the body:

20220611_165012.jpg

The internal bore looks OK.

20220611_165448.jpg

A quick hone and a new seal would probably get this component serviceable again. I saved the slave cylinder, and the master cylinder, for a future rebuild, IF the parts/seals can be found.

Since the slave cylinder is at the bottom end of this hydraulic system, it catches all the crud!!!

20220611_165453.jpg

This is my first time messing with hydraulic clutch stuff. But, if I ever have to do it again, I would definitely plan on swapping ALL the components out, due to possible contamination. Well, if all the parts are EXTERNAL. I have not messed with an internal slave cylinder, OR a hydraulic release bearing, and hope I never have to!!!!

The original slave cylinder push rod has a plastic cap on the end, that fits into/against the clutch release arm inside the bell housing. The ID of this plastic cap was too tight to fit on the new slave cylinder's push rod. I could have bored out the plastic end, but decided to keep it original. What are the odds of finding another one of these plastic end pieces??

Since this push rod is made of the very finest "Chinasium Steel", I chucked it in my drill and spun/turned it against a file, then some sand paper. RedNeckRay lathe, but it works!!!!

20220611_172411.jpg

The reassembled slave cylinder assembly:

20220611_175354.jpg

Note the yellow plastic end piece on the push rod.
 
One other detour.

This is a picture of the original slave cylinder installation:

20220611_132138.jpg

Note the two studs:

Upper stud - no threads extend past the nut
Lower stud - 3-4 threads extend past the nut

At first, I thought maybe someone broke the end off the upper stud? But, it is intact. For some reason, the upper stud is shorter then the lower stud?

Upper Stud - 2.5"
Lower Stud - 2.75"

20220612_105424.jpg

The nuts that go on these studs take a 1/2" wrench, BUT the nuts/studs are Metric. IIRC, 8mm.

I attempted to "double nut" the upper stud, twist it out a few threads, to satisfy my OCD.

20220612_112407.jpg

No bueno. I put a little heat on the stud, maybe twisted it out a half turn, but that is it. I did NOT want to put more heat on it, risk damaging/melting/burning/catching something on fire. I also did NOT want to snap the stud off. That would suck. In the end, sometimes you have to choose your battles, and the downsides definitely outweighed any slight benefit, so my OCD was defeated in this battle. Live to fight another day and all that BS.........................

I have never bled a hydraulic clutch system, either. I have read it can be a major PIA. The slave cylinder on this application has a bleed screw, AND the slave cylinder is located at the lowest part of the system. So, no problem, right? Well, just one. The hydraulic lines comes out the top of the master cylinder vertically, higher then the reservoir. Also, this line then runs straight down, then up, etc. There is no way hydraulic fluid will naturally just flow up this line higher then the reservoir.

My solution:

20220612_115337.jpg

I hooked the hydraulic line to the slave cylinder, BUT I left the slave cylinder dangling, i.e. not installed. This makes it easier to get to the bleeder screw. I cracked the bleeder screw, and filled the clutch master cylinder reservoir. I then installed my hand vacuum pump to the bleeder screw on the slave cylinder. I put a vacuum on the bleeder screw, which draws hydraulic fluid through the hydraulic line into the slave cylinder. I disconnected the vacuum pump, left the bleeder cracked, and ran a pint of fluid through the system. MAKE SURE YOU DO NOT LET THE RESERVOIR RUN EMPTY WHILE YOU ARE BLEEDING THE SYSTEM!!!!!! I then shut the bleeder screw, and installed the slave cylinder:

20220612_121141.jpg

The upper stud is recessed inside its attaching nut one thread or so. As good as it will get. I might go back and put a dap of red Loc-Tite on this nut.

So, everything installed, system bled, clutch works. Nope. I had no pedal. Zero. I scratched my head and ass for a bit, decided to try something:

For whatever reason, I do NOT like how the hydraulic line comes out the top of the master cylinder vertically, then loops down. I am sure there is a reason for this beyond my limited Mississippi intellect/brain power. Whatever. I decided to loosen the hydraulic line at the master cylinder. I loosened it almost all the way out, and finally fluid started leaking out at the fitting.

20220612_131336.jpg

I added a bit of fluid, retightened the line, voila, clutch works perfectly :thumbsup: I am going to "assume" there was an air pocket here. Regardless, easy enough!!!!!!!

Like I mentioned earlier, red Jeeps are spreading like weeds around here, 2 of the 3 need to go!!!!!!!!!!!!!!

20220612_142711.jpg

Test drove this Jeep around for about an hour, clutch is working perfectly. I still am NOT a fan of hydraulic clutches. Too much BS to break/leave you stranded IMO. But, this clutch system is working fine, AND the pedal is more "softer/easier to push down" then the conventional mechanical linkage, if that's your thing.

Not really any other major repairs planned for this one. I might piddle with a few more things, but realistically, it is time for this one to find a new home!!!!!!

That's it for now :wave:
 
Last edited:
Well if you weren’t already finished, I probably won’t be using my line again. Also mine was all bled by the upper nut.
 
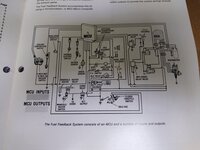
Just a quick interesting picture from the AMC Emissions booklet.

20220613_164205.jpg

Note the "Shift Light" and "High Gear Switch" in the center of the picture, both unique to the 4 cylinder models, I presume? I "think" that the "high gear switch" is located on the top of the transmission (T5), passenger side. I am pretty sure I saw it when I was messing with the clutch slave cylinder.

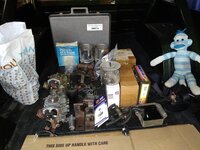
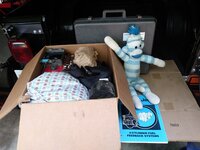
Gathering up all the spare/left over parts, packing them up, mainly to help clean up the garage!!!!!

20220613_163055.jpg

20220613_164408.jpg

Like a puppy at the pound, just looking for a new forever home!!!!!!!!!!

20220613_163117.jpg

That's it for now :wave:
 
Viola...1 Jeep forward and three Jeeps back. Ernie, Meanie, Miney sorry Mo. Load em up so we can go. Block him in so he can’t leave...Ernie,Meanie, Miney SpanKsitrjs! This pickup Order will consist of 1Tripple Slate Blue Metallic Scrambler-82, 1 Triple Slate Blue Metallic CJ-7- I believe 83 and one Sebring red 7-maybe 85 stock base with cruise tach tilt. This Jeep is a total anomaly. This Jeep is THE only Jeep CJ to have seven families of field mice fleeing in this Jeep from their home land crossing rivers escaping the chupacobara, twice, along the way yet finding solace in my warehouse as they were escaping to the calming sounds of the roll up doors closing. Never once was their Sneakyness ever detected by the Arizona landlord. devil. Or, the last to choose from is Deep night blue 83 Slate interior CJ7. Then its off to a tune that Alabama sang, just to send it on down the line!
 
Spanks, I think it's safe to say - you can quit your day job.

Excellent and entertaining. Maybe the parts monkey can get a gig as a spokesman for the "bent carrot" commercial?
 
I have been driving this one around some, two issues:

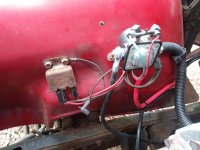
1) And this has happened before, turn the key, no starter. Changed the fender mounted starter solenoid, hopefully that fixes it.

20220818_173139.jpg

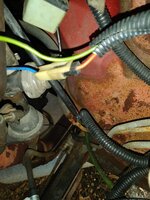
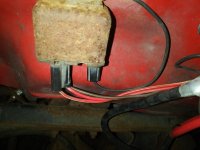
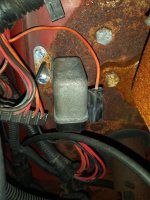
2) The above picture has part of the issue. So, forward of the solenoid, the little metal box with the wires coming out of the bottom. I have not verified, but I believe this is the "choke relay", for the AMC 4 cylinder CJ's. I have been experiencing a random high idle from time to time. The other day, the choke was randomly engaging kicking up the idle?? I manually backed the choke all the way off, this stopped the fast idle, but did not fix the issue. The ground wire tab coming out of the bottom of this relay is broken/loose. Close up of the wires coming out of this doo-hickey:

20220818_190115.jpg

The single black wire is a ground. More diagnostics required, but I believe this doo-hickey is FUBAR.


Another issue involving the "random fast idle":

20220818_190220.jpg

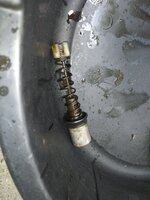
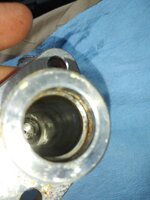
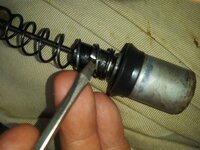
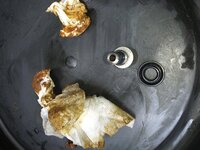
This silver metal doo-hickey, bolted to the fire wall directly inboard of the brake master cylinder, is I "believe" Anti Diesel Relay. I could be wrong here, have not traced the wires out. Anyway, even after disabling the choke, I am getting random/5-10 second duration fast idles. Upon examination, the Sol-Vac is kicking up the idle speed, for no reason (NO AC, not turning the steering wheel). More research needed here, BUT, since day one, if you disconnect/connect the + battery cable, or + wire on the solenoid, this thing chatters/clicks like crazy. More diagnostics needed.....

The other three, more common, greyish/green colored relays along the firewall:

20220818_190231.jpg

One of these is for the intake manifold heater, I will trace out the other two and figure out their purpose.

Quick picture of some of the AMC 4 cylinder feedback wiring/diagram:

20220818_190432.jpg

No where near as much information on the web about the AMC 2.5 feed back system compared to the 4.2, so more digging on my part.

The original choke relay and the original anti-diesel relay are probably about impossible to find NEW. With some web digging, I found potential replacement parts for both, and ordered them, just in case:

Anti-Diesel Relay - NAPA AR253, or "BWD R653". Looks different, someone on the internet said it works, use at your own risk. At NAPA this thing is like $40 new, bought a new one off eBay for $13.

Choke Relay - SUPPOSEDLY :

Standard Motor Products RY144
Advance Auto MR94
Borg Warner R3254
Wells 19967
NAPA AR740 (close to $50 new from NAPA, bought a new one from eBay for $18)
Car Quest 56-1795
GM 14089568 (best number to search)
AC Delco D1780

The replacement choke relay looks nothing like the OEM metal cased unit. The replacement is a plastic cased modern looking relay, The OEM metal cased unit has a separate ground wire, the new plastic unit does not. I will have to see if this impacts its function. According to the internet the above modern replacement relay should work.

I need to chase some wires to confirm some stuff, so that's it for now :thumbsup:
 
  • Like
Reactions: SKT
I’ve got those on mine, that are probably not being used. Since I removed my carb and had a Weber on there. Look new compared to yours
 
I’ve got those on mine, that are probably not being used. Since I removed my carb and had a Weber on there. Look new compared to yours
You won't/don't need them with the carburetor swap, and the future fuel injection/engine swap, so send them on over :thumbsup:

I need to get this one back to JeepAddict and pick yours up :cheers:
 
2) The above picture has part of the issue. So, forward of the solenoid, the little metal box with the wires coming out of the bottom. I have not verified, but I believe this is the "choke relay", for the AMC 4 cylinder CJ's. I have been experiencing a random high idle from time to time. The other day, the choke was randomly engaging kicking up the idle?? I manually backed the choke all the way off, this stopped the fast idle, but did not fix the issue. The ground wire tab coming out of the bottom of this relay is broken/loose. Close up of the wires coming out of this doo-hickey:

The single black wire is a ground. More diagnostics required, but I believe this doo-hickey is FUBAR.
Yeah the black ground is for the solenoid so the relay would not function properly if it is bad.
Another issue involving the "random fast idle":
This silver metal doo-hickey, bolted to the fire wall directly inboard of the brake master cylinder, is I "believe" Anti Diesel Relay. I could be wrong here, have not traced the wires out. Anyway, even after disabling the choke, I am getting random/5-10 second duration fast idles. Upon examination, the Sol-Vac is kicking up the idle speed, for no reason (NO AC, not turning the steering wheel). More research needed here, BUT, since day one, if you disconnect/connect the + battery cable, or + wire on the solenoid, this thing chatters/clicks like crazy. More diagnostics needed.....
I believe by the wiring that is the "Anti Diesel Delay Relay"
Quick picture of some of the AMC 4 cylinder feedback wiring/diagram:

View attachment 104712
My '83 258 was having severe "blowback" issues, after lots of searching under the mess of wires and hoses I found the PCV solenoid melted and stuck closed, after removing it all my problems went away. I later found out that AMC had released a TSB for removal of it.
I know this isn't your issue but just wanted to give you a heads up on the TSB, not sure if it was for the 4cyl also.
 
Yeah the black ground is for the solenoid so the relay would not function properly if it is bad.

I believe by the wiring that is the "Anti Diesel Delay Relay"

My '83 258 was having severe "blowback" issues, after lots of searching under the mess of wires and hoses I found the PCV solenoid melted and stuck closed, after removing it all my problems went away. I later found out that AMC had released a TSB for removal of it.
I know this isn't your issue but just wanted to give you a heads up on the TSB, not sure if it was for the 4cyl also.
Yep, this one came with the PCV solenoid, I removed it :thumbsup:

I will have to check the wiring, but:

1) I guess I can see how/why the OEM metal cased "choke relay" would need the little ground wire, same with the "anti diesel solenoid".
2) IF I replace the OEM choke relay with a new plastic one, I would assume that as long as I ground the black wire harness wire it would function
3) Same with the replacement anti diesel solenoid, ground the black wire that is coming from the harness
 
Back
Top