• Notice for iPhone users: DO NOT use the image size reduction option when uploading photos to the forum. This causes portrait images to post as landscape. We have added a warning to the image insert pop-up as well.

CJ8 Scrambled is now a garage pet

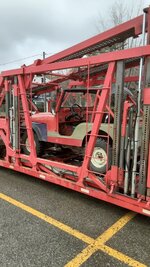
CJ is on its way. Sad to see it go. Fun little buggy.
20210417_121842.jpg
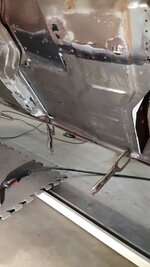
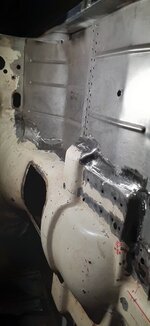
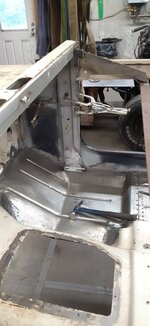
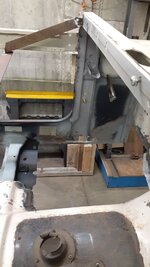
Now to continue where it was left off. A pillar on passenger side. In place...not permanently just to help things along
20210417_100243.jpg
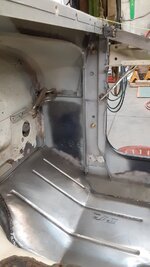
Drivers side in place waiting for the floor.
20210417_100223.jpg
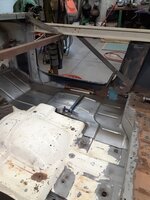
I cut the floor in half because I did not think I could pull everything in place...especially on the rear section. Things just were not lining up with existing.
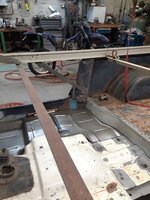
20210417_090953.jpg
20210417_090918.jpg
I am going to try full length on driver side. The big areas of concern was where the two pressed seams fell. They would not fall into place as other areas were worked. See how it goes.
Front passenger section layed in.20210402_163253.jpg
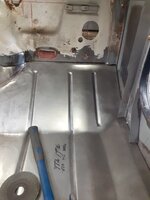
Reference to what was mentioned above. Passenger side A pillar. Set in place and clamped/bolted/spot weld placement for alignment purpose. 20210417_100108.jpg
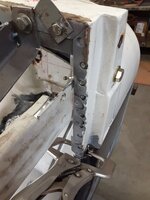
Tacking the floor in place...more pics as that progresses. Fit up will be to coin a phrase...cut and but. Not mine...guy makes it look easy but works very well.
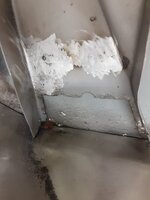
 

Attachments

  • 20210417_100201.jpg
    20210417_100201.jpg
    88.8 KB · Views: 12
So it is getting harder to find the time to work on this hobby...as the weather warms there is no justification to be inside. So a final push to at least finish what was started prior to summer time going into full swing.
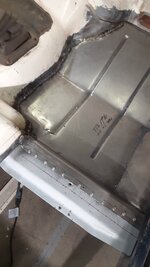
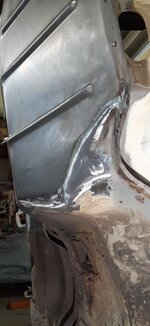
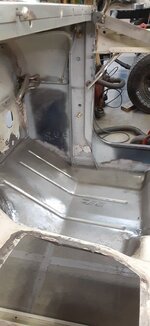
Passenger side panel was tackled and for the most part I am happy with how it came out. As my buddies, drinking my beer would say...your going to bed line or carpet it anyway....they have a point.20210420_102139.jpg
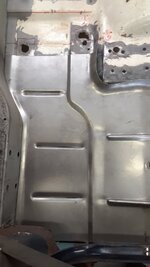
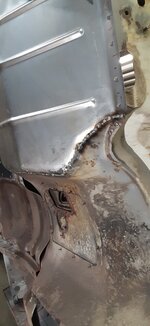
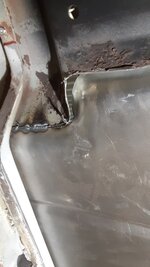
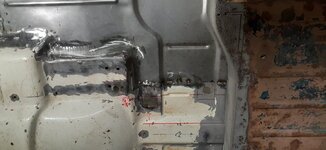
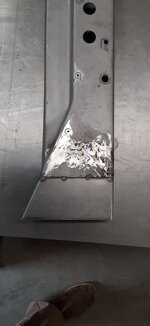
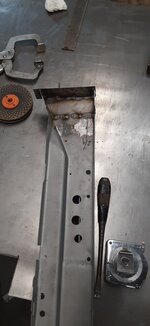
This was my problem area. As one piece I was not able to align the two sets of raised seams. Cut the panel and this is how it came together. I will be repairing the drain hole by the riser so when that square is cut out I will work the orginal seam to match the new and then weld in the patch. The seat belt hole will just be cut out and repaired.20210420_102132.jpg
Inside and outside radius needed a little massage.20210402_163238.jpg
Front section fit pretty well and tacked it in place to be able to cut the seam.
20210417_160549.jpg
As you cut you push the top piece flush with its mate and tack it in place. Pressure of this tack forces the rest to fall in place as the cut continues along.
20210518_104827.jpg
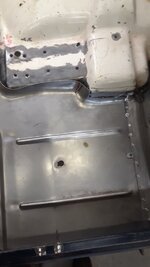
Underside cleaned up and retacked.

20210420_103943.jpg
Rear section getting ready to be tacked to allow cutting a seam.
20210420_105921.jpg
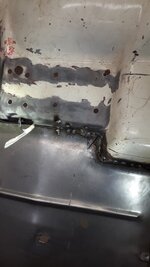
Underside wasn't pretty
20210420_110548.jpg
 
Last edited:
Underside prior to cut and but
20210420_110641.jpg
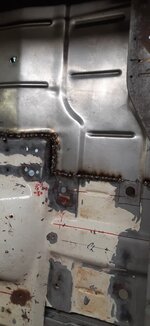
Top side.
20210420_123457.jpg
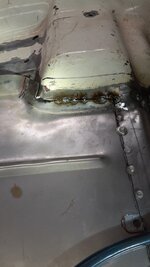
Final run back to riser
20210518_104915.jpg
Cleaning it up
20210520_134829.jpg
20210518_143318.jpg
20210520_135141.jpg
20210518_143238.jpg
I will address the two panel seam as time allows. The floor pan flange is tec screwed to firewall seam, the quarter panel (where there is metal) and along the floor flange to the riser. These will probably stay for a while. I will get the driver panel in and try for a one piece fit. Learned some.... I really wish I hadn't done that..put things away and leave now before matters are made worse things not to do again that hopefully will be applied. Then I will either attack the bed and wheel wells or stick to the front half and make it whole. Not really sure what the better option is at this time.
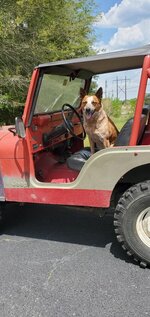
CJ5 made it to Sanford, NCIMG956272.jpg
For now. Have an enjoyable summer with family and friends.
 
Looking good...I have seen a lot of people just cut another piece of metal, hammer it on top of the hole and weld it in... it is nice to see someone take the time to make it look good.

cb
 
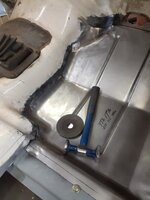
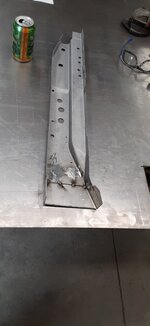
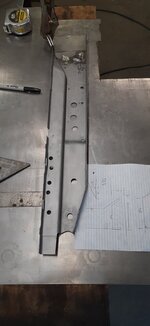
Cleaning up a few loose ends before I move to the drivers side. Specifically the passenger A-pillar. I know my floor is not at the right depth along the quarter panel, and tek screws can be moved to make this correction. What I need is the length from the top to floor
20210524_124345.jpg
I think it is somewhere around 27". If someone could measure there pillars length, I will be able to cut this to size and bolt back in place. My measurement went alongside the outside 90 at the flat top.
20210525_131428.jpg
This measurement will get the floor set and hopefully the front body mount pan set in place.
Thanks in advance.
 
From the top of the cowl panel to the floor comes in at 27 5/16 inches on mine. Same measurement driver and passenger
 
Well my A-piller is just shy of 27 1/4". Floor is in place and opted not to message. Any taller will cause separation at the cowl seam. Spot weld cuts between pillar and sheetmetal line up so I will leave alone.
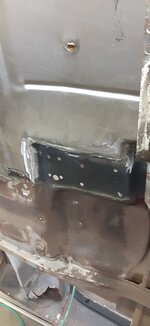
As it was.
Metal bent up and fitted.
20210525_123136.jpg
Couple of tacks.
20210525_131442.jpg
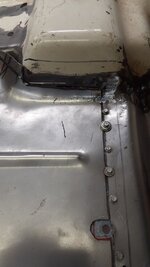
Bottom flange.
20210527_161551.jpg
Cleaned up and reinstalled.20210531_151240.jpg
Next up will be welding up the two floor halves and addressing the rust at the drain hole and seat belt anchor point. These may wait until the floor bracing is in place..
 
Last edited:
Looks great. I agree- I wouldn’t mess with it for 1/16”.
 
Summer's here which means vacation time and overtime. I choose to work blocks of nights instead of quick turn arounds to work day when filling shifts. So little CJ projects or mountain biking in the woods are what happens when I am waiting to go to work.
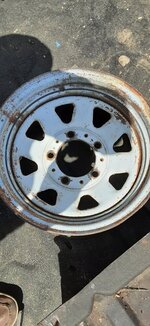
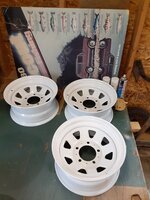
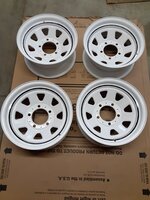
Scrambled rims were pretty bad so I had a local blaster clean them up and epoxy paint them.
20210514_113436.jpg
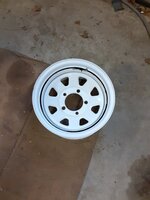
This was probably the best of the 5 rims
20210630_150252.jpgI am happy and unhappy with them but it is what it is. The original rims had the stripe so I tried to replicate it.
20210630_161409.jpg
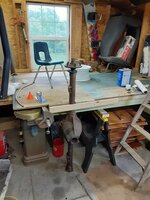
The stripping rig.
20210630_155922.jpg
First attempt on a junk rim I had. Ran away. It is a tough spot to roll because of the rim edge and angle. Needed to speed my rolling fingers up.
20210630_150306.jpg
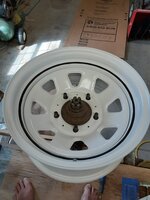
Second attempt and a keeper. I think I should have put the rim face down to prevent run. Looked really good on the jig.
20210630_155945.jpg
Four done. Didn't seem to matter about speed it still did a little running that required clean up. The fifth rim I need a do over it was pretty bad. Something to do tomorrow. All in all I will be OK with them and as messy as it was a pretty fun way to fill some time.
 
Last edited:
Interesting. My wheels had the stripe centered on the valve stem hole. What did you use to paint the stripes? I was going to invest in a Beugler striper. And a low rpm high torque motor to turn the wheel at a constant speed.
 
I purchased a marshalltown: ember paint striping wheel 1/4" from Jackson's art supplies. As much as I wanted to, couldn't justify purchasing a Beugler knowing this would most likely be a one time deal. For me. Best control was using my finger along edge of rim.
Dont know the history of the rims so copied what I had. Now looking I do see some centered on the stem. Were there differences between CJ models?
 
Last edited:
I know my hand is nowhere near steady enough to pull that off, so I was going to fabricate a holder type device. I figured that between the holder and constant speed of the motor I’d have a good chance of it working. But when my Powdercoating came back less than 100% I put the whole deal on the back burner.

I don’t know if there were different stripe placements. I do know earlier years had red stripes.

I would say for freehand yours came out good!
 
This is why I have had a professional do them for me... I can't paint/stripe at all and I know it.

cb
When I finally get to that point, I’m going to check the cost difference between having it done or buying the tools and building a jig that I’ll use once…
 
It passes the 50'/50 mph rule. The quality work you both do requires a professional.
 
Back
Top