• Notice for iPhone users: DO NOT use the image size reduction option when uploading photos to the forum. This causes portrait images to post as landscape. We have added a warning to the image insert pop-up as well.

Expedition Scrambler..?

Happy Thanksgiving everyone!!!!!!!!!!!

Today was a pretty good but tedious day. I was literally the ONLY person down at the shop working today which was nice but made me feel a little bad for keeping the German guys there all day just so I could work on my Jeep. *shrugs* Good side to being all alone is I could ride the angle grinder until my heart was content and nobody would gripe about the noise or me flinging sparks...haha! And BOY did I ride that grinder!
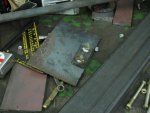
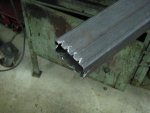
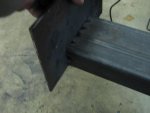
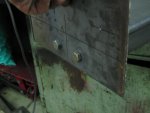
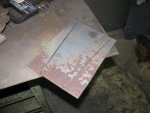
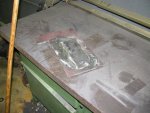
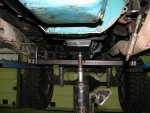
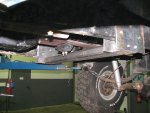
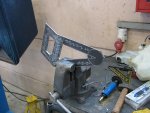
I switched back and forth between working on the inner plates for the cross member and the oil pan/girdle thing. The cross member plates are all done with just some final welding and some angles left to make for them. I really don't like that the 2x4 tubing is the low part and its basically a 2" rock stopper where it meets the frame. That is where I will put some angles..somehow. :)
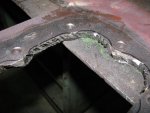
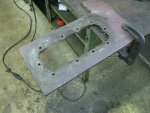
The oil pan thing... oh what a huge pain that has been. I got it all welded up and then had to spend most of the day grinding the crap out of it so that I can get a bolt with a washer, and hopefully a socket, onto all the holes. I bet I ground off over a pound of metal. Yuk! And the funny thing is that I started with a dremel tool... thinking that would let me cut the areas out easier...hahaha! NOT!
But at least the thing is mostly finished. Still needs its torque arm mount and then welded onto the girdle that goes from the tranny to the t-case but I'm getting closer everyday.
I'll add a bunch of random pics from today and some that I hadn't uploaded of the cross member build last weekend.
Happy turkey day folks! I'm back at it again tomorrow!
 

Attachments

  • IMG_0536.JPG
    IMG_0536.JPG
    84.5 KB · Views: 254
  • IMG_0537.JPG
    IMG_0537.JPG
    63.5 KB · Views: 250
  • IMG_0538.JPG
    IMG_0538.JPG
    48.5 KB · Views: 249
  • IMG_0539.JPG
    IMG_0539.JPG
    51.3 KB · Views: 248
  • IMG_0540.JPG
    IMG_0540.JPG
    103.5 KB · Views: 248
  • IMG_0541.JPG
    IMG_0541.JPG
    110 KB · Views: 252
  • IMG_0542.JPG
    IMG_0542.JPG
    97.7 KB · Views: 252
  • IMG_0547.JPG
    IMG_0547.JPG
    106 KB · Views: 252
  • IMG_0548.JPG
    IMG_0548.JPG
    103 KB · Views: 251
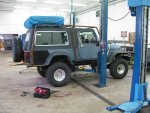
Last two...

Couldn't fit these two in...
 

Attachments

  • IMG_0549.JPG
    IMG_0549.JPG
    96.2 KB · Views: 251
  • IMG_0550.JPG
    IMG_0550.JPG
    89.1 KB · Views: 249
Everyday is a little bit closer... I guess its ADD or something but I just can't make myself cut corners and just make this thing be done. Always some randumb detail I think would be better or something that needs a little extra thought or grinding/sanding... Tomorrow I am hopeful I will be done with the fab aspect of it completely and then it will just be paint and final install. So much left to do...feel a little overwhelmed but happy I'm making progress. Pics and stuff tomorrow.
 
Well... As a photographer I am a failure. Got run out of the shop again tonight so didn't nab any pics. But honestly there isn't a lot to see that can't be visualized from the previous pics. *shrugs* Today was a good day though. I can now say that I am about 97% done with the worlds most expensive cross member! Only things left are to drill the hole for the torque arm mount into the 2x4 tubing, weld on and gusset the angle that will hold the transmission mount, and then paint it. Woot! It was a busy day of small details welding and little attention to cleaning stuff up. I did add some more metal to the 2x4 tubing to make little skid plates. :)
Not sure which project to tackle next but I'm torn between doing the exhaust and seeing what I can do to make a drive shaft. I'm leaning towards the DS as at least then I can move it under its own power... although rather loudly. ;)
One good note is I was taking a thinking break (and let my ears rest from the angle grinder) and got to looking at the bad brake line I have up front. I climbed up the worlds worst step ladder to grab the other lines I had in my stuff and made a discovery. Seems that while the fitting on the line that mounts to the caliper is different, I should be able to make it work. The hole for the bolt is a small fuzz to small but everything else looks like it should work. I will simply redrill the hole one size up until the bolt fits...ta-da! Then I will adjust the stinking STOPS! haha!
There was a civilian contractor a few bays down that was working on his 4wd clone of my Black XJ. We got to talking a little bit and I think he will be buying my white 91 (thing one) off of me when I'm ready to stop using it as storage. I will (big surprise, right) be losing money but at least it will go to a fellow Jeeper and I will make something off of it. Sigh.. I hate letting go of it since it has so much potential but we can't keep ALL the Jeeps. That is just one more thing that will be off my mind once its gone.
Well, tomorrow is back to working on the XJ. I'll get actual pics of the progress there as it should be more interesting... ;)
 
Well... crap! Got to asking around about the forth coming suspension lift for my XJ and found out I will need new control arms to go with it. Not many folks/vendors are willing to ship to the military's APO address system but I found one that did. I grilled him a bunch about what I'd need etc... and ended up ordering about a grand worth of parts. They arrived pretty dang quick too despite being gorilla handled by USPS. So I shot him an email asking why he didn't say anything about needing arms and could he send me a set of his in house long arms (another 650 bucks!). He replied that it would cost about 500 bucks to ship the long arms.... WTF!?! Well... now I'm kinda pissed and not sure where I will go direction wise for the XJ. Just...Damn! I'd order Rusty's LA kit but they don't ship to APO addressed. :(
 
Gonna have to make a necessary break from Scrambler progress this weekend. I hate to as I'm making progress and short on time but... I have a line on some related/cheap/free stuff for both my XJ and the CJ. I have a chance to nab a front dana 30 and the rear leaf springs from a junked XJ as well as the front out put yoke and CV DS (hopefully for the CJ) for basically free. I am expecting the removal of these to be a fight since rust here in Germany is always a battle with bolts. But since both vehicles need these parts I will allow myself this weekend to stand away from the CJ. Can't pass up free...right? :)
 
Today was kinda weird. On any given day that the shop manager is not there, it is usually difficult to get the German workers to actually be helpful. Its cold so they will hide inside and only do the bare minimum...sux but there it is. *shrugs*
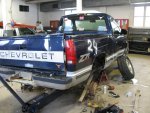
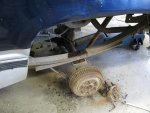
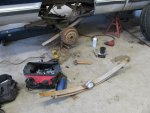
I had a lot to get done today and only made so-so progress. The bay I had hoped to use which is a straight shot from where the Jeep is parked was one of the first ones grabbed by someone else. So to keep moving forward and not have to fight the CJ into a different bay (sux rolling the thing and it was icy so little traction) I moved on to scrounging some leaf springs. That was where part of my trouble with the workers came into play. They didn't feel like using the forklift to move it for me so I cold get what I needed. At first it was them saying stuff about regulations and the strip yard being closed...blah blah. But after I started getting short and grumpy with them they finally got it in gear and did what I asked (and what they are paid for). So with a rusty and beat to hell mid 90's Chevy 4x4 melting snow all over the floor I got to work.
My original idea was to simply take the torch to any part that was even slightly uncooperative. But when I realized that they would probably prefer the truck to still roll around and sit on all 4 tires, I had a new idea. Long story short I ended up cutting the U bolts off and then simply removing the 2nd and third leaves as well as the metal slider/friction pad things. I then had to get creative (ghetto/redneck) and find some way to keep the axle in place simply so it could be pushed and wheeled around. My solution? Coat hangers! hahaha! Yup... in pure "get 'er done" manner I used about 8 wire coat hangers to tie the axle back to the main and over load spring. ;) I was pretty sure it wouldn't hold but I guess I got lucky. When Hans (yup, that's actually his name!) came and picked up the truck with the forklift I told him to be careful and well... it held. Who'd a thought it! heehee!
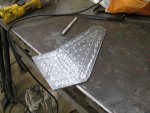
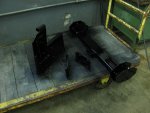
My next step was to remove all the stuff making my XJ into a low rider. The donor Dana 30, a set of XJ leaf springs, 3 CV style front driveshafts and one slip yoke rear one, and an additional complet Dana 30 steering assembly with dampener. Oh, and the piece of 2x5x3/16s plate that was part of the bumper build. :O Funny how the Jeep seems to sit more level now. The plate I laid on the table and began cutting out the two verticals for my brush guard on the XJs bumper I'll work on tomorrow. I barely got through the two big chunks before I realized I was out of cut off wheels! Crap. I swear I must go through 500 bucks worth of cut off wheels a year! First thing I'm gonna buy when I'm back in the states is going to be a port-a-band band saw and a stand for it! Anyway... that pretty much meant that if I wanted to keep working tomorrow I had to wrap things up so I could make it to the store for some more wheels. I did get to pull a measurement on my Speedo cable (66"s) and just shot a message to Joe West to see what is available to reach. Looks like I'll need about 12'' inches more or so...
On the way out the gate I made my usual stop in the recycle center to see if any cool junk had shown up. Not really but I did find a brand new, in the box, GM in tank fuel pump assembly. Not sure what I'll do with it but who throws away NEW parts!?!
Then it was off to the store for stuff.. Obi is kinda like the local version of Home Depot here in Germany. Needless to say I wandered around and found a few extra things I didn't need but ended up with. LOL Got a small air saw and 90* cut off grinder as well as a bunch of wheels for the regular grinder of mine. Tomorrow is gonna be a busy day.
 
Donor...

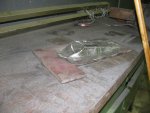
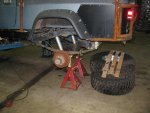
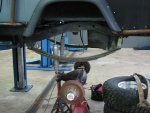
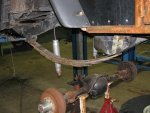
Pics of the junker that donated its springs. Hope these work out and I'm guessing there will be some trial and error involved but we shall see. Worse case... if I can just make it stop doing the butt scoot boogie enough to get through inspection, I'll be happy. I can always order "real" springs when I'm back in the states. :)
Also forgot to mention that I did a quick "test fit" to see about the CV shaft...Looks like I'm gonna have to do some work to the pinion angle AND more cutting of the floor board to come. Wish I had a source for some shims here but I don't. So I may have to cut off the perches and reweld them on at a better angle. :(
 

Attachments

  • IMG_0572.JPG
    IMG_0572.JPG
    102.7 KB · Views: 175
  • IMG_0570.JPG
    IMG_0570.JPG
    101 KB · Views: 176
  • IMG_0571.JPG
    IMG_0571.JPG
    96.2 KB · Views: 175
The Sunday distraction...

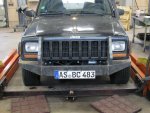
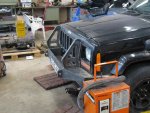
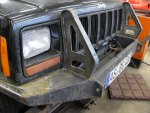
Since I spend Sundays over on the other base I use that time to mostly work on my DD XJ. I've been amassing a large amount of suspension parts and am still waiting for a few important ones before that begins. Kinda stinks since its snowing cats and dogs...er, Reindeer and penguins?? Anyway... Here are a few pics of today's effort. Not pictured is I managed to get my tires mounted on the spare rims after pulling them off to remove the Orange paint the PO had applied. Ugh. They will be getting a simple black hammerite spray job soon.
I think next Sunday I will be able to add the tubes and maybe figure out the winch mounting. Once I'm happy there is no more fabrication to be done to it I will try and find someplace to have it sand blasted then galvanized. Followed by a thick coat of more hammerite. What sucks is all the metal was brand new, clean steel. A little more than a week of driving around in the nasty Germany snow/salt bath has already made it a rusty mess...Nuts! Oh well... it will be nice when its done. :usflag:
 

Attachments

  • IMG_0573.JPG
    IMG_0573.JPG
    98.9 KB · Views: 172
  • IMG_0574.JPG
    IMG_0574.JPG
    99.2 KB · Views: 171
  • IMG_0575.JPG
    IMG_0575.JPG
    102.8 KB · Views: 171
  • IMG_0576.JPG
    IMG_0576.JPG
    113.2 KB · Views: 169
  • IMG_0577.JPG
    IMG_0577.JPG
    117.2 KB · Views: 171
Wow! Looks nice- I like the design!
 
Thanks guys... I'm going for an ARB bull bar look without the cost. :) Hoping to get to it more Sunday but I have SO many things that need attention I'm almost flustered!
In an effort to maybe make Saturday a little easier I went down to the shop over lunch to see how much snow was on the CJ. Mind you, I was raised in Georgia so snow is a somewhat novel thing to me. Well, it was! Holy CRAP! I spent over an hour removing just the snow and ice off the CJ and didn't even get to the other XJ that I mover it around with! And no lunch either! lol! As a guess I'd say there was about 8"s of snow on any horizontal surface? The bottom 3 inches or so being frozen and more like an iceberg! So I got it all off and went back to work... only to look out the window to see it coming down all over again! Guess mother nature is making up for last years "easy" winter here!?! Oh well... the good side is I have a 3 day weekend. Sat and Monday will be CJ and Sunday back to XJ stuff. Plus folks are heading home on leave for the holidays so we are supposed to start a half day schedule. Hopefully I can afford to keep the Jeep inside and work on it as soon as I'm off! Lots has to happen!
I also placed an order for the speedo cable so maybe that will come over the holidays too. Merry Christmas to ME! :)
 
Got off work a little early today so I went by the shop just before closing. I wanted to get the snow brushed off and it inside so I won't have to work in icy raindrops all day. :) Glad I did go by and not wait as it took me almost an hour just to get it inside. Most of the area around the shop has been plowed but whoever did it is a moron. The last few bays, one of which I try to normally use, had all the snow pushed in front of the doors! I have (sadly) gotten pretty good at moving the Jeep by myself using just the white XJ and a tow strap. But today the white one wouldn't start so I tried using the 2wd black one... not very easy but it did work. And I got to test out the handy work on my new bumper. :) So currently the jeep is drip drying inside and the lift is already set. I'm gonna just plot out the "to-do" list and hope I can make a big dent in it. I'm off Monday as well so it will stay inside and maybe I'll get good progress to report. :)
 
Not to shabby there friend! I like the bumper design.

How are you bending the flat stock to surround the plate steel for the risers?

Stay warm and keep the pics coming!

Later
Sean
 
Not to shabby there friend! I like the bumper design.

How are you bending the flat stock to surround the plate steel for the risers?

Stay warm and keep the pics coming!

Later
Sean

Hey Sean,
The first pieces of flat stock I bought were to wide IMHO so I went back to the steel place and found some that looked more aesthetically correct . But these were about twice as thick so bending them by hand wasn't working. I got pretty lucky and the fix worked really well I think. I simply started on one end with the full length of flat stock and got it centered on the riser. I gave it some tack welds until just before the first bend and then clamped it in the bench vise. I used an OXY torch to heat the area to a dull cherry and then bent it around the curve...easy-peasy. :) I then rotated it in the vice and added more spot welds to the next bend... repeat. There were a couple spots where I had to smack it with a hammer to get the metal to "seat" but since it was still pretty warm metal it was very cooperative. Once it was all bent and welded on I just cut off the wild ends with the angle grinder. I probably didn't need to run a full bead all the way around the thing on both sides but I had a few issues with the welder and some of the welds looked hoakey. Guess a little overkill is okay, right? :)
I did get to test it out a little yesterday while trying to motivate my Scrambler into the shop. I used basically the upright to push on the spare tire to get it inside. It was a goodly series of pushes and no damage or breakage so I feel pretty good its on. And once I add the wrap around tubes it will only be more stout.
Off I go to work on the CJ! :)
 
Foreward...ho!

I suppose today could be considered progress even though it didn't feel all that "big"? I finished the last parts for the cross member all up. The plate for the mount, drilling the holes for the torque arm deal, and even got the girdle/t-case pan cleaned up a bit with the sanding disc. Then I shot it all with a few coats of Rustoleum industrial enamel and set it aside.
I then moved on to the rear end. Kinda ran out of time before I got a lot done but at least its prepped for Monday's assault. The Ruff Stuff U bolt plates had never gotten pained so I cleaned them a bit and sprayed them as well. Figure everything will be nice and dry by Monday... I hope. I also cut off all the chinsy spring retaining bands and dug the donor springs out of the snow. That's about where it sits now so I think its reasonable that Monday I should be able to do the final install of the cross member, work in the sort of add a leaves... and hopefully get the spring perches cut off in a way I can reuse them. I will need to raise my pinion angle a bit but have to get the Jeep sitting level first. :)
Tomorrow is of course Sunday so that means I'll be doing XJ stuff. Lots to do there so I need to sit down tonight and prioritize the list.
 

Attachments

  • IMG_0583.JPG
    IMG_0583.JPG
    83.5 KB · Views: 186
  • IMG_0585.JPG
    IMG_0585.JPG
    91.9 KB · Views: 185
Good day...!

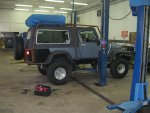
Got some decent progress done today which is great. Tore into the leaves first thing and they went pretty well. After disassembling the saggy pack I looked at the entire thing. Decided to try just one of the Chevy leaves and cut it down so it just past the eyes of the main spring. Its kinda butch on the front end as the main leaf does a little curving...and while it probably won't last it should be enough to get me through inspection and on the boat. I can worry about getting better springs once I'm back in the states. But for a little time and basically free... I can't complain. It sits about level now even with all the extra weight in it and the RTT on top. Woot!
I then ran all over town looking for some studs that would fit the area of the t-case pan. That is part of my cross member "girdle" and thought maybe studs would be a better idea over regular bolts. Well...Germany answered that for me by not having anything even close to studs... let alone the size I would need. So I just used some grade 8 bolts and will call it good for now. I'll just have to keep my eyes on it. So after the goose chase I cleaned up the surfaces and applied some RTV. The girdle got bolted up snug and I'll go back tomorrow to torque it all after the RTV is fully cured.
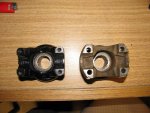
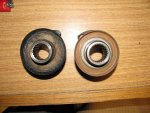
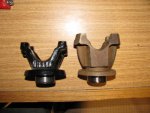
Last step today was to mess with the reat Dana 300 yoke. The old one was stubborn but finally came off. The new one... even more stubborn! Seems like it actually fits better than the one that came off...but. As I was ratcheting it on (off with impact/on by arm strong) it became evident that something was off...As it got closer to bottoming out where it is supposed to be, the yoke stopped wanting to turn. As I look at it I think the problem is the metal bell/ring thingy around the shaft that kinda covers the seal on the out put. If you look at the pictures of the two side by side you'll see the difference. I'll post this question up in the driveline section but if anyone knows if this thing comes off or if its needed, I'd like to know. If I can make it work I will reinstall it tomorrow and start looking at the driveshaft issue and set the pinion. Getting excited again! :)
 

Attachments

  • IMG_0586.JPG
    IMG_0586.JPG
    89.8 KB · Views: 173
  • IMG_0587.JPG
    IMG_0587.JPG
    99.3 KB · Views: 175
  • IMG_0588.JPG
    IMG_0588.JPG
    93.1 KB · Views: 174
  • IMG_0589.JPG
    IMG_0589.JPG
    90.8 KB · Views: 175
  • IMG_0606.JPG
    IMG_0606.JPG
    103.3 KB · Views: 176
  • IMG_0607.JPG
    IMG_0607.JPG
    85.6 KB · Views: 173
  • IMG_0608.JPG
    IMG_0608.JPG
    110.4 KB · Views: 173
If that seal protector is your only problem, you can take it off. It keeps junk out of the seal area. Front yoke, I'd say you need to keep it- but the rear yoke you're probably OK without it. You could try to tap the one off your old yoke and swap them over...

On some newer designs the seal actually rides on the seal protector, sort of like a wear sleeve.
 
Thanks Randy....I've been looking closer at them this morning as I caffinate and I don't see any indication that either one uses the shield for a wear sleeve. Someone on my other posting of this question said they do come off so I am going to try and pull the one off the Dana 300s and put it on the 231s. If I booger them up getting them off... so be it, I'll run without it. Not sure yet what the best way to get them off is. Since they are pressed on I suppose I can try and press them off... just have to rig some sort of jig or find some kind of puller that will work. I will probably soak them in PB first and maybe add a little heat... not a lot, just enough to break the surface tension... I'll post pics as I go. :)
 
Ok... got off work and got sidetracked going by the recycle center... Scored a bunch of cool stuff but that's a different topic. :)
Today was smash my hand and hurt myself day I guess since every time I touched something it bit me. lol! But the first project was to see about the rear output yoke and the little shield that goes to it. I borrowed a big 'ol bearing separator from the shop and clamped it around the 231's yoke thinking that if I screwed it up, finding one of those would be way easier than a Dana 300 one. Well... put it in the press and a couple pumps later it came right off...easy-peasy. :) Then I did the same for the Dana's and again... came right off. At this point I should have run away since nothing ever goes THAT easy, right? Right! Thinking that the press would allow me to get the Dana shield on the 231 yoke easier I grabbed an oversize socket and set it all up in the press....Uh, oops. Long story short, It seems my socket wasn't over sized enough!. Dnag thing ended up getting scrunched onto the shield and it took me about 45 minutes to get it off. Figures it was the shield I NEEDED! Bah! So throwing it in the trash I headed down to see if it made any difference with installing it. It did... and I got it all on using a 1/2" drive ratchet and a pipe wrench (to hold the yoke) but I'm not 100% sure all is well. I didn't have my flashlight with me so I'll need to check tomorrow... I'm worried that maybe there is a gap between the sleeve of the yoke and the out put seal. That would no doubt leak like a blown dike for sure so who knows. Not sure what I will do at this point if it is to small.
Not wanting to dwell on it and hoping for more progress I jumped to installing the cross member. Again... things not going well. First thing was to torque down the bolts that hold the "girdle thing" to the t-case that is also the oil pan for it. Got all of them pretty good with a 3/8s drive and 6" extension going by feel. Then on the last one... the one at the highest point of the pan (thank goodness) I heard that very distinct "Tink" sound one hears as something snaps. I'm not really sure what it was... I thought maybe it was the case case of the Dana maybe breaking at the threads? But after walking away and cooling off I went back and it seemed to tighten up ok.?. *shrugs* I don't really know... I'll just cross my fingers and hope all is good. Then came the next fight I didn't expect... getting the main 2x4 rectangle tubing cross member up into place. I don't know how but it shrank. I kid you not... I've had this part in and out maybe 2 or three DOZEN times while building this thing... never more than a light tap or two with a mallet to get it in place. I know I added paint... several coats, but really???? I had to beat the snot out of it to get it back in place! And nothing like banging on a hollow metal tube with a 3lb sledge to ring your ears! I don't understand but whatever... I go it in. Only to realize I still had something that had to be done! Argh! It seems the drain plug I got and installed in the new t-case "pan" was much bigger than I realized. No mind you, not much of what I do would I consider strict tolerances. But there really isn't a lot of room between the bottom of the "pan" and the top of the rectangular tube... tight enough that the 1/2'' of bolt head was hitting it. :( The solution came to me instantly but meant beating the member back out and doing some more cutting and welding to the nice, freshly painted thing. Drat! Don't you hate having to make pretty paint all yucky! But out came the angle grinder and I made what i should have caught while building it before... an access so I can actually drain the t-case without dropping the rectangle tube. Well... an hour or so later and I was all better but by then I was running out of time and getting worn down. I've been up since 4am and only managed a couple hours sleep so I called that good enough for today. Cleaned up my mess and headed home. Also managed to forget my camera sitting on the lift so I really hope its still there tomorrow. :O
We are on half work days so I'll be back at it again all week as much as I can. Tomorrows list is to install the torque arm assembly (new design) and then drop the Jeep to set the pinion angle.
With a CV shaft I want the pinion pointed directly at the output yoke or the middle of the CV assembly?? And that is with it at ride height with its weight on the springs...right?? Advice?? :)
Once its set I will burn in the perches and then see about destroying some of the CV donor shafts I have. I have virtually no idea how I am going to go about this but I have some guesses. Could use some feedback from anyone that has ever built their own DS if your out there? :)
I think if I can make some decent progress on that tomorrow I may sneak the XJ in for the final two parts for the bumper... the lower "wings" and a couple tabs for lights. Then I can pull it off and hit it with some navel jelly and hope I can get enough of the rust off to primer and paint it. Really tired of seeing it rusting like it is. Once paint is on it I can leave it to sit until Saturday. Then I will mount the winch on it and put it back on the Jeep Sunday....if this isn't a 4 day weekend. hmm....
Tune in tomorrow and I'll load up pics of progress. :)
 
Back
Top