• Notice for iPhone users: DO NOT use the image size reduction option when uploading photos to the forum. This causes portrait images to post as landscape. We have added a warning to the image insert pop-up as well.

Expedition Scrambler..?

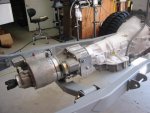
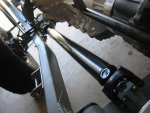
Not a lot to report today and didn't get a chance to snap any pics but progress was made. Still need to keep working on the stupid transmission bolt holes since they just don't want to line up... I'm almost to the point of welding the holes shut and trying to redrill them all over again. Ugh... not looking forward to that but I may have no choice. I did get the girdle and the rear truss parts that tie the drive train together welded together and the tabs for the bushed sleeves welded on as well. Once I get some more photo worthy stuff I'll snap a few and you guys can give me your thoughts on if you think the design will hold up. *crosses fingers* haha! Tomorrow I'm off to work on the XJ again so updates for the scrambler will be next week. Same bat time, same bat chanel! :)
 
Ted: just found and read this thread again. I see you have been having a problem stuffing all the extra length of drive train under the Jeep.

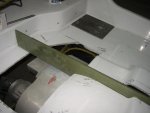
You did the same thing I did on mine, you cut too much out of the floor. This is not your fault as it is very difficult to decern how much to cut out.

My drive train is TH400, US Gear OD and Atlas. similar to yours in length. Luckily you can cut and weld in chunks of the pieces you removed. I have to fiberglass mine back together.:shrug:

Your rear DL angle is going to be high with a low pinion axle. I have a HP D60 in mine so my DL angle is fairly shallow. But with a CV joint in the driveshaft you'll be fine. My Yellow Jeep's (CJ5) rear DL was 14" long at 17 degrees, and ran flawlessly at 4000 rpms . Your's will be around 17-19" long. It must have the CV as you'll never get it to run right without one.

Your front shaft will be longer too. MIne is 55" and we made it out of 3" tube for that reason.

Hope some of this helps.

I don't understand why your thread is over her instead of in the build section?

Randy.. The other Randy!
 

Attachments

  • Scrambler 814.JPG
    Scrambler 814.JPG
    58.6 KB · Views: 253
  • Scrambler 901.JPG
    Scrambler 901.JPG
    44.6 KB · Views: 252
  • Scrambler 381.jpg
    Scrambler 381.jpg
    33.3 KB · Views: 267
  • Scrambler 853.JPG
    Scrambler 853.JPG
    47.3 KB · Views: 253
  • Scrambler 851.JPG
    Scrambler 851.JPG
    55 KB · Views: 253
Randys Randys everywhere...haha! Well, Randy part duex or maybe OR (other Randy)... Thanks for the input. Starting backwards, This is here kinda because I was the first one to hit the outdoor adventure thread/section/thingy. And since the original intent was for this Jeep to be my Expedition vehicle... it seemed appropriate at the time. *shrugs* Well, times and plans change so I suppose the Mods could always move this to the build section if they thought it better to do so. I think the Expo aspect of this Jeep will still be there in many respects but more once I get home and can build my Bantam trailer to tag along with it. Its been an adventure building it at least but not sure if that counts..heehee!
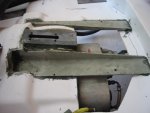
As for cutting the floor... Well, that was a really hard decision that still causes me stomach cramps but is now in the rear view mirror. When I began the surgery I only made simple cuts in the floor. Once I got the general area about where I thought it should be I just peeled the floor back like a banana. I actually can attribute the idea to an article I read in JP magazine. The idea was to leave the factory flooring there and just weld in patches where ever they no longer meet up. Some hammer time and bending will allow me to work most of it back in shape and I don't see a lot of big metal pieces needed but there will be more to come. As for how much got cut, I wanted to try and get the engine close to level and the tranny and t-case tucked up as much as I could without going way overboard. I think its ok at this point but fully agree that the use of a CV shaft is mandatory. Once I get the cross member built and the rear springs repaired to level the Jeep I will pull a final number to order the shafts. I may just get the front for now since shipping stuff over here is so expensive and then order the front when I'm back in the states. But I really don't feel like I cut out to much... It actually conforms around the shapes of the drive train pretty well. Unfortunately it does change the seat base area so I will be forced to make a complete mounting system for the seats. I'm ok with that though and think I will be able to turn out something I actually like versus the way it is now. More to come Saturday perhaps... :)

Oh... And I SOOOO envy you your parking brake!!!!! Sweet!
 
Ted: I had to make mounts for my Yukon Denali mega seats, the piece of green Fiberglass angle is just one side.(see pic) I used to go down and sit in them in the evening as they were more comfortable than my Lazyboy recliner.

The parking brake is from TSM http://www.tsmmfg.com/ and is not that expensive. I think they have a mount for a D300 T-case as well.

They also have patterns from nearly every U joint known to man and the disc bolts to the back side of the output yoke using the clamp bolts..

On another note maybe you could find a wrecked GC with diesel and scalp the engine from it for your Jeep. They had the MBZ 606 motor which is the same 2.5L 5 cyl motor now used in the Dodge and MBZ sprinter vans. It would be an excellent motor for a Jeep. Do get all of the electronics, ignition switch, all wiring etc. While your'e there you might stop by Stuttgart and see if you can't get the MBZ engineers to make a stand alone computer for that motor so we can use them a little more easily for our applications over here. The 3.2L inline 6cyl in the 2005 E300D's put out 201 Hp and 386 Ftlbs of torque. This is more than the 5.9 Cummins in my truck! and half the size.

I used a Lokar brake lever. On mine I had to make my own Caliper mount to mate to the Atlas as I have my Atlas clocked nearly horizontal. Took two tries to get it right.

You enjoy your time in Germany, I would love to go.

Bummer about the vampire lady, I bet that was some hot stuff. Plenty of fish in the sea. And they do love Americans! :smokin:

Randy
 

Attachments

  • Scrambler 432.jpg
    Scrambler 432.jpg
    37.1 KB · Views: 238
Last edited:
Light... tunnel... end...

Well, I was off yesterday and today and got a decent amount of cross member work done. Its been trial and error and trying to think on several dimensions at once but I think I have it now. Finished the passenger side all except final frame welding and got about 85% of the driver side one built. Ran out of time so I'm still not sure if it will work or whatever but I feel good about it. Still a LONG list of other stuff that needs doing and time marches on. I'm debating on towing the Jeep back over to the other post to do the exhaust or if I should just see if I can find flared tubing adapters and stuff locally and just buy what I think I'll need to make the exhaust work. That will be the next routing hurdle I'm not really looking forward to since I'm not sure where it should all go now. Hope it doesn't kick my butt like the cross member did. :O
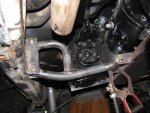
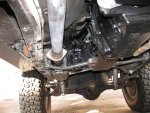
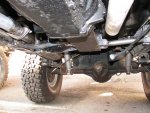
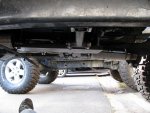
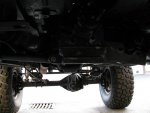
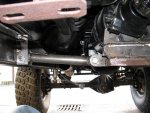
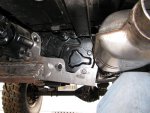
Here's a pic of the unpainted passenger side mount and you can probably see part of the truss/girdle that spans between the tranny pad and the t-case. Let me know what you think...?
Also had to stop early since the shop guy was in a pissy mood today and gave me a rash of sheite about stuff I have stacked on a rolling cart that's in a room they don't use. So for no real good reason I spent about the last hour or so pulling everything out of the scrambler and doing a quick appraisal of what needed to stay versus stuff that could get tossed or moved elsewhere. The pack rat disease is a hard thing to shake by the way...! :banghead: But the hardest part is trying to throw stuff away I know I could use in the future but just not here right now. :( So after emptying it all out I now have 3 (Yup, THREE!) pairs of seats in the jeep, all the major exhaust stuff, and a pile of various other this and that! But the cart got emptied and maybe now they will shut up about it. *shrugs*
Tomorrow is back to the other post to work on the XJ...roof rack time! :)
 

Attachments

  • IMG_0462.JPG
    IMG_0462.JPG
    110.1 KB · Views: 211
Summit Racing has these neato exhaust pipe clamps that make it so you can just about bolt the whole mess together, I used several SS ones on my exhaust and they were like $7-8 each. They have ones that fit over a flared pipe and clamp the strait piece into it or ones that do a butt connection. When you get these things socked down nothing moves!

I used two on the flex joint, and two on the muffler. They come in a variety of sizes. I used 3" ones.

Might make everything alot easier as you wouldn't have to weld as much.

Randy
 

Attachments

  • Scrambler 940.JPG
    Scrambler 940.JPG
    55.8 KB · Views: 203
Thanks Randy2.... I'm hoping it will be exhaust work this weekend a little but have to get the cross member finished and painted and measure for the rear driveshaft as well. I may try and build a temp shaft just so I can move the heep under its own power instead of having to push it in and out of the bay. Of course even as I'm writing this I realize that is kinda wasted effort. There is still a LOT to be done before I could even move it from the drivers seat.... uh, the drivers seat for one thing! haha! Still have to build a new mount for those. Ugh... so much.
But for exhaust I am going to do one of two things maybe. Either fab together a temp one with some nearly new tubing I pulled out of the dumpster (folks here pulling stock stuff off new vehicles to go aftermarket) and just make something work until it gets back to the states or... Try and order from these guys and figure a way to get the stuff sent here. They (like many vendors) won't ship to me because of the Army's APO mail system. But the prices are great so we shall see... :)
http://performance-curve.com/index.aspx
 
Need sleep...

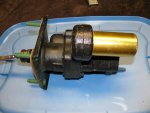
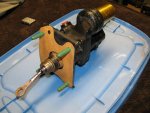
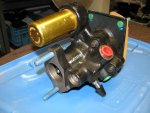
Headed to work on the blue beasty tomorrow so I'll be going to bed early tonight. Wanted to taunt ya'll with a little self gift I pulled from the recycle center dumpster on post here today. I try and hit the "dump" once or twice a week just because there are always some really cool things (our tax dollars sometimes) being thrown (wasted) away. We are headed to the field next week and in just the last couple weeks I've found stuff we need or could use in my unit that was just being thrown away. You never know what to expect to find there but anyone that wants to laugh or scoff at my dumpster diving... Ask how much one of these would cost ya!?! (see pics).
It was pouring down rain today and while I found some stuff to help my unit... this little brand new gem is all mine! Mooahahahaha! Wanna guess what its going into?? :)
 

Attachments

  • IMG_0473.JPG
    IMG_0473.JPG
    77.3 KB · Views: 177
  • IMG_0474.JPG
    IMG_0474.JPG
    84.9 KB · Views: 178
  • IMG_0475.JPG
    IMG_0475.JPG
    95.6 KB · Views: 176
NICE!!! I got mine for free too, but it was used and it leaks... :(
 
So how hard was it to install? Did you use your factory steering pump? What is the master cylinder from? Thoughts or ideas would be great. :)
 
So how hard was it to install? Did you use your factory steering pump? What is the master cylinder from? Thoughts or ideas would be great. :)

heres a list of what I did...
-I made a custom mount to bolt to firewall. (100% bolt on so its easily transferred to any CJ if need be, was on my 7 now on the 8)
-cut the pushrod and threaded it. Used CJ push rod, welded a threaded sleeve on it. This makes the push rod adjustable.
-Used a PSC pump and remote reservoir. I'm running hydro assist steering as well so need a high powered pump and lots of fluid.
-Master is from a 79 Corvette. Its made for 4 wheel disc brakes. its stupid cheap too... $35 Canadian for a reman.
-you can either use farm style hydraulic hoses or use A/N style hoses.

Lots of people use these brake boosters and I think they are the best but ONLY if set up correctly. The pump makes a HUGE difference. Stock pump is not good enough in my opinion.
I can easily lock up my 37s at any speed if needed. For what my Jeep is, it stops on a dime...
 
I have 1 also. Mine was not free, nice find, & mine doesn't leak :) . I bought a master cylinder with it. The hoses came premade & it was fairly easy 2 hook up (it's been awhile ago). I used the factory pump (I use a PSC unit now) without any problems. I like the power it gives in stopping my Scrambler.

Tim
 
I got mine for free too, but it was given to me by Vanco along with all the piece parts to install it. :bacon:

I'm hoping my pump which was running a hydroboost on the Doritos van will be enough.

If I have to add an assist cylinder to push around my 37's I will probably upgrade to either a PSC PP or a Tommy Lee PP. Tommy Lee is a guy who's outfit does alot of racecar and desert racing stuff and he is in LA closer to me.

Randy
 
Last edited:
I'm wondering if the same vehicle (HMMWV) that this was likely for would be a good source for the master. They have 4 wheel (though inboard) discs and stop RTFN (right the F now!) :) I'll have to look closer at them next time I'm in the motor pool. I know a guy on the IFSJA site deals with these a LOT and makes the firewall brackets...I'll shoot him a message. I foresee my heep going to 37s at some point since the 35s look kinda smallish... I'll have to source a pump then as well I guess....Hmm.. Thanks for the input guys, off to work on the beast! :)
 
Woot!!!!!!!! Finally got the drivers side mount finished and dropped the supporting jack to see what I got.... So far looks like I have a winer!!! I have some final welding and clean up/paint to do on the entire thing and then I'll call it done. I may hold off on the paint until I get the exhaust run but I'm heading to the field for almost a month and would like the paint done before hand... guess I'll see how it goes tomorrow. :)
 
Well.... Kinda got my butt handed to me again today but it wasn't all bad. I decided that I would try and tackle the exhaust now instead of waiting till after I had stuff painted and then scratch it all up... Glad I did since there was a LOT of scraping and trial and error though I think I finally have an idea of how it will work. At first I was a bit stymied since I am working with a collection of the old exhaust and some "scraps" I found in various dumpsters. The old cat and muffler are toast! I mentioned this before but the amount of crap and clog that came out of it while I was last playing with it was shocking. I'm surprised the thing ran at all! Well, not having a cat or muffler was a big stalling point for me. I found a place online that has really good prices but they don't ship to my military APO address. And so I dove back in the dumpster and turned up some unknown (car maybe?) exhaust that had a pair of resonators but no cats. The tubing looked to be near new so that was a plus...So then I thought "why not just ditch the cat for now". Well... honestly, I would have except for today's unforeseen windfall.
I was walking about the shops "junkyard" and brainstorming when I spied a really nice Chevy S10 Blazer in the early 2000's age group. At first I though it was just parked there but after a walk around it turned out that it had been turned in by someone leaving here that couldn't get it to pass inspection or get it sold. I asked the shop manager about it and he shrugged and said he didn't know. I asked him if he wouldn't mind if I played with it a bit and he said "go ahead but it's probably got a blown motor". I had to use some pliers to get the hood open because the cheapO hood release was broken and a little temperamental...But after that it was easy. Hooked up the redneck battery charger and then turned the key... Varoom! The dang thing fired right up and purred like a kitten! The 4.3 really IS a good lil engine! Anyway... As a joke I walked to the manager and said "Hey, would you take 50 bucks for the S10 with the blown motor?" He scratched his head and said "why, does it run?" I grinned and said it does, just like a sewing machine! He asked me about it and while I have NO NEED for another project he was glad it ran. It seems one of his employees had smashed a different Jeep XJ while using the forklift and the shop kinda "owed" the owner some help. That guy actually showed up and so a deal was made. He will get that well running S10 and a little help to fix the brakes and the shop will inherit the XJ. As a show of thanks the manager gave me the Cop style unity spotlight that was on the XJ, no charge for the weekend for using the shop, and best of all he let me rummage in HIS stash of stuff for exhaust stuff. In the end I found a near new and complete exhaust system off of a Dodge Hemi Charger, maybe 2010ish?? It was a take off when the owner installed a hy-po exhaust. Well... wouldn't you know it, the new to me exhaust has not one but TWO near new cats and a bunch of handy mandrel bent tubes. It even had the odd looking rectangular tail pipe tips that I may try and incorporate... :) But despite having all that exhaust and stuff I was still shut out trying to get it all to fit together. It was a little like playing with leggos and not finding that one size piece that you need to start off. I know how I need to do it but I'm just shy either some expansions/reducers or I need to learn to butt weld exhaust tubing...haha. What the problem is is the passenger side cross member arm. I built it first and I had thought to run the exhaust through it, which I will, but because of the way I built it I will need to have a way to remove that section of tubing so the cross member can be removed in the future. I can do it... I just need more head scratching time to be able to use what I have. I'm off Monday as well so that will be the day I try and get it fixed and run more of it. I will likely then pull it all apart and clean and paint it all so it dries over the next month while I'm in the field. Then when I come back I can work on the other details that need doing.
On another good note it looks like the mechanical clutch may work out as it is with just some adjusting. :) Plus I found a hand brake assembly from some unknown military vehicle ( I think its actually from a trailer?) that has an adjusting knob built into the handle. I may try and make that work instead of the factory foot one that doesn't like to hold...
Lots left to do and I'll try and get pics up after Mondays work... getting excited again as its coming along. Tomorrow is XJ day and I have a roof rack to build! Later all!

 
Last day...

Today was my last day to wrench for a while as I head out to the field for almost a month at the end of the week. My intent was to get the Jeep more finished up but I didn't quite get where I had hoped to be. But while today was a little frustrating at first, the last couple hours were rather productive. :headbang:
What was screwing me up on the exhaust was the passenger side cross member mount. I didn't think ahead enough when building it and missed a kinda big issue. I originally thought I'd just route the exhaust through the arm, and while that is what I did, I forgot that it would have to be removed at some point....DOH! And where that became an issue was trying to find some sort of way to make that part of the exhaust disconnect and allow me to pull the arm without having to remove the entire exhaust. I was trying to work with what I had but I just didn't have what I needed. So today I wasted several precious hours driving all over looking for an auto parts store that had large enough clamps that I could make work....Sure does make me miss being back home in the land of an auto parts store on every corner!! Not to mention one that is open on Sundays and has parts in stock for junk other than a freakin' VW Golf!
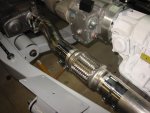
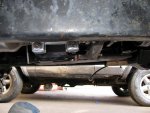
Anyway... I managed to source what I could and made it work. It may not look like much and I have yet to tackle the drivers side and the mufflers/tail pipes... but I'm thinking that should be a little more straight forward. Here are some pics of what its looking like so far... :) :usflag:
 

Attachments

  • IMG_0481.JPG
    IMG_0481.JPG
    125.6 KB · Views: 221
  • IMG_0482.JPG
    IMG_0482.JPG
    122.8 KB · Views: 219
  • IMG_0483.JPG
    IMG_0483.JPG
    96.7 KB · Views: 218
  • IMG_0484.JPG
    IMG_0484.JPG
    65.1 KB · Views: 217
  • IMG_0485.JPG
    IMG_0485.JPG
    98.7 KB · Views: 218
  • IMG_0486.JPG
    IMG_0486.JPG
    104 KB · Views: 218
  • IMG_0487.JPG
    IMG_0487.JPG
    85.2 KB · Views: 219
I do see one minor problem and you can tell me if it is different than what I see in the pics.

The way you have the crossmember side pieces hooked to the frame rails and trans appears to me to be an articulated three piece affair.

IE: there is two side pieces connected to a center section. The two side pieces are connected to the frame rails in two places which is fine.

However the side pieces only connect to the center section at one place essentially making the crossmember act like a three piece part as the trans can shift up and down and only the stiffness of the frame rails is preventing it. Adding to that is the length of the arms which increase the leverage on the frame rails. IE; the more times it moves up and down (vibration) the more the frame rails will flex ( rotate, and in and out) and eventually they will crack at the welds. If you had two connections on the center section (opposite of what you've got) and one on the frame rails it wouldn't do that. Still it really needs to be one piece all the way across.

IF the two sides were connected together independent of the T-case it would be fine. IN other words get rid of the two center bushings, and make it a solid crossmember all the way across. That way all the verticle loads are carried by the frame connections and the forces are strait up and down as opposed twisting the frame rails.

Crossmembers do two main things. They separate the frame rails and prevent them from moving sideways, and they transfer verticle loads to the frame rails. Your setup is only doing the latter.

That's my .02

Randy
 
Last edited:
I do see one minor problem and you can tell me if it is different than what I see in the pics.

The way you have the crossmember side pieces hooked to the frame rails and trans appears to me to be an articulated three piece affair.

I had that same reaction. Randy stated the possible issues very well.
 
Back
Top