• Notice for iPhone users: DO NOT use the image size reduction option when uploading photos to the forum. This causes portrait images to post as landscape. We have added a warning to the image insert pop-up as well.

Expedition Scrambler..?

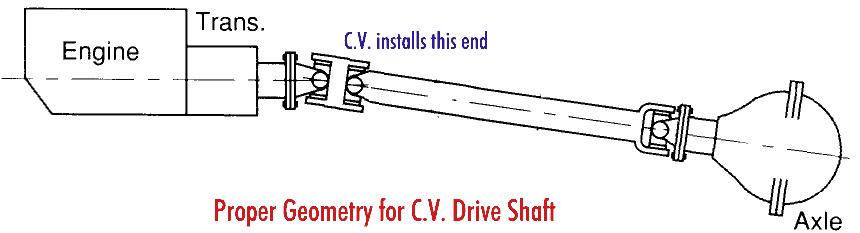
With a CV shaft I want the pinion pointed directly at the output yoke or the middle of the CV assembly?? And that is with it at ride height with its weight on the springs...right?? Advice?? :)
Once its set I will burn in the perches and then see about destroying some of the CV donor shafts I have. I have virtually no idea how I am going to go about this but I have some guesses. Could use some feedback from anyone that has ever built their own DS if your out there? :)


Correct on the CV shaft orientation. Point at the middle of the output yoke joint. At ride height loaded.

cv_anglegif-1.jpg


http://www.4xshaft.com/ Go here, click "Tech Info", then select "Geometry 101".

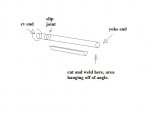
Shortening a driveshaft is not too bad...using an angle grinder remove the weld from the end you're shortening. Pick an area where it's easy to weld- most of the time the one by the non-cv yoke is preferred. You just don't want to get anything that might melt too hot. Sometimes the slip splines are coated with a nylon-type material, they're pretty loose once that melts...:rolleyes:

Anyways- get a couple pieces of angle and weld up a cradle- 2 "X"s will work. If you can weld them to a table, better yet. After the shaft is the right length and placed back together, you're going to lay it in the cradle and rotate it by hand. Watch for any out-of-alignment condition- use a hammer to tap the end or the shaft, whichever works, to try and get it as true as possible.

Once it's true, burn it in and hope it doesn't distort when welding. I do 4 heavy tacks at 12:00, 3:00, 6:00, and 9:00- then I recheck the trueness after tacking and finish weld.

Balancing- that pretty much has to be done by a machine shop.

Good luck!
 
Last edited:
Thanks!

Thanks sir! I've stared at that pic for a while. :) The x braces make sense too... I was just going to lay it in a trough created by some angle thinking it would keep it straight... your idea may be much better.
 

Attachments

  • DIY driveshaft.jpg
    DIY driveshaft.jpg
    27.5 KB · Views: 172
Thanks sir! I've stared at that pic for a while. :) The x braces make sense too... I was just going to lay it in a trough created by some angle thinking it would keep it straight... your idea may be much better.

The angle will work as long as the shaft is smooth. Looks like you've got it under control.
 
Not a lot to report today. I got stuck waiting at work until almost 3pm (was supposed to be off at 11:30) so I only had a couple hours to tinker. I managed to finish the torque arm bushing bracket and get it welded on. Then I dropped the jeep down to look at setting the pinion angle. Figured I'd try just holding up one of the CV shafts I have just because... and wouldn't you know it wouldn't clear the body! The rear output is about 1/3 into the body and the hole I had cut out wasn't big enough for the CV assembly....And since the heep was FULL of crap...I got to spend about 30 minutes emptying it out. Can't believe the junk that I had stored in there...lol! But what bugs me more is that even fully empty the jeep still looks to be sitting about an inch low in the rear!!! :( I may have to DX the RTT to see if that 100 extra lbs matters.?. All I want is it to sit level until I can get home and order new springs. BAH! So after seeing this I just got inside and cut out some more floor pan. Can't feel any worse, can I?? I'll try and play with it tomorrow for a bit and see what I can accomplish. The good news, kinda, is I had to put in a pass for Friday so I can drive a coworker to Frankfurt Thurs after about 1800. So I can work on the jeep a few hours and then hit the road. Do the turn around and crash out for a while and work on the jeep still on Friday, Saturday and maybe Monday and tues... depending on what days the shop is closed for Christmas. No holiday for me! Wish Santa would bring me a pit crew! I may actually have to put the CJ on hold long enough to pull the bumper off the XJ, clean the rust off it, and paint it. That way it can be fully dried soon. Dang my wagon is overloaded!!! :)
One other thing related to the drive shaft... This is definitely going to be a temp! The XJ shaft is from the front of an XJ... And from just a cursory eyeball I don't feel like the slip shaft (male, splined part) looks very stout. And to make it worse... the slip joint will be closer to the axle instead of up by the CV joint/t-case. Not sure if that matters but for now, all it has to do is spin! And I'll put a sticky note on the dash to keep a light right! No hammer foot for me!
 
Last edited:
No time to edit and post pics since I have to take a buddy to Frankfurt. Its a 4 hour drive each way so I'm hoping I can get some sleep tonight...maybe. Have to work on the Jeep more...Must...Work! Jeep!!!!
As a teaser, I got the drive shaft made! ;) Woot!
 
quickie...

Thanks...
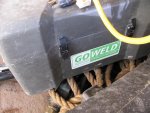
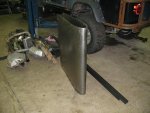
Also grabbed some new to me toys from the dump today... ;)
 

Attachments

  • IMG_0611.JPG
    IMG_0611.JPG
    118.4 KB · Views: 143
  • IMG_0612.JPG
    IMG_0612.JPG
    122 KB · Views: 146
If thats the kinda thing you get from the scrap pile around there can I just send you a wish list? LOL

Build is looking good man!

Later
Sean
 
Here is a link to my thread on my dumpster finds if your interested Sean. All I can say is that the things that get thrown away...that are are tax dollars going in the trash(!) is just repulsive. I've probably saved my unit about 20K in the last month just by going and pulling out things I know we need and that our supply would have likely ordered. The GOV already paid for the stuff, we need it so why pay twice!?! Dumb! Of course... some of the stuff is things no longer used but still have value to folks that can think outside the box. Most of this stuff "should" have been processed and sent on to some GOV liquidation site but with all the shortage of personal, HUGE quantity of outdated equipment... its understandable (but not excusable) how it does end u getting tossed out. Sad. And I'd have to say that the required paperwork is a good sized chunk of why things get shortcutted. The GoWeld was in a pile of stuff waiting to be processed and would have headed across the street to the dump. I got to go look around (Fox in the hen house! haha) and scrounge what I could before it all got processed. The German workers there were more than happy for me to take what I could back to my unit to use since that meant less stuff they have to process. Its a big gaggle Fak to say the least. I've found a LOT of cool and more often than not, fully serviceable (if not brand new) stuff and dragged it back to my unit in my own vehicle. Good thing the XJ only holds so much! :)
Linky: (not sure if you have to be a member to see it, sorry?

http://www.militaryjeepers.com/community/showthread.php?31093-Dumpster-diving-again
 
Need coffeeeee!

And here are a few pics of yesterday and the day before progress. I'm still pretty tired after driving the 7 hours round trip to Frankfurt last night to drop a buddy off at the airport. Weather was coming in and I still didn't have the windshield washer sprayer fixed which sucked. But the XJ drove like a top! :)
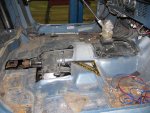
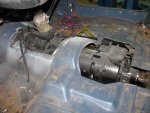
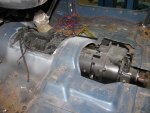
You can kinda see in the pics where I had to cut more floor board out around the tranny cover area to clear the huge NV. I also cut a bunch more out from the t-case area but was able to keep the main "hump" that seems to add much of the rigidity to the floor. My mental picture is that I will be making a very custom bunch of bends and pieces for the floor patch. Whats funny is it looks almost like I could just run extended shifters instead of using the cable ones from North West FabWorks. :( Not sure what I'm gonna do yet there...
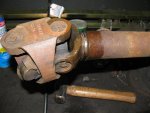
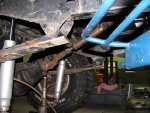
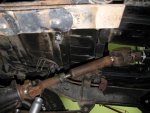
You can also see my home brew driveshaft. I don't know why but it was a bad math day for me. I must have wrote it out a dozen times since the numbers never seemed to look right. haha! But I think given what I was working with the DS came out ok. Not great, but it will (hopefully) do for now. Remember... all it has to do is get me through inspection and the get on the boat! I can order a "real" one when I'm in the states. I will admit that I cut a bit to deep into the CV yolk end while taking it apart. I think I was able to burn it all back together ok but I'll just keep a light foot just in case. Getting the two parts back together was kinda tricky too. With the CV wanting to wobble all over it was hard to push it in/tap it with a hammer. Once it was in though I was able to make adjustments to it and checked it about 10 different ways hoping its on straight and in phase. *crosses fingers* There isn't a lot of play in the shaft but I think there will be enough... the slip joint only has about 3"s travel stock so I split the difference and measured it with maybe just a fuzz erring towards the compression side? Would rather it pull apart than push into the t-case! :O
Well... Got to get motivated and head to the shop. Time's a wastin'! Back later and will write more.
 

Attachments

  • IMG_0614.JPG
    IMG_0614.JPG
    119.4 KB · Views: 228
  • IMG_0615.JPG
    IMG_0615.JPG
    101.7 KB · Views: 227
  • IMG_0616.JPG
    IMG_0616.JPG
    89.6 KB · Views: 226
  • IMG_0613.JPG
    IMG_0613.JPG
    84.5 KB · Views: 225
  • IMG_0617.JPG
    IMG_0617.JPG
    94.7 KB · Views: 225
  • IMG_0618.JPG
    IMG_0618.JPG
    111.2 KB · Views: 224
  • IMG_0619.JPG
    IMG_0619.JPG
    94 KB · Views: 228
Today was a pretty good day even though I felt like I was gonna fall asleep most of the time. :) I concentrated on the rear axle for the most part today so no sheet metal work yet. During my breaks I would stare at the floor pan and have been trying to visualize how it will go. Also trying to take into account the seats and their mounts as well as the center console. Tough.
Not sure why it was bothering be so much but I just wasn't happy with the minor sag in the rear. It was a lot better than before for sure but it still bugged me. And since I still had yet to burn in the spring perches I went ahead and pulled the rear back out again. Added the other pair of GM Pick up springs to the pack and then got it all squished back together. Can't say for sure but I "think" it sits level now. I imagine that once the RTT is off it will maybe even be a wee bit rear high which would be ok.
After getting the springs together it was again back in the Jeep to recheck the pinion angle... actually dropped it back down maybe a degree or so since it looked high. I'm just eyeballing this so I hope the angle is good. Once I was satisfied I buzzed in some tacks and then yet again... out it came! Its so much easier to weld them with the axle out! After getting them fully burned in I broke out the cut off wheel and zipped off the old factory perches. Don't need any more rock claws if I can help it. :) I actually had to catch myself because while it was out I got to pondering building a truss for the 20. Yeah... it couldn't hurt to have one but I just can't spare the labor and time. Not right now at least. So I scrapped that distraction and kept moving forward. Cleaned and shot some hack paint at the springs and the axle where it was cleaned to bare metal. My OCD is really kicking my butt as I can't stand just throwing paint at something.. I would like to do it right, ya know? But again.. time and the fact that this isn't a restoration... just an emergency "get it together ASAP" build. I can imagine myself tearing it all apart in the future and doing a full tilt refurb but not soon. Like I don't have enough irons in the fire as it is! Haha!
As the day was about over I had the thing re-re-re-REinstalled for hopefully the final time. Cinched down the U bolts and installed the drive shaft then it was about time to go. One thing I did notice was that the angle is in two directions.?. The up down is obvious but somehow I never noticed the fact that something is offset a good deal to... the drivers side IIRC? I don't know if the motor was installed like that and me adding length to the drive train only amplified it or if I some how built something crooked...? *shrugs* I don't think it will matter since U joint/CVs don't really know one direction of angle from another...right? Didn't get a pic but I'll try to tomorrow to show what I mean. But since it was mostly nothing new from the previous work, picture wise, I skipped taking any. Tomorrow I will see which direction I head. Floor pan or some of the other stuff I need to do. Brakes, exhaust, and connecting the clutch would let me maybe move it around where as I could just plop a seat in there to make it happen... Hmm... And the exhaust isn't really a Must for that either...haha! I may be driving a race car tomorrow!!! lol. I need to crash as I'm beat but I'll ad more to this in the morning over coffee and before getting to work.
Side note 1) My 80" speedo cable came in today. Woot! Hope it fits! :)
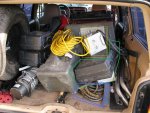
Side note 2) There are two wires in the harness that come into the transmission area. One is maybe for the t-case to indicat 4wd? It has only a simple 90* black rubber boot and orange(?) wire to slide over the sending thing, right? The other one has a more round, light color boot thing with two wires going into it. Is this the Reverse indicator? Anyone know where it goes since I have an NV4500 now?? :) You can see the wires I am talking about in this pic along with a breather hose for something...

 

Attachments

  • IMG_0615.JPG
    IMG_0615.JPG
    101.7 KB · Views: 223
Last edited:
In the last picture, is the drive-shaft at full droop or is the rig sitting on the ground at that point... if not, I was just making sure you had enough travel in the drive-shaft so it wouldn't bottom out (compress) when it was on all 4 with weight on it.

cb
 
Thanks for looking out sir. I believe that pic was with it on its own weight. After redoing the springs and burning in the mounts today I think there is maybe another 1/2" of length than seen in that pic now. I'll get more pics tomorrow. There was only about 3"s of travel in the shaft before I cut it down... not ideal I know but its all I have to work with here for now. I don't see it getting much heavier other than seats and stuff so it should not compress a lot more even if I hit a bump. Not gonna do anything with it but drive to the next base (about 12 miles away) and put it on the boat. :) What sucks is I had found a shaft with long splines for maybe 10 or 12"s of travel but the CV was toast Bad. Plus it was missing the U joint end. :(
 
OK, I just want to make sure you get it on the boat... most important of all!
cb

Thanks and your right. On the boat and headed home is priority one! :)
Today was some good progress but again, nothing worth taking pics of. I still haven't started on the floor yet but that will come late next week I think. Today I got the clutch reconnected. Then I fixed the bad brake line. Got the shocks and rear brake line reattached too. Then I moved to the exhaust hoping it would go smoothly. Kinda did but its still not done. I'm working with scraps and left overs and bits from the original one but since nothing is the same under there it is all close to custom from scratch except without the new pipes and stuff. :O It took a good while to make a cross over pipe but I did it. I bored a hole in the drivers side tubing with a hole saw and then went from there. The welder wasn't behaving so some of the welds look pretty rough but after I got it all tacked where the parts go I pulled it out and did final welding. Still have some ugly welds but it doesn't look like it will have any leaks. That I made sure of! :) Did manage to get the cross over pipe installed after having to scrounge a new doughnut gasket. The one that was in it was fine but slipped and when it fell on the floor it shattered like glass! WTH? But I got one and now it should be good. Need to find some high heat paint for the exhaust when its done too. The cat will be the break away point from the cross over tube. It will attach via a big band clamp thing so I can pull it out whenever the need arises. Following the cat there will be a short piece of tube that goes over the cross member and then I will add a resonator or two. I have a bunch to choose from but no actual mufflers. I think I can make something that will be ok without sounding obnoxiously loud.
Sadly I must be the only one around here without an actual life. The shop was supposed to be open Monday so I planned to get more done. Now I was told it will be closed from Monday through Wed! So no CJ stuff will be happening until Thurs at the earliest. Guess I need a break anyhoo... :( Oh well. At least it gets closer everyday to being back on the road!
 
Forgot to add a couple things...
First is that the drive shaft I made may work but WILL be getting replaced as soon as I can. I noticed that at full droop...well, with no weight on the rear and hanging, that the CV binds. I guess I will need to order a high angle version or something.
The other thing is changing the ball joints. While I was working on the brake line I noticed just how bad the passenger side ones are, Yikes! I'm inclined to believe that they went bad due to me installing them in a rush/poorly but who knows. They were used so its possible they just were on their last legs. Anyway... I have replacement upper and lower ones including the little bags of nuts, snap ring, etc. My question is does anyone have a good description of how best to change these? IIRC, the problem I had last time wasn't so much getting them in the knuckle but getting the knuckle back onto the inner "C". If anyone has a thread to read or helping advice..please! Fire away! :) And is there any chance that a ball joint going bad could ruin anything else like the knuckle or "C" ??
 
I'm ready to go home now thank you. Well, not really but more than tired of working on stuff here in Germany.This evening I decided to give the ball joints a shot and it was just as much fun as I figured it'd be. :rolleyes: I kinda knew going into this that the shop may not be much help but today was a lesson in just how poorly run and maintained it really is. Since I'm as far from the window where you go to draw tools I usually hope that I have what I need. Saves me the walking back and forth and waiting for one of the staff to hand out tools. Well... Today I got to make about 50 trips back and forth and most the time they didn't have what I needed. No idea how a place that is funded as a military program can have so few tools. Heck, most of the tools there are recycled stuff from the military!
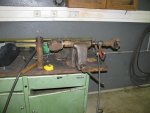
Anyway... the first hurdle was getting the locking and main bearing nuts off. It uses a 2 1/16s thin wall, 6 point socket right? Uh...yeah, you guessed it. They didn't have one. And since I rarely use it Its one of many tools I didn't ship here with me. I used a punch and hammer to get it all off and then things went pretty normal. Fought the ball joints a bit, mostly because the 1915 bench vice is so worn out it hardly holds itself on the table. Thankfully I had bought a ball joint service kit from a guy that left Germany, otherwise I'd really be doing it the hard way! Got the ball joint in and then moved on to installing the knuckle back on. Went so-so... Ended up cutting and grinding down a deep well socket to get the preload adjuster tightened up. I'm still not so sure it is right but the torque wrench said 50lbs... when I tightened the top nut down to the 100lbs it seems a bit stiff. Maybe its just new joints or maybe I did do it wrong...As long as it lasts long enough to get me through inspection I honestly don't care. Get it on the boat and back to the land where things are available!
I'm not sure how I'm going to get the bearing nuts back on at this point and that's where I had to stop for today. I guess I'll go around and see if I can borrow-scrounge one from somewhere. I'd rather not buy one even if I could find one to buy but we'll see what happens. Once the axle is back together I can likely move on to either finish the exhaust or start the to do list of stuff underneath that needs final checks (brakes bled, rear axle torqued, parking brake figured out, etc... Then I may put the drivers seat back in and see if it will go down the road! :) Still need to do a lot but after the exhaust the only other big hurdle is the seats and floor. Those I can do on a flat bay so I'm not hemorrhaging 40 bucks a day on the lift! Still wonder where all that money goes....Sure as hell isn't into shop upkeep and tools!
 
Left in a huff today...
Got released from work around 1100 so I changed and zipped over to the shop to try and make some progress. I had to borrow a 2 1/16s socket from our maintenance troop for the spindle nuts and even that was pure hope. Thankfully it worked and I managed to get the front wheel/hub etc all reassembled. Then I wandered around the shop looking for the ghetto battery charger they have and had to move a pile of the shops crap to get it out. Its basically nothing more than a car battery with half a set of jumper cables and a switch. But while its pretty 'neck... it does work pretty good for slow charging my optima....Normally. That is if the battery on the cart is actually GOOD! Normally they pull a decent one from one of the junked cars and then keep it on the charger until folks need it. Well... I don't think anyone has bothered with it in a month or two plus the shop workers had buried it behind all kinds of junk that is supposed to be shop equipment but that I doubt any of it works. Stuff like floor washers and headlight test things and whatever. Anyway... about busted my butt a few times trying to move stuff around so I could get it out only to have one of the workers come by and snidely tell me I can't pile stuff up in the way... Argh! So I get the charger out and then move the stuff back where it was and when I go to charge the Jeep I notice the battery is dead. Seems it has been "On" while hiding in the corner and was completely done. So I go ask the folks what the deal is and all they do is shrug and say "feel free to go get one out of one of the junk cars!" Me? Really?? Funny... I thought THEY were paid to maintain the shops equipment! Yet needing to get a charge on the Jeep I headed out and tried to find some batteries that looked like they had some life in them. Found one, hooked it up, and the Jeep is super low. So I figured I'd let it charge a while and tinker with the exhaust while I was waiting. Wouldn't you know the same guy that bitched about the stuff being in the way comes down and says he needs the charger for a customer. Well WTF do you think I am!?!? We have some words and the other worker comes down and basically says I can let go of the charger or I can pack up the Jeep and take it all! Oh... I have quite a temper so when things started getting dark I decided it Was time for me to leave. So I came home and will begin a nice long letter to the facility managers and their boss. Thankfully there is a system in place that allows customers to report such issues and it not only goes to the civilian side of the management, but also to the Post commander! I need a while to cool off but the choice use of expletives will be written! Thankfully neither of those two guys will be working tomorrow so I will try and get back to it without blowing a fuse. Wish me luck...
 
Good luck. I don't know if you've fired off that letter yet, but I'd leave out the expletives, no matter how much you "feel" them. The more eloquent and professional a complaint sounds, the more weight it is given. Whenever I had to handle a complaint, and the customer was cussing me, the less motivated I was to help out.

Anyways...hope things go better tomorrow. Good luck!
 
Back
Top