• Notice for iPhone users: DO NOT use the image size reduction option when uploading photos to the forum. This causes portrait images to post as landscape. We have added a warning to the image insert pop-up as well.

FINALLY!!! A Build Thread of My '82 Scrambler!

New un-cut dash panel I will be stripping down to paint and install in place of the old cut up one:

Just curious, but what about this dash panel is "cut"? It looks like a stock dash panel. Is it the radio cut out that qualifies this dash panel as "cut"?

Where will you put the radio when you put in an "uncut" dash?
 
Sounds like to body is in better shape than you thought, looks really straight. Do you think your going to have to replace any rusty areas? Are you planning to leave the spot welds on the sides or are you going to fill them in. I've noticed that folks who are buying high dollar FJ40's usually want to see original spot welds. Haven't heard it brought up much with Scramblers.
 
Looks like some good progress. Congrats on not finding any hidden "secrets" under all the paint:cheers:

That paint stripper stuff looks like a great alternative to sand blasting if you know you have pretty solid sheet metal under the paint. My Red Scrambler just had too much surface rust and other surface flaws, sand blasting was the better alternative in my case:shrug:

I wonder if that stripper would have removed all my bed liner, would have saved my poor fingers and hands:crazy:
 
Just curious, but what about this dash panel is "cut"? It looks like a stock dash panel. Is it the radio cut out that qualifies this dash panel as "cut"?

Where will you put the radio when you put in an "uncut" dash?

The dash panel that is currently in the the Jeep has been cut to accept a new style DIN radio as well as big holes cut in the speaker areas to accept larger speakers. The brown dash panel I got is all original with only the stock holes for the OEM radio which I will be going back to.

Sounds like to body is in better shape than you thought, looks really straight. Do you think your going to have to replace any rusty areas? Are you planning to leave the spot welds on the sides or are you going to fill them in. I've noticed that folks who are buying high dollar FJ40's usually want to see original spot welds. Haven't heard it brought up much with Scramblers.

The only areas that had rust holes were under the legs of the roll bar and I plan on patching those. I will pound out the dent behind the driver's door and fix/patch the area under the tailgate. The rest of the body is very clean and straight. I do plan on leaving the spot welds and not totally smoothing out the sides however, I am documenting this whole process so if I ever do sell I can show that it is a rust free original body.
 
Last edited:
Went up today but spent the day cutting firewood for the shop instead of working on the Jeep. I did work on fitting the soft top but didn't get much done however, I did take a few pics of some of the other projects currently in the shop.

'31 Chevy Sedan:
attachment.php


'40 Ford Pickup:
attachment.php


A better pic of my Father-in-laws '36 Ford Gullwing Pickup:
attachment.php


'68 Triumph TR250 (1 of only 3 that were painted black that year):
attachment.php
 
Last edited:
A few more pics of stuff around the shop.

One of the cars they did was featured in Goodguys Magazine:
attachment.php


Some of the pics they found in the shop when they bought it. It has been a car repair shop since the '20's! You can see the front of the shop in some of the pics!
attachment.php


The amazing thing is that the whole operation is just him and his wife. He does all the body and paint work and she does all the custom interiors work. They farm out engine and drivetrain work to a close friend with a machine shop.
 
Last edited:
A great start on a GREAT Jeep Josh!

Love that shop & all that's going on inside...especially the early Bowtie :D
 
I LOVE this! you have to keep us posted on this one coming together. :popcorn:

Great pics all round!!


A better pic of my Father-in-laws '36 Ford Gullwing Pickup:
attachment.php
 
Last edited by a moderator:
Josh,
What size are those BFG A/T's you've got on it right now? Good fit for the lift IMO.

I'll second the congrats on the best looking starting point on a Scrambler build. Makes things a little more obtainable doesn't it. Keep up the good work.
 
Thanks for the compliments! Starting with a pretty clean Scrambler sure makes the teardown easier and allows me to spend more on fun parts and less on fixing things.

The tires are 33x12.50x15 BFG AT's on OEM 15x7 wheels. The lift is a 4" Rough Country lift. I really like the tire/lift ratio but I'm switching the lift out with a better riding/performing RE 4.5" lift and I'm debating going with 35" BFG MT's.
 
Not much of an update, stripping paint and wiring is just boring and monotonous. One funny thing I did run into when I was stipping the bed liner off the tailgate:

Now where did I leave that razor blade?
attachment.php


Here you can see the razor blade and where it was on the tailgate and the imprint on the underside of the bedliner that I peeled up:
attachment.php


Pretty much shows how poor the prepwork was before they sprayed the liner. :eek:

One question though, one of the plates in the tailgate that the hinges bolt to is loose and rattling around in the tailgate, any tips on how to get that back to where it is supposed to be or am I just goning to have to cut an access hole?
 
Last edited:
That blade being in there is SUCH a Jeep thing (at least that's what I call it when I do something like that). :thumbsup:
 
Update

Almost a week,need pictures.....

Ok only 3 days
 
Last edited:
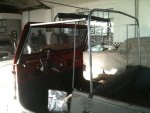
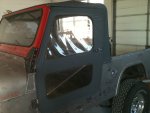
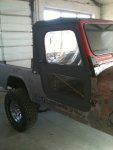
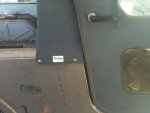
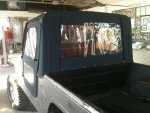
Christmas Eve - Went to the in-laws to spend a little time with them for the Holidays since I'm working for the Fire Department on Christmas and I was working yesterday when they had their big family get-together. I did get to work on the Jeep and got the Whitco 1/2 Soft Top completely fitted and all holes drilled so I won't have to worry about drilling into fresh paint. The top looks great and I'm excited to see it once the Jeep is painted! I also took lots of pics of the top and frame since it is for soft doors. Most of the pics and instructions I've found for Whitco Tops have been for Hard Doors and the two tops do differ. You cannot use Hard Doors with this top, both the frame and top are different. Anyway, here are the pics:

Frame:
attachment.php


Complete top with doors:
attachment.php

attachment.php

attachment.php

attachment.php


I have more pics of the top and I will update my thread about Whitco 1/2 soft tops in the "Tops, Doors, and Racks" section.
 

Attachments

  • 12-24-2011 Half Top Fitment (13).JPG
    12-24-2011 Half Top Fitment (13).JPG
    252.2 KB · Views: 773
  • 12-24-2011 Half Top Fitment (6).JPG
    12-24-2011 Half Top Fitment (6).JPG
    233.6 KB · Views: 768
  • 12-24-2011 Half Top Fitment (7).JPG
    12-24-2011 Half Top Fitment (7).JPG
    210 KB · Views: 773
  • 12-24-2011 Half Top Fitment (8).JPG
    12-24-2011 Half Top Fitment (8).JPG
    233 KB · Views: 768
  • 12-24-2011 Half Top Fitment (9).JPG
    12-24-2011 Half Top Fitment (9).JPG
    241.7 KB · Views: 767
Last edited:
that's a nice soft top, i never knew they made them like that.

i am looking at build threads like yours and saying to myself im glad i don't have to go out in that cold garage and do stuff, i can just turn the key and go now. wwwwwwwwwwweeeeeeeeeeeeeeeee.

you will be thinking that way soon, its fun to do the build but even better when its FINISHED :D:D
 
Worked on the Jeep a little today. Sorry, no pics, it wasn't anything really picture worthy. I did finally get the hard doors completely torn down. One vent window came out somewhat easy but the other (driver's side) was a real PITA! I ended up cutting the rubber weather strip to get it out. At some point it must have been replaced and it was glued back in. Now that I have to get new weather strip for the windows I'm thinking I may just upgrade to the movable vent window. Does anyone know if they are a direct swap with the fixed vent windows?
 
Back
Top