• Notice for iPhone users: DO NOT use the image size reduction option when uploading photos to the forum. This causes portrait images to post as landscape. We have added a warning to the image insert pop-up as well.

Gotta' go

Update

Well, it's been almost a year and I figured I would provide an update since I am the lucky guy who bought this one. Perhaps BW can now move this thread to the build section. The previous owner referred to this as his "Montana Corvette", but after getting into this project she is now known as "Montana Mud".

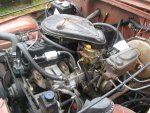
Originally I had planned on just replacing the fender and driving this one. However, the more I got into it the more needed to be fixed or replaced. Actually, the fact that the engine was smoking and kicking around was my first clue I needed to tear her down further (ended up being a bent and detached push rod on cylinder #4, yikes).

More to come...
 
1st things first

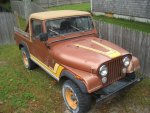
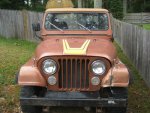
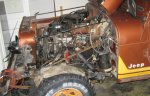
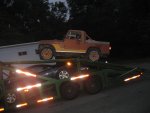
This is how she looked on the day she was delivered.

IMG_1279.jpgIMG_1282.jpgIMG_1283.jpgIMG_1285.jpgIMG_1289.jpg
 
Remving the Fender

So, about a week after it came off the truck I started tearing into that DS fender.

IMG_1318.jpg


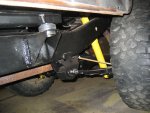
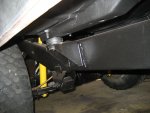
The fender was crinkled so bad. After close inspection, she got hit hard enough that the front DS leaf spring was replaced, although incorrectly. The center pin was reversed on the leaf pack so that the axle could be located. The whole AMC setup on how the axles are located on the leaf springs using the center pin kinda stinks. Especially, when the steering stabilizer brackets the same thickness as the center pin head, and your axle is "floating' on one side. It's amazing this thing didn't walk like a crab down the road. Needless to say, the next step was to replace all the leaf springs, bushing and shackles.
 
Last edited:
Now for the BAD News

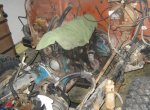
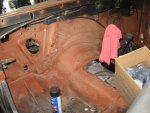
So after pulling of the fender, I really wanted to get her running better. This is when it all hit the fan so to speak. After many "quick fixes" she was just belching white smoke. As my buddy says "Who needs a mosquito magnet when you can turn on the Jeep and smoke them out!". So we decided to take off the valve cover and see what was going on. Sure enough, the push rod on cylinder 4 was bent and off the rocker. Based on this I had to get a peak at the underside of the head and the cylinder walls. More bad news, the cylinder walls were scored and had stratification marks showing where the pistons had sat for some period of time. Looked like some condensation got into the cylinders as well. You could snag you finger nail on the grooves in some of the cylinders. So my dream of driving it was destroyed. But as a lover of the CJ's I decided to do her right and start tearing her down to restore her back to her former glory. As shown in the following picture, I broke her all the way down so I could snag the engine out for rebuild.

IMG_1373.jpg
 
Last edited:
Montana Mud

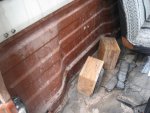
So after disassembly of the engine compartment, I decided it would be best to get to work on the frame so I could get the new leaf springs in. The frame and underside of the body had old crumbling undercoating on it. So armed with a razor blade, creeper and ambition I started scraping and scraping and scraping.....Let me tell you, undercoating in the eyes is no fun. I revised my equipment list to include a full clear face shield, dust mask, and a nice pillow to prop my head up on the creeper. The process of scraping took me approximately 3 to 4 weekends in the dead on winter. Surprisingly the frame looked almost new with only minor rust at the body mount locations.

Once the weather broke in the Spring of 2012, I rolled her out to clean the frame so that I could repaint it front-to back. After removing the body mount and lifting the body up about 8 inches, I started using the POR marine clean for degreasing (which is awesome non-diluted) and a scotch bright pad. The surfaces of the frame were good, but after using the pressure washer to rinse I noticed much larger issues. The frame was almost completely filled in the rear with mud. After using vacuums to try to suck it out and pressure washer to flush it out, I was still getting mud flowing out like a river from the frame. Turns out a mouse had built and extensive nest in the frame which was blocking some of the mud from exiting. I pulled out the mouse house with my homemade mouse house remover (wire coat hangar) and continued to flush. As she sits right now I am unsure if I got all the mud or not, but my neighbor jokes I got free loam with the purchase of the Jeep.
 
Thanks for the kind words about the story. I think it is cool to have the back history from the previous owner. I am working on some more write up and new pictures now. There will be a shiny new rebuilt engine picture in the next update. Yes, I was able to have that original head and engine rebuilt, although it did cost me a bunch.
 
Nice work, Alex. These threads always have a way of making me guilty for not getting to any of the important work on my CJ. Just enough to keep it driving so far, I can never seem to save up enough to do the major work.
 
Moved, with a redirect from the for sale forum. And :popcorn:
 
Frame Paint & Undercoat

Time for another update...Thanks Walkerhound for the kind words on my resto. I should have said this from the start, but this is a budget build. I really don't have deep pockets but I am relying on my labor to make this somewhat affordable. So if I don't take the most expensive route (or best), please forgive me.

After scraping, cleaning and degreasing the frame and underside of the body, I hit any exposed areas with the POR Metal Ready. This stuff chemically inserts the rust. Cool stuff, but it is an acid so don't forget the gloves. Rust areas again were mainly under the body mounts locations. Wire wheeled first, cleaned, and then the Metal ready. After cleaning off the residual metal ready it was time to paint the frames and axles. I started with the straight POR 15 and let it dry overnight. Then I went over the POR 15 with the POR Chassis Black since it has the UV resistances I wanted. Regular POR 15 will NOT hold up to sunlight. After painting the frame I decided to re-undercoat the underside of the body. I had scraped the loose undercoat that was there but there were some bar spots. Being a budget build, I got some spray bomb Dupont Bedliner material suggested by my friend who does restoration for a living. Two coats over all the underside, in the inner foot pans locations, up inside the rear corners, and up the underside of the transmission hump. This stuff puts off some major chemical smell so I would suggest using outdoors. The beauty of this stuff is that is it starts to flake off I can just scrape it again and touch it up.

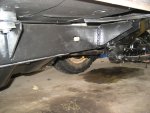
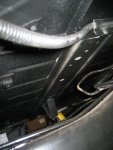
Here are some pics of the frame and body after putting is back down and with the new Crown body mount kit installed. She's not as perfect as a frame off job, but for a single car garage attempt I think it is excellent. IMG_1461.jpgIMG_1458.jpgIMG_1457.jpgIMG_1463.jpg
 
Engine

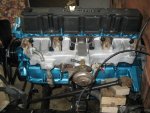
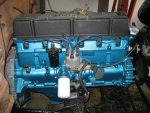
While I was busy with the frame and undercoat I had the engine rebuilt from A to Z. This was not an inexpensive proposition, but I wanted to stay away from crate motors. Plus I wanted the original engine back in this old girl. I have a sheet a mile long of all the things completed on the engine, but I suppose all anyone cares about is how it looks. I went with the Seymour AMC blue spray bomb for color. Probably not a Jeep color, but cool nonetheless. Here are some pics after we got her re-installed.

IMG_1460.jpgIMG_1452.jpg

The old exhaust manifold looks like a real turd, but is was planed to mate with the block correctly. I'll run it for now.

Also, forgot to mention, I had the flywheel turned, new clutch pack and pilot bushing, and new throwout bearing were installed prior to putting the engine in. If you get a Crown clutch kit, your going to get the wrong throw out bearing for a 1981 with the T4. The correct bearing has a plate with two clips on it as opposed to the circular shaft style provided in the kit. I was bale to source a Timken bearing at Autozone (yuck!) on a Sunday no less. Guess it was my lucky day.

Still not sure I dig the Clifford valve cover, but that's what was on it so I am running it for now. Had an offer to but the valve cover alone, are those things rare or something???
 
Body Work

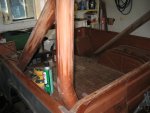
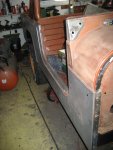
So this is kind of where I am at right now, I am starting on the body work. Had to strip all the paint off the bedsides as there were some dings and dents that were rusting out. Areas not rusted is getting sanded and the scotch bright treatment. I still have a ton of surface prep to finish but the pictures give you an idea of what I am starting with. Any bare metal is getting SEM etch prime prior to 4 coats of regular prime and them paint. Going back with the factory Copper Metallic for paint.

Forgot to mention, the only real body rust on here was in the floor pans. It was pitted a little but I wire wheeled and hit it with some Eastwood Rust Converter. This stuff neutralizes the rust and at the same time preps the surface for paint. We will see how it holds up over the long run.

Also it is curious how AMC never painted under any hinge location. No wonder these things rot out so quickly. I saw some evidence of maybe some black factory primer, but it was mainly bare metal. I will not repeat their mistake, paint will be under every square inch of the tub.

IMG_1456.jpgIMG_1465.jpgIMG_1455.jpg
 
Hope everyone is enjoying the updates. I will try and keep them coming as I progress. Right now I am fitting the nose back on it and working on the doors.
 
On the clifford valve cover, clifford quit making them, but mine leaks, and has leaked most of the time it's been on my engine. I've read that some of them weren't true, and I need to check mine and see if a new gasket and the proper torque procedure will fix it, or if I have a warped cover.

If someone else offers to buy it, I'd sell it! I have a cheapie "4.2" logoed valve cover on my other Jeep and it doesn't leak a drop, and other than the writing on the top looks like the Clifford cover.

Looks great! Glad to see another one brought back to life!
 
wrm69,

Thanks for the insight on the Clifford valve cover. Now I am a little concerned she might leak. Guess I will have to keep a clos eye on it.

Thanks again.
 
Great to see the history from sale to rebuild. You're doing a great job!

Helped a friend with a Clifford valve cover. It was warped front to back, and the flange was angled on one side. Leaked like crazy. We had a machine shop surface it, had to take off a ton to get it true. Left it pretty thin on the flange. Guess what? Still leaks. Cleaned it and used a heavy application of "Right Stuff" RTV. Leaks stopped, but it will be fun if it ever has to come off.

Keep the pictures coming. Enjoying watching the progress.
 
Some Missed Items!

Thanks everyone for the kind words on my restoration, it helps me keep going.

Reading back through my posts I noticed I had a left out a few items. First, I spent a great deal of time going through and cleaning/fixing the wiring harness. Since I had the harness (both engine compartment and interior) out of the Jeep I worked on it in my basement, which is a lot easier than in the Jeep.

I found that someone had used those plastic crimp bypass connectors in some areas of the harness. To me that type of connector is unacceptable. To make sure the harness was OK, I basically pulled the wires out of the loom in 12 inch sections, cleaned everything on and fixed any breaks, or crappy connections. I used CRC electronics cleaner on all the connectors along with toothbrushes and small pics to get them good any clean. Amazingly I only had to fix a few wires. I decided soldering was the way to go with heat shrink tubing on top followed by electrical tape for sealing out the elements. The only connection I am worried about is the factory coil plastic pickup. Mine for some reason has a Ford pickup on it. Not sure if that was factory or not. Nevertheless the wires were broken so I had to splice in new wire to the spade connectors that go into the pickup. The spade connectors were loose inside the pickup so I had to enlarge the ends on them so they wouldn't fall out. I hope this will not be an issue when I go to start the engine, as I believe this pickup helps regulate the voltage to the plugs. Does anyone know what gauge wire was originally used for the pickup? I hope I did not go to small on the wire thickness or if it will impact its operation.

Also in the meantime of doing all this I have been working on all the "smalls" as I call it. Everything I am reusing on the Jeep is getting cleaned and repainted. For the smalls (tailgate brackets, spare tire carrier, mirrors, etc) I am removing all the rust and then priming any bare metal. Following that with etch prime, and then a couple of coats of Duplicolor T-100 generic black spray bomb, followed by a few coats of Duplicolor clear coat (for UV areas). I find it amazing how AMC cut corners in protecting these Jeeps. My whole e-brake, and pedal assembly was painted only up to the bottom of the dash level. Everything up under the dash was bare metal. Looks like AMC just painted these in place and on the fly after they were assembled. I have remedied that by taking care of the rust and repainting.

I am in the process of taking more pictures of these actions and hope to load them up soon. I guess this is slowly turning into my build "diary".
 
GOBobby,

I am not sure if plug wires 3 and 4 are reversed. I will have to check with my 81 AMC service manual. To be honest I did not check the plug wires when it came back because I was going to replace them anyway. I will check and update....

Thanks for the heads up.
 
Back
Top