• Notice for iPhone users: DO NOT use the image size reduction option when uploading photos to the forum. This causes portrait images to post as landscape. We have added a warning to the image insert pop-up as well.

How I internalized my fuel-related issues

cbford

Legacy Registered User
City
CLT
State
NC
Have been reading Spankrj's thread where he talked about fuel problems. So I thought I would Share how I put an OEM fuel delivery unit from a mid 2000's chevy pickup into one of our original Jeep 20 gallon plastic tanks.
I have done this 3 times now. The oldest installation has been working for 4 years.
 
Huh... I guess I will have to come back later and finish when the site will take a url or direct upload picture.
 
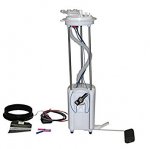
This is the fuel sender assembly I am referring to.

sending unit.jpg

I will show some pictures of the internals if you want, but there are lots on internet already. Basically, this thing puts the fuel pump down into the cup at the bottom of the assembly. The pump has an intake sock in the cup. The cup holds liquid, it is a cup, not a baffle. Also in the bottom of the cup is a syphon intake that has a second intake sock on it that fills the cup from the tank anytime the pump is running. Another way the cup stays full is the fuel return line of your system. the return flow comes in the top of the assembly to the plastic cap, and then runs down the telescoping, spring loaded mounting legs into the cup.
 
Ok.. picture worked...

These are available from junkyards anywhere. Or new from Carter, Delphi, AC Delco, Walboro, Airtex, and others.
The one for the mid 2000's GM truck works well because it is the right height for our tanks without modification. The cup sits on bottom of tank on the feet you see in picture and you press down the spring loaded tube legs until the cap sits into hole on top of tank and the lock ring goes on.
So it doesn't need a seat or bracket to sit still, sloshing fuel wont push it around and it doesn't need an external baffle to keep your pump sitting submerged in fuel.

But it does require a 4 inch hole in the top of the tank to mount it. And a flat flange in tank to seal against, and a top sealing ring to press cap of assembly down onto the tank flange.

4 inches is perfect size hole.
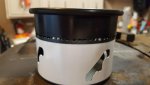
20160716_115847.jpg

Now where to put this thing?
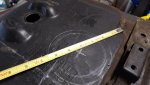
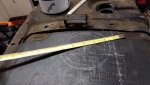
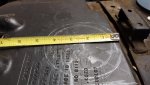
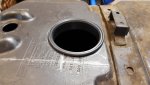
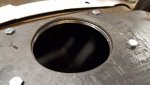
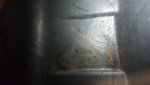
Here is the inside of our tanks. This is the plastic 20 gallon stocker. it has a 3/4 inch deep, slightly sloped sump that is about 8 inches wide at the bottom, center.
20160716_122704.jpg

You can also see the back (as in rear of vehicle) has an upward slope to it which is why bending up a custom in tank pump on tubes for the stock opening is a pain. It cant go straight down, it has to go left about 2 inches and forward about 1.5 inches to reach flat, deepest part of tank.

 
So, to reach the bottom of the sump, and have room for the cup to sit flat in the sump; this is where you drill the 4 inch hole.
20160716_120423.jpg20160716_120438.jpg20160716_120456.jpg20160716_121441.jpg
 
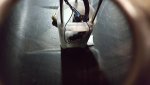
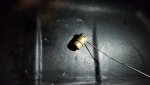
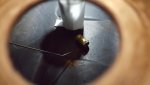
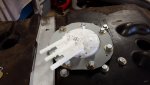
And, once you drill the hole your assembly will slide in there like it was made for the purpose. The cup will sit on the floor of the tank flat on its feet. The offset flat where the gauge sender is mounted on the assembly allows the cup to sit just inside the sump edge. And you have about 1 inch of spring travel to press down the tube legs so the assembly cap can reach the top of the tank.
Also, If you cut/seal the send and return tube on the Jeep stock fuel sender, you can still use the stock fuel sender in its stock location with no modification. It has full travel and works perfectly.

20160716_123554.jpg20160814_103611.jpg20160716_123612.jpg
 
Now, to mount and seal this sucker.

In a GM application, there is a steel flange molded into the top of the tank where they put the pump. The steel flange has screws, ramped teeth, or wedge locks around its perimeter. The assembly sits in the middle and a second locking ring goes over the assembly to press the cap to tank and seal the whole deal. There are videos on youtube and pictures-a-plenty on the google.

So lets make that. Or, most of it anyhow.

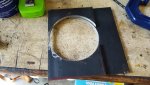
Used 1/4 inch flat stock, made the 4 inch diameter ring in 2 pieces that fit tightly together, can be put in through the new 4 inch hole you cut, and bolted in place. This creates a solid, flat base for viton seal to sit on and the outer ring to press the cap onto the seal onto the tank.
20160716_141832.jpg20160716_150808.jpg

The tank itself has a small arc to its top. But, 1/4 inch is strong enough so that when you tighten the assembly it will all pull down flat and smoothly seal up.

And for those worried about corrosion of the parts there are options. Use stainless. Or paint with epoxy once you are done drilling/cutting/poking. Or, like I did, have them zinc plated.
 
And, last - a few things I did that you may do, but don't have to.

Cut hose control loop off the tank strap. I wanted the inlet/outlet of the assembly to face the way it does in picture due to where I wanted to mount my post pump filter and still have enough hose to drop tank without unhooking hoses.

Seal the bolts through the tank wall into the internal flange. I used nylon washers below the flat washers you see in the pictures. They squish a bit and seal nicely and are fuel safe. I usually use blue Loctite as well as it seals as well as locks the threads.

Make your own lock ring. The one is the picture is not super pretty, but it does work. I have also used one of the stock (ie bought from auto parts place) locking rings that matches the pump assembly and just drilled holes through it to bolt down. Better looking and also worked.

Quick connect inlet/outlets. These are stock GM deals. Available in sizes from 1/4 to 3/4. You can get them for hose, braided hose, steel lines or whatever you may be using pretty much anywhere.
This particular sending unit assembly was made for a 2005 Chevy 2500 with a 6.0 v8 and has a 3/8 outlet, 5/16 inlet and 5/16 vent.
Oh yea... did I mention this assembly gives you another vent with built in liquid check valve? Well, it does. So I tied this to the other 2 stockers and ran a 5/16 line for all three vents up to the charcoal canister just like the stock application.

20160813_150939.jpg
 
And, it works great. No pump noise. No more pressure variations. And it will run the tank down far enough so you have to pump 19.2 gallons into it.
(That was an accident, I didn't test on purpose. Your results may vary)

And for off-roading, I have not had fuel pick-up trouble in steep angle climbing, descending, or side slopes steep enough to flop over on.
It is probably not OEM good, but it is pretty good considering it took 2 hours to install and is a fully off the shelf parts solution.
 
Pretty cool! Can I ask for a bit more info about the flange in the tank? I assume it is bigger than the 4" hole, so it goes in 2 pieces. How do you install it inside the tank without it leaking?
attachment.php
 
Last edited:
I was wondering if you don't have the original tank is there a replacement tank that can be used? Thanks looks good


Sent from my iPad
 
Mysunnshine - yes, MPFI drove this solution. This particular installation is feeding a 331 Ford. I suppose you could swap the pump in the cup out to something else if you wanted lower system pressure.
Generally speaking, the assembly is what makes the idea work and you could use other pumps. The only thing special about the pump is the intake sock, which has a 90 degree fitting on it rather than the traditional straight fitting.
And for the 20 gal Jeep tank, the GM pickup sender is the right height. There are shorter, fatter, taller, and off-set versions of this sender available as GM uses them in lots of stuff.
GM also uses O-rings as seals on some assemblies. I chose this one because I wanted the seal with the 1 inch skirt around its perimeter for more vibration absorption and tank sealing forgiveness.

Spieg - I don't seem to have a picture of it after I was done cutting and filing prior to install. But from the picture of the parts overlaid on the bench above, you can see I used 2 pieces of 4 inch wide, 1/4 inch thick steel to make the full opening. So what I did was carefully measure cut and file them so they butted together to make a nice round, smooth and complete 4 inch internal ring opening that has a square outside perimeter shape.
The 4 bolts in picture you referenced are threaded into the corners of the 2 pieces and hold them in place in tank. Another way to go would be to cut a slot in the ring so you feed in half then rotate in the second half like moving a couch through a narrow door.

Belizeit - I suppose you could do this kind of thing in whatever tank you wanted. This was not my original idea, I just applied it to a stock 20 gal Scrambler tank because I didn't want to spend $1k on a custom tank and my external pump was doing the same thing Spankrj's described.
 
Speig - I missed your question on leaking.

The seal shown with the hole saw is what came with the assembly. The 4 inch hole allows this to slide in and reach below the flange inside the tank. That is why size, roundness and smoothness is important, it affects sealing.

When you press the cap of the assembly (that has the hose connections on it) into the seal, the sides of the cap assembly are tapered out and slide down into the tank about an inch. They are a progressively snug, compressive fit to the seal around the inner diameter the more you push down on the cap. So, when you put the locking ring on top and tighten it down over the assembly cap, it smooshes (sorry to be so technical) the whole thing together.
It presses the cap taper into the sides of the seal through the flange and seals tank to seal and seal to cap. And on top, the cap flange presses down into the non-seated o-ring seal on the tank surface, which seals between the tank and seal and seal and cap.
And same deal on bolts. I use nylon washers between locking ring and tank top to seal the bolt through holes. With Loctite as thread backup.

I haven't left it on its side to see if it will leak. But I park it in a well sealed garage and it never smells a wiff of gas unless you take the fuel cap off.

Then, under the head of the bolts I use to mount the flange, I put a bolt diameter matching nylon washer under the flat and lock washers I use to hold flange in tank. Nylon is gasoline safe material and soft enough to seal the bolt threads and the bolt to tank surface as well, like a gasket. I use blue Loctite on the threads as well as a just in case and for peace of mind.
 
Something I forgot to mention on this re-fit is that it is possible to use the fuel level sender included on the overall assembly if you want.
The resistance range is different than that of a stock Jeep gauge, but if you are planning to use an aftermarket gauge in the more common 240 - 33 ohm range it is an easy way to go.

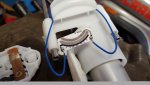
And, I looked at swapping the variable resistor to the new assembly. It will fit nicely and the pivot will carry a signal no problem.
20160302_122256.jpg

But I didn't see a clean, reliable way to get a return on the signal ground from the resistor.

I suppose you could add a variable resistor and make this work for the stock Jeep gauge. But that seems like it would cause a problem with accuracy of the reading as you approached full or empty....
 
Back
Top