• Notice for iPhone users: DO NOT use the image size reduction option when uploading photos to the forum. This causes portrait images to post as landscape. We have added a warning to the image insert pop-up as well.

My "new" dream Scrambler

Just finished reading this thread. Great build! I recently started eyeballing a Scrambler to tinker with and this build was inspirational to say the least. Thanks so much for the detailed info and pics.

Sounds like you've had a lot on your plate lately. Best of luck!
 
I actually got to spend my first afternoon post-wedding in the garage!

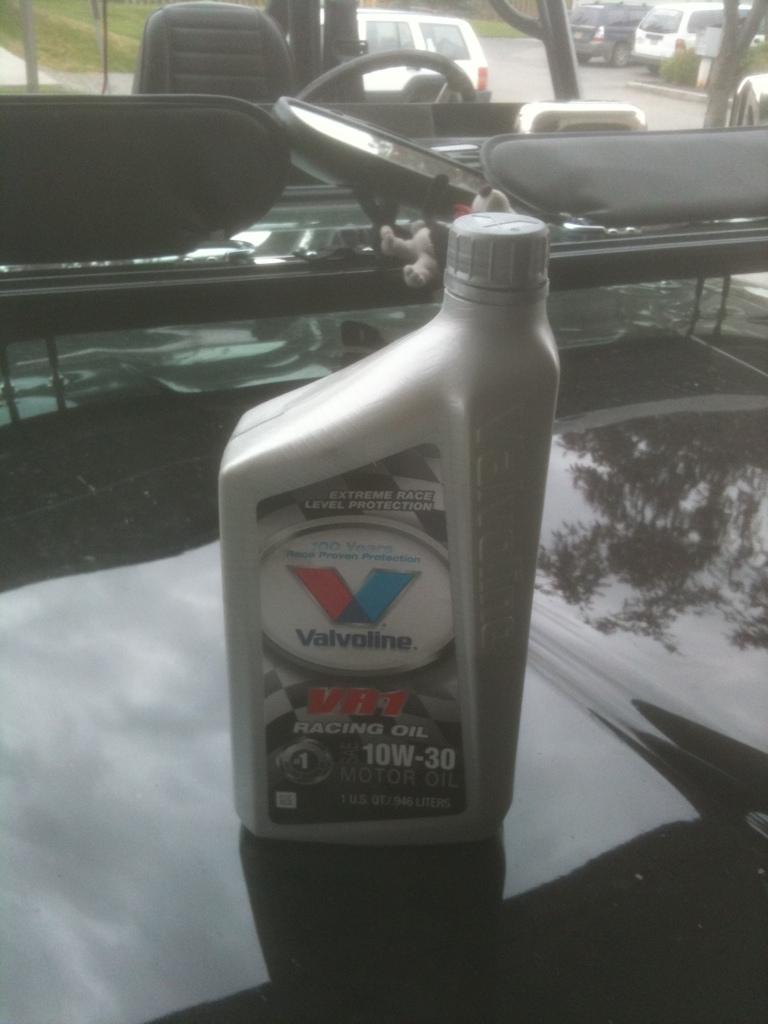
9C62D712A4BB49EE9863CB8924B9852124290000-1.jpg

Oil change! I've got roughly 1500 miles on the engine, so it's time. With the VR1, I don't feel compelled to run the Comp Cams additive due to the high ZDDP content in this oil.

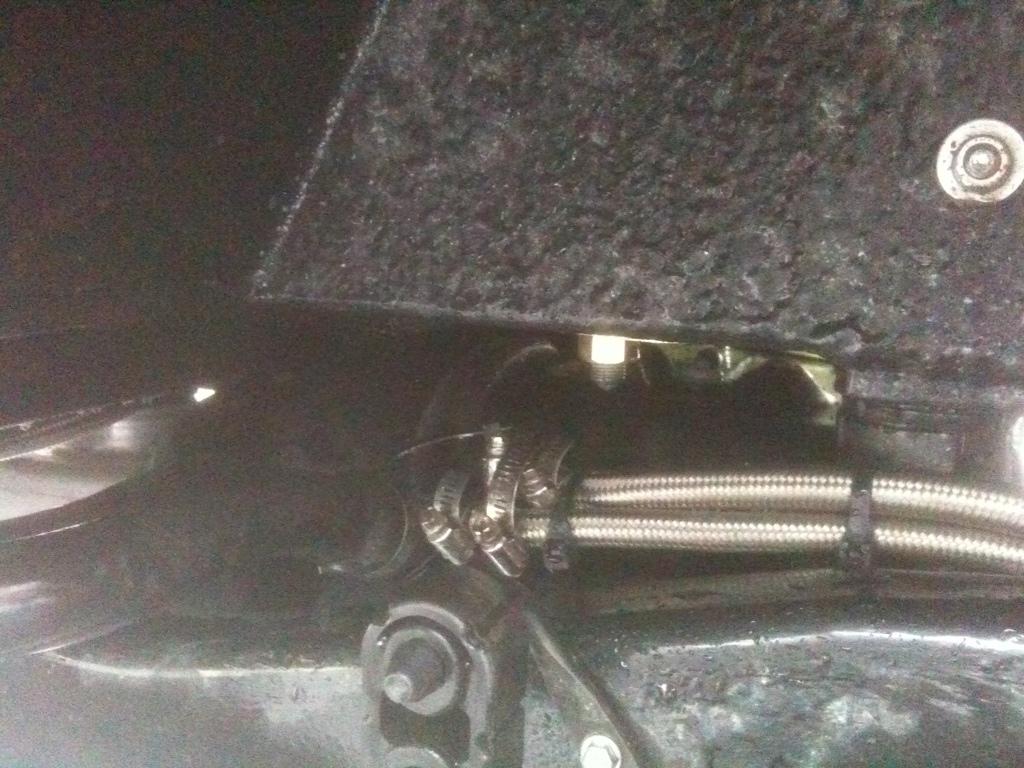
CB1A2410E63245038C4D691F6755ACF524290000-1.jpg

I've had an inconsistent fuel leak at my sending unit, which I could only figure was due to the braided-stainless line not pinching down enough on the sending unit. Tightening the clamps seemed to work, but then it would stop working. I finally decided the solution was a short piece of rubber line, in a slightly smaller diameter, which I could more easily pinch down on the sending unit, spliced into the braided stainless. It worked! No more leak!
 
Great build! You've built something that will last you for along time and looks terrific. ;) Well done!

The fact that you went with the 401 shows you have good taste! There is no reason why they can't be made to run right and stay together. If all else fails use stock parts. It will still have more HP than you can ever use.

I also wanted to compliment on the choice of color which looks great with the polished Aluminum. One of the best looking ones I have seen :thumbsup:

I tried to get an Aqualu/JP Offroad body for mine but it was right at the time when Dave Knight was losing control of the American part of the operation, so there were no deals to be had. I have helped installed about 4 of them on various crawlers and 2 Scramblers, and one was a Bobber. It was the Red one with 40" MTR's that went on the Ultimate Adventure in about 02 or 3. One thing about these bodies, they can take a helluva beating, and it will never rust .

If you have seen my thread (DeScrambler Project) you'll see I went Fiberglass instead. Better than trying to find a decent steel body or buying a new one and trying to build from scratch with that. Way too many parts to find.

Mine will never rust either, and I was able to get everything but the grill in FG.

I figure you built this thing to be a long term project, and possibly a daily driver type vehicle that your wife could drive if she needed to.

I have some suggestions;

Do a shackle reversal on the front, which will help the vehicle go down the road strait. Long shackles on the front of a Jeep tend to flex around too much and make driving the thing a constant chore. MORE Offroad sells a bolt on reversal kit so you wouldn't have to weld on your Galvied frame. Night and day difference in the way it will drive.

Put some 37's on it for the summer and put studs in the 35's so you can drive it in the winter. I know most guys run studs in the winter up there anyway, so you need two sets of tires.

Also if you eventually install some kind of selectable lockers in it, it won't be squirrelly in slippery or offcamber road conditions. When drivng with the diffs open the unpowered wheel tends to hold the vehicle from sliding sideways, and you still have the option of locking one or both when you need it which is really only about .5% of the time anyway.

Detroit locked diffs are just plain scary to drive in the soup and are downright dangerous when it is icy.:banghead:

Finally,,, Jerry is a pretty good guy to deal with on the hardtops, and since he is the only outfit producing Scrambler hardtops, that is a good thing. He could just as easily hold the line, and charge whatever he wanted. He wouldn't sell as many but I think his helpful attitude speaks volumns about his business. Great guy to deal with and anyone looking for a hardtop would be well advised to talk to him.

I was lucky in that he is located about 120 miles from my house so I took my tub there on my trailer and they kind of mounted it for the drive home. I will redo the mounting when I install mine which is still a ways off. It is currently hanging from the roof of my Garage.

In closing I gotta tell you,,, "You done good!" :bow: :cheers:

Randy
 
Last edited:
Great build! You've built something that will last you for along time and looks terrific. ;) Well done!

The fact that you went with the 401 shows you have good taste! There is no reason why they can't be made to run right and stay together. If all else fails use stock parts. It will still have more HP than you can ever use.

I also wanted to compliment on the choice of color which looks great with the polished Aluminum. One of the best looking ones I have seen :thumbsup:
Thanks! I wasn't sure if I wanted to do black, which would match (sorta) my '85 7, or stick with orange, since that's what my donor color was. I think it turned out well.

I tried to get an Aqualu/JP Offroad body for mine but it was right at the time when Dave Knight was losing control of the American part of the operation, so there were no deals to be had. I have helped installed about 4 of them on various crawlers and 2 Scramblers, and one was a Bobber. It was the Red one with 40" MTR's that went on the Ultimate Adventure in about 02 or 3. One thing about these bodies, they can take a helluva beating, and it will never rust .
I ordered the tub and sheetmetal all through TDK when I got the frame. I called Aqualu when preparing to make the order, and figured I'd just go through them, but they said it would be much easier to use a U.S. distributor for import purposes, and informed me that Jeremy (owner of TDK) was a distributor! They still drop-shipped and it came straight up the Al-Can from B.C.

If you have seen my thread (DeScrambler Project) you'll see I went Fiberglass instead. Better than trying to find a decent steel body or buying a new one and trying to build from scratch with that. Way too many parts to find.
I'll look through your thread; it's been a couple months since I've paid much attention to the board. I actually didn't have any problems locating the 8-specific parts, since there are only a few. Having a 7 that was "turning" into the 8 made it easy for most of the little parts. The only Scrambler specific parts are:
Roll-bar: sourced locally from Craigslist for $50
inner roll-bar bracket: sourced locally through the AK 4x4 network for free
lower/outer roll-bar bracket: fabbed up for beer by a friend
tailgate bracket: sourced from eBay for...$50? I bought those fairly early in the build.
plastic left-side fender wiring cover: had a friend weld together two pieces of aluminum angle to make my own
fuel lines: ran custom braided-stainless for the EFI anyway
brake hard-lines: Classic Tube
rear driveshaft: with the SOA, I needed custom shafts anyway, so I had a local drivetrain place make them

Obviously my tops are not factory, but I'm still not sure if I really want a factory hard half-cab, nor do I want a factory full soft-top. What I DO want is a custom soft half-cab that will fit over the front cage.

Mine will never rust either, and I was able to get everything but the grill in FG.

I figure you built this thing to be a long term project, and possibly a daily driver type vehicle that your wife could drive if she needed to.
I started it in 2007, and first drove it in 2011. As with any Jeep, I still have things to do! It's just a matter of time and money.

It's only an occasional nice-day daily-driver; perhaps throughout the summer. It's also a back-up as necessary. I don't expect my wife to drive it unless it's an absolute emergency, or we're wheeling. She's driven it a couple times, but until I get the EFI dialed in, I'm nervous about her putting in too much timing via the throttle and not noticing the pinging. I've had to learn a feathering technique with the throttle. I'm seriously considering going back to a conventional 4-pin HEI with vacuum advance.

I have some suggestions;

Do a shackle reversal on the front, which will help the vehicle go down the road strait. Long shackles on the front of a Jeep tend to flex around too much and make driving the thing a constant chore. MORE Offroad sells a bolt on reversal kit so you wouldn't have to weld on your Galvied frame. Night and day difference in the way it will drive.
Nope. Considered and rejected that a long time ago. I could have ordered the frame with shackle-reversal for a minimal extra charge. There are two-schools of thought, and I am in the other camp. I like that when the spring compresses, the tire is forced forward, into the obstacle. Granted, that did cause a bent spring, but my custom shackles should prevent that from happening again. I've also seen shackle reversals have driveshaft problems due to the need for a long-slip shaft. I didn't want to mess with it. Right now, it rides nicer than a ZJ, and goes perfectly straight down the road. I'm a happy man. If I want to stiffen-up the front end for street driving (which I don't, at least for now), then I'll put on a sway-bar.

Put some 37's on it for the summer and put studs in the 35's so you can drive it in the winter. I know most guys run studs in the winter up there anyway, so you need two sets of tires.
I'm actually thinking 38"s or 40"s, if they'll clear. I need to borrow a set from somebody in my club for a weekend and see how they fit.

I don't plan on driving it much in the winter, and I doubt my 35"s have enough tread left to get studs. All mud tires make crappy winter tires; that's just a fact of life. I ran 33" BFGs when I was in school and living on the east coast, as well as these 35"s, when it was a daily-driver, including after I moved back home. I know they suck, which is why I didn't really drive it at all last winter: I didn't want to be learning about my new suspension and wheelbase in the winter with sucky tires.

Growing up and driving my '85 7, I actually had a traction-permit (for being a poor high school kid), and ran studs year round. I picked up a set of studs for that 7 when I had to press it back into daily-driver service a couple years ago, but then decided to retrieve my mom's Subaru as gas prices spiked. We were always a family that believed in studs, and I still do. My Subaru has two sets of rims/tires, and so does my wife's ZJ.

For the Scrambler, I'm not going to do any winter daily-driving, so I'm not worried about it. When it comes out, it'll be on a nice low-traffic day, or for a winter wheelin' trip.

Also if you eventually install some kind of selectable lockers in it, it won't be squirrelly in slippery or offcamber road conditions. When drivng with the diffs open the unpowered wheel tends to hold the vehicle from sliding sideways, and you still have the option of locking one or both when you need it which is really only about .5% of the time anyway.

Detroit locked diffs are just plain scary to drive in the soup and are downright dangerous when it is icy.:banghead:
I learned how to drive when I was 12 in my '85 CJ-7, that my dad bought new and put a Detroit Locker in it at 10,000 miles. That became my Jeep when I turned 16, and given that I still have it, it occasionally is pressed back into daily-driver service (such as this last month while my Suby is down getting a different engine). Yes, I was a dumb 16-year old high school kid in Alaska commuting 10 miles each way to high school in a CJ-7 with a Detroit. When I got the '84 during college (which turned into my 8), I immediately got an '86 Dana 44 and ordered up a Detroit. I know how they handle and am completely comfortable with them, even in icy-winter conditions, and even with the front axle engaged. If/when the front axle gives up, I'll either rebuild it with a selectable or replace it with a Dana 60 and a selectable, but that may not happen for 10 years or more. It's not a priority. I like the dependability of the Detroit.

My wife, however, does not like the Detroit, but it isn't her Jeep. For her ZJ, she wants selectable lockers. I don't feel like spending the money on a 30/35 for ARBs. If/when the 35 dies, and if I've got the money, we may look into a Pro-Rock with a selectable. In the meantime, her ZJ has an XD9000i.

Finally,,, Jerry is a pretty good guy to deal with on the hardtops, and since he is the only outfit producing Scrambler hardtops, that is a good thing. He could just as easily hold the line, and charge whatever he wanted. He wouldn't sell as many but I think his helpful attitude speaks volumns about his business. Great guy to deal with and anyone looking for a hardtop would be well advised to talk to him.
He was great to work with! But he doesn't actually build them. He's just the west-coast distributor. The manufacturer is actually Xtreme Tops:
http://www.xtremetops.com/catalog/index.php?cPath=21
My top was drop-shipped from their facility. I'd still be happy to order through Jerry.

I was lucky in that he is located about 120 miles from my house so I took my tub there on my trailer and they kind of mounted it for the drive home. I will redo the mounting when I install mine which is still a ways off. It is currently hanging from the roof of my Garage.

In closing I gotta tell you,,, "You done good!" :bow: :cheers:

Randy

Thanks!
 
D08EFC725A1B4AF48EC137198B53CE6326790000-1.jpg

Afternoon/evening progress: I got both of the frame-mounts cut out for the winch plate, and the left side drilled. I need to pick up a couple more sleeves to slide into the frame so it doesn't compress (the back one already has a sleeve from when I drilled that hole for the Big Daddy steering box bracket). I think I'm already going to regret cutting the angle-iron flush with the frame since odds are good it will end up being incorporated into the bumper somehow.
 
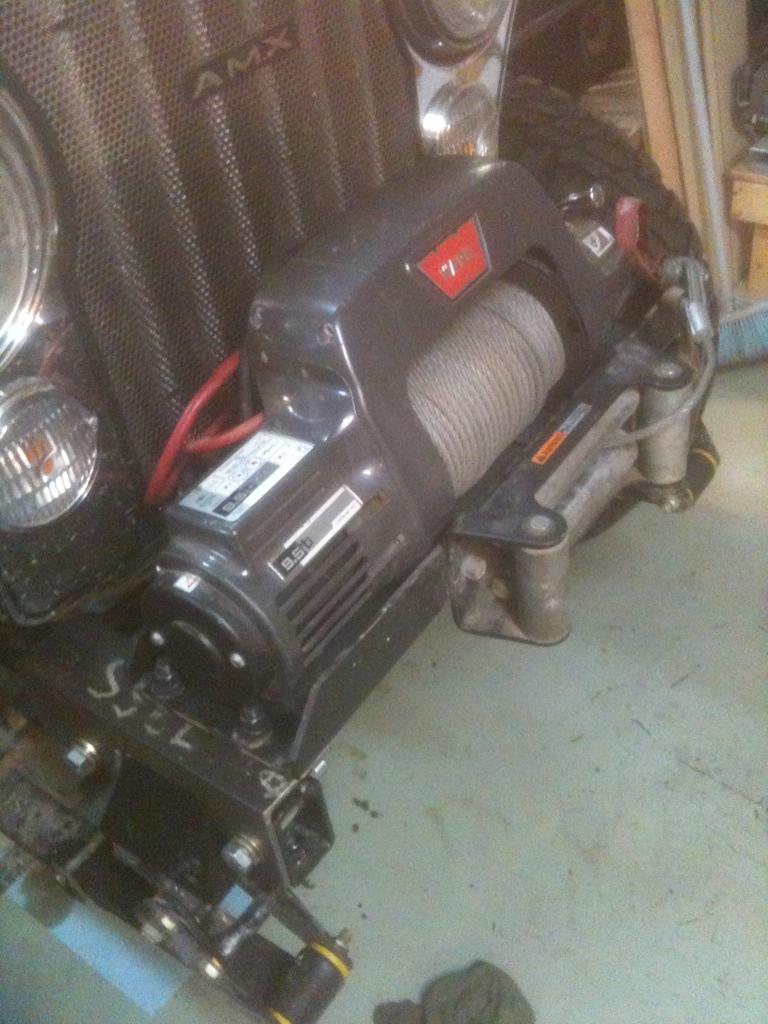
011A72E950CB465BB96CBCD59D9BBDB877020000-1.jpg

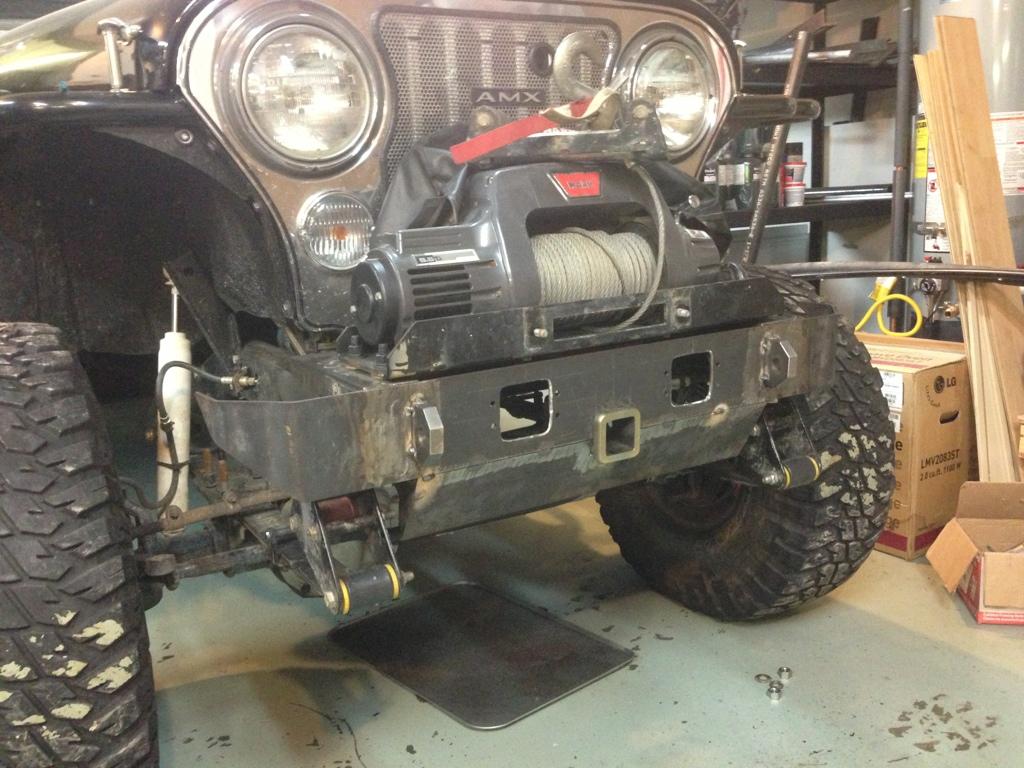
"Why yes, that is a WARN 9.5ti bolted to my custom TDK frame using brackets that I made with upgraded hardware. Why do you ask?"

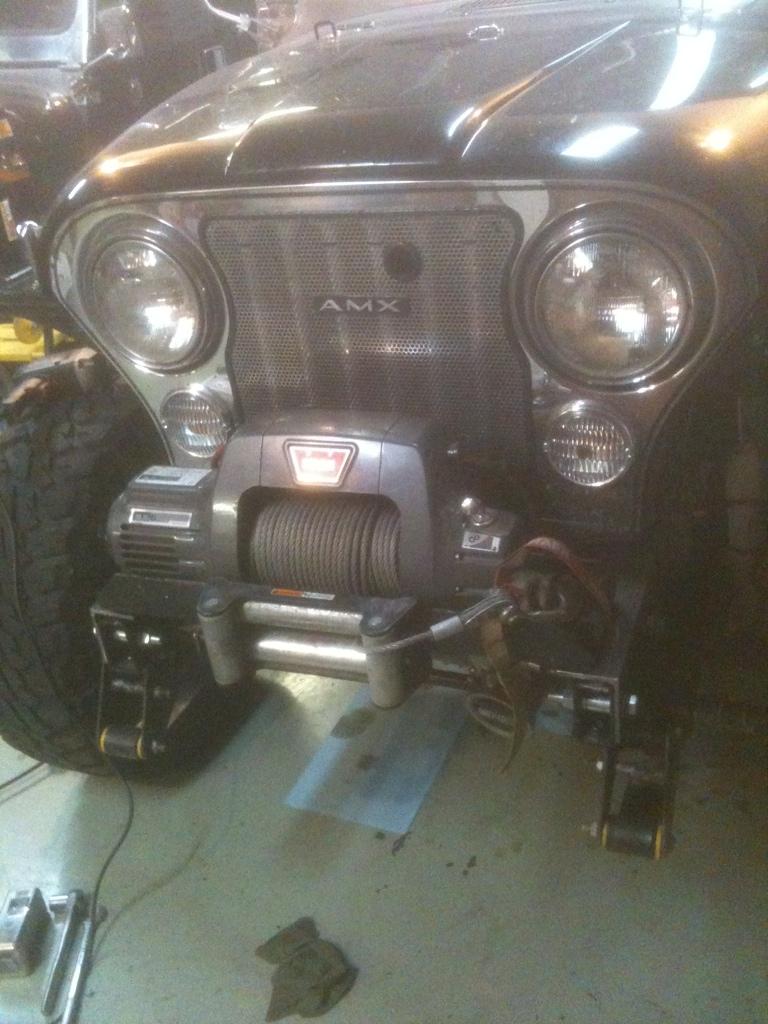
FAB2EEBF38CB48D7A83202C782740DD977020000-1.jpg

98BFA80B0B6B4F2DB4E10A388A3C01BE77020000-1.jpg

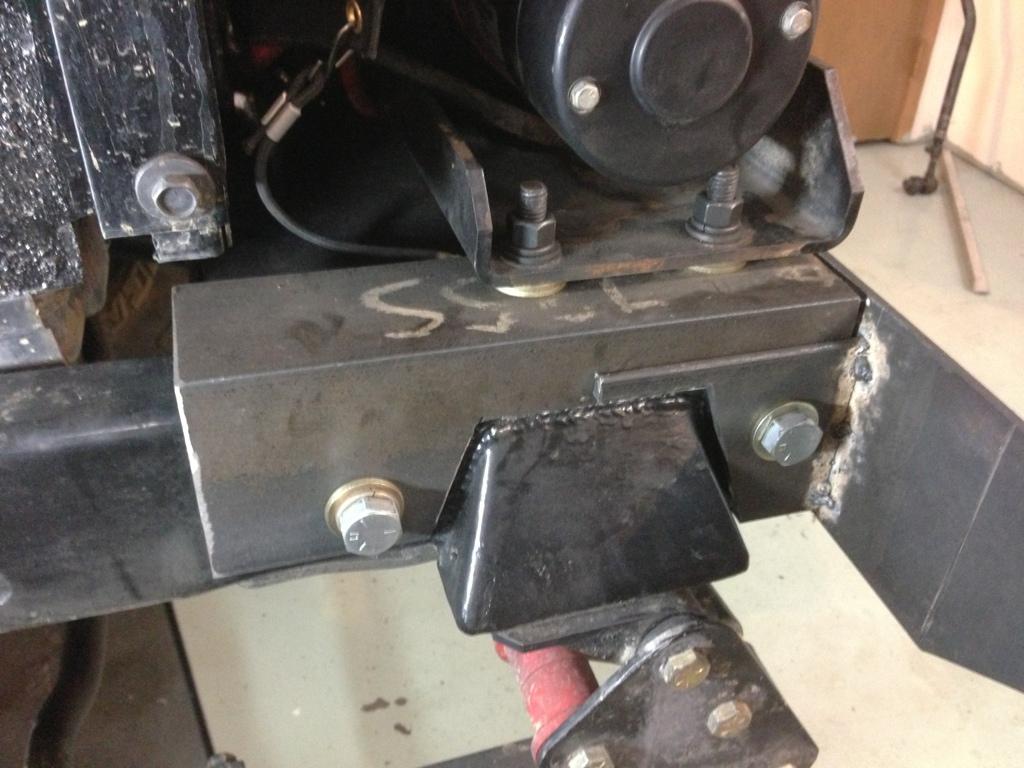
Drilling square holes sucks. My theory behind this mount was to "duplicate" the WARN-designed system as best I could, given the limitations of my out-boarded springs and TDK frame. What I did was take 1/4" angle and cut it to fit around the outboards, then use the same size Grade 5 bolts as was supplied by WARN. The front bolt needed to be longer to go all the way through the frame, and I had to cut out and slide sleeves into the frame for each bolt. When I went to buy the bolts, I decided to upgrade the vertical/upright carriage bolts to 1/2", just because I could. Drilling square holes sucks, but I made it work.

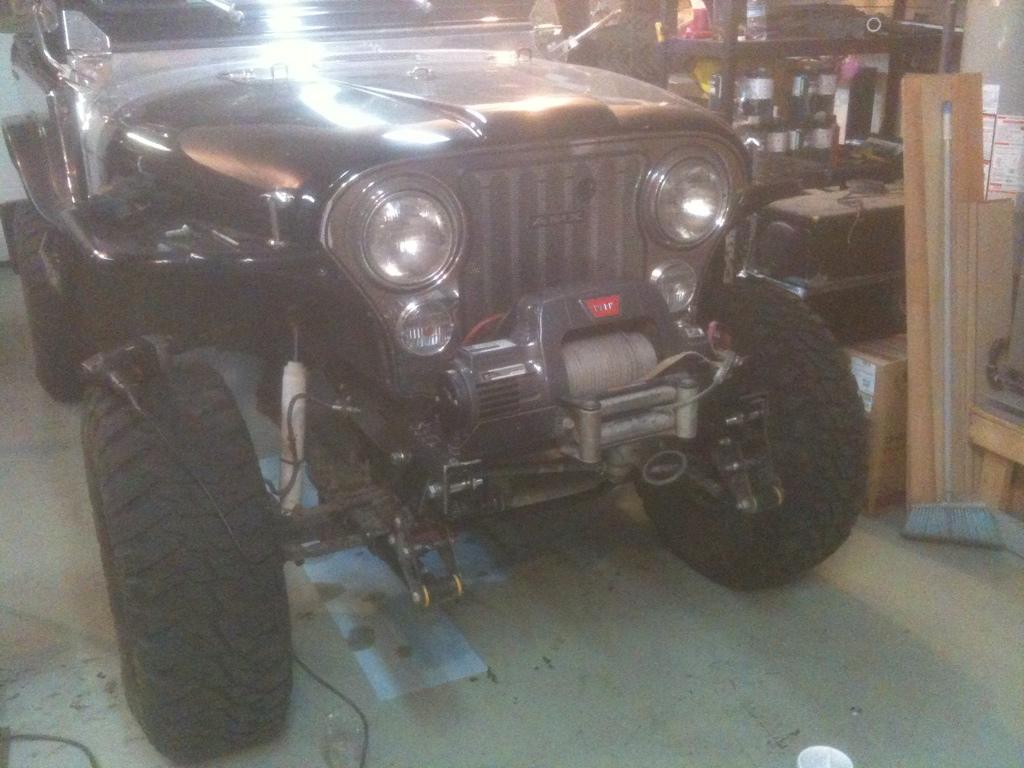
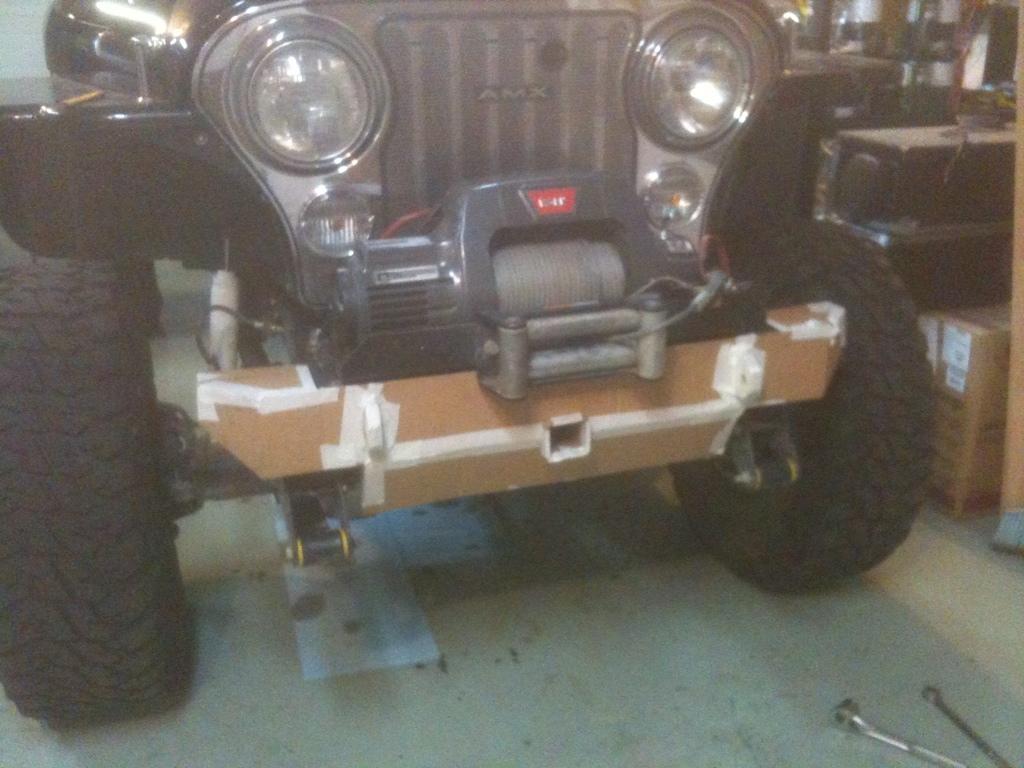
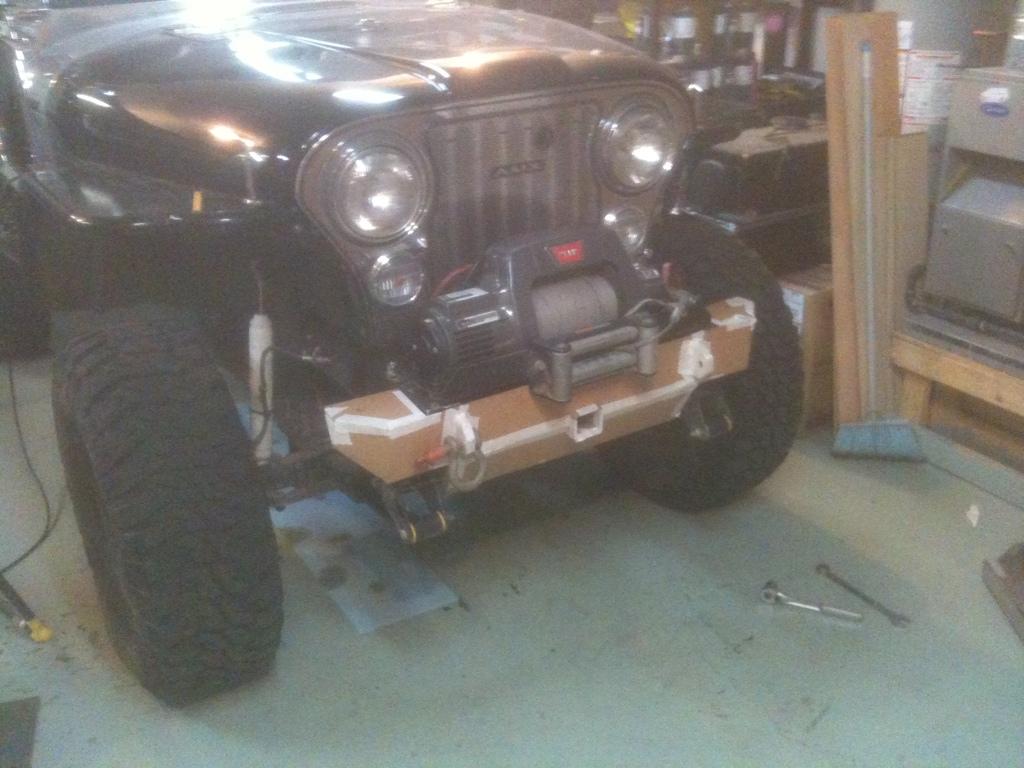
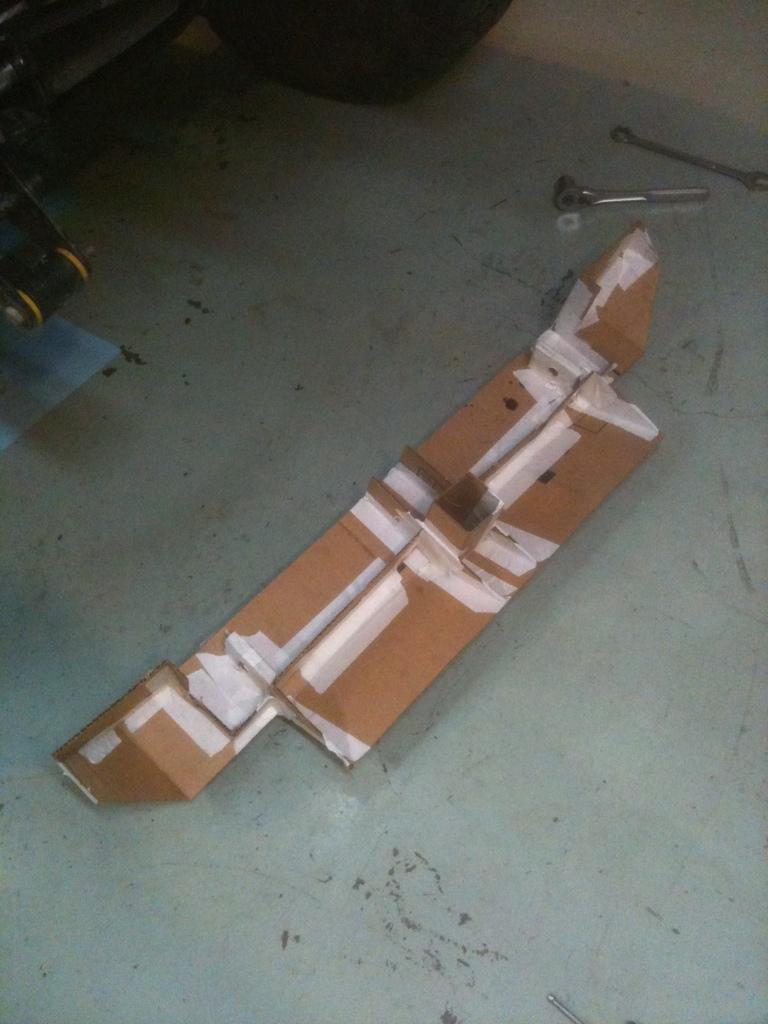
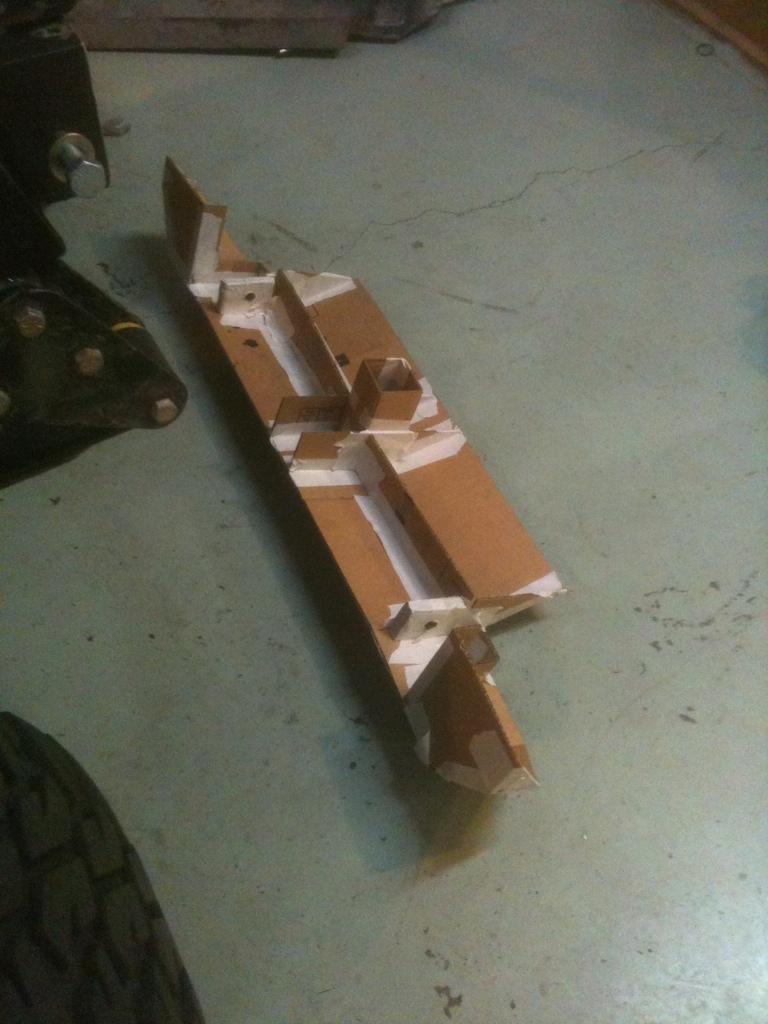
I've decided it was good to leave the winch brackets separate from the bumper brackets, and I have a design in my head for the bumper. Tomorrow I expect to mock that up with some cardboard to get an idea of what it will look like. On the way home from work today I bought a 6" receiver to weld into the center, and I ordered 3/4" shackle-tab brackets from eBay. The way this should all work out, the shackle tabs will be through-bolted to the frame using the front winch-mount bracket bolts, so even if my welds suck it won't matter. The center receiver will ONLY be for positioning trailers, so I'm less worried about f'ing-up structural welds. This should also give me the practice I need to get my welding skills back up to snuff so I can build a rear bumper.
 
So you're going to build the bumper from 3/16-1/4" plate, and weld all the pieces together? Your pad eyes do attach to the frame?

I would look at reinforcing the bumper so if the receiver was pulled on it wouldn't buckle the bumper. I know you said it wouldn't be used as such, but the "option" of using it for a tow or anchor point would be a good thing. Also two bolts in shear are not enough. IF you pull from one side you could easily exceed the shear strength of a 1/2" bolt. It would greatly increase the strength if you had a tab on the outside of the frame so the bolt would go thru the padeye, frame rail and then tab on outside. That way the bolt is being sheared in two places which effectively doubles it's strength.

I never did understand why TDK didn't put a crossmember on the front of their frames. It would give so many other options for mounting bumpers and make all of them stronger.

Plan on hanging the Jeep from the front bumper. That's how strong it really needs to be.

You may need to actually do it someday and the possibility exists way more where you live versus down here.

What you've got so far looks good.

Randy
 
So you're going to build the bumper from 3/16-1/4" plate, and weld all the pieces together? Your pad eyes do attach to the frame?
3/16"x5" plate and 4"x1/4" angle iron. Yes, the 3/4" shackle eyes bolt through to the frame, using the same 5/8" Grade 5 bolts that are used by the winch mount brackets.

I would look at reinforcing the bumper so if the receiver was pulled on it wouldn't buckle the bumper. I know you said it wouldn't be used as such, but the "option" of using it for a tow or anchor point would be a good thing.
I'm not going to use it as such. I'm not even going to leave an attachment point in the receiver. It's going to be filled with a rubber plug unless I need to position a trailer. I've considered adding additional gussets anyway, both above and below the receiver; that's the beauty of doing something in cardboard first. Once I actually get to welding I may change my mind.

Also two bolts in shear are not enough.
That's why there are four bolts holding it to the frame, because it will also use the 1/2" bolts in the "factory" location on the bottom of the frame. And actually, I think the two 5/8" bolts, sleeved through the frame and through the 1/4" angle that also serves as the winch bracket (which then ties them to the other two 5/8" bolts) are sufficient. Think about how a bolt works: it's point is to increase the coefficient of drag on the two flat surfaces that are being bolted together. Sure, the size of the bolt matters, and should that coefficient be exceeded it's nice to have a bolt that can handle shear loads in addition to tension. But the bolt's point is to be in tension. (For what it's worth, I have a bachelor's degree from MIT, where I majored in architecture. I'm not kidding.) Something like a shackle pin does NOT work in tension, so shear strength is where it's at. It has a different function than a bolt.

IF you pull from one side you could easily exceed the shear strength of a 1/2" bolt.
Note the 5/8" bolts, and a side pull would actually be placing the bolt into tension, not shear. A side pull on the FACTORY bolt locations (any pull on factory bolt locations) is in shear.

It would greatly increase the strength if you had a tab on the outside of the frame so the bolt would go thru the padeye, frame rail and then tab on outside. That way the bolt is being sheared in two places which effectively doubles it's strength.
Actually, it does. The 5/8" bolt will also be going through the 1/4" angle "bucket" that will sandwich the winch bracket. I didn't design the cardboard to effectively show this.[/QUOTE]

I never did understand why TDK didn't put a crossmember on the front of their frames. It would give so many other options for mounting bumpers and make all of them stronger.
Jeremy was super-easy to work with on the spring outboards, I have no doubt he could make a crossmember to suit whatever needs you had. I actually wish I'd ordered it with a TJ-style swaybar tube to run the Currie Anti-Rock, but with the leaves it's stable-enough on the road, and I'm not going to cry about.

Plan on hanging the Jeep from the front bumper. That's how strong it really needs to be.
I agree. That's why it's tied into the winch brackets. I love that scene in "The Gods Must be Crazy."

You may need to actually do it someday and the possibility exists way more where you live versus down here.

What you've got so far looks good.

Randy
Thanks! Since the shackle-tabs haven't arrived yet, I'm going to work on a few other little projects that aren't worth writing about today, but I can't wait for these things to show up!

I should also note that this isn't my first bumper, nor my first welding foray. When I had access to the "metal art studio" during college, I made a rear bumper and tire-carrier with jerry-can holder, integrated toolbox, and lockable Hi-Lift mount, for the CJ-7 that this became. It was primarily 1/2", and WAAAAY overkill; one of the professors kept giving me crap for my tractor bumper. I used weld-on D-rings (not the shackle-style) which survived multiple full-pulls on full-size rigs. I also used it to tow the large double-axel U-Haul trailers, once totally overloaded on my move from D.C. to Vermont for grad school. This bumper also towed my 5x8 box trailer, loaded to the gills, across the continent when I returned home from Vermont. I also welded the spring outboards for this axle when it was underneath my CJ-7, which welds and brackets survived beyond the rest of the frame.
 
9834E46C857E4DC6BA4487C5090A401084290000-1.jpg

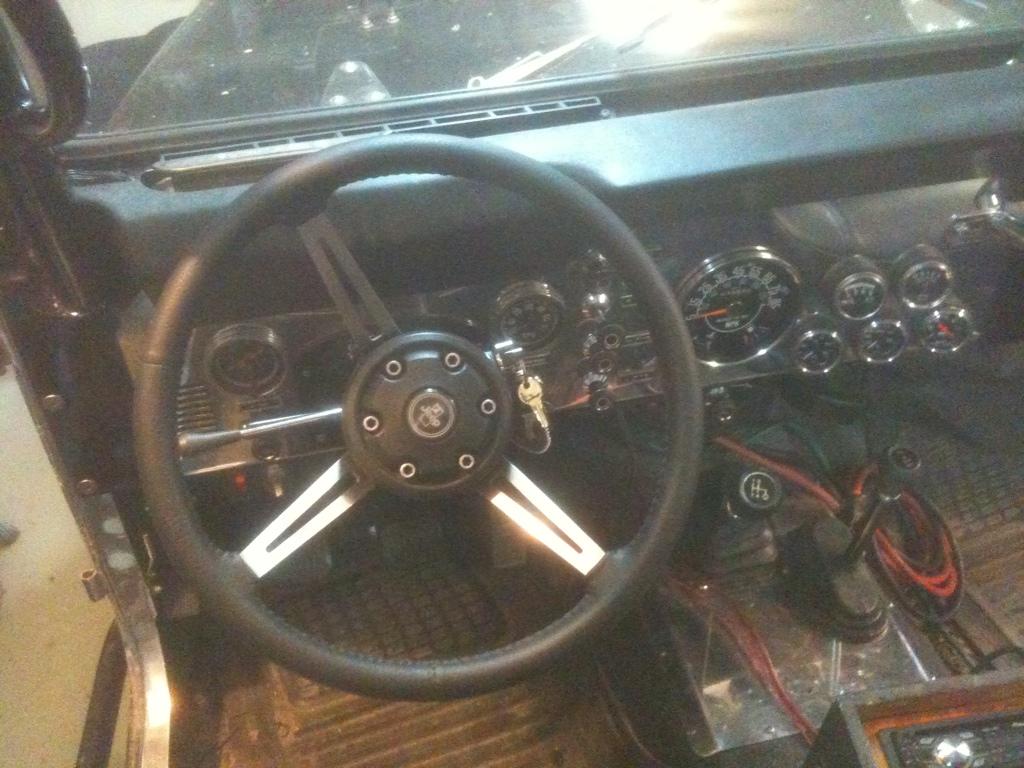
Minor projects: swapped the odometer gear, and while I had the speedo apart, I repainted the fuel gauge needle. (When I was initially assembling the dash and futzing with trying to get the odometer to work, in cleaning my fingerprints off the speedo face, I windexed the paint off the needle! I didn't think it was a big deal, but trying to watch a white needle on white markings was a PIA.) I also replaced all the heater/air cables while I was at it. The "real" purpose of this update is because I finally put on my new steering wheel! This was part of my original parts order before I became a homeowner and got married. It's got a nice thick leather wrapping, similar to the Laredo wheel, but textured. And I actually really like the spokes on this style of wheel versus the Laredo. After putting the new wheel on, I cleaned the horn button and decided to repaint the silver on the fake allen bolts.
 
You definately have it sussed out. My comments were based on what I could see in cardboard. I am in the "making it up as I go" stage of my build so am totally for change on the fly.

I think your choice of parts on this build speaks volumns about your skills. What you've built is considerably past what most would do, and believe me I can appreciate that trait more than most.

If "reasonably cared for" will easily last you for the rest of your life.

You have a galvanized frame, and an aluminum body. Those aren't goin' away any time soon. The rest is just machinery and can come and go as you see fit. The cool thing about Jeeps is they can be built and rebuilt to keep them current with the technology available. good machinery never goes away, it just gets rebuilt and continues service.

People don't seem to understand that some types of technology still remain useful even after they have been rendered "supposedly obsolete" by newer machines. The M1 Garand was made obsolete by the M14, the M14 by the M16, but really,,, How dead can you kill someone. No one has ever built an Airplane to replace the DC3, and they are still in use all over the North and for that matter the world. As long as you can buy gas, your jeep will be ready to take you to the supermarket and back in the middle of a raging blizzard. You might not make it in your new Honda CRV or Ford Edge!

Love to see you put a 4BT in it! Then you'd have an engine that would last the rest of your life too.

Maybe down the road a ways? :shrug:

Randy
 
Last edited:
REALLY boring update:

So I've started a Postal build, in spite of my best intentions, because my wife decided they're cool. I have no business doing this given that MY Scrambler isn't even finished yet, but whatever, she told me to do it. Really I think it's just because she got her MA in Glasgow and wants to drive on the right. I give her three years (or less) of daily-driving it before she realizes that her ZJ is more suited for her, at which time one of you will get your shot at the Alaskan Postal Adventure.


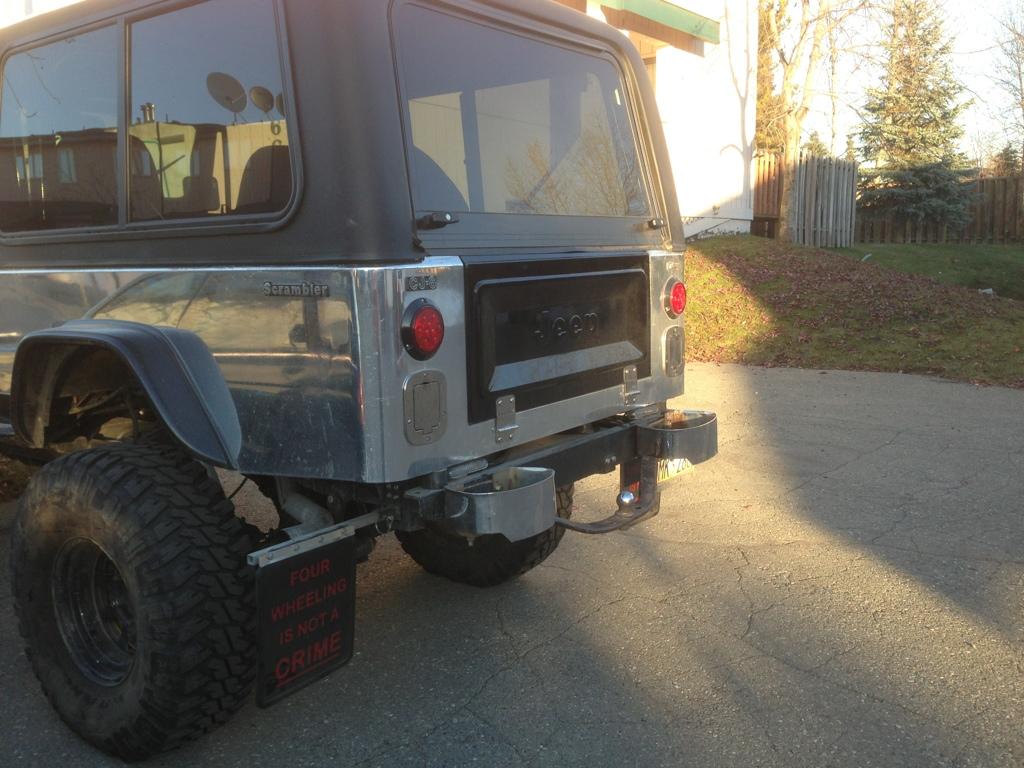
I ended up with a collection of parts in relation to the Postal stuff, which included some OEM chrome bumperettes.
DAB540986E15438C9DA7E889EF8DA0EF14980000-1.jpg

They're not in the best shape, but I figure that until I get a real bumper built, they'll give me at least a hair of rear protection. Plus they're shiny. (The chrome is flaking off on the inside though.)

OH! And she made me upgrade my phone, so now I have a better camera.
 
I see nothing boring about this at all.

What I just read:
*deep breath* Two SWEET Scrambler builds are going to be going on at once for you and your obviously incredibly awesome wife, one dream LHD rig that is drivable and therefore can provide awesome action shots as well as fab stuff as you finish it and one incredibly rare RHD most :cool: Scrambler in existence :rotfl: that needs a ton of work that we get to watch and someone else on here may possibly get to own someday and that you can now better document through your awesome new phone!*whew*

:headbang::bacon: (I really want a bacon headbang icon for times like this....)
 
REALLY boring update:
one of you will get your shot at the Alaskan Postal Adventure.

you had me at "Alaskan Postal Adventure"
I hope I can swing this when the time comes because I need a postal... I better start saving!
 
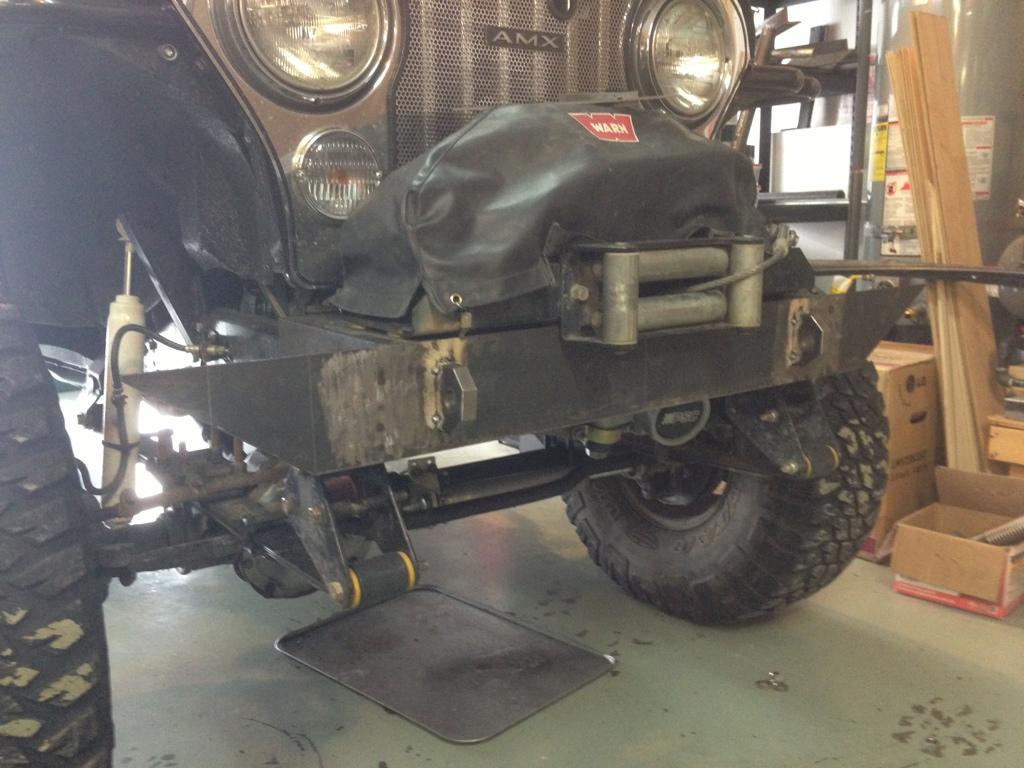
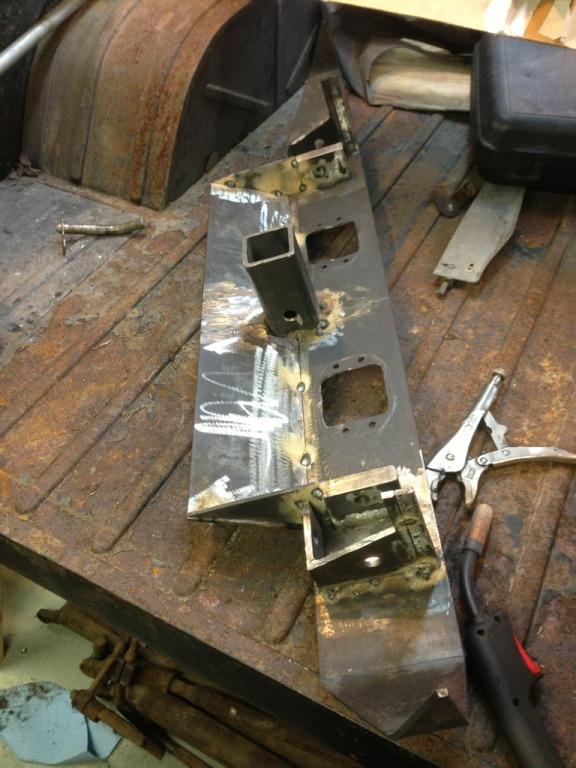
Lots going on in life getting in the way of Scrambler or Postal time. But this was a three-day weekend for me, and my wife was gone, so I was able to get an afternoon at the range with my new POF P308 to try out the Vortex scope I just picked up for it on Thursday, and got most of my front bumper tacked together. Before anybody cries about the welds, I just tacked everything with my 110. I'll take it out to my buddy's place to use his Millermatic for final welds. On to the pics:

FF1C0BEE0DAE4B42961ED488662FDD7614470000-1.jpg

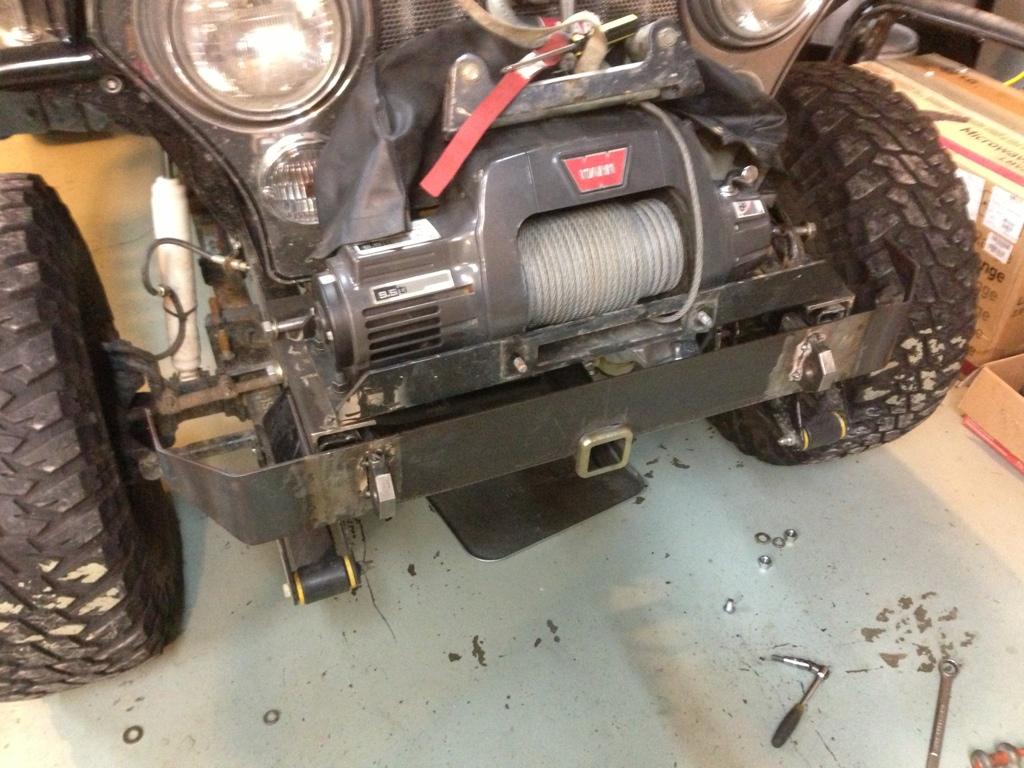
Initial cut of 3/16" plate with 1/4" angle "buckets" for the frame mounts, and pre-cut shackle tabs.


591158CEC172404D9C373CC6309DFB8914470000-1.jpg

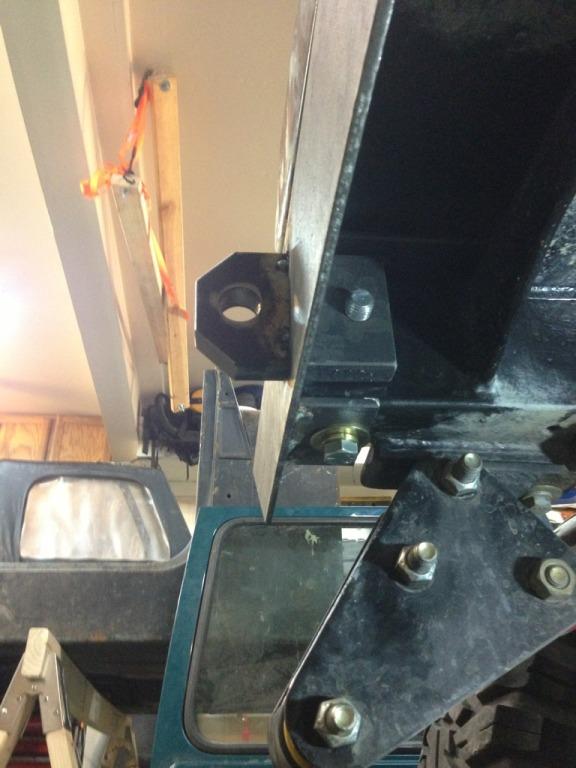
Outer mounts made of 1/4" angle. The bolt goes through, through the winch mount, through the frame, into a sleeve, through the frame again, and then...


DEAF88D3635F47B3ABCC021FFADA0C5714470000-1.jpg

...is threaded into the shackle tab. None of my welds will matter for a good pull on the tabs. I'll probably put a nut with Lock-Tite on over just for good measure. Also keep in mind that by tying in to/through the winch mount, there's another massive bolt further back in the frame that comes into play. I also drilled a hole for a 1/2-13 Grade 5 bolt to go up into the nutsert from the bottom.


B1A710E493A243C9B82859FBBFD91ECB14470000-1.jpg


74710648DCFA480FA073A232C3566CF614470000-1.jpg

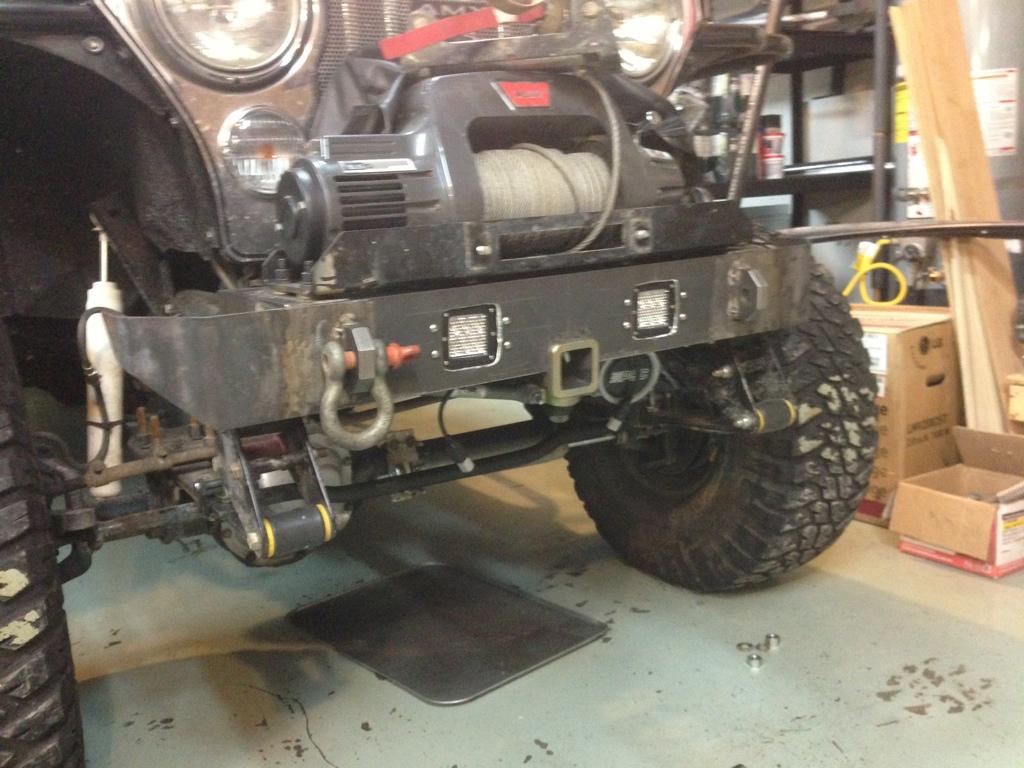
A friend of mine just ordered some Rigid D2 flush-mount lights that he let me borrow for mock-up.


5EE3EBF319DF43B896CCE0DD9A85670D14470000-1.jpg

More-or-less how it will look in the end. The only other "external" piece is the caps for the top on either side.


EC2FB8D2B9754DD3B039DC1D31AAB68814470000-1.jpg

The back, however, still needs significant structural work.
 
Looks nice. Have you checked tire clearance at the bent back "wings" at full lock/full stuff?

POF P308...Vortex scope...I'm jealous...
 
Looks nice. Have you checked tire clearance at the bent back "wings" at full lock/full stuff?
Not yet, but I'm confident it'll clear. If it doesn't, a cutoff wheel will solve the problem, and I'll weld on an end-plate.

POF P308...Vortex scope...I'm jealous...
It's a tack-driver! After coming back from Adak, I decided I wanted a little more mass headed at the caribou than the 55 grains from my AR-15. I got lucky and was able to find the POF for it's "normal" retail price, still well below MSRP. The Vortex is a first focal-plane retical (no lights or batteries on this gun). I've got the scope to within 1 or 1.5 MOA for both elevation and windage, but match-grade ammo was expensive even before all the craziness happened. I kept bouncing back and forth between having fun with my Wolf rounds and the expensive hunting rounds before the range closed for the day. I think in another 30 minutes of range time and I'd have it set. I was throwing rounds on target at 200 yards that would be kill-shots, but I'd like get the group sizes down at that distance.
 
Back
Top