

You are using an out of date browser. It may not display this or other websites correctly.
You should upgrade or use an alternative browser.
You should upgrade or use an alternative browser.
My "new" dream Scrambler
- Thread starter AK-RWC
- Start date

AK-RWC
Legacy Registered User
- City
- south central
- State
- AK
Prepping for a baby and dealing with the rest of life, and a 5.9L ZJ which serves as her DD, has put a major crimp in my garage time to work on the Scrambler.
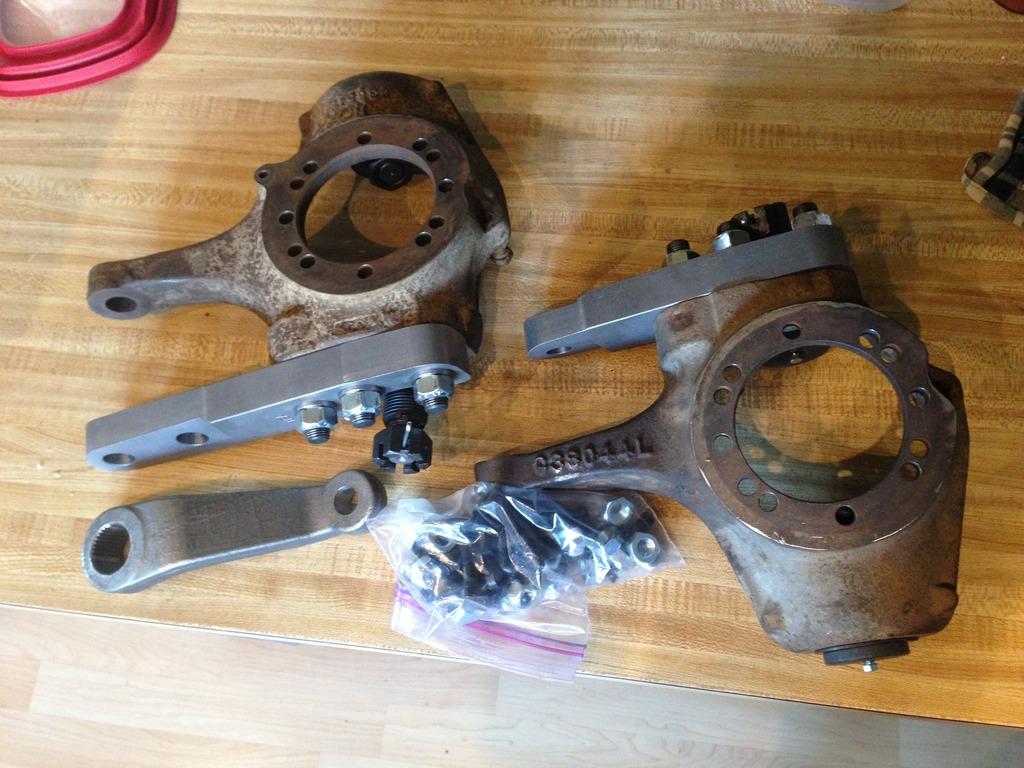
I finally got a few minutes, while waiting for paint to dry on a 5.9L project, to get my knuckles cleaned up and painted:
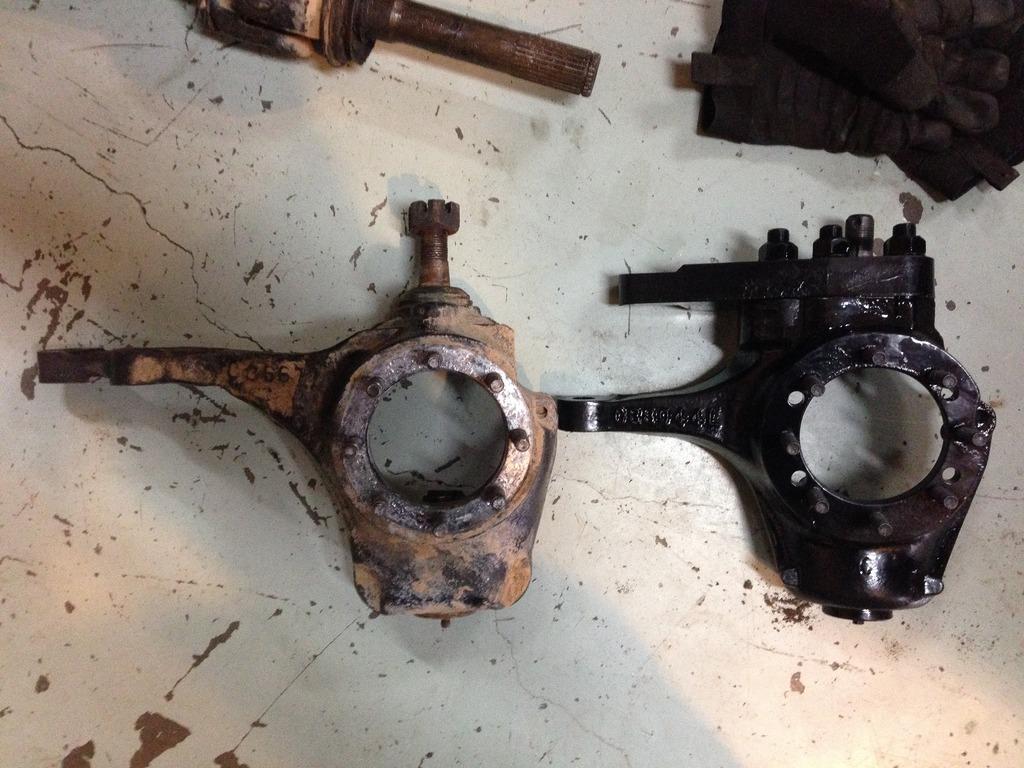
The Scout steering arms are already pretty high, but the actual PartsMike high-steer arms are higher. Please note the back edge of the knuckle: the Scout II knuckle is clearanced there to account for the large-ish Scout calipers. When I took this photo, I had no idea that was about to become an issue.
Then I helped a buddy move and came home with this in the back of my 5x8 trailer:
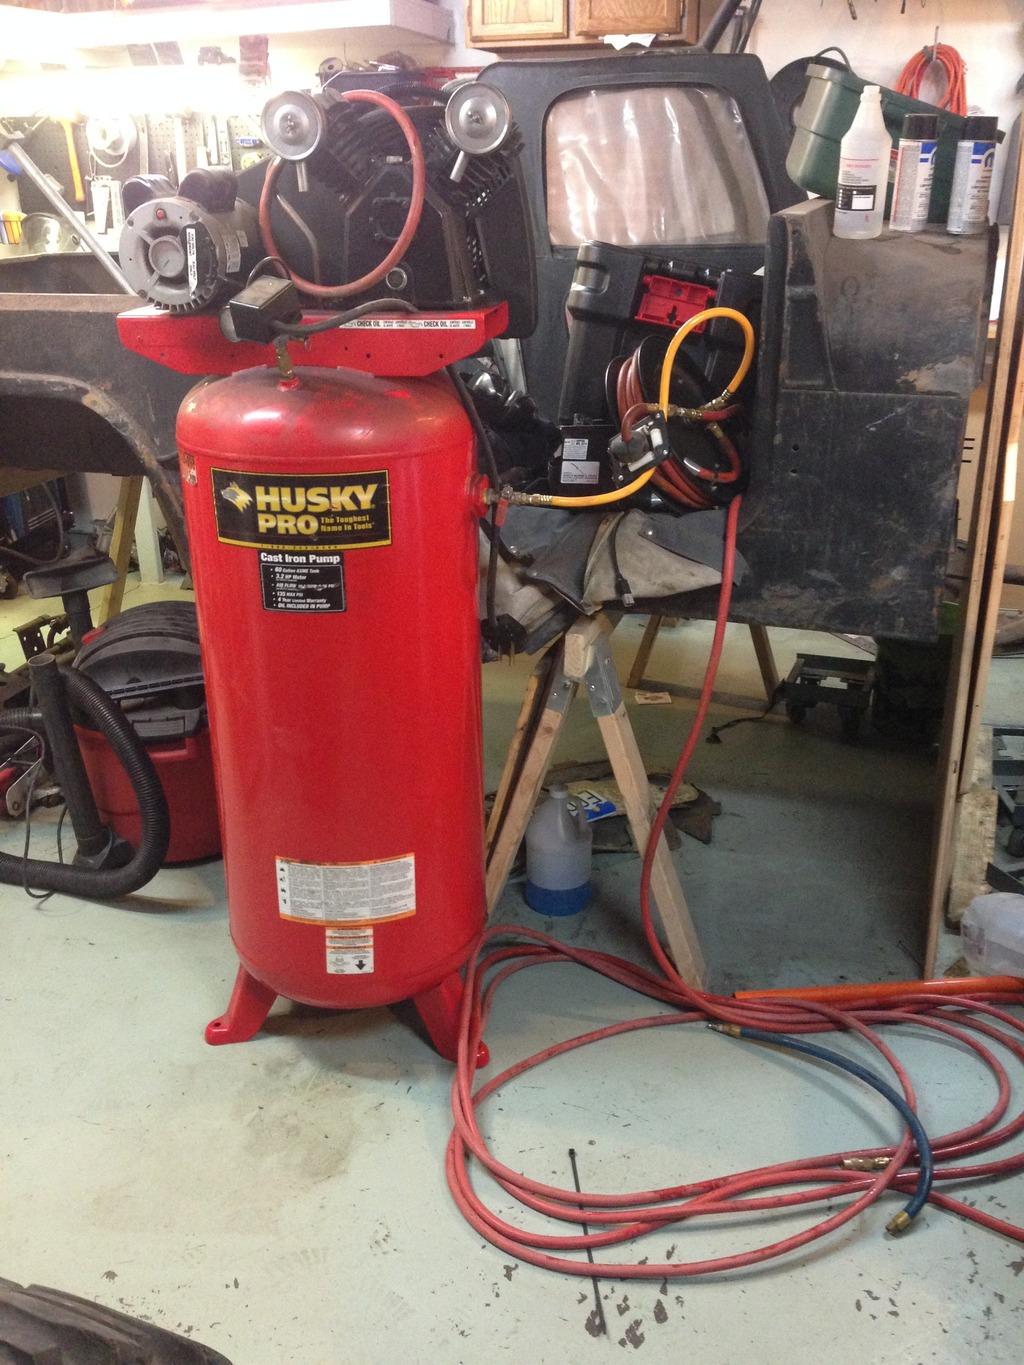
He finally had to sell his house after a divorce, and the place he was moving into to rent didn't have a 220v outlet in the garage. He sold it to me for a buddy price, and I kicked back my little 10-gallon 110v compressor, and the Chevy rims that came on my Boggers. Pull the CJ back in the garage and went back to work:

Before, and . . .

. . . after. I took a break at this point (for a month, grrrr) because I realized I forgot to install the zerk for the upper ball joint and grease it before replacing it with a plug. This also took longer than I'd expected because my spindle bearing was shot, requiring a trip to NAPA, then I spent two hours driving around town trying to find a spanner, and then another two hours trying to determine correct torque sequence and specs, etc. So I left it like that on a Sunday evening.
Then a trip to my home town happened, and a baby shower (that was actually a house party with a keg) and my 8-month pregnant wife insisted on going dipnetting for Sockeye salmon, and she was a bridesmaid for a wedding, and I had to move all the furniture from our carpeted areas (including three bedrooms) so they could get sanitized, then we had to paint all three of those rooms, then move all the furniture back and reorganize/purge, etc.
So last Saturday I finally got another day to pull the spindle back off, yank the shaft, grease the upper joint, and install the plug. But as I was putting the caliper on, I immediately discovered that the caliper, right at the banjo-bolt, hit the back of the steering arm and the top of the knuckle. Out came the grinder. Finally got it done, and went for a short drive (still using the Scout tie-rod) just because I need to drive it. MAJOR DEATH WOBBLE! OMG. I couldn't safely go over 35 mph. At 45 it was guaranteed, and at 40 if I hit a bump. Slowly went to Home Depot to get a longer power cord for the compressor and some curtain rings, and then across town to my buddy's shop to dump waste oil, and very slowly back home. Got the compressor set up that night.
On Sunday I reorganized and reclaimed my bench, swapped out a sketchy electrical box for one of my garage lights (above the bench), and fired up the compressor. I had no idea what's I'd been missing! Yanked the right side knuckle off, and this time immediately dealt with the caliper interference issue so I could take a big chunk off at the bench with a cut-off wheel rather than bent over under the fender. End result:

This is just a mock-up to check clearance (hence the loose and old top nut).
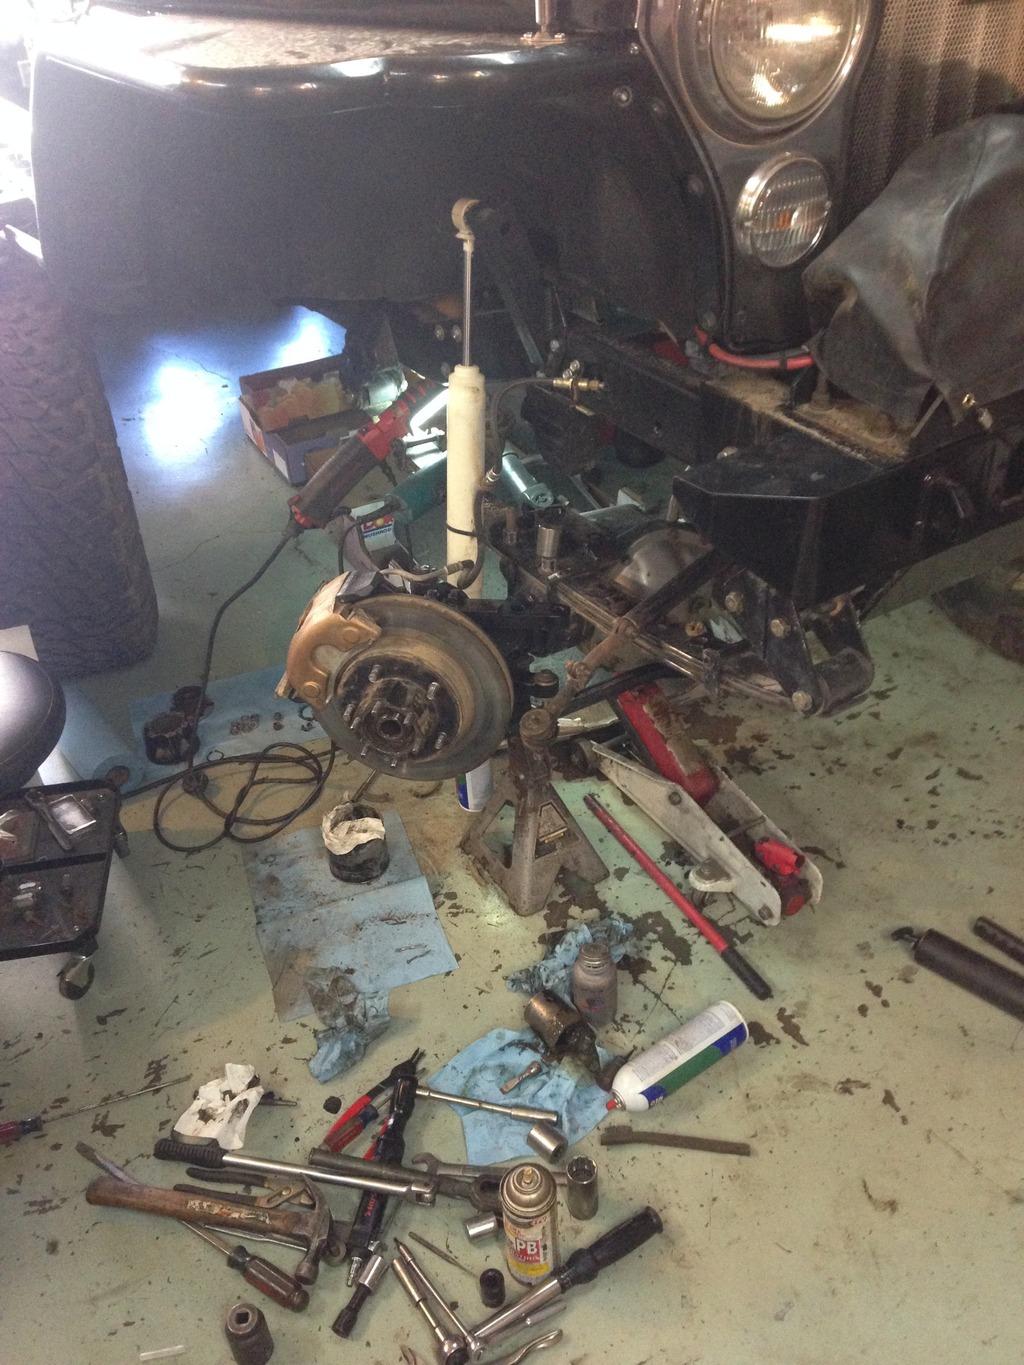
Proof that it'll work! Progress is progress, even if messy. Also got the pitman arm swapped out for a TJ arm, yanked the Scout tie-rod, and mocked up the DOM.
Got a few more minutes in last night:
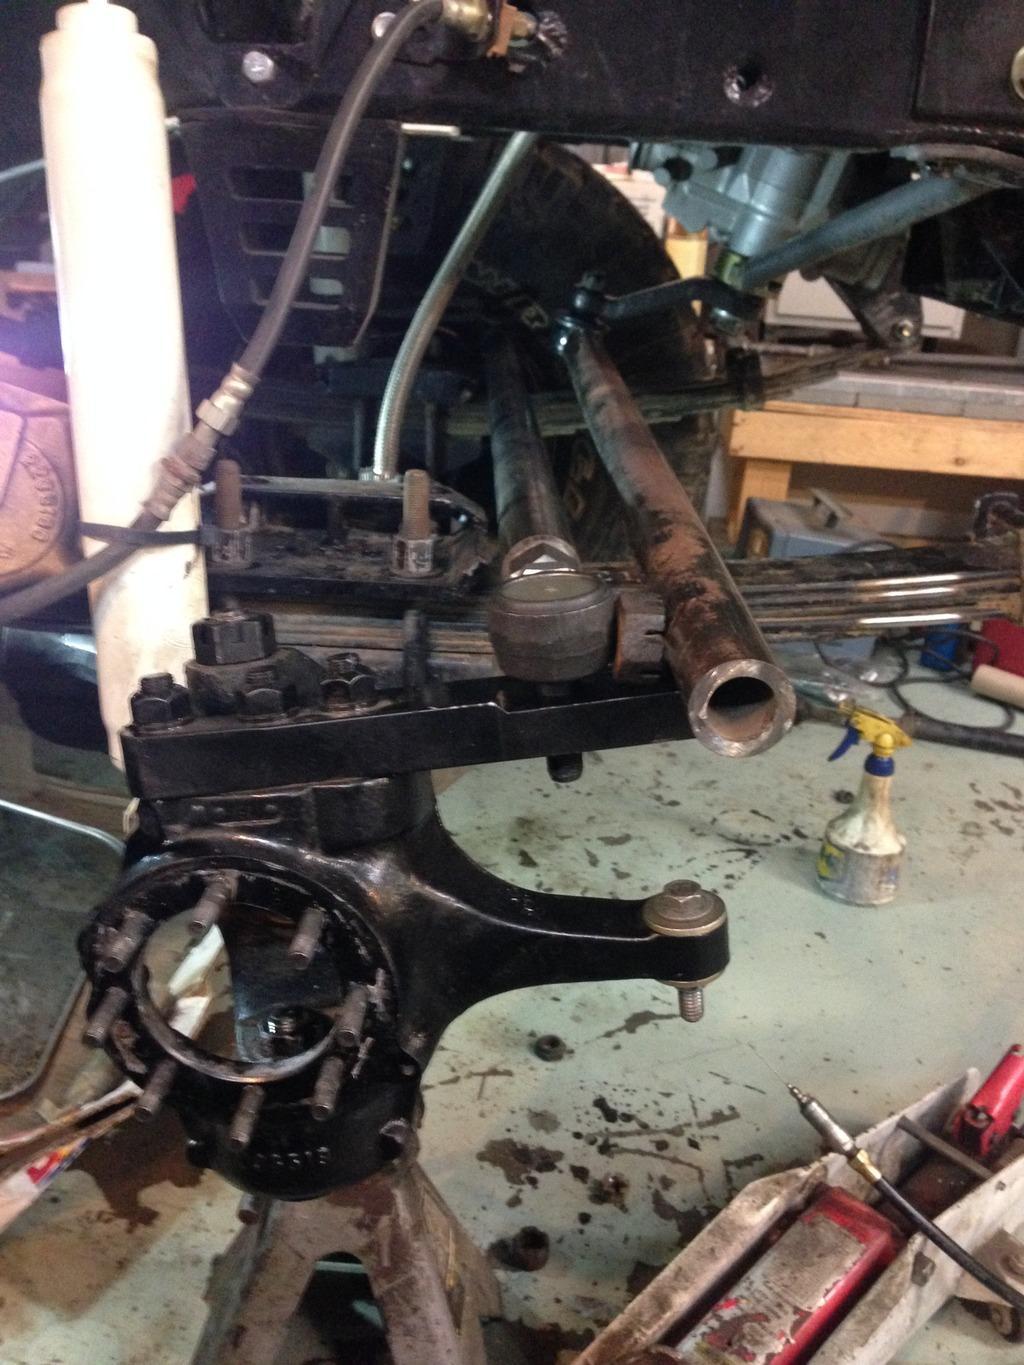
Torqued down the ball-joint nuts, and mocked-up the steering linkage to check for clearance. So far it all looks good, but that might change at full compression. Also will need to trim the leading edge of my spring plates, but I needed to pull them off to revise the bump-stop pad anyway.

Made sure to get the upper ball joint greased this time before I put in the axle shaft, greased up the u-joint, got fresh grease in the spindle bearing (the right side looked good), and called it a night. I need to go through the hub and make sure that the bearings are good before I throw it back on. The grease looked a little dirtier than I would have liked.
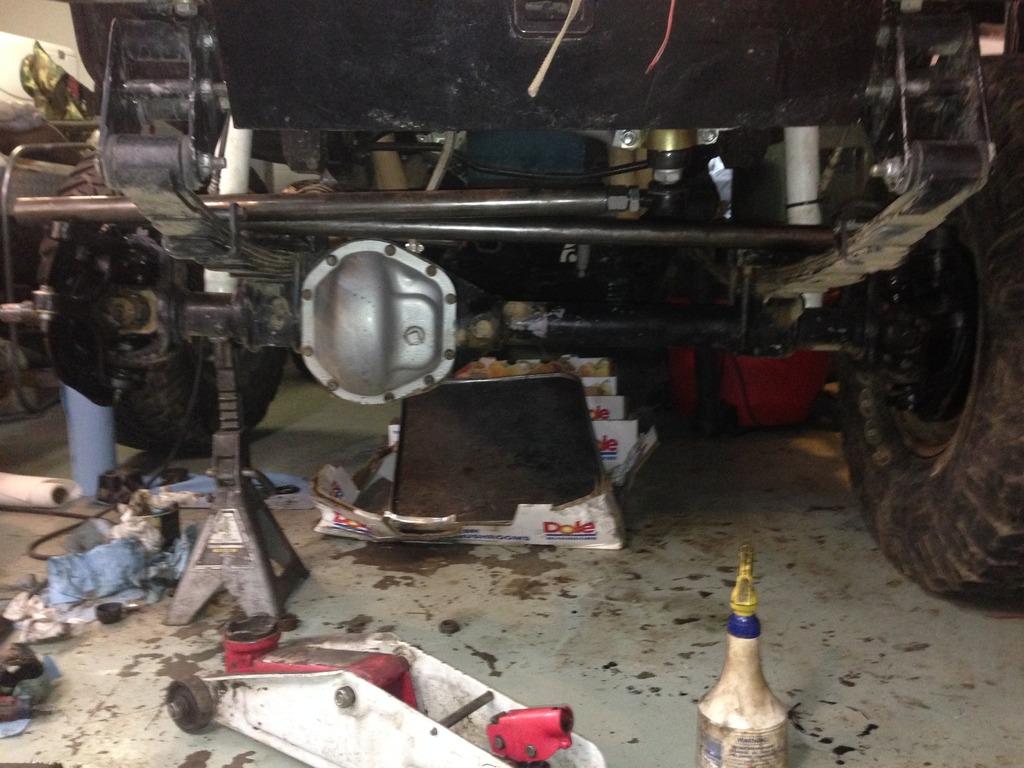
One last pic. I'm simply NOT used to seeing my steering linkage tucked up like this! I love it!
I finally got a few minutes, while waiting for paint to dry on a 5.9L project, to get my knuckles cleaned up and painted:
The Scout steering arms are already pretty high, but the actual PartsMike high-steer arms are higher. Please note the back edge of the knuckle: the Scout II knuckle is clearanced there to account for the large-ish Scout calipers. When I took this photo, I had no idea that was about to become an issue.
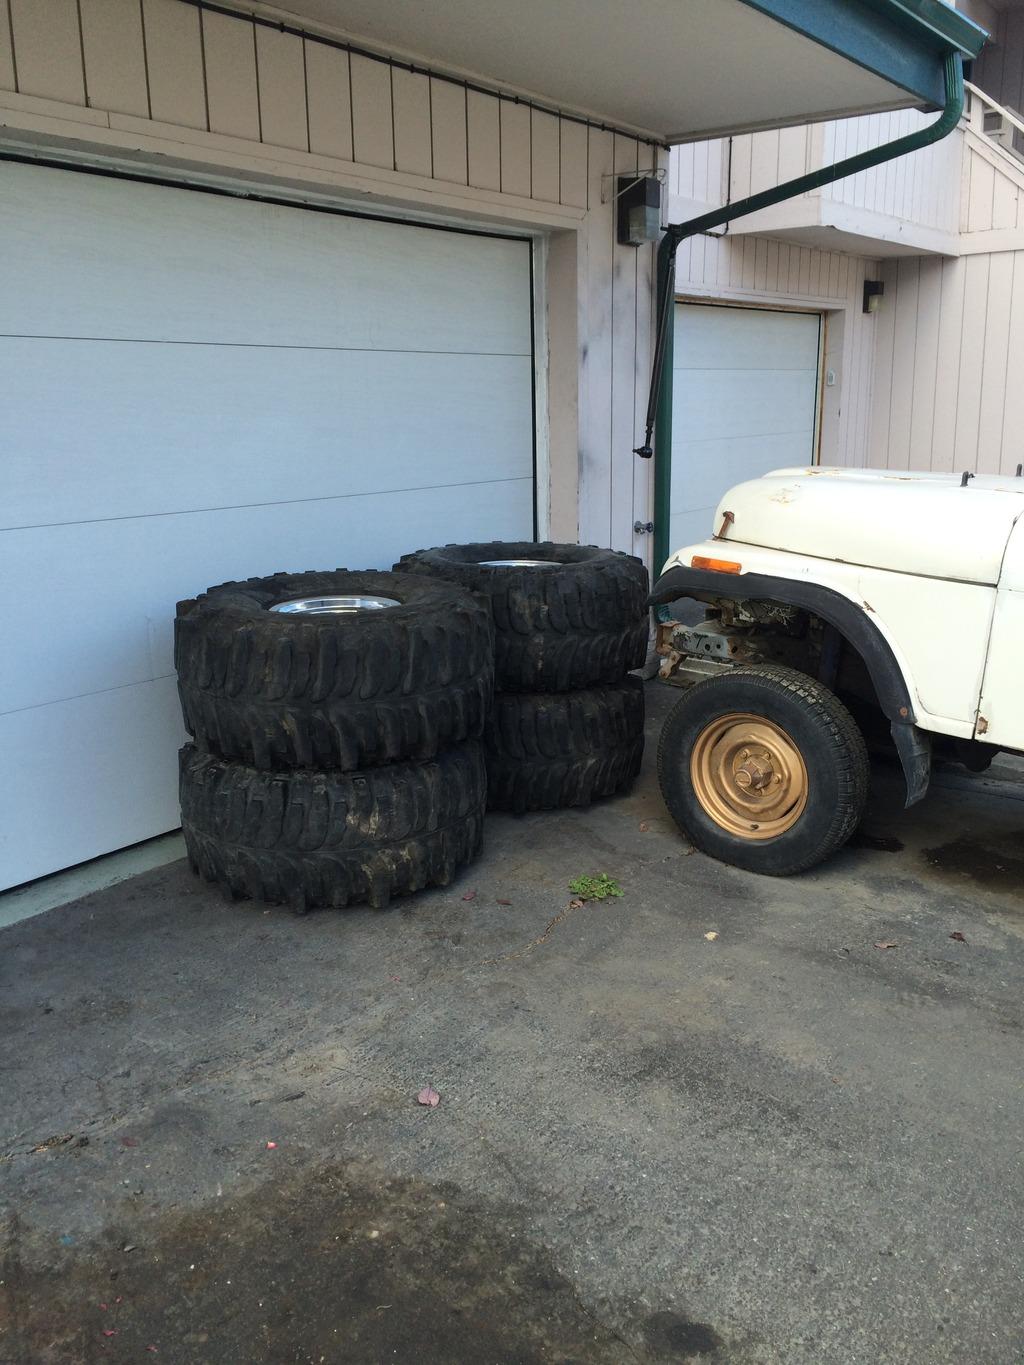
Then I helped a buddy move and came home with this in the back of my 5x8 trailer:
He finally had to sell his house after a divorce, and the place he was moving into to rent didn't have a 220v outlet in the garage. He sold it to me for a buddy price, and I kicked back my little 10-gallon 110v compressor, and the Chevy rims that came on my Boggers. Pull the CJ back in the garage and went back to work:
Before, and . . .
. . . after. I took a break at this point (for a month, grrrr) because I realized I forgot to install the zerk for the upper ball joint and grease it before replacing it with a plug. This also took longer than I'd expected because my spindle bearing was shot, requiring a trip to NAPA, then I spent two hours driving around town trying to find a spanner, and then another two hours trying to determine correct torque sequence and specs, etc. So I left it like that on a Sunday evening.
Then a trip to my home town happened, and a baby shower (that was actually a house party with a keg) and my 8-month pregnant wife insisted on going dipnetting for Sockeye salmon, and she was a bridesmaid for a wedding, and I had to move all the furniture from our carpeted areas (including three bedrooms) so they could get sanitized, then we had to paint all three of those rooms, then move all the furniture back and reorganize/purge, etc.
So last Saturday I finally got another day to pull the spindle back off, yank the shaft, grease the upper joint, and install the plug. But as I was putting the caliper on, I immediately discovered that the caliper, right at the banjo-bolt, hit the back of the steering arm and the top of the knuckle. Out came the grinder. Finally got it done, and went for a short drive (still using the Scout tie-rod) just because I need to drive it. MAJOR DEATH WOBBLE! OMG. I couldn't safely go over 35 mph. At 45 it was guaranteed, and at 40 if I hit a bump. Slowly went to Home Depot to get a longer power cord for the compressor and some curtain rings, and then across town to my buddy's shop to dump waste oil, and very slowly back home. Got the compressor set up that night.
On Sunday I reorganized and reclaimed my bench, swapped out a sketchy electrical box for one of my garage lights (above the bench), and fired up the compressor. I had no idea what's I'd been missing! Yanked the right side knuckle off, and this time immediately dealt with the caliper interference issue so I could take a big chunk off at the bench with a cut-off wheel rather than bent over under the fender. End result:
This is just a mock-up to check clearance (hence the loose and old top nut).
Proof that it'll work! Progress is progress, even if messy. Also got the pitman arm swapped out for a TJ arm, yanked the Scout tie-rod, and mocked up the DOM.
Got a few more minutes in last night:
Torqued down the ball-joint nuts, and mocked-up the steering linkage to check for clearance. So far it all looks good, but that might change at full compression. Also will need to trim the leading edge of my spring plates, but I needed to pull them off to revise the bump-stop pad anyway.
Made sure to get the upper ball joint greased this time before I put in the axle shaft, greased up the u-joint, got fresh grease in the spindle bearing (the right side looked good), and called it a night. I need to go through the hub and make sure that the bearings are good before I throw it back on. The grease looked a little dirtier than I would have liked.
One last pic. I'm simply NOT used to seeing my steering linkage tucked up like this! I love it!
AK-RWC
Legacy Registered User
- City
- south central
- State
- AK
Minor progress: ordered and received some 15x12" Mickey Thompson Classic III wheels. I'd read a couple places (all third-hand information) that these won't clear the CJ hub, but that's clearly incorrect. Technically I have Scout hubs, but same difference for these purposes. Test fit:

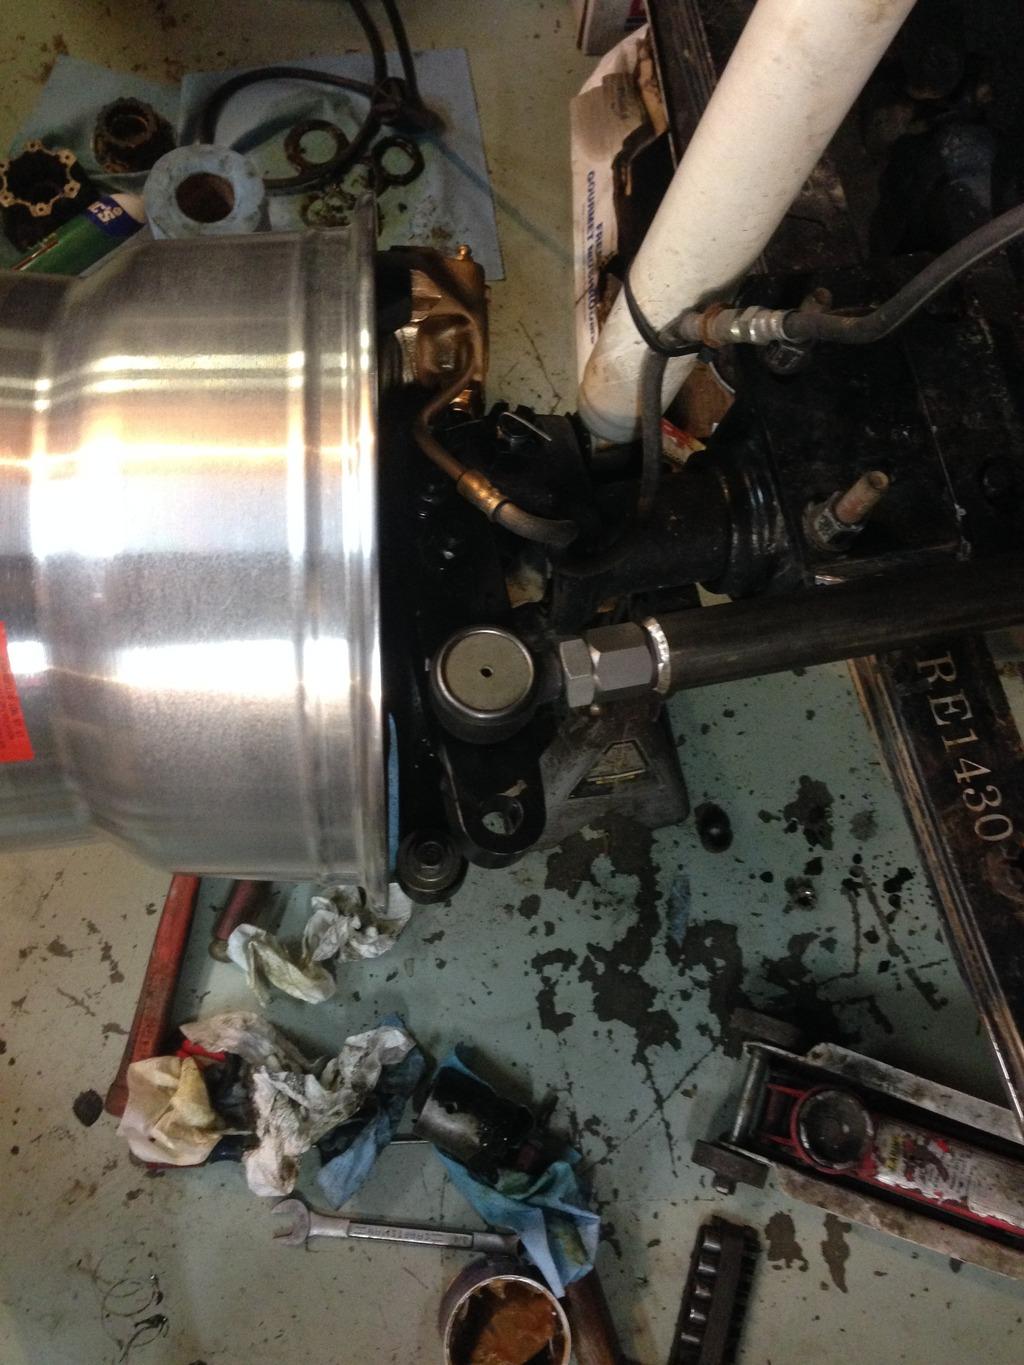
Everything clears! Just barely, but it clears.
Everything clears! Just barely, but it clears.
AK-RWC
Legacy Registered User
- City
- south central
- State
- AK
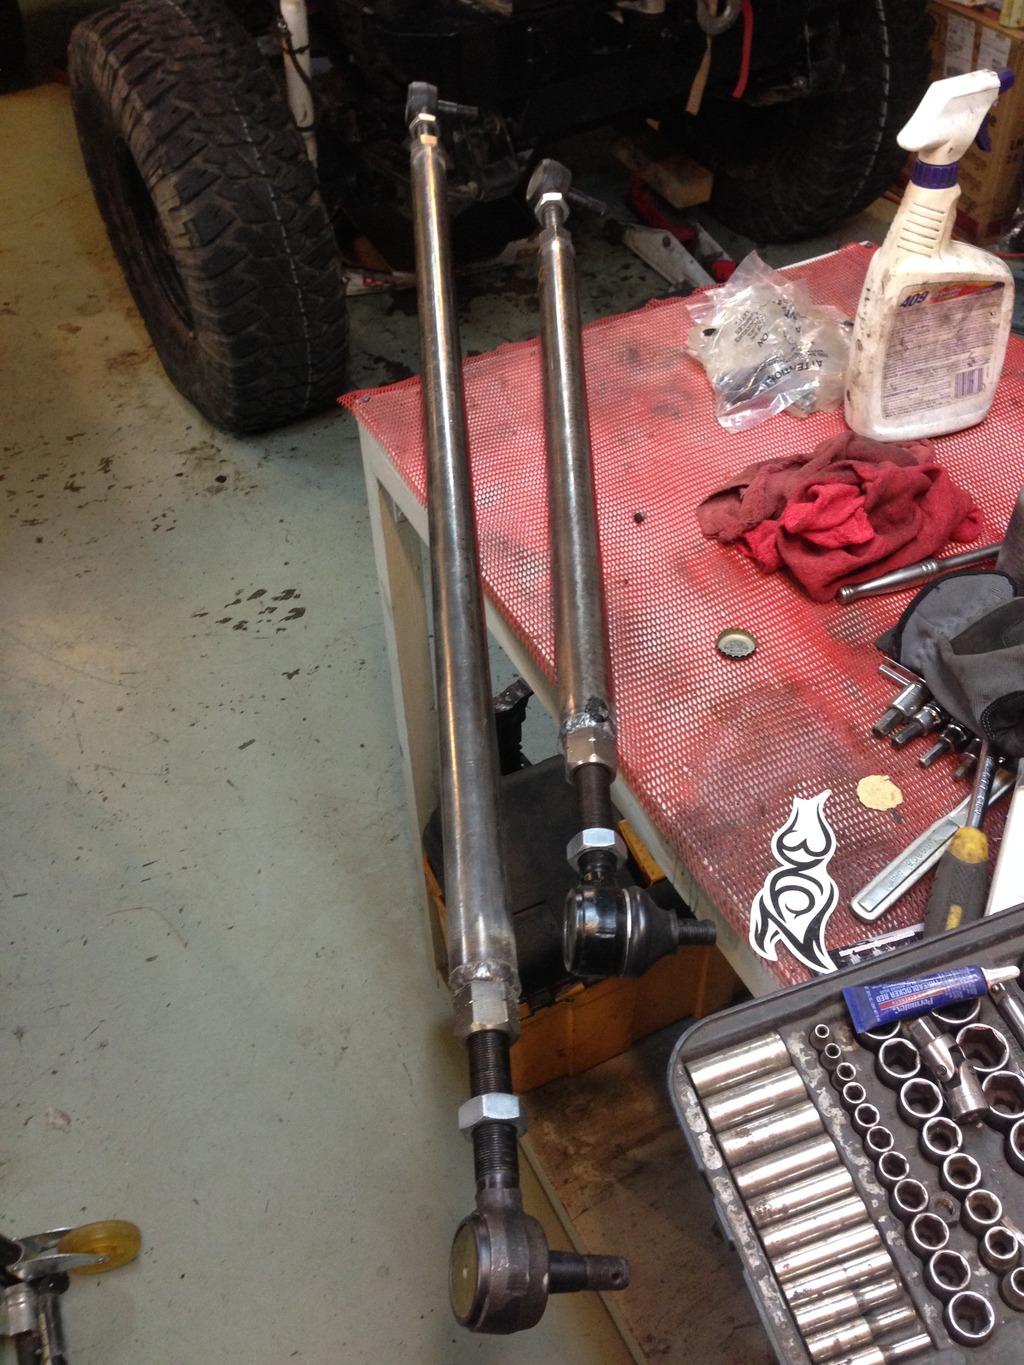
I had a friend come over who has taken a class and is a professional welder come over to get the bungs welded up. Although I'm sure my welds would have been fine, this is one area where I prefer to have some expertise.
Mounted with Airsoft beads.
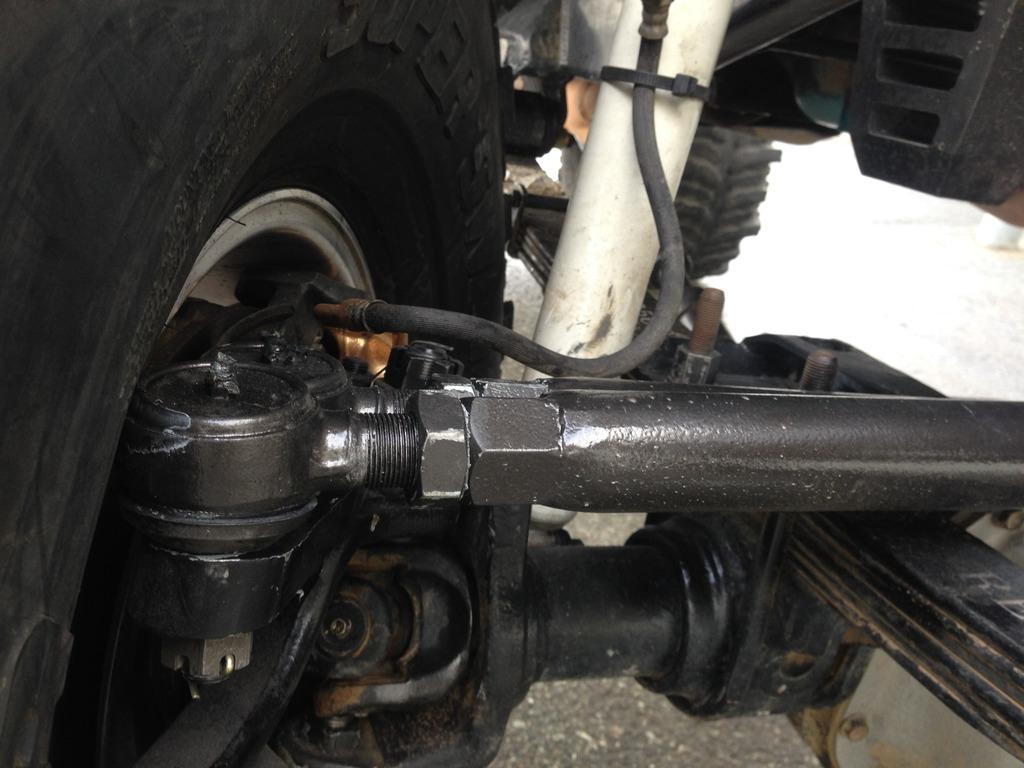
1-ton steering finished and installed.
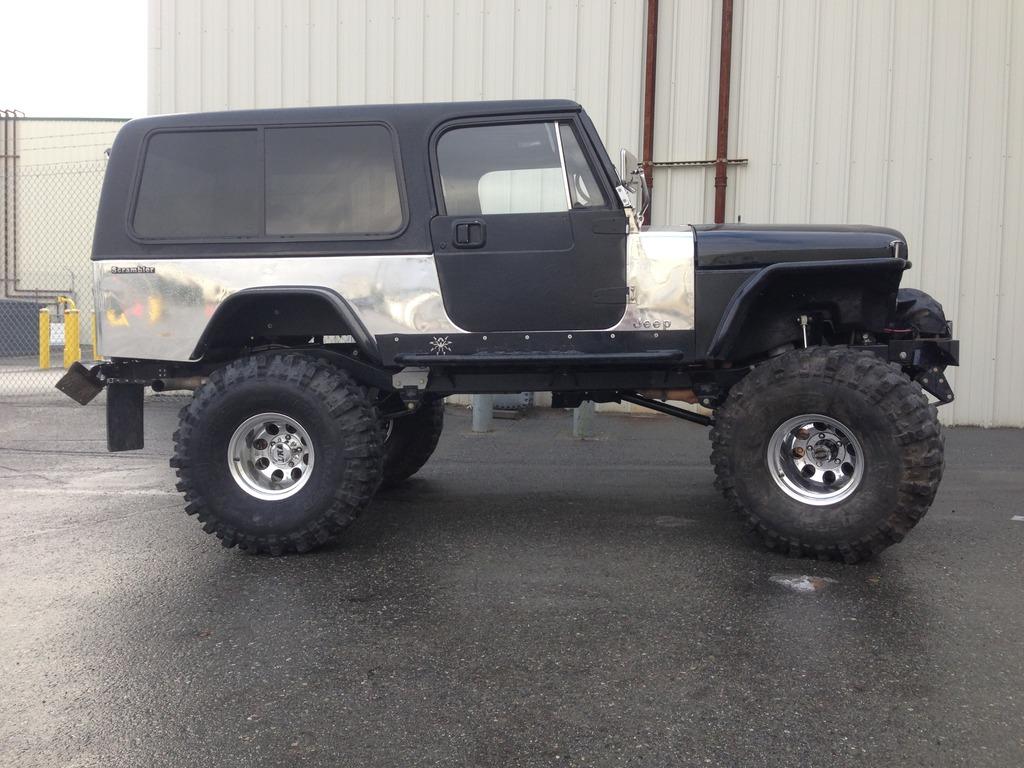
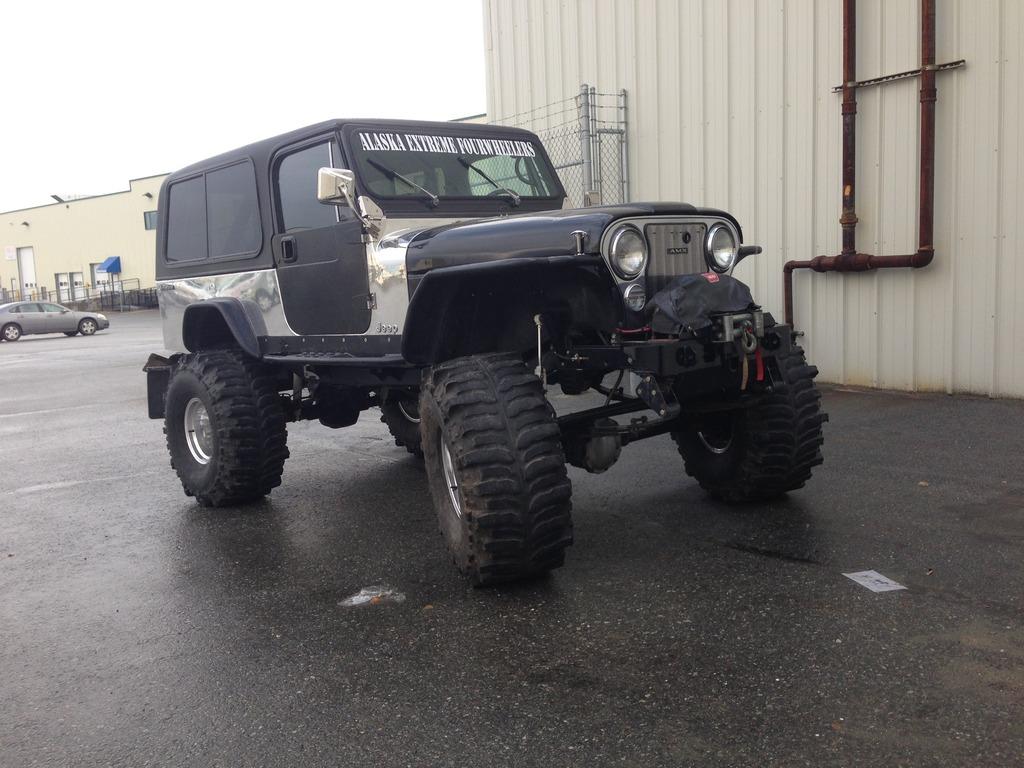
Drove 6.5 miles and took these pictures while helping out a friend with tires.
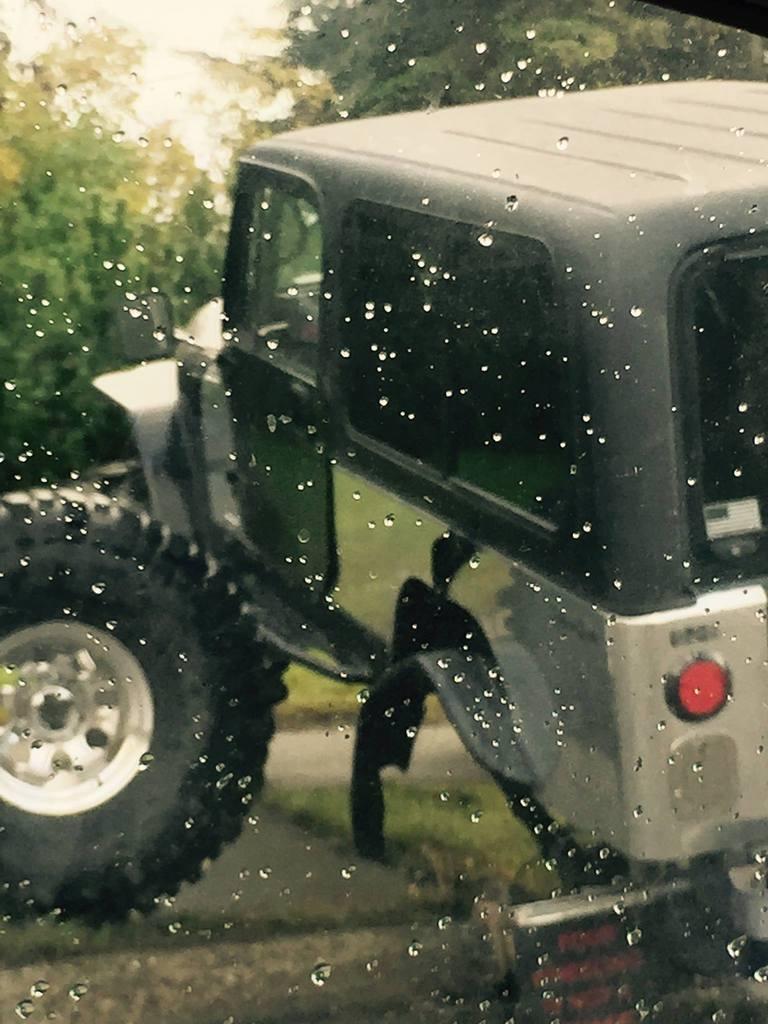
Drove 2.6 miles and had the left rear tire come off. Apparently 85 ft-lbs of torque is not sufficient for 39.5" tires. Who knew? I've been torquing to 85 ft-lbs since my dad taught me to use a torque wrench when I was 13. This picture was snapped by a random person who decided I qualified as one of Alaska's worst drivers. To my credit, I was able to steer out of the roadway and get up so the back end was hanging over in a bus-stop area, so I didn't block traffic at all. Thanks to my rescue team. Reinstalled the tire, torqued everything to 100 ft-lbs, and drove home.
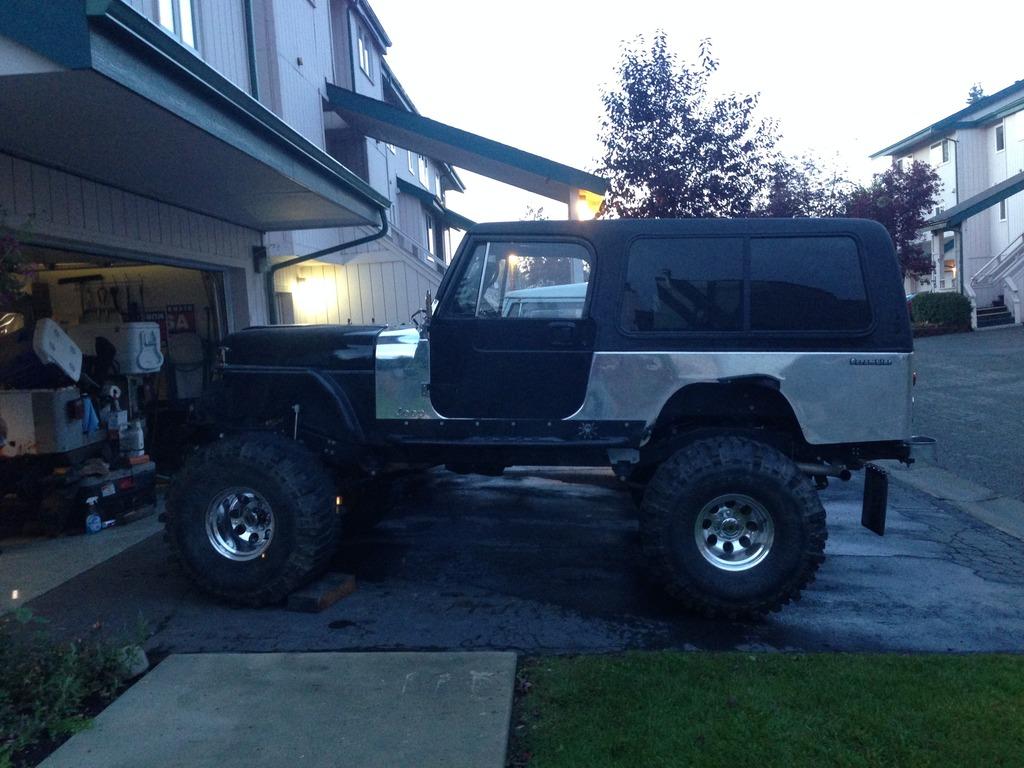
Drove home without incident. Casualty: one fender flare and some lug nuts. The rotor is a little flat, and the dust shield bent.
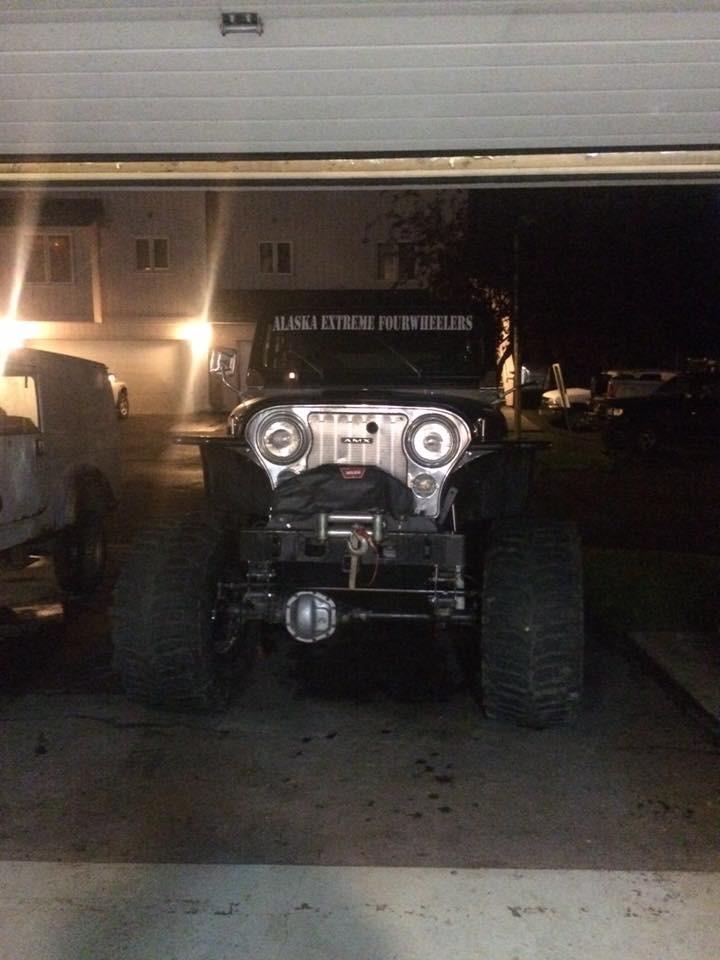
Parting shot from that evening since it won't fit in the garage now. I'm actually going to pick up some used and de-studded 225s tonight solely to get it in/out of the garage.
Last edited:

- City
- Bedford
- State
- NH
Then stick the white one in there!!!!
LOL... sorry to hear about the tire coming off... I know enough about it... when I heard that horrible noise, I got real lucky!
cb
LOL... sorry to hear about the tire coming off... I know enough about it... when I heard that horrible noise, I got real lucky!
cb

- City
- Dexter
- State
- MI
Suck, but is it possible that tire was missed in tightening? Because if 85 ft-lb on five lugs won't keep a tire on for 3 miles of street driving, you've got to have some kind of other serious issue on that corner or with that rim/tire, right?

mysunnshine
Legacy Registered User
- City
- Phoenix
- State
- AZ
It could also be torque sequence too.
Sent from my SM-G920V
Sent from my SM-G920V

AK-RWC
Legacy Registered User
- City
- south central
- State
- AK
Torque sequence was good, and that tire was definitely torqued. It was the last one we did, in fact. I'd just put them on hours before and hadn't been outside of eyesight of the Jeep since installing them. The only other theory is that the wrench is out of calibration, but I've used it this summer on other tires that didn't come off, and on other mechanical projects that didn't fail. Also, while at the scene, we checked the other three tires: left front had four that were slightly loose, and the right side had every nut slightly loose.
I've had two trusted friends (one of whom is one of the most experienced wheelers/builders/mechanics) in the state, tell me that once you jump up to something in that size range, you must torque to 100 - 110 or even 115.
I've had two trusted friends (one of whom is one of the most experienced wheelers/builders/mechanics) in the state, tell me that once you jump up to something in that size range, you must torque to 100 - 110 or even 115.
AK-RWC
Legacy Registered User
- City
- south central
- State
- AK
The steering came out nice. Glad to see you put it to use.
Thank you! And thank you for the sale! It was exactly what I needed!

- City
- Farmington
- State
- NM
This may be a dumb question, but are you using the correct lug nuts for the wheel? Some of the Al wheels do not use standard lug nuts they have to have the one with "sleeve" that goes down in the hole not just he ones with the tapered end.


Kane
CJ-8 Member
- City
- Berlin
- State
- ct
This may be a dumb question, but are you using the correct lug nuts for the wheel? Some of the Al wheels do not use standard lug nuts they have to have the one with "sleeve" that goes down in the hole not just he ones with the tapered end.
MT Classics use the standard tapered nut
AK-RWC
Legacy Registered User
- City
- south central
- State
- AK
Kane's got it right: they are lug-centric and use "normal" acorn nuts. They are machined such that they require a thin-walled socket though, which requires you to very carefully and slowly apply torque to each nut in your star pattern so that you can consistently even fit the socket into the wheel. If it's off even 1/32", you won't be able to get the socket onto any other nuts.
And yes, I did use an extension. There's no way to avoid using an extension. I know that puts the spec off slightly, but I wouldn't have thought it'd be THAT much off. The actual measurement of torque (torque = force x distance) doesn't change if you've got everything lined up correctly with an extension, in a frictionless environment, etc.
Either way, in looking at one of my photos above I realized that some of the paint rubbed off on my drag link end. That made me look a little more closely at the inside edge of the right front tire this morning. I just can't catch a break:
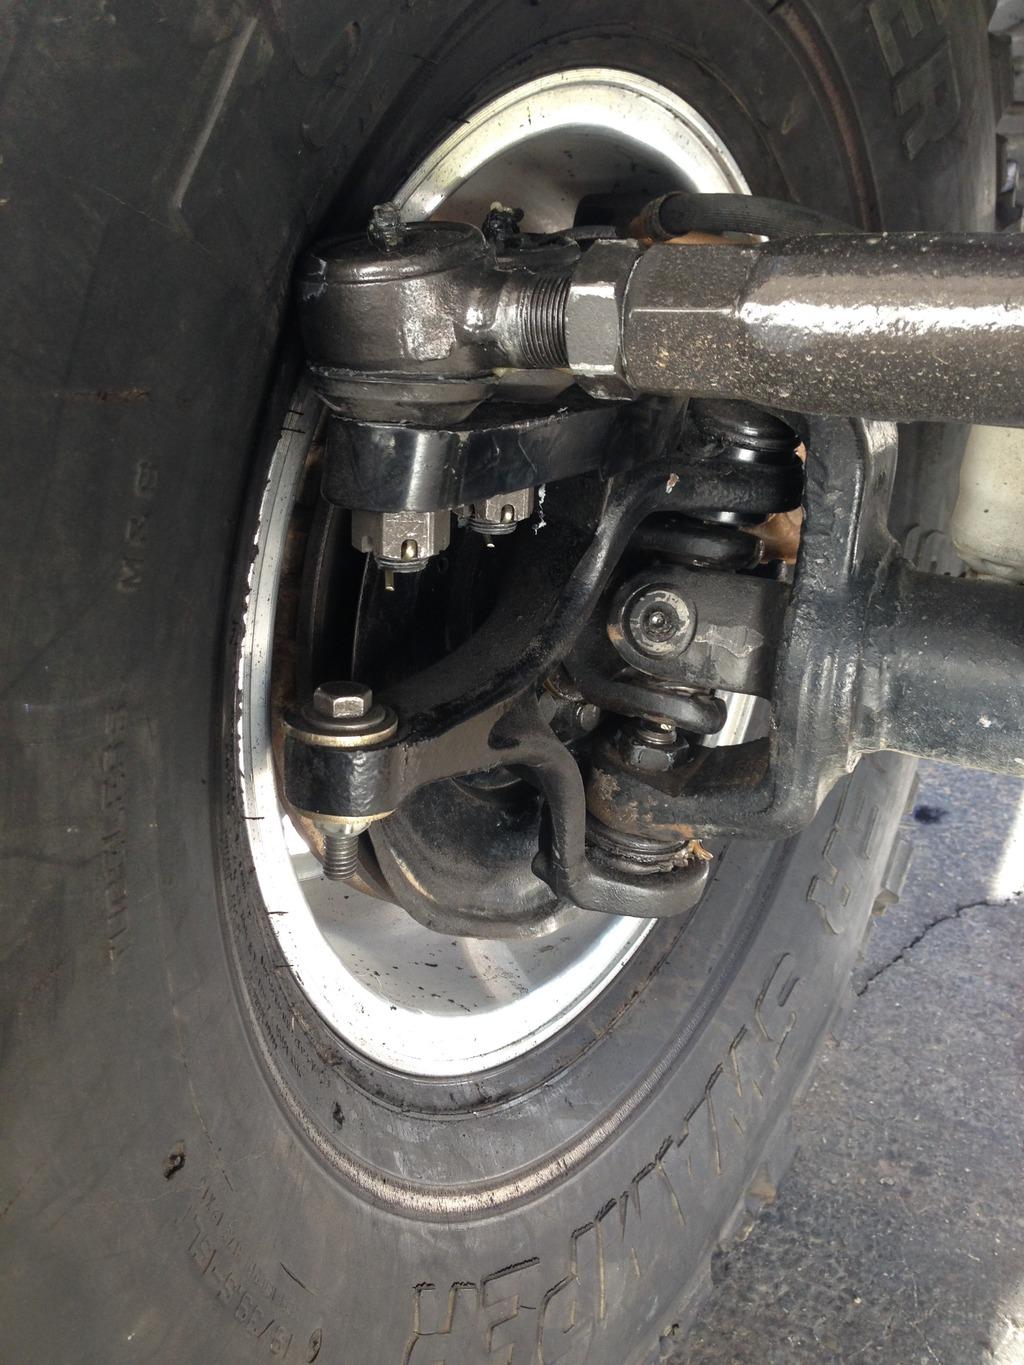
The tire is barely, but substantively, making contact with the top outside edge of the TRE for the drag link. It looks like I'll only need a 1/8" or 1/4" spacer, but now I'm worried about thread engagement. Ugh. "Honey, I know we just had a baby and all, and I need to pull your transmission to replace the torque converter, and the house is a mess, and we've having a dinner party tomorrow, but can I have another garage day to work on my Jeep?"
And yes, I did use an extension. There's no way to avoid using an extension. I know that puts the spec off slightly, but I wouldn't have thought it'd be THAT much off. The actual measurement of torque (torque = force x distance) doesn't change if you've got everything lined up correctly with an extension, in a frictionless environment, etc.
Either way, in looking at one of my photos above I realized that some of the paint rubbed off on my drag link end. That made me look a little more closely at the inside edge of the right front tire this morning. I just can't catch a break:
The tire is barely, but substantively, making contact with the top outside edge of the TRE for the drag link. It looks like I'll only need a 1/8" or 1/4" spacer, but now I'm worried about thread engagement. Ugh. "Honey, I know we just had a baby and all, and I need to pull your transmission to replace the torque converter, and the house is a mess, and we've having a dinner party tomorrow, but can I have another garage day to work on my Jeep?"
AK-RWC
Legacy Registered User
- City
- south central
- State
- AK
Yesterday I had a few minutes, so I checked the torque and found that the rear all held at 100 ft-lbs, but the front had all very slightly backed off. I was curious about thread engagement, particularly since I needed to get a spacer, and tossed one of the open nuts on a front wheel:
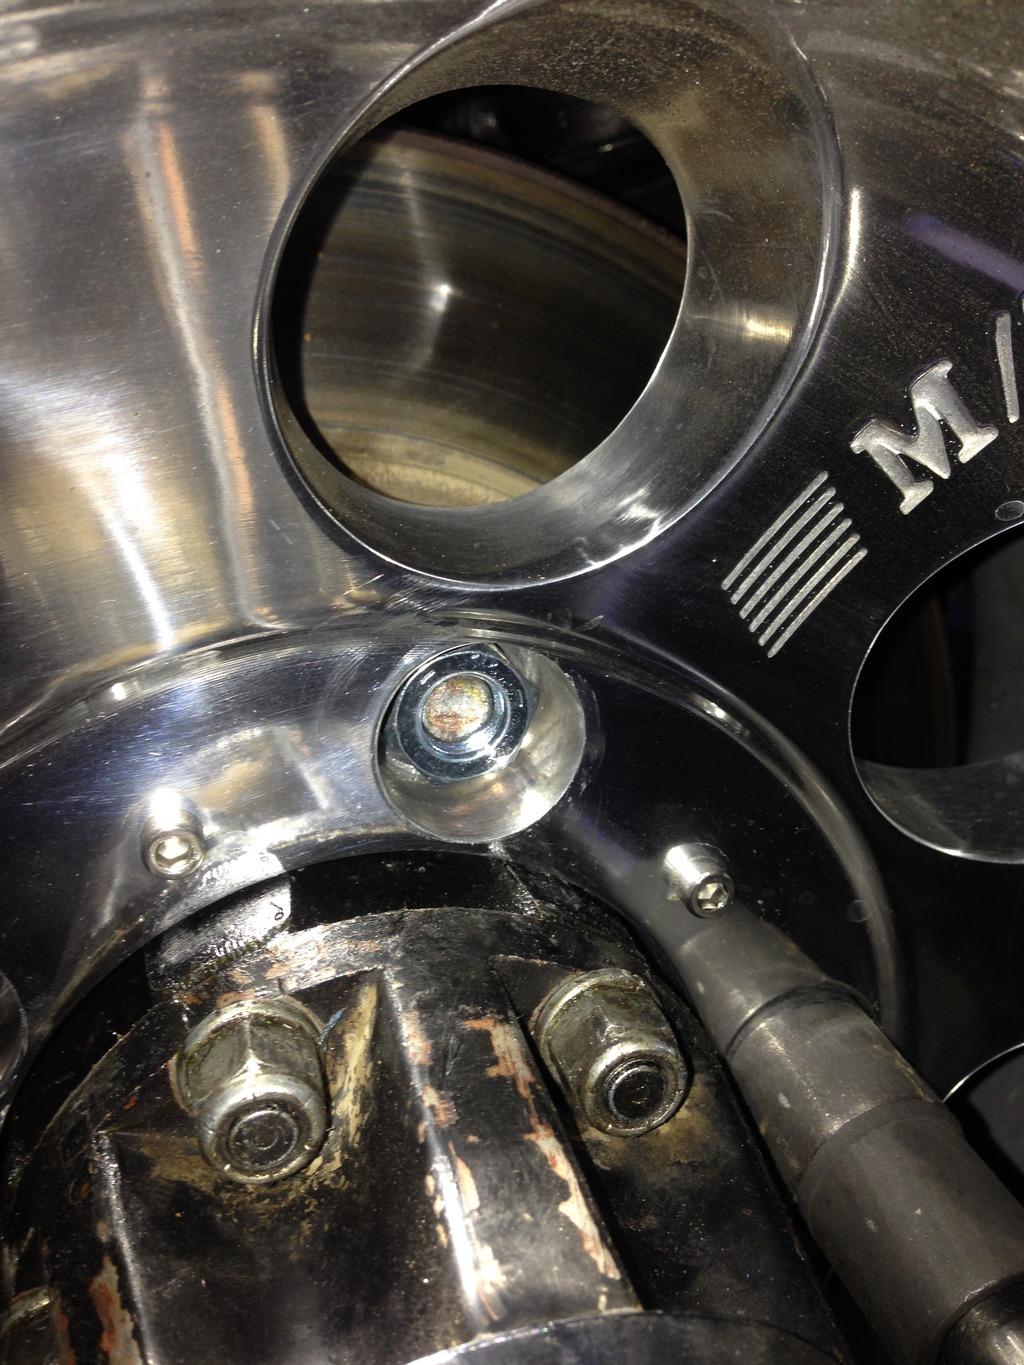
So it looks like even a 3/8" longer stud isn't going to cut it with the spacer.

I picked up the Dorman 711-916 from Autozone anyway because I wanted to see if that's work. The answer is yes, it clears the Scout hub and matches the 5 x 5.5" pattern. But, as suspected...
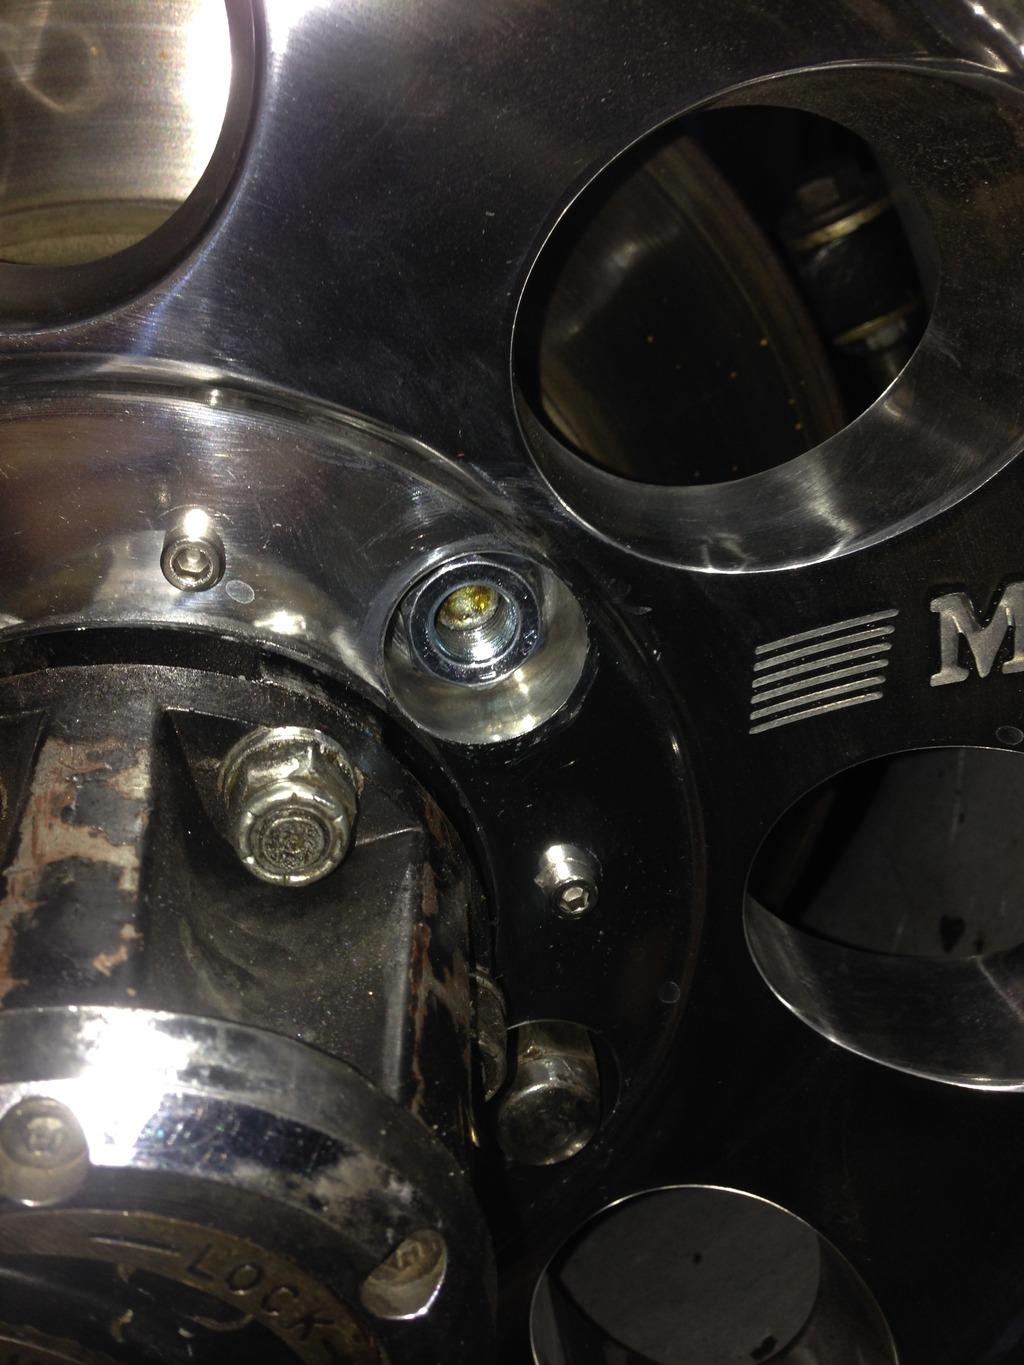
...the existing studs only give about two threads before tightening down.
The next issue is the oddball Scout wheel studs use the same general size as CJ (.625" knurl on a 1/2-20 stud), but have a 3/4" shoulder. I'm not yet sure, but I'm going to try ordering some ARP studs with a .4" shoulder and hope they work.
So it looks like even a 3/8" longer stud isn't going to cut it with the spacer.
I picked up the Dorman 711-916 from Autozone anyway because I wanted to see if that's work. The answer is yes, it clears the Scout hub and matches the 5 x 5.5" pattern. But, as suspected...
...the existing studs only give about two threads before tightening down.
The next issue is the oddball Scout wheel studs use the same general size as CJ (.625" knurl on a 1/2-20 stud), but have a 3/4" shoulder. I'm not yet sure, but I'm going to try ordering some ARP studs with a .4" shoulder and hope they work.
AK-RWC
Legacy Registered User
- City
- south central
- State
- AK
After much research, I'm not sure the ARP studs have a long enough shoulder to work. The rotors are ~3/8" thick where the stud goes through before the knurling makes contact with the hub, which leaves only ~0.025" for actual spline engagement.
Scout forums mention, and specialty shops carry, Dorman p/n 610-273 for the stock stud, which is 1-5/8" long (what I have now, and also appears to be the stock CJ-8 stud), and use 610-219 for the longer stud, which is 3/8" longer (2" overall) with the additional length in the shoulder. This looks like it'll be fine for the left side, where I probably only need another 1/4" to have two threads exposed on the stud, but that won't work on the right side where I also need the spacer to clear the drag link end.
I found a guy on a Scout forum who used 610-277, with an overall length of 2-1/4", with success on his own aftermarket wheels.
That led me to look these up in a .pdf of the Dorman wheel stud catalog, which has lovely pictures in addition detailed specs. 610-277 has a bit of the end without threads, but the shoulder is lengthy and looks like it has the knurling in a location where it will be in the hub rather than in the rotor.
Checking online found both sets of studs at the CarQuest warehouse around the corner from me, so I ordered them and will pick them up tonight after work.
Hopefully these get me rolling again (safely). One thing at a time, right?
AK-RWC
Legacy Registered User
- City
- south central
- State
- AK
Success! Spent Saturday afternoon pulling the studs.

A test fit showed that even on the right side, with the Dorman spacer, I'd still get 1/2" of actual thread engagement.

Once the studs were fully torqued and finished seating, it look like I got a whole extra turn on the right side!
Left side worked as expected, and had probably two threads showing, so I didn't bother with a pic.
I also took a look at my left rear rotor. It had a little rash that was quickly fixed with a file. It otherwise looks fine, so I'm going to continue running it.
I spent essentially all day today driving around in the pouring rain just to get some seat-time. I checked torque every couple stops, and finally at the end of the day the fronts all held 115 lb-ft. I think it's finally road-worthy again! And now it's supposed to snow Tuesday, and drop to 20 on Thursday.
A test fit showed that even on the right side, with the Dorman spacer, I'd still get 1/2" of actual thread engagement.
Once the studs were fully torqued and finished seating, it look like I got a whole extra turn on the right side!
Left side worked as expected, and had probably two threads showing, so I didn't bother with a pic.
I also took a look at my left rear rotor. It had a little rash that was quickly fixed with a file. It otherwise looks fine, so I'm going to continue running it.
I spent essentially all day today driving around in the pouring rain just to get some seat-time. I checked torque every couple stops, and finally at the end of the day the fronts all held 115 lb-ft. I think it's finally road-worthy again! And now it's supposed to snow Tuesday, and drop to 20 on Thursday.
AK-RWC
Legacy Registered User
- City
- south central
- State
- AK
Off topic, but I have to give a solid recommendation for Adams Driveshaft. http://www.adamsdriveshaftoffroad.com/ I ordered a rear shaft for the ZJ last spring, and it arrived in record time, greased, with all Spicer components. It was even painted! AND they gave me a t-shirt! AND it was the best price (even with shipping) from anybody that I could get locally (not even using Spicer components) or any other competitor.
So the slip-joint is going out in the front of the ZJ, and my local shop quoted more JUST to replace the slip-joint than Adams quoted for a whole new shaft, shipped, painted, and with another t-shirt. I'm totally sold on Adams Driveshaft. I wish I'd known about them prior to getting the shafts for the CJ-8. I want to support local businesses, but these guys absolutely crushed their competition here. Plus it's still a U.S. business, and pro-2A at that!
So the slip-joint is going out in the front of the ZJ, and my local shop quoted more JUST to replace the slip-joint than Adams quoted for a whole new shaft, shipped, painted, and with another t-shirt. I'm totally sold on Adams Driveshaft. I wish I'd known about them prior to getting the shafts for the CJ-8. I want to support local businesses, but these guys absolutely crushed their competition here. Plus it's still a U.S. business, and pro-2A at that!