

You are using an out of date browser. It may not display this or other websites correctly.
You should upgrade or use an alternative browser.
You should upgrade or use an alternative browser.
my new scrambler..and first one for me
- Thread starter jeepinjosh
- Start date


- City
- Ashburn
- State
- VA
This is what makes this forum so unbelievable... !!
Agreed. An awesome group of folks.

- City
- Biloxi
- State
- MS
I can't thank you enough for helping me out with this project.
its been a really long, hectic couple years since i started this project..2 jobs, 3 moves, and the 2 stooges paint and body shop disaster. this is the first time I have allowed myself to actually get excited about driving it again. I feel like a kid waiting for Christmas. Maybe you can get a Santa Suit for final delivery..
No problem, it should be a fun project!!!

That sounds like a quiet weekend for you. It should ready on Monday...
Maybe so!!!! Probably not, but you never know!!
I have extra stock carburetors if you need one for parts
Willing to donate to the cause
I might need to see about getting one from you, I will let you know

Yikes! Not two dudes from Mississippi!
"Banjo music playing in the back ground, off hand remarks about mouths"!!!!!!!

This is what makes this forum so unbelievable...love the color !!
The color is similar to my '84, but different.
.
.
Woot Woot - another Spanks build thread!
Are you going to document it here or start another thread?
This wont be like my Red Scrambler/Yard Scrambler/Tan Scrambler threads, this should be a lot less work. But, I will post up pictures and information here


- City
- Dexter
- State
- MI
This wont be like my Red Scrambler/Yard Scrambler/Tan Scrambler threads, this should be a lot less work.
Quoted so he can't deny it later...
- City
- Biloxi
- State
- MS
I have been super busy with my real job, so no time to post
I have been working on this one, and will update with pictures/info later
After sitting for approximately 3 years, I got this Scrambler to start up and run last night - with the steering column 1/2 way disassembled, a 5 gallon gas can on the ground, and a plastic cup under the fuel return line
The body shop/sand blaster caused mucho collateral damage
I have been working on this one, and will update with pictures/info later
After sitting for approximately 3 years, I got this Scrambler to start up and run last night - with the steering column 1/2 way disassembled, a 5 gallon gas can on the ground, and a plastic cup under the fuel return line
The body shop/sand blaster caused mucho collateral damage
- City
- Biloxi
- State
- MS
I have been working on this, my newest yard Scrambler, for the last few weeks. I will try to bring this thread up to speed.
Starting at the beginning, what came with the Scrambler. You have to remember, Josh dropped this Jeep off to be repainted several years ago, when he lived in north Alabama. Unfortunately, the painter/blaster were not organized,and as a result, some things the painter took off, some things the sand blaster dude removed, and some things Josh kept. Unfortunately, some things have been lost.
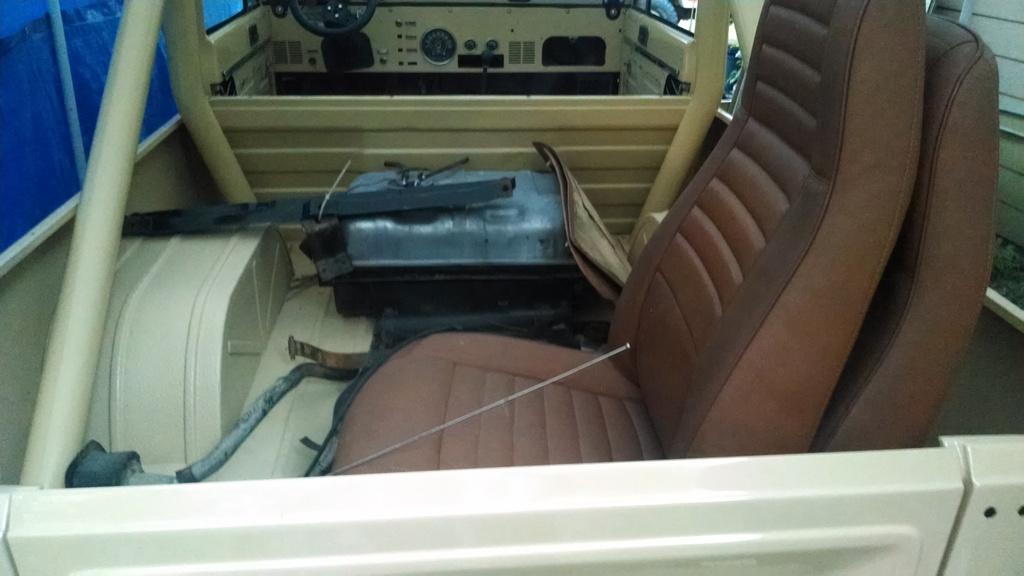
Two nutmeg seats, Nutmeg door panels, gas filler with hoses, antennae, 15 gallon gas tank/skid plate/sender. Also, some steel piece w/brackets, not sure what they are?
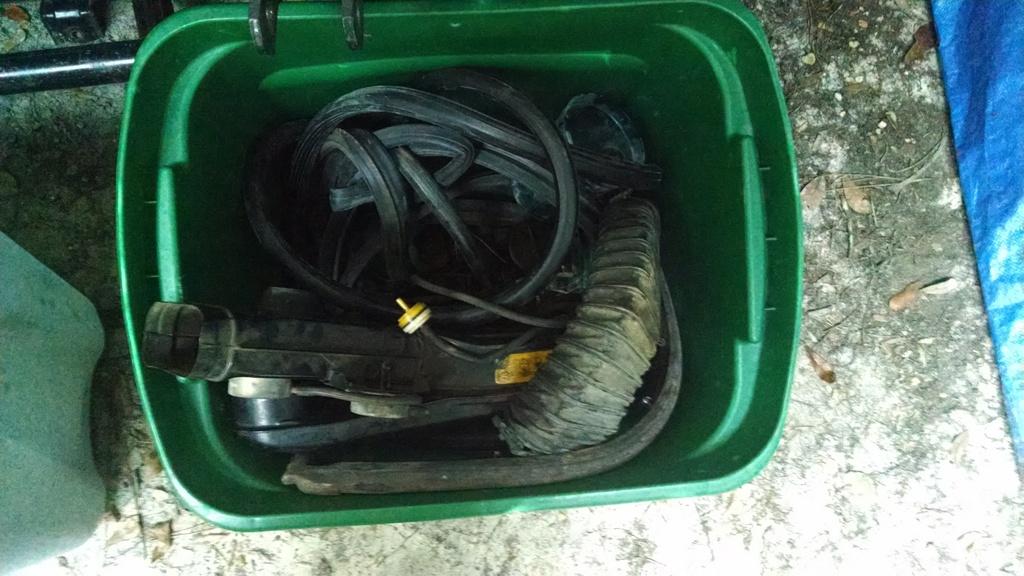
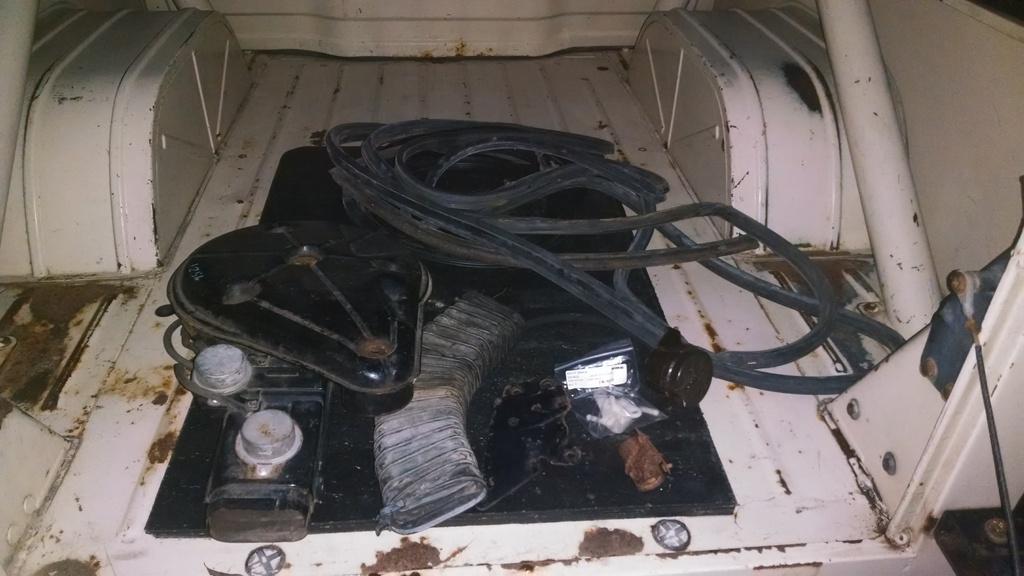
Stock air cleaner, broken weather stripping, rusted roll over check valve, new roll over check valve, bracket for gas tank venting stuff, liquid check valve, and air cleaner snorkel.
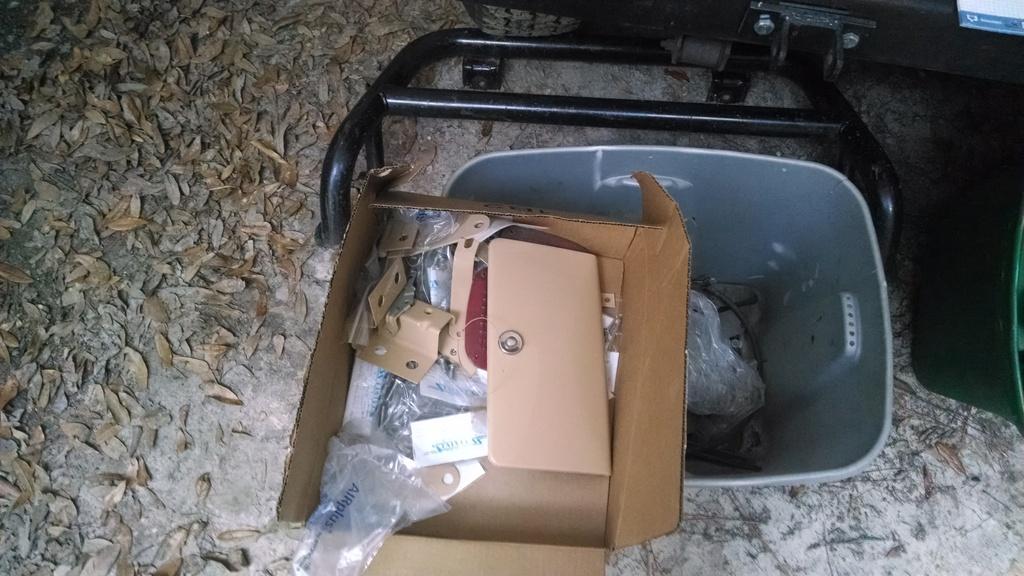
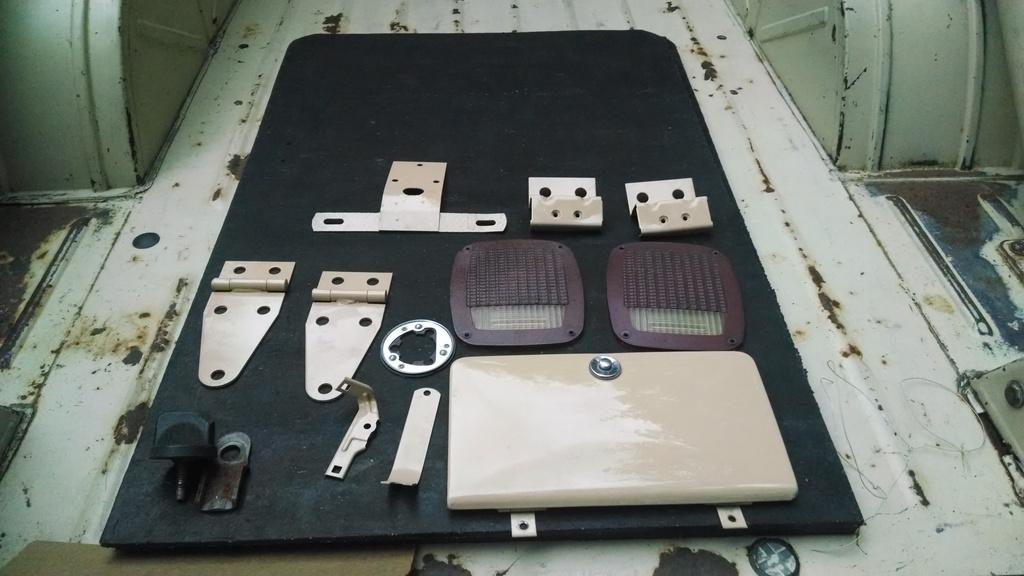
Totally Stainless bolt kit, glove box door, door brackets, hood hinges, license plate bracket, tail light lenses(with overspray), two small brackets painted tan (not sure, maybe carb stuff??), one windshield knob, some other doo-hickies.
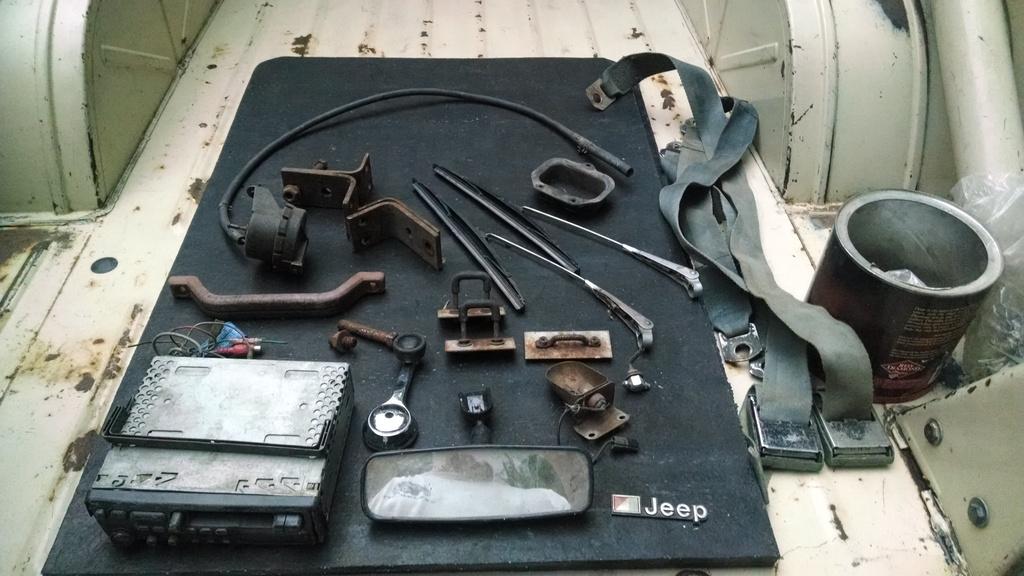
The last of the included bits: two complete lap belts, coffee can of nuts/bolts/screws, two wiper arms, rusty hood footman loops, under hood light, rear view mirror, one window handle, one door pull, set of four rear bumper brackets, radio/tape deck, and one broken liquid check valve.
Besides the Scrambler, this is all I have, so I am missing some stuff. But, there is enough here to get started. I have some missing things, other parts will have to be sourced. Not pictured, 1/2 hard top.
Up next, getting started...............
Starting at the beginning, what came with the Scrambler. You have to remember, Josh dropped this Jeep off to be repainted several years ago, when he lived in north Alabama. Unfortunately, the painter/blaster were not organized,and as a result, some things the painter took off, some things the sand blaster dude removed, and some things Josh kept. Unfortunately, some things have been lost.
Two nutmeg seats, Nutmeg door panels, gas filler with hoses, antennae, 15 gallon gas tank/skid plate/sender. Also, some steel piece w/brackets, not sure what they are?
Stock air cleaner, broken weather stripping, rusted roll over check valve, new roll over check valve, bracket for gas tank venting stuff, liquid check valve, and air cleaner snorkel.
Totally Stainless bolt kit, glove box door, door brackets, hood hinges, license plate bracket, tail light lenses(with overspray), two small brackets painted tan (not sure, maybe carb stuff??), one windshield knob, some other doo-hickies.
The last of the included bits: two complete lap belts, coffee can of nuts/bolts/screws, two wiper arms, rusty hood footman loops, under hood light, rear view mirror, one window handle, one door pull, set of four rear bumper brackets, radio/tape deck, and one broken liquid check valve.
Besides the Scrambler, this is all I have, so I am missing some stuff. But, there is enough here to get started. I have some missing things, other parts will have to be sourced. Not pictured, 1/2 hard top.
Up next, getting started...............
- City
- Biloxi
- State
- MS
Getting the engine to fire up, a taste of things to come.....................
Being curious, I made trying to get the engine fired up one of my first "tasks". It is a basic 258, with an eBay Motorcraft carb conversion. I put a new battery in the CJ8 (painter kept the battery that was in the Scrambler!!!!!!!!!!!), 5 gallon gas tank on the ground with a temporary rubber fuel line, and a plastic cup at the return line.
I turned the key (which is stuck in the key cylinder and is very hard to turn, more on this later) and it turned over. With added electric smoke. Boo.
After a little investigating, two "finds":
This is a 1981 258, so no feedback carb computer. But, it did have another factory computer, which was mounted on the passenger side fender near the solenoid, for the Sol-Vac. Josh had a shop install the Motorcraft carb because the Carter had some issues. Well, here is the problem:
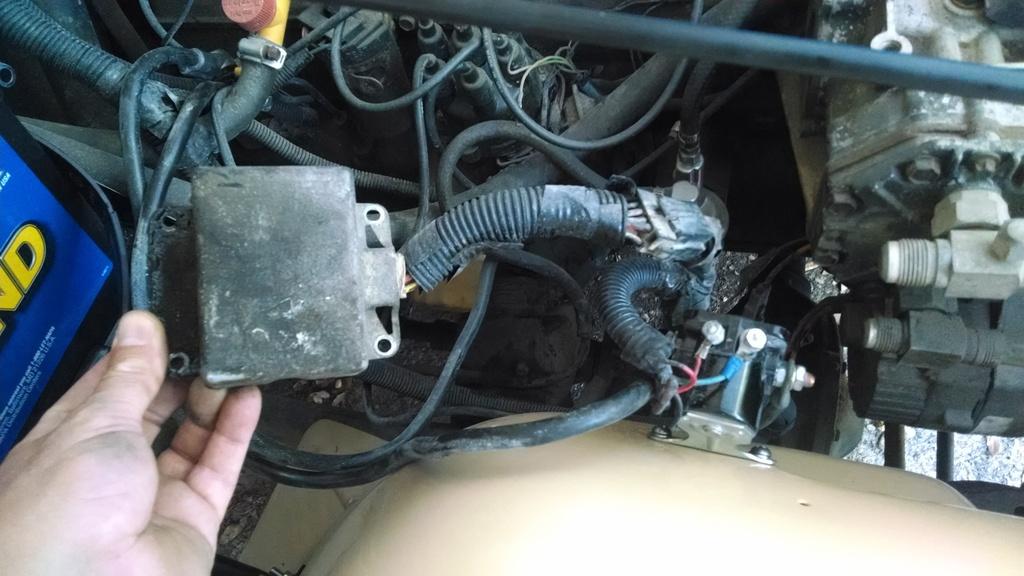
Picture one, the visible side of the Sol-Vac control box, with its associated wiring harness:
Picture two, the underside of the Sol-Vac control box, all the "magic" leaked out!!!!!!!!!!!!
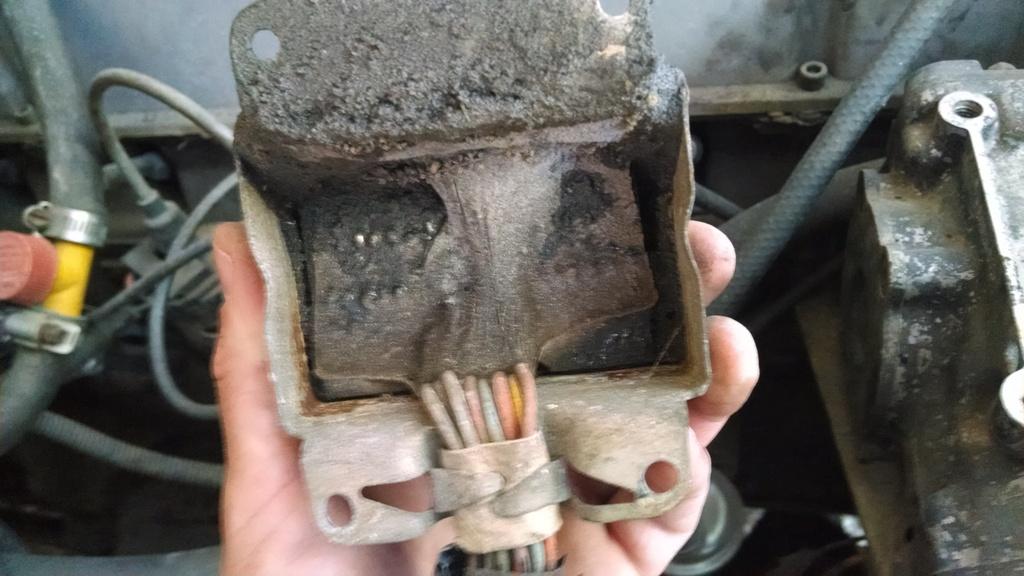
I am not saying this was the only problem with the original Carter, BUT I find it hard to blame the Carter when this essential component is non-operational. Go unplug some sensors on your fancy fuel injected rig and see how it idles, rant over.
Anyway, for some reason I thought Josh had a shop install a Weber, but luckily he has a Motorcraft. I have had good luck with the stock 304 Motorcraft carbs, and they are fairly simple to tune, so I am going to stick with the currently installed Motorcraft carb.
But, back to the "magic smoke", it did not come from the Sol-Vac controller, but from near the starter solenoid. A little digging found this:
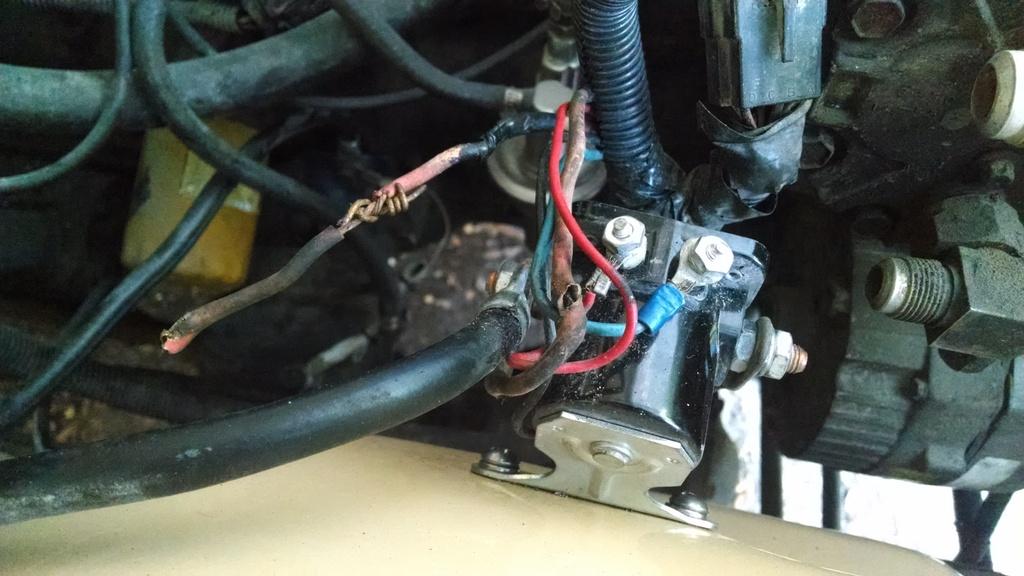
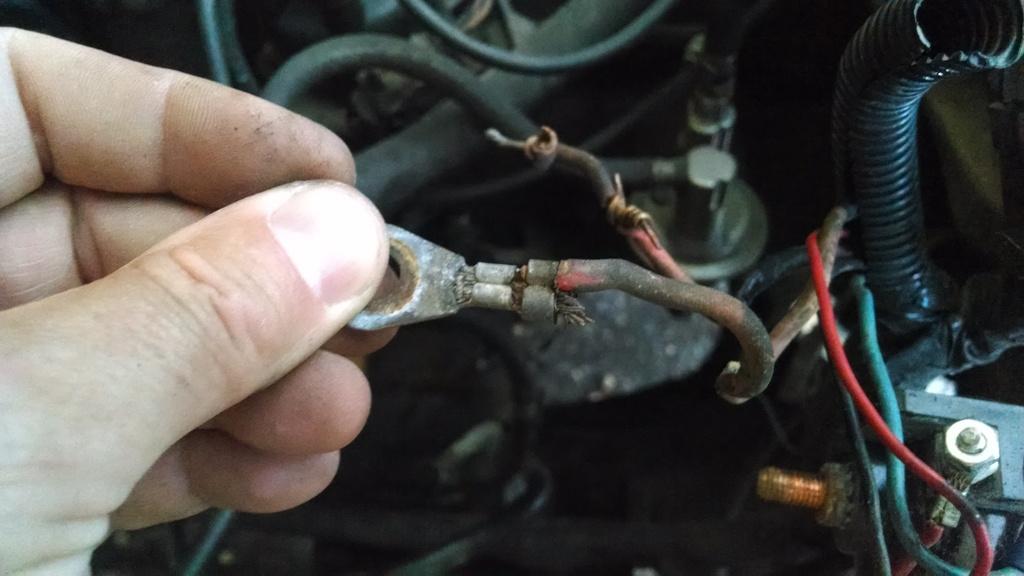
When I first opened the hood, the solenoid/associated wiring was thrown on top of the distributer. The painter/blaster removed the original fenders, then installed these. They must not have cared, obviously, and tore up the wiring. The fusible link wire was broke, so they tried to just wrap it back on to itself. The second picture shows the eyelet that energizes most everything when to key is moved to on. One wire was torn out of this, too.
Most of the "magic smoke" came from the insulation melting/burning off the fusible link wire. Easy fix. But, smoke also came from this, boo:
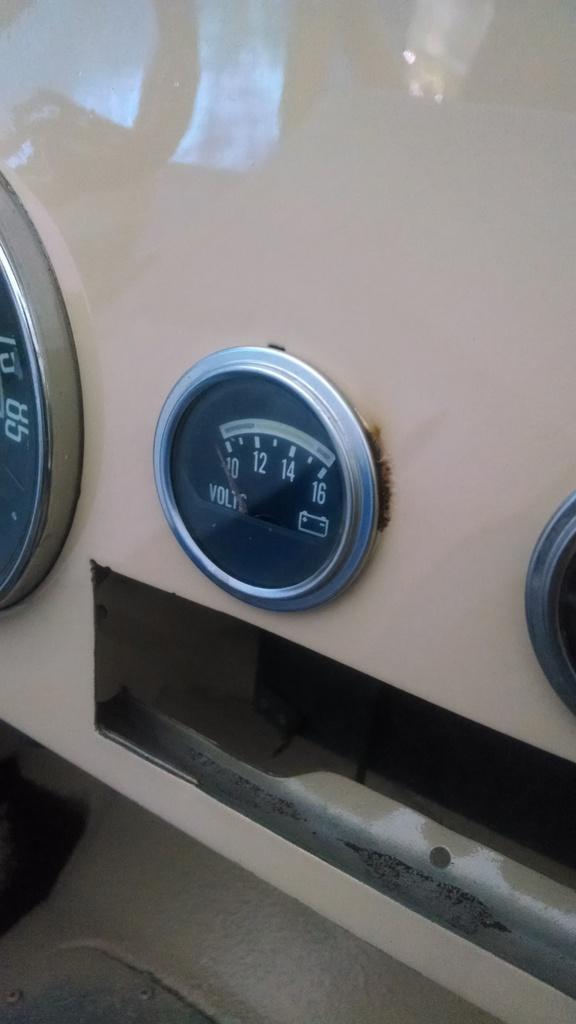
Yep, the volt gauge smoked. Upon investigation, the body shop wired it up backwards. Yeah body shop guys!!!! The good news, it still works. Hopefully the smoke damage to the dash will buff out, I think so!!
OK, got the "magic smoke" contained. So, I poured a few ounces of gas down the carb throat, hit the key, the Scrambler fired right up, and sat there and idled beautifully for 10 minutes!!!!!!!! Yeah Scrambler!!!!!!!!!!
After the initial "pour a bit of gas down the throat of the carb" procedure, the Scrambler repeatedly fired right up. So, it starts up and idles fine, which is good news. Bad news, the key wont turn Off, more on this later!!!
So, what did I learn:
1) The body shop guys are complete careless dumb@zzes, and everything that they touched will turn to poop. So, anything that I even think that they might have touched will have to be thoroughly inspected/repaired/put together correctly - all under hood fender mounted items, all dash board wiring assembly, and just about anything that touches the body!!!!
2) The shop that installed the carb did some "not too top notch work", for example 4' of rubber line from the fuel pump to the carb, fuel filter installed upside down, etc. Besides that, there is under hood stuff like this:
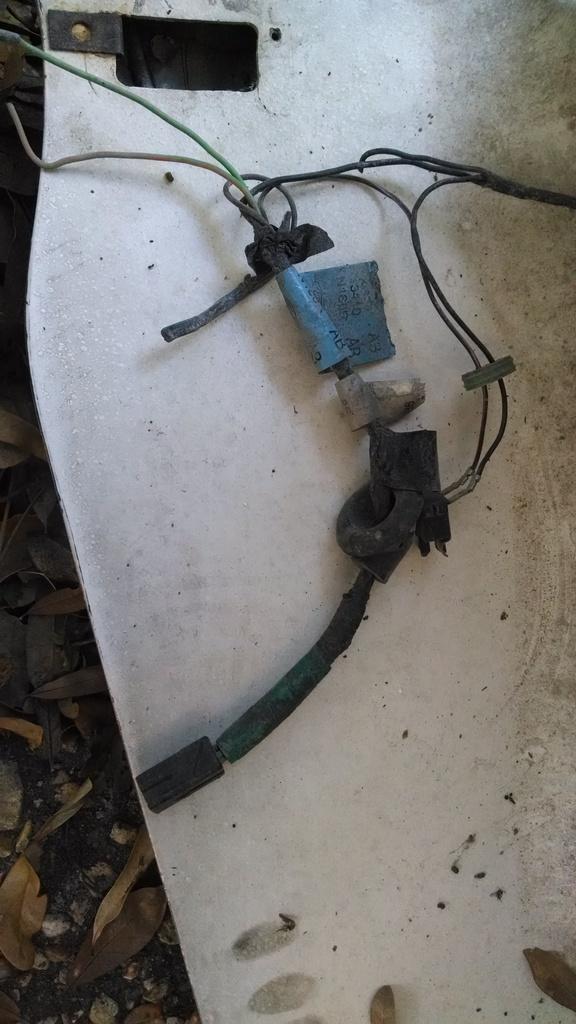
"I guess we don't need that, lets just rip it out", or better yet, "I don't know what it is, lets leave it energized dangling under the hood......"
Anyway, round 1 over, the Scrambler starts. More "fun" to come..................................................
Being curious, I made trying to get the engine fired up one of my first "tasks". It is a basic 258, with an eBay Motorcraft carb conversion. I put a new battery in the CJ8 (painter kept the battery that was in the Scrambler!!!!!!!!!!!), 5 gallon gas tank on the ground with a temporary rubber fuel line, and a plastic cup at the return line.
I turned the key (which is stuck in the key cylinder and is very hard to turn, more on this later) and it turned over. With added electric smoke. Boo.
After a little investigating, two "finds":
This is a 1981 258, so no feedback carb computer. But, it did have another factory computer, which was mounted on the passenger side fender near the solenoid, for the Sol-Vac. Josh had a shop install the Motorcraft carb because the Carter had some issues. Well, here is the problem:
Picture one, the visible side of the Sol-Vac control box, with its associated wiring harness:
Picture two, the underside of the Sol-Vac control box, all the "magic" leaked out!!!!!!!!!!!!
I am not saying this was the only problem with the original Carter, BUT I find it hard to blame the Carter when this essential component is non-operational. Go unplug some sensors on your fancy fuel injected rig and see how it idles, rant over.
Anyway, for some reason I thought Josh had a shop install a Weber, but luckily he has a Motorcraft. I have had good luck with the stock 304 Motorcraft carbs, and they are fairly simple to tune, so I am going to stick with the currently installed Motorcraft carb.
But, back to the "magic smoke", it did not come from the Sol-Vac controller, but from near the starter solenoid. A little digging found this:
When I first opened the hood, the solenoid/associated wiring was thrown on top of the distributer. The painter/blaster removed the original fenders, then installed these. They must not have cared, obviously, and tore up the wiring. The fusible link wire was broke, so they tried to just wrap it back on to itself. The second picture shows the eyelet that energizes most everything when to key is moved to on. One wire was torn out of this, too.
Most of the "magic smoke" came from the insulation melting/burning off the fusible link wire. Easy fix. But, smoke also came from this, boo:
Yep, the volt gauge smoked. Upon investigation, the body shop wired it up backwards. Yeah body shop guys!!!! The good news, it still works. Hopefully the smoke damage to the dash will buff out, I think so!!
OK, got the "magic smoke" contained. So, I poured a few ounces of gas down the carb throat, hit the key, the Scrambler fired right up, and sat there and idled beautifully for 10 minutes!!!!!!!! Yeah Scrambler!!!!!!!!!!
After the initial "pour a bit of gas down the throat of the carb" procedure, the Scrambler repeatedly fired right up. So, it starts up and idles fine, which is good news. Bad news, the key wont turn Off, more on this later!!!
So, what did I learn:
1) The body shop guys are complete careless dumb@zzes, and everything that they touched will turn to poop. So, anything that I even think that they might have touched will have to be thoroughly inspected/repaired/put together correctly - all under hood fender mounted items, all dash board wiring assembly, and just about anything that touches the body!!!!
2) The shop that installed the carb did some "not too top notch work", for example 4' of rubber line from the fuel pump to the carb, fuel filter installed upside down, etc. Besides that, there is under hood stuff like this:
"I guess we don't need that, lets just rip it out", or better yet, "I don't know what it is, lets leave it energized dangling under the hood......"
Anyway, round 1 over, the Scrambler starts. More "fun" to come..................................................
- City
- Biloxi
- State
- MS
Steering column drama, I love Walnuts!!!!!!!!!!!!!!!!!
We last left our imperiled Scrambler with a running engine, but with a key that would not turn off. What to do, lets look inside the mysterious beast that is a Jeep CJ automatic transmission/tilt steering column.
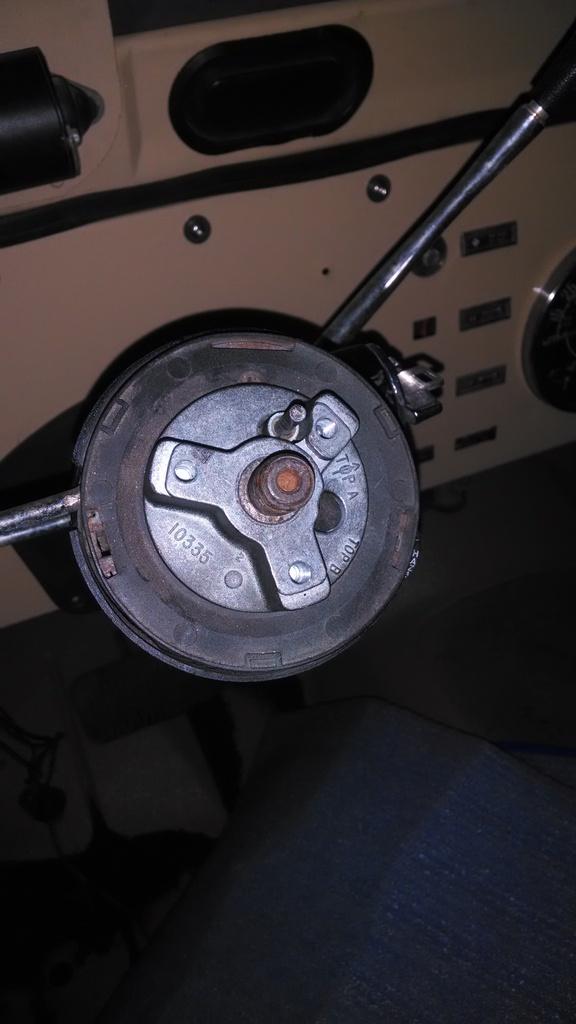
Step one, I removed the tiny aftermarket steering wheel. That the body shop guys did not screw/bolt on, but they did beat it on. The 3 jawed gear puller removed the aftermarket wheel after a brief fight. This revealed this aluminum/pot metal piece. Note that the rod is broke out of the heater switch located on the dash, in the back ground. Yeah body shop!!!!!!
After taking out the lock plate, and turn signal switch, I noticed a problem. Brown dirt/dust everywhere, way more then normal. When I removed the lock cylinder, it was packed with this crud. What is it, you ask? Walnut shell debris!!! The blaster used walnut shells to blast the tub with, and did not remove or cover the steering column, so it is packed full of grit/crud/FACEPALM!!!!!!!!!!!!!!!
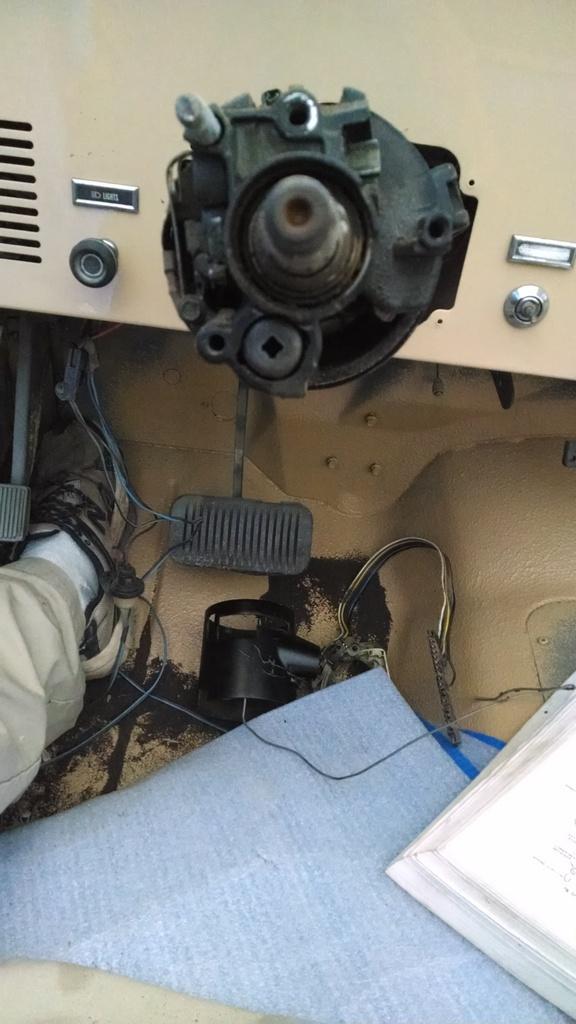
Deeper inside the steering column, more crud!!!! Note the walnut shell debris down by my foot, it is falling out of the steering column!!!
Did someone say "grit in the bearings"!!!!!!!!!!!!!!
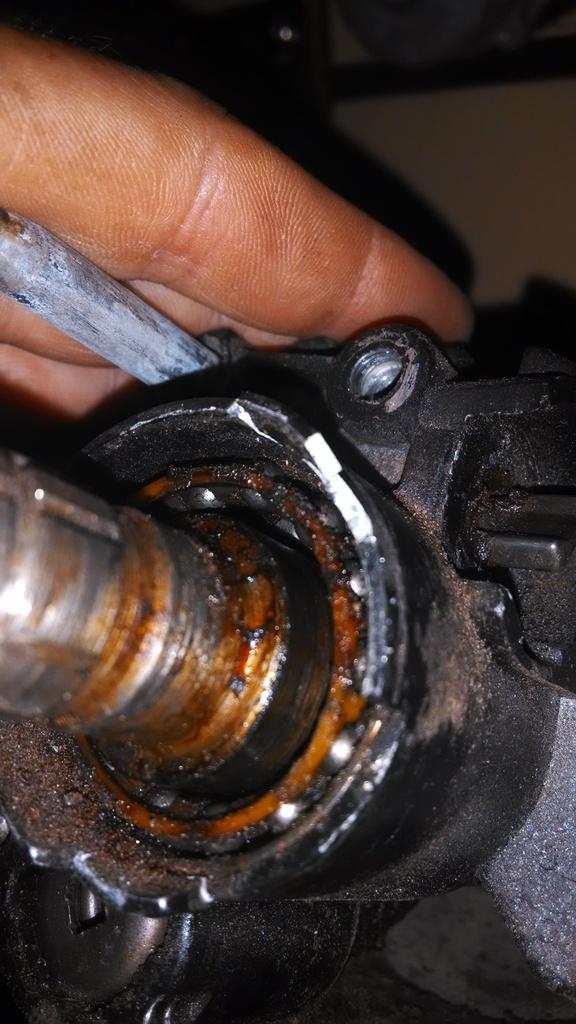
Close up of more grit. I was concerned with this area, around the rack/lock thingy. But, all the parts are still in great shape. Unfortunately, the grease that was on these parts is now full of crud, so everything will have to be torn down, cleaned, re-greased, and re-assembled. All for a stuck key.
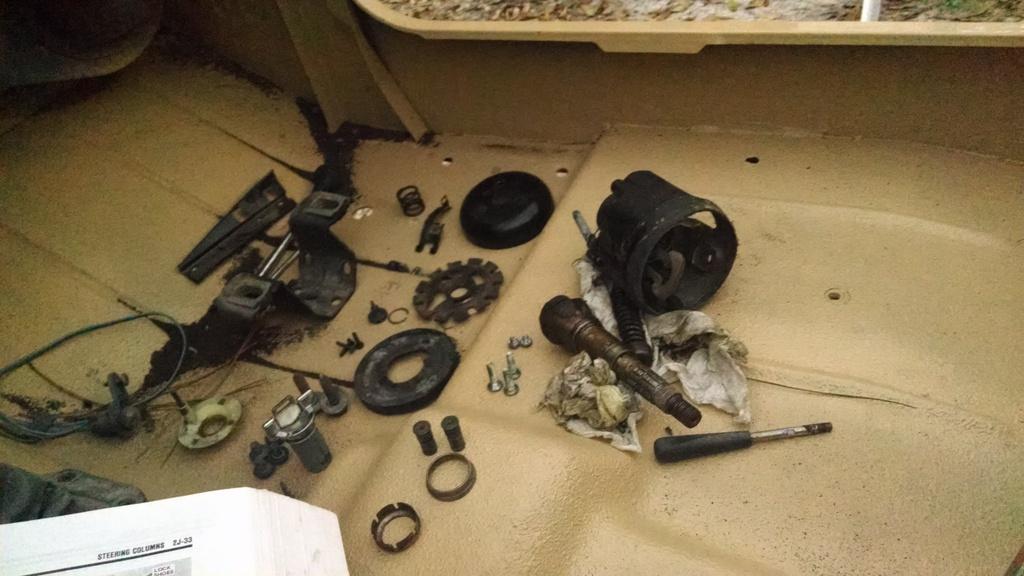
Pile of steering column parts waiting to be cleaned and greased, hope I remember how all this goes LOL!!!!!!!!!!!!!!!!!
I believe that the below picture shows the four "notorious for loosening tilt steering column bolts". All four are still tight. I will pull them, and apply Lock-Tite, since I have the column torn down this far.
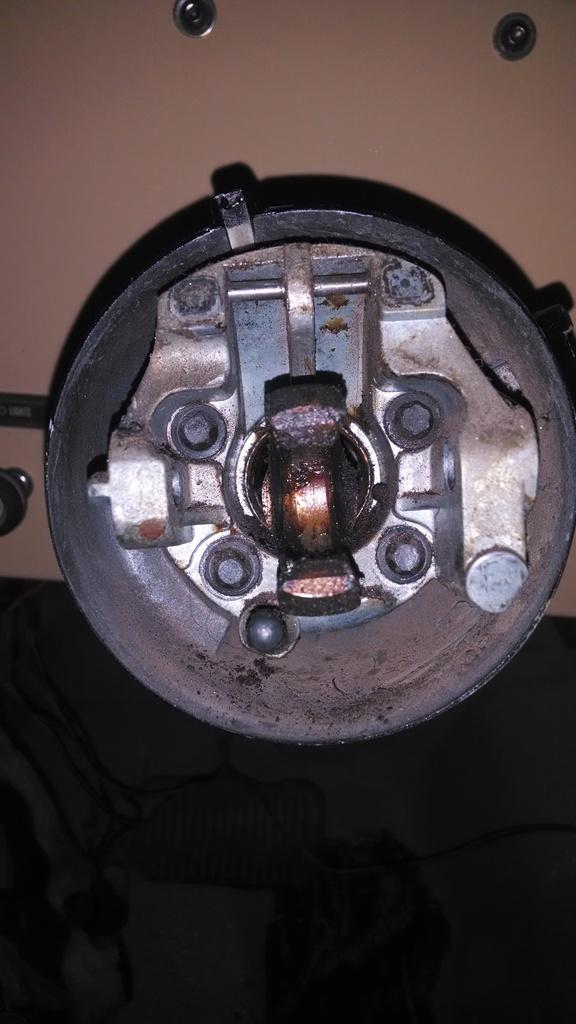
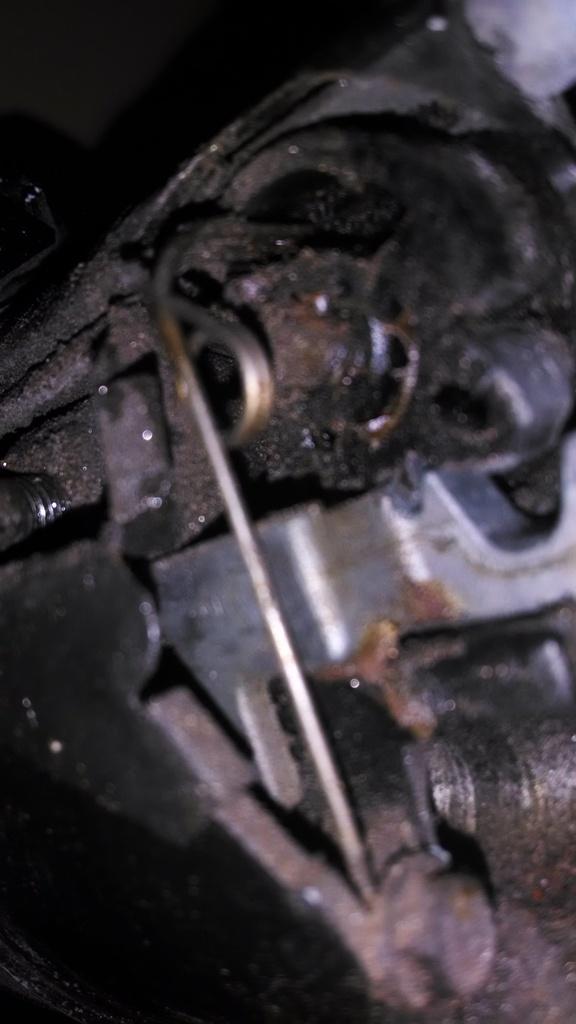
One more picture, showing grit, and showing where the real heart ache begins.............
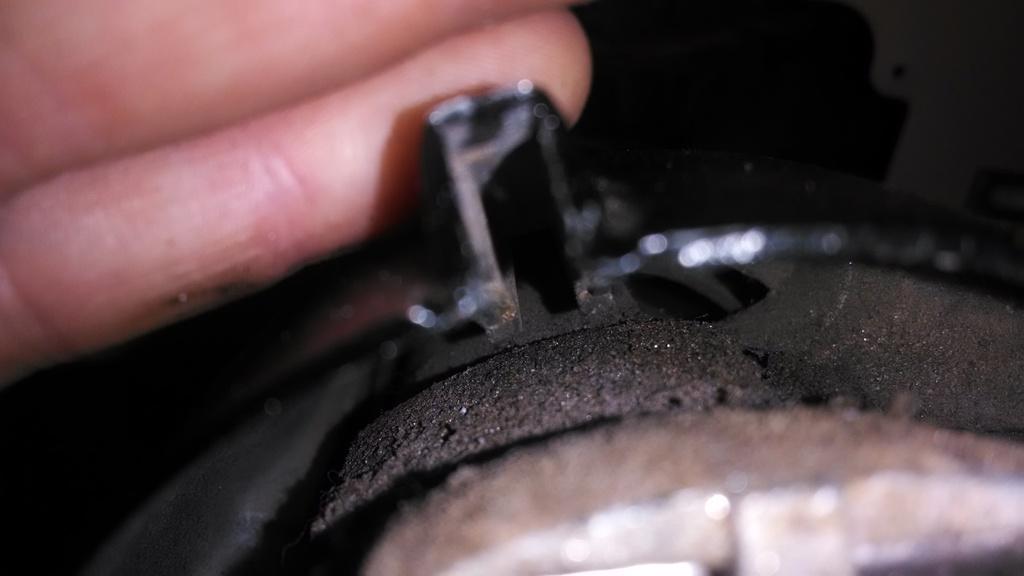
Another clue, as to the major problem:
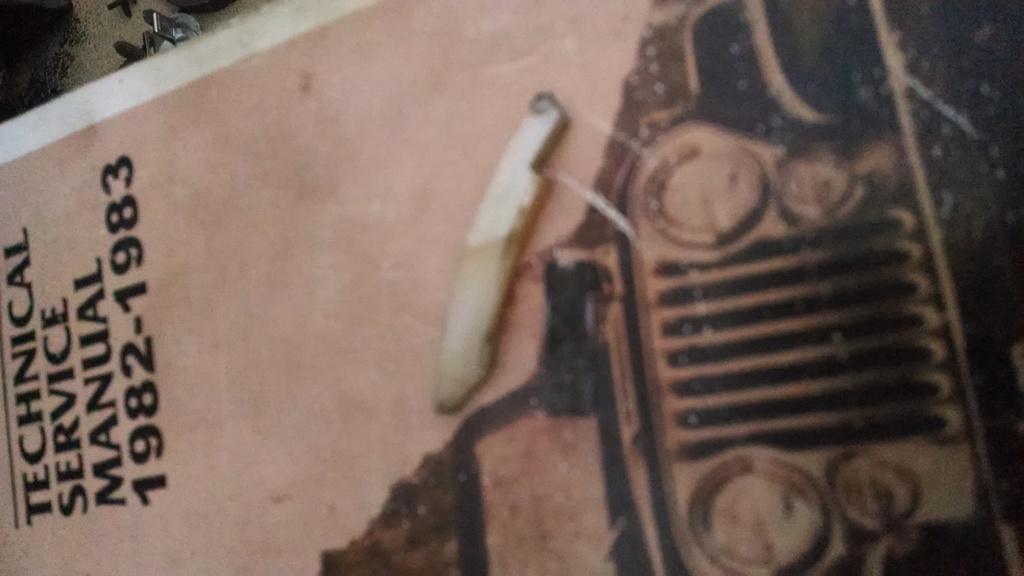
That white piece of plastic is for the column mounted "PRND2L" indicator. This is all I have of this assembly. When Josh brought the Scrambler to the body shop, he had a complete "Shift Quadrant Assembly". Now, besides the above pictured piece of broken white plastic, and the light bulb for the indicator, he has nothing. Yeah body shop!!! Boo. Boo.
Having to rebuild the column is one thing, and I am not going to b1tch too much about that, I can use the practice. At least none of the parts inside are broke. But, for the body shop to lose the "PRND2L" indicator, that F'n sucks, pardon my French. I know it will be tough/expensive to replace all these parts.
The only other casualty of the "Walnut shell attack" was the column mounted ignition switch. But, I was able to disassemble it, clean it, put some more dielectric grease inside it, and it now works.
So, I still need to clean/re-grease all the steering column components, then I will reassemble it. I hope we can find the missing shift quadrant stuff, fingers crossed!!!!!!!
Maybe the body shop will find it, but I doubt it. If you think this body shop boo-boo is bad, wait till you see my next installment!!!!!!!!!!!!!!!!!!!!!!!
We last left our imperiled Scrambler with a running engine, but with a key that would not turn off. What to do, lets look inside the mysterious beast that is a Jeep CJ automatic transmission/tilt steering column.
Step one, I removed the tiny aftermarket steering wheel. That the body shop guys did not screw/bolt on, but they did beat it on. The 3 jawed gear puller removed the aftermarket wheel after a brief fight. This revealed this aluminum/pot metal piece. Note that the rod is broke out of the heater switch located on the dash, in the back ground. Yeah body shop!!!!!!
After taking out the lock plate, and turn signal switch, I noticed a problem. Brown dirt/dust everywhere, way more then normal. When I removed the lock cylinder, it was packed with this crud. What is it, you ask? Walnut shell debris!!! The blaster used walnut shells to blast the tub with, and did not remove or cover the steering column, so it is packed full of grit/crud/FACEPALM!!!!!!!!!!!!!!!
Deeper inside the steering column, more crud!!!! Note the walnut shell debris down by my foot, it is falling out of the steering column!!!
Did someone say "grit in the bearings"!!!!!!!!!!!!!!
Close up of more grit. I was concerned with this area, around the rack/lock thingy. But, all the parts are still in great shape. Unfortunately, the grease that was on these parts is now full of crud, so everything will have to be torn down, cleaned, re-greased, and re-assembled. All for a stuck key.
Pile of steering column parts waiting to be cleaned and greased, hope I remember how all this goes LOL!!!!!!!!!!!!!!!!!
I believe that the below picture shows the four "notorious for loosening tilt steering column bolts". All four are still tight. I will pull them, and apply Lock-Tite, since I have the column torn down this far.
One more picture, showing grit, and showing where the real heart ache begins.............
Another clue, as to the major problem:
That white piece of plastic is for the column mounted "PRND2L" indicator. This is all I have of this assembly. When Josh brought the Scrambler to the body shop, he had a complete "Shift Quadrant Assembly". Now, besides the above pictured piece of broken white plastic, and the light bulb for the indicator, he has nothing. Yeah body shop!!! Boo. Boo.
Having to rebuild the column is one thing, and I am not going to b1tch too much about that, I can use the practice. At least none of the parts inside are broke. But, for the body shop to lose the "PRND2L" indicator, that F'n sucks, pardon my French. I know it will be tough/expensive to replace all these parts.
The only other casualty of the "Walnut shell attack" was the column mounted ignition switch. But, I was able to disassemble it, clean it, put some more dielectric grease inside it, and it now works.
So, I still need to clean/re-grease all the steering column components, then I will reassemble it. I hope we can find the missing shift quadrant stuff, fingers crossed!!!!!!!
Maybe the body shop will find it, but I doubt it. If you think this body shop boo-boo is bad, wait till you see my next installment!!!!!!!!!!!!!!!!!!!!!!!
- City
- Biloxi
- State
- MS
Totally Inexcusable...............Roll Bar Mounting, Part #1
When we picked up the Scrambler from Josh, I was informed the roll bar wasn't bolted down. I thought that was kind of funny, at the time. "What type of shop would be so lazy as to not do something as simple as bolting the roll bar back down?", I thought to myself.
When I got home and looked, I found out.
I know that for us Scrambler owners, a "rite of passage", so to speak, is removing the roll bar mounting bolts. Now, for a novice, who maybe doesn't have torch, or a welder, or even PB Blaster, this can be a trying experience. For a body shop, that works on stuff like this all the time, this should be a piece of cake.
Apparently not.
I believe the conversation went something like this: "Hey Bubba, I dun broke 5 of dem dang star bolt heads off, what do I do?" Bubba responds: "Just beat dem broke bolts down under the rear floor, nobody will notice, ROLL TIDE!!!!"
I made the "ROLL TIDE" part up, maybe, I cant confirm this, maybe they are "War Eagle fans", but the first part, well you be the judge...................
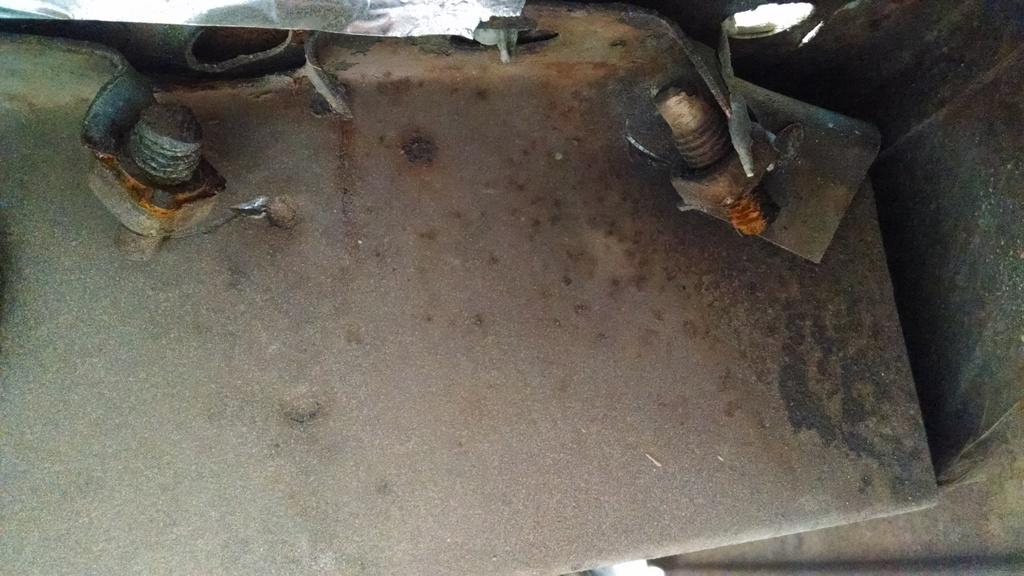
What you are looking at is the remnants of the nuts that are welded to the under bed floor support channel. The roll bar mounting bolts thread into these from the top.
That folks, right there, is real nice. Now maybe you will understand my disdain for this particular shop. The wiring, OK, they are body guys, not electricians. The grit in the column, give them the benefit of the doubt. But this???????????
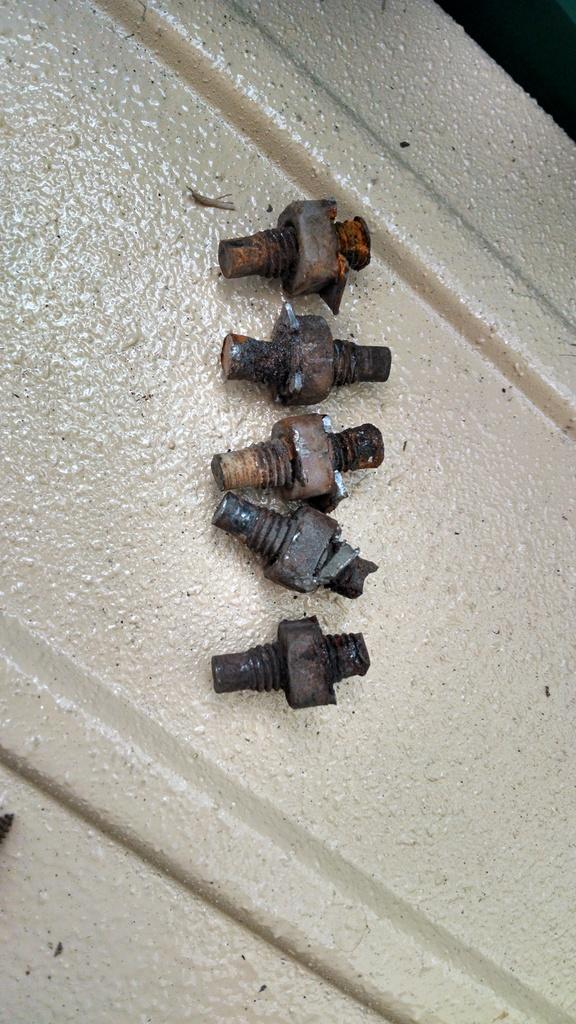
I spent a few hours with a bottle jack and some pieces of pipe. I was able to get them close, and straighten the bent sheet metal lips. But, in this weakened state, no way I can get the bits of threaded bolts out of the nuts. There just isn't enough there to hold the nuts tight.
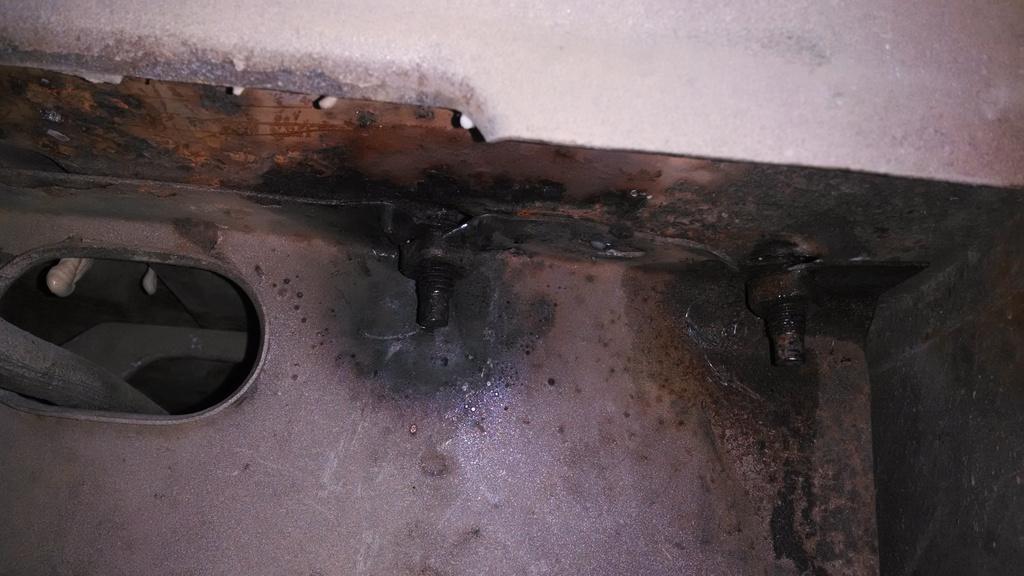
Reluctantly, I went ahead and finished them off. That's 5 of the 8 rear roll bar mounting nuts. Three of the original nuts were still intact, and I was able to run a tap through them to clean them up.
If the Scrambler was about to get painted, I would go ahead and weld new nuts on. I don't have this option, since this is a freshly painted/lined floor. I am scared that heat from welding will damage the finish.
Using the three existing nuts as a guide, I pulled measurements. I then installed all 8 bolts, and positioned the 5 new square nuts exactly where they need to go.
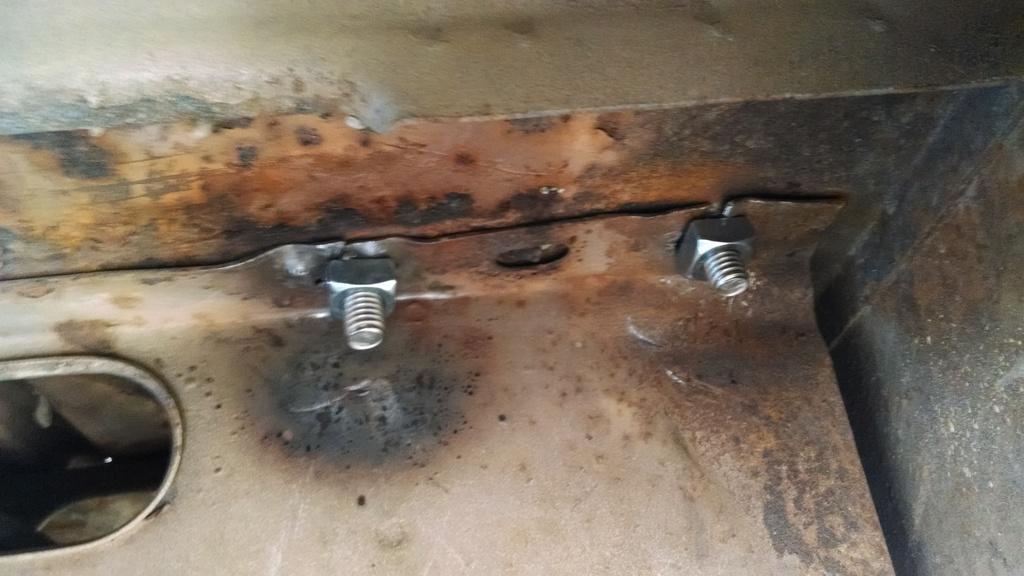
Now, the 64 million dollar question: Do I:
A) Get one of my buddies over to put a small tack on each nut, to keep it in place, risking damaging the floor finish.
B) Get some JB Weld (or similar) to secure these 5 nuts, no risk of damaging the freshly painted/lined floor.
I am leaning toward "B". The stock, welded in place nuts are a "convenience", not a necessity. It is much easier to simply bolt something on if the nut on the back side are welded in place, i.e. not trying to hold a bolt up top while fighting with loose nuts on the bottom. All the tack/JB Weld has to do is keep the nut in place/keep it from spinning. I could just drop the bolt down the hole and then put a washer/nut on the bottom. But, in the future, if someone goes to pull the roll bar, they will have to hold the nut on the bottom still while loosening the bolt up top.
Regardless, I need to get past this obstacle before I can finish another task...................
When we picked up the Scrambler from Josh, I was informed the roll bar wasn't bolted down. I thought that was kind of funny, at the time. "What type of shop would be so lazy as to not do something as simple as bolting the roll bar back down?", I thought to myself.
When I got home and looked, I found out.
I know that for us Scrambler owners, a "rite of passage", so to speak, is removing the roll bar mounting bolts. Now, for a novice, who maybe doesn't have torch, or a welder, or even PB Blaster, this can be a trying experience. For a body shop, that works on stuff like this all the time, this should be a piece of cake.
Apparently not.
I believe the conversation went something like this: "Hey Bubba, I dun broke 5 of dem dang star bolt heads off, what do I do?" Bubba responds: "Just beat dem broke bolts down under the rear floor, nobody will notice, ROLL TIDE!!!!"
I made the "ROLL TIDE" part up, maybe, I cant confirm this, maybe they are "War Eagle fans", but the first part, well you be the judge...................
What you are looking at is the remnants of the nuts that are welded to the under bed floor support channel. The roll bar mounting bolts thread into these from the top.
That folks, right there, is real nice. Now maybe you will understand my disdain for this particular shop. The wiring, OK, they are body guys, not electricians. The grit in the column, give them the benefit of the doubt. But this???????????
I spent a few hours with a bottle jack and some pieces of pipe. I was able to get them close, and straighten the bent sheet metal lips. But, in this weakened state, no way I can get the bits of threaded bolts out of the nuts. There just isn't enough there to hold the nuts tight.
Reluctantly, I went ahead and finished them off. That's 5 of the 8 rear roll bar mounting nuts. Three of the original nuts were still intact, and I was able to run a tap through them to clean them up.
If the Scrambler was about to get painted, I would go ahead and weld new nuts on. I don't have this option, since this is a freshly painted/lined floor. I am scared that heat from welding will damage the finish.
Using the three existing nuts as a guide, I pulled measurements. I then installed all 8 bolts, and positioned the 5 new square nuts exactly where they need to go.
Now, the 64 million dollar question: Do I:
A) Get one of my buddies over to put a small tack on each nut, to keep it in place, risking damaging the floor finish.
B) Get some JB Weld (or similar) to secure these 5 nuts, no risk of damaging the freshly painted/lined floor.
I am leaning toward "B". The stock, welded in place nuts are a "convenience", not a necessity. It is much easier to simply bolt something on if the nut on the back side are welded in place, i.e. not trying to hold a bolt up top while fighting with loose nuts on the bottom. All the tack/JB Weld has to do is keep the nut in place/keep it from spinning. I could just drop the bolt down the hole and then put a washer/nut on the bottom. But, in the future, if someone goes to pull the roll bar, they will have to hold the nut on the bottom still while loosening the bolt up top.
Regardless, I need to get past this obstacle before I can finish another task...................
- City
- Biloxi
- State
- MS
Gas Tank Fun!!!!!!!!!!!
This work was fairly easy, the painters did not mess with any of this stuff!!!!!
When we picked up the Scrambler from Josh, the gas tank/skid plate and other associated parts and pieces were not attached. I believe Josh had some issues of gas leaking from the top of the tank. This is what I started with:
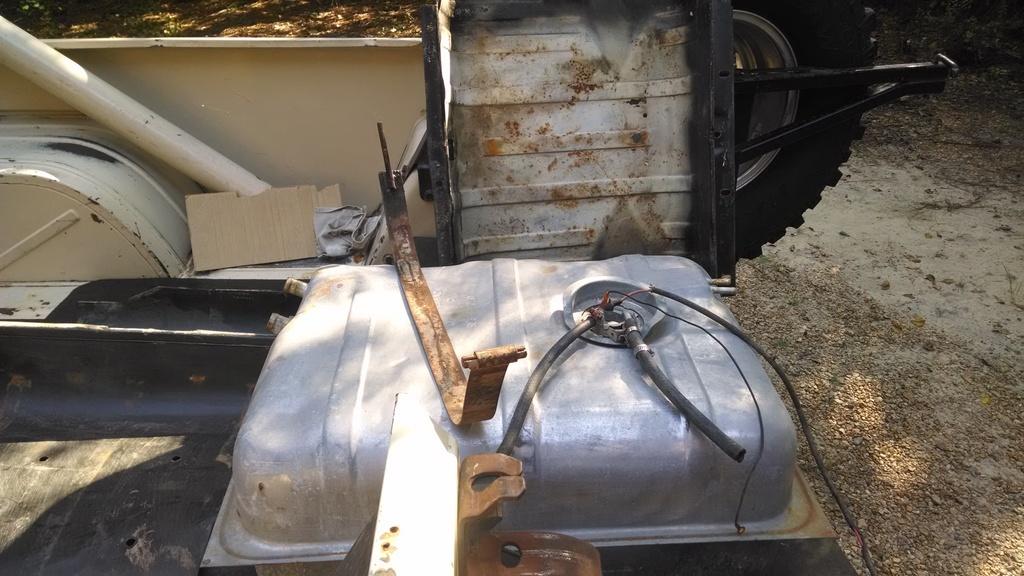
A newer, unpainted, rust free gas tank. A slightly rusty gas tanks strap, the factory plastic liner pieces, and the stock skid plate.
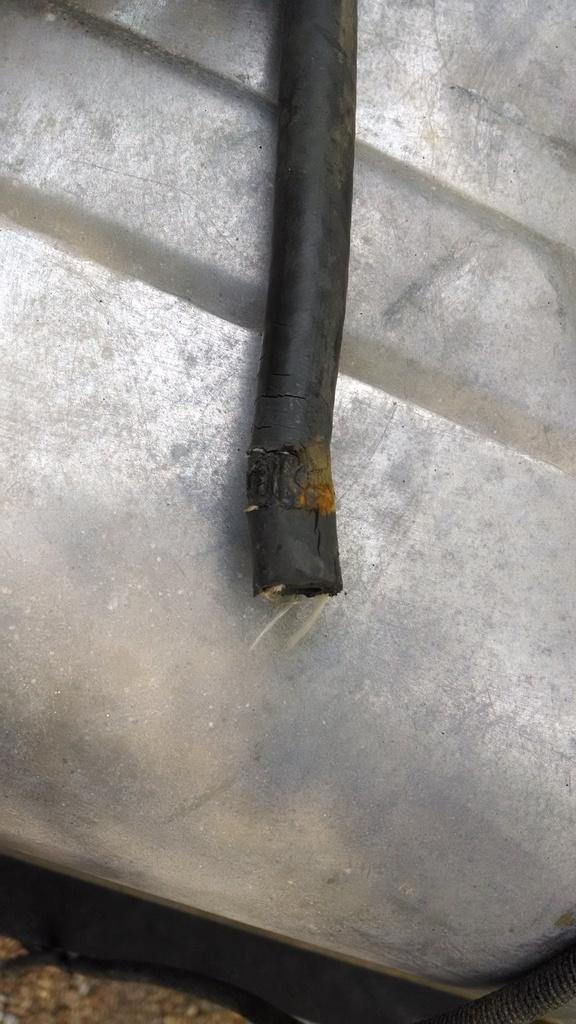
This is probably the source of the gas leak, dry rotted/cracked rubber return line, where it went on the sending unit. I am replacing ALL of the rubber fuel/vent lines on this Scrambler, they all are starting to look like this.
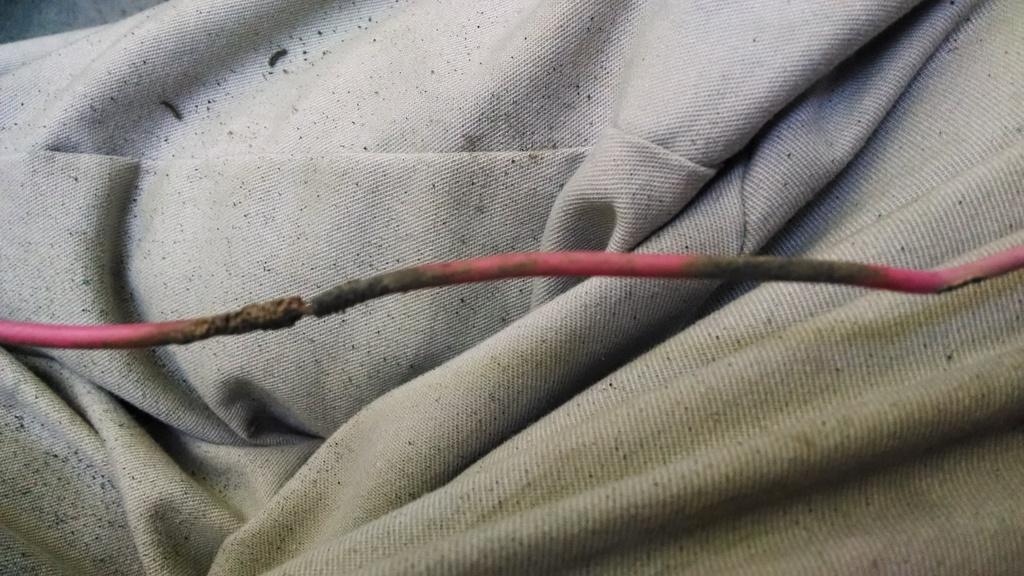
Josh said the fuel gauge was working, but I am still going to repair the sending unit wire!!
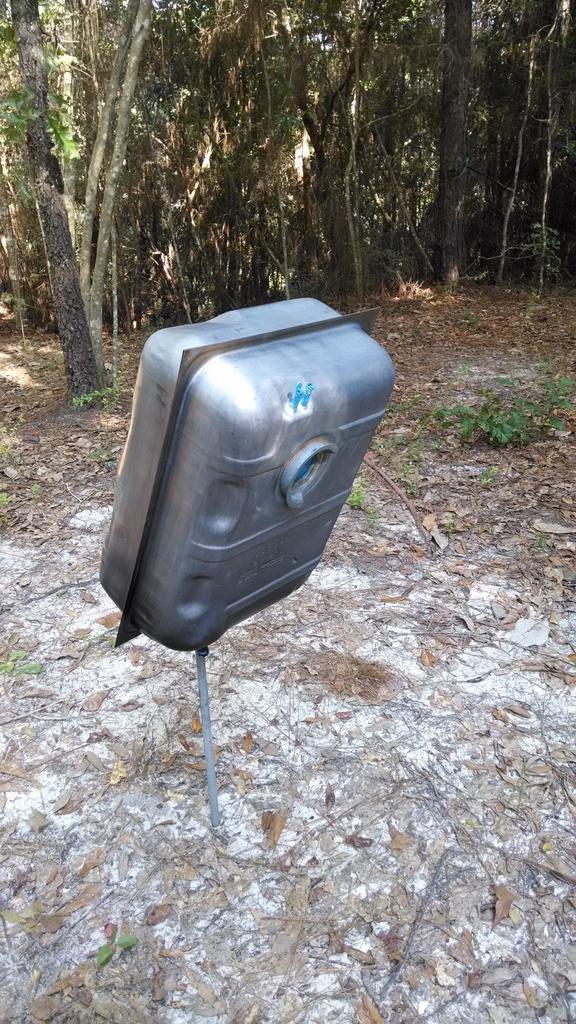
I sanded the little bit of rust off the gas tank, taped up the openings, and painted the gas tank. It was bare steel, it would have started rusting soon. Redneck Ray gas tank paint stand:
After washing/sanding/cleaning the skid plate, primer then paint. More Redneck Ray paint stand ideas:
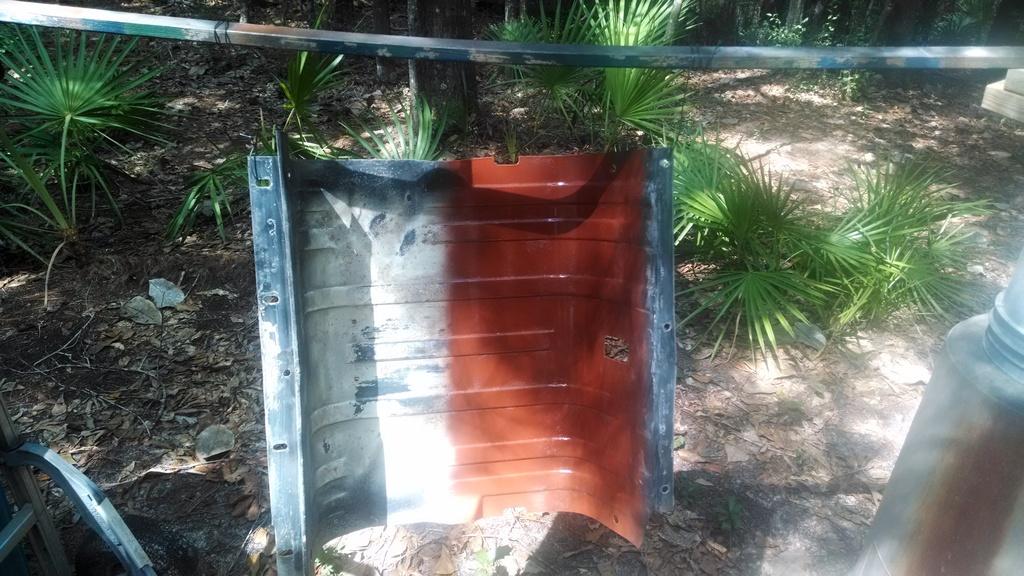
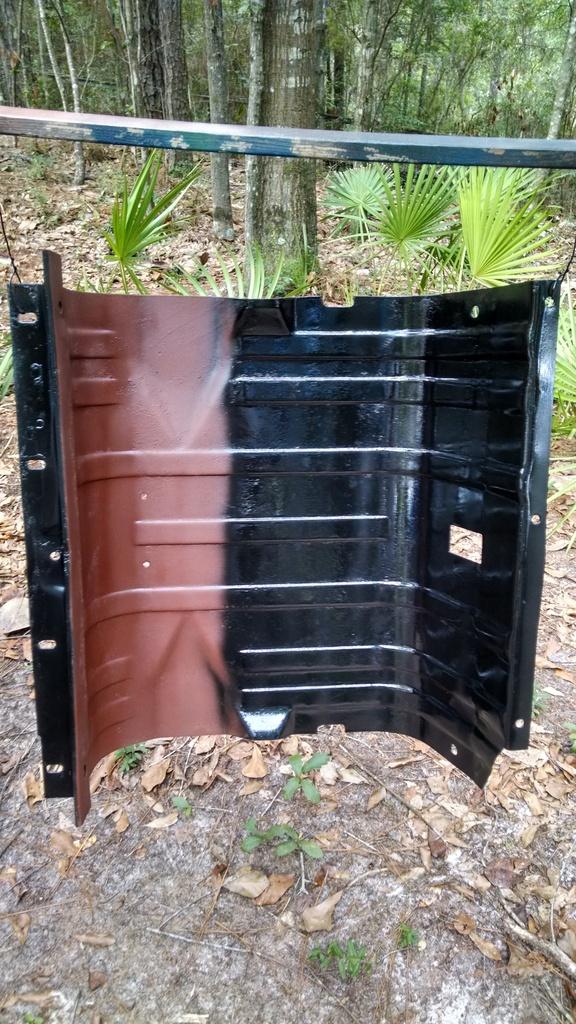
All the freshly pained goodies, assembled. Gas tank, skid plate, and strap. I cleaned and reused the factory plastic liner pieces.
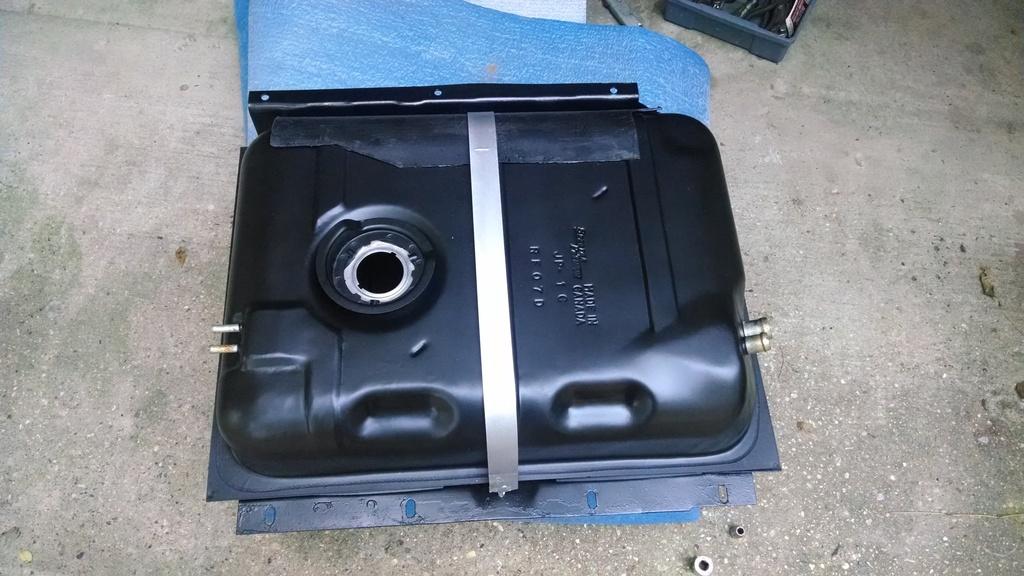
I reused Josh's sending unit, but I replaced the plastic float with a brass/foam SW unit I had. No more cracked float worries. I also installed a new rubber O-ring/lock plate. I also cleaned both ends of the ground wire, and repaired the sending unit wire.
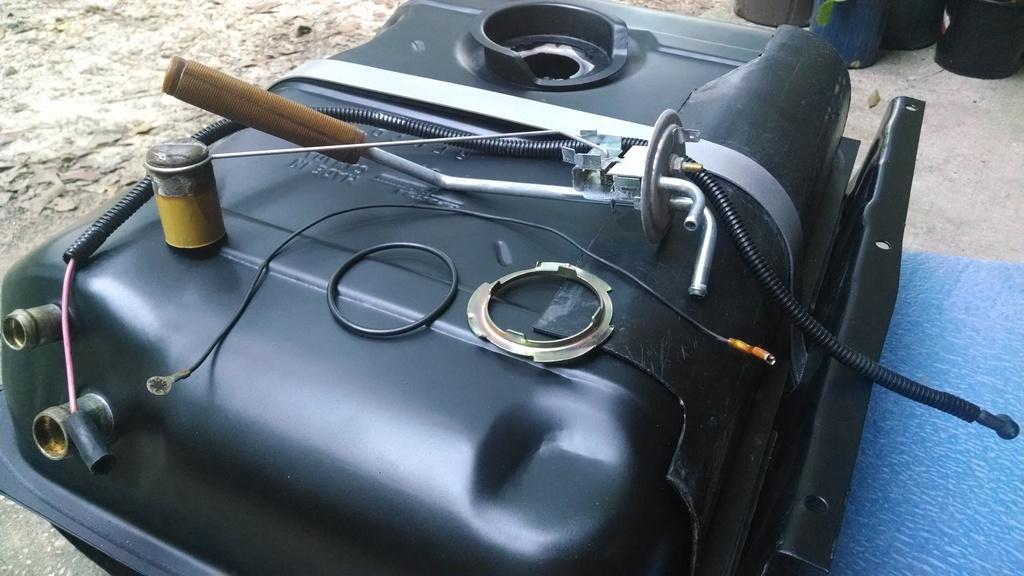
All put together, ready to install:
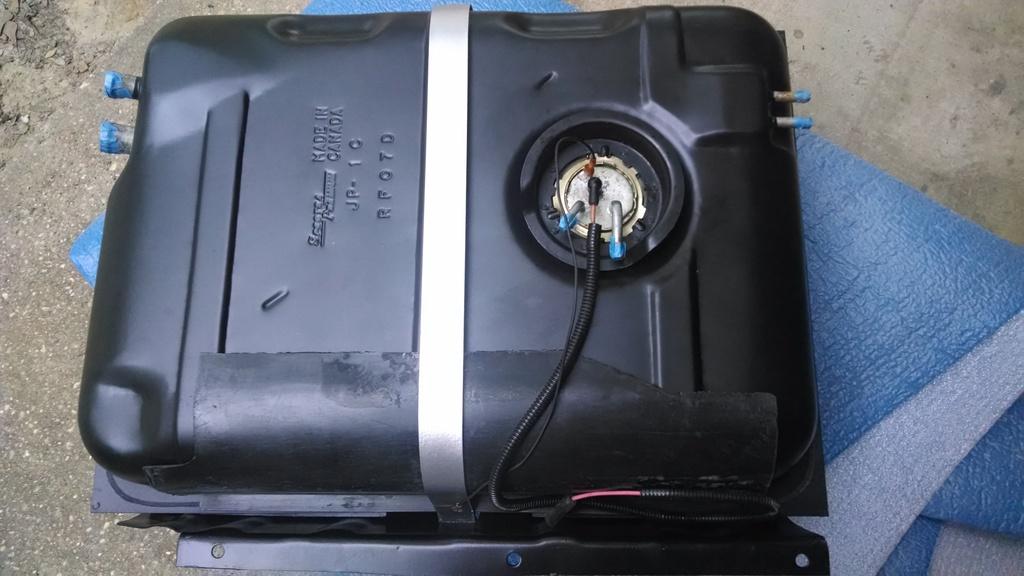
I bolted the newly refreshed gas tank assembly into the Scrambler. I used an air compressor and blew out the frame mounted fuel supply, return, and vent lines. The vent line was plugged up solid at the rear of the Scrambler, I had to clean it out with a coat hanger before it would blow through. I ran new, HP rubber fuel line from the sending unit to the stock fuel lines, both supply and return.
The factory "fill and vent" hoses, passenger side rear, where you put the gas nozzle, were dry rotted. The vent line was cracked, another potential source of fuel leakage. I ordered new hoses, but I cant install them until I "fix" the roll bar mounting bolt nuts. The new hoses will run directly below them.
I also had to rebuild all of this:
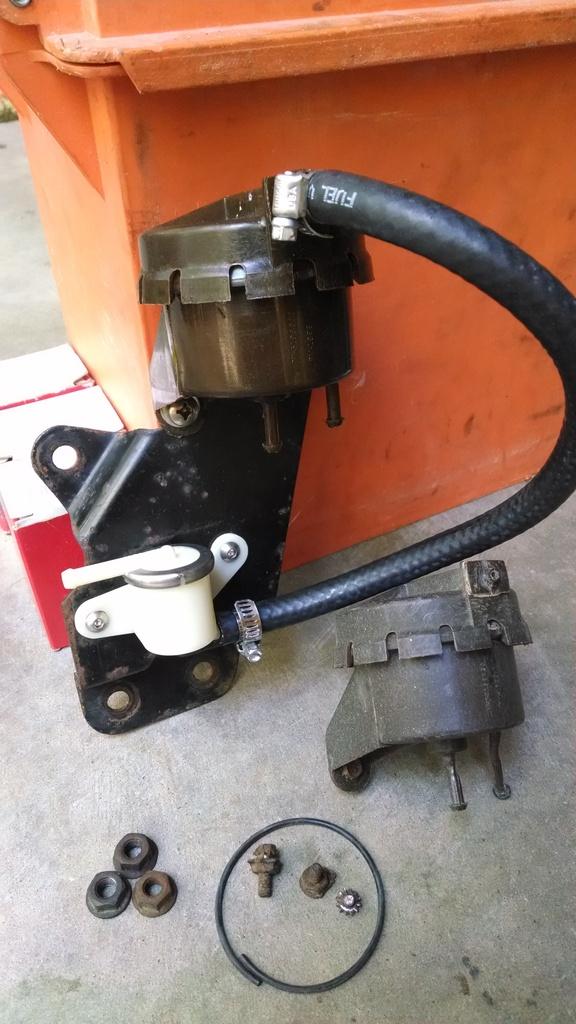
The liquid check valve's (brown thing at top) nozzles were broken off. Josh had a used unit, which was OK. I cleaned it out, bolted it up. I had to replace the O-ring, both of his were tore. I pulled the O-ring from the liquid check valve that came in my now red Scrambler, I upsized to a 20 gallon, didn't need it anymore. The mounting bolts that came in Josh's used/replacement liquid check valve were rust seized, and cracked the plastic at the mounting ears. I got them out, tapped the two holes in the metal plate to 1/4", and used 1/4" machine screws/nuts to secure it to the mounting bracket, problem solved. So now, he has a functioning liquid check valve.
The factory roll over check valve (white thing in bottom of above picture) was rusted, but Josh supplied a plastic "Delorean" replacement, should work fine.
I bolted this "unit" into the cubby hole behind the driver side tail light. I can't run the two vent lines from the gas tank to the liquid check valve, and I cant run the vent line from the roll over check valve, until I resolve the roll bar mounting bolt nuts. The new hoses will run directly below them.
For now, the fuel tank stuff is good to go. Running the new lines/fill+vent hoses will be easy, after I fix the roll bar mounting nuts. All this work should clear up all of the fuel leaking issues Josh was having.
This work was fairly easy, the painters did not mess with any of this stuff!!!!!
When we picked up the Scrambler from Josh, the gas tank/skid plate and other associated parts and pieces were not attached. I believe Josh had some issues of gas leaking from the top of the tank. This is what I started with:
A newer, unpainted, rust free gas tank. A slightly rusty gas tanks strap, the factory plastic liner pieces, and the stock skid plate.
This is probably the source of the gas leak, dry rotted/cracked rubber return line, where it went on the sending unit. I am replacing ALL of the rubber fuel/vent lines on this Scrambler, they all are starting to look like this.
Josh said the fuel gauge was working, but I am still going to repair the sending unit wire!!
I sanded the little bit of rust off the gas tank, taped up the openings, and painted the gas tank. It was bare steel, it would have started rusting soon. Redneck Ray gas tank paint stand:
After washing/sanding/cleaning the skid plate, primer then paint. More Redneck Ray paint stand ideas:
All the freshly pained goodies, assembled. Gas tank, skid plate, and strap. I cleaned and reused the factory plastic liner pieces.
I reused Josh's sending unit, but I replaced the plastic float with a brass/foam SW unit I had. No more cracked float worries. I also installed a new rubber O-ring/lock plate. I also cleaned both ends of the ground wire, and repaired the sending unit wire.
All put together, ready to install:
I bolted the newly refreshed gas tank assembly into the Scrambler. I used an air compressor and blew out the frame mounted fuel supply, return, and vent lines. The vent line was plugged up solid at the rear of the Scrambler, I had to clean it out with a coat hanger before it would blow through. I ran new, HP rubber fuel line from the sending unit to the stock fuel lines, both supply and return.
The factory "fill and vent" hoses, passenger side rear, where you put the gas nozzle, were dry rotted. The vent line was cracked, another potential source of fuel leakage. I ordered new hoses, but I cant install them until I "fix" the roll bar mounting bolt nuts. The new hoses will run directly below them.
I also had to rebuild all of this:
The liquid check valve's (brown thing at top) nozzles were broken off. Josh had a used unit, which was OK. I cleaned it out, bolted it up. I had to replace the O-ring, both of his were tore. I pulled the O-ring from the liquid check valve that came in my now red Scrambler, I upsized to a 20 gallon, didn't need it anymore. The mounting bolts that came in Josh's used/replacement liquid check valve were rust seized, and cracked the plastic at the mounting ears. I got them out, tapped the two holes in the metal plate to 1/4", and used 1/4" machine screws/nuts to secure it to the mounting bracket, problem solved. So now, he has a functioning liquid check valve.
The factory roll over check valve (white thing in bottom of above picture) was rusted, but Josh supplied a plastic "Delorean" replacement, should work fine.
I bolted this "unit" into the cubby hole behind the driver side tail light. I can't run the two vent lines from the gas tank to the liquid check valve, and I cant run the vent line from the roll over check valve, until I resolve the roll bar mounting bolt nuts. The new hoses will run directly below them.
For now, the fuel tank stuff is good to go. Running the new lines/fill+vent hoses will be easy, after I fix the roll bar mounting nuts. All this work should clear up all of the fuel leaking issues Josh was having.
- City
- Biloxi
- State
- MS
Other Random Pictures/Work
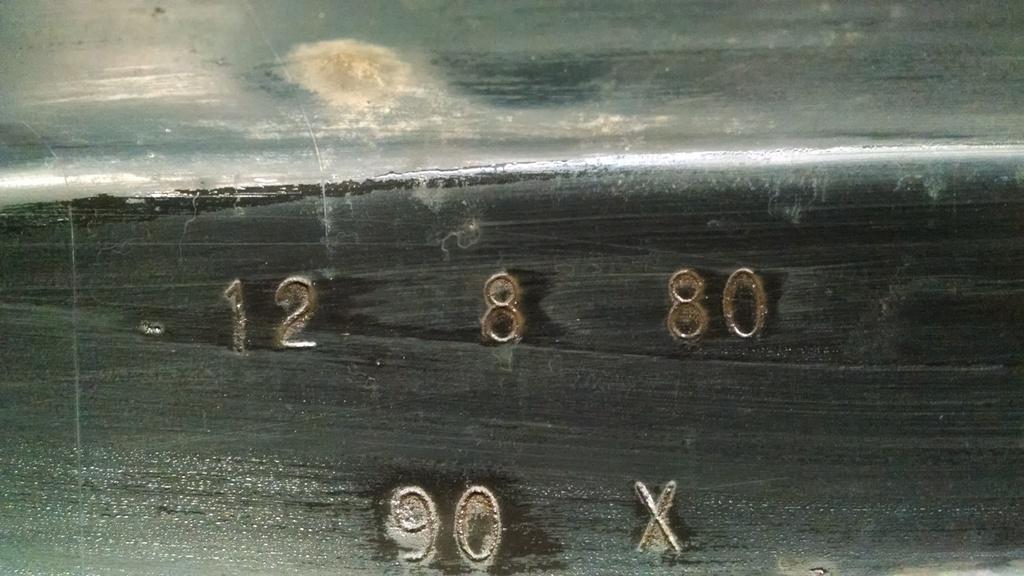
Before I installed the gas tank, I cleaned off the frame cross members that it bolts to. I found this stamp on the forward cross member, never noticed this before:
Also, before bolting in the gas tank, since I am a glutton for punishment..........................
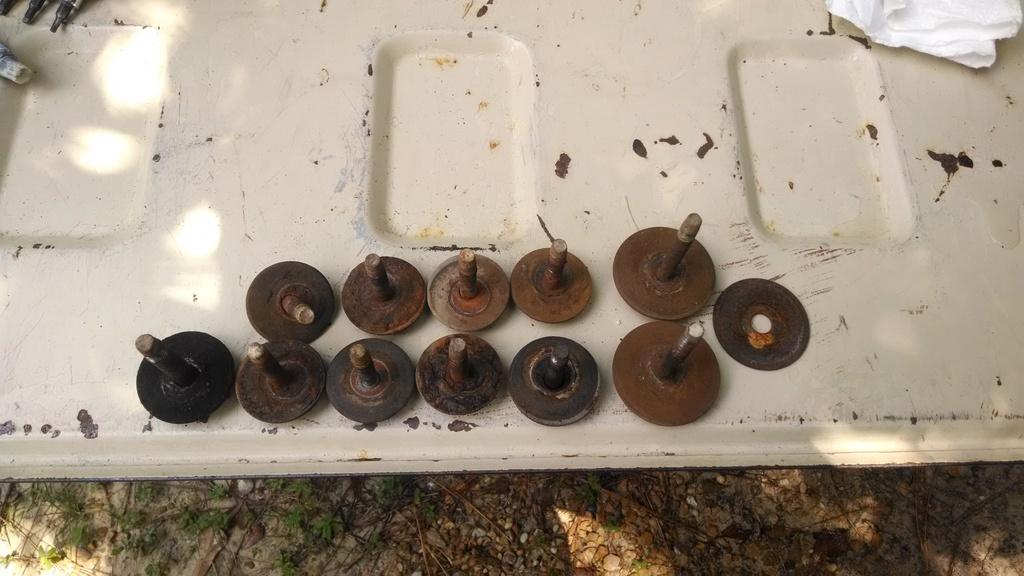
Yep, got them all out, drama ONLY on the passenger side very rear, but I got it in the end. Missing from the picture:
1) grill to frame bolt - it was missing
2) driver side very rear bolt - it was missing
The passenger side very rear captured nut tore loose from its sheet metal enclosure. But, I was able to jam the nut in place with two long screw drivers, heat the bolt with a torch, get the bolt out, re-tap the captured nut, and neatly fold the enclosure back down around it. Problem solved.
All body mount captured nuts were tapped, new bolts installed with anti-seize. All the rubber body mount components need to be changed, but the hard part is done.
A quick summary of how much/where I have spent time:
NOTE - any mention of SS bolt/screw install also included tapping holes (where applicable) and applying antisieze.
Friday, August 21 (6 hours) - Pick up and delivery of Scrambler to my house.
Monday, August 24 (1 hour) - Parts inventory
Tuesday, August 25 (2.5 hours) - Inventoried SS kit contents/drilled out the hood hinge holes the body shop Bondo'd up/installed front bumper SS kit/installed hood hinge SS kit/installed hood latch+support rod SS kit/installed jack bracket SS kit/installed cowl vent SS kit
Wednesday, August 26 (2.5 hours) - installed antennae mount SS kit/installed door strap post brackets/installed license plate bracket and tapped tail light mounting bolt threads/installed spare tire carrier SS bolt kit/re-installed the upside down tail gate hinges, tapped threads, applied anti-seize/disassembled and cleaned gas filler assembly
Thursday, August 27 (1 hour) - installed gas filler SS kit and installed filler neck/got supplies
Friday, August 28 (5 hours) - installed ground straps, battery to body, battery to block, block to frame/re-wired solenoid/1st, failed start attempt/worked on stuck ignition cylinder, loosened it up
Saturday, August 29 (5 hours) - gas tank components clean and paint/steering column disassembly
Monday, August 31 (1 hour) - more steering column disassembly
Wednesday, September 2 (2 hours) - more steering column work/2nd, successful engine start attempt!!!!!!!!!!
Friday, September 4 (3 hours) - gas tank sending unit to tank assembly/more steering column disassembly
Monday, September 7 (7 hours) - finished gas tank work, installed gas tank/body mount bolt removal
Tuesday, September 8 (2 hours) - tapped body mount nut threads/installed new bolts
Saturday, September 12 (5 hours) - rebuilt gas tank vent stuff/roll bar mounting nuts
Sunday, September 13 (3 hours) - installed gas tank evap stuff/roll bar mounting nuts
That about brings me up to date. Before I go, one last job at the body shop:
"Hey Bubba, you reckon he needs them threaded holes for the hood hinges?"
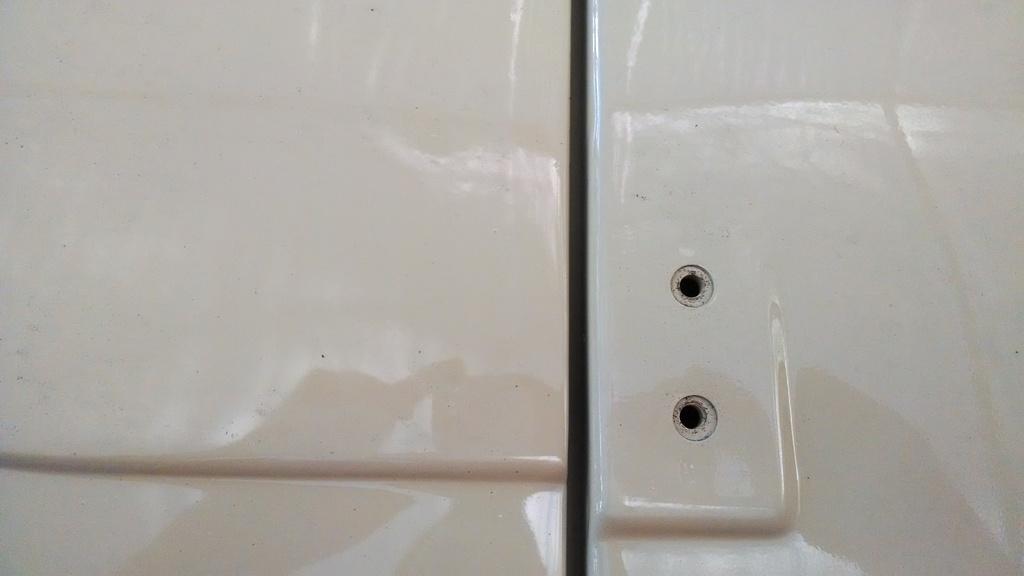
That's it for now
Before I installed the gas tank, I cleaned off the frame cross members that it bolts to. I found this stamp on the forward cross member, never noticed this before:
Also, before bolting in the gas tank, since I am a glutton for punishment..........................
Yep, got them all out, drama ONLY on the passenger side very rear, but I got it in the end. Missing from the picture:
1) grill to frame bolt - it was missing
2) driver side very rear bolt - it was missing
The passenger side very rear captured nut tore loose from its sheet metal enclosure. But, I was able to jam the nut in place with two long screw drivers, heat the bolt with a torch, get the bolt out, re-tap the captured nut, and neatly fold the enclosure back down around it. Problem solved.
All body mount captured nuts were tapped, new bolts installed with anti-seize. All the rubber body mount components need to be changed, but the hard part is done.
A quick summary of how much/where I have spent time:
NOTE - any mention of SS bolt/screw install also included tapping holes (where applicable) and applying antisieze.
Friday, August 21 (6 hours) - Pick up and delivery of Scrambler to my house.
Monday, August 24 (1 hour) - Parts inventory
Tuesday, August 25 (2.5 hours) - Inventoried SS kit contents/drilled out the hood hinge holes the body shop Bondo'd up/installed front bumper SS kit/installed hood hinge SS kit/installed hood latch+support rod SS kit/installed jack bracket SS kit/installed cowl vent SS kit
Wednesday, August 26 (2.5 hours) - installed antennae mount SS kit/installed door strap post brackets/installed license plate bracket and tapped tail light mounting bolt threads/installed spare tire carrier SS bolt kit/re-installed the upside down tail gate hinges, tapped threads, applied anti-seize/disassembled and cleaned gas filler assembly
Thursday, August 27 (1 hour) - installed gas filler SS kit and installed filler neck/got supplies
Friday, August 28 (5 hours) - installed ground straps, battery to body, battery to block, block to frame/re-wired solenoid/1st, failed start attempt/worked on stuck ignition cylinder, loosened it up
Saturday, August 29 (5 hours) - gas tank components clean and paint/steering column disassembly
Monday, August 31 (1 hour) - more steering column disassembly
Wednesday, September 2 (2 hours) - more steering column work/2nd, successful engine start attempt!!!!!!!!!!
Friday, September 4 (3 hours) - gas tank sending unit to tank assembly/more steering column disassembly
Monday, September 7 (7 hours) - finished gas tank work, installed gas tank/body mount bolt removal
Tuesday, September 8 (2 hours) - tapped body mount nut threads/installed new bolts
Saturday, September 12 (5 hours) - rebuilt gas tank vent stuff/roll bar mounting nuts
Sunday, September 13 (3 hours) - installed gas tank evap stuff/roll bar mounting nuts
That about brings me up to date. Before I go, one last job at the body shop:
"Hey Bubba, you reckon he needs them threaded holes for the hood hinges?"
That's it for now

- City
- Dexter
- State
- MI
Now, the 64 million dollar question: Do I:
A) Get one of my buddies over to put a small tack on each nut, to keep it in place, risking damaging the floor finish.
B) Get some JB Weld (or similar) to secure these 5 nuts, no risk of damaging the freshly painted/lined floor.
Why not weld the nuts to the underside of a piece of angle/strap/plate with holes drilled to match? Leave it loose and you'd have to start both bolts, but then they'd be easy to run in and pretty easy to remove.
- City
- Biloxi
- State
- MS
Roll Tide!!!!
Well done Raymond!
Yep, LOL, appreciate it

Why not weld the nuts to the underside of a piece of angle/strap/plate with holes drilled to match? Leave it loose and you'd have to start both bolts, but then they'd be easy to run in and pretty easy to remove.
Good idea, that would work on the rear most pair of nuts, no problem
But, the front pair of nuts on each side are inaccessible if you still have/using the plastic splash guards on each side. They are easy enough to remove, but you destroy the plastic rivets every time you remove them, and the plastic/rubber is easy to damageIn the end, I went ahead and JB Welded 5 new nuts in place. Should work out fine.
On another positive note, the body shop that painted this Scrambler is now out of business
 And, Josh found a guy to rummage thought the shop, and he was able to find some of the missing stuff, including the steering column mounted shift quadrant thing


- City
- Biloxi
- State
- MS
- City
- Biloxi
- State
- MS
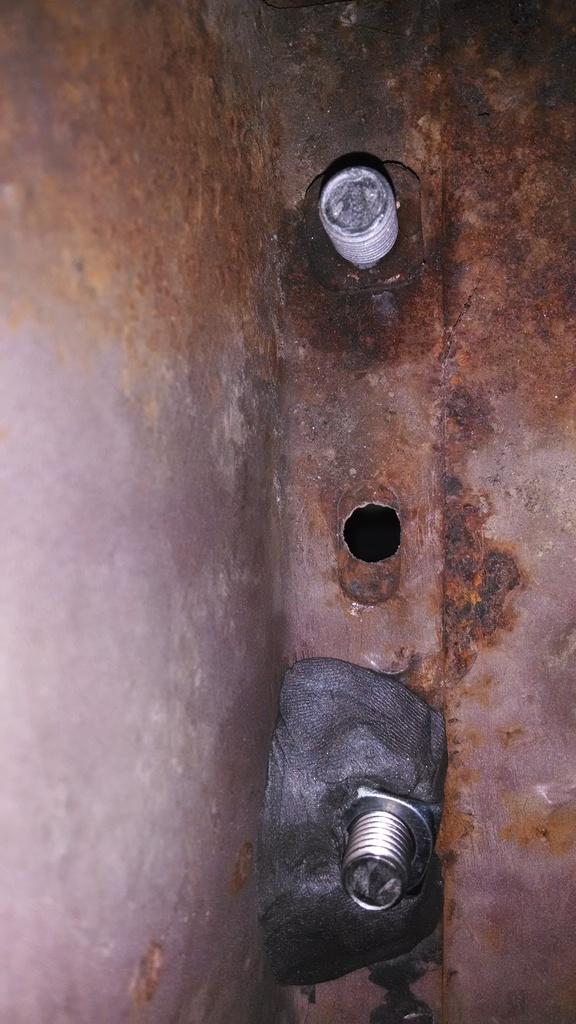
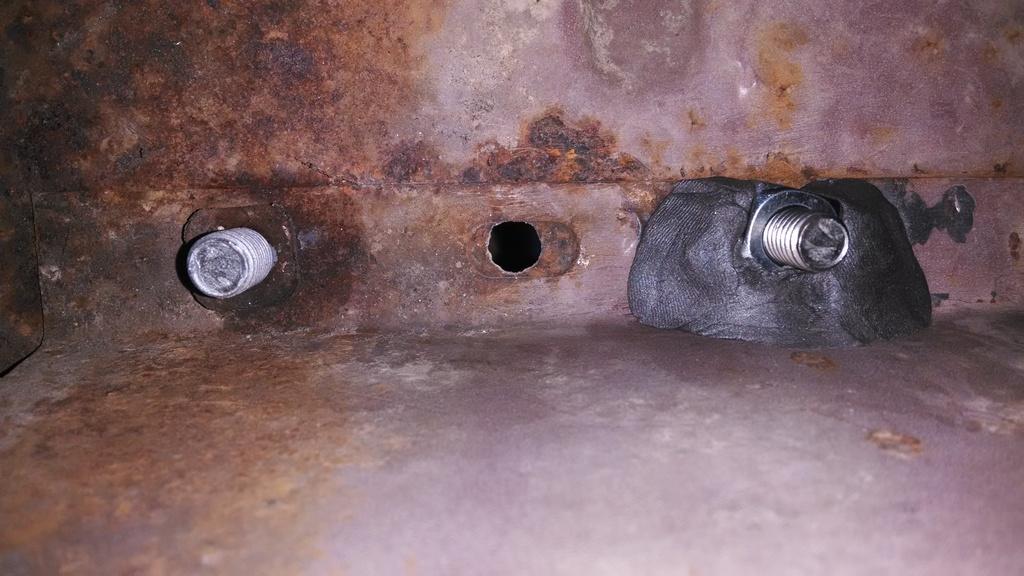
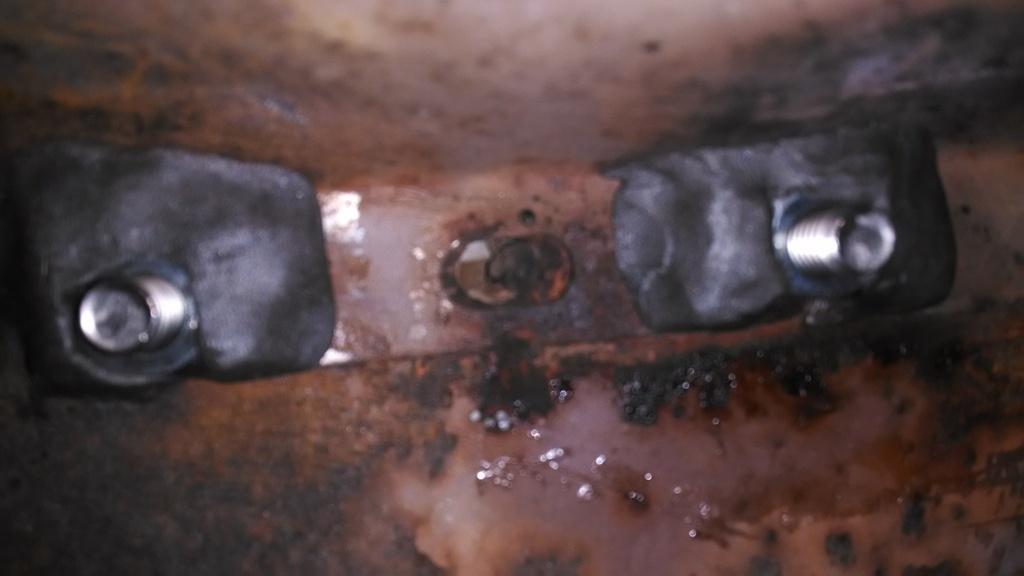
A few quick pictures of the "repaired" rear roll bar leg underbody mounting nuts. From the factory, all the little tack weld does is keep the nut from falling off/spinning, this will do the same, just not as discreetly.
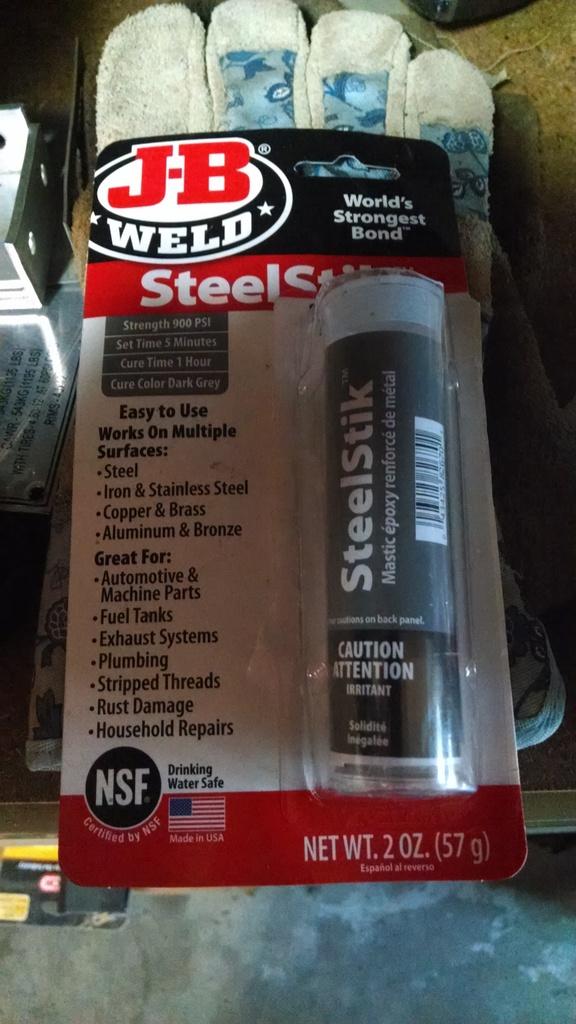
My "weapon of choice", easy to use, no risk to topside paint:
Stock nut, little tack weld, new nut, JB welded in place, it wont spin (maybe if you hit it with an impact):
Since I have done some "work" in this area, I am going to knock the surface rust off, prime, and paint these areas. After that, I can:
1) Reinstall the plastic splash shields
2) Install tank vent/fill hoses on passenger side
3) Install vent hoses on driver side
That's it for now
My "weapon of choice", easy to use, no risk to topside paint:
Stock nut, little tack weld, new nut, JB welded in place, it wont spin (maybe if you hit it with an impact):
Since I have done some "work" in this area, I am going to knock the surface rust off, prime, and paint these areas. After that, I can:
1) Reinstall the plastic splash shields
2) Install tank vent/fill hoses on passenger side
3) Install vent hoses on driver side
That's it for now
- City
- Biloxi
- State
- MS
Moving forward again, finished up the body shop butchered up rear roll bar attaching nuts.
A bit of primer to protect the metal:
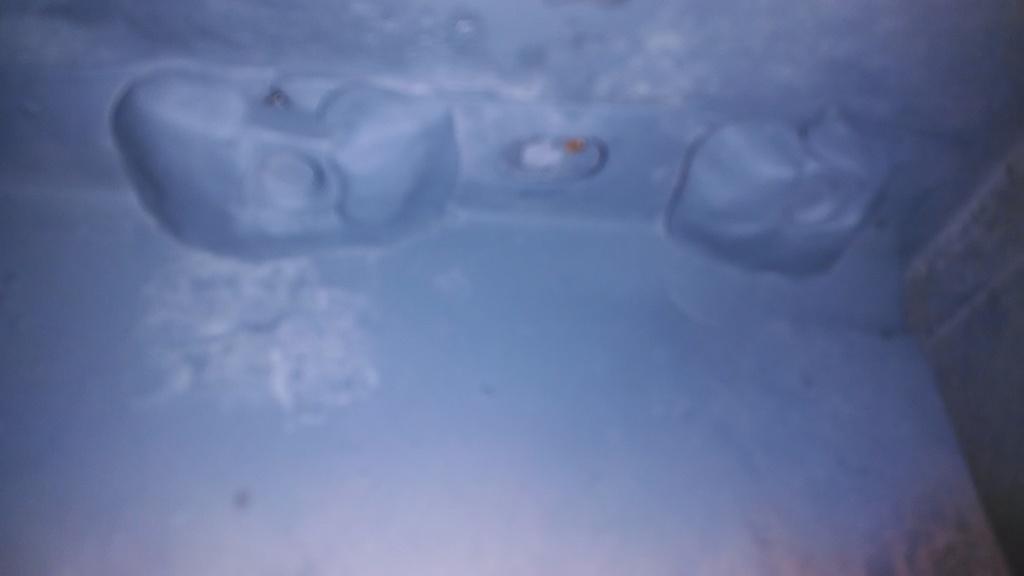
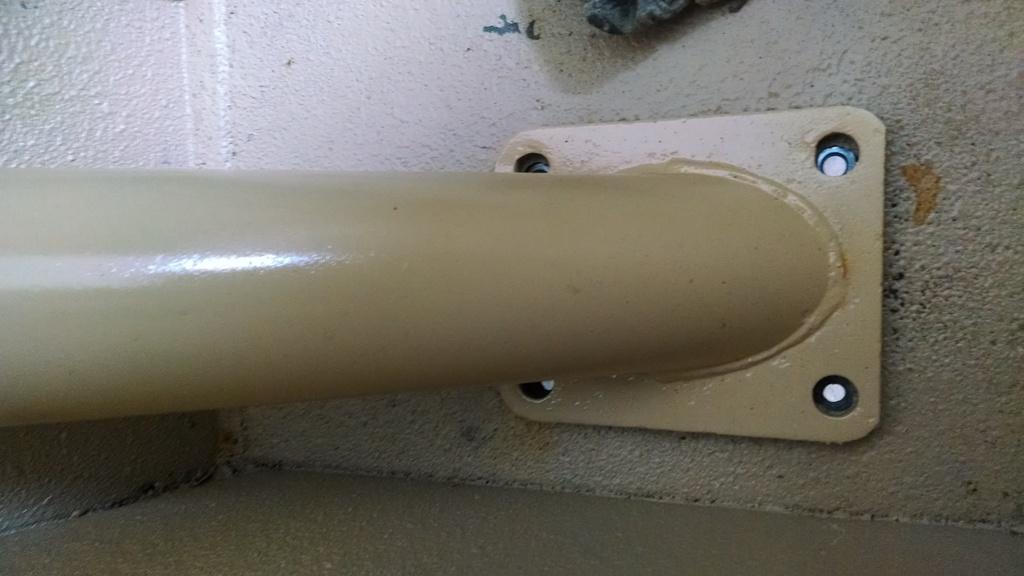
And from above, my careful measurements paid off, all the roll bar holes aligned with the underbody nuts!!!!
With this task complete, I was able to:
1) Install the gas tank fill/vent hoses
2) Install the gas tank to liquid check valve to roll over check valve to vent line hoses (9' of new 1/4" fuel line!!!!!!)
3) Install the underbody plastic splash shields
4) Install the rear roll bar mounting bolts
So, besides the steering column that I still need to clean/reassemble, moving forward from the rear, the next area that needs attention:
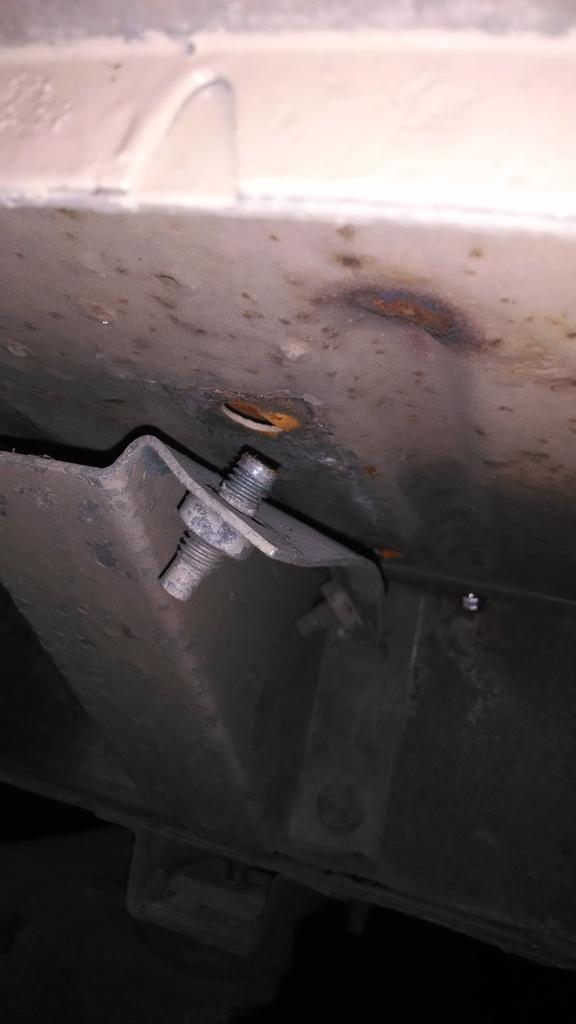
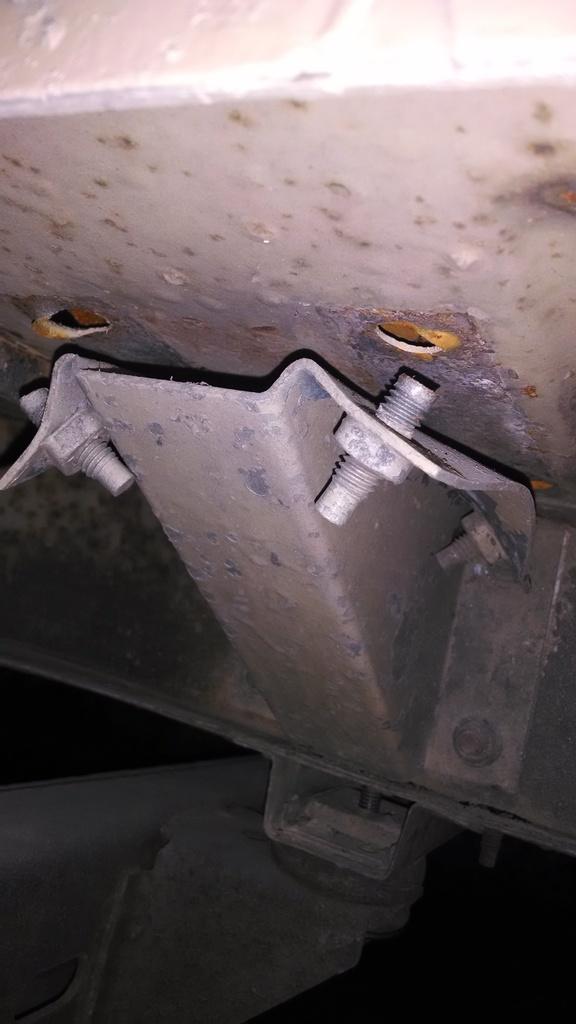
Hip Hip HooRay body shop b@st@rds, they struck again!!!!!!!!! Well, this will be easier to repair. I can un bolt these brackets from the body tub, negating any potential paint damage, remove the broke bolts with a torch/drill press/whatever will work, re-paint the brackets, and reinstall. And, so far, only one of these eight nuts are broke off.
My plan for this weekend, besides going to the Saints game Sunday:
1) remove/repair the front roll bar under body brackets
2) start cleaning/reassembling the steering column
That's it for now
A bit of primer to protect the metal:
And from above, my careful measurements paid off, all the roll bar holes aligned with the underbody nuts!!!!
With this task complete, I was able to:
1) Install the gas tank fill/vent hoses
2) Install the gas tank to liquid check valve to roll over check valve to vent line hoses (9' of new 1/4" fuel line!!!!!!)
3) Install the underbody plastic splash shields
4) Install the rear roll bar mounting bolts
So, besides the steering column that I still need to clean/reassemble, moving forward from the rear, the next area that needs attention:
Hip Hip HooRay body shop b@st@rds, they struck again!!!!!!!!! Well, this will be easier to repair. I can un bolt these brackets from the body tub, negating any potential paint damage, remove the broke bolts with a torch/drill press/whatever will work, re-paint the brackets, and reinstall. And, so far, only one of these eight nuts are broke off.
My plan for this weekend, besides going to the Saints game Sunday:
1) remove/repair the front roll bar under body brackets
2) start cleaning/reassembling the steering column
That's it for now
- City
- Biloxi
- State
- MS
More work on Josh's Scrambler this weekend. While finishing some gas tank work, found some more interesting wiring, fairly common with old Jeeps, this is the rear tail light wiring:
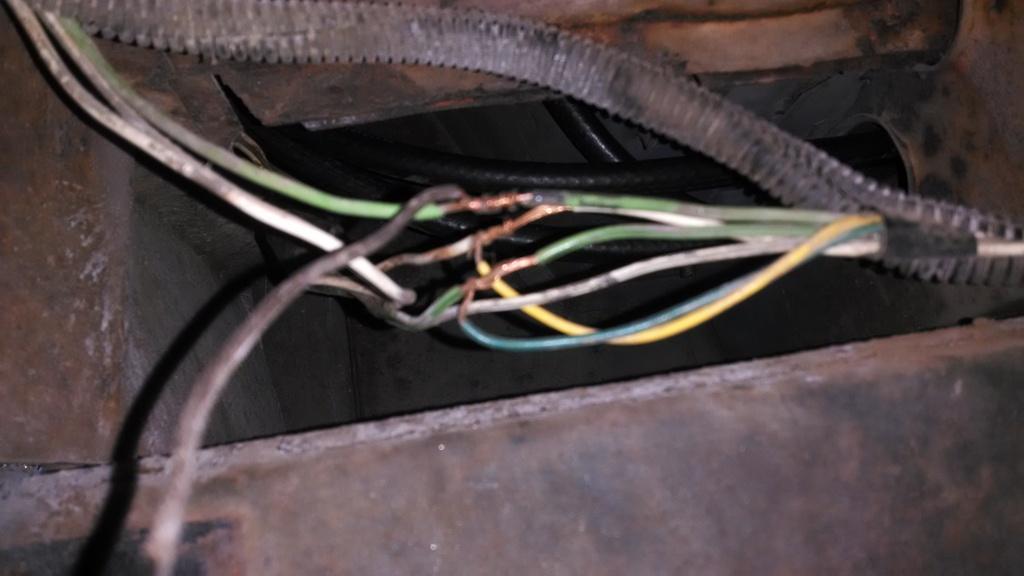
So, once I finish messing with the roll bar mounting, then put the steering column back together, I will tackle the wiring. I was planning on pulling the dash off anyway, so a little bit more wiring work wont be a big deal.
Totally Inexcusable...............Roll Bar Mounting, Part #2
If you thought the rear roll bar mounting was a fiasco, take a look at the front mounting brackets!!!!
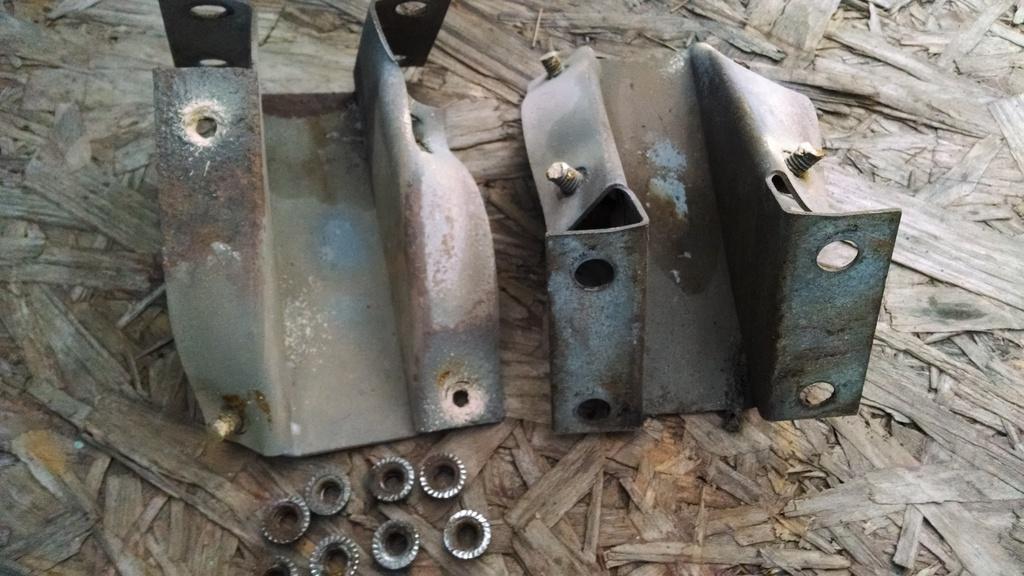
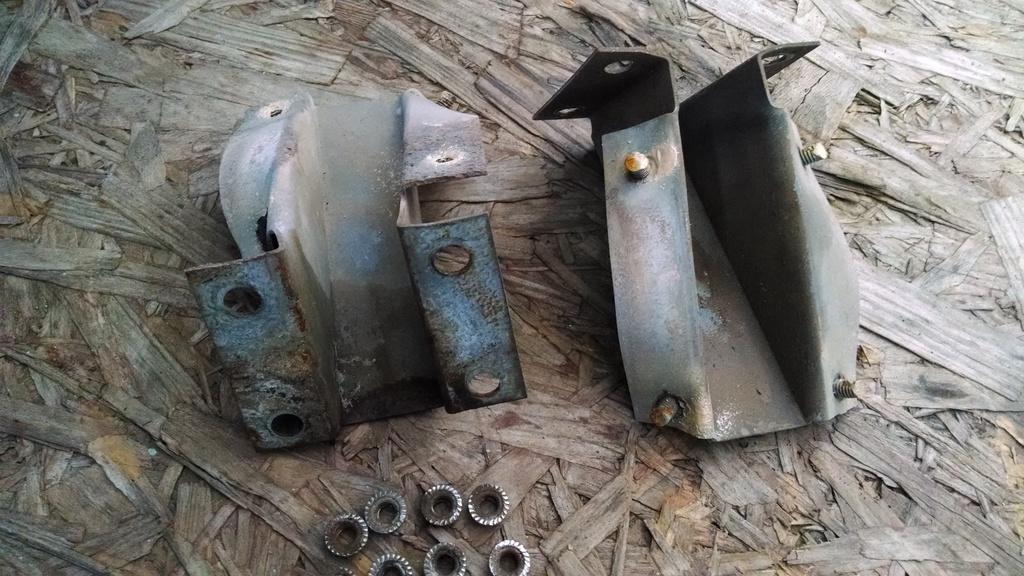
Yep, another "yeah body shop moment". Since these brackets don't grow on trees, I spent all day Saturday repairing them.
First, using my Tan Scrambler, a piece of 3/8" plate steel, a bottle jack and a C-clamp, we have "Redneck Ray"" press:
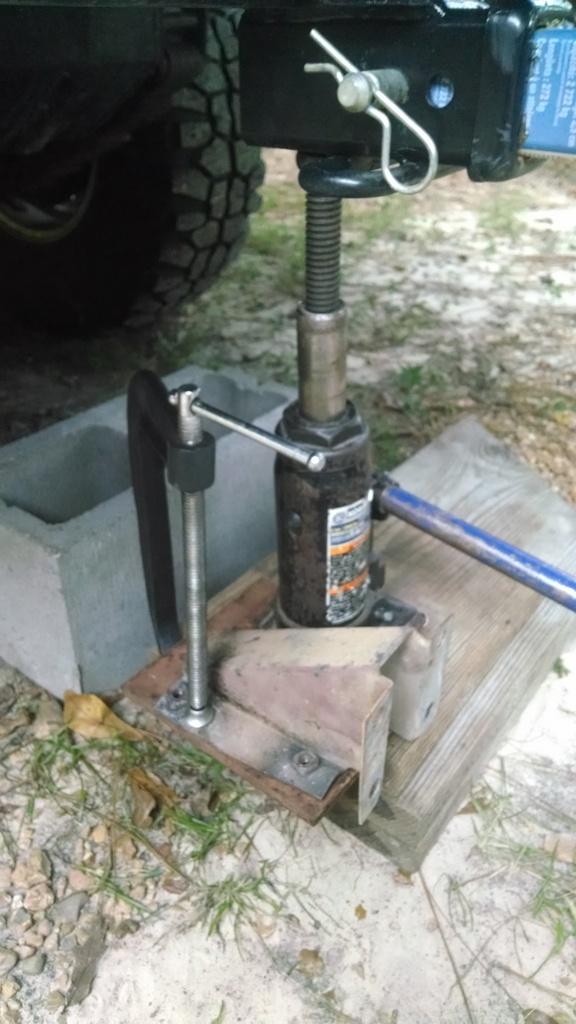
That got them close to back to shape. Next, drilled holes in the 3/8" plate, used some bolts to finish straightening out the brackets:
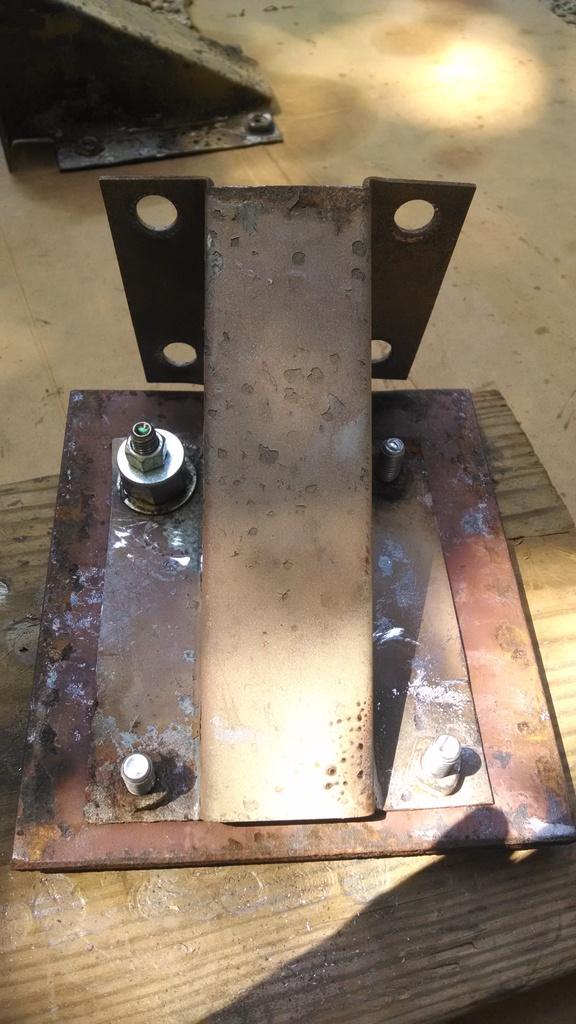
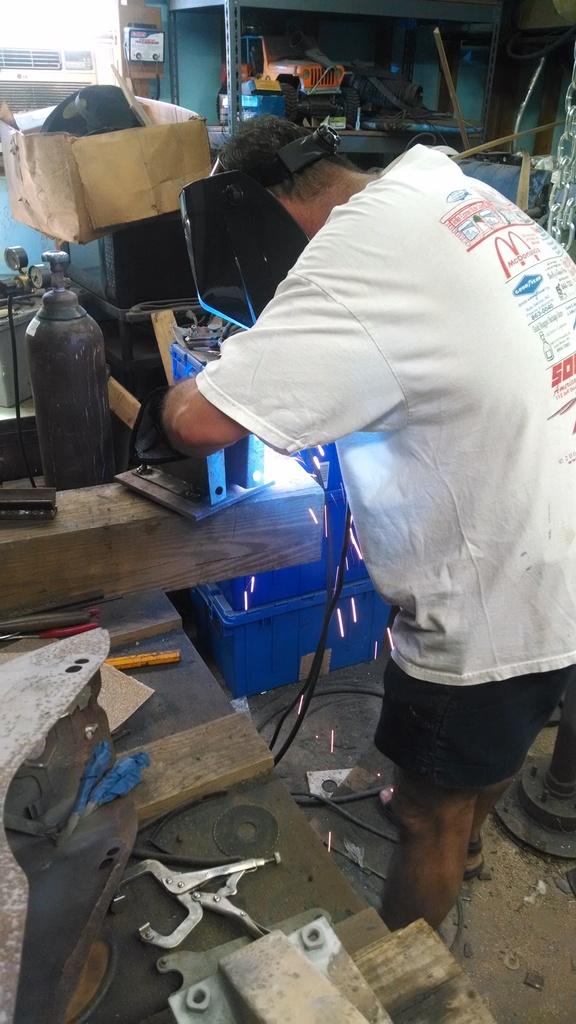
Only one of the factory nuts was broke off, but, while straightening the brackets, the other nuts tack welds were weakened. So, my good buddy Chuck welded on one new nut, and we re-tacked all the other nuts:
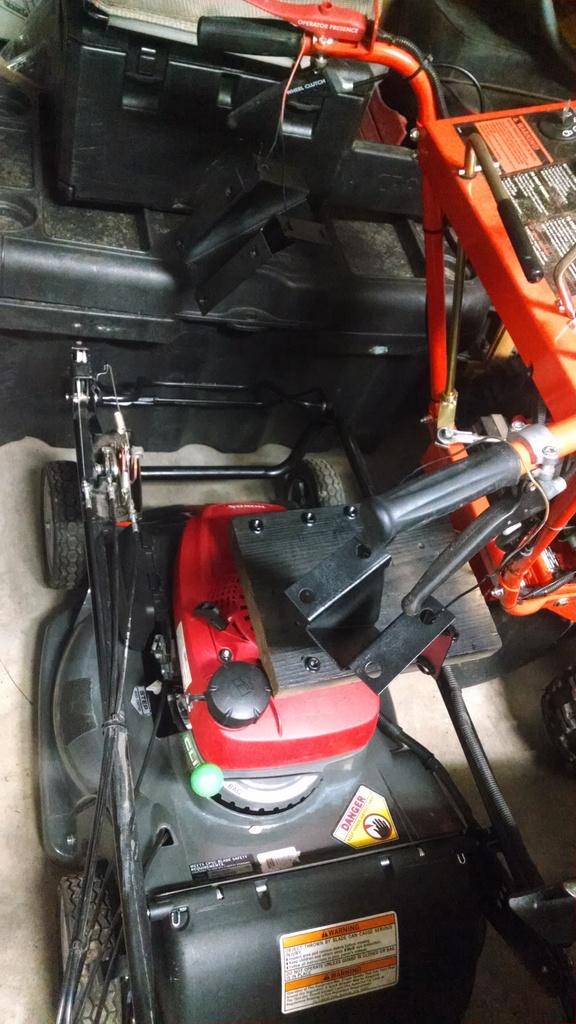
Sand blasting, priming, painting, I now have some usable brackets:
I also sanded/spot primed under the bed, where these brackets go, to prevent rust:
The rust that is visible in the above picture is on the bottom of the roll bar feet. The body shop blasted feet bottoms, but did not paint them. I will have to paint this area, too.
That's it for now
So, once I finish messing with the roll bar mounting, then put the steering column back together, I will tackle the wiring. I was planning on pulling the dash off anyway, so a little bit more wiring work wont be a big deal.
Totally Inexcusable...............Roll Bar Mounting, Part #2
If you thought the rear roll bar mounting was a fiasco, take a look at the front mounting brackets!!!!
Yep, another "yeah body shop moment". Since these brackets don't grow on trees, I spent all day Saturday repairing them.
First, using my Tan Scrambler, a piece of 3/8" plate steel, a bottle jack and a C-clamp, we have "Redneck Ray"" press:
That got them close to back to shape. Next, drilled holes in the 3/8" plate, used some bolts to finish straightening out the brackets:
Only one of the factory nuts was broke off, but, while straightening the brackets, the other nuts tack welds were weakened. So, my good buddy Chuck welded on one new nut, and we re-tacked all the other nuts:
Sand blasting, priming, painting, I now have some usable brackets:
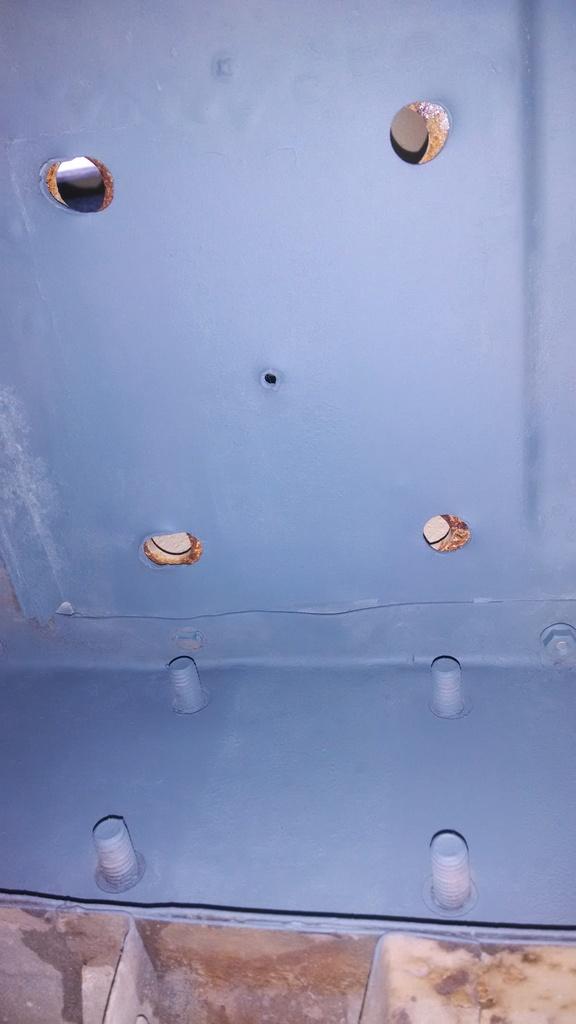
I also sanded/spot primed under the bed, where these brackets go, to prevent rust:
The rust that is visible in the above picture is on the bottom of the roll bar feet. The body shop blasted feet bottoms, but did not paint them. I will have to paint this area, too.
That's it for now