• Notice for iPhone users: DO NOT use the image size reduction option when uploading photos to the forum. This causes portrait images to post as landscape. We have added a warning to the image insert pop-up as well.

Randyzzz Scrambler Restification Thread!

jeffs396 said:
and some under-tub & frame pics when you get it pulled! ;)

Thanks!

I am ready to pull the tub, but I have to get the Wagoneer finished first, so it might be a week or two....
 
wheel backspacing?

Randy

I'm building pretty much the same axle - what's the backspacing on those front wheels? I want to get them tucked in as close as possible without rubbing steering components.

Thanks
Brian
 
They're generic 15X10 wheels...they have a 3 3/4 from the rear lip to the backside of the mounting surface. So a -44mm offset.
 
Transmission progress

I posted up yesterday about my good fortune to score a transmission and get the Novak tailshaft installed and a mini-overhaul at the same time. So...here's pics of the adapter install, and with the 241OR bolted up. Don't know how I will clock it yet, I am going to wait until it's in the frame for the final bolt up. Just have to sing the praises of Novak again- the adapter fit like a glove.

Here's the trans with the output shaft installed. The tone ring is for the 5.3 speed sensor. It comes pre-installed on the shaft.
***lost***

Here's the speed sensor installed. The white goop is the supplied thread sealant. The nut I made myself- maybe I'm just too particular, but I felt some sort of mechanical locking device was needed. Setting up the proper gap was fairly easy- I won't go into the steps but it turns out lightly bottoming the sensor against the tone ring and then backing it out slightly more than 1/2 turn gives the proper air gap. (basically unscrewing the sensor counterclockwise from 12:00 to 4:00)
***lost***

So...adapter is bolted to the transmission, and the seal extension is installed. A 241OR is a short output case, so a seal spacer is needed. Long input cases don't need this extension, and use the seal already installed in the adapter. This is a newer design, the adapter is "dry"- the transmission fluid is retained by the seal from the adapter to the t/c input shaft. This eliminates the need to replace the T/C input seal with a double lipped seal, and also minimizes the possibility of leakage.
***lost***

Here's the 241OR installed. This is at the next to fully clocked position. Novak gives 4 different clockings. This position is close to vertical on the T/C shifter housing.
***lost***

Close up of the adapter. (I will install lock washers on the T/C studs when i determine proper clocking.) The adapter is fairly short and there is plenty of clearance between the T/C front output and the 4L60E case. Overall I'm very pleased with the installation.
***lost***
 
Last edited:
Ok...jeepinarkansas posted pics of his beer fridge, so here's mine. Got it at a garage sale for $25.00:D

attachment.php


No keg, just bottles.

attachment.php


I have a cool beer sign too- it was left in the metal bin at work, so I grabbed it!

attachment.php
 
looks like your making some good progress too. Doesn't matter about having a keg, it matters to have a good selection of beer close at hand. You probably have access to a lot of good microbrews that aren't available here in Arkansas.
Jake

cool sign btw
 
Got some wiring work done over the past few days. I think I'm cross-eyed from reading the schematics and following the wires, but I am confident I have a good handle on it. I removed all the wires not needed, left a few that might be useful in the future, and then re-wrapped the looms. Still have to recover them.

I now have about 8 different wire bundles leading to fuses, 6 wires leading to various external inputs, such as starter, fuel pump relay,cruise,brake switch, tach..., and the wires for the MIL and OBDII connector. I'm going to try and either find a suitable power distribution center at the junkyard, or make my own using a Pelican waterproof case and fuse panels from Waytek Wire.

I still am wondering if I should just bypass the PCM for the start function and run it off the key switch like the Scrambler was stock. The other option is to run it like it was in the Chev, the ign switch signals the PCM which then initiates and controls the starter through a relay. Tap the key, and the PCM takes over and cranks until it starts or times out. This opens up the possibility of remote start (great on those freezing days)too! Any ideas either way?

Here's the pics...sorta boring.

Back together again-
attachment.php


This is where the fuse/relay panel goes-
attachment.php


PCM connectors. Still need to remobve the unused wires and plug the connector.
attachment.php


The last two are of some Waggy progress- if you've ever used a FSJ shifter, you know the little flag shifter on the floor and the switch on the dash suck. So, I grafted in a Chev pickup 4WD shifter and housing, seeing as I'm using a 241c case. It works like a champ! Looks like it belongs there too- fit like a glove. Might be an option for other Jeeps, too....

attachment.php


attachment.php
 

Attachments

  • Wiring harness 005.jpg
    Wiring harness 005.jpg
    48.3 KB · Views: 924
Awesome. I think your brave to tackle the wiring like that. Did your Scrambler have an auto before you gutted it? What I am getting at is the brake switch issue. I will need a new switch apparently to send a signal that will lock up the torque converter. What switch should I get? One from a jeep w/ an auto? Scott Anderson visited me the other day and brought that to my attention.
 
Mine had a manual to begin with. I found an auto pedal assy and just swapped the shaft and brake pedal.

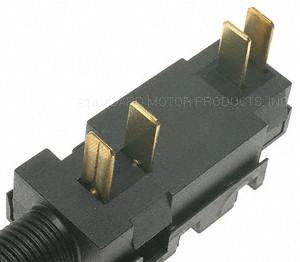
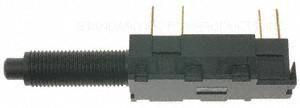
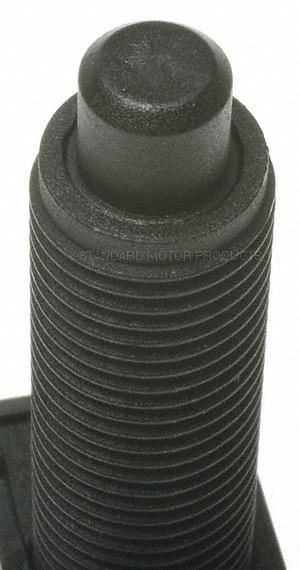
You can address the switch one of two ways. You can use your existing switch and wire in a relay to give you the TCC signal. Or you can get a 4 prong brake switch, I am using one from a 74 Chev pickup with cruise. Standard Brand part number is SLS159T. It has the 2 standard contacts that close when the pedal is pressed, and another two on the back that go open when the pedal is pressed. Here's a pic and a link...

http://c2c.activant.com/ctoc/index.jsp?ID=dEz1sGyk_BU5_Oy9_CUZPM2FCV1Q6ZChqVnRaLU0A

612714749-1.jpg

1010857274-1.jpg

818118443-1.jpg


Here's how to wire the switch...or the relay. Go to page 9 after this downloads- it's from Painless Wiring. I thought the switch was an easier, more bulletproof design, plus it's how the factory does it.

http://www.painlessperformance.com/Manuals/90530Manual.pdf
 
The day of free stuff...

It was a good Scrambler day today. I went to the junkyard looking for the flex-fuel composition sender- they had one left and the guy I bought the engine from said "I probably should have given that to you- just take it." Score! Then I went to the U-Pull-It yard, and got a handful of wiring harness plugs/ect that I needed both for the Scrambler and the Waggy. Then I found a new Painless O2 sensor bung lying on the ground. Same story there- Just take it! At work, I was looking through the junk harness pile, and found a sweet underhood fuse box and a relay box. Again, free! A local exhaust guy stopped by, and I asked about a Y-Pipe for the Waggy. He said stop by, he's give me one he removed to install headers! And, to add the icing to the cake, a friend called and asked if I wanted an old CJ-7 tub! Start for a jeep trailer!:D I probably should have bought a lottery ticket.....

Now I need to decide if I want to eliminate the underdash fuse panel and have all the fuses in the panel under the hood. Might take a bit more wiring, but I think it would be an extremely sanitary installation! Any thoughts?
 
Randy, I have a 2004 5.3 vortech and a 4l60e from a tahoe in my scrambler with the dana 300 transfer case, with an advanced adapters conversion plate where i ran into trouble was the engine computer codes. i found a performance shop with a dyno and they had the ls1 edit computer software, they used an f-body computer and rewrote the program to eliminate anti theft, cat convetors, and all of the other things a 5.3 would look for. it now runs and shifts like it came from the factory. before that it would barely run, and when it did at full throttle it wouldnt turn more than 2000 rpm. now its a dream and the power is silly!!! Dave:evil:
 
Sounds like what I'm hoping for. I have a guy that is going to do the programming for me. I'd like to buy LS1 Edit, but cant justify the $$ for one program.

Any idea what mileage you're getting?
 
i run 373 gears with 33's, i havent checked lately but i always have the top off and do a good amount of 75mph highway runs my guess would be the 15-16 range. could be alot more with top on and doing the speed limit!!! now im curious though.oh, its one of matts full hard tops. give me a week, i will get a better number for you. dave. p.s. the ls1 edit dyno time was a set it and forget it. no codes from the computer, regardless of weather etc. stock vortech exhaust manifolds into dual straight pipes into flowmasters, no cats.
 
I'm planning on stock Vette manifolds- found them on EBay for $50.00
6834_1JPG-1.jpg

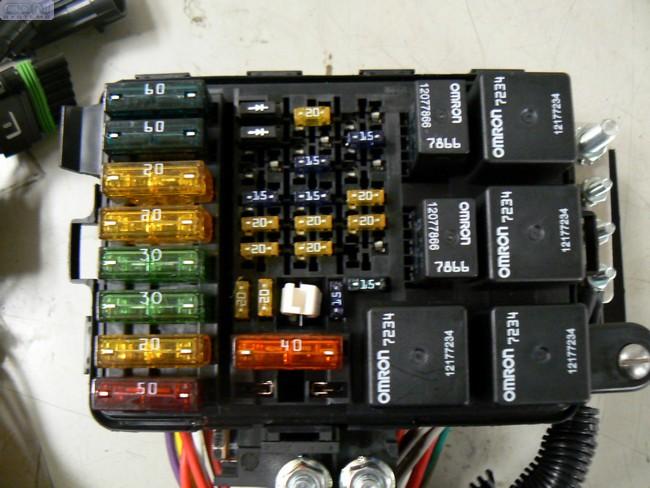
going 2 into 1 around the front, probably 2 1/2-3" tube back, into a cat and then into a stock type Camaro muffler. 4.56's with 36" tires. I'm also keeping the flex fuel sensor, found that might increase mileage a bit. I just can't wait until it's running. I made a big decision today, I'm going to delete my underdash fuse panel in favor of an underhood unit. Just got a killer deal on a police panel- $55.00
I29Q0094-1.jpg

Figured the newer vehicles use underhood power distribution systems, and this panel should have enough capacity. It's also rated for -40 to +220 degrees...280 amps, 6 relays, and 18 circuits. I'm also going to use relay switched power for most things so there's minimal load on the ignition and headlight switches. I'm also going to replace the stock headlight switches with Carling rockers. Going for the hi-tech look.

I always liked this Jeep dash...It's a Jeepster, not a CJ.
jeep_int_104.jpg
 
Exhaust Manifolds-

Last post I showed a pic of the manifolds I got off EBay. They are off of an 05 and up LS2 6.0 out of a Corvette. They came yesterday and I bolted them up. The clearance looks good, the angles look good, and as an added bonus both manifolds are pre-drilled for O2 sensors! They fit similar to shorty headers, but (hopefully) without the header leaks.

Brand new take offs, $49.95 for the pair!:D Here's a link, in case you're interested in a set...he has 6 left.
http://cgi.ebay.com/ebaymotors/_Car...c0.m245&_trkparms=72:1171|65:12|39:1|240:1318

attachment.php


attachment.php


attachment.php


attachment.php
 
Last edited:
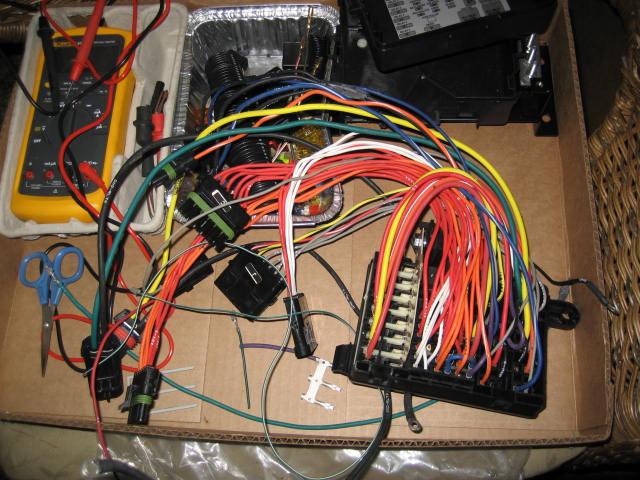
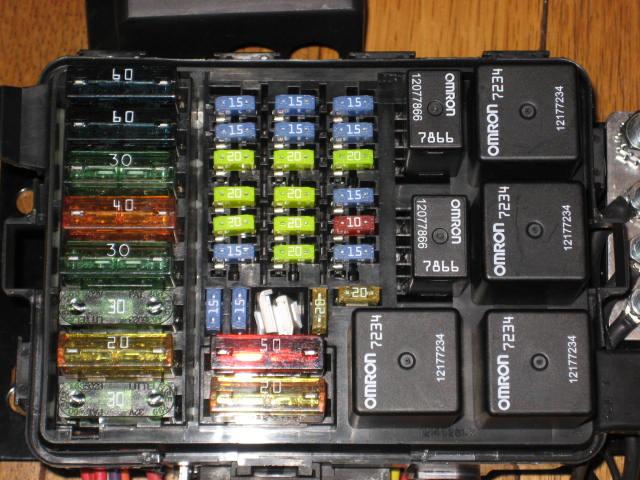
Been working on the underhood fuse panel...I am moving all fuses to a central panel under the hood. Just a teaser pic...

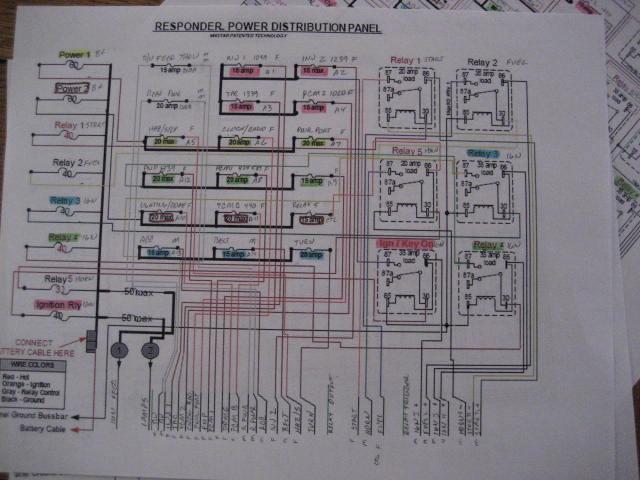
Wiring diagram...I took the one I found online and modified it in Paint to fit my application
Shockswiring001-1.jpg


The panel as it sits now, waiting to be modified.
Shockswiring002-1.jpg


PDC003-1.jpg


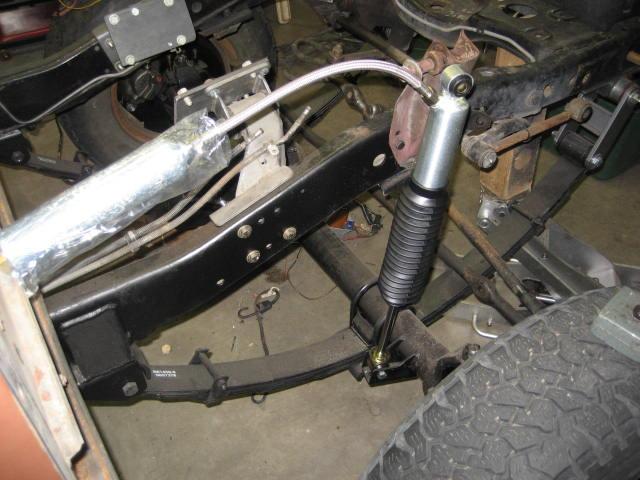
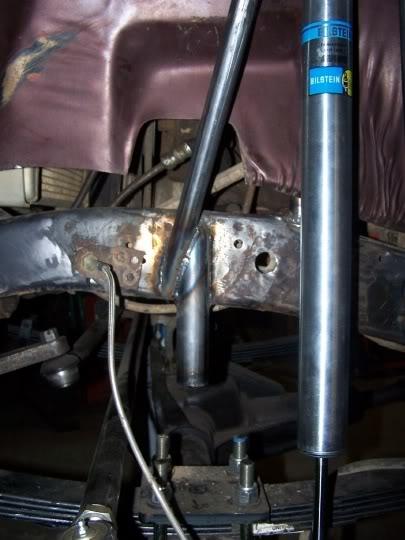
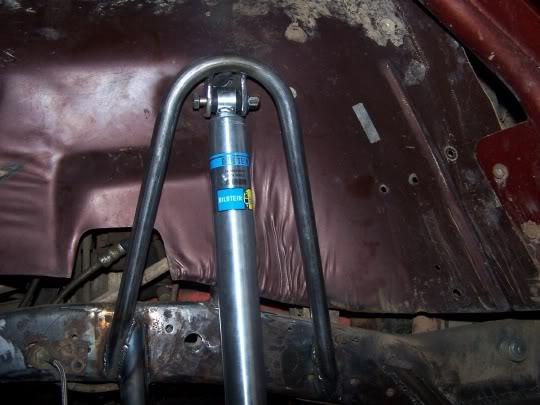
Also got my Edelbrock IAS shocks today...:D Dang, if these things work half as good as they look I'll be overjoyed! (Gotta build a new shock tower out of tube.)

Shockswiring005-1.jpg
 
Last edited:
I put in shock towers made out of 1" tubing and they work great BUT I just helped a buddy on his YJ, he was going with the tubes until he found out that you can use shock towers for an F250 and they are perfect for this application, sturdy 1/4" steel and only $15 a piece. A lot simpler than the tubing.
 
I've used those Ford towers before- I even have one sitting on my shelf. They do work great. I just want to make something unique looking...Trying for the "looks as good as it works" scenario. And I have a tubing bender and a pile of tube...:D
 
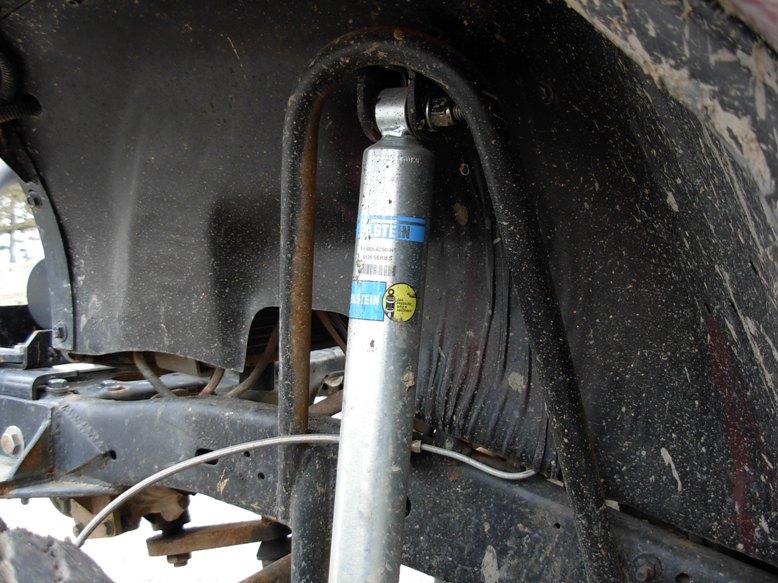
I agree. I do like the look of my hoops on my scrambler:


100_7672-1.jpg


100_7673-1.jpg


hoop2JPG-1.jpg


There is a brace on the front hoops that comes from the frame up and 90 degrees through the fender. Pics do not show it well.
 
Randy, any other good links that you have for wiring in the new harness? I dont feel like tackling the stock fuse block at this time, just wanna hear her fire over soon.
Jake
 
Back
Top